53,99 €
Mehr erfahren.
- Herausgeber: Packt Publishing
- Kategorie: Fachliteratur
- Sprache: Englisch
This book teaches you to design and develop classic arcade video games. Using modern, free software tools like Unity, you’ll create five retro games inspired by the classics. All source code, art, and sound files are provided in the companion files. You'll enjoy customizing graphics, adjusting scoring, coding AI, and creating sound effects, gaining a deep understanding of the roots of modern video game design from the '70s and '80s.
The course begins with an introduction and essential tools, then guides you through creating various retro games. Each chapter builds on the previous one with detailed instructions, exercises, and classic game design rules. The book includes historical anecdotes from a former Atari programmer and insights on applying classic game design concepts to modern games.
Understanding these design elements is crucial for developing engaging video games. This book transitions readers from beginners to proficient game developers, blending theoretical knowledge with practical skills. Companion files enhance the learning experience, making this book an invaluable resource for mastering classic game design with modern tools.
Das E-Book können Sie in Legimi-Apps oder einer beliebigen App lesen, die das folgende Format unterstützen:
Seitenzahl: 337
Veröffentlichungsjahr: 2024
Ähnliche


CLASSIC GAME DESIGNSecond Edition
LICENSE, DISCLAIMER OF LIABILITY, AND LIMITED WARRANTY
By purchasing or using this book (the “Work”), you agree that this license grants permission to use the contents contained herein, but does not give you the right of ownership to any of the textual content in the book or ownership to any of the information or products contained in it. This license does not permit uploading of the Work onto the Internet or on a network (of any kind) without the written consent of the Publisher. Duplication or dissemination of any text, code, simulations, images, etc. contained herein is limited to and subject to licensing terms for the respective products, and permission must be obtained from the Publisher or the owner of the content, etc., in order to reproduce or network any portion of the textual material (in any media) that is contained in the Work.
MERCURY LEARNING AND INFORMATION (“MLI” or “the Publisher”) and anyone involved in the creation, writing, or production of the companion disc, accompanying algorithms, code, or computer programs (“the software”), and any accompanying Web site or software of the Work, cannot and do not warrant the performance or results that might be obtained by using the contents of the Work. The author, developers, and the Publisher have used their best efforts to insure the accuracy and functionality of the textual material and/or programs contained in this package; we, however, make no warranty of any kind, express or implied, regarding the performance of these contents or programs. The Work is sold “as is” without warranty (except for defective materials used in manufacturing the book or due to faulty workmanship).
The author, developers, and the publisher of any accompanying content, and anyone involved in the composition, production, and manufacturing of this work will not be liable for damages of any kind arising out of the use of (or the inability to use) the algorithms, source code, computer programs, or textual material contained in this publication. This includes, but is not limited to, loss of revenue or profit, or other incidental, physical, or consequential damages arising out of the use of this Work.
The sole remedy in the event of a claim of any kind is expressly limited to replacement of the book, and only at the discretion of the Publisher. The use of “implied warranty” and certain “exclusions” vary from state to state, and might not apply to the purchaser of this product.
Companion files on the disc are also available by writing to the publisher at [email protected].
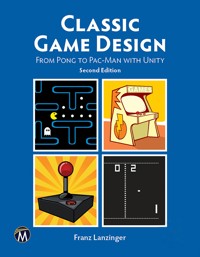
CLASSIC GAME DESIGN
From Pong to Pac-Man with Unity
Second Edition
Franz Lanzinger
MERCURY LEARNING AND INFORMATION
Dulles, Virginia | Boston, Massachusetts | New Delhi
Copyright ©2019 by MERCURY LEARNING AND INFORMATION LLC. All rights reserved.
This publication, portions of it, any companion materials, or its derivations, may not be reproduced in any way, stored in a retrieval system of any type, or transmitted by any means, media, electronic display or mechanical display, including, but not limited to, photocopies, recordings, Internet postings, or scans, without prior permission in writing from the publisher.
Publisher: David Pallai
MERCURY LEARNING AND INFORMATION22841 Quicksilver DriveDulles, VA [email protected](800) 232-0223
This book is printed on acid-free paper.
Franz Lanzinger. Classic Game Design. From Pong to Pac-Man with Unity, Second Edition.
ISBN: 978-1-68392-385-5
The publisher recognizes and respects all marks used by companies, manufacturers, and developers as a means to distinguish their products. All brand names and product names mentioned in this book are trademarks or service marks of their respective companies. Any omission or misuse (of any kind) of service marks or trademarks, etc. is not an attempt to infringe on the property of others.
Library of Congress Control Number: 2019939379
192021 321
Printed on acid-free paper in the United States of America.
Our titles are available for adoption, license, or bulk purchase by institutions, corporations, etc . For additional information, please contact the Customer Service Dept. at 1-(800) 232-0223.
The sole obligation of MERCURY LEARNING AND INFORMATION to the purchaser is to replace the disc, based on defective materials or faulty workmanship, but not based on the operation or functionality of the product.
TABLE OF CONTENTS
CHAPTER 1: INTRODUCTION
Who Are You?
What are Classic Arcade Video Games?
Unity, Blender, Gimp, and Audacity
How to Use This Book
CHAPTER 2: TOOLS OF THE TRADE
Installing Unity
Hello World!
Programming with C#
Using GIMP to Make an Image
Using Blender to Make a 3D Object
Using Audacity to Make a Sound Effect
Using Unity: My First Demo
CHAPTER 3: PONG
Before Pong
Pong, Atari (1972)
Coin-op, the Real Atari
Pong Sequels and Clones
Bitmasters, Day One
Pong at Forty
CHAPTER 4: CLASSIC PADDLE GAME
Getting Ready
Version 0.01: The Playfield
Version 0.02: The Paddles
Version 0.03: The Ball
Version 0.04: A Better Playfield
Version 0.05: Audio
Version 0.06: Scoring
Version 1.0: First Release!
Postmortem
Exercises
CHAPTER 5: BREAKOUT
Woz
Breakout, Atari (1976)
Breakout Sequels
Where Are They Now?
CHAPTER 6: CLASSIC BRICK GAME
Paddle Game for One
Version 0.01: The Playfield
Version 0.02: The Player
Version 0.03: Basic Ball Movement
Version 0.04: Collisions
Version 0.05: Bricks
Version 0.06: First Playable
Version 0.07: Scoring
Version 0.08: Title Screen
Version 1.0: First Release and Postmortem
Exercises
CHAPTER 7: SPACE INVADERS
Huge Money, Huge
The Design of Space Invaders, Taito (1978)
Score Equals Skill
Going Strong 41 Years Later
CHAPTER 8: CLASSIC GAME PROJECT THREE: VERTICAL SHOOTER
Designing a Shooter
Version 0.01: The Playfield
Version 0.02: The Spaceship
Version 0.03: Sprites
Version 0.04: Aliens
Version 0.05: Alien Shots
Version 0.06: Scoring and Lives
Version 0.07: Alien Death Sequence
Version 0.08: Sound
Version 0.09: Levels
Version 1.0: Release and Postmortem
Exercises
CHAPTER 9: SCRAMBLE
Scrolling Shooter
Experts Rule
Scramble Sequels
CHAPTER 10: CLASSIC GAME PROJECT FOUR: SCROLLING SHOOTER
Designing a Scrolling Shooter
Version 0.01: The Playfield
Version 0.02: Spaceship Part 1: Modeling
Version 0.03: Spaceship Part 2: Texturing
Version 0.04: Spaceship Control
Version 0.05: Level 1
Version 0.06: Rockets
Version 0.07: Flying Rockets
Version 0.08: Shots
Version 0.09: Flying Saucers
Version 0.10: Level Design
Version 0.11: Audio
Version 0.12: Scoring
Version 1.00: Release and Postmortem
Exercises
CHAPTER 11: PAC-MAN
The First Maze Game
Cutscenes
Pac-Man Fever
Ending Rule
Pac-Man AI
Pac-Man Sequels and Maze Games
CHAPTER 12: CLASSIC GAME PROJECT FIVE: MAZE GAME
Designing a Maze Game
Version 0.01: The Maze
Version 0.02: The Player
Version 0.03: Nasty Enemies
Version 0.04: Dots
Version 0.05: Audio
Version 0.06: Scoring and Levels
Version 0.07: Tuning
Version 1.00: Release and Postmortem
Exercises
EPILOGUE
So Many Games, So Few Pages
Novelty
How Modern Games are Influenced by the Classics
APPENDIX I: INTRODUCTION TO C# FOR BEGINNERS
Programming Is Easy
Interpreted or Compiled?
Numbers and Strings
Variables and Variable Names
Whitespace
Statements and Semicolons
Computations
Functions and Function Calls
Looping
Learning to Code
The Code in this Book
APPENDIX II: EIGHT RULES OF CLASSIC GAME DESIGN
APPENDIX III: ABOUT THE DVD
INDEX
Acknowledgments
I’d like to thank just some of the many people who made this book possible.
Most significantly, Eric Ginner and Robert Jenks read and worked through large portions of the book in draft form and gave voluminous feedback and suggestions. This book would be less without their valuable contributions.
Special thanks to Mark Robichek, Karl Anderson, Mark Alpiger, Sam Mehta, Brian McGhie, Desiree McCrorey, Joe Cain, Eugene Polonsky, Bob Jones, Aaron Hightower, Ed Logg, Dave O’Riva, Steve and Susan Woita, and everyone at Atari coin-op.
David Pallai, my fantastic publisher, helped every step of the way and is always kind and supportive.
A big word of thanks to my parents, Klaus and Aida Lanzinger, for their humanity and love.
And last, but not least, a giant hug and thank you to my wife, Susan Lanzinger, for helping throughout the years. I couldn’t have done this without you.
About the Author
Franz Lanzinger is the owner of Lanzinger Studio, an independent game development and music studio in Sunnyvale, California. He began his career in game programming in 1982 at Atari Games Inc., where he designed and programmed the classic arcade game Crystal Castles. In 1989 he joined Tengen, where he was a programmer and designer for Ms. Pac-Man and Toobin’ on the NES. Mr. Lanzinger co-founded Bitmasters, where he designed and coded games including Rampart and Championship Pool for the NES and SNES, and NCAA Final Four Basketball for the SNES and Sega Genesis. In 1996 Mr. Lanzinger founded Actual Entertainment, publisher and developer of the Gubble series for PC and IOS. Mr. Lanzinger has a B.Sc. in mathematics from the University of Notre Dame and attended graduate school at the University of California at Berkeley. In 1980 he started playing arcade games, and at one time held the arcade world record scores on Centipede and Burgertime. Franz Lanzinger is a professional accompanist, piano teacher, and avid golfer. He continues to design and code games.
CHAPTER
1 Introduction
IN THIS CHAPTER
This is a hands-on book about game design, and what better way to learn about game design than to study and emulate the classics. You’re going to make some games, not just read about them. Assimilating the classics is a time-honored tradition. Pianists play Bach, writers read Shakespeare, and painters copy the Mona Lisa. It’s not just about experiencing them; it’s about creating something very similar and grasping the process of creation that brings the most benefit.
WHO ARE YOU?
This book is for everyone who loves to play and make games, preferably in that order. You should be somewhat computer literate, but it’s OK if you’ve never written a line of code, never taken an art class, and you’re tone deaf.
Maybe you’re a student concentrating your studies on programming, art, or design. This book can teach you about the basics of classic game design and introduce you to the major classic games and design techniques that every game developer should know. It’s these classics that led the way and showed future generations of designers how to make games.
Maybe you’re a fan of the old games, the ones that started it all. It’s just plain fun and relatively easy to recreate the old games using modern tools. Maybe you own a few classic arcade games and you like to change the option switches to see what happens. This book will allow you to do a lot more than that. Not only are the sample games fun by themselves, you’ll learn how to make changes to them without being a professional programmer. With a little bit of effort you’ll learn the basics of how to add new features, change the way the scoring works, and replace the graphics and sounds with something entirely different.
Possibly you’re just interested in learning Unity, Blender, GIMP, or Audacity. These development tools are the basis of this hands-on approach and enable you to get started making your own games right away. These tools are free to use. GIMP, Audacity, and Blender are open-source software, which means that you can use them any way you wish, no strings attached. As of 2019, Unity is available in three versions, two of which cost money. In this book you will be using the free version. See the Unity website for details. These four tools are extremely powerful. By using Unity, Blender, GIMP, and Audacity to make a few games you’ll gain a good introductory understanding of the entire process. You’ll then be able to more easily tackle a myriad of advanced topics in game design and development. Installation instructions are available later in this chapter.
Just as composers need to listen to music, artists should look at art, and writers had better read, so game designers ought to play games, especially their own games. There’s a word for it, “dogfooding,” which literally means that if you’re making dog food, you need to eat it too. In the classic era of the ‘70s and ‘80s, it was possible to keep up with the industry and play all the top games. Nowadays you have to pick and choose, but that’s no excuse for not playing at all. Whether you’re a newbie designer or a forty-year veteran with dozens of credited titles, you need to also be a player.
WHAT ARE CLASSIC ARCADE VIDEO GAMES?
Arcade games are coin-operated machines, where players pay money in the form of coins or tokens to play a game. They are sometimes called coin-op games for short. The early arcade games were built and designed to be played in arcades and street locations such as restaurants, movie theaters, or airports. Arcade video games work as a business because they provide a game experience that’s hard to duplicate at home. Ever since home console and PC video games became hugely popular in the late ‘80s arcade video games have been relegated to the few remaining arcades and street locations. Thirty years later there has been renewed and often nostalgic interest in arcade games by collectors and hobbyists, but the days of manufacturing tens of thousands of arcade cabinets for the latest arcade hit are over.
From a game design perspective, arcade video games are no different from the console games of today, for the most part. Some coin-specific features such as “add-a-coin” or dealing with a ticket dispenser only apply to arcade games, but the basics of controlling a character on a rectangular screen haven’t really changed since 1972 and apply to arcade games, computer games, console games, and even mobile games.
The heyday of these types of games started in 1972 and ended in about 1984 when the arcade game industry collapsed in the United States. New arcade games are still manufactured today, but in much lower numbers than in the ‘80s.
What is meant by a classic? A classic should be of high quality, timeless, and influential. These are somewhat subjective criteria, but they’ll have to do. Amazingly, a very large proportion of the top-selling arcade video games from the heyday of arcade video games fit this description. This almost seemed inevitable. There weren’t that many arcade games made when compared to the huge number of new games released in the following decades. In the ‘80s this art form was so new and resulted in such huge growth that almost any reasonable idea would get reused countless times in the coming years. It was much easier to create an influential game back then compared to the present day. The high quality and timeless aspects were more difficult to achieve, especially because the technology was new and often cumbersome. Still, the ‘70s and early ‘80s were nothing less than the golden age of video game design.
In this book you will take a detailed look at five classic arcade video games: Pong, Breakout, Space Invaders®, Scramble™, and Pacman™. In the interest of learning the basics well rather than doing a comprehensive survey, the scope of this book is limited to those five featured games. There are probably several dozen other classic arcade video games that are similarly influential and important, games such as Asteroids, Missile Command, Galaxian, Defender, Joust, Frogger®, and Pole Position, just to name a few. It is left up to you to look at, play, and learn from the many other classic arcade video games out there.
Each of the featured games is responsible for countless imitators. They pioneered some of the most important game categories. The games you will be creating come from five categories: a paddle game, a brick game, a vertical shooter, a scrolling shooter, and a maze game. Furthermore, you’ll be looking at some of the methods and design decisions that go into making these types of games.
This is a book about design, so it won’t dwell too much on the now outdated technologies used to make the original featured games. Rather, it’ll try to answer some very basic design questions that every game designer needs to tackle: What do the players do? What’s their motivation? What are the strategies and tactics? What are the basic design elements?
The influence of classic arcade video games on modern games is undeniable. When you see a player getting points for running into something, or dying when colliding with something, it’s because some arcade video game in the ‘70s or ‘80s pioneered it. Much of the history of these early days is lost, so it’s difficult to give proper credit to the people and companies who are responsible.
The real fun comes when you try to reconstruct some of the game elements from the classics. The paddles in Pong, the bombs in Scramble, the shots in Space Invaders: these are basic game elements that every video game designer needs to understand. There’s no better way to gain this understanding than by building some simple games that use these elements.
In the next section, you’ll be taking a closer look at the tools you’ll be using to make your own classic games.
UNITY, BLENDER, GIMP, AND AUDACITY
Yes, you’ll dive right in and use professional tools to make your games. Here are free to use, modern, professional game development tools: Blender for 3D graphics, GIMP for 2D graphics, Audacity for sound, and Unity for creating the logic for the games and putting it all together. These are some of the same tools that many professional game developers use when making commercial games. Just a few years ago it would have cost many thousands of dollars to get access to game development tools of this caliber. Via the generous efforts of these open-source projects and the free version of Unity, even the smallest of budgets is sufficient to make a good-looking, good-sounding, and high-quality video game.
In the next chapter, you’ll install the following software on your Mac or Windows PC.
Unity 2018.3.0f2 or later, Unity Personal version at unity.com
Blender 2.79b or later at blender.org
GIMP 2.10.2 or later at gimp.org
Audacity 2.3.0 or later at audacityteam.org
Next, it’s time to look at how to work with these tools as illustrated in Figure 1.1.
You’ll be using GIMP to make 2D graphics assets for your projects. You paint something in GIMP, export to the asset directory used by your Unity project, and then you’re immediately ready to use the graphics in your Unity project. Unity automatically imports the graphics. This allows you to make changes to your graphics in GIMP, export, and immediately test the changes in Unity. If you prefer you may use another paint program of your choosing. You merely need to export to one of the many supported graphics file formats such as .png, .tif, or .jpg. Alternatively, you could use a camera or scanner to make graphics files. Do you want to put a picture of yourself or your pet into the game? No problem. Just take a digital photo and put it into our Images directory. You’ll also have the option of using GIMP to add effects to your images.
FIGURE 1.1 Unity, Blender, GIMP, and Audacity Workflow.
When making 3D art, the pipeline is a little more complex. You will start with making some 2D images, use them to make textured 3D models in Blender, and then use them in Unity. Blender allows you to create 3D models to be used directly in Unity. You’ll use the textures from your Images directory to make the 3D models look better. Strictly speaking, you don’t really have to have textures, especially for really simple games. But to make your games look more realistic you’ll want to use textures.
Each graphic asset gets imported into Unity. Whether it’s a spaceship, an alien, or an elaborate scene, it all goes through the art pipeline in order to be usable by Unity. Unity will be described in much more detail in the next chapter.
But hold on, don’t forget about sound! You’ll be adding some simple sound effects to your classic games. You’ll be using the open-source tool Audacity to help make the sound effects. It would be easy to use a bunch of sound effects from an effects library. However, in the spirit of classic gaming, you’ll be creating your sound effects from scratch.
HOW TO USE THIS BOOK
This book is intended to be read cover to cover, all the while carefully following the hands-on step-by-step instructions. This will give you a good foundation in the basics of classic game design and development. Along the way you’ll learn some of the history and gain an appreciation of the pioneering arcade games that launched the video game industry.
If you’re an experienced programmer and game developer, you might be able to dive right into the projects in the later chapters. You could also just load the projects as starting points for your own experiments.
The projects are all available on the companion DVD for this book.
If you’re just interested in the programming aspects of these projects, you can just use the art and sound assets and follow along with the programming steps. Similarly, if you want to learn how we made the graphics, you can skip our programming and sound discussions.
You can just read the chapters about the featured classic games and learn about design without worrying about the technical implementations. However, it’s recommended that you work through one or two of the classic game projects. The best way to learn anything is “learning by doing.” This is especially true for the daunting task of learning how to be a game designer.
In the next chapter, you’ll get started by taking the software out for a quick spin.
CHAPTER
2 Tools of the Trade
IN THIS CHAPTER
The goal for this chapter is to create a small demo application with 3D graphics and sound. You’ll install Unity, Audacity, Blender, and GIMP. You’ll create assets in GIMP, Blender, and Audacity. Finally, you’ll see how these applications fit together by importing assets into Unity and setting up the demo.
INSTALLING UNITY
If you haven’t done so already, go ahead and install Unity on your computer. None of the software tools in this book require a high-end system, but it’s a good idea to use your fastest system with the best monitor setup. In order to run the tools in this book, you need access to a relatively recent PC or Mac. You’re probably OK with a system built after 2015. If your computer is older, it may still be compatible depending on the particular capabilities of the system. To find out, go to the Systems Requirements webpage on the Unity website for details. Once you’ve determined that your system meets or exceeds those requirements, the next step is to install Unity version 2018.3.0f or later at www.unity.com. If you qualify for it, select the personal edition, which is free to use. This book is also compatible with the paid versions of Unity.
If you are using a somewhat later version of Unity there’s a good chance that you can follow the steps in this book, with possibly some minor adjustments along the way. Be aware that the screenshots in this book may not match your screen if you do that. If you are reading this book several years after 2019, then you’ll be best off installing the exact version recommended above, or look at www.classicgamedesign.com for updated information on compatibility with the latest version of Unity.
This book supports both PCs and Macs. The projects in this book were originally developed on a PC and then tested on a Mac. The step-by-step instructions are designed to work on both PCs and Macs. The screen shots used to generate the illustrations in this book were captured on a PC, so if you’re using a Mac you might notice some cosmetic differences between your screen and the PC screen shots in the book. When necessary, the book explains differences in performing the steps on a PC vs. on a Mac.
It is highly recommended that you use an HD monitor, preferably with a resolution of 1920x1080 or better. A dual or even triple monitor setup is definitely a plus and well worth it, considering the relatively low cost. Another possible setup is a laptop with an external second monitor to be used when convenient. It is also recommended that you connect a three-button mouse with a scroll wheel. Using a touchpad on a laptop is very cumbersome. For Blender, a full keyboard with a numeric keypad is much better than smaller keyboards. There is a workaround by configuring Blender for laptop use. Instructions on how to do that can be found online by searching for “configuring Blender for laptop.”
If you’re using a high DPI (dots per inch) monitor, you might find that the Unity fonts are too small to read. There is currently no setting inside of Unity to increase the font size, but you can do this in Windows 10 by going to the display settings and adjusting “Change the size of text, apps, and other items” to something higher than 100%. This screenshots for this book were produced on a Windows 10 machine with a 4K monitor and a 250% text size setting. You may need to make a similar font adjustment if you’re using a Mac with a high-end 4K or better monitor.
The next section describes how to make a minimal coding application in Unity, which traditionally is called a “Hello World” program.
HELLO WORLD!
Before you create the demo application it’s a good idea to make something even simpler. The phrase “Hello World” has taken on a special meaning for programmers. It is customary for programmers to make a “Hello World” application when first encountering a new programming language or development environment. A “Hello World” application simply displays the words “Hello” and “World.” This is about as simple as it gets, and yet it can take quite a bit of time and effort to get this done. It’s not intended to be a true test of the power of Unity. Rather, it’s a simple exercise to make sure you can do something very basic.
This is the first step-by-step process in the book. There are a bunch of them, so get ready to follow along on your own computer. It’s easy to get lost, skip a step, or to not quite follow the instructions exactly as written, so please read each step very carefully before trying the step on your own.
After the initial description of a step, there often follows a more detailed explanation. You may wish to read the explanations before doing the associated steps. It is often a good idea to read ahead by several steps to get a sense of where you’re headed.
Step 1: Start Unity.
Make sure you’ve successfully installed Unity 2018.3.0f2 or later on either your PC or your Mac as described in the previous section. Later, or even slightly earlier versions of Unity will probably work as well, though you might need to make some adjustments.
Step 2: Click on New
This icon is near the upper right corner of the window.
Step 3: Under Project name replace “New Unity Project” with “HelloWorld.”
You don’t need to enter the quotes, just the letters. There’s no space between Hello and World.
Step 4: For Template, select 2D, for Location a directory of your choice.
For the location it’s a good idea to use a newly created empty directory called CGD, short for Classic Game Design. The idea is that you aim to put all projects from this book together into this directory for easy reference. In the location box you can click on the three dots to browse for a good location on your computer.
Step 5: Click on Create project.
Depending on the speed of your computer, you’ll now need to wait a minute or two while Unity creates the project. You’ll see several messages while this is happening.
Step 6a: Click on Layout and select Revert Factory Settings…
If you’re an experienced Unity user and wish to keep your existing settings intact, simply select the Project and Scene tabs instead.
Step 7: In the Scene panel, look for the 2D icon and click on it if it’s not highlighted.
Your screen should look similar to the screenshot in Figure 2.1.
FIGURE 2.1 The Unity Blank Project.
Step 8: Click on the Layout drop-down menu and select the Default layout, if not already selected.
If you wish, go ahead and try out the other layouts, but switch back to the Default layout before continuing on. Notice the text on the top middle or top left of the window. It should say something similar to:
Unity 2018.3.0f2 Personal – SampleScene.unity - HelloWorld – PC, Mac & Linux Standalone <DX11>
This text on the title bar of the window gives you some basic info such as the name of the current project and the version of Unity. The <DX11> text is the version of DirectX used by Unity in this project. DirectX is only used on Windows computers. On a Mac you’ll likely see <Metal> instead of <DX11>.
In Steps 9 through 13, you will create the “Hello World” text object.
Step 9: Click on GameObject – UI – Text.
Step 10: In the Hierarchy panel, highlight Text.
Step 11: In the Inspector Panel, Set Pos X and Pos Y to 0.
You do this by clicking the number entry boxes and typing 0 for each. This moves the text object to the center of the camera view.
Step 12: Move the mouse to the Scene panel, and press the f key to focus on the text.
Your screen now looks like Figure 2.2.
If the Scene panel is blank, try clicking on “Text” in the Hierarchy, and repeat Step 12.
Before you move on and create the Hello World text, take a closer look at the Unity window. These last steps caused a great many changes to the screen. The next several paragraphs explain the layout of the Unity editor in more detail.
First, the window title now has a star at the end of it (PC version only). This is an indication that something has changed since you last did a save. Earlier in Step 8, you were asked to select the Default layout. If for some reason you have a different layout selected, please change it back to “Default” so your screen more closely matches the screen shots in the book.
FIGURE 2.2 Creating a GUI Text Object.
There are four panels displayed currently: Hierarchy, Scene, Inspector, and Project. There are also unselected tabs for the Game, the Console, and the Asset Store panels. Each panel is displayed if you click on the corresponding tab.
On the top left of the Unity editor window is the Hierarchy panel. It displays four game objects in the current scene: “Main Camera,” “Canvas,” “Text,” and “Event-system.” The Text object is a subobject of the Canvas and is highlighted because it is currently selected. The Scene panel is the big, dark grey panel in the middle. It contains a graphical view of the current scene from the developer’s perspective. There are four blue dots surrounding the Text game object and a string of characters with the current value of “New Text.” In the next step you will change the text to “Hello World!”.
The Game panel is at the same location as the Scene panel depending on the tab selection. It shows the game as it appears to the players. The players don’t need to see the blue dots. They just see the text in the middle of the screen.
Next, on the right side of the window you have the Inspector panel. It shows the properties of the currently selected game object. Here is where you change the properties of your game objects by pointing, clicking, and typing.
The bottom section of the window shows the Project panel. It consists of a list of Favorites, Assets, and Packages. The Assets are shown in more detail in the subpanel to the right. This panel works much like the Windows File Explorer built into Windows. Try clicking on Favorites, then Assets, and then Packages. Now go back and click on Assets again. You will be using the Assets view throughout this book.
The Project panel shows items that make up the project. Currently, there’s just one item in the project, the Scenes folder. You can double-click on the Scenes folder to reveal the one and only scene in the project, called SampleScene. Notice that there’s a slider at the bottom right of the Project panel. Sliding this makes the asset names appear larger or smaller. Also, notice that the Inspector panel changes when you select items in the Project panel. To see the Text properties again you need to click on Text in the Hierarchy panel.
The Console panel is currently hidden behind the Project panel. To view it, click on the Console tab to select it. This is a panel used to display system messages. Unity prints error messages here, as well as debug messages generated by scripts. Click on the Project tab again to go back to displaying the Project panel.
You’re now ready to change the text in the Text object. Click on Text in the Hierarchy panel if necessary. In the Inspector panel near the middle you’ll see the property named “Text” with the value “New Text” in an editable box nearby.
Step 13: In the Inspector panel, click on “New Text” and change it to Hello World!
Notice that when you’re making edits there, the display of the Text object changes in real time in the Scene panel and that the line that you’re editing is highlighted in blue.
You could stop right now, but it’s just too tempting to experiment with some other properties in the Inspector panel.
You want to make the text larger, so that means you change the font size.
Step 14: In the Text section look for Font Size and change it from 14 to 60.
This has the effect of making the text disappear! To get it back change the overflow settings as follows:
Step 15: Change Horizontal and Vertical Overflow to Overflow. Click on the Game tab.
You see that the text is much larger. The Game panel should look like Figure 2.3.
Next you will “run” the application inside of Unity. This application doesn’t do much, but that’s OK. Recall that the goal is to test running a very simple application in Unity.
Step 16: Select the Scene panel, then click on the play button above the Scene panel.
Unity automatically switches to the Game panel when the game is running. The game itself doesn’t do anything yet other than display your Hello World! text. Currently, it looks identical to the view of the Game panel when the game isn’t running. You can tell that the game is running by seeing that the play button is highlighted.
FIGURE 2.3 Big Hello World! in the Game panel.
Step 17: While the game is running, go to the Inspector panel and change Pos X position to 100.
You can change the properties of objects while the game is running. This is one of the amazing and useful features of Unity that make game development quick and interactive, but watch out! These changes are only temporary.
Step 18: To stop running the application, click on the play button again.
The Scene panel just came back, but notice that the Pos X is back at 0, which is where it was before you started running the game.
Step 19: Run the application again by clicking on the play button.
You can see that when you run the game now, the text is again the middle of the screen, just as before.
Step 20: Click the play button yet again to stop the application.
Step 21: Click on File – Save Project.
If you should forget to save before exiting, Unity will remind you to save.
Step 22: Exit Unity.
Unity will remind you to save your scene if you forget to save. It’s a good idea to save your scenes and your project frequently. The most recent scene that you worked on will be automatically loaded next time you start up Unity with the same project.
This HelloWorld project is a test to see if you can do the very basics of Unity. Of course, Unity can do much more than display text, but you took your first steps. This philosophy of trying out the simple features first before moving on to more complex and difficult ones fits in with a recurring theme in software development: Test everything early and often.
You might have noticed that there was no coding necessary yet. It’s time to try some programming.
PROGRAMMING WITH C#
Before you get started with programming in Unity, it’s time for a quick history lesson. Unity initially supported three programming languages: C# (pronounced C sharp), JavaScript, and Boo. The first edition of this book used only JavaScript. Recently, Unity has stopped supporting JavaScript and Boo. Thus, you will be coding in C#. C# is a simple, modern, powerful, general-purpose, object-oriented language. Learning all of C# is a daunting task, but it’s fine to use just the basic features of C# when getting started.
You’re going to dive right in and write a small program. Your first goal is to add 2 and 2 and to display the result on the Hello World game panel.
Step 1: Look at Appendix I, Introduction to C# for Beginners, near the back of this book.
If you’re very new to programming, it’s recommended that you carefully read that appendix before continuing. If you’re an experienced C# programmer, you can safely skim through that appendix and move on to the next step.
Step 2: Open Unity and load the HelloWorld project.
Step 3: Click on the triangle next to Canvas and then on Text in the Hierarchy panel.
The Inspector will once again show the properties of the Text object. At the bottom of the Inspector panel, there’s an “Add Component” box. You’ll be using that box to add a small C# program to this object. You may need to scroll the Inspector panel down to see the “Add Component” box, depending on the size and resolution of the Unity window.
Step 5: Click on the Add Component box.
Step 6: Click on New Script at the bottom, and then change the name of the script to Testing123, and click on Create and Add.
Step 8: Click on Testing123 in the Assets panel.
Depending on your window resolution, you might notice that the script name is truncated to something like “Testing1…”. The ellipsis (the three dots) appears if the asset name is too long to fit underneath the asset icon. To see the full asset name, slide the icon slider at the bottom right of the Assets panel all the way to the left, or all the way to the right.
There is now a default script in the Inspector right below the label “Imported Object,” consisting of the following:
If you are reading this book in color, rather than on a black-and-white device, you will notice that there are blue, green, teal, and black words in the code as printed in this book. This is called color coding and it can be very helpful when editing code. For example, keywords are blue, class names are teal, comments are green, numbers and operators are black. The colors may be different on your computer. There is no color coding in the Inspector panel.
This is the code where you’ll insert additional code to compute 2+2. You’ll be editing this script in the following steps.
Step 9: Double click on Testing123 in the Assets panel.
After a delay of several seconds, the Visual Studio window should appear. It contains the same code you saw earlier, but now it’s editable and color coded. If Visual Studio doesn’t start up, try reinstalling Visual Studio Community Edition. It should have been installed when you installed Unity.
It may be helpful for you to know that in earlier versions of Unity an application called Monodevelop was used instead of Visual Studio. This is the reason for the rather esoteric term “MonoBehaviour.” It is still possible for you to use Monodevelop instead of Visual Studio if you prefer. This book uses Visual Studio for code editing.
Step 10: Edit the script so it looks like the following:
This is the first time you’re editing text into Unity, so it’s time to do some experimentation. In the following steps you’ll test the code to see if it’s working.
Step 11: Save the code! Use File – Save


