32,99 €
Mehr erfahren.
- Herausgeber: John Wiley & Sons
- Kategorie: Wissenschaft und neue Technologien
- Serie: CertMike Get Certified
- Sprache: Englisch
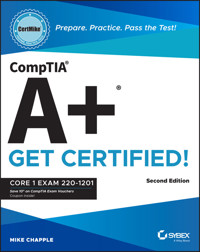
Skip the fluff and quickly master the essentials with this accurate CompTIA A+ certification test prep
In the second edition of CompTIA A+ CertMike: Prepare. Practice. Pass the Test! Get Certified! Core 1 Exam 220-1201, tech educator and expert Mike Chapple delivers a hands-on guide to efficiently and effectively preparing for the CompTIA A+ Core 1 exam. The book contains concise discussions of the mobile devices, networking technologies, hardware components, virtualization and cloud computing services, and troubleshooting techniques you'll need for the updated test and on a day-to-day basis at your job.
Chapple covers all relevant technological advances in mobile, cloud, networking, and security that have taken place since publication of the first edition of this book. He also walks you through the material you need to know to succeed on the newly created 220-1201 exam.
You'll use the proven CertMike approach to:
- Prepare—CertMike is your personal study coach, guiding you through all the exam objectives and helping you gain an understanding of how they apply to on-the-job tasks!
- Practice—Each chapter includes two multiple choice practice questions. Work through the detailed explanations to evaluate each answer option and understand the reason for the best answer!
- Pass—On exam day, use the critical knowledge you've learned when you're ready to take the test. You'll feel ready and confident to pass the exam and earn your certification!
Laser-focused on starting and accelerating your IT technician career and ensuring your success on the A+ certification Core 1 exam, the book skips the fluff and familiarizes you with IT basics you'll use on the test and every day in your work. It also offers complimentary access to helpful online study tools, like a bonus practice exam and audio recordings of the CertMike Exam Essentials.
The second edition of CompTIA A+ CertMike is perfect for anyone preparing for their A+ certification who wants to reduce test anxiety, boost their confidence, and get up to speed quickly and efficiently. It's also a great resource for hardware and PC technicians who want to reinforce foundational skills and upgrade their professional knowledge.
Sie lesen das E-Book in den Legimi-Apps auf:
Seitenzahl: 536
Veröffentlichungsjahr: 2025
Ähnliche


TABLE OF CONTENTS
COVER
TABLE OF CONTENTS
FRONT ADVERTISEMENT
WILEY BOOKS IN THE CERTMIKE SERIES
TITLE PAGE
COPYRIGHT
ACKNOWLEDGMENTS
ABOUT THE AUTHOR
ABOUT THE TECHNICAL EDITOR
INTRODUCTION
PART I: DOMAIN 1.0: MOBILE DEVICES
CHAPTER 1: MOBILE DEVICE HARDWARE
EXPLORING MOBILE DEVICES
BATTERIES AND POWER SUPPLIES
KEYBOARDS
MEMORY
STORAGE
WIRELESS CONNECTIVITY
SECURITY AND PRIVACY COMPONENTS
WI-FI ANTENNA PLACEMENT
CAMERA/WEBCAM
MICROPHONES
CHAPTER 2: MOBILE DEVICE ACCESSORIES AND CONNECTIVITY
CONNECTION METHODS
ACCESSORIES
DOCKING STATIONS
PORT REPLICATORS
TOUCH DEVICES
CHAPTER 3: MOBILE DEVICE NETWORK CONNECTIVITY AND APPLICATION SUPPORT
MOBILE DATA NETWORKS
BLUETOOTH
LOCATION SERVICES
MOBILE DEVICE MANAGEMENT (MDM)
MOBILE DEVICE SYNCHRONIZATION
PART II: DOMAIN 2.0: NETWORKING
CHAPTER 4: TCP/IP NETWORKING
WHAT IS TCP/IP?
TCP VS. UDP
CHAPTER 5: TCP/IP PORTS AND PROTOCOLS
WHAT ARE PORTS?
PORTS AND PROTOCOLS
CHAPTER 6: WIRELESS NETWORKING PROTOCOLS
WI-FI NETWORKING
BLUETOOTH
NFC
RADIO-FREQUENCY IDENTIFICATION (RFID)
CHAPTER 7: NETWORKED HOST SERVICES
SERVER ROLES
INTERNET APPLIANCES
LEGACY AND EMBEDDED SYSTEMS
INTERNET OF THINGS DEVICES
CHAPTER 8: NETWORK CONFIGURATION
DNS
DHCP
VIRTUAL LANS
VIRTUAL PRIVATE NETWORKS
CHAPTER 9: NETWORKING HARDWARE
ROUTERS
SWITCHES
ACCESS POINTS
PATCH PANEL
FIREWALL
POWER OVER ETHERNET
BROADBAND ACCESS DEVICES
NETWORK INTERFACE CARD
CHAPTER 10: INSTALLING AND CONFIGURING NETWORKS
INTERNET PROTOCOL ADDRESSING
CHAPTER 11: INTERNET CONNECTION TYPES
INTERNET CONNECTION TYPES
NETWORK TYPES
CHAPTER 12: NETWORKING TOOLS
CRIMPER
CABLE STRIPPER
WI-FI ANALYZER
TONER PROBE
CABLE TESTER
LOOPBACK PLUG
NETWORK TAP
PART III: DOMAIN 3.0: HARDWARE
CHAPTER 13: DISPLAYS
DISPLAY ATTRIBUTES
DISPLAY TYPES
TOUCH SCREEN/DIGITIZER
CHAPTER 14: CABLES AND CONNECTORS
NETWORK CABLES
PERIPHERAL CABLES
VIDEO CABLES AND CONNECTORS
HARD DRIVE CABLES AND CONNECTORS
CHAPTER 15: RANDOM ACCESS MEMORY (RAM)
RAM HISTORY
FORM FACTORS
DOUBLE DATA RATE (DDR) ITERATIONS
ERROR-CORRECTING CODE (ECC) VS. NON-ECC RAM
CHANNEL CONFIGURATIONS
CHAPTER 16: STORAGE DEVICES
HARD DRIVES
SOLID-STATE DRIVES
RAID DRIVE CONFIGURATIONS
REMOVABLE STORAGE
OPTICAL DRIVES
CHAPTER 17: MOTHERBOARDS
MOTHERBOARD FORM FACTORS
MOTHERBOARD CONNECTOR TYPES
MOTHERBOARD COMPATIBILITY
COOLING
CHAPTER 18: BOOTING, CPUS, AND EXPANSION CARDS
BIOS/UNIFIED EXTENSIBLE FIRMWARE INTERFACE (UEFI) SETTINGS
VIRTUALIZATION SUPPORT
ENCRYPTION
CPU ARCHITECTURE
EXPANSION CARDS
CHAPTER 19: POWER SUPPLIES
INPUT 110–120 VAC VS. 220–240 VAC
OUTPUT 3.3 V VS. 5 V VS. 12 V
20 + 4 PIN MOTHERBOARD CONNECTOR
REDUNDANT POWER SUPPLY
MODULAR POWER SUPPLY
WATTAGE RATING
ENERGY EFFICIENCY
POWER SUPPLY INSTALLATION PROCESS
CHAPTER 20: PRINTER AND MULTIFUNCTION DEVICE CONFIGURATION
UNBOXING AND SETUP
OPERATING SYSTEM DRIVERS
FIRMWARE
DEVICE CONNECTIVITY
PUBLIC/SHARED DEVICES
CONFIGURATION SETTINGS
SECURITY
NETWORK SCAN SERVICES
AUTOMATIC DOCUMENT FEEDER (ADF)/FLATBED SCANNER
CHAPTER 21: PRINTER MAINTENANCE
LASER PRINTERS
INKJET PRINTERS
THERMAL PRINTERS
IMPACT PRINTERS
PART IV: DOMAIN 4.0: VIRTUALIZATION AND CLOUD COMPUTING
CHAPTER 22: VIRTUALIZATION
VIRTUAL MACHINES
DESKTOP VIRTUALIZATION
CONTAINERS
CHAPTER 23: CLOUD COMPUTING
WHAT IS CLOUD COMPUTING?
CLOUD DEPLOYMENT MODELS
CLOUD SERVICE CATEGORIES
PART V: DOMAIN 5.0: HARDWARE AND NETWORK TROUBLESHOOTING
CHAPTER 24: TROUBLESHOOTING
TROUBLESHOOTING METHODOLOGY
CHAPTER 25: TROUBLESHOOTING MOTHERBOARDS, RAM, CPU, AND POWER
COMMON SYMPTOMS
CHAPTER 26: TROUBLESHOOTING STORAGE
COMMON SYMPTOMS
CHAPTER 27: TROUBLESHOOTING VIDEO
COMMON SYMPTOMS
CHAPTER 28: TROUBLESHOOTING MOBILE DEVICES
COMMON SYMPTOMS
CHAPTER 29: TROUBLESHOOTING NETWORKS
COMMON SYMPTOMS
CHAPTER 30: TROUBLESHOOTING PRINTERS
COMMON SYMPTOMS AND SOLUTIONS
LINES DOWN THE PRINTED PAGES
GARBLED PRINT
PAPER JAMS
FADED PRINTS
PAPER NOT FEEDING
MULTIPAGE MISFEED
PRINT QUEUE ISSUES
SPECKLING ON PRINTED PAGES
DOUBLE/ECHO IMAGES ON THE PRINT
GRINDING NOISE
FINISHING ISSUES
INCORRECT PAGE ORIENTATION
TRAY NOT RECOGNIZED
CONNECTIVITY ISSUES
INDEX
BACK ADVERTISEMENT 1
BACK ADVERTISEMENT 2
END USER LICENSE AGREEMENT
List of Illustrations
Chapter 1
Figure 1.1 A typical laptop
Figure 1.2 Two common smartphones: (a) an Apple iPhone, and (b) an Android device
Figure 1.3 Tablet user interacting with photographs
Figure 1.4 A user-replaceable battery after being removed from a laptop
Figure 1.5 The top and bottom rows of a typical Windows laptop keyboard. Use the Fn key to ...
Figure 1.6 Preparing to disconnect the keyboard interface cable from a typical laptop mothe...
Figure 1.7 From left to right, typical DDR5, DDR4, and DDR3 SO-DIMM modules
Figure 1.8 Inserting an SODIMM module into place (left) and after it has been locked into p...
Figure 1.9 Four storage devices: a 3.5-inch HDD, a 2.5-inch HDD, a 2.5-inch SSD, and an M.2 SSD
Figure 1.10 A wireless network card using the mini-PCIe interface
Figure 1.11 A wireless network card using the M.2 interface
Figure 1.12 Fingerprint reader on a laptop computer
Figure 1.13 An LCD panel with individually serviceable components
Figure 1.14 This microphone and webcam can be easily replaced if they fail
Chapter 2
Figure 2.1 USB 3.1 Gen 1 Type-A and USB Type-C ports
Figure 2.2 The USB ports on this MacBook support USB 3.0 (5 Gbps) but are marked with the o...
Figure 2.3 Mini USB and Micro USB ports for USB 2.0 connections compared to a Micro USB for...
Figure 2.4 Mini USB and Micro USB cables for USB 2.0 connections compared to a Micro USB fo...
Figure 2.5 USB Type-A to USB-C and USB Type-A to Lightning cables for mobile devices
Figure 2.6 The Bluetooth & Devices pane on a typical Windows laptop
Figure 2.7 Preparing to share Wi-Fi via the Windows Mobile Hotspot pane
Figure 2.8 User interacting with a tablet using a stylus
Figure 2.9 Configuring settings for a touch pen in Windows
Figure 2.10 A 3.5 mm connector used for headsets
Figure 2.11 A variety of docking stations made for PCs (top/middle) and Macs (bottom)
Figure 2.12 Laptop with a built-in trackpad
Figure 2.13 Touchpad settings in Windows 11
Figure 2.14 Laptop keyboard with an integrated track point
Figure 2.15 A Wacom drawing pad suitable for use with both laptops and desktops
Chapter 3
Figure 3.1 Normal (left) versus Airplane mode (right) on a typical Android smartphone; Airp...
Figure 3.2 Normal mode (left) on a typical iPhone (iOS) smartphone versus Airplane mode (ri...
Figure 3.3 SIM cards and SIM slot on a mobile device.
Figure 3.4 Wi-Fi settings on an Apple iPhone
Figure 3.5 Typical hotspot settings for an Android smartphone. Tap Configure to change the ...
Figure 3.6 Pairing with a Merkury speaker on iPadOS
Figure 3.7 Pairing with a keyboard on Android
Figure 3.8 Android Location Services when turned on (left) and off (right)
Figure 3.9 Android cellular location services when turned on (left) and off (right)
Figure 3.10 iOS location services (left) and adjusting location access for a specific app (right)
Figure 3.11 Configuring cloud synchronization in iOS
Chapter 4
Figure 4.1 A bank website using HTTPS
Chapter 6
Figure 6.1 Typical graph of Wi-Fi 2.4 GHz networks showing how channels other than 1, 6, an...
Figure 6.2 Enabling Bluetooth on a Windows laptop
Figure 6.3 Select Bluetooth as the type of device, and then select the device to add
Chapter 7
Figure 7.1 Preparing to view properties for an Ethernet adapter in Windows
Figure 7.2 Entering the Google IPv4 DNS server addresses
Figure 7.3 A Print Management dialog from a Windows computer
Figure 7.4 Configuring Windows IIS
Figure 7.5 Configuring a manual proxy server in Windows
Chapter 8
Figure 8.1 DNS query for
certmike.com
that returned four A records
Figure 8.2 IPv6 DNS query for
google.com
that returned one AAAA record
Figure 8.3
www.linkedin.com
is an alias with three CNAME records
Figure 8.4 MX records for
certmike.com
Figure 8.5 A typical lease obtained and lease expires report from
ipconfig /all
Figure 8.6 Adjust the size of the IP Address pool and its starting and ending addresses to ...
Chapter 9
Figure 9.1 A typical wireless router
Figure 9.2 A managed switch that also supports SPF modules
Figure 9.3 A typical unmanaged Gigabit Ethernet switch
Figure 9.4 Typical front (top) and rear (bottom) views of an RJ45 Ethernet patch panel
Figure 9.5 A typical SOHO firewall configuration screen
Figure 9.6 Typical 12-watt PoE injector
Figure 9.7 Front (left) and rear (right) views of a cable modem with VoIP support
Figure 9.8 Front (top) and rear (bottom) views of a typical DSL modem with integrated wirel...
Figure 9.9 A typical ONT connected to a home network
Figure 9.10 Typical dual-homed NIC that connects to two networks for redundancy
Chapter 10
Figure 10.1 Class A, B, and C net ID and host ID comparison
Figure 10.2 Using an online calculator to find out desired subnet values
Figure 10.3 Seeing your public IP address with
myexternalIP.com
Figure 10.4 Setting up a static IP address in Windows
Figure 10.5 A Wi-Fi network adapter with both IPv4 and IPv6 link-local addresses
Chapter 11
Figure 11.1 Typical Viasat dish for geosynchronous satellite Internet service
Figure 11.2 Starlink portable antenna
Figure 11.3 Typical WISP using a base and relay station
Figure 11.4 Examples of WISP long-distance directional and short-distance antennas
Figure 11.5 Typical MAN versus LAN comparison
Chapter 12
Figure 12.1 A crimper designed for RJ45 and RJ11 cable
Figure 12.2 Stripping the jacket off a 22 AWG UTP wire
Figure 12.3 Typical handheld Wi-Fi analyzers
Figure 12.4 Viewing nearby 2.4 GHz (left) and 5 GHz (right) Wi-Fi networks with the Wi-Fi An...
Figure 12.5 Typical toner probe
Figure 12.6 A typical cable tester preparing to test a short Ethernet cable
Figure 12.7 Typical RJ45 loopback plugs
Figure 12.8 A typical network TAP
Chapter 13
Figure 13.1 A simplified diagram of the layers in a typical LCD display
Figure 13.2 Preparing to remove a failed inverter
Chapter 14
Figure 14.1 Twisted-pair cable (top) and coaxial cable (bottom)
Figure 14.2 UTP (left) versus STP (right) cable
Figure 14.3 CAT5e (top) and CAT6 (bottom) cable labels
Figure 14.4 T568B and T568A wire pairings and an assembled UTP cable using the T568B standard
Figure 14.5 RJ45 connectors
Figure 14.6 UTP and STP connectors
Figure 14.7 A typical RJ45 cable (left) and a typical RJ11 cable (right)
Figure 14.8 Inserting wire pairs into a punchdown connector with a punchdown tool
Figure 14.9 RG6 coax cable connector and interior
Figure 14.10 Single-mode fiber (top) vs. multimode fiber (bottom)
Figure 14.11 Fiber-optic cable connectors: LC (left), ST (center), and SC (right)
Figure 14.12 USB 2.0, 3.0, and 3.2 Gen 2 Type-A ports and a USB-C port on a typical desktop c...
Figure 14.13 USB Connectors. From left to right, USB-A, USB-B, USB-C, MicroUSB, and MiniUSB
Figure 14.14 Lightning connector
Figure 14.15 RS-232 serial cable with thumbscrews (top) and DB9 serial port (bottom)
Figure 14.16 HDMI connector
Figure 14.17 DisplayPort connector
Figure 14.18 DVI connector
Figure 14.19 VGA cable
Figure 14.20 SATA data and power cables and drive connectors
Figure 14.21 eSATA (left), SATA (center) and SATA with right-angle connector (right) cables
Figure 14.22 Molex power connector
Chapter 15
Figure 15.1 A typical DDR4 SODIMM (top) compared to a DDR4 DIMM (bottom)
Figure 15.2 A typical DDR3 DIMM (top) compared to a DDR4 DIMM (bottom)
Figure 15.3 A typical DDR5 DIMM (top) compared to a DDR5 SODIMM (bottom)
Figure 15.4 A pair of identical DIMMs installed on a DDR4 motherboard
Figure 15.5 Use identical modules in memory slots A2 and B2 for dual-channel performance per...
Chapter 16
Figure 16.1 A typical 3.5-inch HDD with its top cover removed
Figure 16.2 Typical SATA drives in order by size, smallest to largest dimensions
Figure 16.3 mSATA SSD drive
Figure 16.4 M.2 SSD drive
Figure 16.5 Size comparison of SATA (left), mSATA (center), and M.2 (right) SSDs
Figure 16.6 Four PCIe slots on a motherboard. The second slot from the top is an ×8 slot, wh...
Figure 16.7 Two M.2 NVMe drives
Figure 16.8 Serial Attached SCSI (SAS) drive
Figure 16.9 RAID 0 stripes data across two or more disks
Figure 16.10 RAID 1 stores identical copies of the data on both disks
Figure 16.11 RAID 5 combines disk striping with the use of parity for redundancy
Figure 16.12 RAID 6 uses two parity blocks
Figure 16.13 RAID 10 stripes data across mirrored pairs
Figure 16.14 Inside the shell of a typical 64 GB flash drive
Figure 16.15 SD and microSD cards and adapters with different speed markings
Figure 16.16 Optical disc being placed in a computer
Chapter 17
Figure 17.1 Typical ATX motherboard (left) and microATX motherboard (right)
Figure 17.2 Typical ATX port cluster (top) and microATX port cluster (bottom)
Figure 17.3 A typical mini-ITX motherboard optimized for home theater use.
Figure 17.4 PCI card and PCI slots compared to PCIe ×16 and ×1 slots
Figure 17.5 24-pin ATX (left) and 8-pin EPS 12 V (right) power connectors
Figure 17.6 Front-mounted (left) and top-mounted (right) SATA ports from two different mothe...
Figure 17.7 eSATA port (left inset), USB 3.0 port (right inset), and SATA-eSATA adapter cable (top)
Figure 17.8 Typical headers for USB 2.0, USB 3.0, and front-panel cables
Figure 17.9 Typical headers for four-pin CPU fan (left) and three-pin system (case) fans (right)
Figure 17.10 Removing the cover over an M.2 slot in preparation for installing an M.2 SSD
Figure 17.11 Installing an AMD PGA processor
Figure 17.12 Installing an Intel LGA processor
Figure 17.13 Top and bottom views of an AMD heat sink fan (left) and an Intel heat sink fan (right)
Figure 17.14 A typical PCIe video card with two fans for cooling the GPU and video RAM
Chapter 18
Figure 18.1 When the full-screen logo option is disabled in BIOS/UEFI firmware, you can see ...
Figure 18.2 Boot options menu
Figure 18.3 Enabling or disabling individual USB ports is an option available on some systems
Figure 18.4 USB Legacy mode and XHCI Hand Off BIOS/UEFI settings
Figure 18.5 AMD fTPM before and after being enabled
Figure 18.6 CPU and Chassis fan displays on a typical desktop computer; the inset shows conn...
Figure 18.7 A system with three passwords that can be enabled in BIOS/UEFI settings
Figure 18.8 An AMD system with TPM 2.0 enabled as reported by Security Processor Details
Figure 18.9 Disabled onboard video
Figure 18.10 Preparing to disable onboard NIC
Chapter 19
Figure 19.1 A power supply with a manual voltage switch
Figure 19.2 A 24-pin ATX power cable
Figure 19.3 EPS12 V, ATX12 V, and PCIe power leads
Figure 19.4 Molex and SATA power leads
Figure 19.5 Mini (Berg) power lead
Figure 19.6 20- to 24-pin ATX power adapter
Figure 19.7 A traditional (nonmodular) power supply
Figure 19.8 A fully modular power supply
Figure 19.9 A high-quality 750-watt power supply
Figure 19.10 A typical PC power supply and mounting screws
Chapter 20
Figure 20.1 Ethernet (RJ45) (top) and USB 2.0 (bottom) ports on a typical MFD
Figure 20.2 Wireless configuration dialogs from a typical SOHO MFD (Epson ET-4750)
Figure 20.3 Verifying that File And Printer Sharing and Network Discovery are enabled on a p...
Figure 20.4 Sharing a printer in Windows
Figure 20.5 A Microsoft OneNote for Windows printer dialog
Figure 20.6 Additional settings (not available on all printers)
Figure 20.7 Enabling PrintService ➣ Operational Print Logging
Figure 20.8 A logged print job
Chapter 21
Figure 21.1 Toner cartridge in a typical printer with a separate imaging drum
Figure 21.2 Typical ink cartridges after installation
Figure 21.3 Ink levels in an inkjet printer with ink tanks
Figure 21.4 Preparing to calibrate an inkjet printer
Figure 21.5 The parts of a typical impact printer
Figure 21.6 Multipart paper
Chapter 24
Figure 24.1 CompTIA’s six-step troubleshooting methodology
Chapter 25
Figure 25.1 A typical Windows STOP error (Blue Screen of Death)
Figure 25.2 The macOS pinwheel
Figure 25.3 A properly installed chassis power switch
Figure 25.4 Installing a drive bay fan in a typical desktop computer
Figure 25.5 An extremely dirty system with virtually no airflow
Figure 25.6 HWMonitor displays temperature, voltages, and fan speed for the CPU and other co...
Figure 25.7 A typical liquid cooling kit for Intel or AMD processors
Figure 25.8 A standard DDR4 DIMM (top) compared to a high-performance model with built-in he...
Figure 25.9 Leaking, swollen capacitors compared to intact capacitors
Figure 25.10 The Compatibility tab for an app in Windows can be used to help a balky app run ...
Figure 25.11 Replace the RTC battery on a desktop or laptop to solve a problem with inaccurat...
Chapter 26
Figure 26.1 A typical motherboard’s drive activity (HDD) LED and power LED front panel headers
Figure 26.2 Correctly installed front-panel LED and other leads
Figure 26.3 A data drive reaching 100% active time during complex file editing is normal, bu...
Figure 26.4 This system drive needs to free up about 75 GB more space
Figure 26.5 Windows Boot Manager is the default boot drive on a Windows system using Secure Boot
Figure 26.6 A physical drive is the default boot drive on systems running Linux or Windows w...
Figure 26.7 S.M.A.R.T. data from a Western Digital SATA drive indicates no issues
Figure 26.8 CrystalDiskMark IOPS test of a 5,400 rpm SATA HDD drive
Figure 26.9 CrystalDiskMark IOPS test of a typical SATA SSD drive
Figure 26.10 Disk Management shows both partitions and assigned drive letters
Chapter 27
Figure 27.1 Selecting the correct data source
Figure 27.2 This display is set to use the recommended resolution
Figure 27.3 Using JScreenFix to try to repair a stuck or dead pixel
Figure 27.4 A PCIe video card being removed from its expansion slot. When properly seated, t...
Figure 27.5 Reconnecting the PCIe power cable to a PCIe video card
Figure 27.6 A three-ring (combined microphone/speaker or headset) jack at left compared to s...
Chapter 28
Figure 28.1 Using the battery and device maintenance menu on a Samsung Android smartphone
Figure 28.2 Phone with a swollen battery
Figure 28.3 Phone with a broken screen
Figure 28.4 Preparing to calibrate a touchscreen or touchpad in Windows with Tablet PC Settings
Figure 28.5 Calibrating an Android touch screen with the RedPi Apps Touchscreen Calibration app
Chapter 29
Figure 29.1 Selecting QoS settings suitable for VoIP and media streaming in an Asus router
List of Tables
Chapter 1
Table 1.1 SODIMM characteristics
Chapter 3
Table 3.1 3G-4G-5G Quick Reference
Chapter 5
Table 5.1 Protocols and ports on the A+ Core 1 exam
Chapter 6
Table 6.1 Wi-Fi 1 through Wi-Fi 6 speeds and frequency bands
Chapter 8
Table 8.1 DNS record types and their purposes
Chapter 10
Table 10.1 Reserved private IP addresses by class
Chapter 14
Table 14.1 CAT5-5e-6-6a-7 specifications
Table 14.2 EIA/TIA T568A and T568B wiring standards
Chapter 17
Table 17.1 PCIe slots and versions
Table 17.2 CPU socket types
Chapter 18
Table 18.1 Selected recent AMD and Intel multicore CPUs
Chapter 19
Table 19.1 Power connectors and uses
Chapter 25
Table 25.1 Some beep codes and LED codes for dell precision desktops
Chapter 26
Table 26.1 RAID failure
Guide
COVER
TABLE OF CONTENTS
FRONT ADVERTISEMENT
WILEY BOOKS IN THE CERTMIKE SERIES
TITLE PAGE
COPYRIGHT
ACKNOWLEDGMENTS
ABOUT THE AUTHOR
ABOUT THE TECHNICAL EDITOR
INTRODUCTION
BEGIN READING
INDEX
BACK ADVERTISEMENT 1
BACK ADVERTISEMENT 2
END USER LICENSE AGREEMENT
Pages
ii
v
vi
vii
ix
xi
xxi
xxii
xxiii
xxiv
xxv
xxvi
xxvii
xxviii
1
2
3
4
5
6
7
8
9
10
11
12
13
14
15
16
17
18
19
20
21
22
23
24
25
26
27
28
29
30
31
32
33
34
35
36
37
38
39
40
41
42
43
44
45
46
47
48
49
50
51
52
53
54
55
56
57
58
59
60
61
62
63
64
65
66
67
68
69
70
71
72
73
74
75
76
77
78
79
80
81
82
83
84
85
86
87
88
89
90
91
92
93
94
95
96
97
98
99
100
101
102
103
104
105
106
107
108
109
110
111
112
113
114
115
116
117
118
119
120
121
122
123
124
125
126
127
128
129
130
131
132
133
134
135
136
137
138
139
140
141
142
143
144
145
146
147
148
149
150
151
152
153
154
155
156
157
158
159
160
161
162
163
164
165
166
167
168
169
170
171
172
173
174
175
176
177
178
179
180
181
182
183
184
185
186
187
188
189
190
191
192
193
194
195
196
197
198
199
200
201
202
203
204
205
206
207
208
209
210
211
212
213
214
215
216
217
218
219
220
221
222
223
224
225
226
227
228
229
230
231
232
233
234
235
236
237
238
239
240
241
242
243
244
245
246
247
248
249
250
251
252
253
254
255
256
257
258
259
260
261
262
263
264
265
266
267
268
269
270
271
272
273
274
275
276
277
278
279
280
281
282
283
284
285
286
287
288
289
290
291
292
293
294
295
296
297
298
299
300
301
302
303
304
305
306
307
308
309
310
311
312
313
314
315
316
317
318
319
320
321
322
323
324
325
326
327
328
329
330
331
332
333
334
335
336
337
338
339
340
341
342
343
344
345
346
347
348
349
350
351
352
353
354
355
356
357
358
359
360
361
362
363
364
365
366
367
368
369
370
371
372
373
374
375
376
377
378
379
380
381
382
383
384
385
386
387
388
389
390
391
392
393
394
395
396
397
398
399
400
401
402
403
404
405
406
407
408
409
410
411
412
413
414
415
416
417
418
419
420
421
422
423
424
425
426
427
428
429
430
431
432
WILEY BOOKS IN THE CERTMIKE SERIES
CompTIA Tech+ CertMike:Prepare. Practice. Pass the Test! Get Certified! Exam FC0-U71
by Mike Chapple
(ISBN 9781394290659)
CompTIA A+ CertMike:Prepare. Practice. Pass the Test! Get Certified! Core 1 Exam 220-1201, Second Edition
by Mike Chapple
(ISBN 9781394357536)
CompTIA A+ CertMike:Prepare. Practice. Pass the Test! Get Certified! Core 2 Exam 220-1202, Second Edition
by Mike Chapple
(ISBN 9781394357680)
CompTIA Network+ CertMike:Prepare. Practice. Pass the Test! Get Certified! Exam N10-008
by Mike Chapple and Craig Zacker
(ISBN 9781119898153)
CompTIA® A+® CertMikePrepare. Practice. Pass the Test! Get Certified!
Core 1 Exam 220-1201
Mike Chapple
Second Edition
Copyright © 2025 by John Wiley & Sons, Inc. All rights reserved, including rights for text and data mining and training of artificial intelligence technologies or similar technologies.
Published by John Wiley & Sons, Inc., Hoboken, New Jersey.
Published simultaneously in Canada.
No part of this publication may be reproduced, stored in a retrieval system, or transmitted in any form or by any means, electronic, mechanical, photocopying, recording, scanning, or otherwise, except as permitted under Section 107 or 108 of the 1976 United States Copyright Act, without either the prior written permission of the Publisher, or authorization through payment of the appropriate per-copy fee to the Copyright Clearance Center, Inc., 222 Rosewood Drive, Danvers, MA 01923, (978) 750-8400, fax (978) 750-4470, or on the web at www.copyright.com. Requests to the Publisher for permission should be addressed to the Permissions Department, John Wiley & Sons, Inc., 111 River Street, Hoboken, NJ 07030, (201) 748-6011, fax (201) 748-6008, or online at http://www.wiley.com/go/permission.
The manufacturer’s authorized representative according to the EU General Product Safety Regulation is Wiley-VCH GmbH, Boschstr. 12, 69469 Weinheim, Germany, e-mail: [email protected].
Trademarks: Wiley and the Wiley logo are trademarks or registered trademarks of John Wiley & Sons, Inc. and/or its affiliates in the United States and other countries and may not be used without written permission. All other trademarks are the property of their respective owners. John Wiley & Sons, Inc. is not associated with any product or vendor mentioned in this book.
Limit of Liability/Disclaimer of Warranty: While the publisher and the authors have used their best efforts in preparing this work, including a review of the content of the work, neither the publisher nor the authors make any representations or warranties with respect to the accuracy or completeness of the contents of this work and specifically disclaim all warranties, including without limitation any implied warranties of merchantability or fitness for a particular purpose. No warranty may be created or extended by sales representatives, written sales materials or promotional statements for this work. The fact that an organization, website, or product is referred to in this work as a citation and/or potential source of further information does not mean that the publisher and authors endorse the information or services the organization, website, or product may provide or recommendations it may make. This work is sold with the understanding that the publisher is not engaged in rendering professional services. The advice and strategies contained herein may not be suitable for your situation. You should consult with a specialist where appropriate. Further, readers should be aware that websites listed in this work may have changed or disappeared between when this work was written and when it is read. Neither the publisher nor authors shall be liable for any loss of profit or any other commercial damages, including but not limited to special, incidental, consequential, or other damages.
For general information on our other products and services or for technical support, please contact our Customer Care Department within the United States at (800) 762-2974, outside the United States at (317) 572-3993 or fax (317) 572-4002.
Wiley also publishes its books in a variety of electronic formats. Some content that appears in print may not be available in electronic formats. For more information about Wiley products, visit our web site at www.wiley.com.
Library of Congress Cataloging-in-Publication Data Applied For:
Print ISBN: 9781394357536
ePDF ISBN: 9781394357550
epub ISBN: 9781394357543
Cover Design: Wiley
Acknowledgments
I’d first like to thank the people who helped shape the vision for this series. The original idea was hatched over breakfast with two very supportive editors from the Wiley team: Ken Brown and Jim Minatel. I’ve worked with both Jim and Ken on many books over the years, and they’re both insightful industry experts who know what it takes to produce a great book.
I’d like to extend a special thank-you to my agent, Carole Jelen of Waterside Productions. Carole is also an experienced industry pro who can deftly navigate the murky waters of publishing. Carole is the one who pushed me to create my own series.
Of course, the creation of any book involves a tremendous amount of effort from many people other than the author. I truly appreciate the work of Colleen Diamond, the copy editor. I’d also like to thank Chris Crayton, the technical editor, who provided insightful advice and gave wonderful feedback throughout the book; and Balasubramanian Shanmugasundaram, production editor, who guided me through layouts, formatting, and final cleanup to produce a great book. I would also like to thank the behind-the-scenes contributors, including the graphics, production, and technical teams, who make the book and companion materials into a finished product.
I’d also like to extend my thanks to the members of the CertMike team who assisted with this book. Shahla Pirnia, our eagle-eyed technical editor, makes sure that we’ve accurately dotted every i and crossed every t. Laurence Urbano, our project manager, helped keep the team on track through the production of this book.
Finally, I would like to thank my family who supported me through the late evenings, busy weekends, and long hours that a book like this requires to write, edit, and get to press.
About the Author
Mike Chapple, PhD., is author of the best-selling CISSP ISC2 Certified Information Systems Security Professional Official Study Guide (Sybex, 2024) and the CISSP ISC2 Official Practice Tests (Sybex, 2024). He is an information technology professional with two decades of experience in higher education, the private sector, and government.
Mike is currently a teaching professor in the IT, Analytics, and Operations department at the University of Notre Dame’s Mendoza College of Business, where he teaches undergraduate and graduate courses on cybersecurity, cloud computing, data management, and business analytics.
Before returning to Notre Dame, Mike served as executive vice president and chief information officer of the Brand Institute, a Miami-based marketing consultancy. Mike also spent four years in the information security research group at the National Security Agency (NSA) and served as an active duty intelligence officer in the U.S. Air Force.
Mike has written more than 50 books. He earned both his B.S. and PhD. degrees from Notre Dame in computer science and engineering. Mike also holds an M.S. in computer science from the University of Idaho and an MBA from Auburn University. Mike holds dozens of professional IT certifications.
Learn more about Mike and his other security certification materials at his website, CertMike.com.
About the Technical Editor
Chris Crayton is a technical consultant, trainer, author, and industry-leading technical editor. He has worked as a computer technology and networking instructor, information security director, network administrator, network engineer, and PC specialist. Chris has authored several print and online books on PC repair, CompTIA A+, CompTIA Security+, and Microsoft Windows. He has also served as technical editor and content contributor on numerous technical titles for several of the leading publishing companies. He holds numerous industry certifications, has been recognized with many professional and teaching awards, and has served as a state-level SkillsUSA final competition judge.
Introduction
If you’re preparing to take the A+ Core 1 exam, you might find yourself overwhelmed with information. This exam covers a broad range of topics, and it’s possible to spend weeks studying each one of them. Fortunately, that’s not necessary!
As part of the CertMike Test Prep series, CompTIA®A+®CertMike: Prepare. Practice. Pass the Test! Get Certified! Core 1 Exam 220-1201 is designed to help you focus on the specific knowledge that you’ll need to pass the exam. CompTIA publishes a detailed list of exam objectives, and this book is organized around those objectives. Each chapter clearly states the single objective that it covers and then, in a few pages, covers the material you need to know about that objective.
You’ll find two important things at the end of each chapter: exam essentials and review questions. The CertMike Exam Essentials distill the major points from the chapter into just a few bullet points. Reviewing these Exam Essentials is a great way to prepare yourself right before the exam. I’ve also recorded a free audio version of the Exam Essentials that you’ll find on the book’s companion website at www.wiley.com/go/sybextestprep. They’re great listening when you’re in the car, at the gym, or mowing the lawn!
Each chapter concludes with two practice questions that are designed to give you a taste of what it’s like to take the exam. You’ll find that they’re written in the same style as the A+ exam questions and have detailed explanations to help you understand the correct answer. Be sure to take your time and thoroughly read these questions.
Finally, the book’s website includes a full-length practice exam that you can use to assess your knowledge when you’re ready to take the test. Good luck on the A+ Core 1 exam!
NOTE
Don’t just study the questions and answers! The questions on the actual exam will be different from the practice questions included in this book. The exam is designed to test your knowledge of a concept or objective, so use this book to learn the objectives behind the questions.
THE A+ CERTIFICATION
A+ is designed to be a vendor-neutral certification for those seeking to enter the information technology field. CompTIA recommends this certification for individuals who want to be problem-solvers in the world of endpoint management and technical support. These are common job roles held by A+ certified individuals:
Business Analyst
Data Support Technician
Field Service Technician
Help Desk Technician
IT Server Technician
IT Specialist
IT Support Manager
MSP Personnel
Technical Support Specialist
The A+ certification is unique in that earning it requires passing two separate exams from the same series:
A+ Core 1 (220–1201)
, which covers mobile devices, networking technology, hardware, virtualization, and cloud computing
A+ Core 2 (220–1202)
, which covers operating systems, security, software, and operational procedures
This book focuses on the Core 1 exam, which covers five major domains of knowledge.
Mobile Devices
Networking
Hardware
Virtualization and Cloud Computing
Hardware and Network Troubleshooting
These five areas include a range of topics, from installing printers to configuring networks, while focusing heavily on the basic knowledge expected of IT technicians.
The A+ exam uses a combination of standard multiple-choice questions and performance-based questions (PBQs) that require you to manipulate objects on the screen. This exam is designed to be straightforward and not to trick you. If you know the material in this book, you will pass the exam.
Each exam costs $265 in the United States, with roughly equivalent prices in other locations around the globe. More details about the A+ exams and how to take it can be found at:
https://www.comptia.org/en-us/certifications/a/core-1-v15/#objectives
You’ll have 90 minutes to take each exam and will be asked to answer up to 90 questions during that time period. Your exam will be scored on a scale ranging from 100 to 900, with a passing score of 675.
NOTE
CompTIA frequently does what is called item seeding, which is the practice of including unscored questions on exams. It does so to gather psychometric data, which is then used when developing new versions of the exam. Before you take the exam, you will be told that your exam may include these unscored questions. So, if you come across a question that does not appear to map to any of the exam objectives—or for that matter, does not appear to belong in the exam—it is likely a seeded question. You never really know whether a question is seeded, however, so always make your best effort to answer every question.
Taking the Exam
Once you are fully prepared to take the exam, you can visit the CompTIA website to purchase your exam voucher.
https://www.comptia.org/en-us/certifications/a/core-1-v15/#overview
Currently, CompTIA offers two options for taking the exam: an in-person exam at a testing center and an online exam that you take on your own computer.
TIP
This book includes a coupon that you can use to save 10% on your CompTIA exam voucher.
In-Person Exams
CompTIA partners with Pearson VUE’s testing centers.
Simply set up a CompTIA SSO account and schedule an exam.
On the day of the test, take two forms of identification, and make sure to show up with plenty of time before the exam starts. Remember that you will not be able to take your notes, electronic devices (including smartphones and watches), or other materials in with you.
Online Exams
CompTIA began offering online exam proctoring in 2020 in response to the coronavirus pandemic. As of the time this book went to press, the online testing option was still available and appears likely to continue. Candidates using this approach will take the exam at their home or office and be proctored over a webcam by a remote proctor.
Because of the rapidly changing nature of the online testing experience, candidates wanting to pursue this option should check the CompTIA website for the latest details.
After the Exam
Once you have taken the exam, you will be notified of your score immediately, so you’ll know if you passed the test right away. You should keep track of your score report with your exam registration records and the email address you used to register for the exam.
After you earn the A+ certification, you’re required to renew your certification every three years by either earning an advanced certification, completing a CertMaster continuing education program, or earning 20 continuing education units (CEUs) over a three-year period.
Many people who earn the A+ credential use it as a stepping-stone to earning other certifications in their areas of interest. Those interested in networking work toward the Network+ credential, data analytics professionals might go on to earn the Data+ certification, and the Security+ credential is a gateway to a career in cybersecurity.
WHAT DOES THIS BOOK COVER?
This book covers everything you need to know to pass the A+ Core 1 exam. It is organized into five parts, each corresponding to one of the five A+ Core 1 domains.
Part I: Domain 1.0: Mobile Devices
Chapter 1: Mobile Device Hardware
Chapter 2: Mobile Device Accessories and Connectivity
Chapter 3: Mobile Device Network Connectivity and Application Support
Part II: Domain 2.0: Networking
Chapter 4: TCP/IP Networking
Chapter 5: TCP/IP Ports and Protocols
Chapter 6: Wireless Networking Protocols
Chapter 7: Networked Host Services
Chapter 8: Network Configuration
Chapter 9: Networking Hardware
Chapter 10: Installing and Configuring Networks
Chapter 11: Internet Connection Types
Chapter 12: Networking Tools
Part III: Domain 3.0: Hardware
Chapter 13: Displays
Chapter 14: Cables and Connectors
Chapter 15: Random Access Memory (RAM)
Chapter 16: Storage Devices
Chapter 17: Motherboards
Chapter 18: Booting, CPUs, and Expansion Cards
Chapter 19: Power Supplies
Chapter 20: Printer and Multifunction Device Configuration
Chapter 21: Printer Maintenance
Part IV: Domain 4.0: Virtualization and Cloud Computing
Chapter 22: Virtualization
Chapter 23: Cloud Computing
Part V: Domain 5.0: Hardware and Network Troubleshooting
Chapter 24: Troubleshooting
Chapter 25: Troubleshooting Motherboards, RAM, CPU, and Power
Chapter 26: Troubleshooting Storage
Chapter 27: Troubleshooting Video
Chapter 28: Troubleshooting Mobile Devices
Chapter 29: Troubleshooting Networks
Chapter 30: Troubleshooting Printers
Study Guide Elements
This study guide uses a number of common elements to help you prepare.
Exam Tips Throughout each chapter, I’ve sprinkled practical exam tips that help focus your reading on items that are particularly confusing or important for the exam.
CertMike Exam Essentials The Exam Essentials focus on major exam topics and critical knowledge that you should take into the test. The Exam Essentials focus on the exam objectives provided by CompTIA.
Practice Questions Two questions at the end of each chapter will help you assess your knowledge and whether you are ready to take the exam based on your knowledge of that chapter’s topics.
Additional Self-Study Tools
This book comes with a number of additional self-study tools to help you prepare for the exam. They include the following.
NOTE
Go to www.wiley.com/go/sybextestprep to register and gain access to this interactive online learning environment and test bank with study tools.
Online Test Bank
Sybex’s online test bank lets you prepare for taking the actual CompTIA exam with a full practice exam that is included with this book. This is a great way to test your knowledge of A+ Core 1 exam objectives.
Audio Review
I’ve recorded an audio review where I read each set of chapter exam essentials. This provides a helpful recap of the main material covered on the exam that you can use while you’re commuting, working out, or relaxing.
CORE 1 EXAM 220-1201 EXAM OBJECTIVES
CompTIA goes to great lengths to ensure that its certification programs accurately reflect the IT industry’s best practices. It does this by establishing committees for each of its exam programs. Each committee comprises a small group of IT professionals, training providers, and publishers who are responsible for establishing the exam’s baseline competency level and who determine the appropriate target-audience level.
Once these factors are determined, CompTIA shares this information with a group of hand-selected subject-matter experts (SMEs). These folks are the true brainpower behind the certification program. The SMEs review the committee’s findings, refine them, and shape them into the objectives that follow this section. CompTIA calls this process a job-task analysis (JTA).
Finally, CompTIA conducts a survey to ensure that the objectives and weightings truly reflect job requirements. Only then can the SMEs go to work writing the hundreds of questions needed for the exam. Even so, they have to go back to the drawing board for further refinements in many cases before the exam is ready to go live in its final state. Rest assured that the content you’re about to learn will serve you long after you take the exam.
CompTIA also publishes relative weightings for each of the exam’s objectives. The following table lists the five A+ Core 1 objective domains and the extent to which they are represented on the exam:
Domain
% of Exam
1.0 Mobile Devices
13%
2.0 Networking
23%
3.0 Hardware
25%
4.0 Virtualization and Cloud Computing
11%
5.0 Hardware and Network Troubleshooting
28%
220-1201 CERTIFICATION EXAM OBJECTIVE MAP
Objective
Chapter(s)
1.0
Mobile Devices
1.1
Given a scenario, monitor mobile device hardware and use appropriate replacement techniques.
1
1.2
Compare and contrast accessories and connectivity options for mobile devices.
2
1.3
Given a scenario, configure basic mobile device network connectivity and provide application support.
3
2.0
Networking
2.1
Compare and contrast Transmission Control Protocol (TCP) and User Datagram Protocol (UDP) ports, protocols, and their purposes.
4
and
5
2.2
Explain wireless networking technologies.
6
2.3
Summarize services provided by networked hosts.
7
2.4
Explain common network configuration concepts.
8
2.5
Compare and contrast common networking hardware devices.
9
2.6
Given a scenario, configure basic wired/wireless small office/home office (SOHO) networks.
10
2.7
Compare and contrast Internet connection types, network types, and their characteristics.
11
2.8
Explain networking tools and their purposes.
12
3.0
Hardware
3.1
Compare and contrast display components and attributes.
13
3.2
Summarize basic cable types and their connectors, features, and purposes.
14
3.3
Compare and contrast RAM characteristics.
15
3.4
Compare and contrast storage devices.
16
3.5
Given a scenario, install and configure motherboards, central processing units (CPUs), and add-on cards.
17
and
18
3.6
Given a scenario, install the appropriate power supply.
19
3.7
Given a scenario, deploy and configure multifunction devices/printers and settings.
20
3.8
Given a scenario, perform appropriate printer maintenance.
21
4.0
Virtualization and Cloud Computing
4.1
Explain virtualization concepts.
22
4.2
Summarize cloud computing concepts.
23
5.0
Hardware and Network Troubleshooting
5.1
Given a scenario, troubleshoot motherboards, RAM, CPUs, and power.
25
5.2
Given a scenario, troubleshoot drive and RAID issues.
26
5.3
Given a scenario, troubleshoot video, projector, and display issues.
27
5.4
Given a scenario, troubleshoot common mobile device issues.
28
5.5
Given a scenario, troubleshoot network issues.
29
5.6
Given a scenario, troubleshoot printer issues.
30
NOTE
Exam objectives are subject to change at any time without prior notice and at CompTIA’s discretion. Please visit CompTIA’s website (www.comptia.org) for the most current listing of exam objectives.
HOW TO CONTACT THE PUBLISHER
If you believe you’ve found a mistake in this book, please bring it to our attention. At John Wiley & Sons, we understand how important it is to provide our customers with accurate content, but even with our best efforts an error may occur. In order to submit your possible errata, please email it to our Customer Service Team at [email protected] with the subject line “Possible Book Errata Submission.”
Part IDomain 1.0: Mobile Devices
Chapter 1
Mobile Device Hardware
Chapter 2
Mobile Device Accessories and Connectivity
Chapter 3
Mobile Device Network Connectivity and Application Support
Mobile Devices is the first domain of CompTIA’s A+ Core 1 exam. It provides the foundational knowledge that IT professionals need to work with laptops, smartphones, and other devices used by end users. This domain has three objectives.
1.1 Given a scenario, monitor mobile device hardware and use appropriate replacement techniques.
1.2 Compare and contrast accessories and connectivity options for mobile devices.
1.3 Given a scenario, configure basic mobile device network connectivity and provide application support.
Questions from this domain make up 13% of the questions on the A+ Core 1 exam, so you should expect to see approximately 12 questions on your test covering the material in this part.
Chapter 1Mobile Device HardwareCore 1 Objective 1.1: Given a scenario, monitor mobile device hardware and use appropriate replacement techniques.
Mobile devices outsell other PC types, so, as an IT technician, you’ll be responsible for maintaining, monitoring, and upgrading them. We’ll look at three major types of mobile devices: laptops, smartphones, and tablets.
Laptops include the same categories of components as desktop computers but offer portability, allowing users to take their work with them as they travel around the world. Smartphones and tablets offer somewhat more limited functionality but provide a smaller, more convenient form factor.
In this chapter, you will learn everything you need about A+ Core 1 Objective 1.1, including the following topics:
Battery
Keyboard/Keys
Random-Access Memory (RAM)
Hard Disk Drive (HDD)/Solid-State Drive (SSD)
Wireless Cards
Physical Privacy and Security Components
Wi-Fi Antenna Connector/Placement
Camera/Webcam
Microphone
EXPLORING MOBILE DEVICES
As you work with users, you’ll encounter a wide variety of devices that they use to carry out their job functions. These include laptops, smartphones, and tablets.
Laptops
A traditional laptop is a portable computer with a built-in display that folds on top of the base unit. A laptop has the same categories of components as a desktop computer but uses parts with smaller form factors for portability. Figure 1.1 shows a typical laptop: a MacBook Air.
Figure 1.1 A typical laptop
A laptop also differs from a desktop in having a built-in keyboard, webcam, microphone, speakers, touchpad, battery power, and display. Most of these components are identified in Figure 1.1.
Although laptops are much smaller and typically have smaller storage and memory capacities than high-end desktops, laptops can perform almost any job a desktop can do, from lightweight web surfing to photo and video editing and 3D gaming.
EXAM TIP
The A+ Core 1 exam likes to use drag-and-drop simulations for system assembly and troubleshooting, so be sure to study the equipment and troubleshooting examples in this book carefully.
Smartphones
These days, almost everyone carries a smartphone around with them as they work and during their leisure time. These devices are small computers and, in fact, they’re much more powerful than the laptop and desktop computers of a decade ago!
Figure 1.2 shows two smartphones—an Apple iPhone on the left and an Android device on the right. These are the two most common smartphones on the market today. We’ll talk more about how smartphones connect to the network in Chapter 2, “Mobile Device Accessories and Connectivity” and Chapter 3, “Mobile Device Network Connectivity and Application Support.”
Figure 1.2 Two common smartphones: (a) an Apple iPhone, and (b) an Android device
Tablets
Tablets are portable devices that fill the gap between smartphones and laptops, combining the portability of a smartphone with the larger screen size and functionality of a laptop. These devices are typically flat, slate-shaped computers that rely on touchscreens as the primary input method. They are popular for tasks such as web browsing, reading ebooks, streaming videos, and even light productivity work like editing documents and managing spreadsheets.
Figure 1.3 shows a user interacting with a typical tablet device. Tablets can range in size from 7 to 13 inches, with some larger options available for specialized use cases.
Figure 1.3 Tablet user interacting with photographs
Tablets are designed for portability and ease of use. Unlike laptops, they often lack a physical keyboard and instead rely on virtual keyboards or external accessories, such as detachable keyboards or stylus pens. They typically have built-in cameras, speakers, microphones, and wireless connectivity, including Wi-Fi and Bluetooth, and many models offer cellular capabilities for Internet access on the go.
Tablets can run a variety of operating systems, the most common being Apple’s iPadOS and Android. Some tablets, such as Microsoft Surface devices, run a full desktop operating system like Windows, providing even greater flexibility. This makes tablets versatile tools for both personal and professional use.
EXAM TIP
Be familiar with the different features and functions of tablets, such as touch screen gestures and operating system differences. You should also understand common troubleshooting steps for these devices. The A+ Core 1 exam may include scenarios where you’ll need to identify or resolve issues with these devices.
BATTERIES AND POWER SUPPLIES
One of the key features of all mobile devices is their capability to run off both battery power and AC electricity. As users travel, they use the battery. When they return to their desk, home, or another temporary location, they can plug in the device and operate from normal AC power while the battery recharges. Some laptops offer user-replaceable batteries, such as the one shown in Figure 1.4. The user or a technician can remove this battery by sliding a switch on the bottom of the unit to release the retaining mechanism.
Figure 1.4 A user-replaceable battery after being removed from a laptop
Other laptops, as well as most smartphones and tablets, have internal batteries that require a trip to the repair shop for replacement. For example, a laptop with a built-in battery might require a near-complete teardown to access the battery. These batteries are often directly wired to the laptop motherboard.
WARNING
Before replacing a battery or any other internal component, be sure to shut down the unit and disconnect it from AC power.
KEYBOARDS
Laptop keyboards typically have layouts similar to desktop keyboards, although the positioning and size of arrow keys may differ, and some keyboards lack a dedicated number pad. However, the biggest difference between laptop keyboards and desktop keyboards is the presence of special laptop keys. There are no standards for the number and positions of laptop keys, so different laptops might feature different combinations of some of the following (see Figure 1.5 for an example):
Volume controls
Play/pause/forward/rewind media controls
Switch to external display
Enable/disable on-board Wi-Fi
Display brightness
Display contrast
Figure 1.5 The top and bottom rows of a typical Windows laptop keyboard. Use the Fn key to activate the special laptop keys
These keys are usually combined with other keys, such as function (F1–F12) keys. Switching to the secondary key assignment is done by pressing and holding the Fn key and then pressing the other key. Depending upon the laptop model, the primary key assignment might be the function keys, or it might be the laptop keys.
Laptop keyboards are often more fragile than desktop keyboards and are thus more likely to suffer broken keys. Replacements are model-specific. To replace a laptop keyboard, follow this basic procedure:
Consult the laptop’s service manual to determine whether the laptop keyboard is fastened to the bottom of the laptop base. If it is, remove the necessary screws.
Gently remove the plastic molding around the edge of the keyboard using special case-removal tools.
Pry open the laptop carefully until the interface cable is visible. It is typically a flat cable.
Carefully disconnect the interface cable (see
Figure 1.6
) from the motherboard.
Figure 1.6 Preparing to disconnect the keyboard interface cable from a typical laptop motherboard
Lift the keyboard out of the system.
Connect the new keyboard’s interface cable to the motherboard and snap the keyboard into place.
Replace the plastic molding around the keyboard.
Fasten the keyboard back into place with the necessary screws.
Reconnect the laptop to power and check the keyboard.
EXAM TIP
Laptops vary from manufacturer to manufacturer, and most manufacturers provide service manuals to assist technicians in performing maintenance and upgrades. It’s always a good idea to consult the service manual before starting an unfamiliar project!
MEMORY
Random access memory (RAM) is your computer’s short-term memory—it stores data that the CPU may need to access quickly as it processes tasks. Laptops use a smaller type of RAM called SO-DIMM (small outline dual-inline memory module). These are compact versions of the RAM sticks used in desktop computers, designed to fit into a laptop’s limited space.
Modern laptops typically use DDR5 or DDR4 SO-DIMMs, which are fast and efficient. However, if you’re working with an older laptop, you might come across DDR3 SO-DIMMs instead. Figure 1.7 shows examples of the different types of SO-DIMM modules, while Table 1.1 provides some key differentiating characteristics for each type, including the number of pins and the location of the small keying notch that appears in those pins.
Figure 1.7 From left to right, typical DDR5, DDR4, and DDR3 SO-DIMM modules
Table 1.1 SODIMM characteristics
SODIMM Type
Pins
Keying Notch Location
DDR3
204
Left
DDR4
260
Center
DDR5
262
Center
EXAM TIP
When adding RAM to a laptop, be sure to determine the supported type, speeds, and sizes for that particular laptop model. If it’s not compatible, it probably won’t work properly! Many memory vendors have online system checkers or databases you can use to find compatible modules for a given system.
Some laptops offer easy access to RAM sockets for upgrading. In the example shown in Figure 1.8, a panel on the bottom of the laptop is removed to provide access to RAM. Some laptops have separate panels for access to other user-upgradeable components such as mass storage or wireless cards, while others use a single larger panel to cover multiple components.
Figure 1.8 Inserting an SODIMM module into place (left) and after it has been locked into position (right)
By contrast, other laptops require that the system be dismantled to the motherboard level to provide access to the memory modules. With systems like this, it is necessary to remove the keyboard, mass storage devices, and other components before memory can be upgraded or replaced.
The memory upgrade/installation process follows this basic outline:
After consulting the service manual, remove the cover or other components necessary to access the module sockets.
If you need to remove one or more existing modules to make room for other modules, push the spring-loaded holders out of the way until the module pops out, and carefully remove it. Place it in an anti-static bag or container.
Insert the new module into the connector at about a 20-degree angle and push it down so it is horizontal to the motherboard and locks into place.
Close up the laptop, reattach power, restart it, and check memory for proper operation.
You’ll learn more about memory in Chapter 15, “Random Access Memory (RAM)”.
STORAGE
Storage drives provide the long-term storage that allows mobile devices to store and retrieve data even after they have been powered off. If RAM is the short-term memory of the computer, storage is the long-term memory.
Laptops use two different types of primary storage. Hard disk drives (HDDs) are an older technology that uses magnetic platters that spin at high speeds to store data. Solid-state drives (SSDs) are a newer, more expensive technology that uses high-speed, high-capacity flash memory to store data. HDDs come in two sizes: 3.5 inches and 2.5 inches, while SSDs come only in the 2.5-inch size as well as the even smaller M.2 form factor. Figure 1.9 shows these four device form factors side-by-side.
Figure 1.9 Four storage devices: a 3.5-inch HDD, a 2.5-inch HDD, a 2.5-inch SSD, and an M.2 SSD
You’ll learn more about storage in Chapter 16, “Storage Devices.”
WIRELESS CONNECTIVITY
All mobile devices have onboard Wi-Fi and Bluetooth interfaces for mobile connectivity, and some also feature cellular radios. Older laptops use the mini-PCIe interface (Figure 1.10), while current laptops use an M.2 interface (Figure 1.11) that is keyed for add-on cards instead of storage devices.
Figure 1.10 A wireless network card using the mini-PCIe interface
Figure 1.11


