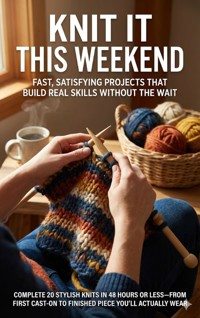
Knit It This Weekend: Fast, Satisfying Projects That Build Real Skills Without the Wait E-Book
Brianna Lewis
Erhalten Sie Zugang zu diesem und mehr als 300000 Büchern ab EUR 5,99 monatlich.
- Herausgeber: epubli
- Kategorie: Lebensstil
- Sprache: Englisch
Tired of knitting projects that take months to finish? Want something beautiful you can wear by Monday? Traditional beginner knitting starts with endless scarves and afghans that test patience more than skill. But quick-finish projects let you experience completion joy repeatedly, build confidence faster, and actually use what you make—all while learning the same fundamental techniques. This energizing guide teaches essential knitting skills through 20 weekend-completable patterns designed for maximum satisfaction with minimum time investment.
Sie lesen das E-Book in den Legimi-Apps auf:
Seitenzahl: 336
Veröffentlichungsjahr: 2025
Das E-Book (TTS) können Sie hören im Abo „Legimi Premium” in Legimi-Apps auf:
Ähnliche


Table of Contents
Chapter 1: Welcome — Why Weekend Knitting Works
Why weekend knitting beats marathon projects
What "48 hours or less" really means
Choosing your first weekend projects
Tools and materials that speed you up
Simple time-saving techniques and quick fixes
Chapter 2: Gear Up — Needles, Yarns, and Fast-Making Tools
Yarn Choices That Speed Progress Without Looking Cheap
Needles That Keep Your Hands Moving
Small Tools That Save Big Time
Set Up a Fast, Comfortable Knitting Station
Fast Finishing and Care That Keeps Projects Wearable
Chapter 3: Quick Skills — Essential Stitches and Simple Shaping
Casting On and Getting Started
Knit and Purl: Building Rhythm
Simple Shaping: Increases and Decreases
Binding Off and Finishing Neatly
Practice Sequences, Tension Tips, and On-the-Fly Troubleshooting
Chapter 4: Plan Your Weekend — Realistic Time Estimates and Scheduling
Know What "Weekend" Means: Honest Time Estimates
Block Out Your Weekend: Practical Session Plans
Sample Schedules: Match Time Blocks to Projects
Time-Saving Knitting Habits That Don’t Sacrifice Quality
Tools, Checklists, and a Printable Weekend Template
Chapter 5: Smart Pattern Sequencing — Build Skills and Keep the Wins
Why sequencing matters
A simple progression map
Smart swapping and substitutions
Time-smart planning for weekends
Speed techniques that keep quality
Quick troubleshooting so mistakes don't stall you
Chapter 6: Time-Saving Techniques — Speed That Still Looks Good
Optimize Tension and Rhythm
Choosing Fast-Friendly Yarn and Needles
Efficient Stitch Techniques
Streamlined Finishing and Seaming
Batch Knitting and Project Organization
Quick Troubleshooting and Time-Saving Fixes
Chapter 7: Troubleshooting on the Fly — Fix Mistakes Without Losing Time
Spot mistakes fast
Dropped stitch rescue
Fixing twisted stitches and joins
Uneven edges and tension fixes
Rip back or tweak — quick decision rules
Quick checks and emergency tools
Chapter 8: Batch Knitting and Gifting — Make Multiples Without Burnout
Planning Your Batch
Choosing Batch-Friendly Patterns
Setup for Efficient Workflows
Time-Saving Knitting Techniques
Customization Without Extra Work
Finishing, Packaging, and Avoiding Burnout
Chapter 9: Patterns Part 1 — Tiny Wins: Accessories and Small Gifts
Coffee Sleeve (2 hours)
Mug Cozy (2 hours)
Bookmark Set (5 hours)
Coaster Set (6 hours)
Scrunchie Set (4 hours)
Chapter 10: Patterns Part 2 — Wearables You Can Finish Fast
Headband — Fast, flattering, beginner-friendly (3 hours)
Phone Case — Practical, portable, and done in an evening (3 hours)
Infinity Scarf — Wearable reward in a few hours (4 hours)
Messy Bun Hat — Chic, quick, and comfortable (5 hours)
Chapter 11: Patterns Part 3 — Hands and Neck: Gloves, Warmers, and Cowls
Planning Your Weekend Hands-and-Neck Session
Fast Hand Warmers: Pattern, Structure, and Checks
Fingerless Gloves: Thumb Shaping and Fit in a Weekend
Neck Warmer: Quick Construction, Warm Results
Matching, Finishing, and Troubleshooting on the Fly
Chapter 12: Patterns Part 4 — Home and Baby: Practical Weekend Makes
Choosing Yarn for Home and Baby
Dishcloth Set: Quick, Durable, and Stylish
Wash Mitts: Shaping and Sturdiness
Baby Booties: Soft, Secure, Fast
Finishing, Care, and Batch Knitting
Chapter 13: Patterns Part 5 — Bigger Weekend Projects That Still Finish
Weekend pacing and the payoff
Materials and tools that speed progress
Simple cowl: plan, pace, finish
Simple shawlette: get shape without drama
Chunky beanie: quick crown, instant wear
Simplify without sacrificing style
Chapter 14: The Lap Blanket and Next Steps — Keep the Momentum Going
Finishing the Lap Blanket: A realistic 12-hour plan
Apply speed techniques without sacrificing neatness
Troubleshooting quickly so you stay on schedule
Blocking, edging and finishing for a polished result
Keep the momentum: next projects and skill growth
Final Stitches: Your Weekend Knitting Game Plan
Pick the right weekend project
Block out your weekend schedule
Prep your kit and workspace
Smart techniques to save time without sacrificing quality
Quick troubleshooting that keeps momentum
Batch knitting, finishing fast, and building habit
Chapter 1: Welcome — Why Weekend Knitting Works
Welcome to Knit It This Weekend: Fast, Satisfying Projects That Build Real Skills Without the Wait. This opening chapter explains why choosing short, finishable projects beats the traditional marathon approach. You’ll learn how quick wins keep motivation high, how finishing makes learning stick, and why you don’t need months to make something you’ll use. I’ll also set expectations: what ‘‘weekend-ready’’ really means, how to pick your first few projects, and how this book will guide you from first cast-on to finished piece in 48 hours or less.
Why weekend knitting beats marathon projects
Short projects give fast satisfaction and keep you knitting more often, which is the fastest way to improve.
Finishing fast gives you the satisfaction loop that makes you want to pick up your needles again and again.
When you complete a piece quickly, your brain rewards you with a small burst of satisfaction — that pleasant sense of accomplishment that makes knitting feel worthwhile. That positive feedback encourages you to knit again, and again, turning a hobby into a habit rather than a stalled project pile.
Short projects create many of these rewards in a short time: cast on Friday, finish Saturday, wear Sunday. Each finish builds confidence, reduces the intimidation of new techniques, and proves you can move a project from start to finish. Over time those repeated wins accelerate learning because practice is paired with motivation. You’ll notice you’re more willing to try a new stitch or tweak a pattern when the payoff comes quickly.
Small projects reduce decision fatigue so you actually complete something instead of letting it sit unfinished.
Big projects ask you to make dozens of choices — yarn, needles, color, pattern, shaping, and more. That mental load can lead to paralysis: you’re overwhelmed before you even cast on. Small, weekend-sized projects limit those choices to a few essentials, making starting easy.
Restricting decisions also simplifies troubleshooting. If a tiny cowl “isn’t working,” you can frog it and restart without the sunk cost of days invested. Practical strategies: pick one yarn weight, choose 2–3 favorite colors, and use patterns with clear stitch counts. These tiny constraints speed decisions and increase the chance you’ll finish, learn, and enjoy what you make.
Quick wins let you learn stitches and shaping by repetition, which builds real muscle memory.
Repetition is how knitting skills become automatic. When you complete several small projects that reuse the same stitches and shaping methods, your hands and eyes learn patterns without conscious effort. That muscle memory makes future projects faster and more enjoyable.
Weekend knitting lets you repeat techniques in different contexts — a beanie that uses decreases, then fingerless gloves with the same decreases, then a messy-bun hat variant. Each repetition reinforces the movement and reduces errors. Because projects are short, you cycle through practice and mastery quickly, turning intimidating techniques into familiar, reliable tools in your knitting toolkit.
You get practical feedback fast: wear the item, notice fit issues, and adjust on the next weekend.
One of the best teaching tools is immediate, real-world feedback. Finish a neck warmer or beanie and you’ll quickly see what works: fit, tension, length, or stitch choice. That immediate outcome is far more instructive than theoretical practice.
Use that feedback to make small, targeted adjustments on your next weekend project. Maybe your gauge is tight and needs larger needles, or the hat crown sits high and needs fewer decrease rows. Quick projects let you iterate fast — test a tweak, wear it, and learn. Keeping short notes with each finish speeds this cycle and makes improvement concrete and efficient.
Weekend projects preserve free time while still producing useful, wearable results you’ll reach for.
Knitting shouldn’t cost you your evenings or entire weekends. Weekend-sized projects are designed to fit realistic pockets of free time so you can enjoy making without sacrificing other parts of your life. This keeps knitting sustainable and fun.
Even with limited hours you’ll create items you actually use: a chunky beanie on a chilly Monday, a cozy cowl for commute warmth, or a mug cozy for your desk. Because these pieces are wearable and useful, you’ll be proud to reach for them — and proud to gift them too. That practicality keeps knitting feeling valuable instead of indulgent.
This approach shifts your focus from perfection to progress, which speeds learning and lowers stress.
When projects are short, the emphasis naturally moves from "perfect, final piece" to "what did I learn this weekend?" That mindset reduces fear of mistakes and encourages experimentation. You’ll try new stitches or color combos knowing the project is recoverable and won’t cost weeks of effort.
Progress-focused knitting lets you celebrate incremental improvements: a neater bind-off, a smoother join, better tension. Over time those small gains add up to noticeable skill growth. Lower stress means more enjoyment, and enjoyment is what keeps you practicing. In short: choose progress over perfection, and you’ll learn faster while having more fun.
What "48 hours or less" really means
Here’s how we use 48 hours and what realistic timelines look like for a beginner and a faster knitter.
Time estimates refer mainly to active knitting time; they usually exclude long soak times or complex blocking.
When we say “4 hours” or “12 hours,” we mean the time you’ll spend actively knitting — the stitches on the needles, not the hours your project needs to rest. Long soaks, blocking overnight, or lengthy mattress-stitch seams can add passive time that doesn’t require your hands-on attention, so they’re not included in the headline estimate.
For beginners, this distinction matters: you can cast off on Sunday and still need to let a piece dry before wearing it Monday. The book flags which projects require blocking or extended finishing and gives realistic timelines for those steps. If you’re short on time, pick patterns labeled “no-block finish” or use suggested quick finishes like steam-shaping or light pressing to shave hours without compromising appearance.
Each pattern shows typical completion times for a motivated beginner and for someone who knits faster.
Patterns list two time estimates: one for a motivated beginner and one for a knitter who has more speed and experience. These dual estimates reflect how repetition and familiarity with basic stitches shorten working time dramatically.
Beginners should use the lower-speed estimate to plan, knowing that practice will move them toward the faster number. The estimates assume steady focus rather than marathon sessions; breaks and small interruptions are accounted for. Each pattern also includes suggested pacing—like “cast on + first section” and “finish + weave in ends”—so you can map the project onto your weekend and see where you’ll likely land.
We break patterns into hour-by-hour checkpoints so you can track progress and adjust your pace.
Every pattern is split into checkpoints—short, time-based goals such as “first 30 minutes: cast on and rib,” “next hour: body to halfway marker,” and so on. These checkpoints help you measure progress and make mid-project adjustments if you fall behind or gain speed.
Checkpoints are practical: they tell you what stitch counts or finished dimensions you should have after each block of time. If you see you’re behind, the book suggests simple shortcuts—like switching to a chunkier needle for a section or reducing repeats—without altering the finished look too much. This system keeps weekend knitting from feeling like guesswork and makes it easier to finish on schedule.
Weekend knitting works even with a few short interruptions; you can split time across two days successfully.
One of the strengths of weekend projects is their flexibility. Most patterns are written so you can pause between checkpoints without losing your place. Short interruptions—meals, errands, or a quick call—don’t derail a 48-hour timeline.
The book shows natural stopping points and how to leave a project mid-row, safely store your needles, and pick up again quickly. For multi-day plans, it suggests what to do at the end of Day 1 (secure live stitches, small notes on row count) so Day 2 is focused on moving forward. This practical guidance helps you complete satisfying pieces even with a normal, interruption-filled weekend.
Gauge swatches are short and useful, but some patterns give safe shortcuts when you need to save time.
Swatching is valuable for fit and consistency, but it doesn’t always need to be a lengthy ritual. The book teaches quick, effective swatches—small squares you can knit in 10–20 minutes—and how to measure them accurately. These are often sufficient for accessories and many small garments.
When time is tight, several patterns include safe shortcuts: recommended yarn/needle pairings with low-risk gauge sensitivity, relaxed-fit designs that tolerate slight differences, and suggested adjustments (change needle size or number of repeats) to correct small gauge variances without re-knitting. Use these shortcuts selectively—when fit isn’t critical—to keep projects within your weekend window while still getting a good finish.
Expect your first try to be slower; time estimates become more accurate as you repeat similar projects.
Your first time knitting a new pattern will likely take longer because you’re learning the rhythm, reading instructions, and double-checking counts. That’s normal and expected—consider it part of the practice that makes future projects faster and more enjoyable.
Each pattern includes notes on common time-consuming steps beginners hit and offers tips to speed them up on subsequent attempts. As you repeat similar projects, you’ll notice the time estimates align more closely with your pace. Track your actual hours in the pattern margin; you’ll quickly build a personal reference that helps you choose the right next weekend project with confidence.
Choosing your first weekend projects
Pick small, useful projects that teach one new skill without overwhelming you so you finish and learn.
Start with accessories such as a beanie or cowl that use plain shaping and clear stitch patterns.
Accessories like a beanie or simple cowl are ideal first weekend projects because they focus on a small set of skills. These pieces usually involve basic shaping—short rows, decreases, or simple seaming—and repeat stitch patterns that you can memorize quickly. That means less time spent reading instructions and more time knitting, which is perfect when you want a quick win.
Choose a pattern that repeats a single stitch or two and avoids complex increases or elaborate finishing. A plain beanie with stockinette or a cowl in garter stitch teaches tension, stitch consistency, and finishing without overwhelming you. Because accessories are wearable and compact, you’ll see progress rapidly; that visual feedback boosts confidence and motivates you to tackle slightly harder projects next weekend.
Choose patterns with clear stitch counts and verification points so mistakes show up early and are easy to fix.
Patterns that give explicit stitch counts and regular verification checkpoints are beginner-friendly and time-efficient. Verification points—such as “after 10 rows you should have 48 sts”—help you catch errors before they multiply. This prevents the frustrating scenario of finishing an entire section only to discover a mistake that’s hard to correct.
When you pick a pattern, scan for numbered rows, mid-row markers, or clear breakpoints like “repeat to desired length.” These features let you periodically stop and confirm your work. If something’s off, you’ll spend five to ten minutes fixing it rather than hours ripping back, keeping your weekend timeline intact and your morale high.
Look for beginner-friendly patterns that include photos or short video links to guide tricky steps.
Visual aids transform a confusing line of text into a do-able move. Patterns that include step-by-step photos or short video links make cast-ons, joins, and finishing techniques much easier to learn quickly. Watching a 30- to 90-second clip of a method can save you time and reduce hesitation at key moments.
Prioritize patterns that reference videos for any non-standard technique—think provisional cast-on, Kitchener stitch, or a particular decrease. If a pattern lacks visuals, search the pattern title plus “tutorial” online; most designers or community knitters have quick demos available. Visual guidance keeps your hands moving and your project moving toward completion.
Match yarn weight and needle size to the time goal: bulky yarn and large needles work up fastest.
When your aim is a weekend finish, yarn weight and needle size are your best tools. Bulky or super-bulky yarn combined with larger needles creates more fabric per stitch, drastically reducing knitting time. A chunky cowl that would take a week in fingering weight will be done in a few hours with bulky yarn.
Also consider fiber choice: smooth, worsted- or bulky-weight yarns stitch up quickly and show pattern definition well, whereas slippery or novelty yarns can slow you down. Check the pattern’s recommended gauge and choose a yarn/needle combo that meets the time estimate without sacrificing the look you want. Swatching for five to ten minutes can prevent surprises and keep you on schedule.
Avoid complicated colorwork or lace initially; save those techniques after you’ve finished several quick projects.
Colorwork and lace are beautiful but often require extra concentration, counting, and corrections—things that can derail a tight weekend plan. Stranded knitting needs tension management for multiple yarns; lace demands precise increases, decreases, and frequent stitch counting. Both can slow you down and reduce the satisfaction of a quick finish.
Instead, reserve these techniques until you’ve completed several simpler projects and built confidence in basic stitches and shaping. Once you’ve experienced a few complete weekend makes, you’ll have better rhythm, fewer errors, and more patience for the extra focus colorwork and lace require.
Pick at least one project you can wear or gift immediately to reinforce motivation and celebrate success.
Choosing a project that’s instantly usable—like a hat, cowl, or warm pair of hand warmers—gives immediate payoff. Wearing something you made within days, or giving it as a ready-to-use gift, creates a strong emotional reward loop that encourages continued practice. That feeling of “I made this” powers your momentum far more than a half-finished blanket ever could.
If motivation is a concern, plan one wearable and one tiny practical item each weekend. The wearable item serves as a visible accomplishment while the small item reinforces technique. Together they build confidence, develop skills, and make your knitting habit pleasurable and sustainable.
Tools and materials that speed you up
The right tools change how fast and nicely a piece comes together, so invest a little for better results.
Bigger needles and bulky yarn dramatically cut knitting time while still producing attractive, wearable items.
Choosing bigger needles and bulky yarn is one of the fastest ways to shorten project time. Thick strands and large needles create fewer stitches per inch, so row counts fall and fabric grows visibly fast. That means a cowl, beanie, or lap blanket can go from cast-on to wearable in a single weekend.
Bulky yarn also yields a cozy, modern look—chunky stitches are stylish and forgiving, hiding small tension variations. Be mindful of gauge: check a small swatch so the finished piece fits as intended, especially for wearables. If a pattern lists DK or worsted, look for quick-alternative patterns written for chunky yarn or adapt by changing needle size and expecting a different drape. For beginners, bulky projects build confidence fast because you see progress with every few rows.
Smooth, tapered needles help you work quickly; blunt tips are better for small, fiddly stitches when needed.
Smooth needles with a good taper let yarn glide, which keeps your rhythm and speed up. When stitches slip easily off the needle only when you want them to, your knitting feels faster and less fussy. Metal or high-quality coated wooden needles often provide that slick surface beginners appreciate.
Tapered points help with precise stitch placement, useful for increases, decreases, and lace—tasks that can otherwise slow you down. But blunt tips have their place: if you're working garter, chunky stitches, or manipulating lots of live stitches at once, a blunter tip prevents accidental drops. Try a couple of needle materials and tapers to see what fits your hands and patterns; many knitters keep one smooth, tapered pair for speed and a blunter pair for safety on fiddly sections. Comfortable needles also reduce fatigue, letting you knit longer sessions over the weekend.
Circular needles let you work flat or in the round without switching tools mid-project, saving time and hassle.
Circular needles are versatile: use them for seamless hats, cowls, and bags, or turn them into a straight-needle substitute to knit flat pieces without swapping tools. That flexibility cuts project time because you won't pause mid-project to change equipment.
Long cables also allow larger projects like lap blankets to be worked on one tool, preventing juggling multiple needle pairs. For beginners, using a circular needle with a short cable (for hats) or long cable (for blankets) means fewer ends to weave in and fewer joins. Learn to join in the round and use the magic loop technique—both will expand what patterns you can complete quickly. Many patterns in this book are written with circulars in mind to eliminate seams and streamline finishing, which is a key time-saver.
Keep essentials handy: stitch markers, a tape measure, tapestry needles, a stitch holder, and sharp scissors.
A small kit of essentials saves time because you won't stop searching for tools mid-knit. Keep stitch markers nearby to mark repeats or ends—drop them in and keep knitting without counting obsessively.
Carry a tape measure or ruler to check length and gauge quickly; it's faster than knitting a huge swatch. Tapes and tape measures let you hit measurement checkpoints (like armhole depth) without guesswork.
Tapestry needles and a stitch holder finish projects fast: use a blunt tapestry needle for tidy weaving and a stitch holder for holding live stitches while you work another section. Keep a pair of sharp scissors for precise trimming of yarn ends. Stash these in a small pouch and your weekend flow stays uninterrupted. A compact notions bag makes them portable for knitting on the go and keeps replacements at hand if you misplace something.
Prewind yarn into center-pull cakes to avoid tangles and keep knitting moving smoothly.
Prewinding yarn into center-pull cakes prevents tangles and keeps you knitting at pace. Pulling from the center means the yarn feeds smoothly without the skein rolling—no chasing a ball across the table.
Use a yarn swift and ball winder if you have them; they make neat cakes quickly. If you don't, wind by hand around a chair back or a book, keeping tension even. Label cakes with yarn weight and color info so you can match dye lots or remember needle recommendations. For multi-skein projects, wind all skeins before you start so you don't have to stop mid-weekend to deal with snarls. Even a quick hand-wound cake beats fighting tangles when you're on a tight timeline.
Choose washable, durable yarns for wearables so finishing and care are simple and forgiving.
Picking washable, durable yarns means your finished pieces are ready to wear right away and survive regular use. Machine-washable blends, like superwash wool or wool/acrylic mixes, remove the need for delicate hand-washing and reduce anxiety about spills or everyday wear.
Durable fibers also change how you finish items: less worry about fragile pilling or felting means you can use simple seams and practical finishes that save time. Look for yarns labeled "machine washable" and check fiber content for durability. For baby items or items you'll wear often (hats, cowls, mitts), prioritize easy-care yarns. If you love luxury fibers, reserve them for quick accessories that won't be washed frequently. Choosing practical yarn upfront keeps blocking and care simple, and lets your weekend knits actually see real-life use without extra maintenance.
Simple time-saving techniques and quick fixes
Learn a few practical shortcuts and quick repairs that keep you on schedule without making sloppy work.
Master a fast cast-on and a neat bind-off to avoid slow starts and messy edges.
Starting and finishing cleanly saves more time than you’d think. Learn one fast cast-on—many beginners find the long-tail cast-on both quick and tidy once you can estimate the tail. Practice tension so your first row isn’t too tight; a relaxed edge makes the rest of the project go smoothly. If sizing the tail is hard, try the knitted cast-on for speed until you gain confidence.
For bind-offs, pick one reliable method and practice it until it’s even: a basic bind-off works for most pieces, while Jeny’s Surprisingly Stretchy Bind-Off or a sewn-off bind-off is great for edges that need give. Finish by weaving in ends neatly and giving the edge a gentle block or steam to settle stitches. Clean starts and finishes make short projects look polished without extra hours of fiddling.
Try continental or combination knitting for faster hand motion once you feel comfortable with basics.
When you’ve got knit and purl down, experimenting with continental or combination knitting can speed your work significantly. Continental holds the yarn in your left hand so the yarn travels less distance; combination changes how stitches sit on the needle to make purling faster for some knitters. Both reduce wasted motion and fatigue, ideal for weekend projects.
Switch slowly: practice on a small swatch or a few rows of your project before committing. Watch videos to get finger placement right and troubleshoot common snags like tightened stitches or twisted rows. You don’t have to change everything at once—adopt the technique that feels natural and gradually build speed while keeping your fabric even and tidy.
Use provisional cast-ons and mattress stitch to speed finishing and create tidy joins quickly.
Provisional cast-ons are a quick trick for projects that need neat, seamless joins—think cowl ends or reversible edges. Use a scrap contrasting yarn or a crochet chain as the temporary foundation so you can later pick up live stitches and graft or continue knitting. That avoids fiddly seams and gives a clean finish faster than sewing two edges together.
For seams, mattress stitch is the go-to: it produces a nearly invisible join on right-side fabric. Align stitch columns, use a blunt tapestry needle, and weave the ladder evenly for speed and strength. These two techniques reduce finishing time and elevate the final look, especially when you’re making multiples or want professional results without complex sewing.
Fix mistakes fast: tink back a stitch or use a lifeline so you don’t redo whole sections.
Mistakes happen—quick fixes keep them from ruining a weekend timeline. Tinking (knit spelled backward) lets you unknit one stitch at a time by reversing your knitting motion; it’s ideal for small slip-ups near the needles. For problems several rows back, use a crochet hook to ladder down to the error and reknit that section without ripping the whole piece.
Lifelines are a lifesaver: thread contrasting yarn or dental floss through live stitches at a safe row so you can rip back to that point without panic. Place a lifeline after pattern repeats or tricky shaping. For tiny flaws, consider duplicate stitch or a small tuck repair. These tactics mean less undoing and more forward momentum on your weekend make.
Batch knit small items like coasters or scrunchies when you need several gifts in a short time.
When you need multiples, batching is faster than making one at a time. Choose a simple, repeatable pattern and cast on for several pieces in sequence or use one long circular needle to work small items in rotation. Keeping one yarn and needle combination steady reduces setup time and helps maintain consistent gauge across items.
Organize work in stages: cast on all pieces, complete the main body on each, then move to finishing steps as a group—block, weave in ends, and package together. Pre-measuring yarn for each item and prepping labels or tags in advance also speeds the process. Batch knitting turns gift-making into an efficient, satisfying assembly line.
Quick blocking methods—steam blocking or towel shaping—give a polished look without long drying waits.
Blocking makes a big visual difference and doesn’t have to take days. For quick wins, steam blocking smooths and opens stitches fast: hover a steam iron or steamer a few inches above the fabric and gently shape with your hands, using a pressing cloth to protect delicate fibers. Avoid direct contact unless you understand the yarn’s heat tolerance.
For faster wet shaping, towel blocking is effective: lightly wet or spritz your piece, roll it in a towel to remove excess water, then lay it flat and pin to shape. A fan or low-heat hair dryer speeds drying. Always check yarn labels—some fibers (like certain wools or felting blends) need gentler care—so you get polished results without waiting days for a full dry.
Chapter 2: Gear Up — Needles, Yarns, and Fast-Making Tools
Before you cast on, you need the right tools. This chapter covers yarn choices that speed progress without looking cheap, needle sizes that help you keep gauge without slow fiddling, and small accessories that shave minutes off every step. I’ll explain weight choices like bulky versus worsted for weekend work, which needles give the smoothest motions, and useful extras such as stitch markers, blunt darning needles, and simple blocking supplies. By the end you’ll be ready to shop confidently and set up a fast, comfortable knitting station.
Yarn Choices That Speed Progress Without Looking Cheap
Choosing the right yarn is the fastest route to a finished piece that still looks great. In weekend knitting, yarn weight and fiber decide how quickly rows grow and how wearable the final item feels. This section walks through which weights give the biggest payoff for time, how fiber affects stitch definition and ease, and what visual choices help you finish fast without sacrificing style.
Pick bulky and super bulky for speed
When you want something done in a few hours, bulky (5) and super bulky (6) yarns are your best friend. Those thick strands create large, visible stitches that knit up quickly, so a hat, cowl, or chunky headband can be finished in an evening. Because each row covers more inches, you get the satisfaction of rapid progress—which keeps momentum high on weekend builds.
Bulky yarns also pair well with simple stitch patterns like garter or basic ribbing, which keeps counting minimal and mistakes less obvious. Be mindful of warmth and drape: super bulky is cozy but can feel heavy for accessories that need movement. For beginners, larger needles (and these yarns) reduce fiddliness and build confidence fast.
Worsted and aran for a balance of speed and versatility
Worsted (4) and aran (4/5) yarns hit the sweet spot between speed and finish. They work up faster than fingering or sport weights but give better drape and stitch definition than super bulky, so your weekend projects look more refined. Choose these weights for chunky beanies, market bags, baby items, or any piece where you want both polish and quick turnaround.
If you want extra speed, try a needle one size larger than the pattern recommends—but always knit a tiny swatch to check gauge. When short on time, simplify the texture: use stockinette with a neat rib edge instead of complex cables. These weights are also forgiving for shaping and finishing, making them ideal for learning without sacrificing wearability.
Fiber matters: choose based on feel, care, and speed
Fiber choice affects how fast you knit, how the stitches behave, and how easy the finished piece is to care for. Acrylic and other synthetics are inexpensive, glide smoothly on needles, and are machine washable—perfect for quick projects and gifts that need little worry. They’re forgiving of tension inconsistencies and dry quickly after washing.
Wool and wool blends offer great elasticity, stitch memory, and warmth; they can hide small tension issues and bloom nicely with blocking. Cotton is excellent for dishcloths and market bags but is heavier and less springy, so it can feel slower to work with. Blends (for example superwash wool with nylon) often deliver the best mix of speed, durability, and easy care for weekend knits.
Use color and texture to hide or highlight work
Color and texture choices change how visible mistakes are and how “finished” a quick project looks. Solid colors and lightly heathered yarns show stitch patterns best, so they’re ideal when you want crisp texture. Variegated and self-striping yarns can hide small tension irregularities and make a simple pattern read as intentional and lively.
Avoid tiny speckled yarns for heavily textured stitches—they can compete visually and obscure the texture. For faster satisfaction, choose a bold mid-tone that shows off progress without hiding stitches (very dark or very pale shades make counting harder). Testing a small swatch helps you see whether the color enhances or muddles your chosen stitch pattern.
Plan yardage and shop smartly
Running out of yarn mid-weekend kills momentum. Before you cast on, check the pattern’s yardage requirements and buy at least 10–20% extra, especially for garments or projects where dye lot matters. That buffer covers gauge variation, extra length, or finishing mishaps.
For batch knitting, purchase all skeins from the same dye lot to avoid noticeable color shifts; if that’s impossible, alternate skeins every other row to blend shades. Keep a small emergency stash of a neutral worsted or bulky yarn for quick repairs or substitutions. Finally, save labels: record yarn weight, yardage, dye lot, and needle size so you can replace or match yarn fast if needed.
Needles That Keep Your Hands Moving
Needles are where technique meets comfort. The right needle type and size reduce fuss, increase speed, and help you maintain an even gauge without thinking about it. This section covers materials, length choices, and size strategies that make weekend knitting a satisfying, not frustrating, experience.
Choose needle material based on yarn and personal rhythm
Metal needles are slick and let stitches glide, ideal with sticky fibers or when you want faster movement. Wood and bamboo offer more grip, which helps control stitches and slows you just enough to avoid dropped stitches when learning. Plastic needles are lightweight and often quieter. Try a few types to find what matches your pace.
Many beginners love bamboo for control, then switch to metal when they want extra speed. Think of needle material like shoes: the right pair makes long sessions pleasant. If your yarn feels like it's slipping off, choose a grippier option; if stitches catch and slow you down, go slicker.
If possible, borrow or test short sets at a yarn shop. Small experiments will save frustration and speed up progress more than buying every needle type at once.
Go up a needle size to speed up without losing structure
If a pattern calls for 5.5 mm and you want a quicker knit, try 6 mm and make a small gauge swatch. Larger needles create bigger stitches and spread the work faster. You'll sacrifice some density, so this works best on accessories like scarves, cowls, and slouchy hats.
Always check your final piece against desired dimensions; if it becomes too loose, wash and block to see how fiber relaxes before altering the needle size again. For fitted items like gloves, mitts, and baby clothes, be cautious—bigger needles can change fit dramatically.
A quick process: swatch, measure, adjust. Cast on the number of stitches recommended, knit a 4x4 square, measure stitches per inch, and compare. If gauge is off but you prefer the faster look, consider using a firmer yarn or tighter tension to regain structure.
Use circular needles for most projects
Circular needles aren't just for knitting in the round. They distribute weight better than long straights and let you work flat or in the round without switching tools. For quick projects, a 16 to 24 inch circular can replace straight needles for hats, cowls, and small blankets using the magic loop or small-circ technique.
They reduce hand fatigue and keep your pace steady for longer sessions. If you tend to drop stitches when moving between straights, circulars let your work sit on the cable and move with you. Beginners find that fewer needle changes mean fewer interrupted rhythms and more consistent stitches.
Buy one or two trusty cable lengths — a 24-inch and a 32-inch cover most weekend patterns. If you get an interchangeable set, the ability to switch cable length quickly makes it the most flexible and space-saving choice for a fast maker.
Straights, double points, and alternatives for specific items
Double-pointed needles (DPNs) are handy for small-circumference projects like baby booties and fingerless gloves, but many knitters now use circulars and magic loop to avoid juggling. Straight needles still shine for flat pieces like dishcloths or simple scarves.
Think about project shape before you pick tools. Narrow tubes and tiny circumference work are where DPNs or 9–14 inch circulars excel. For long flat pieces, straights can feel simpler because the rhythm is straightforward and you only handle two needles.
There are also hybrid options: short circulars (20-inch) for narrow projects, and interchangeable needle tips that let you convert between straight and circ-like setups. Try the method that makes you relaxed — comfort speeds you up more than any "right" tool.
Invest in a couple of go-to sizes
Instead of buying every size, choose a small selection that covers most weekend patterns: one set in a medium size (5.5 to 6.5 mm) for worsted and aran projects, and one larger set (8 to 10 mm) for bulky knits. Keep them in a pouch with a few sizes up and down so you can adapt instantly.
A pair of interchangeables with a few cable lengths can be the most flexible and space-saving investment for a fast maker. They let you swap tips to match patterns and store compactly. If budget is tight, prioritize needle pairs in sizes you actually use on current projects.
Mark your favorites with a sticker or colored tape so you grab the right size without thinking. Having go-to sizes on hand reduces frustrating runs to a shop mid-project and keeps your weekend timeline intact.
Small Tools That Save Big Time
Several small accessories shave minutes off each step and stop problems before they start. This short list highlights inexpensive, high-impact tools that make finishing quick projects less stressful and more reliable.
Stitch markers and row counters keep you on track
Stitch markers are tiny heroes for beginner projects. They mark pattern repeats, the beginning of a round, or where decreases and increases belong, so you don’t waste time recounting stitches every few rows. Use locking markers where you’ll remove them and ring markers for permanent divides — both are inexpensive and instantly reduce errors.
A simple mechanical row counter or a smartphone app saves huge chunks of time during repeats. Instead of pausing, trying to remember, or recounting, you tap and carry on. This matters on short weekend projects: avoiding a late-night discovery that you’re off by six rows prevents ripping back hours of work.
Together, these two tools reduce frustrating mistakes and keep your momentum. For beginners, that means more finished pieces, faster confidence, and better learning — all without adding complexity to your knitting bag.
Yarn bowl and clip-on bobbins prevent tangles
A yarn bowl stabilizes your skein so the yarn feeds smoothly while you knit. It’s especially useful for bulky or center-pull cakes: the bowl’s opening guides the strand and prevents the whole cake from rolling across the room. Less chasing your yarn means more uninterrupted knitting time.
For multi-color projects or stranded motifs, clip-on bobbins or small plastic bobbins keep short lengths tidy and separate. They stop the inevitable knotting that chews minutes and tests patience. A compact project bag with separate pockets also works well for carrying multiple skeins on the go.
Blunt darning needles and small scissors for fast finishing
Finishing is where many projects stall, so keep blunt darning needles and a couple of small scissors within reach. Blunt needles glide between yarn plies without splitting, making weaving in ends quick and neat. Carry at least one larger needle for bulky yarn and one finer needle for lighter weights.
Sharp small scissors let you trim ends close to knots without fraying, giving a professional look. A pair with a pointed tip helps with precision, while spring-loaded or ergonomic scissors reduce hand fatigue during batch finishing.
Having these tools on the final workday prevents procrastination. Instead of staring at a nearly-finished piece, you’ll seam, weave, and trim confidently — and be ready to wear your weekend knit by Monday.
Blocking basics that work fast
Blocking transforms homemade items, smoothing stitches and shaping pieces so they look intentional and polished. For weekend knits, keep a spray bottle, a small foam blocking mat or towel, and a few rust-proof T-pins in your kit. These are inexpensive and compact.
Wet-spritz blocking works well for many accessories: mist, shape gently, and pin into position for a short rest. Bulky items need less stretching — just even out edges and allow to dry. If you’re short on time, gentle steam and reshaping by hand will give a respectable finish without full blocking.


