Erhalten Sie Zugang zu diesem und mehr als 300000 Büchern ab EUR 5,99 monatlich.
- Herausgeber: Creative Homeowner
- Kategorie: Lebensstil
- Sprache: Englisch
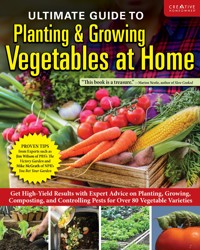
Every vegetable gardener needs at least one comprehensive how-to book on their shelf. Ultimate Guide to Planting & Growing Vegetables at Home is that book. It's an all-in-one resource for beginner and advanced gardeners with chapters on what you need to think about before starting a vegetable garden, planning, prepping, choosing the vegetables, sowing, growing, small space gardening, raised bed gardening, container and vertical gardening, and harvesting. The editors of Creative Homeowner cover essential topics including where to plant your vegetable garden, projects to support high-yield plant growth, protection and care of plants, soil treatments, disease and pest treatment, and so much more! This ultimate guide features 32 vegetable plant profiles such as potatoes, lettuce, beetroot, radishes, and more, with 91 varieties. Each profile includes variety, whether to plant or seed, spacing, harvesting, ratio of plant to harvest, whether to repeat sowing, ideal conditions, maintenance, watering, and troubleshooting. Includes beautiful full-color photos to help gardeners along the way. Gardening is made easy with this all-in-one reference guide.
Sie lesen das E-Book in den Legimi-Apps auf:
Seitenzahl: 527
Veröffentlichungsjahr: 2025
Das E-Book (TTS) können Sie hören im Abo „Legimi Premium” in Legimi-Apps auf:
Ähnliche


Copyright © 2025 Creative Homeowner
Ultimate Guide to Planting & Growing Vegetables at Home (2025) contains content first published in Garden DIY (CompanionHouse Books 2020); Organic Gardening Techniques (New Holland Publishers 2008); Low-Maintenance Vegetable Gardening (CompanionHouse Books 2018); Beginner’s Garden (IMM Lifestyle Books 2018); You Bet Your Garden Guide to Growing Great Tomatoes, Second Edition (Fox Chapel Publishing 2020); Self-Sufficiency: Grow Your Own (IMM Lifestyle Books 2011); Homegrown Vegetables, Fruits, and Herbs (Creative Homeowner 2010); Fast, Fresh Garden Edibles (Creative Homeowner 2011); and Organic Book of Compost, 2nd Revised Edition (IMM Lifestyle Books 2020).
This book may not be reproduced, either in part or in its entirety, in any form, by any means, without written permission from the publisher, with the exception of brief excerpts for purposes of radio, television, or published review. All rights, including the right of translation, are reserved. Note: Be sure to familiarize yourself with manufacturer’s instructions for tools, equipment, and materials before beginning a project. Although all possible measures have been taken to ensure the accuracy of the material presented, neither the author nor the publisher is liable in case of misinterpretation of directions, misapplication, or typographical error.
Creative Homeowner® is a registered trademark of New Design Originals Corporation.
Ultimate Guide to Planting & Growing Vegetables at Home
Managing Editor: Gretchen Bacon
Acquisitions Editor: Lauren Younker
Editor: Sherry Vitolo
Designer: Wendy Reynolds
Indexer: Jay Kreider
Paperback ISBN 978-1-58011-606-0
Hardcover ISBN 978-1-58011-619-0
eISBN 978-1-63741-335-7
Library of Congress Control Number: 2024918920
We are always looking for talented authors. To submit an idea, please send a brief inquiry to [email protected].
Creative Homeowner®, www.creativehomeowner.com, is an imprint of New Design Originals Corporation and distributed in North America by Fox Chapel Publishing Company, Inc., 800-457-9112, 903 Square Street, Mount Joy, PA 17552.
About the Contributors
Ian Cooke has been a professional horticulturalist for over forty years. He runs his own consultancy, advising, designing, and writing on all matters horticultural, and is the author of six gardening books. He splits his time between the UK and the United States.
Jane Courtier has written many gardening books, including The No-Garden Gardener, Patio and Courtyard Gardens, and Vegetable Gardening: From Planting to Picking—The Complete Guide to Creating a Bountiful Garden. She contributes to many magazines, writing on a wide range of gardening topics.
Nick Hamilton is the owner of Barnsdale Gardens, Britain’s largest collection of individually designed gardens with 39 working gardens on an eight-acre site. He carries on the legacy of his father, the late Geoff Hamilton, legendary host of the BBC’s Gardener’s World TV show. Nick is the author of The Barnsdale Handy Gardener and Geoff Hamilton—A Gardening Legend. He has a lifelong passion and enthusiasm for organic gardening, principles which he puts into effect at Barnsdale Gardens.
Daniel Johnson and Samantha Johnson (Phelps, Wisconsin) are siblings who have collaborated on a number of rural-living guidebooks, including How to Raise Rabbits and Beginner’s Guide to Beekeeping. Both are 4-H alumni and live on the family farm, Fox Hill Farm, in far northern Wisconsin (www.foxhillphoto.com). Samantha is a certified horse show judge and raises purebred Welsh Mountain ponies and Dutch, Holland Lop, and Netherland Dwarf rabbits. Daniel is a professional photographer who specializes in imagery of farm life.
Clare Matthews runs a successful garden design business. Her own garden has both been filmed by BBC Gardener’s World and featured in many leading gardening publications. She is the author of several books.
Mike McGrath is editor-at-large for Organic Gardening and is the former editor-inchief. He writes a monthly column, “Mike McGrath’s Tall Tales,” and answers questions on the magazine’s website. McGrath’s “You Bet Your Garden” airs weekly on National Public Radio. He has made frequent guest appearances on NBC’s Weekend Today and NPR’s “All Things Considered.”
Alex Mitchell is a journalist, author, and gardener. She has a regular column in The Sunday Telegraph where she covers everything from how to deter slugs to the best hand cream to use after a day in the elements. She studied at the Chelsea Physic Garden and grows her own fruits, salad, herbs, and vegetables.
Pauline Pears is head of knowledge transfer at Garden Organic Ryton, part of Garden Organic, which is Europe’s largest organic membership organization. She and her team answer many thousands of gardening queries a year. She has written six books on organic gardening and is heavily involved with community composting, giving help and advice to members of the public.
Jim Wilson was a prolific educator, author, and gardener. He was one of the hosts of PBS’s The Victory Garden, the national spokesman for the Garden Writers Association’s Plant a Row for the Hungry program, and was elected to the Garden Writers Hall of Fame in 1995.
Contents
Getting Started
Sunlight
Siting
Water
Tools
CHAPTER 1:Choosing What to Grow
Grow What You Like
Choosing Which Cultivar to Grow
What Not to Grow
Dealing with Shade
Buying Seeds
Choosing the Right Vegetables
CHAPTER 2:Soil
Types of Soil
Soil pH
Water in the Soil
Life in the Soil
Soil Cultivation
Soil Conditioners
CHAPTER 3:Compost, Fertilizer, Manure, and Mulch
What Is Compost?
How to Make Compost
What Is Needed for Effective Composting
Collecting Materials for Your Compost Heap
What Can I Compost?
Buying a Compost Bin
Using Compost
Manure for Composting
Using Autumn Leaves and Leaf Mold
Using Composted Wood Chips and Shreds
Fertilizers and Plant Nutrients
Green Manures
Mulching
CHAPTER 4:Planning and Design
Planning for Crop Rotation
Companion Planting
Raised Bed Gardening
Container Gardening
Vertical Options and Support Pieces
CHAPTER 5:Preventing Pests, Diseases, and Weeds
Preparing Your Crops
Use Perfect Timing
Create Barricades
Fighting off the Enemy
Organic Products for Fighting Pests and Diseases
The Future of Organic Options
Guidelines for Spraying
Common Pests and Controls
Common Diseases and Controls
Dealing with Garden Critters
Combating Weeds
Using Covers
CHAPTER 6:Plant Profiles
Salads and Greens
Podded Vegetables
Roots and Tubers
Brassicas
Stems and Bulbs
Fruiting Vegetables
Allium Family
CHAPTER 7:Sowing and Planting, Growing, and Harvesting
Sowing Seeds
Planting Seedlings
Spacing and Seasonal Planning
Time to Maturity
Growing and Care
Crop Rotation in Practice
Never Let Weeds Get Out of Hand
Picking and Harvesting
CHAPTER 8:Storing and Using Your Produce
Short-Term Storage
Long-Term Storage
Storage Tips by Plant Type
Photo Credits
Getting Started
The essentials of gardening are sunlight, siting, water, and tools. Once you familiarize yourself with these topics, the nuances of choosing your plants, soil, planning your garden, and more build off this foundational knowledge. It’s important to remember that while this book covers general knowledge of planting and harvesting a vegetable garden, it’s always key to know the specifics of your region and growing zone.
Sunlight
Full sun is preferable, by far. No vegetables, fruits, or herbs will grow well in dense, daylong shade, and all but rhubarb will be challenged by light to mottled shade for most of the day. Most kinds will endure either afternoon or morning shade but will produce less than they would in full sun. (Although, afternoon shade can be beneficial where sunlight is extremely intense, such as in deserts and semitropical areas.) Midsummer—when the sun beams straight down at noon—is not the best time for evaluating how shadows might affect food production. Also, keep in mind that shadows from trees and buildings cover more ground during spring and fall months, which are the most enjoyable seasons for working in a food garden.
Light and Shade
Fruit and vegetable plants like good, bright light; they will struggle to grow well in shade. Most yards are shady only in certain areas or at certain times of the day. On a sunny day, take photographs of your yard or outdoor space every two or three hours so that you have a record of exactly which areas are shaded and for how long. This will help you decide the best position for your vegetables.
If your urban outdoor space is shaded by high walls or fences, you can improve the quality of light by painting their surfaces white or a light color or by propping a reflective or light-colored material against them. Prune back trees and shrubs that are casting shade; however, if a neighbor‘s tree is causing the shade, first ask for permission.
A white background helps reflect light onto your plants, including those in planters on the wall (like these tomatoes).
Warmth
Plants need warmth to start photosynthesizing and growing, but the amount of warmth they prefer varies from one species to another. In general, temperatures of 65–80°F (18–27°C) produce the best results but be sure to adjust your planting and sowing dates according to your climate.
You can extend the growing season by starting seeds indoors and planting them outdoors when warm enough, or by using covers. This is especially useful for plants that thrive in heat like tomatoes, squash, and peppers. Start cool-season vegetables, such as radishes, spinach, and turnips, directly outdoors.
Tomatoes are one of the warm-season crops, along with squash and peppers, that love the heat. In most regions, you’ll want to start these indoors and wait for warm weather to plant them outside.
When choosing an area for your vegetable garden, pick one that will receive plenty of sunlight.
Siting
Having little or no outdoor space doesn’t mean that you have no room for growing vegetables. In the same way that fast-growing, easy-care vegetables don’t require as much of your time as you might have expected, fruits and vegetables also don’t need that much space. Don’t just look at the obvious areas of ground space for growing your vegetables. You can grow plants in pots on balconies, on windowsills, and at the sides of paths and steps. Walls and fences can support climbers and scramblers, as well as hanging baskets.
If you are planning a roof garden or intend to grow vegetables on your balcony, be sure that the structures will support the weight of the plants and soil in pots, and that hanging baskets and window boxes are safely secured, especially if they are up high.
Once you’ve decided on a space, the next step is to look at the conditions. You may need to improve or adapt them before you can start growing your own vegetables.
Small Spaces, Big Ideas
Don’t let limited outdoor space make you think you can’t grow your own food—there’s always space for a vegetable of some kind. Take a look at the many small growing spaces throughout this book to provide inspiration for your own situation.
Your options will depend on your living accommodation. You may have a yard in which you can dedicate a small section for a patch, or you might be able to fit vegetables in with ornamental plantings in a flower bed or border. You can use a patio, deck, balcony, or roof space for growing vegetables. Even if these are not options for you, a window can be enough for fresh herbs, salad greens, and perhaps even a few sweet peppers.
A vegetable patch doesn’t need to be huge. This small, informal plot provides plenty of space for beans, carrots, and beets, among other vegetables.
The first step is to look at the space you have with an open mind. Any experienced gardener with a small yard knows that you have to make every inch count. By using some typical gardening techniques and adapting them in innovative ways, you can grow your own vegetables even in small spaces.
Up On the Roof
A roof garden can be a wonderful oasis, providing the same options as a balcony. However, if you plan to make one, first be sure the roof is strong enough to support the weight. Even when using lightweight containers and a soilless mix, freshly watered plants in pots can be heavy. As with a balcony, a structural engineer can advise you whether your roof area is structurally safe.
Urban gardeners are adept at using roof spaces for vegetable gardening, but they need to make sure the structure is strong enough to support the weight of the fully planted pots.
Vertical structures are great solutions to make extra space for growing vegetables.
A courtyard garden is an ideal space for plants. Even if there‘s no soil, you can build raised beds to grow your vegetables.
At Ground Level
For some homes, the outdoor space is just a small patio area, completely paved over, with no soil in which to grow plants. Often these small plots are courtyards, surrounded with walls or fences. As long as they get some sun for at least part of the day, these can be ideal places to grow plants in containers; tender vegetables, such as peppers and tomatoes, will thrive in the sheltered conditions. Walls and paving absorb heat from the sun during the day and gradually release it over several hours, meaning that a sheltered patio or courtyard can remain several degrees warmer than the surrounding area into the night. It will protect plants from frost and chilling winds, giving you heavier and earlier crops.
It may be possible to lift an area of paving to expose some soil underneath, or you can build a raised bed directly on top of the paving. Raised beds allow you to try a wider range of plants than you can grow in pots. If you do have a yard with ground space, you may want to plan what areas will be reserved for gardening. This helps avoid your entire yard being taken up by your growing vegetables.
SMART GARDENER
Site your garden where it will receive full sun all or most of the day, and where it will drain quickly after a rain without the soil washing away. Place it well away from trees, keeping in mind that tree roots can spread well beyond the edge of the foliage canopy.
Root Competition
When siting your garden, make sure it is well away from sizeable trees. Tree roots can reach out 1 ½ times as far as the diameter of the foliage canopy. When trees want water and nutrients, they take them—sucking lesser plants dry and robbing them of nutrients. Cutting invasive tree roots yearly with a spade won’t work for long. Roots will retake the moist, porous soil of your vegetable garden in a matter of weeks.
Drainage
For vegetable gardening, you need to consider both surface and internal drainage. All vegetables and herbs grow best in moderately well-drained soil. Wet soil warms slowly in the spring and is more likely to harbor organisms that cause root rot. Loose, sandy soil drains too rapidly if not modified with organic matter.
Before you select a site for your garden, traverse it like a golfer assessing the best track for a long putt. Look for a good, uniform slope that can carry away heavy rainfall. If the area is level, you will need to build up beds to give your vegetables well-drained root runs. Make sure there are no low spots or swales where runoff from higher areas could create gullies or where water could stand for a day or two. Internal drainage is a function not only of the soil type (clay, loam, silt, or sand), but also of how much you modify your soil with organic matter.
Choosing the Right Location
Choosing the right location is the best way to start if you want to grow great vegetables with the minimum of effort. Give your vegetable garden the best growing space in your yard or outdoor area. This will save you from the struggle of trying to modify an area that is less than perfect. While it is possible to improve the negative aspects of some sites, it is definitely easier not to. The ideal location is fairly sunny and sheltered with good, well-drained soil that is not prone to flooding, becoming waterlogged, or drying out completely, and where there is no competition from the roots of large trees or vast areas of shade.
Some difficulties can be overcome. A windy site, for instance, can be protected by adding a windbreak in the form of fencing, a trellis, or wires held on posts that are used to support rugged climbers. Poor soil can be improved using organic matter or avoided by building raised beds (see here), and shady areas can be opened up with careful pruning. If your garden has to be close to the house, it can be prettied up enough to be proud of. But regardless of the situation, be realistic about what you can achieve.
THE BASICS
Give your vegetable garden the area with the most favorable growing conditions. The ideal is a sunny, sheltered area with good soil and good drainage.
The siting of this property-line beet garden still allows for prolific vegetable growth despite being in a narrow space.
Grouping
When creating your vegetable garden, you should always try to avoid grouping all your plants of any one kind in one spot. If, for instance, you have eight tomato plants and eight raised beds, you should place one plant in each bed instead of filling up, say, two of the beds with all your tomato plants.
Grouping all of your plants of the same type together can lead to pests and diseases. Once a bad bug or plant sickness finds one of your vegetable plants, it will spread its negative effects quickly to the adjacent ones. Numerous research studies have found that simply mixing up your plantings greatly limits the spread of disease and discourages garden pests.
You want to avoid planting some plants, like tomatoes, in the same spot season after season. If you do plant them in the same spots, soil-borne diseases like verticillium or fusarium wilt can attack your plants. How long do you have to wait until a spot is safe again? Nobody knows for sure, but a three-year rotation is a safe bet.
If you have a large area for your vegetable garden, you can position your plants perfectly, as well. “Perfect” is where they will get the first possible rays of the morning sun. Vegetables, such as corn and cabbages, do not need the morning sun, but tomato plants need morning rays. If you can’t manage to position your garden to get the morning sun, make sure your plants are out in the open, with good air circulation all around. Before you dig holes for your plants, you’ll want to make sure:
1. The plants won’t be crowded when they reach full size.
2. The plants aren’t all grouped together unless you deliberately want to plant them all in one or two large beds with enough room for 1’ (30.5cm) of open space between each fully grown plant so you can rotate them to different beds next year. This can be a good strategy—but only if you give each plant lots of room.
3. The plants are in a spot in the garden that gets the most and earliest morning sun, and are out in the open with good air circulation all around. (Don’t plant your vegetables up against a wall or where they’ll be surrounded by other tall plants.)
Crowding is more of an irreparable issue. If you’re short on space, you may have to give away a few of your vegetable plants, grow your extras in a nearby community garden, or use containers, because crowding will hurt your garden. You’ll get a lot more from two plants with elbow room than you will from six plants crammed together.
You’ll always get more and better-quality plants from thoughtfully spaced raised beds rather than flat earth.
When digging your holes, make sure each plant has plenty of room and the right amount of light.
Always remove the leaves from the lower half of the plant and plant it deeper than you think you should.
Water
Water is important for plants. Water pressure within the cells keeps plants firm and upright, preventing them from wilting. All the minerals needed must be dissolved in water before plants can transport and make use of them, and water is essential for photosynthesis, the process by which plants manufacture their energy. The natural source of water for plants is rain, but in some areas, there is not enough rainfall for growing certain vegetables. Urban gardens surrounded by tall buildings often receive a limited amount of rain. For vegetable plants being grown in containers, where the amount of soil is restricted, natural rainfall is rarely sufficient.
Virtually all vegetables have a high water requirement, so keeping your garden irrigated in dry weather is recommended. In particular, containers will need regular watering. Freshly transplanted vegetables will also need regular watering. Germinating seeds are also very sensitive, and you must avoid damaging delicate seedlings or the soil structure. A heavy sprinkler pounding water onto a seedbed is likely to cap the surface, preventing seedlings from emerging.
Individual plants will, however, have certain peak times in their growth sequence when water is most important. For example, tomatoes must have enough water when the flowers are ready for pollination or they will not set, and potatoes must have generous supplies of water when the tubers are swelling.
In general, the principle should always be to apply liberal quantities of water to allow the soil to become fully charged, then repeating this only when the soil is showing signs of drying. Frequent small applications of water are not recommended as they only dampen the surface and do not penetrate to the roots. You should apply water thoroughly using a hose to get the soil completely moist down to the root level. A good sprinkler with coarse droplets is ideal in the evening or at night rather than in bright sunshine or windy conditions, when a proportion of the water will be lost to evaporation.
Lettuce is just one of the vegetables that will wilt quickly if not provided with adequate amounts of water.
Water Conservation
In this era of water shortages, storing rainwater is a great option for conserving water in your garden. Various techniques and pieces of equipment are available to divert rainwater into a storage water butt. Note: This type of stored water is stagnant and may contain plant diseases, so should not be used with any young seedlings.
It is possible, but not advised to use gray water, which is recycled water from your washing machine, bath, and dishwasher. You can buy diverter kits, which will channel this water into water butts or storage tanks, but this water often contains cleaning agents or other chemicals.
Mulching refers to the spreading of a “blanket” of material over the soil to help retain moisture by reducing evaporation and reduce weed growth. This is often a bulky organic material such as mushroom compost, shredded bark, or leaf mold. For your vegetable garden, you can also use polyethylene sheets or a purpose-made horticultural fabric as a base.
Mulches should always be applied when the soil is already moist so that the water within the soil is trapped. Organic mulches will slowly break down and act as general soil improvers. They can also be important sources of nutrients, particularly trace elements. A mulch should be applied 3″ to 4″ (7.6 to 10.2cm) deep to be effective. All mulches also help to regulate soil temperatures, keeping them cool in summer and warm in winter.
Irrigation
You can economize on water use for your garden by running soaker hoses down rows. The slow drip of water from the porous rubber hoses minimizes evaporation by placing it in the root zone of plants rather than spraying it into the air. Sprinkler irrigation can evaporate or be blown away from your targeted plants. Even if you are not under restrictions on watering, you should consider drip irrigation to save money and ensure optimum growth of your plants. Drip irrigation does have a shortcoming, however; the water spreads horizontally only about 9″ (22.9cm) to either side of the leaky hose or drip emitter. The cone of moist soil widens somewhat as the water gravitates down, but you still need to direct-seed or transplant seedlings close enough to the water source to meet your plants’ soil moisture needs.
The old saying of “an inch of water per week” won’t cut it for vegetable gardens during hot, dry spells, and rarely do summer rains occur weekly. So, plan on irrigating every four to seven days, and providing at least 1″ (2.5cm) of water each time. That entails a lot of moving of water hoses, so you should site your garden as near as possible to a faucet. One faucet with a Y adapter can handle two hoses with sprayers or soaker hoses laid down the center of raised beds.
Some homes are equipped with water softeners. Make sure that your outside faucets are not connected to the softener, or you may be irrigating your vegetable garden with sodium-laced water. If water is scarce in your community, consider installing soaker hoses made of porous material down each row to provide drip irrigation. You might also install a catch-barrel for rainwater. Connect it to a downspout from your roof.
Watering
Watering is one of those jobs that is far more complicated than most people’s perception of it. The timing is allimportant, and changes based on the season.
WATERING DURING WINTER AND SPRING
Watering is very important in the late winter and early spring, as slightly too much water will cause your vegetables to rot, while underwatering may cause a delay in your vegetables’ growth. If you are ever in doubt about whether you’re watering enough during this time, don’t be. Even though this may mean that your vegetables grow later in the year, you should always err on the side of caution—a later plant is by far better than one that has rotted in the garden.
To counter this problem during the spring for potted plants, stand all your pots on capillary matting. At least once a day, water the matting to ensure it is kept wet, as the pots will take up the water they require from this matting. It works, as the name suggests, through capillary action, with the drier soil drawing water from the wetter capillary mat. If the soil is not dry, it will not draw up any water, so there is no chance of plants rotting through overwatering using this method. It also limits the amount of overhead watering that is required, minimizing the potential for fungal diseases.
Save water by switching from a sprinkler to soaker hoses.
At this time of year, use a watering can with a fine rose to water your garden. Even with a fine rose, there is generally a sudden rush of water out of the can as it is tipped forward before it stabilizes into a steady flow. Always start by holding the can away from the garden, and move it over the seedlings once the initial rush of water has passed.
TIPS FOR WATERING
If your productive area is small, all the watering can be done with a watering can, but for larger areas, a hose is easier and less time-consuming. The good thing about a hose is that water can be applied exactly where it is needed, whereas with a sprinkler, wastewater may fall in areas that are unoccupied or where watering isn’t needed. There are areas where the use of hoses and sprinklers is banned, so always check before using.
The most important factor when watering is to give your vegetables enough. A steady but constant watering that is allowed to penetrate deeper into the soil is by far better than a quick gush of water. Some of the latter will flow away and the rest wet only the very surface of the soil, where the water quickly evaporates in hot or windy weather.
For very precise watering on vegetables such as green runner beans, use either drip irrigation or a soaker hose. The drip irrigation needs to be run from a garden faucet, whereas a soaker hose can be run directly from a rain barrel. Both systems will deposit water where it is required and can be laid in place to last for the life of the plant.
Although watering is required on productive vegetable gardens during most years, mulching and removing competition, such as weeds, minimizes the frequency at which it’s needed.
WATERING DURING WARMER WEATHER
As the weather warms and the light levels increase, the plants’ requirement for water becomes greater, so you should switch to a medium rose on the watering can to dispense more water. With warmer weather, there’s less of a need for precise watering due to the increased evaporation from the soil surface and loss of water through the plant leaves. This does not mean that water can be applied without thought or care; it simply means that there is a little bit more leeway between watering the right amount and overwatering. This is important because at some point the plants will require feeding, whether to encourage growth or for flowering and fruiting, and this is usually applied as a liquid feed when watering.
In addition to using a watering can, you can also water your vegetable garden with a hose or sprinkler. There will be more evaporation of water from the plant leaves as well as the soil surface, due not only to the summer heat but also to exposure to wind. Underwatering can result in the plants running to seed, producing hard and inedible vegetables, or just ending up with a much-reduced yield, so the need for ample water is vital. The vegetables need to be started in the correct way, and applying water to the bottom of a shallow furrow before sowing will get the seeds germinating quickly and growing properly. Giving transplanted vegetable plants a good watering after planting will ensure that they do not wilt and continue to grow unchecked, resulting in a bumper yield.
To ensure your vegetables are ready to harvest when planned, the plants must be kept growing at their optimum rate, which is why watering, particularly at stressful times for plants, is so essential. Once your vegetables have been sown or planted, there is no definitive timetable for applying water because each vegetable has different water needs and the weather will not be consistent. It is important to be aware that windy or breezy and sunny days are very drying. It is good to check your garden areas every day.
You have a little more leeway when watering plants in warm weather.
Tools
You no longer have to do every job by hand to have a productive vegetable garden. Over the years, tools and pieces of equipment have been developed to make every job in the garden that much easier. Most gardeners swear by the tools and equipment they have had for years, but modern developments in certain areas have made gardening much easier, so the best range of tools is a mix between the two.
Essential Tools
The following tools are the everyday pillars of the home vegetable garden. Depending on the type of garden and the vegetables you’re planting, these items are necessary for truly successful planting.
SPADE
Soil cultivation is one of the most essential parts of the productive process, and the spade is the workhorse most used to satisfy this requirement. There are two basic types, the border spade and the digging or garden spade. Although named for use in other areas of the garden, the border spade does have a place in some growers’ sheds, particularly those with bad backs or limited mobility, or who just find a digging spade too heavy to handle when full of soil. The better the quality of the spade, the more expensive it will be, but the longer it will last. For that reason, you should look toward wooden-handled border and digging spades.
There is a spade out there for everyone, as different makes have different lengths of handle. There is no substitute for going to the garden center and trying out prospective spades in person. This will limit the problem of backaches caused by using an inappropriate piece of equipment.
The digging spade has a larger blade and therefore stronger handle than the border spade, as it is made for heavier work. Both types will need to be treated with respect to ensure that the blade is not damaged nor the handle broken. The great advantage of wooden-handled types is that, after many years of use, when the spade has more than fulfilled the promise shown on that first day and the handle finally snaps, you can buy a new handle to replace the broken one. This is not possible with plastic handles.
Border spades are smaller than digging spades, so you can use them in tighter spaces.
A digging spade with a wooden handle can withstand heavy-duty use.
If you are going to be doing a lot of digging, it may be worthwhile investing in a spade that has a foot tread on the blade. It is very easy to get into the digging groove and, without thinking, end up with a hole in the bottom of a good pair of boots because the corner of the spade has pierced it. This generally happens when pushing into heavier ground, but if this may be a problem, then a spade with a foot tread is the answer. It will spread the weight on the underside of the foot and prevent the spade from piercing any quality boot soles.
FORK
The concerns of quality and handle length apply to forks, as well. A fork is used for many more jobs than a spade, although not usually for such heavy work. It can be used for cultivating, breaking up lumpy soil, harvesting root vegetables, dividing large clumps of herbs and artichokes, and filling wheelbarrows with organic matter, as well as many other jobs in your vegetable garden. There are digging forks and specialized border forks, with the border forks having a smaller head. These are useful for gardeners who cannot manage the larger digging forks.
The versatile garden fork has a wide range of uses.
SPORK
A spork is a hybrid between a spade and a fork, hence the name. It does a job that is somewhere between the two, as the tines are wider than a standard fork, without having a complete blade like a spade.
For gardeners confined to a wheelchair or with limited mobility, this tool is easier to use than a spade, while moving more soil than a standard fork.
TROWEL
Trowels are usually sold in sets with small forks. The trowel is primarily used when planting or transplanting crops outside, although it can also be used to divide smaller clumps of herbs, where a spade or fork would be too large. Along with the dibble, this is probably the most likely tool to be lost or inadvertently damaged.
Trowels also work well as measuring sticks, so, depending on which vegetable is being planted, using the trowel will very often save on having to fetch the planting board. There are also easy-grip trowels available, with a soft-grip handle angled approximately 90 degrees from the trowel blade.
Trowels and small forks work well for more precise work.
DIBBLE
Essentially, the dibble is a tool for making a long hole in which to sow large seeds, such as fava (broad) beans or runner beans, or to plant vegetables. There are types that have markings down their length that are very useful when determining at what depth the appropriate seed is being sown. Although dibbles make excellent presents, if you do not want to go to that expense for yourself, they are cheap and simple to make.
A dibble is used to make holes for sowing seeds or transplanting seedlings.
Invaluable for planting seeds, leeks, and onion sets, a calibrated dibble is a garden essential.
RAKE
The garden rake is a must for leveling ground and preparing seedbeds, but it is also one of the most dangerous tools in the garden shed. It is so easy to lay it down in between jobs, forget where you put it, and then cause severe facial damage to yourself or somebody else when you inadvertently stand on the rake head. When not in use, rakes should always be left with the head up and the end of the handle on the ground. It is better still to hang them up in a toolshed or cupboard.
The head of the rake usually comprises between eight and fifteen prongs. Rakes are available with varying gaps between each prong, with everybody having a particular favorite dependent on their soil type, what they want their rake to achieve, and their past experience. It is possible to buy metal, wooden, or plastic rakes to fit the requirement. When raking soil, the rake head will collect large soil clumps and stones but allow the majority of soil to pass through.
LONG-HANDLED HOE
There are two main types of long-handled hoe: the draw hoe and the Dutch hoe. It is beneficial to have one of each in your shed, with the Dutch hoe being used for weeding and the draw hoe mainly for making furrows.
In a productive vegetable garden, weeds should usually be small and therefore young and soft when they are hoed off, so the Dutch hoe, which is pushed forward to cut off the top of the weeds where they meet the soil, is very easy and efficient at the job. The draw hoe is very good for chopping through larger, woodier weeds, as a sharp downward action will usually do the job. The draw hoe can move quite a lot of soil around during weeding, while the soil falls through the large central hole of a Dutch hoe, leaving the soil very much in place.
A long-handled draw hoe (bottom) or Dutch hoe (top) will be helpful for weeding.
ONION HOE
The much smaller handheld onion hoe is used where the other types of hoe would be too cumbersome. It is ideal for hoeing weeds growing in between plants growing in rows.
Wheelbarrows with inflatable tires will make pushing heavier loads much easier.
WHEELBARROW
There will always be material that has to be moved around the productive areas, and there is no better piece of equipment for this task than the wheelbarrow. For a larger vegetable garden, the wheelbarrow is used to transport mostly soil, compost, or farmyard manure. For tiny vegetable areas, a bucket may suffice, but most people will find a wheelbarrow essential.
As with most tools, there are several different makes, each having good points and bad, with each being preferred by some gardeners. It is beneficial to have a wheelbarrow with an inflatable rubber tire. Although there may be the odd puncture to repair, pushing heavy loads, such as organic matter or soil, will be made much easier with this type of tire. The most satisfying use of a wheelbarrow is when you have to use it to bring the harvest from the productive garden to the house.
HAMMER
Apart from the obvious hammering in of nails when building structures such as compost bins, a hammer is handy for smashing items, such as brassica stems, before they are put into the compost bin.
TAPE MEASURE
If you do not have a planting board, then a tape measure is the next best thing to use for ensuring that your row and plant spacing is correct.
PLANTING BOARD
A planting board is used for measuring the distance between rows and the planting distances of various vegetables and herbs.
PLANKS
For anybody growing on a heavy clay soil, planks are imperative if work is to be carried out in the winter. The planks will spread the weight of both heavy wheelbarrows and people, thereby reducing compaction. This in turn keeps that excellent soil structure in place that has taken so much work to achieve.
You can buy ready-made planting boards or make your own. Even something as simple as a piece of wood with measurement labels will work.
Garden twine is a great option for keeping your planting lines neat and organized.
GARDEN TWINE
There can be nothing more exciting than seeing a line of newly sown seeds germinating and nothing more disappointing than that line not being straight. Apart from the aesthetic pleasure gained from seeing a straight line, if a line of seedlings is not straight, it will either be taking up unnecessary space on one side or be too close to a row on the other. You can buy garden twine on a special holder but winding the string onto two 18″ (45.7cm) lengths of bamboo is just as good.
When setting out your line, pull it tight and make sure that it is still tight when you are planting along its length and while making any shallow furrows. You need to check it on a regular basis to ensure that it has not moved. The simplest way to check it is to pull it upward, away from the soil, and let it go—it will end up in the same position if it hasn’t moved.
KNIFE
In the average garden, it is generally necessary to have only a pocketknife that can be used for a variety of jobs in the vegetable areas. A blunt knife is more dangerous than a sharp one, so be sure to keep your knife sharp by touching up the blade with a suitable sharpening stone on a regular basis.
PRUNING SHEARS
In your vegetable garden in particular, pruning shears will be used on a very regular basis, so a good-quality pair is a must. Not only will these last longer, but they will also produce a better cut, and the better-quality blade will require less sharpening. There are two distinct types: anvil pruning shears or bypass pruning shears. The anvil types have the upper blade coming down onto a flat surface, whereas bypass pruning shears have the blade cutting past the usually curved lower section.
Some gardeners feel that the anvil types may bruise the branches and stems that are cut because the blade pushes them against the anvil in the process of cutting. With the bypass type, if the blade is not perfectly sharp, the stem or branch being cut will snag; in other words, it does not make a clean cut, leaving an uneven surface that will be more susceptible to disease. Gardeners are adamant in their opinions about the best type, but both have pros and cons. Some bypass pruning shears can also be taken apart completely, which makes maintenance and blade sharpening very easy.
PRUNING SAW
This piece of equipment is for cutting branches that are too large to be cut by pruning shears. A lot of pruning saws are now folding types, which makes them much safer to carry around. When making your purchase, ensure that the blade has a good locking system, so that when the blade is open, it cannot suddenly shut onto your fingers.
SPADE-CLEANING TOOL
Plastic, wooden, and even metal spade-cleaning tools are available, but you can make one yourself. An odd piece of wood lying around can be cut into the correct shape, and the edges then smoothed with a piece of sandpaper. It is worth keeping an edge on the flat cleaning end. This means that the tool does not really need to be too big, so 6″ (15.2cm) is generally long enough. It is a simple piece of equipment that is used to keep a spade blade clean of soil, making digging that much easier. As the soil begins to stick to the blade, run the cleaning tool down the blade’s length three or four times before you begin digging again.
Bypass-type pruning shears have curved blades.
WATERING CAN
A watering can is a must for any productive garden because it will direct water exactly where it is needed. Watering cans come in a range of shapes and sizes, as well as being made from plastic or metal, and available in various colors. Always buy one that has a rose attachment. The most important point to remember is that you must be able to lift it high enough for watering when completely full.
A watering can with a rose attachment is a must for your vegetable garden.
RAIN BARREL
It is very important with the erratic weather patterns to have a rain barrel at the end of every available downspout to collect water for use on the productive areas. Make sure that the barrel is easily accessible and has an easy-to-use outlet point. Usually, you will need to stand the rain barrel on something, such as stacked bricks, so that you can access the outlet point. As water becomes scarce, the need for collecting your own becomes vital because vegetables and herbs will bolt (send up flower spikes) very quickly if left to go dry.
Rain barrels collect valuable water for use on your garden.
HOSES
Used correctly, hoses are not wasteful pieces of garden equipment, although it is essential to check before use whether there is a watering ban in place. In larger vegetable gardens, it is much easier to roll out a long hose and put the same amount of water onto your vegetables than it is to traipse backward and forward with a watering can. When buying a hose, look for a better-quality one that does not kink, and store it on a specially made reel, as it will last longer.
SOAKER HOSES AND DRIP IRRIGATION
Soaker hoses or drip irrigation are essential for many short-term as well as long-term vegetables. You can lay a soaker hose on the ground next to the vegetable plant, and attach it to a hose that runs to the water faucet. As long as the water is turned on, the hose will constantly drip water exactly where it is required. Soaker hoses are often made from recycled rubber, and the tiny openings in it allow water to easily seep out of the hose. Therefore, not much pressure is needed to force the water droplets out and into the soil. The great advantage of this is that it can be run from a rain barrel and does not need to be attached to a faucet. Drip irrigation is slightly different in that you can bury the pipe just under the ground next to the desired plant.
POT MAKER
The need to be more environmentally friendly is not going away, and recycling paper is one of the easiest things you can do. With a simple pot maker, you can use surplus newspaper by transforming it into small biodegradable pots that are ideal for starting seedlings. Then, when you are ready, you can transplant the seedlings directly, paper pots and all!
FIRMING BOARD
Firming boards are used to firm the soil when sowing into seed trays. You can buy them, but they are easy to make.
SPRAYER
Most vegetable gardeners will find a small hand sprayer sufficient, although some handheld pump-action types are worth considering for the ease of use. You need only one sprayer—provided you clean it well after each use—because you will use it only for organically permissible insecticides or fungicides.
Small holes allow the soaker hose to continually release droplets of water.
CHIPPER/SHREDDER
A chipper/shredder is an absolute must for the vegetable grower. All types of waste can be passed through a chipper/shredder and recycled into one part of the garden or the another. Tough vegetable waste needs to be shredded before going onto the compost heap. Do not be fooled by very cheap machines that will manage only to squash most of the material. With a chipper/shredder, you get what you pay for.
A chipper/shredder is a big help in preparing materials for the compost heap.
LAWN MOWER
If you have grass paths growing in or along your vegetable garden, then a lawn mower is an essential piece of equipment for keeping this grass under control. This piece of machinery is very much like the spade, in that all gardeners seem to have their own personal preference, for no other reason than they like and get along well with the mower they have.
STRING TRIMMER
String trimmers (commonly known as “weed whackers”) are used for tidying up around fruit trees and those areas that mowers cannot reach. It is important always to wear sturdy boots when using one of these, as well as a pair of goggles, to protect against the inevitable flying objects. The bulkier gas string trimmers will come with a string head, used for clearing long grass, weeds, and the like, and a blade head for tougher materials, such as brambles. For gardeners who cannot cope with the weight of gas string trimmers, there is a range of excellent lightweight alternatives. It is also possible to buy a string trimmer with a revolving handle that will cut the lawn edges as well.
SEED SOWERS
Many gardeners sow seeds with their fingers. Unfortunately, this seed-sowing method, which is taken for granted by most, is not possible for all gardeners, so having a piece of equipment to do the job easily and accurately is important for some. A ball sower uses the suction from a rubber ball to suck the seeds up a needle-like tube, so that they can then be released in the appropriate place. This is an excellent device for all seed sizes, as there are different sizes of tubes for the varying seed sizes.
For gardeners who do not have the use of their hands for sowing, there is also a mouth-operated seed sower available. It looks like a pen connected by a tube to the mouthpiece, and it is the suction created from the mouth that enables the seeds to be picked up and easily dropped on the surface of the soil. A filter is provided to prevent inhalation of any dust particles and seeds.
There are many great precision seed-sowing options available.
Gardening gloves protect your hands from soil pathogens, broken materials, and the regular wear and tear of tough jobs.
EASY-GRIP ADD-ON HANDLE
For gardeners with hand or wrist problems, these handles can make their work easier. They fit onto tools with handles up to 16″ (40.6cm) long. They are attached with finger-operated wing nuts and come with optional arm support.
GARDENING GLOVES
You should always have a stout pair of gardening gloves, such as disposable vinyl gloves, to protect your hands when doing tough jobs. Soil can easily contain pathogens, which cause infections, and there is always the risk of broken glass or rusty metal. You can also use a good skin cream on your hands before and after a gardening session.
Optional Equipment
The tools in this section aren’t entirely necessary depending on the space and vegetables you’re working with, but they are indispensable in some cases and extremely helpful in most.
ELECTRIC TILLER
An electric tiller, or rototiller, is a handy piece of machinery. Whether you own, borrow, or rent one, it will cultivate land and prepare areas down to a fine tilth suitable for direct seed sowing. They can be rear-wheeldriven or powered by the rotary blades at the front that churn the soil.
Electric tillers can be used regularly on light soils, but beware of using them too often on heavy clay soils. The blades will smear the clay soil into an almost impenetrable barrier to water (called a pan), which will drastically impair drainage. Most modern machines will cultivate to a depth of between 6″ and 9″ (15.2 and 22.9cm), so digging is required in most years.
INTERCHANGEABLE GARDEN TOOL SET
If space is limited for tool storage, or you have problems bending down, then an interchangeable garden tool set can be very helpful to you. These sets come in various sizes with varying handle lengths to suit gardeners of all heights. The vast range of tool heads available includes forks, trowels, rakes, hoes, tillers, edgers, loppers, shears, pruning saws, and more.
DIY TOOLS
Gardeners who prefer to make instead of buy garden structures (for example, compost bins or hoophouses) will find equipment, such as handsaws and screwdrivers, very useful.
Rototillers vary in size; this is a compact model.
SLEDGEHAMMER/CLUB HAMMER
Although you can dig holes and refill the soil around supporting stakes, knocking them into the ground using a sledgehammer or smaller club hammer will give a much firmer hold in the ground. Although these hammers are ideal for specific jobs, you might consider borrowing one because their general use in the productive garden is limited and may not warrant the purchase price.
SPRINKLER
As with the hose, before you invest in a sprinkler, it is prudent to check whether it is possible to use one, or whether they are covered under any water restrictions. Always look for sprinklers that are sturdy and have an adjustable sprinkler head that can be set to water only the areas requiring it. These types are able to water in a full circle or can be adjusted to water partial circles, ensuring that water is not wasted.
LAWN EDGER
Although a spade can be used to keep the grass edges looking neat and tidy, the blade of a spade is slightly curved, so this straight-edged piece of equipment will do the job much better. For gardeners with back problems, longer-handled versions are available.
EDGING SHEARS
Edging shears are another piece of equipment designed simply to keep the grass edges looking neat, so that they do not detract from the well-kept productive areas. Also available are lightweight shears, ones with longer or telescopic handles, and shears with geared blades, for gardeners with mobility problems. A great addition to fit most edging shears is the edging-shears grass collector. This does exactly what it says it does by collecting the cut grass at the time of cutting. This saves you the job of having to collect it later.
FLEECE
Horticultural fleece is a useful white fabric that can be used as a floating mulch, protecting plants from insect pests and frost, or used to warm up the soil early in spring. It gets a little dirty but will last several seasons.
Horticultural fleece provides wamrth and protects against pests.
Chicken wire is an easy solution for keeping animals away from your vegetables.
CHICKEN WIRE
Chicken wire can be pinned to the soil to keep rodents away from pea and bean seeds, or bent into arched tunnels to keep birds and butterflies off brassicas (cabbages).
INSECT-PROOF MESH
This mesh is used to protect vegetables from even the smallest insect pest. It’s fairly expensive, but can be reused and has the advantage of allowing more air to circulate than fleece.
PLASTIC BOTTLES
You can make individual cloches out of bottles for small seedlings to protect them from slugs.
SEED COMPOST
For your vegetable garden, you can use seed compost for planting small seeds.
Modified plastic bottles are excellent, cost-effective cloches to protect your plants.
Seed-Sowing Tools
For seed sowing, use either small 3″ (7.6cm) plastic pots or seed-starting trays—plastic grids of interconnected cells available from any garden center. These are great because, when it’s time to transplant the seedlings, you just pop out the cell and plant the whole thing, so you don’t have to worry about damaging the roots.
Labels are good for reminding you what you’ve sown where.
HOW TO TRANSPLANT SEEDLINGS FROM SEED-STARTING TRAYS
Getting plants out of pots without destroying them is a basic but much overlooked skill. The best way to get your seedlings out intact is to give each cell a gentle squeeze to loosen the roots from the sides, and then poke up through the drainage hole with a stick or the blunt end of a pencil. The whole plant, roots and all, should just pop out, and you can then replant it into a bigger container, handling it by the root ball so you don’t damage the plant itself. Also see here.
Those gardening in containers can do everything they need with a hand trowel, some nice pots, and a watering can with a rose attachment (a perforated spout).
To make your own raised beds or any of the building projects in the book, you’ll need some of the construction tools discussed here.
Construction Tools: A Few Things You’ll Need
As a gardener, you may know all about your garden tools, but are you equally adept and knowledgeable about basic construction tools? Here is a quick rundown of the basics you may need when planning and planting your vegetable garden. Many of these tools are common to any household, but some are more specialized and require proper skills to pick up and use safely.
CIRCULAR SAW
A circular saw is one of the most useful items a DIYer can have on hand in the workshop. Besides its ability to quickly and easily make crosscuts, circular saws are adaptable enough to make miter cuts and rip cuts. You’ll find circular saws with a traditional power cord, or you might look into circular saws that run on rechargeable batteries. Battery-powered saws are convenient but may not have quite the strength that a traditionally powered circular saw will have.
ELECTRIC DRILL
On frequent occasions, a modern cordless electric drill can be used as an electric screwdriver. Coupled with the right bits (you might consider collecting a variety of Phillips, flat, square, and Torx “star” bits in various sizes) and a good selection of screw sizes, an electric drill will allow you to breeze through construction projects, quickly fastening lumber and building large and small items out of wood with minimal effort. You can use cordless drills, but consider your needs and select one with enough voltage to perform at the level you want; at least 12 volts is good, while more might be better. (More voltage may mean a heavier drill.)
JIGSAW
Perfect for making rounded cuts or for cutting small pieces in tight places, a jigsaw is useful for adding artistic or decorative touches to many woodworking projects. Look for a jigsaw that is powerful enough for what you want it to do, and be sure to purchase the right blade for the right job.
GENERAL SAFETY WARNING
It goes without saying that any activity involving construction and assembly using hand or power tools should be approached with due caution and safety in mind, and gardening DIY projects are no exception. Always use caution when working on any construction project—safety should always be the main priority. Pay attention to your task and your surroundings—including curious onlookers. Read manuals and learn the safest ways to operate your tools, and don’t ever place yourself in danger while working. Construction activities have the potential to be dangerous, and failure to exercise proper safety behaviors could result in injury or death. The authors and the publisher cannot assume responsibility for any damage to property or injury to persons or property as a result of the use or misuse of the information provided.
TABLE SAW
Most of the time when you’re making basic cuts to lumber, it’s a crosscut—that is, cutting across the grain. But the need often arises to make a rip cut, where you cut along the grain, splitting a piece of lumber lengthwise. A table saw is often the easiest and most accurate way to perform a rip cut, and it can save a lot of time if you frequently need to work this way. Keep in mind that table saws are a large machine and a large investment that you may or may not want to make.
MITER SAW
Whenever you’re faced with a large number of crosscuts to make, a miter saw can greatly simplify and speed up this process. The same job could be performed with a circular saw, but the miter saw is a lot more convenient and more accurate. Another advantage of the miter saw is its ability to quickly and easily make angled cuts; this can come in handy quite a bit whenever you’re making multiple cuts that will fit together, like four mitered corners. Again, the circular saw could achieve the same results, but it’s a bit more challenging to make an accurate miter cut with a circular saw.
The right jigsaw will be useful for plain cuts or rounded or more detailed cuts.
HAMMER
You probably already have a hammer. It’s most likely a claw hammer—the kind with two tapering spikes in the back for prying on things or removing stuck nails. You’re probably already familiar with the basics of hammering nails (although not every project requires nailing), and using the hammer to tap or push stuck pieces of lumber into place. All in all, you’ll want to keep that hammer and those skills nearby during the construction process.
A miter saw is the most convenient, quick option for making angled cuts.
FINISH NAILER
For any projects that require nailing, a finish nailer powered by an air compressor makes things easy and fast. Even if you don’t have access to a finish nailer, keep in mind that you can always nail by hand with a hammer, but consider predrilling your nail holes in this case; it makes the nailing process much smoother.
TAPE MEASURE
You won’t get too far on your DIY projects without a good tape measure to guide you on your way. From measuring lumber to marking your cuts, a quality tape measure with a good locking mechanism is essential to have on hand. A common length is 25’ (7.6m), although you could probably get away with a shorter tape measure for vegetable garden projects.


