Erhalten Sie Zugang zu diesem und mehr als 300000 Büchern ab EUR 5,99 monatlich.
- Herausgeber: The History Press
- Kategorie: Wissenschaft und neue Technologien
- Sprache: Englisch
The objects in this book relate to a key period in polar exploration history, from the 1770s to the early 1930s. Today they are located worldwide, whether in polar regions, public spaces, museums and other repositories, or in private collections. Some objects were used by famous explorers, but more testify to important work by mariners, scientists, artists, photographers and filmmakers, or sometimes overlooked roles played by explorers' relatives, sponsors and other supporters. They include: • Mrs Elizabeth Cook's 'ditty box' • An innovative crow's nest • Francis Crozier's penguin specimen • An octant used in searches for John Franklin • A scientist's portable paintbox • An expedition prospectus • An Antarctic Baby biplane • HMS Erebus's long-lost bell Collectively, the objects evidence a continuum of polar endeavour which, notwithstanding national ambitions and personal rivalries, reflect levels of international collaboration to which we should aspire when exploring or attempting to safeguard the increasingly fragile polar regions.
Sie lesen das E-Book in den Legimi-Apps auf:
Seitenzahl: 382
Veröffentlichungsjahr: 2024
Das E-Book (TTS) können Sie hören im Abo „Legimi Premium” in Legimi-Apps auf:
Ähnliche


This book is for, and in memory of, family members, friends, travelling companions and readers who have explored, recently or in the past, this wonderful yet fragile world we live in.
Inside front: Map from Theatrum Orbis Terrarum, by Abraham Ortelius, 1570; iStockphoto.
Inside back: Septentrionalium Terrarum descriptio, by Gerard Mercator, 1623; Wikimedia Commons.
First published 2024
The History Press
97 St George’s Place, Cheltenham,
Gloucestershire, GL50 3QB
www.thehistorypress.co.uk
© Anne Strathie, 2024
The right of Anne Strathie to be identified as the Author of this work has been asserted in accordance with the Copyright, Designs and Patents Act 1988.
All rights reserved. No part of this book may be reprinted or reproduced or utilised in any form or by any electronic, mechanical or other means, now known or hereafter invented, including photocopying and recording, or in any information storage or retrieval system, without the permission in writing from the Publishers.
British Library Cataloguing in Publication Data.
A catalogue record for this book is available from the British Library.
ISBN 978-1-80399-608-0
Typesetting and origination by The History Press
Printed in Turkey by IMAK
eBook converted by Geethik Technologies
Contents
Introduction
Part I: Laying Foundations
1 HMS Resolution in Pack Ice
2 Elizabeth Cook’s Ditty Box
3 Scoresby’s Barrel Crow’s Nest
4 A Panorama of Spitsbergen
5 William Scoresby’s Manuscript
Part II: Exploring North and South
6 Weddell’s ‘Sea Leopard of South Orkneys’
7 Edward Parry’s Deck Watch
8 A Canister of Meat
9 James Ross’s Career-Defining Portrait
10 Rossbank Magnetic Observatory, Hobart
11 A Great Icy Barrier
12 Francis Crozier’s Penguin
Part III: The Northwest Passage: The Search Continues
13 A Daguerreotype
14 A Rock at Port Leopold
15 John Rae’s Octant
16 A Graveyard on Beechey Island
17 Eleanor Gell’s ‘Franklin Search’ Collection
Part IV: A New Start
18 A Photograph of Antarctic Icebergs
19 A Menu for a Banquet
20 Cornelius Hulott’s Resolute Box
21 ‘On Board Eira’: From the ‘Eira 1880’ Album
22Illustrated London News Front Page
Part V: Antarctica Revealed
23 A Stereoview of Adrien de Gerlache and a Weddell Seal
24 Louis Bernacchi’s Cape Adare Home
25 RRS Discovery
26 Edward Wilson’s Portable Paintbox
27 A Postcard of Three Scottish Scientists
28 ARA Uruguay
Part VI: Striving for Polar Firsts
29 Amundsen’s Dip Circle
30 Shackleton’s Sledging Compass
31 Deception Island
32 Matthew Henson’s Fur Suit
Part VII: Southward Ho!
33 Ponting’s Kinematograph
34 A Samurai Sword
35 Mawson’s Anemograph
36 Joseph Kinsey’s Visitors’ Book, April 1912
37 ‘Three Polar Stars’ Photograph, January 1913
38 Henry ‘Birdie’ Bowers’s Sledge Flag
Part VIII: ‘White Warfare’ and Testing Times
39 An Expedition Prospectus
40 A Statue of Cheltenham’s Local Hero
41 A Rock from Elephant Island
Part IX: The Age of Aviation
42 An Avro Antarctic Baby
43 A Tribute to Shackleton from a ‘Fan’
44 ‘Uranienborg’: An Explorer’s Refuge
45 Mawson’s Gipsy Moth
46 A Young Explorer’s Special Medal
Part X: Learning from the Past and Looking to the Future
47 A ‘Polar Centre’: The Scott Polar Research Institute Building
48 The Erebus Bell
49 An Expedition Hut
50 A Well-Travelled Crow’s Nest
Conclusion
Appendix A: Terminology, etc.
Appendix B: Summary Timeline
Appendix C: Maps
Acknowledgements
Notes
Bibliography
Index
Introduction
A History of Polar Exploration in 50 Objects: From Cook’s Circumnavigations to the Aviation Age is, like all histories, a history, rather than the history of its subject. The timespan of this book runs from the late 1760s to the early 1930s – a relatively short period, but one during which understanding of the polar regions increased rapidly. This era included, to paraphrase Charles Dickens (who has a walk-on part in this book), ‘the best of times and the worst of times’. Although we no longer adhere to some of the values of those times, we still owe a debt of gratitude to those who travelled into the unknown in hopes of increasing the sum of human knowledge.
Some of the fifty selected objects were, as might be expected, used during polar expeditions. Others, by contrast, shed light on explorers’ personal lives or ways in which they communicated their plans and findings to others, including the general public. Some objects are associated with world-famous explorers, others with those whose names are less widely known but who played their part in polar exploration history. The sizes of objects range from that of a tiny box to a massive ice-shelf. Some objects are highly crafted; others are more or less as found in remote polar regions. Some remain in their original locations; most can be viewed in person or online.
Authors are regularly asked why they decided to write a particular book. This book emerged from my increasing realisation that many of the Antarctic explorers, scientists and photographers who featured in my previous books were also interested in or explored Arctic regions.
As to the format of the book, I have long admired and learned much from Neil MacGregor’s A History of the World in 100 Objects and felt that a book using his template suited this topic and might appeal to both new readers and those already interested in the history of polar exploration.
I hope readers enjoy exploring these fifty objects. All bar four are presented broadly chronologically, in nine parts, which culminate in The Age of Aviation. The objects in the final part are presented in a slightly different format, allowing for wider consideration of issues relating to the conservation of historical objects.
For readers for whom A History of Polar Exploration in 50 Objects is a voyage of discovery, I wish them ‘bon voyage’. For those for whom some of the territory is already familiar, I hope you find some uncharted areas or an object which sheds new light on your own experience of polar regions or the history of polar exploration.
Anne StrathieCheltenham, 2024
Part I
Laying Foundations
James Cook was recognised during his lifetime as one of the British Royal Navy’s greatest mariners and surveyors and is still regarded as such by many. During his first two circumnavigations he attempted to reach or, failing that, delineate what was known as the Southern Continent or Terra Australis Incognita (‘unknown southern land’). On his third circumnavigation, his orders were, if possible, to navigate the fabled Northwest Passage from the Pacific Ocean eastwards.
Cook, who was raised in rural north Yorkshire, joined the navy in his late twenties, following an apprenticeship and a period working with Whitby-based shipowner John Walker. After joining the navy in 1755, Cook served in the Seven Years’ War and, thanks to innate ability and encouragement and support from his commanding officer, Hugh Palliser, he was appointed Surveyor of Newfoundland. While Cook was in the latter post, his observations of a solar eclipse also brought him to the notice of members of the Royal Society.1
By early 1768, officials of the Royal Society were planning an expedition to the Pacific Ocean, during which Royal Society scientists would take readings of June 1769’s transit of Venus over the sun. The Royal Society hoped Admiralty officials would loan them a vessel – which they did, on condition that a competent naval officer was in command. Although Cook was still only a non-commissioned officer, the highly competent 6ft-tall ship’s master was promoted to lieutenant and given command of HMS Endeavour, a converted Whitby cargo ship.2
When Endeavour left Britain in the summer of 1768, Cook was accompanied by Royal Society nominees including astronomer Charles Green, naturalist Joseph Banks and the latter’s entourage of scientists and artists. On 3 June 1769, on the Pacific Ocean island of Otaheite (present-day Tahiti), Green and Cook recorded the passage of Venus. With the first stage of his mission complete, Cook opened a second set of Admiralty orders, which instructed him to sail to 40°S where, according to the Royal Society’s chief geographer Alexander Dalrymple, he might meet the northern shores of the great Southern Continent.
In summer 1771, Cook returned to London. While he had seen no signs of a southern continent, he had, by circumnavigating New Zealand, established that the latter was not part of the supposed continent. Cook had also charted the east coast of New Holland and, thanks to his experiments with a range of recommended anti-scorbutics, kept scurvy, the scourge of long-distance mariners, at bay during Endeavour’s three-year absence.3
After reporting to the Admiralty, Cook was promoted to commander and presented to the king. While still working on his expedition reports, he accepted a commission for a second circumnavigation.
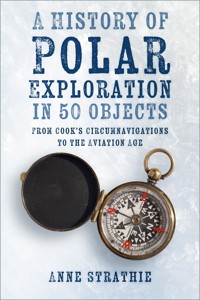
Portrait of James Cook (lithograph based on Nathaniel Dance’s portrait, c.1775); image courtesy of the Wellcome Collection.
1
HMS Resolution in Pack Ice
The watercolour ‘Resolution in a Stream of Pack-Ice, 1772–3’ was one of many works produced by artist William Hodges (1744–97) during and following James Cook’s second circumnavigation. Cook believed that drawings, watercolours and paintings produced by Hodges would give those who saw them a more vivid impression than Cook’s own written descriptions. During the voyage, Hodges produced many small watercolours, showing the ships among pack ice or icebergs, in the hopes of conveying something he had never seen before to those who were unlikely to ever see it themselves.
This wash and watercolour image, painted on laid paper (around 8½in square), is in the collection of the Captain Cook Museum, Whitby, England.
During his second circumnavigation, James Cook was given command of two converted Whitby-built vessels, Resolution and Adventure, and provided with a brand-new chronometer based on John Harrison’s famous ‘sea watch’, which would enable him to calculate longitudes to much higher degrees of accuracy than previously.1 Both Cook and the Royal Society hoped Joseph Banks would join the voyage, but the much-enlarged scientists’ quarters that had been built to accommodate Banks and his team made Resolution’s deck unstable. After Admiralty officials insisted they were demolished, Banks resigned from the voyage and, with his Royal Academician artist friend Johann Zoffany, several scientists and John Gore (one of Cook’s Endeavour officers), left London for Iceland.
When Resolution and Adventure left Britain in July 1772, Royal Society-appointed scientists Johann and Georg Forster and Admiralty-appointed artist William Hodges were aboard. At the Cape of Good Hope, the
‘Resolution in a Stream of Pack-Ice, 1772–3’, William Hodges; image © and courtesy of Captain Cook Memorial Museum, Whitby.
Forsters ‘botanised’, while Hodges sketched and painted landscapes around Table Bay. As they continued south, the Forsters recorded sightings of penguins and unfamiliar seabirds, and Hodges made sketches of the ships passing through ice-scattered seas and among huge ‘ice islands’. Despite Cook spending hours on the main mast with his telescope, he saw no land to the south. He was, however, encouraged that ice chunks harvested from the sea, when melted down, produced fresh-tasting drinking water rather than thirst-inducing brine. As he continued, Cook became increasingly convinced that, should the Southern Continent exist, it must lie south of 60°S.
‘Ice Islands’, William Hodges (ref. kXReyb473GbXp); image courtesy of Mitchell Library, State Library of New South Wales, Sydney.
On 17 January 1773, at around 39°E, Resolution and Adventure crossed the invisible Antarctic Circle. After sailing in rapid succession through clear water, loose ice and ice islands of assorted sizes, they passed 67°S and came up against what Cook recalled Greenlanders describing as ‘field ice’. As close-packed ice fragments and ice islands up to 20ft high clustered round his ships, Cook climbed to the masthead in hopes of finding a way through.
To Cook’s eye, some ice islands looked beautiful, while others appeared threatening – qualities he hoped Hodges might convey more eloquently with pencils, brushes and paints than he, a self-confessed ‘plain-speaking’ Yorkshireman, could in words. As the southern winter approached, Cook and his shipmates admired the ephemeral beauty of celestial displays which, as they reminded Cook of northern Aurora Borealis, he called Aurora Australis.2
Cook returned to New Zealand where, in safe harbour, his ships could be overhauled – and Hodges could paint Resolution at anchor and work up his sketches of ice formations. In June, Cook decided to escape the southern winter and return to Otaheite to replenish the water on his ships and restock with fresh produce. On the way back to New Zealand, the smaller, slower Adventure became separated from Resolution, leaving Cook with little alternative but to suggest that her captain, Tobias Furneaux, sail her back to England, leaving him and those on Resolution to search for the Southern Continent.
The so-called southern summer barely merited the name as, during December, Resolution was engulfed by blizzards, while icicles formed on the rigging and men’s noses. Shortly after Resolution passed 67°S she became ice-beset, so Cook followed the pack edge to 70°S, when he saw open water ‘leads’ among the pack ice and turned south again. On 3 February 1774, at 107°W, Resolution reached 71° 10’S. As Cook scanned the horizon, he longed to continue south. He concluded, however, that with 100 ice islands in view and daylight hours reducing fast, it would be a ‘dangerous and rash enterprise’ to continue.3 He remained unsure whether the Southern Continent existed, so suggested in his reports that either the pack ice extended to the South Pole or the Southern Continent, from which ice islands probably emanated, was smaller and lay further to the south than was currently believed.
While Cook and his men saw many natural wonders during the southern leg of their circumnavigation, they were glad to return to the Pacific Ocean, where fresh produce was plentiful, and they made a first visit to Rapa Nui, or Easter Island, where they saw huge statues of the islanders’ ancestral chiefs. In mid-January, after rounding Cape Horn and entering the south Atlantic Ocean, Cook saw, at around 54°S 38°W, a range of mountains, which appeared to be covered by snow and ice.4 On 17 January he landed and, after firing a few rifle volleys, claimed the territory in the name of King George; the only living creatures much in evidence were fur seals and the largest penguins Cook or the Forsters had seen. When they reached and rounded a headland, however, Cook realised he was surveying an island rather than (as he had hoped) the northernmost reaches of the elusive Southern Continent. After charting the offending headland as ‘Cape Disappointment’, Cook named the island for King George and headed north.5
‘The Ice Islands’ [9 January 1773], William Hodges, showing men collecting ice for fresh water (ref. 4B3E2wzJO2vjy); image courtesy of Mitchell Library, State Library of New South Wales, Sydney.
In late summer 1775, Cook returned to London, where he tried to summarise his findings for his reports. If there was a Southern Continent, he explained, it was ‘doomed by nature never once to feel the warmth of the sun’s rays, but to lie buried in everlasting snow and ice’. Should other mariners venture there, they would probably find ‘thick fogs, snowstorms, intense cold, and every other thing that can render navigation dangerous’. And should they venture further south than he had, they risked ‘being fixed there forever, or of coming out in an ice-island’.
The Admiralty’s contract with Hodges suggested that his illustrations should ‘give a more perfect idea than [could] be formed from written descriptions only’. Admiralty officials were so pleased with Hodges’s portfolio of works that they asked him to prepare engravings of a selection of them for inclusion in the printed expedition reports, so readers would have an impression of the wonders Hodges, Cook and their shipmates had seen.
POLAR POSTSCRIPT: Cook’s circumnavigations established a template for expeditions, which combined geographical exploration and surveying with detailed scientific enquiry and, at the conclusion of the voyage, published reports illustrated with maps, charts and engravings made from drawings and paintings by professional or highly skilled amateur artists.
2
Elizabeth Cook’s Ditty Box
This ‘ditty box’* was presented to Mrs Elizabeth Cook after her husband’s ship, Resolution, returned to London in 1780. The oak box was made by crew members from timbers from the ship. It was carved with Polynesian symbols and decorated with miniature silver plates etched with inscriptions relating to the box and Cook’s career.
The ditty box, measuring around 3½in by 2¾in, is in the Dixson Library collection in the State Library of New South Wales, Sydney, Australia (ref. SAFE/DR2; npAd3Ob1).
In summer 1775, Elizabeth Cook was, as ever, relieved to welcome her husband James back to their home following another long voyage.1 In his absence, she had mourned the death of baby George, the third of their five children to die while he was away. She was, however, gratified when he was promoted to the rank of captain and offered the sinecure post of Fourth Captain of Greenwich Hospital, which provided him with an income while he wrote up his expedition reports. She was also pleased when he was elected to Fellowship of the Royal Society and invited to submit a paper on his use of anti-scorbutics as a means of keeping scurvy at bay during his circumnavigations.
Although Cook enjoyed attending Royal Society meetings with his wife, he soon began spending increasing amounts of time with his friend and mentor Hugh Palliser, who was now a member of the Admiralty Board. Palliser told Cook that Joseph Banks’s friend Constantine Phipps (who had family estates near Whitby) had recently failed to reach the Pacific Ocean via Spitsbergen, the putative Open Polar Sea and the Bering Strait.2 As the Admiralty Board were now planning a Northwest Passage expedition, starting from the Pacific Ocean and Bering Strait, Palliser wondered if Cook could help him and his fellow board members with drawing up a shortlist of potential commanders for such an expedition.
Mrs Cook’s ditty box showing decorative features and multi-part cover (ref. npAd3Ob1); images © and courtesy of Dixson Library, State Library of New South Wales, Sydney.
In January 1776, following an informal dinner with Palliser and other Admiralty Board members, Cook agreed to lead the forthcoming expedition. While Elizabeth prepared for the arrival of another child, Cook was informed that he would again command Resolution, while Charles Clerke (who had served on his last two circumnavigations) would captain Discovery, another Whitby-built vessel.
In late May, Elizabeth – shortly after attending a Royal Society meeting with her husband – gave birth to a son, whom they named Hugh for his godfather, Hugh Palliser. On 12 July, Cook sailed from Plymouth.
Shortly after Elizabeth learned of her husband’s safe arrival at Cape of Good Hope, she was presented, on his behalf, with the Royal Society’s Copley Medal for his paper on scurvy.3 Although the Cooks’ elder sons, James and Nathaniel, were also now at sea, Elizabeth had Hugh for company and passed the time by making an embroidered waistcoat for her husband from tapa fabric he had brought back from Otaheite.4 She had little idea when to expect her husband back, so was shocked when, in early January 1780, newspapers reported that he had died in February 1779 on Owhyhee, a remote Pacific Ocean archipelago.5
In due course, Elizabeth learned that her husband had first visited Owhyhee in January 1778 to rewater his ships before exploring and charting America’s north-west coast. After finding no likely route running from the west coast to Hudson’s or Baffin Bays, he had continued to the Bering Strait and across the Arctic Circle. When his ships became ice-beset at around 70°N, he had returned south and, rather than overwinter in chilly Kamchatka, returned to Owhyhee. Although the islanders had initially seemed as friendly as before, a series of misunderstandings resulted in a skirmish during which Cook, four marines and sixteen islanders died.
Charles Clerke and Lieutenant John Gore, now in charge of the expedition, decided to return to the Bering Strait the following year. They were soon blocked by ice, and as Clerke was now seriously ill, headed for Kamchatka. Clerke died before they reached there so, after dispatching reports to London, Gore captained Cook’s ships back to Britain.6
King George, who reportedly wept on learning of Cook’s death, granted Elizabeth a pension and financial support for her three sons. When Cook’s ships returned, Elizabeth was presented with a carved oak ditty box, fashioned in the shape of a coffin and decorated with patterns similar to those on the tapa fabric she had been using to make the waistcoat her husband would never wear. Set in the wood were four silver discs made from beaten coins, each bearing an inscription: ‘Made of Resolution oak for Mrs Cook’; ‘Captain James Cook slain at Owhyhee, 14 February 1779’; ‘Quebec Newfoundland Greenwich Australis’; and ‘Lono and the Seaman’s idol’ – the last being, Elizabeth learned, a reference to a religious ceremony celebrated in Owhyhee.7 Within the ditty box lay a lock of Cook’s hair, a watercolour of Owhyhee and other mementos.8
Within months of her husband’s ships returning, Elizabeth learned that her 15-year-old son Nathaniel had drowned when his ship, HMS Thunderer, went down with all hands during a Caribbean hurricane.9 While she grieved, her husband’s posthumous fame grew, thanks to eulogistic poems and prose, printed reproductions of portraits by Royal Academician Nathaniel Dance and others, and a Royal Society commemorative medal struck at the request of Joseph Banks, the society’s then president. Banks also encouraged Elizabeth to collaborate with Royal Society member Andrew Kipps on a biography of her husband, which was published in 1788, with Dance’s portrait as a frontispiece. That year, Elizabeth and her younger son Hugh moved to a spacious new home in Clapham’s High Street, conveniently close to Merton, where her cousin Isaac Smith (who had regularly sailed with Cook) had a country home to which he often invited Elizabeth and Hugh.
In 1793, 16-year-old Hugh left Clapham to study theology at Christ’s College Cambridge and his brother James, now approaching 30, received his first naval command. Within a year, however, Elizabeth lost her two remaining children after Hugh succumbed to a fever in his college rooms and James died in an accident when returning to his ship.10 Although Elizabeth was near-paralysed by grief, she gradually, thanks to Isaac Smith and other relatives, came out of mourning and resumed her active social life.
In 1835, Elizabeth died in her Clapham home, aged 94. The woman described in newspapers as the ‘esteemed and respected […] widow of the celebrated circumnavigator’ retained her mental faculties to the end. Her husband’s expedition records and charts were already in safekeeping with the Admiralty and Royal Society and, shortly before she died, she sent her copy of the Royal Society’s commemorative medal to the British Museum for safekeeping.11 As she had regarded her husband’s public roles as separate from their private life, she destroyed his personal letters to her and gave his gifts and other personal mementos, including her precious ditty box, to relatives and close friends who had supported her over her long life.
POLAR POSTSCRIPT: In 1806, Elizabeth Cook gave her ditty box to a relative, John Carpenter, from whom it passed by descent to Thomas Hart. It was later purchased by Sir William Dixson, who bequeathed it, along with other items from his collection, to the State Library of New South Wales. Although there are numerous memorials to Elizabeth’s husband in public places in Britain and elsewhere, her will made provision for a memorial to the entire Cook family to be made and erected in the Church of St Andrew the Great, in Cambridge, where she and her sons Hugh and James are buried.
* Ditty boxes were made and used by mariners to store small, important personal possessions during voyages.
3
Scoresby’s Barrel Crow’s Nest
During summer 1807, whaling master William Scoresby of Whitby used, for the first time, a mast-mounted ‘barrel crow’s nest’ of his own design. He could now, with both hands free, use his telescope to search the horizon for whales’ spouts and leads through the Arctic sea ice. The barrel crow’s nest, sometimes referred to as Scoresby’s ‘tunna’ (from ‘tun’, meaning barrel), soon became a standard feature on British whalers and other vessels, particularly those operating in polar regions.
This replica crow’s nest (approximately full size) is based on Scoresby’s design and is in the Whitby Museum. The museum also holds documents and other artefacts relating to William Scoresby and his son William, who became both a whaler and respected scientist.
William Scoresby, like James Cook, was raised in rural Yorkshire and moved as a young man to Whitby, where he served a mariner’s apprenticeship with relatives of Cook’s employer and mentor, John Walker.1 In 1790, Scoresby’s first season in command of the whaling ship Henrietta, he and his employer were both disappointed with his catch. The following year, however, when there was more sea ice, he returned with a record catch of eighteen whales which, thanks to high demand for whale oil and ribs, meant he was well paid for his efforts.2
By 1806 Scoresby owned his own whaler, which he named for James Cook’s Resolution. During her first season, Scoresby and his 16-year-old son William reached 81° 30’N, a new ‘Farthest North’ for British vessels operating off Greenland. That year, the Scoresbys returned with over twenty whales, as well as seals and walruses and – to the amazement of Whitby’s residents – two white-coated Arctic bears.
Replica of a crow’s nest designed by William Scoresby Snr; collection of Whitby Museum; photograph © A. Strathie, with permission of Whitby Museum.
Over the winter, Scoresby designed an apparatus which would allow ships’ captains or other lookouts to remain safe when aloft, rather than holding masts and telescopes with frost-nipped fingers.3 Scoresby’s barrel crow’s nest, mounted on the main mast, could be entered through a trapdoor in its base. The interior was fitted with internal racks and hooks where telescopes, instruments, signal flags and a loud hailer could be stored when not in use. In recognition of the vagaries of Arctic weather, Scoresby also fitted the crow’s nest with a retractable hood, which protected the user and telescope lenses from rain, sleet and snow. During the 1807 whaling season, Scoresby and his son William – who had joined his father as a 10-year-old but was now Resolution’s chief officer – made good use of the new crow’s nest.
Although William’s formal schooling had taken second place to his father’s whaling activities, he began spending winters in Edinburgh, studying natural history, mathematics and logic with Professor Robert Jameson and other university tutors. William’s education was again interrupted when he and several friends were enticed to enrol for the navy, which was looking for new recruits to fight the French. But his new career ended abruptly after a near shipwreck on his first voyage resulted in him being discharged at Portsmouth.4 When William told his father where he was, his father asked him to make a detour via London, where he had left reports he wanted delivered to the Royal Society’s President, Sir Joseph Banks.5 Banks was interested that William was studying in Edinburgh with Robert Jameson (whom Banks knew) and invited William to keep in contact.
Following another summer in Resolution’s crow’s nest, William returned to Edinburgh, where he completed his studies and was elected to membership of the city’s Wernerian Society. In 1811, William married and, after his father moved to Scotland, he became a Whitby whaling master in his own right. Despite his additional responsibilities, he continued his scientific work, of which he sent details regularly to Jameson.
William also kept up his correspondence with Joseph Banks, who kindly sent from London a new, highly accurate, deep-sea marine thermometer. When William noticed in summer 1817 that there was less ice between 74°N and 80°N than in previous years, he wrote to advise Banks, who suggested this tallied with reports of melting alpine glaciers and other indications that, following centuries of historic lows, northern hemisphere air temperatures appeared to be rising.6 After William sent Banks a copy of his ‘Treatise on the Northern Ice’, Banks reminded him that a 1745 Act of Parliament offered ‘a reward of £20,000 for the discovery of a NW passage and £10,000 for the ship that shall first reach the 89th degree of North Latitude’.
When William explained to Banks that whalers were neither equipped for nor could afford to embark on such speculative ventures, Banks invited him to London to meet Admiralty officials who were organising an Arctic ‘voyage of discovery’. Banks had sent a copy of William’s treatise to Admiralty officials, although, when William met John Barrow, the Admiralty’s apparently influential Second Secretary, the latter made no mention of the paper and told William that only naval officers were eligible for senior expedition posts.7 After Banks warned William that Barrow was unlikely to change his mind, William spent the winter working on a book Jameson wanted him to write on the Arctic regions.8
In early 1818, Banks confirmed that the Admiralty had appointed Captain David Buchan and Lieutenant John Franklin to lead an expedition to Spitsbergen and the North Pole on Dorothea and Trent, while Commander John Ross and Lieutenant Edward Parry, on Isabella and Alexander, would survey Baffin Bay, then attempt to enter the Northwest Passage.9 Parry was also charged with locating the North Magnetic Pole which, as Admiralty officials and mariners knew, increasingly affected the accuracy of ships’ and other compasses as they approached it.
HMS Alert crow’s nest, from Illustrated London News, 5 July 1875; author’s collection.
In mid-April 1818, while heading north to the whaling grounds, William wrote to Banks from Shetland. Among other matters, he reminded Banks that, notwithstanding the public’s and the Admiralty’s expectations, there was no guarantee that the approaching summer would find northern waters as relatively ice-free as they had been in 1817. Should ice conditions be more like 1816 and previous years, William would, he admitted, be surprised if Buchan’s party passed 84°N or Ross’s men traversed the Northwest Passage on their first attempt.
In the event, William’s prediction proved correct. He was running ahead of Buchan and Franklin’s ships and, despite his best efforts from the crow’s nest, became ice-beset at around 80°N. With more ice than the previous year, William returned to Whitby with a good catch. A few months later, he learned that Dorothea and Trent had also been forestalled at around 80°N and that Ross’s ships had failed to enter the Northwest Passage.
POLAR POSTSCRIPT: Crow’s nests based on William Scoresby’s 1807 design were widely used throughout the nineteenth and early twentieth centuries by whalers and sealers and on Admiralty and other ships exploring polar regions.
4
A Panorama of Spitsbergen
During Commander David Buchan’s 1818 expedition to Spitsbergen and the North Pole, Lieutenant Frederick Beechey (son of Royal Academician Sir William Beechey) produced panorama drawings of the area north of Spitsbergen where expedition ships Dorothea and Trent became frozen in.1 Beechey’s drawings were later scaled up and used to create a painted panorama which was shown at Henry Barker’s Rotunda off Leicester Square, London. Barker’s father was Scottish panorama artist Robert Barker, who had pioneered panoramas as a form of popular entertainment, particularly for audiences interested in seeing large-scale images of distant lands.2
No original canvases of the Spitsbergen panorama exist. Keyed drawings of the panoramas, as shown here, were incorporated into guides which were sold to visitors. Examples of them can be found in archives and libraries and are occasionally offered for sale.
On 11 April, Easter Monday 1819, customers arrived at Henry Aston Barker’s Rotunda off Leicester Square, eager to see what was advertised as a ‘novel scene’ from a recent polar expedition. After paying a shilling to enter, customers mounted a circular platform from where they viewed a long, 30ft-high mounted canvas panorama of an Arctic vista. A keyed diagram and text explained that HMS Dorothea and HMS Trent (both visibly listing) were trapped in the ice and their captains, David Buchan and John Franklin (seen in the foreground), were ‘consulting together on future proceedings’.
Visitors’ attention was also drawn to the magnificent snow-capped mountains and huge ice barrier, and to polar bears, walruses and other unfamiliar creatures. While the awe-inspiring scenery recalled scenes in Frankenstein, a recent novel, or Coleridge’s Rime of the Ancient Mariner, the magnificent and apparently peaceful vista made it difficult for visitors to imagine Buchan, Franklin and their men winching boats to just beyond 80°N or being tossed in storm-damaged ships in ice-strewn seas.
‘Panorama of the North Coast of Spitzbergen’, Henry Aston Barker (from Beechey’s drawings); image © and courtesy of Russell A. Potter.
Although Barker’s Rotunda could accommodate two panoramas, there was no companion display showing Baffin Bay and Lancaster Sound, which John Ross and Edward Parry had explored on HMS Isabella and Alexander during a second Admiralty expedition. John Barrow had no desire to publicise this second expedition, notwithstanding that John Ross had, in accordance with orders, completed the first survey of Baffin Bay since William Baffin first charted it 200 years previously. Ross had also, with assistance from Royal Society representative Edward Sabine and others, taken and recorded numerous magnetic and other readings. He had established that Cumberland Sound, one of several channels leading off Baffin Bay, was an impasse, and, as instructed, entered Lancaster Sound. After Ross entered the sound and saw what he thought were mountains blocking his way west, he had, to Edward Parry’s disappointment, turned back well before reaching the uncharted mountains – which Ross designated ‘Croker’s Mountains’ in honour of the Admiralty’s First Secretary.
Barker’s Rotunda, Leicester Square, cross-section from Robert Mitchell’s Plans and Views in Perspective … (pub. 1801) (ref. 52.519.153); Rogers Fund 1952, Metropolitan Museum of Art, New York (Open Access Initiative).
Barrow wrote a scathing review of Ross’s official expedition report; when the review was published anonymously it resulted in Ross being satirised and caricatured.3 And although Ross had lost no ships and could not be court-martialled, Barrow ensured Ross was summoned to an Admiralty hearing. So vociferous was Barrow’s criticism of Ross’s actions that Ross found it difficult to persuade his nephew James (who had sailed with him since boyhood) to testify in his favour. After Parry and the Admiralty’s magnetism expert Edward Sabine spoke out against Ross, John Barrow effectively debarred Ross from further expeditions.
Shortly after the Spitsbergen panorama opened, Edward Parry, now in command of HMS Hecla and Griper, left Britain with Beechey, Sabine, James Ross and other veterans of the 1818 expeditions to embark on a second attempt at traversing the Northwest Passage. While they were away, John Franklin would lead a small party, including Trent veteran George Back and naval surgeon-cum-naturalist Dr John Richardson, to Hudson’s Bay. From there, they would be joined by experienced Hudson’s Bay Company (HBC) personnel, who would accompany them down the Coppermine River to the north Canadian coast where, all being well, they would join Parry’s ships and complete the Northwest Passage.
Meanwhile, John Ross remained in Britain on half pay and mourned the death of his baby daughter, who had died in his absence. In September, he and his wife welcomed a baby son, Andrew. By then, his expedition report – lavishly illustrated with drawings and paintings by him and his expedition’s Inuit translator John Sacheuse – had run to a second edition. As the panorama based on Beechey’s drawings continued to draw crowds, Ross provided panorama proprietors Messrs Marshall with some of his illustrations, which their painters used as templates for large canvas panels within one of Marshall’s famous ‘peristrephic’, or moving, panoramas, which regularly toured Britain.
By April 1820, Marshall’s artists had produced, from Ross’s work and a further selection of Beechey’s drawings, a ‘Grand Panorama of the Magnificent Scenery of the Frozen Regions’.4 The panorama opened at Birmingham’s Shakespeare Tavern, then toured the country. Performances were regularly enhanced by live music, ‘brilliantly illuminated’ evening performances and an Arctic ‘museum’, which featured a stuffed white bear and other Arctic animals, a 15ft kayak and examples of Inuit clothing that Ross had brought back from his voyage. By October, when Parry and his men returned to London, the original Spitsbergen panorama had completed its run, but Marshall’s ‘Frozen Regions’ panorama was still attracting crowds in Edinburgh.
Parry had, Ross learned, reached Lancaster Sound early in the season, sailed straight through the area of the map where Ross had marked Croker’s Mountains and continued to 110°W before becoming blocked by huge quantities of ice flowing south into what Parry had named Barrow Strait. For Barrow, Parry was now the man of the moment and Barrow already had plans for him – in the form of an expedition to Hudson’s Bay, from where Parry was instructed to find a southern route which would bypass the heavy ice which had prevented Hecla and Griper from reaching the Bering Strait and Pacific Ocean.
In January 1823, while Marshall’s ‘Frozen Regions’ panorama continued to tour Britain’s major towns and cities, the Bath Chronicle announced its imminent arrival in the home town of ‘Capt. Parry, the most heroic and intrepid voyager that ever crossed the ocean’.5 The ‘intrepid voyager’ was still in the Arctic, but those looking forward to the opening of ‘Frozen Regions’ also had to contend with adverse weather conditions. As the Chronicle informed its readers, the freezing of canals between Birmingham and Bath would result in the late arrival in Bath of the ‘Frozen Regions’ panorama. The panorama was, potential visitors were assured, well worth waiting for, as the Bath performances featured live musical accompaniment, including perennial favourites such as ‘Hearts of Oak’ and the specially commissioned ‘Captain Parry’s Waltz’.
POLAR POSTSCRIPT: Panoramas, including of polar and other distant regions, remained popular with the public until the 1890s. Barker’s Rotunda was purchased in 1865 by the Archdiocese of Westminster and converted into a church, of which the Rotunda’s dome remains a notable feature.
5
William Scoresby’s Manuscript
William Scoresby, at the suggestion of Professor Robert Jameson of Edinburgh University, wrote his first book, An Account of the Arctic Regions, with a History and Description of the Northern Whale-Fishery, between whaling seasons. It was published in 1820 in two volumes (around 600 pages each) by William Constable of Edinburgh and praised as the first comprehensive survey of the Arctic region. The publication of his book resulted in Scoresby being recognised as a polar scientist as well as a successful whaling captain.
The manuscript and Scoresby’s first-edition copy of his book are in the Whitby Museum, Whitby, Yorkshire.
When William Scoresby’s whaler became ice-beset during the summer 1818 season, he took magnetic and other readings, made surveys and wrote descriptions of Spitsbergen’s glaciers and sea ice, all of which he planned to incorporate into his forthcoming book on the Arctic regions. Scoresby’s mentor, Professor Robert Jameson, introduced him to his publisher, Archibald Constable, who, while best known for publishing Walter Scott’s novels, also published scientific textbooks by Jameson and others.1 In December, following the birth of Scoresby’s second son, Constable confirmed that his company would publish his manuscript in two illustrated volumes, and that, six months after publication date (probably spring 1820), they would pay him £250 for his efforts.
In May 1819, Scoresby, accompanied by his wife and two sons, moved to Liverpool, where he juggled working on his manuscript with overseeing the construction of a new whaler which his new business partners had promised would be ready for the 1820 season. As the result of Edward Parry’s second expedition was unlikely to be known before his book went to press, Scoresby’s chapter on the Northwest Passage was largely historical in nature. As a proud Yorkshireman, he praised Whitby’s ‘adventurous navigator’, James Cook, for his attempt to traverse the passage from the Bering Strait. He also suggested that, despite John Ross’s failure to enter the Northwest Passage from Lancaster Sound, his ‘brief and unostentatious’ expedition report and his and Parry’s charts of Baffin Bay were comprehensive.
Manuscript of Rev. William Scoresby’s An Account of the Arctic Regions.First edition of An Account of the Arctic Regions, published by William Constable (1820).Both photographs © A. Strathie, taken in display cases with permission of Whitby Museum; the manuscript is copyright Whitby Museum.
As Scoresby’s book was likely to outlast the Croker’s Mountains controversy, he showed Lancaster Sound as an open-ended channel from which a speculative ‘Frozen Ocean’ continued to the Bering Strait. As to the feasibility of traversing the passage, Scoresby noted that he considered it unlikely that the passage could be completed in a single summer and ships of 100–200 tons were more likely to pass through the passage’s icy, sometimes narrow channels than larger vessels – although he conceded the latter could carry more provisions.2 He also praised the dog sledge-driving capabilities of HBC employees, Inuit and other inhabitants of Arctic regions.
Scoresby was not, he admitted, a believer in the concept of an ‘Open Polar Sea’ beyond the northern Arctic pack ice, but he accepted that, given Parliamentary rewards were available for reaching the North Pole or Bering Strait by that route, the search for it would continue.
Scoresby supplemented his historical overviews with chapters on a myriad of topics, from seals to snowflakes and scurvy to sledging. He also included detailed meteorological and other tables and charts and illustrations. In a dedication, he acknowledged the ‘early and uniform friendship’ of Professor Jameson – whose nomination of Scoresby to Fellowship of the Royal Society of Edinburgh allowed Scoresby to append ‘F.R.S.E.’ to his name on the title page. Scoresby also thanked Joseph Banks for ‘friendly suggestions and encouragement’ and his ‘kindness and liberality’ in loaning and presenting him with scientific instruments and other items.
In mid-March 1820, following the publication of An Account of the Arctic Regions, Scoresby received a package of author’s copies from Constable, which he distributed to Jameson, Banks, his father and others. That done, he sailed for Greenland on his new ship, Baffin. On the way north, he stopped at Stranraer in hopes of recruiting additional crew members and was pleased to meet an acquaintance, David Gordon, who invited Scoresby to spend the evening with him and his friend, John Ross.3
Fig. 2 from Scoresby’s paper to the Royal Society of Edinburgh (18 December 1820) showing ‘remarkable Atmospheric Reflections and Refractions, observed in the Greenland Sea’; image A. Strathie.
Scoresby and Ross soon found common ground (other than being the object of John Barrow’s apparent disdain) and Scoresby gladly accepted Ross’s invitation to visit his lochside home the following day. Scoresby enjoyed seeing Ross’s manuscript charts of Baffin Bay and, by way of thanking Ross for gifts of printed charts and a copy of his pamphlet on marine instruments, he invited Ross to lunch on Baffin the following day – when Ross presented Scoresby with a copy of his 1818 expedition report. That evening, following a farewell dinner at Ross’s home, the two independently minded polymaths agreed to remain in contact.
Baffin performed well on her maiden voyage and, although Scoresby captured no whales until mid-May, he returned to Liverpool in late August with what he learned was the largest catch ever landed there from Greenland waters.
Back in Whitby, he found his wife and two young sons well, although he was saddened to learn of the death of his mentor and supporter Joseph Banks. On a more positive note, his publishers confirmed they were ‘much pleased’ with sales of An Account of the Arctic Regions, and with reviews that praised it for its blend of scientific and practical information.
Scoresby had included a short section on atmospheric refractions in his book, but his new-found friendship with Ross made him more interested in the subject. As he had recently seen refractions which, like those Ross had seen in Lancaster Sound, resembled a mountain range, he submitted a paper on the topic to the Royal Society of Edinburgh. When the paper was accepted, Scoresby felt he had both supported his friend John Ross and enhanced his own growing reputation as a fully fledged scientist.4
POLAR POSTSCRIPT: Scoresby’s An Account of the Arctic Regions became an indispensable standard text for polar scientists and explorers and remained so for over a century. In more recent years, Scoresby’s name became familiar to readers of Philip Pullman’s His Dark Materials, through the character Lee Scoresby who, appropriately, spends time in the Arctic.
Part II
Exploring North and South
John Barrow knew that many of the men who volunteered for the current wave of Admiralty ‘voyages of discovery’ to the Arctic and other regions were interested in exploring uncharted areas or learning more about magnetism or other areas of science. There was no denying, however, that the prospect of returning to full pay and active service after the enforced idleness of the post-Napoleonic Wars era was also an attraction. There was also, as Edward Parry and naval officers knew, the possibility of advanced promotion or a share of Longitude Discovery Bill awards ranging from £5,000, for reaching 110°W or 89°N, to £20,000, for charting a route between the Atlantic and Pacific Oceans, whether via the Northwest Passage or the North Pole.


