Erhalten Sie Zugang zu diesem und mehr als 300000 Büchern ab EUR 5,99 monatlich.
- Herausgeber: The History Press
- Kategorie: Geisteswissenschaft
- Serie: Battle Story
- Sprache: Englisch
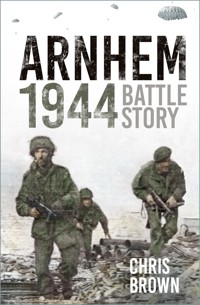
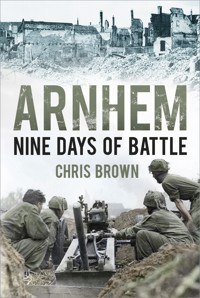
The Battle of Arnhem has acquired a near-legendary status in British military history as an audacious plan to land paratroopers into the Netherlands and spearhead an attack against the German-held Ruhr. Beyond images of brave paratroopers and scenes from A Bridge Too Far, this was in fact one of the most complex and strategically important operations of the war. It was expected that the British would sweep through and connect with the Arnhem force within a matter of days. But things on the ground proved very different. The Allied forces were isolated, without reinforcements and unable to advance. The operation ended in disaster. Using first-hand accounts, maps and detailed timelines, historian Chris Brown explores the unfolding action of the battle and puts the reader on the front line. If you truly want to understand what happened and why – read on.
Sie lesen das E-Book in den Legimi-Apps auf:
Seitenzahl: 199
Veröffentlichungsjahr: 2011
Das E-Book (TTS) können Sie hören im Abo „Legimi Premium” in Legimi-Apps auf:
Ähnliche


This book is dedicated to the memory of my late father-in-law, Robert Smith of Arran and to his dear friend James ‘Laindon’ Jackson Cornwell, who died in Japanese captivity on or about 3 May 1943, aged twenty-two.
First published 2011
This paperback edition first published 2022
The History Press
97 St George’s Place, Cheltenham,
Gloucestershire, GL50 3QB
www.thehistorypress.co.uk
© The History Press, 2011, 2022
The right of Chris Brown to be identified as the Author of this work has been asserted in accordance with the Copyright, Designs and Patents Act 1988.
Chris Brown has asserted his moral right to be identified as the author of this work.
All rights reserved. No part of this book may be reprinted or reproduced or utilised in any form or by any electronic, mechanical or other means, now known or hereafter invented, including photocopying and recording, or in any information storage or retrieval system, without the permission in writing from the Publishers.
British Library Cataloguing in Publication Data.
A catalogue record for this book is available from the British Library.
ISBN 978 0 75246 844 0
Typesetting and origination by The History Press
Printed and bound in Great Britain by TJ Books Limited, Padstow, Cornwall.
eBook converted by Geethik Technologies
CONTENTS
Acknowledgements
List of Illustrations
Introduction
Timeline
Historical Background
The Armies
The British
The Germans
The Strategy
The Days Before Battle
Planning the Landings
The XXX Corps’ Plan
The Landings Commence
The Battlefield: What Actually Happened?
The Attack Commences – Day One
Appraising the Situation – Day Two
Opposition Increases – Day Three
Waiting for Reinforcements – Day Four
The Bridge is Lost – Day Five
No Way Across – Day Six
Under Fire – Day Seven
Operation ‘Berlin’ – Day Eight
After the Battle
The Germans
The Legacy
Orders of Battle
Further Reading
Index
ACKNOWLEDGEMENTS
As ever I am indebted to my wife and I am grateful for the patience of my children and their partners, Robert, Charis, Christopher, Colin, Alex, Juliet and Mariola and my dog Sam, all of whom have to listen to much more history than can possibly be reasonable. My grateful thanks also to the series editor, Jo de Vries, whose patience with writers is seemingly boundless and also to Ian Davidson of the Parachute and Glider Warfare Group and Mark Hickman at the Pegasus Archive for all their generous help with the photographs. Lloyd Clark kindly granted permission for use and adaptation of several maps from his excellent book, Arnhem: Operation Market Garden, September 1944 (Sutton/The History Press, 2002). Several photographs have also been used from the recent detailed study, Operation Market Garden: Legend of the Waal Crossing (The History Press, 2011), by kind permission of the author, Tim Lynch.
LIST OF ILLUSTRATIONS
Unless otherwise credited all illustrations have been sourced from US and UK public domain sources.
1 North-west Europe, 1944. (Courtesy of Lloyd Clark, Arnhem)
2 Elements of XXX Corps approaching the Meuse-Escaut Canal from the bridgehead at Neerpelt.
3 Map of the Market Garden operation. (Courtesy of Tim Lynch)
4 British officer armed only with a service revolver.
5 Four of these American Waco gliders were assigned to the Arnhem operation to transport American air support control staff.
6 General Urquhart outside his headquarters at the Hartenstein Hotel in Oosterbeek.
7 British paratroops landing.
8 A Bren Carrier being unloaded from a Hamilcar glider.
9 75mm Pack Howitzer of the 1st Light Regiment in action.
10 Airspeed Horsa – Horsa gliders, two have been split in the centre in order to remove jeeps or 6 pounder anti-tank guns.
11 LZ ‘Z’, showing Hamilcar gliders.
12 Men of 1st Battalion the Parachute Regiment in a C47 Dakota en route to Arnhem.
13 A British Sherman at Nijmegen.
14 General Wilhelm Bittrich. (Courtesy of Bundesarchiv)
15 German infantry moving along a ditch in the Arnhem area. (Courtesy of Bundesarchiv)
16 The Market Garden plan, September 1944. (Courtesy of Lloyd Clark, Arnhem)
17 Field Marshal Montgomery and Lieutenant General Horrocks. (Courtesy of Tim Lynch)
18 101st Airborne inspecting broken glider in Holland.
19 General Sosabowski of the Polish Parachute Brigade talking with General Browning.
20 Tanks of XXX Corps en route to Arnhem passing crowds of enthusiastic Netherlanders.
21 A Douglas C47 ‘Dakota’ aircraft. (Courtesy of Tim Lynch)
22 1st Parachute Brigade descending on Drop Zone (DZ) ‘X’ on the first day of the battle.
23 The Arnhem Battlefield, 17–19 September 1944. (Courtesy of Lloyd Clark, Arnhem)
24 The Hartenstein Hotel as seen from the tennis courts where German POWs were held. (Author photograph)
25 A British M10 tank destroyer crossing a Bailey bridge.
26 Landing Zone (LZ) ‘Z’ covered with Horsa gliders.
27 A unit of Guards Armoured Division at Valkenswaard on the first day of the battle.
28 Brigadier P.H.W. Hicks.
29 British Airborne troops dug-in behind a hedge.
30 Arnhem bridge. (Author photograph)
31 Known to the troops of the Airborne Division as ‘The White House’, the Hotel Dreyeroord was the scene of fierce combat through the middle and latter stages of the battle. (Author photograph)
32 British Airborne troops carrying the unloved Sten gun on a patrol in the Oosterbeek area.
33 Two British airborne soldiers – one apparently wearing a signaller’s headset – man a slit-trench among the redundant jeeps and trailers.
34 Vickers guns of a British machine gun platoon.
35 1st Airlanding Regiment in action at Oosterbeek.
36 Elements of XXX Corps held up on the exposed road to Arnhem.
37 British casualties receiving attention from American Airborne medics on the road to Nijmegen.
38 Airborne troops recovering supplies after a drop.
39 Nijmegen Bridge.
40 Oosterbeek parish church at the base of the perimeter. (Author photograph)
41 Temporary grave of an unidentified British airborne soldier.
42 Vehicles of XXX Corps crossing the bridge at Nijmegen.
43 German troops on the march near Arnhem.
44 War correspondents of the Airborne Division.
45 Airborne medic at the temporary grave of Private Edmond of 1st Airlanding Reconnaissance Squadron.
46 German troops in distinctive ‘pea-dot’ camouflage kit taken prisoner early in the fighting.
47 Transport and fuel shortages forced the German Army to requisition thousands of bicycles.
48 German Pzkw or ‘Panther’ tank.
49 XXX Corps armour moving through Eindhoven.
50 A platoon of British infantry perched precariously on a Sherman tank. (Courtesy of Tim Lynch)
51 The British 17 pounder anti-tank gun. (Courtesy of Tim Lynch)
52 A 6 pounder anti-tank gun moving toward Arnhem in the early stages of the operation.
53 A Sherman tank at the entrance to the Airborne Museum, formerly the Hartentstein Hotel, Oosterbeek. (Author photograph)
INTRODUCTION
The Market Garden operation, and particularly the battle that raged in and around Arnhem and Oosterbeek for nine days in September 1944, has attracted a remarkable amount of attention and a formidable amount of material has been published about it, by participants and by both popular and academic historians. There are many reasons why it has proved to be such a ‘popular’ battle. It was an unparalleled event; by far the greatest airborne operation there had ever been. It was dramatic and innovative, and it captured the imagination of the public throughout Europe and the United States. It has that special aura of a romantic and, in a sense, glorious defeat.
Another reason that it has been of enduring interest is that it is very rare to be able to study a divisional battle in such isolation. The battle area is relatively small and can be studied on the ground to a worthwhile degree in a fairly short space of time. For anyone who has the opportunity to visit the city of Arnhem and town of Oosterbeek, I can thoroughly recommend Major John Waddy’s book A Tour of the Battlefields of Arnhem, and also Major and Mrs Holt’s Battlefield Guide to Operation Market Garden for those who wish to see the bigger picture of the campaign as a whole.
Although this book is focused on the struggle of the British 1st Airborne Division and the attached 1st Polish Parachute Brigade, it is important to remember that their fight was part of a much larger offensive; there would have been no strategic value in capturing what is now called the John Frost Bridge over the Lower Rhine without also gaining control of a chain of river crossings from Neerpelt to Nijmegen.
Perhaps the single most important factor which has kept the battle alive in the public consciousness is the remarkable courage exhibited by so many men in such a short space of time and in such a small area. To some extent echoes of the events at Arnhem have drowned out examples of outstanding soldiering in other parts of the campaign. The 82nd and 101st Airborne divisions of the United States Army carried out their tasks with stupendous vigour and professional ability, and with many acts of astonishing courage. The assault at Nijmegen is one example; soldiers of Colonel Reuben Tucker’s 504th Parachute Infantry Regiment boarded boats that they had never seen before and undertook an attack of a kind that they had never been trained for under heavy fire and in broad daylight. This outstanding feat of arms is, rightly, a famed example of exceptional courage and tenacity, but it has, perhaps, overshadowed the determination and achievements of the other elements of the US Airborne divisions. It is somehow typical of the entire Market Garden operation that once the 504th had stormed the bridge and the British armour had crossed it, the day’s operations ground to a halt.
If the Market Garden offensive – and the Arnhem battle in particular – is a tale of bravery and ability in a particularly trying military environment, it is also a tale of confusion, professional incompetence and eventual failure in which sheer common-or-garden bad luck played a conspicuous part. It is a little bit too easy to point the finger at several senior commanders for a mixture of slap-dash work and wishful thinking. It does no harm to remember Clausewitz’s (the famous military theorist) warning that the things required to achieve victory in war are very simple, but that in war even the very simplest things are exceptionally difficult to achieve and, of course, the old military dictum that ‘no plan survives contact with the enemy’.
It is impossible to escape the conclusion that Allied officers at all senior levels – British and American, army and air force – failed to really take account of the enemy. Of the senior officers briefed before the landings only two – General Sosabowski and Brigadier Hackett – seem to have been at all concerned about the possibility that the German Army might have some influence on the progress of the operation.
For the Germans, Arnhem was really the last battlefield victory in the western theatre. If the military environment was challenging for the Allies, it was no less so for the Germans. They had to overcome the confusion of a long retreat in front of an enemy with massive air superiority, and at a time when their ability to replace men and material had been overstrained for years. Few could have been in any doubt that they were in the course of losing the war, but they were not yet ready to give up the struggle.
Although the troops of the main body of the German Army at Arnhem – 9th and 10th divisions of General Bittrich’s 2nd SS Panzer Corps – had had some training in anti-airborne operations in 1943, the majority of those divisions were dead, wounded or prisoners by September 1944. Many of the troops who fought the British at Arnhem were not highly trained, experienced and motivated troops, but army and SS trainees or sailors and airmen waiting for re-assignment and re-training. The shock of being handed a rifle and a few rounds of ammunition before being thrown into the battle – often under officers and NCOs that they did not know – must have been dreadful. The fact that they were able to withstand an enormous onslaught on the ground and in the air, and not only contain, but defeat, a body of troops like the 1st Airborne Division is a testament to astonishingly good staff work, and to the training and commitment of the ordinary German soldier. That they did so with courage and a considerable degree of humanity – and in several incidents chivalry – is all the more remarkable.
TIMELINE
1940
10/11 May
German glider troops seize the Belgian fort of Eben-Emael in the first airborne operation in Western Europe, inspiring Churchill to order the formation of an airborne force to total 5,000 men
22 June
No. 2 Commando is assigned to a parachute and glider role
22 November
No. 2 Commando is re-named 11th Special Air Service Battalion and becomes the foundation of British airborne forces
1941
1st Parachute Brigade and 1st Airlanding Brigade are formed as the basis of 1st Airborne Division under the command of Lieutenant General Browning
10 February
The first British airborne venture, Operation Colossus, is mounted to seize and destroy an aqueduct in Calibri, southern Italy. The operation fails to achieve its objective
27/28 February
Operation Biting is mounted to capture German radar equipment at Bruneval and is a success
September
Formation of 1st Polish Parachute Brigade at Leven, Scotland under Major General Sosabowski. The Poles invented and developed many techniques and practices which had a profound effect on the development of Allied airborne forces. The brigade was initially raised for operations in Poland in support of the Polish Government in exile
10 October
1st Airlanding Brigade formed under Brigadier Hopkinson
1942
November
1st Parachute Brigade and other elements of 1st Airborne Division are deployed to North Africa. Units are in action between 12 and 29 November at Bone, Beja, Souk-el-Akra and Pont du Fahs
1943
July
Elements of the airborne forces are deployed in Operation Husky, the invasion of Sicily. Towards the end of the year 1st Airborne units are withdrawn to Britain to train for the invasion of North-west Europe
1944
January
Major General Urquhart takes command of 1st Airborne Division
June
A plan to land 1st Airborne near Caen as part of the Normandy campaign is abandoned due to the risk of high losses. Over the next two months at least a dozen proposed operations were abandoned either because they were unfeasible or because the advance to the Seine was so rapid that the planned objectives were overrun before the operation could be mounted
19–25 August
The battle and liberation of Paris
1 September
Eisenhower assumes command of all Allied forces in Europe, superseding Montgomery
2 September
Allied troops enter Belgium
3 September
British Second Army liberates Brussels
4 September
Montgomery is given control of 1st Allied Airborne Army and starts to formulate a plan to renew the offensive in North-west Europe
7 September
11th Armoured Division crosses the Albert Canal
10 September
Eisenhower accepts Montgomery’s ambitious plan for a massive airborne operation to seize the road from Neerpelt to Arnhem – Operation Market Garden
11 September
15th Scottish Division crosses into the Netherlands
16 September
Air strikes in support of Market Garden begin throughout the Arnhem–Nijmegen–Eindhoven–Grave areas
17 September
First lift of the British 1st Airborne Division lands at Arnhem as the American 101st and 82nd Airborne divisions land around Nijmegen and Eindhoven
18 September
The second lifts of the three airborne divisions arrive
19 September
Poor weather conditions in Britain prevent the deployment of the infantry battalions of 1st Polish Parachute Brigade
20 September
Nijmegen Bridge is captured by 504th Parachute Infantry Regiment
21 September
The infantry battalions of 1st Polish Parachute Brigade are dropped around Driel on the south side of the Lower Rhine. Arnhem Bridge is recovered by the Germans
24 September
Lieutenant General Horrocks’ XXX Corps reaches the Lower Rhine
25 September
Horrocks and Browning agree that Market Garden should be abandoned and 1st Airborne is withdrawn from Oosterbeek through the night
HISTORICAL BACKGROUND
1. North-west Europe, 1944. (Courtesy of Lloyd Clark, Arnhem)
The Normandy landings of 6 June 1944 opened a new front in the war against Nazi Germany. As a consequence of a thorough deception campaign, the Germans were taken completely by surprise, indeed for some weeks Hitler persisted in believing that the Normandy landings were no more than a deception and that the main Allied effort would be made at Calais. The initial landings were very successful and the Allied armies were firmly ensconced within days; however, the Germans reacted with incredible efficiency and the battle stalled at Caen, leading to a fierce struggle in the bocage of Normandy instead of a rapid breakout into the more open countryside of western France. Eventually the heavy losses in Normandy and the dramatic thrust of American armies from the Cotentin peninsula caused a collapse of the German defence, trapping a huge portion of the combat strength of German Army Group B at Falaise.
The loss of thousands of Wehrmacht and SS troops, and great quantities of equipment, destabilised German strategy, compromising their ability to react to US and British operations. This was not simply a matter of battlefield losses. In the months before the Normandy invasion British and American air strikes had demolished the transport infrastructure that the Germans required to move new formations to the Normandy front and to replenish the units that were already engaged. Allied commanders had expected a rather different schedule. Capturing Caen had been a much more difficult project than had been anticipated, and had held up operations to a considerable degree, but neither Montgomery, who was the senior commander on the ground, nor his superior, Eisenhower had envisaged a German collapse.
When Brussels fell to the British divisions of 21st Army Group (the parent group of Second Army), they had been in action continuously for almost exactly three months. Supply problems and exhaustion were now major factors and the campaign faltered. In addition to the challenges faced by the armies, there was also profound disagreement among the Allied commanders about the next step. Eisenhower took the view that the general strategy should be to pressure the enemy on a broad front. British historians have taken this to mean a front hundreds of miles long, from the channel to the south of France. This was not at all what he had in mind. As long as Patton and Devers were making good progress and destroying the enemy, Eisenhower was reluctant to bring their operations to a dead halt, but on the other hand, so long as the British and Canadian armies were making similar progress in the north, he was not eager to interrupt them in their pursuit of an enemy who, in July and August, was looking like it might collapse completely, allowing a rapid advance into Germany. Equally, he was aware that the logistical effort available was not up to the task of supporting all of the Allied armies at the rates of advance that had occured during July and August.
Two influential figures were unhappy about the situation. Montgomery and Patton both believed that the Germans were on the verge of a total strategic and tactical breakdown and that one axis of advance with all of the resources of the Allies firmly behind it would knock Germany out of the war much more quickly than a combination of advances. Naturally, each believed that they were the man for the job and that his force was better suited for a major strategic strike into Germany.
What was not in question was that some action was needed. If the Germans were reeling under the blows they had already received, the last thing that was wanted was to allow them any opportunity to recover. Both men had valid points, but on balance, Eisenhower decided that Montgomery should have priority over Patton and that he should mount a major new offensive which would carry Allied forces though the Netherlands, across the remaining geographical barriers facing the northern army group: the rivers of Waal, Maas and Rhine, and on into Germany. Montgomery’s forces would thus bypass the heavily fortified Siegfried Line, then move into the industrial heartland of Germany. In order to achieve this objective, Montgomery was given command of the three divisions of 1st Airborne Corps from the newly named 1st Airborne Army.
The Airborne Army had been formed partly as a means of avoiding unnecessary duplication of effort in the way of research and development, training and planning facilities, but chiefly to ensure the efficient use of the limited airlift capacity. It consisted of six divisions: British 1st Airborne, the American 82nd, 101st and 17th Airborne, the Scottish 52nd (Airportable) Division and the Polish Parachute Brigade. The 1st, 82nd and 101st divisions and the Polish Brigade would be available for the initial strike, with the 52nd standing by for delivery to the battlefield once Deelen airfield had been secured. The commanding officer of the Airborne Army was Lieutenant General Lewis Brereton, an American Army Air Force general, who had previously had command of the US 9th Air Force. The normal practice for joint American-British formations was to appoint an American officer as commander with a British officer as his deputy. That post was held by General Frederick Browning, known throughout the British Army as ‘Boy’ Browning. As Brereton’s deputy and commander of the 1st Airborne Corps, Browning would be the commander of the airborne element of the operation that Montgomery intended to launch to renew the campaign.
The operation, codenamed ‘Market Garden’, would involve placing three divisions of airborne troops – more than 30,000 men and hundreds of vehicles and artillery pieces – at several locations behind the German lines; in the case of British 1st Airborne and the Polish Brigade almost 62 miles (100km) beyond the front. Over the next 24 hours – or 48 hours at most – General Horrocks’ XXX Corps from General Dempsey’s Second Army would advance from Neerpelt with extensive close air support and batter their way along one road, linking up with elements of 82nd and 101st Airborne divisions who would have seized and held a chain of bridges up to and including the great road bridge at Nijmegen; from there XXX Corps would press on to Arnhem and then on towards Germany.
If everything went to plan, the war would be over by the end of 1944. Most, if not all, of Germany would have fallen to the Allies; an achievement which would have implications for the future relationship between the Western Allies and the Soviet Union. At best this was an optimistic view of the situation, but there was something of an undercurrent of wishful thinking which pervaded Allied planning and policy generally. The advance through France and Belgium had led to an assumption that the German Army was ready to crack and that one more great strategic victory would do the job; the collapse of the Wehrmacht and the SS, and the capture of the industrial regions of western Germany, would destroy whatever hope still existed among the German people and would bring about the final destruction of the Nazi’s domestic political credibility. However attractive this may have seemed to elements in the Allied High Command it was far from being a realistic appreciation of the political, economic, strategic and tactical realities of the day.
2. Elements of XXX Corps approaching the Meuse-Escaut Canal from the bridgehead at Neerpelt.


