Erhalten Sie Zugang zu diesem und mehr als 300000 Büchern ab EUR 5,99 monatlich.
- Herausgeber: Fox Chapel Publishing
- Kategorie: Lebensstil
- Sprache: Englisch
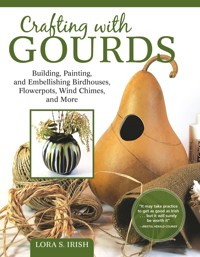
Transform ordinary gourds into extraordinary art! This complete artist's guide to gourd crafting will teach you an amazing array of techniques for creating unique and attractive décor. Legendary crafting artist Lora S. Irish explains all the basics from gourd selection and preparation to materials, supplies, and construction methods. Learn interesting ways to blow, dab, drip, and splatter paint to make spectacular effects. Discover how to add 3D texture and sculpt gourd art that is both visually and tangibly fascinating. Lora guides you through 14 step-by-step projects for making beautiful birdhouses, wind chimes, pitchers, flowerpots, and more.
Sie lesen das E-Book in den Legimi-Apps auf:
Seitenzahl: 128
Veröffentlichungsjahr: 2018
Das E-Book (TTS) können Sie hören im Abo „Legimi Premium” in Legimi-Apps auf:
Ähnliche


Acknowledgements
I wish to extend my deepest thanks to Chris Reggio, Tiffany Hill, Colleen Dorsey, and Wendy Reynolds for their excellent work in creation, development, and refinement of this manuscript. As an author, it is a wonderful experience to be working with such a well-skilled team.
© 2018 by Lora S. Irish and Fox Chapel Publishing Company, Inc., 903 Square Street, Mount Joy, PA 17552.
Crafting with Gourds is an original work, first published in 2018 by Fox Chapel Publishing Company, Inc. The patterns contained herein are copyrighted by the author. Readers may make copies of these patterns for personal use. The patterns themselves, however, are not to be duplicated for resale or distribution under any circumstances. Any such copying is a violation of copyright law.
Shutterstock photos: pages 8–9 gourds by KobchaiMa; page 22 brushes by Kostenko Maxim; page 25 painter’s tape by Mega Pixel; page 27 gloves by Looka; pages 46–47 paints by Angela Ostafichuk; pages 130–131 textiles by Marta Maziar.
ISBN 978-1-56523-960-9eISBN 978-1-60765-550-3
Library of Congress Cataloging-in-Publication Data
Names: Irish, Lora S., author.
Title: Crafting with gourds / Lora S. Irish.
Description: Mount Joy: Fox Chapel Publishing, [2018] | Includes index. |
Identifiers: LCCN 2018028217 (print) | LCCN 2018031682 (ebook) | ISBN
9781607655503 (ebook) | ISBN 9781565239609
Subjects: LCSH: Gourd craft.
Classification: LCC TT873.5 (ebook) | LCC TT873.5 .I75 2018 (print) | DDC 745.5—dc23
LC record available at https://lccn.loc.gov/2018028217
To learn more about the other great books from Fox Chapel Publishing, or to find a retailer near you, call toll-free 800-457-9112 or visit us at www.FoxChapelPublishing.com.
We are always looking for talented authors. To submit an idea, please send a brief inquiry to [email protected].
For a printable PDF of the patterns used in this book, please contact Fox Chapel Publishing at [email protected], stating the 9781565239609 and Crafting with Gourds of the book in the subject line.
Introduction
Gourds are beautiful, dynamic, organic items that are a joy to use in crafting. You can construct interesting and useful shapes with gourds and then paint and decorate them in unique and interesting ways. The projects that you will encounter in this book can be used as fully finished standalone pieces or as bold, bright backgrounds for your own patterns and designs. The techniques you will learn are so versatile that you can use gourds of any shape or size and then put those gourds to many uses—as flowerpots, soap dishes, birdhouses, decorations, or whatever else you can imagine.
You will be creatively manipulating color by using plastic straws, sea sponges, plastic netting, and old toothbrushes. You will be dripping color, dabbing color, splattering color, and sponging color into dynamic, free-flowing mixes. You will also learn how to add and control texture in your gourd art by working with air-dry modeling clay, acrylic sculpture paste, and collage using burlap, twine, and even newspaper.
So grab your stash of gourds, set out all your painting supplies, pull a chair up to your worktable, and get ready to have fun crafting with gourds.
There are no detailed step-by-step instructions for these little owls in this book, but by the time you have worked on the other projects, you will be ready to create them on your own using your new gourd art skills.
Contents
CHAPTER 1: GETTING STARTED
Thinking about Gourd Projects
Supplies
Gourd Preparation
Construction Skills
Special Skills
CHAPTER 2: SMOOTH PROJECTS
Wind Chime Construction
Dip Wind Chime
Drip Wind Chime
Drip Flowerpot
Dab Wind Chime
Dab Pitcher
Splatter Birdhouse
Blown Bird
Netting Bird
Cloisonné Birdhouse
CHAPTER 3: TEXTURED PROJECTS
Sculpture Paste Woolly Lamb
Sculpture Paste Starburst Birdhouse
Textile Birdhouse
Crochet Bowl
Newspaper Collage Bird
Ready to Fly
About the Author
CHAPTER 1
Getting Started
WORKING WITH GOURDS is not exactly the same as working with wood, pyrography, or any other craft, though a lot of the skills you already know from various crafts will certainly apply to gourd crafting. Because gourds contain mold and dust, they always need to be properly prepared before crafting begins. Once you have a gourd ready to go, there are many smart ways to build gourd art that go beyond just customizing a single gourd. This chapter will teach you all you need to know about getting your gourds ready for painting and crafting.
Thinking about Gourd Projects
Examine the Gourd
A few moments of preparation early on can save you hours of struggle later in your gourd project. Take time to check your gourd for both its best features and its problem areas. Remember that what may appear at first to be a major problem can often be turned to your advantage if you prepare in advance.
Feature
Solution
Uneven bottom
Better hanging than sitting
Pits and holes
Open with a knife and fill with sculpture paste
Scarring
Sand with 220-grit sandpaper
Nice, straight neck
Excellent for a birdhouse
Fat, round belly
Lots of room for a nest
Blotchy color
Use a primer
Open small holes and pits with a knife to create straight walls. This avoids trapping small air bubbles when you add sculpture paste (see here).
Plan the Structure
By planning first where you need to add hardware, holes, and accents to your project, you can determine exactly how much space you actually have for your artistic design. Here’s an example birdhouse plan including all its features. The decorative design will need to be customized to suit these features.
• Vent holes at top for air circulation
• Drainage holes at bottom
• Placement of perch/perch holes
• Added eye hook using wood filler
• Thinner neck tucks into the leaves of the branch
• Size and placement of the hole determines the kind of bird that will nest here
Plot the Design
A quick pencil sketch can help you plot your focus points, accent elements, and the overall shape of your design. With colored pencils, crayons, or gel pens, you can lay out the general color areas inside your pattern, too. It is far easier to make adjustments and changes on paper than it is when you are in the midst of painting.
• A bright focal area just below the nesting hole brings the eye to where there will be activity in the nest.
• A blue to blue-green wash background will intensify the yellows and oranges in the poppies.
• Small purple violets complement the orange of the poppy flowers, yet blend with the bluish background.
• Branches of three to five leaves will help the design curl around the sides of the gourd.
Supplies
Brushes
For most painting, you’ll need some kind of brush. The bristles of a brush determine how the brush can and should be used in a project. Stiff-bristled brushes are used to scrub the paint into the deep crevices of a piece, whereas very soft-bristled, flexible brushes hold large amounts of color and are used to flood an area with paint. Natural-haired brushes have a spring action that helps create thin, long, controllable line work. Below is a review of a few key kinds of brush bristle types. Brush shape is also relevant to painting—see here for more detail.
Extremely soft, thin bristles, whether natural or synthetic, are used to hold large amounts of color with each brushstroke. This type of bristle is most commonly found in mop brushes and is used to flood an area with thinned color.
Ox-hair blends, as shown in this deer-foot stippler brush, are a stiff, firm bristle that has little bend or spring. When applying color, the blended ox-hair bristles hold the shape of the brush’s profile.
Ox-hair brushes are created from goat or pig hair. They are strong and stiff, allowing you to scrub color into tight, deep crevices. Use an ox-hair brush when you want overall coverage of a color that will have no spaces with small, trapped air bubbles. These brushes are most commonly used for primer coats, full coverage coats, and oil stains.
Red synthetic bristles give you the flexibility of a natural-haired brush, similar to a red sable (see F), but without the high price. The flat shaders, rounds, and liners that use a red synthetic bristle are the mainstay of our brush kit, used to fill areas and create shaded strokes.
White synthetic bristles are softer and more flexible than red synthetic bristles, similar to a squirrel-hair bristle (see G). White synthetics, available in flat shader, round, and liner styles, create extra-smooth brushstrokes and are wonderful for wash techniques.
Red sables are natural bristles that carry a large amount of color. Sables have a natural spring, returning the brush to a fine point or fine edge as you push and then lift the brush off the project.
Squirrel-hair bristles are extra-soft, natural bristles that hold their shape and spring even with very hard use. This bristle type gives the greatest range of flexibility to your brushstroke work.
Regarding brush shape, there are many different brush shapes that each have different best uses. Here is a brief tour of seven different shapes you may want to use and that are used throughout this book.
Fan brushes are perfect for applying thinned wash coats and creating interesting texture strokes. The wide, curved edge disguises the beginning of the brushstrokes so that the color application easily blends into one even coating.
Mops can have either flat or curved leading edges. The three brushes pictured are all flat mops. Whether their bristles are synthetic or natural, these brushes have soft, springy hair that allows the brush to hold enormous quantities of color. As their name implies, mops are used to apply thinned wash coats of color.
Liners are used to create fine line details in your work. Smaller liners, numbered from the small #000 through the large #1, are often called fine liners, China liners, or China dolls, as they were originally designed to paint the fine eyelashes and eyebrows on ceramic doll faces. These sizes are usually ½" (1cm) long or shorter. Longer liners, shown middle, which begin at around 1" (2.5cm) long, are sized from #2 up to size #24. This style of brush has extra-long bristles for maximum paint capacity that come to an extra-sharp point. The #4 liner, shown far right in this photo, can create a finer line than the three left fine liners at far left, and that line can be over 12" (30.5cm) long per brushful of color.
Rounds, also called pointed rounds, give you the advantage of the fine point found in liners but with the addition of a wider body that has a higher paint capacity. This style of brush is used for full coverage and for specialty brushstrokes that create shaded petals, leaves, and calligraphy strokes. Sizes for rounds are not standardized and so may vary between manufacturers.
Flats, also called flat shaders, flat wash brushes, or brights, are flat brushes that are squared off. They can either be sized by the measurement of the brush at the top of the ferrule (the metal piece attaching the bristles to the handle) or given a numerical size. So it is possible to have two brushes, one marked as a ⅜" (1cm) flat and one marked as a #10 flat, that are actually the same size. This style of brush is excellent for smooth, even coverage that does not leave a ridge of paint along the sides of the stroke.
Slants, also called slant flats or angular flats, are flat brushes that have the leading brush edge cut at an angle. The slant allows you to carry as much color in the brush as you can with a standard flat shader while also providing a sharp, pointed leading edge for fine line work.
Filberts, also called filbert flats or filbert brights, are flat brushes that have a curved leading edge. This curve creates wonderful, fine feathering work and instant brushstroke petals.
Painting and Coloring Media
Any painting media that can be applied to canvas or paper can be used on your gourd projects, including artist-quality acrylic paints, craft-quality acrylic paints, oil paints, watercolors, colored pencils, watercolor pencils, pastels, and even gel pens. Here is a quick look at the media that you can choose to use on your gourds.
Artist-Quality Colored Pencils
Pictured below are artist-quality, wax-based colored pencils. Colored pencils are available individually, in assorted sets from 12 to 150, and even in pre-selected color ranges for skin tones or shading tones. Student and hobby-quality colored pencils are made with pigment suspended in a chalk base, which makes the pencils hard and opaque. Artist-quality pencils use a wax base, making the coloring semi-transparent, and this allows the pencil color to be applied evenly across the work. Applied in thin layers, artist-quality colored pencils are easy to mix and match to create new color tones.
Artist-Quality Watercolor Pencils
Watercolor pencils are water-soluble. After the layers of colored pencil work are completed, a damp, blotted, soft-bristled brush is used to wet the colors and blend them. Watercolor pencils can also be used over artist-quality colored pencils to add shading and enrich your tonal work. You can use watercolor pencils over a white matte primer to create a transparent wash effect or add shading layers of watercolor pencils over your craft and acrylic paintings to create more gradual, even blends in the design.
Artist-Quality Colored Pencils
Artist-Quality Watercolor Pencils
Watercolors
Available in tube or cake form, these paints contain a chemical or mineral pigment that is suspended in a water-soluble binder such as gum arabic. Simply add water to create beautiful color washes. Watercolors can be blended on the gourd surface after application with a damp brush. Watercolors in gourd art work best over a white matte primer base to keep your colors crisp and strong. Used directly on your gourd surface, your painting will take on a muted or sepia-toned look, as the beige-tan coloring of the gourd shows through the transparency of the watercolors.
Watercolors
Craft and Decorative Acrylic Paints
Available at most hobby and craft stores, this type of painting media is very affordable for any crafter. Craft and decorative acrylics tend to be opaque, giving you solid coverage. Available in a wide variety of hues, shades, and tones, you seldom have to mix your own specific colors. Color names will vary between manufacturers. We will use acrylic craft paints throughout this book.
Artist-Quality Acrylic Paints
Fine, artist-quality acrylics often are transparent or semi-transparent colors, unlike craft-quality paints, which are often opaque, and you may need a primer coat on your gourd (see here) before you begin your color application. This type of paint is often sold under the chemical names or chemical combinations used to create that color, such as Cadmium Red Medium or Titanium Dioxide White.
Oil Paints
Artist-quality oil paints contain ground chemicals and minerals suspended in an oil base such as safflower oil or linseed oil. Because of the oil base, these colors dry very slowly, allowing plenty of time for blending and smooth color changes.
Oil Pastels
Oil pastels are ground pigments that are combined with an oil base and then compressed into easy-tohandle sticks. They are available in sets with a full range of colors. You will find them in the drawing aisle of your favorite art supply store.
Gel Pens and Permanent Markers
Gel pens and permanent markers are perfect for creating even, fine lines in a design, especially when you are uncomfortable or inexperienced with a liner brush. If you want to add a personal touch with handwritten names and dates to a project, you can use a gel pen or permanent marker in the exact same manner as you would an ink pen on paper.


