Erhalten Sie Zugang zu diesem und mehr als 300000 Büchern ab EUR 5,99 monatlich.
- Herausgeber: Fox Chapel Publishing
- Kategorie: Lebensstil
- Sprache: Englisch
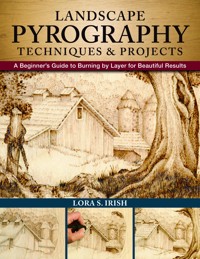
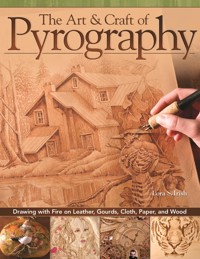
Learning pyrography has never been easier with this comprehensive guide. Nationally recognized artist and pyrographer Lora S. Irish reveals her easy-to-learn methods for working in layers to obtain stunning results. Lora introduces you to many different aspects of burning, and guides you through small practice patterns so you can discover and apply all the techniques. Learn about pen tips, temperature settings, fill patterns, and everything else you need to burn interesting, textured, lifelike landscapes. Inside Landscape Pyrography Techniques & Projects you'll find: • Complete guide to supplies, burning units, pen tips, pyrography media, safety, and more. • How to create practice boards for pen tip strokes, texture fills, landscape features, and architectural elements. • Four complete practice projects for a wide range of pyro techniques and effects. • Step-by-step project for a rustic Mail Pouch Tobacco-style barn. • Dozens of ready-to-use patterns for landscape scenes, with finished examples.
Sie lesen das E-Book in den Legimi-Apps auf:
Seitenzahl: 145
Veröffentlichungsjahr: 2019
Das E-Book (TTS) können Sie hören im Abo „Legimi Premium” in Legimi-Apps auf:
Ähnliche


LANDSCAPE
PYROGRAPHY
TECHNIQUES & PROJECTS
A Beginner’s Guide to Burning by Layer for Beautiful Results
LORA S. IRISH
ACKNOWLEDGMENTS
I wish to extend my deepest thanks to Chris Reggio, Colleen Dorsey, and Wendy Reynolds for their excellent work in the creation, development, and refinement of this manuscript. As an author, it is a wonderful experience to be working with such a well-skilled team.
© 2018 by Lora S. Irish and Fox Chapel Publishing Company, Inc., 903 Square Street, Mount Joy, PA 17552.
Landscape Pyrography Techniques & Projects is an original work, first published in 2018 by Fox Chapel Publishing Company, Inc. The patterns contained herein are copyrighted by the author. Readers may make copies of these patterns for personal use. The patterns themselves, however, are not to be duplicated for resale or distribution under any circumstances. Any such copying is a violation of copyright law.
ISBN 978-1-56523-931-9
The Cataloging-in-Publication Data is on file with the Library of Congress.
To learn more about the other great books from Fox Chapel Publishing, or to find a retailer near you, call toll-free 800-457-9112 or visit us at www.FoxChapelPublishing.com.
We are always looking for talented authors. To submit an idea, please send a brief inquiry to [email protected].
Printed in Singapore
First printing
Because working with woodburning tools and other materials inherently includes the risk of injury and damage, this book cannot guarantee that creating the projects in this book is safe for everyone. For this reason, this book is sold without warranties or guarantees of any kind, expressed or implied, and the publisher and the author disclaim any liability for any injuries, losses, or damages caused in any way by the content of this book or the reader’s use of the tools needed to complete the projects presented here. The publisher and the author urge all readers to thoroughly review each project and to understand the use of all tools before beginning any project.
INTRODUCTION
Pyrography is the art of creating simple line designs, highly detailed renderings, and finely shaded and shadowed drawings using a hot-tipped pen. As the electrically heated pen is pulled across the surface of the chosen medium, the tip literally burns the medium to create varying tonal value lines. The most common and familiar medium used in pyrography is wood, which is where the oft-used term “woodburning” comes from, although pyrography is done on many other media as well, such as paper, leather, and gourds.
The pattern of lines and shading strokes that you use in your pyrography work determines the art style of the finished piece. Any pattern can be worked in any art style or in a combination of styles. In this book, you will encounter many different styles of burning and be able to try small practice patterns for each style so you can discover which styles you prefer. You’ll learn about pen tips, temperature settings, fill patterns, and everything else you need to know to set yourself up for success.
Everything you learn will enable you to burn interesting, textured, lifelike landscapes with your pyrography tools and chosen media. You’ll be amazed at the variety and realism of what you can create. So without further ado, dive in and start burning!
CONTENTS
Introduction
Chapter 1Basic Supplies and Techniques
Chapter 2All About Pen Tips
Chapter 3Creating Essential Practice Boards
Chapter 4Structure, Texture, and Weather Practice Boards
Chapter 5Practice Projects
After the Rain
Climbing Tree
Dark Stone Barn
Barbed Wire Barn
Chapter 6Capstone Project: Advertising Barn
Chapter 7Patterns and Inspiration
About the Author
Safety Resources
Index
CHAPTER1
Basic Supplies and Techniques
A pyrography project is created using four basic elements: the burning unit, the pen tips, the medium on which you are working, and the pattern or design you will burn. There is also a host of important basic techniques, finishes, and tricks that you’ll want to know to maximize your skills and ensure your finished piece turns out just how you want it. We’ll cover pen tips in detail in a later chapter, but for now, it’s time to learn about all the basic supplies and techniques, starting with burning units.
Burning Units
There are three styles of burning units: one-temperature tools, rheostat-controlled tools, and variable-temperature tools. Which one you choose depends on both the depth of your interest in the craft and your budget.
ONE-TEMPERATURE UNITS
One-temperature burning units are very similar to soldering irons. The solid interchangeable tips are made from brass and screw into the front end of the burning unit. When this tool is plugged into the wall outlet, it heats to a single temperature: high. The most commonly used solid brass tip is called a universal tip. This is the tip shown on the burning unit below, and can be used for both fine line work and shading work. The other common solid tips that are available for this type of burning unit are the calligraphy tip, used for lettering, and the flow tip, used for large area shading.
A full range of tonal values can be burned using a one-temperature tool. Burn pale tones as the tool tip begins to heat; save the darkest tones for when the tool tip has reached its full heat capacity.
RHEOSTAT TOOLS
A rheostat burning unit has a rheostat on the power cord that allows you to fully control the temperature of the pen tip. A rheostat burning unit uses the same interchangeable brass tips as a one-temperature tool. The tonal values that you can see in the practice board below are worked by controlling the pressure of the tip on the wood, the speed of the stroke, and the density of the lines burned, and by adjusting the rheostat temperature setting.
The color tones that you burn using this type of burning unit are controlled by the texture pattern and speed at which you burn. Moving the tool slowly will create a black/brown line. If you speed up your movement, the line color will become paler.
Here you can see an inexpensive beginner’s pen, along with its attached rheostat for regulating the temperature.
VARIABLE-TEMPERATURE UNITS
Variable-temperature units have a thermostat base that can be set in a wide temperature range, from very cool at setting number 1 to extremely hot at setting number 10. Because this type of unit has such a wide range of temperatures, you will need to discover which settings are best for your projects. You can accurately set the tip temperature to easily reproduce consistent tonal values in your work. This high level of control ensures that the pen tip remains at a constant temperature as you work.
I use both the Colwood Detailer unit and the Optima 1 Dual unit on a regular basis, and highly recommend either unit as your mainstay burning unit. Both systems provide a wide, reliable temperature range. I tend to use only a small portion of their potential power, setting my temperature settings at 2-3 for pale tones, 3-4 for medium tones, and 5-6 for the darkest tones.
The Optima 1 Dual unit has a dual-pen system that allows you to have two burning tips ready for work at all times. A simple toggle switch lets you move from one pen to the next quickly. The pens for this unit have foam grips, which dramatically reduce the heat you feel during a long burning session. The temperature range of the thermostat is excellent and will give you total control over your tonal values.
The Colwood Detailer unit, with its single pen, has a wide range of temperature settings. Changing fixed-tip pens or changing tips on the interchangeable-tip pens is quick and easy. The temperature dial system responds quickly for fast tonal value changes. This particular unit can reach very hot temperatures; creating extreme black tones is simply a matter of turning up the heat. The cork handles are very comfortable and dramatically reduce the heat transfer from the tip to your hand.
Optima 1 Dual burning unit
Colwood Detailer burning unit
Cleaning Your Pen Tips
The best-burned strokes are made with a clean, bright tip. As you burn, the tips of your pens will begin to collect residue from the wood sap and carbon buildup from the burned wood. The tips can become so coated with carbon that they take on a black, crusted finish. That black carbon can even be transferred to your project and will appear as long, thin, dark gray streaks in the work. It also can cause your tip to lose heat or create uneven distribution of the heat to your tip.
I use two methods for cleaning my pen tips: emery cloth, and a woodcarving strop with aluminum or red oxide rouging compound. I also clean my tips frequently, long before the carbon buildup can become too intense. Before beginning to clean a pen tip, always unplug the burning unit and allow the pen to fully cool. A hot pen tip can burn both emery cloth and leather strops.
600-grit or finer emery cloth, which can be purchased at your local hardware store, can be used to clean badly encrusted tips. Fold the emery cloth to a size small enough to secure it with your fingers. Gently pull the tip of the pen over the cloth. Use as little pressure as possible as you clean the tip, to avoid distorting or bending the tip.
A leather or synthetic woodcarving strop, used to sharpen woodcarving tools, makes a wonderful cleaning board for any pen tip. Prepare the strop with a coating of either aluminum oxide powder or any fine-grit rouging compound. Pull the tip across the strop, using gentle pressure, until the tip is clean and bright.
After cleaning your pen tip using one of these methods, wipe it and the pen shaft with a clean, dry cloth to remove any remaining carbon particles.
Cleaning the carbon buildup from your pen tips allows you to create clean, crisp burned lines.
Burning Surfaces
Any natural surface can be used for pyrography, including wood, gourds, paper-mache, cotton and linen cloth, watercolor paper, and vegetable-tanned leather. Avoid any material that has been chemically treated or painted, because the high temperatures of the tool tips will release the chemical fumes of these materials during the burning process.
WOOD
Basswood and poplar are favorite woods for pyrographers. Both species have finely packed wood grain and a naturally pale white coloration, and both are commonly available in 1/8" (3mm) or thicker plywood sheets. The natural color of wood affects the color ranges that you will be able to see in your work. Naturally pale basswood, poplar, and birch will show a very wide range of pale-toned burns. Dark African mahogany and black walnut will not show burning until you reach mid-toned or dark-toned burns.
VEGETABLE-TANNED LEATHER
Vegetable-tanned, non-dyed leather is a favorite burning medium. Pyrography leather is available in large pieces, precut kits, and manufactured forms such as purses, book covers, and wallets. Leather offers the pyrographer a world of three-dimensional possibilities.
Leather comes in a variety of weights, from very lightweight 1-ounce leather, which is approximately 1/64" (0.4mm) thick, to 8-ounce leather at 1/8" (3mm) thick, and even heavier belt-weight leather that can be as thick as 1/4" (6mm).
Leather is also available in pre-dyed colors and suede textures, neither of which are recommended for burning: the chemicals used to create dyed leathers can produce toxic fumes during the burning process, and textured suede does not provide a smooth, uniform surface for clean, clear burned lines.
In this burning, worked on 8-ounce vegetable-tanned leather, the landscape structures are used as a pale background scene to provide the setting for an old truck and car.
GOURDS
Dried craft gourds make wonderful surfaces for your pyrography projects. Dried gourds, with their densely packed, woodlike fibers, provide an artist with interesting shapes for their pattern decoration. Easily cut with a craft knife or bench knife, a gourd can become a bowl, sand candle cup, vase, lamp, or, of course, delightful birdhouse. Use a dust mask when cleaning and cutting any dried craft gourd, because gourds often have fine powder residue surrounding the inner seed pod that can cause both skin and lung irritation.
ARTIST-QUALITY PAPERS
Artists use many styles of paper for their work in watercolors, marker illustration, pastels, and hand-pulled prints. The heavyweight, high-quality papers used for these arts are suitable for any pyrography pattern. You can find these papers with anything from a very smooth surface to a deeply toothed (or pebbly) texture. For pyrography, a smooth or lightly textured surface works best, since the pebbling can distort your lines as you burn. Paper is an interesting pyrography medium because you can easily color your designs with colored pencils, pastels, inks, and watercolors when you have finished burning.
Medium-textured, 140-pound watercolor paper is an inexpensive and extremely versatile medium for pyrography.
PAPER-MACHE AND CHIPBOARD
Both chipboard and paper-mache are made from shredded paper pulp. The pulp can be pressed into strong, flat sheets called chipboard or pressed into a mold to create three-dimensional shapes. Undyed chipboard is available in a natural medium gray-beige tone, which limits your tonal value range in the pale value areas. You can also purchase chipboard that has a polished, white paper coating.
Transferring Patterns
Two products that you can use to transfer a design to your work surface are carbon paper and graphite paper, which are both types of transfer paper.
Lay transfer paper under your paper pattern so that the transfer side is against your work surface. Then start tracing the paper pattern with a pencil or pen. As you trace, the transfer paper will deposit a fine line on your work surface. Any transfer paper should be used carefully, as the transfer lines cannot be easily removed from your work surface after the burning is complete. I tend to use graphite paper most often because of its pale gray coloring, especially on gourds, paper-mache, and darker woods.
You can also create your own homemade transfer paper. Blacken the back of a pattern paper with a soft pencil, covering the back completely. Place the pattern onto your work surface and trace over the pattern lines just as you would with real transfer paper. This will leave a fine line of pencil graphite on your work surface. Pencil rubbing tracings leave extremely fine, thin lines, which are accurate to your tracing, easy to follow, and easy to clean up with a white artist eraser after burning.
Pencil rubbing pattern transfer.
Graphite paper pattern transfer.
Carbon paper pattern transfer.
Safety
Before beginning any pyrography project or practice, you must be familiar with a few simple safety guidelines.
1. Your project medium should be an untreated, unpainted, and unfinished natural surface. Paints, polyurethane sealers, varnishes, and chemicals used in treating wood can release toxic fumes during the burning process.
2. Search online to double-check that the medium you will be burning does not have any toxic properties. There are several excellent databases available. For some suggestions, see page 206.
3. Work in a well-ventilated area. A small fan placed on your table can move the smoke and fumes away from your face. Whenever possible, work near an open window.
4. Avoid placing your project in your lap while burning. This places your face directly above the fumes, increasing your chances of inhaling the smoke.
5. Unplug your burning unit from the wall socket whenever you are not working. A moment of forgetfulness and an unattended hot pen tip can cause a fire.
6. While working, set your pens either on the pen stand provided by the manufacturer or on a ceramic tile to protect your work surface.
Finishing Sealers
The lines and shading that you work with your burning tools do not require a finishing sealer. They are permanently set into the work surface. However, your work surface may need a finishing coat to seal the project from dirt, to give the completed project a shine, or to protect any paint or pencil coloring you add to your burning.
Cotton cloth and paper are usually not sealed after the work is completed. Vegetable-tanned leather may need a waterproof coating of oil added. Wood often needs a finishing coat of spray sealer, varnish, or oil finish.
Polyurethane and acrylic spray sealers are readily available and easy to use. After any painting steps are completely dry, apply two to three light coats, allowing each coat to dry thoroughly. This type of sealer coat comes in matte, semi-matte, and gloss sheens and does not change the natural color of your wood.
An oil finish, such as tung oil, Danish oil, or a half-and-half mix of turpentine and linseed oil, gives a soft sheen to your work. Apply oils following the manufacturer’s directions. Dispose of any oil-coated rags or paper towels only after submerging them in soapy water—oily rags are a fire hazard. Oil finishes darken the tonal value of the wood, and so will change or darken your pyrography work.
Brush-on polyurethane and varnishes are also available for your pyrography project at your local hardware store. Follow the manufacturer’s directions and allow ample time between coats for thorough drying. Polyurethane does not change the natural coloring of your wood and gives a very durable long-term finish. Varnishes, however, can give the wood a golden-yellow cast. Do a small test sample on a scrap board to check the final varnish coloring. Like polyurethane, varnishes give a strong, lasting protective coating to your work.
“Grandpa’s Pride,” worked on a 12" (30cm) square birch plywood board and finished with a polyurethane spray semi-gloss sealer.


