Erhalten Sie Zugang zu diesem und mehr als 300000 Büchern ab EUR 5,99 monatlich.
- Herausgeber: Spellmount
- Kategorie: Geisteswissenschaft
- Sprache: Englisch
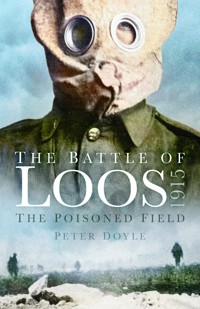
Through the first year of the First World War, Allied strategy had relied upon a series of small-scale assaults, which in reality achieved little or no ground gained. The Battle of Loos was to be different. Kitchener's Army was deployed in strength for the first time and an ambitious plan aimed to take ground over a 20-mile front. However, the battlefield was not the Allies' ideal site and the battle plans did not account for the lack of ammunition and artillery. It was the attempt to overcome some of these shortcomings that would put this battle firmly in the history books, as the British deployed poison gas for the first time, hoping to confuse and overwhelm the German positions. With facts and stats that explore both sides of the conflict, as well as the innovations brought to this battle, The Battle of Loos, 1915 analyses the key strategies at play, studies the lasting legacy of this battle on the rest of the war and explores the myth of the Footballer of Loos – an iconic image of the First World War to this day.
Sie lesen das E-Book in den Legimi-Apps auf:
Seitenzahl: 167
Veröffentlichungsjahr: 2012
Das E-Book (TTS) können Sie hören im Abo „Legimi Premium” in Legimi-Apps auf:
Ähnliche
For Kitchener’s volunteers
Front cover illustrations: British ‘P’ helmet; and men of the 47th Division.
First published 2012 as Loos 1915: Battle Story
This paperback edition first published 2025
The History Press
97 St George’s Place, Cheltenham,
Gloucestershire, GL50 3QB
www.thehistorypress.co.uk
© The History Press, 2012, 2025
The right of Peter Doyle to be identified as the Author of this work has been asserted in accordance with the Copyright, Designs and Patents Act 1988.
All rights reserved. No part of this book may be reprinted or reproduced or utilised in any form or by any electronic, mechanical or other means, now known or hereafter invented, including photocopying and recording, or in any information storage or retrieval system, without the permission in writing from the Publishers.
British Library Cataloguing in Publication Data.
A catalogue record for this book is available from the British Library.
ISBN 978 0 75248 369 6
Typesetting and origination by The History Press
Printed and bound in Great Britain by TJ Books, Padstow, Cornwall
eBook converted by Geethik Technologies
The History Press proudly supports
www.treesforlife.org.uk
EU Authorised Representative: Easy Access System Europe
Mustamäe tee 50, 10621 Tallinn, Estonia
Contents
Acknowledgements
List of Illustrations
Introduction
Timeline
Historical Background
The Armies
The British Army
The Imperial German Army
The Days Before Battle
The Battlefield: What Actually Happened?
25 September 1915: IV Corps
25 September 1915: I Corps
24–25 September 1915: Movement of XI Corps
26 September 1915: The Crucial Day
After the Battle
The Legacy
Orders of Battle
Further Reading
Acknowledgements
In attempting to write a readable introduction to the subject, I owe a debt to those authors who have endeavoured before me; I am particularly grateful for the rich legacy left by Sir James Edmonds’ remarkably lucid official account. I am also grateful for contemporary accounts written by authors who served: Patrick MacGill in The Great Push (1915); Ian Hay in The First Hundred Thousand (1915); and James Norman Hall in Kitchener’s Mob (1916). I thank Nigel Wilkinson, of the London Irish Rifles, for his hospitality and the chance to examine the football of Loos, and for permission to use images of the London Irish; Paul Reed for his support; and Paul Evans for his companionship on a damp day on the battlefield. Julie and James are my greatest support. Thanks also to Jo de Vries for her enthusiastic interest. Other than those I’ve taken or that are from my collection, the illustrations have been gathered from the pictorial publications of the day. Particularly important are The War Illustrated (Amalgamated Press), The Illustrated War News and The Manchester Guardian History of the War. I am also grateful for access to the free online resources of the Great War Picture Archive and the Library of Congress. The Loos battlefield is still strangely disturbing, even today. Industry and battle scarred, the clouds hang heavily over this part of French Flanders, often ignored by most who travel to the modern city of Lens or on to Arras. A pause here will repay the curious.
List of Illustrations
1. The Belgian city of Ypres under bombardment, 1914.
2. The Ypres Salient in the summer of 1915.
3. Map of the Allied front showing the Noyon Salient.
4. Sketch map of Second Ypres, 1915.
5. General Joseph Joffre.
6. Field Marshal Lord Kitchener.
7. The British 18-pounder field gun.
8. The British ‘Gor Blimey’ cap.
9. A British second lieutenant of the Manchester Regiment.
10. A Scottish sergeant of the Seaforth Highlanders.
11. The Short, magazine, Lee-Enfield rifle (SMLE).
12. The British ‘cricket-ball’ grenade.
13. The British 1908 pattern webbing equipment set.
14. Field Marshal Sir John French.
15. General Sir Douglas Haig.
16. German soldier, 1915.
17. German officers in a communication trench, 1915.
18. The 1915 pattern Pickelhaube.
19. German Landsturm soldier.
20. General Bertram Sixt von Armin.
21. The post-industrial landscape of the Loos battlefield.
22. Map of the Western Front.
23. ‘Tower Bridge’.
24. ‘Big’ and ‘Little Willie’.
25. Shrapnel shells.
26. British gas cylinders in position.
27. The nightmarish British ‘P’ tube helmet.
28. German medic equipped with respirator.
29. Map of the Loos battlefield.
30. Topographic map of the IV Corps front.
31. Men of the 47th Division advancing.
32. Soldier of the London Irish.
33. The Loos football.
34. Attack of the Scots of the 15th Division.
35. Piper Laidlaw VC.
36. Attack of the 1st Division.
37. Topographic map of the I Corps front.
38. The quarries of Hulluch.
39. Uncut wire of the Loos defences.
40. View of the defensive position of the Hohenzollern Redoubt.
41. Grenades.
42. British grenade attack.
43. Advance of the line at the evening of 25 September.
44. The quarries in front of Hulluch.
45. ‘Tower Bridge’, Puits 14 bis and Hill 70.
46. Soldier from the 2nd Battalion, the Welsh Regiment.
47. The Leichenfeld von Loos.
48. The ruins of Loos.
49. The grave of Lt John Kipling.
50. Anglo-French gains in Artois.
51. Cheerful casualties.
52. The ‘Loos Trenches’, Blackpool.
53. The killing fields of the Champagne.
54. British wounded awaiting evacuation.
55. ‘The Man of Loos’.
Introduction
‘You bloody cowards, are you leaving me to go alone?’… ‘Not cowards, sir. Willing enough. But they’re all f—ing dead.’
Lt Robert Graves, Goodbye to All That
The Battle of Loos (pronounced ‘Loss’), fought in September–October 1915, is still a relatively unstudied corner of the Great War. For some time, the focus of British military historians and family genealogists has been on two sectors of the Western Front: the Ypres Salient of 1915–18 (likened to Britain’s Verdun and the scene of at least four major battles) and the Somme battlefields of 1916. Today, thousands of people make the Channel crossing to visit these two regions, the people of Flanders and Picardy there to welcome them. Yet, between these two war-torn regions sits a less well-visited area of British and Commonwealth endeavour, a line of trenches that stretched from the southern shoulder of the Ypres Salient to Vimy Ridge. Flat, dreary and quite often rain sodden, visitors usually hurry through this area of French Flanders on their way to the delightful city of Arras, or farther onwards to the rolling chalk downlands of the Somme. Yet it was in this sector that the major British offensive efforts on the Western Front of 1915 were expended, and within which many tens of thousands of British lives were lost. Here too were the brickstacks of Cuincy, the canal at La Bassée, the village of Laventie immortalised in so many post-war accounts; here also were fought the battles of Neuve Chapelle, Aubers Ridge, Festubert and Loos. Commonwealth War Graves Commission cemeteries dot this landscape in testimony to the sacrifices made there. Though ill-fated, these 1915 campaigns would nonetheless shape British military thinking, and would cause great changes on the Home Front – yet they are still vaguely formed in the mind of the average battlefield visitor.
Why so? Much folklore about the Great War is focused upon the events of 1916–17 and the ‘lost generation’, the flower of British youth, swept aside on the battlefields of the Somme. Most modern historians contest this image, citing dry statistics to demonstrate that just over 11 per cent of those who joined died, but despite this there is evidence to suggest that loss became commonplace and bereavement a matter of fact. Fighting a rear-guard action against what could be termed the ‘lost generationists’, many historians are also committed to turning around that other juggernaut, the concept of ‘Lions led by Donkeys’, the incompetence of British ‘Chateau Generals’ all too willing to send their men ‘up the line to death’. Founded in post-war disenchantment, this popular image of British incompetent generalship, of ‘butchers and bunglers’, first gained momentum in the 1960s, following the publication of Alan Clark’s The Donkeys (1961), a controversial book that lambasted the efforts of 1915 and that was to inspire the Joan Littlewood stage production Oh, What a Lovely War! (1963). Roundly criticised and mostly discredited, the idea that all British generals were incompetent nevertheless finds currency today, with the television comedy Blackadder Goes Forth reviving the theme in 1989. There are signs that the juggernaut is starting to turn, however, and that the main focus of all of this ire, General Sir Douglas Haig, is being rehabilitated from ignorant ‘donkey’ to intelligent ‘lion’.
In the 1980s, several historians developed a concept of the British Army in the Great War that became known as the ‘learning curve’. The main focus was the conduct of the British Army during the closing stages of the war, the battles of the Hundred Days that commenced with the offensive at Amiens on 8 August 1918 and which were to drive the Germans back to their starting positions of September 1914. If the generals, Haig in particular, were so stupid, the men so poorly led, how could they achieve so much? The doctrine of the learning curve places the experience gained by the British offensives of 1915–17 on a parabolic rise that leads to the victory of 1918. Instead of the ‘futility’ expressed by the ‘Donkeys’, we now have the hope that the lives lost would amount to a meaningful purpose. This view was certainly sincerely held by many veterans, now all gone. Recent scholarship suggests the learning curve was, however, a somewhat sinuous curve, with many setbacks interspersed with advances in tactics and technology – referred to as revolutions in military affairs (or RMAs); the Battle of Loos marks one of the most important arcs in the early parts of the curve.
Loos has been the subject of several books over the last ten years, despite having been largely overlooked and even ignored in the wake of the publication of Alan Clark’s polemic. The first attempt at a study was Philip Warner’s collection of veterans’ memories, widely criticised for not offering a view on the battle, but a valuable collection of memories nonetheless. More recently, three new studies of the battle have examined its progress in minute detail, and in particular the performance of the various divisions pitted against the German defences on 25–26 September and on its succeeding days. These books have marked in sometimes bewildering detail the movement of corps, divisions, brigades and battalions across the battlefield. For readers requiring an insight into such detail, I commend Brigadier General Sir James Edmonds’ original Official History of 1928, which is written with lucidity and insight; and Nick Lloyd’s careful step-by-step analysis of the major components of the battle, Loos 1915, published eighty years later in 2008. The purpose of the present book, however, is to provide a brief introduction based on the key issues, an introductory narrative to the battle. As such, I have attempted to keep the discussion of the separate units, corps, divisions, brigades and battalions as simple as possible.
What emerges from any study of Loos is that it was fought against the prevailing opinion of the British generals, against the view that the British Army should stand on the defensive on the Western Front until its citizen army was trained and ready for deployment to meet the Germans. However, at a time of growing crisis in the world war, with the Russian armies in Poland on the verge of collapse, it was also fought in support of the French and their desire to break the deadlock of positional warfare, following Joffre and Foch in their doctrine of the offensive. Similar circumstances would also prevail in the offensives fought by the British on the Somme in 1916 and at Arras in 1917. Loos was also fought against the concept of ‘good ground’. In history, the lessons of fighting against instead of with terrain (comprising geology, topography, routes to the front and weather conditions) are clear; at Loos, these factors had a major role to play in the outcome of the battle. All these aspects are discussed in this book.
Timeline
1915
10 March
Battle of Neuve Chapelle opens
13 March
Battle of Neuve Chapelle halted
22 April
Second Battle of Ypres opens
9 May
Battle of Aubers Ridge
19 May
Battle of Festubert
25 May
Second Battle of Ypres ends
20 September
XI Corps form up in reserve
21 September
Preliminary bombardment opens
25 September
First day of the Battle of Loos
25 September
French Tenth Army attacks south of Lens, opening of the Third Battle of Artois
25 September
Third Battle of the Champagne opens
25 September
21st and 24th divisions (XI Corps) moved up
26 September
Second day of the Battle of Loos; attack of the XI Corps fails
27 September
German counter-attack at The Dump and Hohenzollern Redoubt
28 September
Attack on Hill 70 and Chalk Pit Copse
28 September
High watermark of Third Artois Offensive
29 September
General Haig writes to Lord Kitchener to complain about French’s handling of the reserves
3 October
Hohenzollern Redoubt retaken
13 October
Last actions of the Battle of Loos
4 November
End of the Battle of the Champagne
6 November
Official end of the Battle of Loos
10 December
General Haig replaces Field Marshal French as British commander-in-chief
Historical Background
The ill-fated Loos offensive was undertaken directly against the opinion of Haig, the man who, as Commander of the First Army, had to carry it out.
Sir Basil Liddell-Hart, 1930
In 1915, the Entente Powers were on the back foot; the Germans were still in the ascendancy, fighting a holding war of position in the west, while forcing the Russians back in the east. In the opening days of the war, the Schlieffen Plan had been intended to knock France out, but the swinging door of the German Army had met the door jamb of the Marne, just in front of Paris. From this point on, the war was condemned to be a long engagement, and, as Kitchener would predict, it would last at least three years. On the Marne it was the French commander-in-chief, Joseph Joffre, who was to recall all reservists, famously ferried from Paris to the front in taxicabs by the order of General Gallieni. The French were to be joined by the British Expeditionary Force (BEF) in holding the enemy at a most critical point in the campaign. From this point on, and until the end of 1914, the battles that would become known as the ‘Race to the Sea’ would witness the two sides trying to turn the flank of the other in the traditional cockpit of Europe – Flanders, the flat manoeuvring ground of European armies for centuries. This distinctive region of northern Europe stretches from the sand-dune-stretched littoral of France and Belgium to the chalk upland of Artois, and has seen warfare since the Middle Ages. Journeying to the south, the landscape of this flat and open region passes from the Belgian clay plain to the dowdy industrial chalk flats of French Flanders.
1. The Belgian city of Ypres under bombardment, 1914.
For the BEF, placed between what remained of the Belgian armies (reinforced by the French) at the coast of Flanders and the French armies in Artois, Flanders would become the place of battle for four years of a hard war. Ypres – now the Flemish-speaking town of Ieper – would be the centre of British endeavour, with battles there from late 1914 right the way through to the end of the war in 1918. The First Battle of Ypres, in November–December 1914, was to form part of the ‘Race to the Sea’, with British regular troops (and some Territorials) holding on tenaciously in the face of a determined German Army. Here there would be waterlogged ground, hasty scrapes in the earth and the birth of the legend of the old BEF and its fire rate of fifteen rounds a minute from Lee-Enfield rifles. With the German line held by the close of the year, the early part of 1915 saw the development of the tradition of trench warfare that has come to represent the Great War to so many people. Grimly holding on, the British toiled in and around the clay plain of Ypres, while the Germans set about holding the high ground that faced the town on three sides, part of the Ypres Salient.
2. The Ypres Salient in the summer of 1915.
This bulge, following the low rising hills to the east of the town, defined an arc with a long axis running approximately north–south, facing east–west. The salient had been born in November 1914, when the German attacks from Armentières to Nieuport ran out of steam. Running around the hills, the German line, and British line following it, passed southwards over its saddle back and down to the damp valley of the Lys and on to Armentières. Farther south, the line passed through French Flanders to the canal of La Bassée, in that flat tract of land between the Lys and the Scarpe rivers. South from this the line was in French hands and ran southwards to Noyon, before tracking westwards to Verdun and the St Mihiel Salient, from there arcing around to the Swiss frontier. Stabilised in late 1914, this line would form the linear fortress of the Western Front, scene of the titanic battles of 1916–18, and successive attempts to break the line and sweep to victory. However, in 1915, matters were complicated.
For the French, the occupation of their home soil by the Germans was a national disgrace. General Joffre, commander-in-chief of the French armies and hero of the Marne, was a strong character whose relationship with his British Allies was not always what it should have been. Commanding armies many divisions strong, it was obvious that Joffre and the French were the principal opponents of the Germans on the Western Front, with the BEF in a subsidiary role at this point in its history. Field Marshal Sir John French, the British commander, was ordered to maintain an independent command, yet was unable to act alone. Though having the power to organise and command his armies and their dispositions, the British commander would, in essence, have to bow to the pressures of his French ally to press the enemy line and force the Germans back.
3. Map of the Allied front showing the Noyon Salient and the French (F) and British (B) plans to attack in Artois and the Champagne in 1915.
With this in mind, General Joffre enacted plans in late 1914 and 1915 that would throw the might of the French Tenth Army at the Germans in Artois, close to the city of Arras, and particularly the natural stronghold of Vimy Ridge; while also committing the French Fourth and Second Armies in the Champagne. In attacks that commenced in the winter of 1914–15 he hoped that the right-angled dogleg of the German front could be driven in, thereby allowing for mobile warfare to be resumed. This plan would form the basis of French planning throughout 1915 – and would see a vast toll of French casualties mount up in these war-blighted areas. Subsidiary to the might of the French armies, all the BEF could do was bob up and down on the line like flotsam brought in by the tide, yet still carrying out its main responsibilities – to support the French commander-in-chief while maintaining its guard on the Channel ports vital to both the protection of the BEF itself and to the defence of the coast of southern England, facing France across the Channel. This would mean a number of small offensives in 1915 north of La Bassée canal intended to support the French, at Neuve Chapelle in March 1915 and at Aubers Ridge and Festubert in May 1915. These attacks would all have two points in common: a lack of resources and reserves, and a certainty that any breakthrough would quickly be swallowed up by the envelope of the German Army.
