51,99 €
Mehr erfahren.
- Herausgeber: John Wiley & Sons
- Kategorie: Wissenschaft und neue Technologien
- Sprache: Englisch
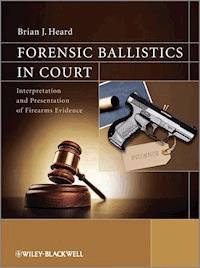
Forensic Ballistics in Court: Interpretation and Presentation of Firearms Evidence is an accessible introduction to firearms and ballistics evidence and how this is analysed and presented as evidence in a court of law.
The book approaches the subject in terms of the realities of case work, opening with a clear and illustrated explanation of the correct nomenclature for various weapon types and their parts. Ammunition is also extensively covered, again with annotated illustrations. Basic external and terminal ballistics, wounding capabilities are likewise covered to give an overview of the subject. A key aspect of the book covers the theory and philosophy behind striation matches and the associated statistics, how positive matches should be peer reviewed and the importance accreditation has on this subject.
Gunshot residue formation and identification and the various methods used in its analysis are reviewed in depth. This includes a critical examination of the pros and cons of each type of examination and the evidential weight which can be applied to each method.
- Accessible and reader-friendly introduction to firearms and ballistics.
- Clarifies the limitations of firearms evidence.
- Extensive use of global case-studies throughout.
- Focus on the interpretation and assessment of the weight of firearms/ballistics evidence presented at court.
- Covers the importance of witness and accused statements and their interpretation in relation to the investigation under review.
- Includes coverage of gunshot residue collection, examination and interpretation and the potential for contamination of GSR samples.
- Includes numerous real life case studies that the author has dealt with over the past 45 years.
- Takes an applied approach to the subject.
Sie lesen das E-Book in den Legimi-Apps auf:
Seitenzahl: 781
Veröffentlichungsjahr: 2013
Ähnliche


Contents
Cover
Title Page
Copyright
About the Author
Introduction
About the Companion Website
chapter 1: Firearms History
1.0.1 Introduction
1.0.2 The Flintlock (Figure 1.0.1)
1.0.3 The Percussion System (Figure 1.0.5)
1.0.4 The Pinfire System (Figure 1.0.6)
1.0.5 The Rimfire System (Figure 1.0.7)
1.0.6 The Dreyse Needle Fire System (Figure 1.0.8)
1.0.7 The Centre Fire System (Figure 1.0.9)
1.0.8 The Revolver (Figure 1.0.10)
1.0.9 The Self-Loading Pistol (Figure 1.0.11)
Further Reading
Chapter 2: Weapon Types and Their Operation
2.0.1 Introduction
2.0.2 Handguns
2.0.3 Rifles
2.0.4 Shotguns
2.0.5 Combination Weapons
2.0.6 Sub-Machine Guns
2.0.7 Assault Rifles
2.0.8 Machine Guns and Heavy Machine Guns
2.0.9 Muzzle Attachments
2.0.10 Important Parts of a Weapons Mechanism
2.0.11 Bent and Sear
2.0.12 Other Important Parts of a Revolver Mechanism
2.0.13 Hand and Ratchet
Further Reading
chapter 2.1: Gas and Air Powered Weapons
2.1 Introduction
2.1.2 Weapon types
2.1.3 Ammunition
2.1.4 Considerations
Further Reading
chapter 2.2: Rifling Types and Their Identification
2.2.1 Introduction
2.2.2 Basics
2.2.3 Class Characteristics
2.2.4 General Introduction to Rifling
Additional Reading
chapter 2.3: Home-made, Improvised and Converted Firearms
2.3.1 Introduction
2.3.2 Improvised Firearms
2.3.3 Converting air Weapons
2.3.4 Home-Made and Converted Toys and Replica Weapons
2.3.5 Home-Made Ammunition
Further Reading
chapter 2.4: Antique Weapons
2.4.1 Introduction
2.4.2 Background
2.4.3 Defining ‘Antique’
Chapter 3: Proof Marks
3.0.1 Introduction
3.0.2 Proof Marks
3.0.3 Types of Proof
3.0.4 Proof Marks and the Examiner
3.0.5 Examples of Proof Marks
Further Reading
Chapter 4: A Brief History of Ammunition
4.0.1 Introduction
4.0.2 Basics
Further Reading
chapter 4.1: Ammunition Components
4.1.1 Introduction
4.1.2 Basics
4.1.3 Ammunition Types
4.1.4 Primer Cap Types
4.1.5 Cartridge Cases
4.1.6 Shotgun Ammunition
Further Reading
chapter 4.2: Bullet Types
4.2.1 Introduction
4.2.2 Basics
4.2.3 Bullet Materials
4.2.4 Other Bullet Types
4.2.5 Bullet Nose Configuration
4.2.6 Bullet Base Configuration
4.2.7 Bullet Lubrication
Further Reading
chapter 4.3: Headstamps and Other Identifying Features on Ammunition
4.3.1 Introduction
4.3.2 Basics
4.3.3 Clandestine Ammunition
4.3.4 Colour Coding of Ammunition
Further Reading
chapter 4.4: Non-toxic and Frangible Bullets
4.4.1 Introduction
4.4.2 Elimination of Lead in Ammunition
4.4.3 Materials Used in Non-Toxic Ammunition
4.4.4 The Current Situation
Further Reading
chapter 4.5: Non-toxic Shot
4.5.1 Introduction
4.5.2 Materials Used in Non-Toxic Shotgun Ammunition
Suggested Further Reading
chapter 4.6: A Brief History of Propellants
4.6.1 Introduction
4.6.2 Basics
4.6.3 Black Powder
4.6.4 Nitro Propellants
4.6.5 Dating of Ammunition
4.6.6 Reduced Loads for Target Shooting
Further Reading
chapter 4.7: Priming Compounds
4.7.1 Introduction
4.7.2 Basics
4.7.3 A Short History of Priming Compounds
4.7.4 Manufacture
4.7.5 Accidental Discharge of Primers
Further Reading
Chapter 5: An Introduction to Ballistics
5.0.1 Introduction
5.0.2 Basics
5.0.3 Background
Further Reading
chapter 5.1: Internal Ballistics
5.1.1 Introduction
5.1.2 Basics
5.1.3 Recoil
5.1.4 Barrel Pressure
Further Reading
chapter 5.2: External Ballistics
5.2.1 Introduction
5.2.2 Basics
5.2.3 Maximum Range of Missiles
5.2.4 Maximum Altitude That a Bullet Will Attain
5.2.5 Terminal Velocity
5.2.6 Use of Sight to Compensate for Bullet Drop
5.2.7 Other Influencing Factors
5.2.8 Muzzle Energy
5.2.9 Momentum
Further Reading
chapter 5.3: Terminal Ballistics
5.3.1 Introduction
5.3.2 Basics
5.3.3 General Wound Ballistic Concepts
5.3.4 Other Factors Influencing the Wounding Capabilities of a Missile
5.3.5 Bullet Performance and ‘Wounding Capabilities’
5.3.6 Relative Stopping Power (RSP)
5.3.7 Bullet Resistant Vests (BRV)
Further Reading
Chapter 6: A Brief History of Forensic Firearms Identification
6.0.1 Introduction
6.0.2 Early Cases Involving Bullet Identification
6.0.3 Use of Photomicrographs
6.0.4 Identification of Weapon from Breech face Markings
6.0.5 Early Use of Comparison Microscope
6.0.6 Introduction of the Binocular Comparison Microscope
6.0.7 Improvements in Illumination
6.0.8 Photography of Stria
6.0.9 Modern Technology for Stria Comparison (Figure 6.0.1)
Suggested Further Reading
Chapter 7: Basic Concepts of Striation Matching
7.0.1 Introduction
7.0.2 Basics
7.0.3 Identification of Weapon Type
7.0.4 Individual Characteristics on Cartridge Cases
7.0.5 Formation of Stria
7.0.6 Problematical Areas
Further Reading
chapter 7.1: Basic Concepts in Comparison Microscopy
7.1.1 Introduction
7.1.2 Basic Methodology and Background to Stria Comparisons
7.1.3 Lighting used for Comparison Microscopy
7.1.4 The Concept of Consecutive Matching Stria
7.1.5 Obtaining Control Samples
7.1.6 Manufacturing Marks on Ammunition
7.1.7 Recovery Methods for Fired Bullets
7.1.8 Conclusion
Further Reading
chapter 7.2: The Concept of Consecutive Matching Stria
7.2.1 Introduction
7.2.2 Basics
7.2.3 Arguments for and Against the Concept of Stria Comparisons
Further Reading
chapter 7.3: A Statistical Model to Illustrate the Concept of Individuality in Striation Matches
7.3.1 Introduction
7.3.2 Basics
7.3.3 Stria Individuality
7.3.4 Philosophy
References
Chapter 8: Accidental Discharge
8.0.1 Introduction
8.0.2 Basics
8.3 Trigger Mechanisms
8.4 Reasons for an Accidental Discharge
8.5 Negligent Discharges
Further Reading
Chapter 9: Identification of Calibre from the Bullet Entry Hole
9.0.1 Introduction
9.0.2 Basics
9.0.3 Determination of Bullet Type
Further Reading
Chapter 10: Ricochet Analysis
10.0.1 Introduction
10.0.2 Basics
10.0.3 Variables Influencing the Liability of a Missile to Ricochet
Further Reading
Chapter 11: Bullet Penetration and Trajectory through Glass
11.0.1 Introduction
11.0.2 Glass Types and Glass Substitutes
11.0.3 Deviation of missile after penetrating glass
11.0.4 Penetration of Normal Window Glass
11.0.5 Penetration of Laminated and Bullet-Resistant Glass
11.0.6 Penetration of Tempered or Toughened Glass
11.0.7 Determination of Bullet Type from the Entry Hole
11.0.8 Deflection of Bullet by Glass
Further Reading and References
Chapter 12: Range of Firing Estimations and Bullet Hole Examinations
12.0.1 Introduction
12.0.2 Basics
12.0.3 Range of Firing Estimations for Pistols and Rifles
12.0.4 Extended Range of Fire Estimations
12.0.5 Range of Firing Estimations on Badly Decomposed Bodies
12.0.6 Bullet Wipe Marks
chapter 12.1: Chemical Tests for Range of Fire Estimations and Bullet Entry/Exit Hole Identification
12.1.1 Introduction
12.1.2 Chemical Tests for Range of Firing Estimations
12.1.3 Range of Firing Estimations on Heavily Bloodstained Garments
12.1.4 Range of Firing Estimations for Non-Toxic Non-Lead Primers
Further Reading
chapter 12.2: Range of Fire Estimations for Shotguns
12.2.1 Introduction
12.2.2 Basics
12.2.3 Shotgun Cartridges Fired in Revolvers
Suggested Further Reading
Chapter 13: The Use of X-ray Photography for Projectile Identification
13.0.1 Introduction
13.0.2 Estimation of Calibre from X-ray Photographs
Further Reading
Chapter 14: Gunshot Residue Examination
14.0.1 Introduction
14.0.2 Basics
14.0.3 Identification of GSR Particles
14.0.4 The Use of the Scanning Electron Microscope (SEM) with Energy Dispersive X-Ray Analysis (EDX) for the Detection and Analysis of GSR Particles
14.0.5 Sample Collection
14.0.6 GSR Retention
14.0.7 Interpretation of Results
14.0.8 Identification of Type of Ammunition and Country or Origin from GSR Composition
14.0.9 Environmental Contaminants
14.0.10 Extending the Period Over Which GSR Particles can be Recovered
14.0.11 General Considerations to be made when Examining GSR Analysis Results
14.0.12 Discussion
References
Chapter 15: Gun Handling Tests
15.0.1 Introduction
15.0.2 History
15.0.3 Methodology for the use of Ferrozine
Further Reading
Chapter 16: Laser-etched Serial Numbers and Bar Codes
16.0.1 Introduction
16.0.2 Laser-Etched Serial Numbers
16.0.3 Bar Codes
16.0.4 Conclusion
Further Reading
Chapter 17: Classification of Firearms-related Death
17.0.1 Introduction
17.0.2 Basics
17.0.3 Multiple Shot Suicides
References and Further Reading
chapter 18: Practical Considerations in a Firearms Case from a Legal Point of View
18.0.1 Introduction
18.0.2 Key Questions
18.0.3 Legal Challenges to Forensic Firearms Evidence in the USA
18.0.4 Conclusion
Further Reading and References
chapter 19: Qualifying the Expert and Cross-examination Questions
19.0.1 Definition
19.0.2 Introduction
19.0.3 Qualifying the Expert
19.0.4 General Background Questions
19.0.5 Comparison Microscopy
19.0.6 Gunshot Residue
19.0.7 Ferrozine Test
Further Reading
chapter 20: Chain of Custody
20.0.1 Introduction
20.0.2 Basics
20.0.3 Process
20.0.4 In Court
Further Reading
Appendix 1: Standard of Review: ‘Daubert Trilogy’
Appendix 2: Commercial and General Abbreviations for Bullet Configurations
Appendix 3: Some of the More Common Trade Names
Appendix 4: Important Dates in the History of Firearms from 1247
Appendix 5: Dates for the Introduction of Various Cartridges by Calibre
Appendix 6: Some Trademarks Found on Guns
Appendix 7: General Firearms Values Conversion Table
Appendix 8: Hearing Loss
Appendix 9: A List of Handgun Cartridges
Appendix 10: A List of Rifle Cartridges
Appendix 11: Air Weapon Legislation
Index
This edition first published 2013 © 2013 by John Wiley & Sons, Ltd
Wiley-Blackwell is an imprint of John Wiley & Sons, formed by the merger of Wiley's global Scientific, Technical and Medical business with Blackwell Publishing.
Registered office:John Wiley & Sons, Ltd, The Atrium, Southern Gate, Chichester, West Sussex, PO19 8SQ, UKEditorial offices:9600 Garsington Road, Oxford, OX4 2DQ, UKThe Atrium, Southern Gate, Chichester, West Sussex, PO19 8SQ, UK350 Main Street, Malden, MA 02148-5020, USAFor details of our global editorial offices, for customer services and for information about how to apply for permission to reuse the copyright material in this book please see our website at www.wiley.com/wiley-blackwell.
The right of the author to be identified as the author of this work has been asserted in accordance with the UK Copyright, Designs and Patents Act 1988.
All rights reserved. No part of this publication may be reproduced, stored in a retrieval system, or transmitted, in any form or by any means, electronic, mechanical, photocopying, recording or otherwise, except as permitted by the UK Copyright, Designs and Patents Act 1988, without the prior permission of the publisher.
Designations used by companies to distinguish their products are often claimed as trademarks. All brand names and product names used in this book are trade names, service marks, trademarks or registered trademarks of their respective owners. The publisher is not associated with any product or vendor mentioned in this book.
Limit of Liability/Disclaimer of Warranty: While the publisher and author(s) have used their best efforts in preparing this book, they make no representations or warranties with respect to the accuracy or completeness of the contents of this book and specifically disclaim any implied warranties of merchantability or fitness for a particular purpose. It is sold on the understanding that the publisher is not engaged in rendering professional services and neither the publisher nor the author shall be liable for damages arising herefrom. If professional advice or other expert assistance is required, the services of a competent professional should be sought.
Library of Congress Cataloging-in-Publication Data
Heard, Brian J.
Forensic ballistics in court : interpretation and presentation of firearms evidence / Brian J. Heard.
pages cm
Includes index.
ISBN 978-1-119-96267-0 (cloth) – ISBN 978-1-119-96268-7 (pbk.) 1. Forensic ballistics. 2. Firearms–Identification. 3. Bullets–Identification. 4. Criminal investigation. I. Title.
HV8077.H4293 2013
363.25'62–dc23
2012042783
A catalogue record for this book is available from the British Library.
Cover image: Images supplied by iStock
Cover design by Dan Jubb
Wiley also publishes its books in a variety of electronic formats. Some content that appears in print may not be available in electronic books.
About the Author
Brian Heard started his career as a forensic firearms examiner in the New Scotland Yard Forensic Science Laboratory in 1966. He rose to become Deputy Head of the firearms section before joining the Ballistics and Firearms Identification Bureau in the Royal Hong Police Force. In 1996, he was promoted to Director of what was then called the Forensic Firearms Examination Bureau of the Hong Kong Police Force.
He was awarded the Distinguished Service Medal and the Police Meritorious Service Medal for his work in forensic science.
He retired in 2001 and now works as a consultant and lecturer in Forensic Firearms Examinations.
Introduction
An expert may be used in, basically, two different capacities: for consultation or for testimony.
These are derived from five general categories of expertise:
In court, the proffered witness must be assessed as to his/her:
Expertise. Courts rely heavily on forensic evidence to convict the guilty and to protect the innocent. The presentation of flawed forensic evidence has obvious implications for individual cases, but raises questions about the integrity of the entire criminal justice system. Innocent people may be wrongly convicted and people may lose trust in the justice system. This is not unknown, as a number of recent high profile cases have proved.Training. What sets an expert apart from a novice? How does forensic expertise develop over time? Does the speed of expert decision-making influence performance? How does memory for forensic information relate to matching accuracy? Can training time be reduced without compromising performance? What is the best way to provide feedback to examiners about their performance? Do examiners know when to ask for help? How much should examiners rely on instructions from a textbook, compared to practical experience?Testimony. What can examiners reasonably claim when testifying in court? What is the most effective way to present forensic evidence to juries? On what basis should judges admit forensic testimony? Should examiners report opinions or statistics?Judges also have to consider the following factors in determining the manner in which expert testimony should be presented to a jury and in instructing the jury in its evaluation of expert scientific testimony in criminal proceedings:
Many of the reported problems with forensic science evidence have resulted from the failures of trial legal representatives to investigate thoroughly forensic science evidence, the misunderstandings concerning the nature of that evidence, and mis-statements concerning the weight to be attributed to that evidence. Until an elevation in the knowledge base of trial legal representatives is achieved, the adversarial system will continue to falter with respect to the proper presentation of forensic science evidence.
In investigating, assessing and presenting forensic science evidence, the legal representatives should consider the following:
The extent to which a particular forensic science discipline is founded on reliable scientific methodology that gives it the capacity to analyse accurately the evidence and to report findings.The extent to which examiners in a particular forensic science discipline rely on human interpretation.The extent to which the examiner using the particular forensic science technique in the case has followed established procedures and standards in examining the evidence.By keeping these considerations in mind during the investigation and presentation of forensic science evidence, legal representatives will better inform the jury of the relevant contested forensic science issues in the case. The evidence presented that is relevant to these considerations will also provide the underlying basis for instructions to the jury concerning the consideration of the forensic scientist.
Experts frequently testify that they have made a match ‘to the exclusion of all other firearms.’1 This is simply another way of claiming uniqueness. In United States v. Green,2 the court questioned such testimony: ‘O'Shea [the expert] declared that this match could be made “to the exclusion of every other firearm in the world”.... That conclusion, needless to say, is extraordinary, particularly given O'Shea's data and methods.’3
Further, in 2008, a year before the National Academy of Science (NAS) report on forensic science was issued, a different NAS report, one on computerised ballistic imaging, addressed this issue. The report cautioned: ‘Conclusions drawn in firearms identification should not be made to imply the presence of a firm statistical basis when none has been demonstrated.’4 In particular, that report was concerned about testimony cast ‘in bold absolutes’, such as that a match can be made to the exclusion of all other firearms in the world: ‘Such comments cloak an inherently subjective assessment of a match with an extreme probability statement that has no firm grounding and unrealistically implies an error rate of zero.’ Some courts are in accord.5
The court should consider whether additional factors such as those set forth below might be especially important to a jury's ability to fairly assess the reliability of and the weight to be given testimony on particular issues in the case.6
As a consequence of advances in analytical technology and limitations on the way in which suspect interrogation is carried out, there has been an increasing necessity for courts of law to rely on expert testimony. Scientific proof has therefore become a necessity in reconstructing the sequence of events at a crime scene. Such ‘scientific proof’ covers a large range of disciplines, varying in value from the indisputable to that of very dubious value.
Data obtained in a forensic laboratory has no meaning or worth until presented to a court of law. It is the expert witness who must serve as the vehicle to present this scientific data effectively to the court in a manner understandable to the layman.
Unfortunately, it is often the interface between the lawyer and the expert that breaks down, leaving the court with a somewhat myopic view of the evidence available. This lack of intelligible dialogue with the expert will often result in both the defence and prosecution failing to utilise the testimony of the expert fully and to their best advantage.
At times, it is the lawyer's lack of scientific knowledge which is at fault, while at others it is the expert's inability to present his testimony in a clear and precise manner.
It must be stated that it is not the role of the defence – or, for that matter, the prosecution – to verbally batter the expert into submission. This could easily destroy a perfectly well-qualified expert's career and alienate the court towards the lawyer concerned. What is required is for the lawyer to qualify the expert, seek out the relevance of his or her experience and qualifications to the matter in question, and then delve into the probative value of the evidence tendered.
Notes
1.See Giannelli, P.C. & Imwinkelried, E.J. (2007). Scientific Evidence (4th ed., citing FBI Handbook of Forensic Sciences 57 (rev. ed. 1994)), § 14.01, at 706 n.1. Albany, NY: Lexis Publishing Co.
2. United States v. Green, 405 F. Supp. 2d 104 (D. Mass. 2005).
3.Ibid. at 107 (citations omitted).
4. National Research Council, National Academy of Sciences, Ballistic Imaging82 (2008).
5.See United States v. Alls, slip opinion, No. CR2-08-223(1) (S.D. Ohio Dec. 7, 2009) (‘Although Ms. McClellan may testify as to her methodology, case work, and observations in regards to the casing comparison she performed for this case, she may not testify as to her opinion on whether the casings are attributable to a single firearm to the exclusion of all other firearms.’); Diaz, 2007 WL 485967, at ∗1.
6. The court should instruct the jurors only on the factors relevant to the specific forensic science evidence in the case as presented by the parties. Not all factors will be relevant in every case. Parties should consider limiting the instruction to the most probative contested factors to avoid overwhelming the jury with a ‘laundry list’ of factors that may diminish the jury's consideration of the most probative evidence.
About the Companion Website
This book is accompanied by a companion website:
www.wiley.com/go/heard/forensicballistics
The website includes:
Powerpoints of all figures from the book for downloadingPDFs of tables from the book1.0
Firearms History
1.0.1 Introduction
It may seem that a history of firearms is an illogical way to begin this book, but any competent forensic firearms examiner needs to have a good working knowledge of this subject matter. As such, it should form part of the court qualification process at the beginning of any trial. Having said that, though, it would be unreasonable to expect a firearms examiner with many years' experience to be able to give, for example, a precise date for the introduction of the Anson and Deeley push button fore-end. Such an esoteric piece of firearms history may have formed part of the examiner's training many years ago, but unless s/he had a particular interest in shotgun history it would be unlikely that s/he would remember little other than an approximate date or period.
Knowledge of the subject matter will also add gravitas to the presentation and examination of witnesses by the legal team. It may not help the case, but it will show that the solicitor or barrister is familiar with the history and workings of the presented firearm and can pose knowledgeable questions without the fear of being bamboozled by an expert witness.
It should also be appreciated that there is a very large market in replica ‘antique’ firearms. Some of these are only approximate reproductions of the original weapon, while others are made to the exact measurements of the original. A working knowledge of what these particular weapons look like and how their mechanisms work is therefore a perquisite.
While a history of firearms should start with the earliest of hand cannons, progressing through the wheel lock, miquelet and so on. For this book, however, it will start at the flintlock, as it is unlikely that anything earlier would be encountered in everyday case work. A much more comprehensive history of firearms is offered in Appendix 4.
1.0.2 The Flintlock (Figure 1.0.1)
Figure 1.0.1 The flintlock
The flintlock ignition system really signalled the advent of an easy-to-use firearm with a simple mechanism for the discharge of a missile via a powdered propellant. In this type of weapon, the propellant was ignited via a spark produced by striking a piece of flint against a steel plate. The piece of flint was held in the jaws of a small vice on a pivoted arm, called the cock. This is where the term ‘to cock the hammer’ originated.
The steel, which was called the frizzen, was placed on another pivoting arm opposite the cock, and the pan containing the priming compound was placed directly below the frizzen. When the trigger was pulled, a strong spring swung the cock in an arc so that the flint struck the steel a glancing blow. This glancing blow produced a shower of sparks which dropped into the priming pan, igniting the priming powder. The flash produced by the ignited priming powder travelled through the touch hole, situated at the breech end of the barrel, igniting the main charge in the barrel and thus discharging the weapon.
The flintlock represented a great advance in weapon design. It was cheap, reliable and was not overly susceptible to damp or rainy conditions. Unlike the complicated and expensive wheel lock, this was a weapon that could be issued in large numbers to foot soldiers and cavalry alike.
As in the case with most weapon systems, it is very difficult to pinpoint an exact date for the introduction of the flintlock system. There are indications of it being used in the middle of the 16th century, although its first widespread use cannot be established with acceptable proof until the beginning of the seventeenth century.
Three basic types of flintlock were made:
Snaphaunce (Figure 1.0.2)
Figure 1.0.2 The snaphaunce
A weapon with the mainspring inside the lock plate and a priming pan cover which had to be manually pushed back before firing.
The snaphaunce was used from about 1570 until modern times (in North African guns), but by about 1680 it was out of fashion everywhere except Northern Italy, where it persisted until the 1750s.
Miquelet (Figure 1.0.3)
Figure 1.0.3 The miquelet
A weapon with the mainspring outside of the lock plate, but with a frizzen and priming pan cover all in one piece. In this type of lock mechanism, the pan cover was automatically pushed out of the way as the flint struck the frizzen. The great advantage of this type of lock is that the gunpowder in the priming pan is covered up until the point of ignition by a spring loaded plate, thus allowing the weapon to be used in adverse weather conditions.
It is generally thought that the miquelet was introduced after the disastrous campaign of Algiers (1541), where ‘wind and rain’ prevented firing, firstly by blowing away the gunpowder and/or secondly by wetting the gunpowder. In less than three decades, a lock did appear that is known today as the miquelet lock.
True Flintlock (Figure 1.0.4)
Figure 1.0.4 True flintlock
A weapon with a mainspring on the inside of the lock plate and with the frizzen and priming pan cover in one piece. This also had a half cock safety position, enabling the weapon to be safely carried with the barrel loaded and the priming pan primed with powder. This system was probably invented by Mann Le Bourgeoys, a gun maker for Louis XIII of France, in about 1615.
1.0.3 The Percussion System (Figure 1.0.5)
Figure 1.0.5 The percussion lock
The flintlock continued to be used for almost 200 years. It was not until 1807 that a Scottish minister, Alexander John Forsyth, revolutionised the ignition of gunpowder by using a highly sensitive compound which exploded on being struck. When struck by a hammer, the compound, mercury fulminate, produced a flash which was strong enough to ignite the main charge of powder in the barrel. A separate sparking system and priming powder was now no longer required. With this invention, the basis for the self-contained cartridge was laid down and a whole new field of possibilities opened up.
Once this type of ignition, known as percussion priming, had been invented, it was still some time before ways for it to be applied practically were perfected.
From 1807 to 1814, a wide range of systems were invented for the application of the percussion priming system, including the Forsyth scent bottle, pill locks, tube locks and the Pauly primer cap.
The final form of the percussion cap was claimed by a large number of inventors. It is, however, probably attributable to Joshua Shaw, an Anglo-American living in Philadelphia in 1814. Shaw employed a small iron cup, into which was placed a small quantity of mercury fulminate. This was placed over a small tube, called a nipple, projecting from the breech end of the barrel. When the hammer struck the cap, this detonated the mercury fulminate, causing a strong flame to travel down the nipple and thus igniting the main charge in the breech end of the barrel.
1.0.4 The Pinfire System (Figure 1.0.6)
Figure 1.0.6 The pinfire
Introduced in the United Kingdom at the Great Exhibition in London in 1851 by Lefaucheux, the pinfire was one of the earliest true breech-loading weapons, using a self-contained cartridge in which the propellant, primer and missile were all held together in a brass case.
In this system, the percussion cup was inside the cartridge case, while a pin, which rested on the open end of the percussion cup, protruded through the side of the cartridge case. Striking the pin with the weapon's hammer drove the pin into the priming cup, causing the mercury fulminate to detonate and so ignite the main charge of propellant powder. The pin, which protruded through a slot in the side of the weapons chamber, not only served to locate the round in the correct position, but also aided the extraction of the fired cartridge case.
The pinfire was at its most popular between 1890 and 1910 and was still readily available in Europe until 1940. It had, however, fallen out of favour in England by 1914 and was virtually unobtainable by 1935. Boxes of old ammunition can, however, still be purchased in shooting quantities, from specialised ammunition dealers. This could place into question the placing of this type of weapon into the category of ‘Antique’ rather than that of a firearm requiring certification.
Calibres available for pinfire revolvers were 5, 7, 9, 12 and 15 mm, while shotgun and rifle ammunition in 9 mm and 12 bore and other various calibres were also available.
The really great advance of the pinfire system was, however, not just the concept of it being a self contained cartridge, but obturation, the ability of the cartridge case under pressure of firing to swell and so seal the chamber preventing the rearward escape of gases.
1.0.5 The Rimfire System (Figure 1.0.7)
Figure 1.0.7 The rimfire system
Although the pinfire system was a great step forward, it did have a number of drawbacks, not least of which was the tendency for the cartridge to discharge if dropped onto its pin. The problem was all but eliminated by the rimfire system which, like the pinfire, was exhibited at the Great Exhibition in 1851.
The rimfire system consists of a thin walled cartridge with a hollow flanged rim. Into this rim is spun a small quantity of a priming compound. Crushing the rim with a firing pin causes the priming compound to explode, thus igniting the propellant inside the case.
The initial development was made by a Paris gunsmith, Flobert, who had working examples of it as early as 1847. It was some time before it gained acceptance, however, and it was not until 1855 that Smith and Wesson manufactured the first revolver to fire rim fire cartridges. This was a .22″ calibre weapon in which the barrel tipped up by means of a hinge on the top of the frame. This enabled the cylinder to be removed for loading and unloading the weapon.
Although the rimfire was a great step forward, the rimfire cartridge was only suitable for high pressure weapons in small calibres. With any calibre above .22″, the soft rim necessary for the ignition system resulted in cartridge case failures.
1.0.6 The Dreyse Needle Fire System (Figure 1.0.8)
Figure 1.0.8 The Dreyse needle fire
The Dreyse needle gun was a military breech-loading rifle famous as the main infantry weapon of the Prussian army, who adopted it for service in 1848 as the Dreyse Prussian Model 1848. Its name, the ‘needle gun’, comes from its needle-like firing pin, which passed through the cartridge case to impact on a percussion cup glued to the base of the bullet.
The Dreyse rifle was the first breech-loading rifle to use a bolt action to open and close the chamber, executed by turning and pulling the bolt handle.
The Dreyse rifle was invented by the gunsmith Johann Nikolaus von Dreyse (1787–1867) and it was first produced as a fully working rifle in 1836. From 1848 onwards, the new weapon was gradually introduced into the Prussian service, then later into the military forces of many German states. The employment of the needle gun radically changed military tactics in the 19th century.
The cartridge used with this rifle was a self-contained paper case containing the bullet, priming cup and black powder charge. The bullet, which was glued into the paper case, had the priming cup glued to its base. The upper end of the case was rolled up and tied together. Before the needle could strike the primer, its point had to pass through the paper case, then through the powder charge, before striking the primer cup on the base of the bullet. The theory behind the placement of the primer was that it would give a more complete ignition and, thus, combustion of the charge of propellant. Unfortunately, this led to severe corrosion of the needle, which then either stuck in the bolt or broke off, rendering the rifle useless. It was, however, a major step forward in the production of a modern rifle firing a self-contained cartridge.
1.0.7 The Centre Fire System (Figure 1.0.9)
Figure 1.0.9 The centre fire system
This was the great milestone in weapon and ammunition development. In centre fire ammunition, only the primer cup needed to be soft enough to be crushed by the firing pin. The cartridge case could thus be made of a more substantial material, which would act as a gas seal (obturation) for much higher pressures than could be obtained with rimfire ammunition.
Once again, the exact date for the invention of the first centre fire weapon is difficult to ascertain, although a patent was issued in 1861 for a Daws centre fire system.
Probably no invention connected with firearms has had such an impact on the principles of firearms development as the obturating centre fire cartridge case. Although invented around 1860, the principles are still the same and they are utilised in every type of weapon, from the smallest handgun up to some of the largest artillery pieces.
Rocket-propelled bullets (the Gyrojet), caseless ammunition, hot air ignition and many other esoterica have come and gone. However, for simplicity, reliability and ease of manufacture, the centre fire ignition system in an obturating cartridge case has not been excelled.
1.0.8 The Revolver (Figure 1.0.10)
Figure 1.0.10 Major parts of a typical solid frame revolver
A revolver is a weapon that has a revolving cylinder containing a number of firing chambers (basically a revolving magazine) which may be successively lined up and discharged through a single barrel.
In the long history of revolvers, no name stands out more strongly than that of Samuel Colt. However, despite his claims to the contrary, Colt did not invent the revolver.
The earliest forms of the revolver include a snaphaunce revolver made in the days of King Charles I, said to have been made before 1650, and an even earlier weapon made during the reign of Henry VIII, some time before 1547.
Those early revolvers were, surprisingly enough, practically identical to the actions covered in Colt's early patents. The actions for those early patents are still in use today in the Colt Single Action Army or Frontier model.
Colt's original patent, dated 1835, dealt with revolving of the cylinder via a ratchet and pawl arrangement. The original patents belonging to Colt were so tightly worded that no other manufacturer had any real impression on the market until these patents ran out in 1850. After this, the market opened up, with Dean-Adams in 1851, Beaumont in 1855, and Starr and Savage in 1865 all bringing out innovative designs. These were, however, still all muzzle-loading percussion systems.
It was not until the advent of the rimfire in 1851 that breech-loading revolvers really started to appear. Even then, it was not until 1857 that Smith and Wesson introduced the first hinged frame .22″ rim fire revolver. The patent for bored-through chambers and the use of metallic cartridges gave Smith and Wesson the market until 1869.
With the passing of the Smith and Wesson patents, there was a flood of breech-loading arms in calibres from .22″ to 50″. However, except for .22″ target shooting, the days of the rimfire were numbered, thanks to the introduction of the centre fire system.
The first centre fire Colt revolver to be patented was the Colt Single Action Army Model 1873. In 1880, Enfield produced a .476″ hinged frame revolver, but it was a design monstrosity and was soon superseded by the now familiar Webley top latching hinged frame design in 1887. In 1894, this was modified slightly and it became the standard Webley Mk.1 British Army service revolver. In 1889, the US Government officially adopted a Colt .38″ revolver, using the now familiar swing-out cylinder system.
A multitude of variations on the Smith and Wesson and Colt designs followed, but little has really changed in the basic design of the revolver mechanism since then. It would seem that little can be done to improve on the efficiency of the basic Smith and Wesson and Colt designs.
1.0.9 The Self-Loading Pistol (Figure 1.0.11)
Figure 1.0.11 Major parts of a typical self-loading pistol
The principle of the self-loading pistol was grasped long ago. It is reported in Birche's History of the Royal Society for 1664 that a mechanic had made a claim of being able to make a pistol which could ‘shoot as fast as presented and stopped at will’. However, without the necessary combination of a self-contained cartridge, smokeless propellant and metallurgical advances, it was not possible to utilise these principles in a practical way.
While patent records from 1863 show numerous attempts to develop a self-loading pistol, it was not until 1892 that the first successful weapon appeared. This was a weapon patented by the Austrian Schönberger, and made by the company Steyr. It was a blowback design and made for the 8 mm Schönberger, a very powerful cartridge.
The first commercially successful design was by an American, Hugo Borchardt. Unable to finance his design, he took it to Germany to have it manufactured there. Although clumsy, this weapon was of radical design, containing the first magazine to be held in the grip and the ‘knee-joint’ toggle locking system. It was this design which was slightly modified by Luger to become Germany's first military self-loading pistol, the Walther P08.
In 1893, Bergman produced a whole range of pistols, one of which, the 1897 8 mm ‘Simplex’, is of particular interest as the cartridge became the .32″ Colt Automatic Pistol (ACP) cartridge.
In 1896, the story of the truly successful self-loading pistol really began with the introduction of the 7.63 mm calibre Mauser ‘broom handle’ pistol (Mauser Model C96 pistol). This was the pistol made famous by Winston Churchill, who purchased one for use during the Sudan campaign of 1898. Churchill credited the weapon with saving his life when he shot his way out of a native trap, ‘killing several fuzzy-wuzzies’! I have lost count of the number of Mauser C96 pistols I have examined which have had ‘Winston Churchill’ engraved on the side. So far not one has proved to be genuine!
In 1898, the German factory of DWM brought out the first model of the famous Luger pistol in 7.65 mm Parabellum calibre. In 1904, the weapon was made available in 9 mm Parabellum, which was the calibre adopted for the German service pistols.
In 1897, John Browning, the greatest of all American small arms designers, produced his first patent. This was finally introduced as the Model 1900 Colt .38″ automatic.
Webley made a few unsuccessful forays into the self-loading pistol market, with their .455″ calibre 1904 model, the .45″ 1905 model, the 1910 .38″ calibre and the .455″ Navy model in 1913. The Webley design was not, however, very successful and never became popular.
Probably the most successful pistol ever to be introduced was the Colt Model 1911. This was designed by Browning and was placed into military service as the Colt Government Model in .45″ calibre. With minor modifications, as the Model 1911A1, the weapon was the standard issue military weapon for the USA until the late 1980s.
Since then, the main innovations have been in the use of lightweight aluminium and plastics for the weapons frame, the move towards smaller calibres and higher velocity bullets, the development of magnum handgun ammunition and the use of gas-operated locking systems. These are, however, only variations on a theme and, as with revolvers, it would seem that there is little that can be done to improve on the basic design.
Further Reading
1. Chase, K. (2003), Firearms: A Global History to 1700, Cambridge University Press, ISBN 0-521-82274-2.
2. Myatt, F. An Illustrated History of the Development of the World's Military Firearms During the 19th Century.
3. Fowler, W., North, A. & Stronge, C. The Development of Small Firearms, from 12th-century Hand Cannons to Modern-day Automatics.
4. Fowler, W., North, A., Stronge, C. & Sweeney, P. The Illustrated World Encyclopaedia of Guns: Pistols, Rifles, Revolvers, Machine and Submachine Guns through History in 1200 Colour Photographs.
5. Hogg, I. Jane's Guns Recognition Guide: Every firearm in use today. Jane's Recognition Guides.
6. Hogg, I.V. The Greenhill Military Small Arms Data Book.
7. Greener, W.W. The Gun and Its Development.
8.Jane's Infantry Weapons (2012).
9. Mathews, Firearms Identification Vol. I, II & III.
2.0
Weapon Types and Their Operation
2.0.1 Introduction
In any court case, it is essential for the prosecution or the defence to be able not only to identify correctly the type of weapon being referred to, but also to have some idea as to the important component parts of its mechanism and what function they serve.
Considerable confusion exists as to what are a pistol, revolver, self-loading pistol and automatic. This is very basic firearms nomenclature, but it is so often wrongly applied. Here is an explanation of the correct usage and any alternatives which one might encounter, where they exist.
2.0.2 Handguns
There are three basic types of handgun: single shot, revolving and self-loading pistols. Such exotica as Double Barrelled Howdah pistols, self-loading revolvers and self-loading pistols with revolving magazines can be ignored for the purposes of this chapter.
In English nomenclature all handguns are pistols; some are ‘single shot pistols’, others are ‘revolving pistols’ and the others are ‘self-loading pistols’. American nomenclature takes a slightly less stringent approach with the terminology, using ‘revolvers’ and ‘pistols’. Pistols are also referred to as ‘autos’ and ‘semi-automatics’.
The term ‘automatic’ or ‘auto’ is often misused. When correctly used, the term signifies a weapon in which the action will continue to operate until the finger is removed from the trigger or the magazine is empty – hence, ‘automatic’.
A true self-loading pistol will, after firing, eject the spent cartridge case and then load a fresh round of ammunition into the chamber. To fire the fresh round, the pressure on the trigger has to be released and then re-applied.
A few true automatic pistols have been commercially manufactured. Examples are the Mauser Schnell-Feuer pistol, the Astra Mod 902 and more recently the Glock Mod. 18. Fully automatic pistols have, however, never been a commercial success, due to the near impossibility of controlling such a weapon under full automatic fire. Each shot causes the barrel to rise during recoil, and the next round has fired before the firer has time to reacquire the target within the sights, causing the barrel to rise even further. Even at close range, it is unusual for more than two shots to hit a man-sized target.
Single Shot Pistol
The vast majority of single shot pistols are .22″ LR (Long Rifle) calibre and are intended for target use. Generally, the barrel is hinged to the frame, with some locking mechanism to keep it in place during firing. On unlocking, the barrel swings down, allowing the empty cartridge case to be removed and a fresh one inserted. Other types exist in which the barrel is firmly fixed to the frame, and there is some form of breech block which swings out, pulls back or slides down to expose the breech end of the barrel for loading/unloading. This type of pistol varies from the crudely made saloon pistol to highly sophisticated target pistols for competition shooting.
Following is an example of a Flobert saloon pistol (Figure 2.0.1). This type of pistol was intended for use in short distance indoor target practice using a very short BB (bulleted breech) or CB (conical breech) cartridge. These were very popular in the early part of the 20th Century.
Figure 2.0.1 .22″ calibre saloon pistol.
Often wrongly classified as ‘antiques’, these weapons fire currently manufactured ammunition with a lethal potential.
An example of a more modern single shot pistol would be the Thompson Contender Single Shot, as pictured in Figure 2.0.2.
Figure 2.0.2 Thompson single shot pistol.
Revolving Pistol or Revolver
In a revolving pistol, or revolver as it is usually referred to, the supply of ammunition is held in a cylinder at the rear of the barrel, with each round having its own chamber. Cocking the hammer rotates the cylinder, via a ratchet mechanism, to bring a new round of ammunition in line with the barrel. Pulling the trigger then drops the hammer, thus firing the round. This is the simplest type of revolving pistol mechanism, and it is called the ‘single action’ mode of operation. The earliest types of revolving pistol employed this type of mechanism. A good example of a single action revolver is the Colt Single Action Model of 1873 (Figure 2.0.3.)
Figure 2.0.3 Colt Single Action Army revolver.
The other type of revolving pistol mechanism is called ‘double action’. In this design, a long, continuous pull on the trigger cocks the hammer, rotates the cylinder and then drops the hammer, all in one operation. Most modern revolvers employ this type of mechanism, with virtually all of them having the capability for single action mode of operation as well. An example of a double action revolver is the Colt Police Positive revolver (Figure 2.0.4).
Figure 2.0.4 Colt Police Positive double action revolver.
In the past, a very few self-cocking revolving pistols have also been manufactured. These have an action which, after firing a round, automatically rotates the cylinder and re-cocks the hammer. The most successful of this type was the Webley Fosberry. This type of weapon is, however, extremely rare, and exist nowadays only as collectors' items or in museums.
Frame Type
Revolvers can be sub-grouped into ‘solid frame’, where the frame is made from a single forging, and ‘hinged frame’, where the frame is hinged to tip either up or down for access to the cylinder.
Examples of a solid frame revolver would be the Colt Single Action Army (Figure 2.0.3), the Colt Police Positive (Figure 2.0.4) and the Smith & Wesson Mod. 10 (Figure 2.0.5).
Figure 2.0.5 Smith & Wesson Mod. 10 revolver.
An example of a hinged frame revolver would be the Webley and Scott revolver (Figure 2.0.6).
Figure 2.0.6 Webley & Scott revolver – open for loading.
Access to the cylinder for loading or reloading in solid frame revolvers is generally accomplished by having the cylinder mounted on a ‘crane’ which can be swung out from the frame. Some weapons also have the cylinder mounted on a removable axis pin which, when removed, allows the cylinder to be completely removed from the frame for loading and unloading. This type of frame is more commonly encountered in cheaper weapons. Of the two frame types, the solid frame is the most common, due to its inherent strength and ease of manufacture.
Self-Loading Pistol
In this type of weapon (Figure 2.0.7), the ammunition is normally contained in a removable spring-loaded magazine, usually housed within the grip frame. The barrel of the weapon is surrounded by a slide with an integral breechblock, which is kept into battery (i.e. when the face of the breechblock is up tight against the breech end of the barrel in a position ready for firing) with the rear of the barrel by a strong spring. Pulling back the slide allows the topmost round of ammunition in the magazine to present itself to the rear of the barrel. When the slide is allowed to move forward under spring pressure, the round is pushed by the bottom of the breechblock from the magazine into the chamber of the barrel. This action also cocks the trigger mechanism.
Figure 2.0.7 Colt 1911A1 self-loading pistol.
When the trigger is pulled, the hammer drops and the round is fired, pushing the bullet down the barrel. These gases also exert an equal and opposite force on the cartridge case, which forces the slide and breechblock to the rear. This ejects the spent cartridge case through a port in the side or occasionally, on the top of the slide. At the end of its rearward motion, the spring-loaded slide moves forward, stripping a fresh round off the top of the magazine and feeding it into the rear of the barrel, ready for firing. As the action is only self-loading, the pressure on the trigger has to be removed and then re-applied before another round can be fired.
To prevent the weapon from firing continuously, a part of the action, called a disconnecter, removes the trigger from contact with the rest of the mechanism. Releasing the trigger disengages the disconnecter, allowing the trigger to re-engage with the mechanism so that the fresh round can be fired.
An action such as that described above, where the slide is kept into battery with the barrel by spring action alone, is the simplest type of self-loading pistol mechanism. It is generally referred to as a ‘blowback’ action and is only of any real use for lower-powered cartridges. If a blowback action were used for any of the more powerful calibres, the unsupported cartridge would, on exiting from the barrel, explode due to the tremendous pressures produced during firing. For all practical purposes, the most powerful round which can safely be fired in a blowback action weapon is a .380″ ACP (.380″ Automatic Colt Pistol, also known as the 9 mm Short) cartridge. Some blowback action weapons, such as the Astra Mod. 400 and the Dreys 1910 Military Model, have been designed to fire more powerful cartridges by having massive recoil springs. However, these are very difficult to cock, due to the strength of the recoil spring, and they generally require some method of disconnecting the spring during the cocking operation.
When more powerful ammunition is used, some other mechanism has to be employed to ensure that the pressures produced fall to a safe level before the fired cartridge case exits from the barrel. This is accomplished via a ‘locked breech or delayed blowback mechanism’. In such a weapon, the barrel is locked to the breechblock by some mechanical means during the instant of firing. With this type of action, the rearward thrust of the cartridge case against the breechblock causes the barrel and attached breechblock to move backwards together. At some point on its rearward travel, once that the bullet has exited the barrel and the barrel pressures have fallen to acceptable levels, the barrel is stopped and unlocked from the breechblock. The breechblock and slide can then continue to the rear and, in so doing, eject the empty cartridge case. On its return journey into battery with the barrel, a fresh cartridge is loaded into the chamber and the mechanism is cocked, ready to fire again.
The variety of locked-breech mechanisms is vast and outside the scope of this book. They range from the very simple Browning ‘swinging link’ and Luger ‘toggle joint’ to the more modern systems using high-pressure gas tapped from the barrel, either to keep the breech locked or to operate the unlocking mechanism.
2.0.3 Rifles
Rifle actions can be very roughly grouped into ‘single shot’, ‘bolt action’, ‘self-loading’ and ‘pump action’.
Single Shot
In single shot weapons, the barrel can be hinged to the frame, allowing the barrel to be dropped down for loading and unloading, or it can have some form of breech block which swings out, pulls back or slides down to expose the breech end of the barrel.
Bolt Action
In bolt action weapons (Figure 2.0.8), a turning bolt slides in an extension to the barrel, which is basically the same system as in a turn bolt used to lock a door. Pushing the bolt forwards brings the bolt face into battery with the breech end of the barrel, and cocks the striker (or firing pin). Turning the bolt then locks it into place via bolt lugs engaging with slots in the barrel extension.
Figure 2.0.8 Bolt action rifle.
Other bolt action weapons cock the striker on the opening of the bolt.
Straight pull bolt actions also exist in which the rotary motion required to turn the bolt locking lugs into their recesses is applied by studs on the bolt, which slide in spiral grooves cut into the barrel extension.
Bolt action weapons are generally magazine fed, either by a tubular magazine under the barrel, through the butt stock or via a box magazine under the bolt.
Self-Loading Rifles
Self-loading rifles are, with the exception of the lowest power weapons, of the locked breech type. These are generally very similar to those used in locked breech pistols, but of a much stronger design to cope with the higher pressures involved. Figure 2.0.9 is an example of a self-loading rifle.
Figure 2.0.9 Self-loading rifle.
There are basically two types of self-loading rifle action:
Short recoil, in which the bolt and breechblock are only locked together for about .75″ of rearward travel before unlocking. It then operates as a normal self-loading pistol would.Long recoil, in which the barrel and breechblock are locked together for the full distance of the recoil stroke. After reaching the end of its travel, the barrel is then unlocked and pushed forward by spring action, ejecting the spent cartridge during its forward motion. When the barrel is fully forward, the breechblock begins its forward motion, reloading a fresh cartridge into the chamber and cocking the action.A few weapons have been produced with a blow forward action. These guns work in the reverse of the conventional blowback. The breech, which contains the hammer, remains stationary, while the barrel moves forward from the pressure produced during firing. The cartridge case, held stationary by the extractor, is pulled out of the chamber, and a stud on the barrel extension kicks it free. Meanwhile, a projection at the bottom of the extension pulls the next round forward out of the magazine and positions it to be chambered when the barrel returns to battery.
Pump Action
In Pump Action (sometimes also referred to as slide action) weapons (Figure 2.0.10), the breech block is attached, via operating rods, to a moveable fore-end. On pulling back the fore-end, the mechanism locking the breechblock to the barrel is released. Pulling the fore-end to the rearmost extent of its travel, then pushing it forward, causes the empty cartridge case to be ejected, a fresh round to be loaded into the chamber and the action to be cocked.
Figure 2.0.10 Pump action rifle.
2.0.4 Shotguns
Shotgun actions are basically the same as those found in rifles, and include single/double shot weapons with barrels hinged to the frame for loading/unloading, bolt action, self-loading and pump action. In double barrelled weapons, the barrels can be either positioned one on top of the other, ‘over and under’, or ‘superposed’ (Figure 2.0.11) or ‘side by side’.
Figure 2.0.11 Over and under shotgun.
In the smaller calibres (i.e. .22″, 9 mm and .410″), double barrelled shot pistols are also occasionally encountered.
2.0.5 Combination Weapons
Shotgun/rifle combinations are popular on the Continent and can consist of one shotgun barrel and one rifle barrel (Zwilling), two shotgun barrels with one rifle barrel (Drilling), two rifle barrels and one shotgun barrel (also called a Drilling) or, occasionally, two rifle and two shotgun barrels. Typical combination gun configurations are shown at Figure 2.0.12.
Figure 2.0.12 Typical combination gun configurations.
2.0.6 Sub-Machine Guns
Sub-machine guns were once considered outside the scope of a book such as this. In recent years, however, violent armed crime and terrorism has seen this type of weapon increasingly used.
Sub-machine guns are fully automatic weapons, usually with a single shot option, and they are generally chambered for pistol calibre ammunition.
The simplest type of action encountered is a simple blowback (Figure 2.0.13). To overcome the problems of the cartridge exiting the chamber before the pressures have dropped to safe levels, a very heavy reciprocating bolt and a large spring are employed to delay the cartridge extraction. The classic example of this type of action is the Sten gun used by the British forces in WW II (Figure 2.0.13). While this is extremely simple, is cheap to manufacture and has a reliable action, it does tend to be rather heavy and prone to accidental discharge.
Figure 2.0.13 Sten Mk.III sub-machine gun.
More modern weapons are equipped with some form of delayed blowback action of the type used in self-loading pistols and rifle actions, for example the Uzi (Figure 2.0.14). While this does produce a much lighter weapon, it is much more expensive to manufacture and, being more complicated, can be prone to malfunction.
Figure 2.0.14 Uzi sub-machine gun.
2.0.7 Assault Rifles
An assault rifle is basically a short, lightweight weapon firing a cartridge of lower power than that used in rifles, but more powerful than that used in sub-machine guns. To handle the increased pressures encountered in such cartridges, complicated systems involving gas delayed blowback or roller locking mechanisms have to be utilised to ensure that the high pressures involved have dropped to safe levels before the spent cartridge is ejected. An example of such a weapon, using a gas delayed blowback mechanism, is the Kalashnikov AK47 (Figure 2.0.15).
Figure 2.0.15 Kalashnikov assault rifle.


