40,81 €
Mehr erfahren.
- Herausgeber: Packt Publishing
- Kategorie: Wissenschaft und neue Technologien
- Sprache: Englisch
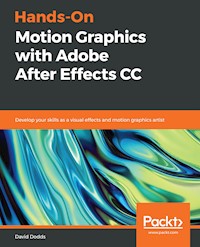
Discover techniques to enhance your videos with complex animation
Key Features
- Design, animate, and sequence a complete motion graphics project
- Work with compositions and pre-compositions to create animations speedily
- Maximize your motion graphics and visual effects skills
Book Description
If you're thinking seriously about making and publishing your videos with professional editing and animation, look no further! Adobe After Effects is a popular tool among video editors and YouTubers to enhance their videos and bring them to life by implementing visual effects and motion graphics.
This book will take you right from the basics through to the advanced techniques in Adobe After Effects CC 2018. You will start by setting up your editing environment to learn and improve techniques to sharpen your video editing skills. Furthermore, you will work with basic and advanced special effects to create, modify, and optimize motion graphics in your videos. Lastly, you will not only learn how to create 2.5D animations, but also get to grips with using Cinema 4D Lite to build and animate complete 3D scenes.
By the end of the book, you'll have learned how to package a video efficiently with the help of the projects covered.
What you will learn
- Create a lower third project for a TV show with complex layers
- Work with shape layer animation to create an animated lyrics video
- Explore different tools to animate characters
- Apply text animation to create a dynamic film-opening title
- Use professional visual effects to create a VFX project
- Model, light, and composite your 3D project in After Effects
Who this book is for
If you're a student, professional, YouTuber, or anyone who is interested in video editing, animation, and motion graphics, this book is for you. You'll also find this resource useful if you're an Illustrator looking to put your creations in motion.
Das E-Book können Sie in Legimi-Apps oder einer beliebigen App lesen, die das folgende Format unterstützen:
Seitenzahl: 216
Veröffentlichungsjahr: 2019
Ähnliche
Table of Contents
Hands-On Motion Graphics with Adobe After Effects CC
Hands-On Motion Graphics with Adobe After Effects CC
Copyright © 2019 Packt Publishing
All rights reserved. No part of this book may be reproduced, stored in a retrieval system, or transmitted in any form or by any means, without the prior written permission of the publisher, except in the case of brief quotations embedded in critical articles or reviews.
Every effort has been made in the preparation of this book to ensure the accuracy of the information presented. However, the information contained in this book is sold without warranty, either express or implied. Neither the author, nor Packt Publishing or its dealers and distributors, will be held liable for any damages caused or alleged to have been caused directly or indirectly by this book.
Packt Publishing has endeavored to provide trademark information about all of the companies and products mentioned in this book by the appropriate use of capitals. However, Packt Publishing cannot guarantee the accuracy of this information.
Commissioning Editor: Vijin Boricha
Acquisition Editor: Prachi Bisht
Content Development Editor: Shubham Bhattacharya
Technical Editor: Sayali Thanekar
Copy Editor: Safis Editing
Project Coordinator: Nusaiba Ansari
Proofreader: Safis Editing
Indexer: Manju Arasan
Graphics: Jisha Chirayil
Production Coordinator: Aparna Bhagat
First published: April 2019
Production reference: 1240419
Published by Packt Publishing Ltd.
Livery Place
35 Livery Street
Birmingham B3 2PB, UK.
ISBN 978-1-78934-515-5
www.packtpub.com
mapt.io
Mapt is an online digital library that gives you full access to over 5,000 books and videos, as well as industry leading tools to help you plan your personal development and advance your career. For more information, please visit our website.
Why subscribe?
Packt.com
Did you know that Packt offers eBook versions of every book published, with PDF and ePub files available? You can upgrade to the eBook version at www.Packt.com and as a print book customer, you are entitled to a discount on the eBook copy. Get in touch with us at [email protected] for more details.
At www.Packt.com, you can also read a collection of free technical articles, sign up for a range of free newsletters, and receive exclusive discounts and offers on Packt books and eBooks.
Contributors
About the author
David Dodds is an artist with a lifelong love of learning and teaching, which led him to a teaching career at UCLA. He stays on the forefront of the motion graphics industry by working with companies and creating motion graphics for the entertainment industry. David teaches, mentors students, and lectures at various events in connection with the exciting motion graphics industry. He currently lives and works in Los Angeles.
I would like to thank my family and friends for their support. Especially my partner, Bradley Hankey, for believing in me and always encouraging me to follow all my many creative passions! I would also like to thank my colleagues at Packt Publishing and my students at UCLA; I learn so much from you all. Thank you for helping me become a better instructor!
About the reviewer
Luis Medrano started his career as a hand-drawn cartoon animator in 1995 in Panama City, Panama, later becoming a 3D and After Effects artist. In 2003, he moved to the United States, where his distinctive cinematic style earned him recognition in the competitive New York City television market as a design director and animator. His vast experience covers marketing, animation, broadcast production, virtual integration, and live television. A self-proclaimed animation scientist, he is currently writing his theories on Motion Orchestration™. Luis is the recipient of two Emmy awards and three Promax awards for his work in animation. He currently works as a CGI artist and consultant in the New York area.
Packt is searching for authors like you
If you're interested in becoming an author for Packt, please visit authors.packtpub.com and apply today. We have worked with thousands of developers and tech professionals, just like you, to help them share their insight with the global tech community. You can make a general application, apply for a specific hot topic that we are recruiting an author for, or submit your own idea.
Preface
Welcome to this introduction to motion graphics with Adobe After Effects, your guide to motion graphics, the most exciting field in the world today. This book will provide readers with the knowledge and skills required to communicate effectively with After Effects and with the ability to create infographics through the use of feature film-level compositing tools. Other topics covered include editing, camera work, and lighting. You will learn how to create stunning visual effects and exciting animated 3D typography. This book will train readers in the concepts of motion design, examining a range of diverse issues, such as merging graphic design and animation with cinematic storytelling techniques.
Who this book is for
This book is targeted at students, professionals, YouTubers, and people who are interested in video editing, animation, and motion graphics. It is also designed for illustrators who would like to set their creations in motion. All these groups will really enjoy reading this book.
What this book covers
Chapter 1, Getting Started with After Effects, explains where the main tools and menus are to be found. The focus will be on shape and text layers, animating position, scale, rotation, opacity, and masks.
Chapter 2, Creating a Lower Third for a Television Show, talks about precomps. This is a very important part of After Effects. It helps you to create complex animations quickly. Once you understand this concept, we will create a lower third project with more complex layers.
Chapter 3, Using Shape Layers to Create an Animated Lyric Video, builds on the previous chapter in understanding more complex layers. We will also begin working with text animators. Text animators are more complex text tools that allow you to achieve detailed animation using text presets.
Chapter 4, Creating an Infographic with Character Animator, takes your text animation to a more advanced level and uses it to communicate. You will animate icons dynamically. Having an understanding of the graph editor will make your animations more realistic and professional. You will also learn about different tools for animating simple characters to use in your projects.
Chapter 5, Producing a Film Title Project Using Text Animator, explains how opening film titles are a great way to set a mood and communicate what the movie is about (according to Saul Bass, a graphic designer who pioneered motion graphics and contemporary film titles). In this chapter, we are going to create a dynamic film title opening sequence.
Chapter 6, Animating Sports Graphics with Compositing Effects, begins our work with video footage. Understanding how to edit video and add effects to footage is an important tool in After Effects. You will learn how to use tools commonly used in the entertainment industry to composite and track video.
Chapter 7, Developing a VFX Project Using the 3D Camera Tracker, gets more advanced with professional-level visual effects commonly used in the entertainment industry. Understanding how to separate objects from their background opens up a plethora of possibilities in special effects. We will also learn how to use the particle system.
Chapter 8, Creating a 2.5D Environment Camera Fly Through, takes your layers and puts them in the 3D space. After Effects has a powerful 3D workspace. Understanding how to animate in a 3D space opens up a lot of options in terms of creating dynamic videos. In this chapter, you will get up and running with all the 3D tools.
Chapter 9, Building a 3D C4D Lite Logo Project, teaches you how to model, light, and composite your 3D project in After Effects.
To get the most out of this book
Before beginning to use this book, you should have a working knowledge of your computer. You should know how to use the mouse and how to open, save, and close files.
After Effects CC is not included with this book. You need to purchase and install it. Some of the lessons in this book use Adobe Bridge, Photoshop, Illustrator, and Character Animator. You must install these programs from Adobe Creative Cloud.
To work through the projects in this book, you need to download the lesson files. The link is provided in the Technical requirements section of Chapter 2, Creating a Lower Third for a Television Show.
Download the color images
We also provide a PDF file that has color images of the screenshots/diagrams used in this book. You can download it here: https://www.packtpub.com/sites/default/files/downloads/9781789345155_ColorImages.pdf.
Conventions used
There are a number of text conventions used throughout this book.
CodeInText: Indicates code words in text, database table names, folder names, filenames, file extensions, pathnames, dummy URLs, user input, and Twitter handles. Here is an example: "Create a new 1920 x 1080 comp with a frame rate of 29.97."
Bold: Indicates a new term, an important word, or words that you see on screen. For example, words in menus or dialog boxes appear in the text like this. Here is an example: "Go to Layer | New | Solid, and change the color to blue."
Note
Warnings or important notes appear in a box like this.
Tip
Tips and tricks appear like this.
Get in touch
Feedback from our readers is always welcome.
General feedback: If you have questions about any aspect of this book, mention the book title in the subject of your message and email us at [email protected].
Errata: Although we have taken every care to ensure the accuracy of our content, mistakes do happen. If you have found a mistake in this book, we would be grateful if you would report this to us. Please visit www.packt.com/submit-errata, selecting your book, clicking on the Errata Submission Form link, and entering the details.
Piracy: If you come across any illegal copies of our works in any form on the internet, we would be grateful if you would provide us with the location address or website name. Please contact us at [email protected] with a link to the material.
If you are interested in becoming an author: If there is a topic that you have expertise in, and you are interested in either writing or contributing to a book, please visit authors.packtpub.com.
Reviews
Please leave a review. Once you have read and used this book, why not leave a review on the site that you purchased it from? Potential readers can then see and use your unbiased opinion to make purchase decisions, we at Packt can understand what you think about our products, and our authors can see your feedback on their book. Thank you!
For more information about Packt, please visit packt.com.
Part I. Section 1: Text, Layers, Characters, Animation
In this section, you will learn where the main tools and menus are. The focus is on shape and text layers, animating position, scale, rotation, opacity, and masks.
The following chapters are included in this section:
Chapter 1. Getting Started with After Effects
Welcome to this exciting journey into After Effects! In this chapter, I will give you a grand tour of this powerful program.
You will learn to navigate using After Effects and to locate your tools and effects. You will be introduced to the layer panel, the timeline, and key frames, and you will learn to import files. You will also learn to create, animate, and mask your layers.
We'll begin the chapter with the program's interface, to help you understand how to navigate. By the end of this chapter, you will know how to create a simple animated slideshow. The concepts we'll learn in this chapter are simple; however, the tools that we'll learn to use will be crucial to future projects (Illustration, photography, and all artistic content by David Dodds).
This chapter will cover the following topics:
Technical requirements
To use this book, you will need Photoshop, Illustrator, Character Animator, and After Effects CC. You need to have a good understanding of standard menus and commands. Some of the lessons in this book use Adobe-Character Animator, Adobe Bridge, Adobe Media Encoder, Adobe Illustrator, and Adobe Photoshop. You must install these applications from Adobe Cloud. Some knowledge of Adobe Photoshop and Illustrator will be helpful for performing the projects in this book.
Computer requirements
After Effects requires a minimum of 8 GB of RAM.
Exploring the interface
Now, let's take a look at the After Effects interface. When you first open After Effects, you will see a Start menu. Close this by clicking the red X in the upper right-hand top corner:
Start menu
This menu can be helpful if you need to locate a recently opened project. I find it best to close this and locate what we need in the program itself.
Resetting the layout
Your workspace is where all your panels and tools are located. This is the heart of the program. Your workspace can be configured in different ways; let's make sure it's set to the default state.
Go to Window | Workspace | Reset "Standard" to Saved Layout. This is the standard workspace:
Resetting the workspace
This way, everything is where it's supposed to be in our interface; nothing is out of place.
Saving your project
Saving a project is always a good practice. Let's start our project by creating a new file by saving it:
We have started saving our first project. It's important to start saving things right away.
The project panel
The project panel is where you bring in all your assets. After Effects is often used in post-production. You are usually working from many different asset types. Your project can get very disorganized quickly. This is where you keep all your assets tidy. You will be very happy when your project gets more difficult and you have taken the time to keep things organized. It is easier to find things when you have a tidy project. It also helps you to work faster. The project panel has icons at the bottom of the panel. Choose the one called folder:
Creating a new folder
Let's learn how to create folders in our project panel by following these steps to create one:
When you bring media into After Effects, be sure to organize all your media into the appropriate folders.
You can create the following folders:
You should have five folders. Right-click on the folder to rename them.
The projects in this book will use these five folders. We have created them to organize everything properly.
Importing images
Let's import a large image (at least 1,920 x 1,080) by double-clicking the open area. This brings up your media folders. You can click anywhere in the area where I'm standing in the next screenshot:
Project panel
Drag and move this image into the Images folder. You can rename your images by right-clicking on the layer.
After Effect references material. It doesn't actually keep anything in the project; it references things. You should never rename a file outside After Effects. When you import images into a Photoshop document, it saves a copy with the document. However, After Effects links to the assets you import into your project. You should always leave the name unchanged because After Effects will not be able to find the new name for its referencing, and you will receive an error message.
Rather than renaming or removing your files from After Effects, it's better to create a copy or not to move it. If you need to replace a file, you have to right-click on the layer and choose to replace or reload the footage:
Replace footage
Practice renaming and relinking your files a couple times, just to make sure you understand that concept.
If you need to delete anything, drag it into the trashcan; this is highlighted in the following screenshot:
Trashcan
Preferences – Autosave
Now we will turn our attention to setting Auto-Save... for your projects. It's important to get that set up so your project will automatically save, even if you forget to do this. The following steps will show you how to set up autosave:
Autosaving projects
Setting up autosave can save your life. If your project crashes, you will be happy that you have a back-up copy saved in the autosave folder. This is located wherever you save your project.
Creating compositions
After Effects uses compositions to place and arrange your elements. Remember to consider design principles that help create a strong composition when you arrange your elements. In After Effects, these compositions are referred to as comps. I am going to create a comp by hitting the new composition icon. If you look closely at the icon, you will see that it looks like a composition symbol with shapes:
New composition
Leave all these settings as they are, but make the comp size 1,920 x 1,080, and make the time duration 0;04;00;00. Name the comp MAIN:
Composition settings
Drag the main comp into the MAIN comp folder:
Organizing a project
The timelines and the toolbar
Look at the lower-third of the screen. This is called the timeline panel. The timeline is the works space where you create key frames. This is where you make your layers animate across time. You also organize your layer-stacking order. This stacking order is similar to Photoshop. Layers at the top will appear on top of other layers:
Timeline panel
After briefly learning about the timeline panel, let's discuss how to bring layers into your composition.
Bringing layers into your composition
Bringing layers into your composition is easy. Layers are the basic building blocks for creating a movie. A layer can be an image, video footage, or an audio file.
Follow these steps:
Bringing an image into the timeline
Tool panel
Let's go over our tools! The tool panel is where you find all your tools to edit your layers. Here, you can find tools to move your layers and navigate around your composition:
Selection Tool
The arrow icon on the far left is called the Selection Tool.
Hand Tool (H): The hand tool is to the right of the arrow tool. This tool lets you move around in your composition:Hand Tool
Now select the hand tool or use the keyboard shortcut H. You can use the hand tool to move around in your view or navigate around in the comp.
Zoom Tool (Z): The zoom tool is next to the hand tool. This tool will magnify your image in the composition. Select the zoom tool, or use the keyboard shortcut Z, and click on the image in the comp a few times:Zoom Tool
Rotate Tool
Let's explore how to use the rotate tool. The center of the screen where your image is displayed is called the composition window. At the bottom left is an icon called the Magnification ratio popup. Choose fit to 100%. This will zoom out so we can see what's happening:
Magnifying
Select the rotate tool, or use the keyboard shortcut W, and adjust the image:
Rotate
To undo an action, go to the top-left corner and choose Edit | Undo Rotate Object:
Undo
Pan behind tool


