22,99 €
Mehr erfahren.
- Herausgeber: John Wiley & Sons
- Kategorie: Wissenschaft und neue Technologien
- Sprache: Englisch
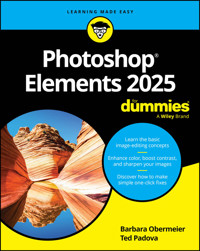
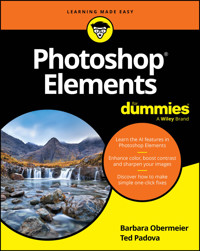
A step-by-step guide to the core features of Photoshop Elements, one of the world's most accessible photo-editing apps for non-pros
In Photoshop Elements For Dummies, an experienced team of design professionals walks you through the beginner-friendly photo editing tool that's used by countless amateur photographers and designers around the world. The authors focus on the tools and features of Photoshop Elements used over and over by its vast audience. From utilizing layers to AI-powered one-click fixes, colorizing techniques, and filters, Photoshop Elements For Dummies offers step-by-step demonstrations of how to turn your images into stunning showstoppers.
You'll learn to enhance everyday photographs you've taken at weddings, on hikes, with friends, and anywhere else. You'll also discover how to:
- Replace backgrounds and duplicate layers to transform your photos into entirely new creations
- Generate different views of an image and use the photomerge feature
- Use Quick Mode to make fast and easy edits and manage your catalog of images
- Apply the latest AI features
Perfect for non-professional photographers and graphic designers new to the software, Photoshop Elements For Dummies is a great way to get a grasp on the core functions of Photoshop Elements that stay the same from version to version.
Sie lesen das E-Book in den Legimi-Apps auf:
Seitenzahl: 478
Veröffentlichungsjahr: 2025
Ähnliche
Photoshop® Elements For Dummies®
To view this book's Cheat Sheet, simply go to www.dummies.com and search for “Photoshop Elements For Dummies Cheat Sheet” in the Search box.
Table of Contents
Cover
Table of Contents
Title Page
Copyright
Introduction
What’s New in Photoshop Elements
About This Book
Icons Used in This Book
Beyond the Book
Where to Go from Here
Part 1: Getting Started with Photoshop Elements
Chapter 1: Exploring the Photo Editor
Examining the Photo Editor
Playing with Panels
Using the Photo Bin
Chapter 2: Getting Familiar with the Organizer
Touring the Organizer
Organizing Photos and Media on a Hard Drive
Adding Images to the Organizer
Navigating the Media Browser
Setting Organizer Preferences
Chapter 3: Organizing Your Pictures
Organizing Groups of Images with Tags
Rating Images with Stars
Adding People in the Media Browser
Chapter 4: Viewing and Finding Your Images
Cataloging Files
Switching to a Different View
Viewing Photos in Memories (Slideshow)
Searching for Photos
Part 2: Selecting and Correcting Photos
Chapter 5: Editing Camera Raw Images
Launching the Camera Raw Editor
Understanding Camera Raw
Getting Familiar with the Raw Editor
Getting Familiar with the Panels
Working with Filmstrips
Working with Profiles
Opening Non-Raw Images in the Camera Raw Editor
Changing Image Defaults
Working with XML Files and Preferences
Chapter 6: Making and Modifying Selections
Defining Selections
Creating Rectangular and Elliptical Selections
Making Freeform Selections with the Lasso Tools
Working Wizardry with the Magic Wand
Modifying Your Selections
Painting with the Selection Brush
Painting with the Quick Selection Tool
Selecting with the Auto Selection Tool
Selecting Your Subject, Background, or Sky with One-Click Selecting
Fine-Tuning with the Refine Selection Brush
Working with the Cookie Cutter Tool
Eliminating with the Eraser Tools
Using the Select Menu
Chapter 7: Working with Layers
Getting to Know Layers
Tackling Layer Basics
Moving a Layer’s Content
Transforming Layers
Flattening and Merging Layers
Chapter 8: Simple Image Makeovers
Cropping and Straightening Images
Recomposing Images
Employing One-Step Auto Fixes
Editing in Quick Mode
Fixing Small Imperfections with Tools
Chapter 9: Correcting Contrast, Color, and Clarity
Editing Your Photos Using a Logical Workflow
Adjusting Lighting
Adjusting Color
Adjusting Clarity
Working Intelligently with the Smart Brush Tools
Part 3: Exploring Your Inner Artist
Chapter 10: Using Artificial Intelligence in Photoshop Elements
Using Adobe’s Integrated AI Technology
Using Quick Actions with One-Click
Exploring New Generative AI Tools
Getting AI Assistance
Chapter 11: Playing with Filters, Effects, Styles, and More
Having Fun with Filters
Correcting Camera Distortion
Exploring Elements’ Unique Filters
Dressing Up with Photo and Text Effects
Adding Shadows, Glows, and More
Mixing It Up with Blend Modes
Using Photomerge
Chapter 12: Drawing, Painting, and Typing
Choosing Color
Getting Artsy with the Pencil and Brush Tools
Filling and Outlining Selections
Splashing on Color with the Paint Bucket Tool
Working with Gradients and Patterns
Creating Shapes of All Sorts
Creating Type
Specifying Type Options
Editing Text
Enhancing Type
Part 4: Printing, Creating, and Sharing
Chapter 13: Getting It on Paper
Getting Pictures Ready for Printing
Working with Color Printer Profiles
Getting Familiar with the Print Dialog Box
Chapter 14: Sharing Your Work
Using the Share Panel
Chapter 15: Making Creations
Creating Projects in Photoshop Elements
Making Creations in Photoshop Elements
Making Creations in Adobe Express
Part 5: The Part of Tens
Chapter 16: The Ten Best Guided Edits
Correct Skin Tone
Sharpen
Object Removal
Perfect Portrait
Replace Background
Remove a Color Cast
Levels
Resize Your Photo
Recompose
Move & Scale Object
Chapter 17: Ten (or So) More Project Ideas
Screen Savers
Flyers, Ads, and Online Auctions
Clothes, Hats, and More
Posters
Household and Business Inventories
Project Documentation
School Reports and Projects
Blogs
Wait — There's More
Index
About the Authors
Connect with Dummies
End User License Agreement
List of Illustrations
Chapter 1
FIGURE 1-1: The Photo Editor workspace.
FIGURE 1-2: Tool Options provide more editing features for tools selected in th...
FIGURE 1-3: The image window displays an open file undocked within the Elements...
FIGURE 1-4: Click the readout on the status bar to see file information.
FIGURE 1-5: From the pop-up menu on the status bar, choose commands to show mor...
FIGURE 1-6: A contextual menu for a selection.
FIGURE 1-7: Additional tools within a tool group are available in the Tool Opti...
FIGURE 1-8: The Tools panel with keystroke equivalents to access a tool from th...
FIGURE 1-9: The Layers panel with a Background and three layers.
FIGURE 1-10: The Layers panel pop-up menu.
FIGURE 1-11: Actions panel opened in a group of floating windows.
FIGURE 1-12: Open the Photo Bin Options pop-up menu to display various actions ...
Chapter 2
FIGURE 2-1: The Organizer workspace.
FIGURE 2-2: The Get Photos and Videos from Files and Folders dialog box (Window...
FIGURE 2-3: The Elements Organizer – Photo Downloader opens.
FIGURE 2-4: Folder names appear in the Import panel.
FIGURE 2-5: Photos are displayed in a Tree view in the Import panel. The Hide P...
FIGURE 2-6: Open the Organizer’s Preferences and deselect all the Media-Analysi...
Chapter 3
FIGURE 3-1: The Tags panel in the Organizer.
FIGURE 3-2: The Create Keyword Tag dialog box.
FIGURE 3-3: The Tags panel after adding a tag in the Keywords category.
FIGURE 3-4: Photos rated with stars.
FIGURE 3-5: Click the plus (+) icon to open the drop-down list and then choose ...
FIGURE 3-6: Click Add Name and type a name.
FIGURE 3-7: Photo tagged with name.
Chapter 4
FIGURE 4-1: The Catalog Manager dialog box.
FIGURE 4-2: The wizard provides options for selecting the destination media for...
FIGURE 4-3: The first photo in Full Screen view opens with a number of tool and...
FIGURE 4-4: Click Film Strip to see mini thumbnails of the photos in the slides...
FIGURE 4-5: Click Search to display the Search overlay window.
FIGURE 4-6: Choose Find?⇒?By Details (Metadata) in the Organizer to open the di...
FIGURE 4-7: Mark the object you want to search and then click the Search Object...
Chapter 5
FIGURE 5-1: The Camera Raw Editor user interface.
FIGURE 5-2: The Camera Raw Editor tools.
FIGURE 5-3: The Crop panel.
FIGURE 5-4: The Panel Bin showing a list of panels.
FIGURE 5-5: The Basic panel with the sliders at defaults.
FIGURE 5-6: The red overlay shows clipping.
FIGURE 5-7: Click the Detail text in the Panel Bin to open the Detail panel.
FIGURE 5-8: Press Alt/Option when adjusting Masking.
FIGURE 5-9: To make a noncontiguous selection, press Ctrl/⌘?? and click each im...
FIGURE 5-10: Right-click a thumbnail to open a context menu.
FIGURE 5-11: Profile thumbnails displayed after clicking the Browse icon.
FIGURE 5-12: Open a context menu on a profile thumbnail.
FIGURE 5-13: A number of profiles added to the Favorites list.
FIGURE 5-14: Press Ctrl/⌘ +K to open the Preferences dialog box.
FIGURE 5-15: Click the first icon in the top-right corner to open the Save Opti...
Chapter 6
FIGURE 6-1: Use the Rectangular Marquee tool to create rectangular selections.
FIGURE 6-2: The Elliptical Marquee tool is perfect for selecting round objects....
FIGURE 6-3: Apply Marquee settings in the Tool Options.
FIGURE 6-4: Feathering creates soft-edged selections.
FIGURE 6-5: The Lasso tool makes freeform selections.
FIGURE 6-6: After you close the polygonal lasso line, Elements creates a select...
FIGURE 6-7: The Magic Wand selects pixels based on a specified Tolerance settin...
FIGURE 6-8: The Selection Brush allows you to make a selection (right) by creat...
FIGURE 6-9: Paint a selection with the Quick Selection tool.
FIGURE 6-10: The Auto Selection tool easily and quickly selects your object.
FIGURE 6-11: The Select Subject command analyzes and selects people, animals, c...
FIGURE 6-12: Use the Refine Selection Brush to fine-tune your selection.
FIGURE 6-13: Crop your photo into interesting shapes with the Cookie Cutter.
FIGURE 6-14: Erase either to your background color (left) or to transparency (r...
FIGURE 6-15: The Background Eraser erases similarly colored pixels sampled by t...
FIGURE 6-16: Fine-tune your selection with Refine Edge.
Chapter 7
FIGURE 7-1: Layers enable you to easily create composite images.
FIGURE 7-2: The Layers panel controls layers in your image.
FIGURE 7-3: We created this effect by using blend modes and opacity options.
FIGURE 7-4: When you cut a selection from a layer, take note of the resulting h...
FIGURE 7-5: Flattening combines all your layers into a single background.
Chapter 8
FIGURE 8-1: The shield and Rule of Thirds overlay allow for easy framing of you...
FIGURE 8-2: The Perspective Crop tool crops while correcting keystone distortio...
FIGURE 8-3: Brush over areas you want to protect and remove in your image.
FIGURE 8-4: Recompose your image to your desired size and aspect ratio without ...
FIGURE 8-5: In a hurry? Apply the Auto Smart Fix command to quickly improve an ...
FIGURE 8-6: Apply Auto Smart Tone to quickly adjust the tonal values in an imag...
FIGURE 8-7: Auto Levels adjusts the overall contrast of an image.
FIGURE 8-8: The Auto Contrast command adjusts contrast without messing up color...
FIGURE 8-9: The Auto Haze Removal command works wonders on hazy images.
FIGURE 8-10: Use Auto Color Correction to remove a color cast.
FIGURE 8-11: Use Auto Sharpen to improve focus.
FIGURE 8-12: The Auto Red Eye Fix and the Red Eye tools detect and destroy drea...
FIGURE 8-13: Quick mode provides basic tools for fixing your image.
FIGURE 8-14: The Clone Stamp tool enables you to realistically duplicate soft-e...
FIGURE 8-15: Wipe out ten years in two minutes with the Healing Brush tool.
FIGURE 8-16: Eliminate kids on swings and other objects with the Content-Aware ...
FIGURE 8-17: Eliminate distracting objects with the Remove tool.
FIGURE 8-18: Recompose your image by using the Content-Aware Move tool.
FIGURE 8-19: Use the Dodge and Burn tools to lighten and darken small areas.
FIGURE 8-20: The Smudge tool can make your images appear to be painted.
FIGURE 8-21: The Blur tool can be used to emphasize a focal point.
FIGURE 8-22: Reserve the Sharpen tool for small areas, such as eyes.
FIGURE 8-23: The Sponge tool increases or decreases the intensity of the color ...
Chapter 9
FIGURE 9-1: Correct the lighting in your images with the Shadows/Highlights adj...
FIGURE 9-2: The Brightness/Contrast adjustment is best reserved for correcting ...
FIGURE 9-3: The Levels histogram displays the distribution of brightness levels...
FIGURE 9-4: Improve the contrast of an image with the intelligent Levels comman...
FIGURE 9-5: Get rid of nasty color shifts with the Remove Color Cast command.
FIGURE 9-6: Adjust the color, intensity, or brightness of your image with the H...
FIGURE 9-7: Wash away color with the Convert to Black and White command.
FIGURE 9-8: The Replace Color command enables you to replace one color with ano...
FIGURE 9-9: Change the color of desired objects within an image with the Change...
FIGURE 9-10: The Color Curves adjustment provides both basic and advanced adjus...
FIGURE 9-11: Color Curves improves tonal range in color images.
FIGURE 9-12: Give your friends and family a complexion makeover with the Adjust...
FIGURE 9-13: Remove the colored halo around your selections with the Defringe c...
FIGURE 9-14: Get rid of haze with the Haze Removal command.
FIGURE 9-15: Change the colors in your image by remapping them to other values....
FIGURE 9-16: Use the Lens Blur filter to create a shallow depth-of-field effect...
FIGURE 9-17: Sharpening mimics an increase in focus by increasing contrast betw...
FIGURE 9-18: The Adjust Sharpness dialog box.
FIGURE 9-19: Fix images with the Open Closed Eyes feature.
FIGURE 9-20: Use the Colorize Photo feature to bring life to black-and-white im...
FIGURE 9-21: The Smooth Skin feature quickly softens wrinkles and blemishes.
FIGURE 9-22: The Adjust Facial Features command easily modifies facial characte...
FIGURE 9-23: Add animated content to your static images with the Moving Overlay...
FIGURE 9-24: Create animated GIFs or MP4 files easily with the Moving Photos en...
FIGURE 9-25: Give selected areas of your image movement with the Moving Element...
FIGURE 9-26: The Smart Brush enables you to paint on adjustments.
FIGURE 9-27: The Detail Smart Brush lets you paint on a variety of special effe...
Chapter 10
FIGURE 10-1: Use the Remove tool to draw around the subject or area you want to...
FIGURE 10-2: Depth blur applied to the image at right.
FIGURE 10-3: An Object Color Change applied to the image at the right.
FIGURE 10-4: Two images used to perform the Combine Photos task.
FIGURE 10-5: The composite image after using the Combine Photos command.
FIGURE 10-6: The Quick Actions panel.
FIGURE 10-7: A Blinking Heart Graphic added to a static photo adds animation.
FIGURE 10-8: Original photo (left) and the photo after adding more content usin...
FIGURE 10-9: Artwork-generated AI image.
FIGURE 10-10: Photo-generated AI image.
FIGURE 10-11: Click the Create button in the Organizer or Photo Editor to open ...
FIGURE 10-12: Enter a description of the image you want to generate.
FIGURE 10-13: Final image after editing the template.
FIGURE 10-14: Paint an area with the Insert Object Brush where you want to inse...
FIGURE 10-15: Final result after generating a white rose.
FIGURE 10-16: The gremlin sitting on a table was created through Generative AI.
FIGURE 10-17: To restore vintage or damaged photos, choose Enhance ⇒ Restore Ph...
FIGURE 10-18: Click the Find People in the Background button and then click Don...
FIGURE 10-19: Click the AI Assistant icon in the top-right corner of the Photo ...
Chapter 11
FIGURE 11-1: Use filters to correct image imperfections or to completely transf...
FIGURE 11-2: Apply and edit multiple filters in the Filter Gallery.
FIGURE 11-3: The Liquify filter enables you to interactively distort your image...
FIGURE 11-4: The Correct Camera Distortion filter fixes distortions caused by c...
FIGURE 11-5: The Comic filter turns a photo into an illustration.
FIGURE 11-6: Create an image worthy of a graphic novel.
FIGURE 11-7: Create a cartoon-like image with the Pen and Ink filter.
FIGURE 11-8: Enhance your images by adding effects.
FIGURE 11-9: The Double Exposure edit enables you to creatively merge two photo...
FIGURE 11-10: Add dimension by applying shadows and bevels to your object or ty...
FIGURE 11-11: The Graphics panel provides an abundance of backgrounds and frame...
FIGURE 11-12: The Dissolve blend mode allows pixels from one layer to peek rand...
FIGURE 11-13: These blend modes darken your image layers.
FIGURE 11-14: These blend modes lighten your image layers.
FIGURE 11-15: Some blend modes adjust the lighting between your image layers.
FIGURE 11-16: Difference and Exclusion blend modes invert colors.
FIGURE 11-17: Some blend modes mix colors based on the actual hue, richness, an...
FIGURE 11-18: Combine multiple images into a single panorama with Photomerge Pa...
FIGURE 11-19: Select the two images that you want to composite.
FIGURE 11-20: Composite two images seamlessly with Combine Photos.
Chapter 12
FIGURE 12-1: Choose your desired color from the Color Picker.
FIGURE 12-2: Choose and store colors in the Color Swatches panel.
FIGURE 12-3: The Eyedropper tool enables you to sample color from your image to...
FIGURE 12-4: You can use the Pencil tool for digital drawings.
FIGURE 12-5: Choose from other brush libraries.
FIGURE 12-6: Change brush options to create a custom brush.
FIGURE 12-7: The Impressionist Brush turns your photo into a painting.
FIGURE 12-8: Fill your selection or layer with color or a pattern.
FIGURE 12-9: Stroke a selection to create a colored border.
FIGURE 12-10: The Paint Bucket tool makes a selection and fills it at the same ...
FIGURE 12-11: We filled our sun selection with a radial Orange, Yellow gradient...
FIGURE 12-12: Fill your selection with one of the many Elements preset patterns...
FIGURE 12-13: Elements images can be vector-based (left) or pixel-based (right)...
FIGURE 12-14: Custom shapes run the gamut from animals to food.
FIGURE 12-15: Paragraph type automatically wraps to fit within your bounding bo...
FIGURE 12-16: Specify your type options, such as font family and size, before y...
FIGURE 12-17: The Anti-aliasing option softens the edges of your type.
FIGURE 12-18: You can vary the opacity of type layers to allow the underlying l...
FIGURE 12-19: Applying a motion blur to type can make it appear as fast as the ...
FIGURE 12-20: Bring your type to life with color (left) or a gradient (right).
FIGURE 12-21: Text remains fully editable after you apply distortions with the ...
Chapter 13
FIGURE 13-1: The Print dialog box (Windows).
FIGURE 13-2: The More Options dialog box (Windows and Mac).
Chapter 14
FIGURE 14-1: The Share panel as it appears in the Organizer (left) and Photo Ed...
FIGURE 14-2: Set the Quality slider to a medium setting for faster uploads to y...
FIGURE 14-3: Add recipients from your Address Book.
FIGURE 14-4: A photo uploaded to a Facebook account.
FIGURE 14-5: Adobe Elements (Beta) web page.
Chapter 15
FIGURE 15-1: The Create panel from the Organizer.
FIGURE 15-2: Click Create in the Photo Editor and you open the Adobe Express We...
FIGURE 15-3: Select a theme for your creation.
FIGURE 15-4: The Pages panel.
FIGURE 15-5: The Layouts panel offers choices for many layouts.
FIGURE 15-6: Advanced mode provides you with the Photo Editor tools to edit pho...
FIGURE 15-7: Click a Theme to apply to the video.
Chapter 16
FIGURE 16-1: The Correct Skin Tone edit removes color casts from your people’s ...
FIGURE 16-2: Remove objects for your desired composition.
FIGURE 16-3: Swap out your original background with a new one.
FIGURE 16-4: Eliminate color casts from your images.
FIGURE 16-5: Adjust the contrast in your images with the Levels Guided Edit.
FIGURE 16-6: Resize your image without losing important content.
FIGURE 16-7: Move and scale your subject seamlessly.
Guide
Cover
Table of Contents
Title Page
Copyright
Begin Reading
Index
About the Authors
Pages
i
ii
1
2
3
4
5
6
7
8
9
10
11
12
13
14
15
16
17
18
19
20
21
22
23
24
25
26
27
28
29
30
31
32
33
34
35
37
38
39
40
41
42
43
44
45
46
47
48
49
50
51
52
53
54
55
56
57
59
60
61
62
63
64
65
66
67
68
69
70
71
72
73
74
75
76
77
78
79
80
81
82
83
84
85
86
87
88
89
90
91
92
93
94
95
96
97
98
99
100
101
102
103
104
105
106
107
108
109
110
111
112
113
114
115
117
118
119
120
121
122
123
124
125
126
127
128
129
130
131
133
134
135
136
137
138
139
140
141
142
143
144
145
146
147
148
149
150
151
152
153
154
155
156
157
158
159
160
161
162
163
164
165
166
167
168
169
170
171
172
173
174
175
176
177
178
179
180
181
182
183
184
185
186
187
188
189
190
191
192
193
194
195
196
197
198
199
200
201
202
203
204
205
206
207
208
209
210
211
212
213
214
215
216
217
218
219
220
221
222
223
224
225
226
227
228
229
231
232
233
234
235
236
237
238
239
240
241
242
243
244
245
246
247
248
249
250
251
252
253
254
255
256
257
258
259
260
261
262
263
264
265
266
267
268
269
270
271
272
273
274
275
276
277
278
279
280
281
282
283
284
285
286
287
288
289
290
291
292
293
294
295
296
297
298
299
300
301
302
303
304
305
306
307
308
309
310
311
312
313
314
315
316
317
319
320
321
322
323
324
325
326
327
328
329
330
331
332
333
334
335
336
337
339
340
341
342
343
345
346
347
348
349
350
351
352
353
354
355
357
358
359
Photoshop® Elements For Dummies®
Published by: John Wiley & Sons, Inc., 111 River Street, Hoboken, NJ 07030-5774, www.wiley.com
Copyright © 2026 by John Wiley & Sons, Inc. All rights reserved, including rights for text and data mining and training of artificial technologies or similar technologies.
Media and software compilation copyright © 2026 by John Wiley & Sons, Inc. All rights reserved, including rights for text and data mining and training of artificial technologies or similar technologies.
No part of this publication may be reproduced, stored in a retrieval system or transmitted in any form or by any means, electronic, mechanical, photocopying, recording, scanning or otherwise, except as permitted under Sections 107 or 108 of the 1976 United States Copyright Act, without the prior written permission of the Publisher or authorization through payment of the appropriate per-copy fee to the Copyright Clearance Center, Inc., 222 Rosewood Drive, Danvers, MA 01923, (978) 750-8400, fax (978) 750-4470, or on the web at www.copyright.com. Requests to the Publisher for permission should be addressed to the Permissions Department, John Wiley & Sons, Inc., 111 River Street, Hoboken, NJ 07030, (201) 748-6011, fax (201) 748-6008, or online at http://www.wiley.com/go/permissions.
The manufacturer’s authorized representative according to the EU General Product Safety Regulation is Wiley-VCH GmbH, Boschstr. 12, 69469 Weinheim, Germany, e-mail: [email protected].
Trademarks: Wiley, For Dummies, the Dummies Man logo, Dummies.com, Making Everything Easier, and related trade dress are trademarks or registered trademarks of John Wiley & Sons, Inc. and may not be used without written permission. Photoshop is a registered trademark or trademark of Adobe in the United States and/or other countries. All other trademarks are the property of their respective owners. John Wiley & Sons, Inc. is not associated with any product or vendor mentioned in this book. Photoshop® Elements For Dummies® is not authorized, endorsed, or sponsored by Adobe, publisher of Photoshop Elements.
LIMIT OF LIABILITY/DISCLAIMER OF WARRANTY: THE PUBLISHER AND THE AUTHOR MAKE NO REPRESENTATIONS OR WARRANTIES WITH RESPECT TO THE ACCURACY OR COMPLETENESS OF THE CONTENTS OF THIS WORK AND SPECIFICALLY DISCLAIM ALL WARRANTIES, INCLUDING WITHOUT LIMITATION WARRANTIES OF FITNESS FOR A PARTICULAR PURPOSE. CERTAIN AI SYSTEMS HAVE BEEN USED IN THE CREATION OF THIS WORK. NO WARRANTY MAY BE CREATED OR EXTENDED BY SALES OR PROMOTIONAL MATERIALS. THE ADVICE AND STRATEGIES CONTAINED HEREIN MAY NOT BE SUITABLE FOR EVERY SITUATION. THIS WORK IS SOLD WITH THE UNDERSTANDING THAT THE PUBLISHER IS NOT ENGAGED IN RENDERING LEGAL, ACCOUNTING, OR OTHER PROFESSIONAL SERVICES. IF PROFESSIONAL ASSISTANCE IS REQUIRED, THE SERVICES OF A COMPETENT PROFESSIONAL PERSON SHOULD BE SOUGHT. NEITHER THE PUBLISHER NOR THE AUTHOR SHALL BE LIABLE FOR DAMAGES ARISING HEREFROM. THE FACT THAT AN ORGANIZATION OR WEBSITE IS REFERRED TO IN THIS WORK AS A CITATION AND/OR A POTENTIAL SOURCE OF FURTHER INFORMATION DOES NOT MEAN THAT THE AUTHOR OR THE PUBLISHER ENDORSES THE INFORMATION THE ORGANIZATION OR WEBSITE MAY PROVIDE OR RECOMMENDATIONS IT MAY MAKE. FURTHER, READERS SHOULD BE AWARE THAT INTERNET WEBSITES LISTED IN THIS WORK MAY HAVE CHANGED OR DISAPPEARED BETWEEN WHEN THIS WORK WAS WRITTEN AND WHEN IT IS READ.
For general information on our other products and services, please contact our Customer Care Department within the U.S. at 877-762-2974, outside the U.S. at 317-572-3993, or fax 317-572-4002. For technical support, please visit https://hub.wiley.com/community/support/dummies.
Wiley publishes in a variety of print and electronic formats and by print-on-demand. Some material included with standard print versions of this book may not be included in e-books or in print-on-demand. If this book refers to media that is not included in the version you purchased, you may download this material at http://booksupport.wiley.com. For more information about Wiley products, visit www.wiley.com.
Library of Congress Control Number is available from the publisher.
ISBN 978-1-394-37996-5 (pbk); ISBN 978-1-394-37998-9 (ebk); ISBN 978-1-394-37997-2 (ebk)
Introduction
This book focuses on the new features and updates introduced in Photoshop Elements 2026. Starting with this version, Adobe has updated its licensing model. Instead of being offered through a one-time purchase, Photoshop Elements is now available only through a subscription service. This subscription grants users access to the software for a three-year term. At the end of this period, users must renew their subscription to continue using the software.
Following Adobe’s release cycle, this edition of Photoshop Elements For Dummies covers the 2026 version. We do not plan to release a new edition until 2029, when the next licensing cycle begins. In the meantime, Adobe will roll out annual updates. We encourage readers to consult the in-app help files and online resources to stay up to date with new features as Adobe introduces them.
Photoshop Elements brings a host of new tools and capabilities, with a strong emphasis on artificial intelligence (AI). In fact, because of the extensive enhancements in AI, we’ve included an entire chapter dedicated to AI-powered features.
What’s New in Photoshop Elements
The following AI-powered features are new in Photoshop Elements:
Text to Image:
Use Generative AI to transform text prompts into visually compelling images. This feature creates entirely new content that doesn’t already exist in your photos.
Insert Object Brush:
Add new elements — like a hat, bouquet of flowers, animal, or virtually anything — into your photos using Generative AI.
Photo Restoration:
Restore old photos with a single click — remove film grain, repair scratches, and fix cracks or torn edges.
Auto Distraction Removal:
Effortlessly remove unwanted objects or people. The AI intelligently fills in the background for a seamless look.
Here are the non-AI features and enhancements as of the 2026 version:
Contextual taskbar:
A smart taskbar appears automatically based on your current actions, when you place or open an image.
Color fonts:
Enjoy a selection of new, curated color fonts introduced in this version.
Rich tool tips:
Discover modern, visually enhanced tool tips that improve usability.
Modern Creations launch experience:
Adobe has redesigned the Creations interface, which now includes a new window with free templates from Adobe Express.
Simplified mobile-to-desktop import:
Transferring files between your mobile device and desktop is now much easier.
Additional improvements:
This version includes an optimized crop tool, dynamic user-interface scaling, live blending-mode previews, enhancements to existing AI tools, and improved accessibility features in the Remove tool.
About This Book
Throughout this book, especially in step lists, we point you to menus for keyboard commands. For accessing a menu command, you may see something like this:
Choose File ⇒ Get Photos ⇒ From Files and Folders.
In this case, the command means to click the File menu to open its drop-down menu, click the menu command labeled Get Photos, and then choose the command From Files and Folders from the submenu that appears. It’s that simple.
We also refer to context menus, which jump up at your cursor position and show you a menu of options related to whatever you’re doing at the time. To open a context menu, just right-click the mouse, or Ctrl+click on a Mac if you don’t have a two-button mouse.
When we mention that you need to press keys on your keyboard, the text looks like this:
Press Alt+Shift+Ctrl+S (Option+Shift+⌘+S on the Mac).
In this case, this command means to hold down the Alt key on Windows or the Option key on the Mac, and then the Shift key, and then the Ctrl key on Windows or the ⌘ key on the Mac; then press the S key. You then release all the keys at the same time.
Icons Used in This Book
In the margins throughout this book, you see icons indicating that something is important, as follows:
This icon informs you that this item is a new feature in Photoshop Elements.
Pay particular attention when you see the Warning icon. This icon indicates possible side effects or damage to your image that you might encounter when performing certain operations in Elements.
This icon is a heads-up for some information you may want to commit to memory. Usually, it tells you about a shortcut for a repetitive task that can save you time.
A Tip tells you about an alternative method for a procedure, giving you a shortcut, a work-around, or some other type of helpful information.
Elements is a computer program, after all. No matter how hard we try to simplify our explanation of features, we can’t entirely avoid some technical information. If a topic is a little on the technical side, we use this icon to alert you that we’re moving into a complex subject. You won’t see many of these icons in the book because we try our best to give you the details in nontechnical terms.
Beyond the Book
In addition to what you’re reading right now, this product also comes with a free, online Cheat Sheet that includes a detailed look at the Elements photo-editing workspace, Tool Panel shortcuts, tricks for selecting objects, and more. To get this Cheat Sheet, simply go to www.dummies.com and type Photoshop Elements For Dummies Cheat Sheet in the Search box.
Where to Go from Here
Try to spend a little time reading through Chapter 1, Exploring the Photo Editor. After you know how to edit and save photos, feel free to jump around, paying special attention to the cross-referenced chapters in case you get stuck on a concept. Also look over Chapter 3, where we talk about organizing and searching photos. When it comes to editing photos, peruse Chapter 5 carefully. Everything begins with adjusting photos for brightness, contrast, and color. In Chapter 5, you find out that using the Camera Raw Editor is your first stop when editing a photo for any kind of output. If you’re ready to jump into more advanced tasks, check out Parts 2 and 3, where you see how to make selections; layer images and effects together; add filters and type; and much, much more.
We added a new chapter solely dedicated to artificial intelligence(AI) used in Photoshop Elements. For a thorough understanding of AI features, see Chapter 10.
We hope you have much success and enjoyment in using Adobe Photoshop Elements, and it’s our sincere wish that the pages ahead provide you with an informative and helpful view of the program.
Part 1
Getting Started with Photoshop Elements
IN THIS PART …
Tour the Photo Editor interface so that you know how to switch among images and navigate the many panels and options.
Discover the basic features of the Organizer interface.
Import images from your computer, camera, or scanner into the Organizer.
Tag images with keywords, faces, places, or events so that you can easily find images.
View your pictures in the Media Browser and change views.
Use the Organizer’s search features to pinpoint the images you need.
Chapter 1
Exploring the Photo Editor
IN THIS CHAPTER
Examining the Editor workspace
Working with panels
Photoshop Elements has two workspaces: the Organizer, which we discuss in Chapter 2, and the Photo Editor, introduced in this chapter. You manage and arrange your photos in the Organizer, and you edit photos in the Photo Editor.
In this chapter, you look at the Photo Editor, where you can refine your photo-editing skills. You discover the Photo Editor’s workspace in depth as well as how to access the Photo Editor’s three editing modes: Quick, Guided, and Advanced. You access these three workspaces by clicking the tabs above the image window.
Examining the Photo Editor
Before you begin editing photos, you’ll find it helpful to look over the Photo Editor and figure out how to move around the workspace. When the Photo Editor is in Advanced mode, you find the following (as labeled in Figure 1-1):
Menu bar:
As does just about every other program you launch, Elements supports drop-down lists. The menus are logically constructed and identified to provide commands for working with your pictures (including many commands that you don’t find supported in tools and on panels). A quick glimpse at the menu names gives you a hint of what might be contained in a given menu list. Throughout this book, we point you to the menu bar whenever it’s helpful. Most of the menu commands you find in Elements 2025 are the same as those found in earlier versions of Elements.
Create button:
When you click the Create button to open the Create panel and choose an option, you leave the current editing mode. For example, when in Advanced mode, choose Create ⇒ Photo Collage, and all the options that were available in the Photo Editor temporarily disappear when the Creation Wizard opens. To return to the Photo Editor, complete the creation or cancel the wizard.
Chapter 15
guides you through the options in the Create panel.
Photo Editor modes:
The Photo Editor has three modes. The Advanced mode is shown in
Figure 1-1
. You find a detailed look at Quick mode in
Chapter 8
.
Parts 2
and
3
of the book cover all the different features of Advanced mode, including making selections, creating composites from several images, drawing, adding text, and exploring creative flourishes with filters and effects.
Features buttons:
On Windows, you find three buttons in the top-right corner. These buttons are used to (1) minimize the window; (2) maximize/minimize the window; and (3) close the application. On Apple Macintosh, the same three buttons appear, but they are placed in the top-left corner of the window.
Share menu:
The Share menu works similarly to the Create menu and offers options for sharing your images.
Chapter 14
focuses on the Share menu.
Panel Bin:
Figure 1-1
shows the Layers panel. You change panels by clicking the icons at the bottom of the Panel Bin. (The icons are described in item
S,
Panels.)
Creations
(things you make) are also contained in the Panel Bin when you click the Create button (item B).
Open menu: When you have several files open in the Photo Editor, the Open menu is one way to switch among these files. To use this menu, click the down-pointing arrow adjacent to the Open button and, from the drop-down list, choose the image you want to move to the foreground. Note: The Open menu also offers you an option to create a new, blank file.
In Figure 1-1, several files are open, as indicated by the tabs at the top of the image window. You can also place an open file in the foreground in the image window in these other ways:
Click a tab at the top of the image window to move the image to the foreground.
Click a photo in the Photo Bin (see item K).
Open the Window menu and choose a photo listed at the bottom of the menu.
File tabs: Multiple photos opened in the Photo Editor appear in different tabs at the top of the window by default.
In technical-speak, this is a docked position, meaning that the photos are docked in the image window. You can click a tab and drag it down to undock the photo. To undock photos, you must change a preference setting in the General Preferences by checking Allow Floating Windows in Advanced mode. (See the Photoshop Elements Help file to learn more about Preferences.) Doing so makes the photo appear as a floating window. You might want to float windows when copying and pasting image data between two or more photos. You can also view all open files in a floating window without choosing All Floating from the Layout pop-up menu (item N). To use this menu command, you must first enable the Preferences to allow floating windows.
Tools panel:
Here you find the Photo Editor toolbox, where you click a tool and apply an edit to the photo. See “
Selecting the tools
” and “
Selecting from the Tool Options
,” later in this chapter.
Document Information Pop-up Menu:
Click to open a pop-up menu displaying document information.
Photo Bin/Tool Options:Figure 1-1 shows the Photo Bin open. Click the Tool Options button, and a set of Tool Options replaces the Photo Bin. You can also open the Tool Options by clicking a tool in the Tools panel.
Tool Options enable you to specify how the selected tool works. For example, the Tool Options for the Brush tool, as shown in Figure 1-2, enable you to select from a few different brush styles, set the size of your brush, and much more. (You discover how the specific tools work in the relevant chapters later in this book. For example, you find out how the Brush tool works in Chapter 12, which covers drawing, painting, and typing.)
Each tool in the Tools panel supports various tool options. To return to the Photo Bin, click the Photo Bin button at the bottom left of the window.
Undo/Redo:
These commands are so useful that they have an extra-prominent place in the Photo Editor interface. You can also press Ctrl+Z (⌘+Z on the Mac) for Undo and Ctrl+Y (⌘+Y on the Mac) for Redo.
Rotate:
Click the Rotate Left tool to rotate counterclockwise 90 degrees. Click the down-pointing arrow on the Rotate tool and choose the Rotate Right tool to rotate a photo 90 degrees clockwise.
Layout:
When you have multiple photos open in the Photo Editor, the Layout pop-up menu enables you to choose how the photos display in the image window (such as rows, columns, as a grid, and so on). To return to the tabbed view, choose Default from the Layout pop-up menu.
Organizer:
Click the Organizer button to open the Organizer, which we cover in detail in
Chapter 2
. Elements makes it very easy for you to toggle back and forth between the Organizer and the Photo Editor by clicking their respective buttons at the bottom of the windows.
Home Screen:
Opens the Elements Home Screen window.
Media Window:
This window shows the active document.
Panels:
Click the icons to open the panels that include Layers, Effects, Filters, Styles, Graphics, and a category named More, which opens the More panel.
More panel:
To open additional panels, click the three dots to open a pop-up menu of choices. The panels you open from the Panel Options menu appear as floating windows and can’t be docked in the Panel Bin.
The description of the Photo Editor workspace is brief in this chapter. We discuss most of the options you have for using tools, panels, and menu commands in later chapters. For now, try to get a feel for what the Photo Editor provides and how to move among many of the Photo Editor features.
Photo by Ted Padova, with a Generative AI background
FIGURE 1-1: The Photo Editor workspace.
FIGURE 1-2: Tool Options provide more editing features for tools selected in the Tools panel.
Examining the image window
Not surprisingly, the image window’s tools and features are most useful when an image is open in the window. To open an image in the image window, shown in Figure 1-3, follow these steps:
Choose File ⇒ Open.
The standard Open dialog box appears; it works like any ordinary Open dialog box that you find in other applications.
You can always click one or more photos in the Organizer and click the Editor button to open the selected photos in the Photo Editor.
Navigate your hard drive (by using methods you know to open folders) and then select a picture.
If you haven’t yet downloaded digital camera images or acquired scanned photos and want an image to experiment with, you can use a sample image. Both your operating system and Photoshop Elements typically provide sample images:
On your operating system, you can typically find sample images in your Pictures folder, which is one of the default folders in both Windows and macOS installations.
In Elements, you can store photos anywhere on your hard drive and access them in your Organizer.
Select a picture and click Open.
The photo opens in a new image window in Elements.
You can open as many image windows in Elements as your computer memory can handle. When each new file is opened, a thumbnail image is added to the Photo Bin at the bottom of the workspace (refer to Figure 1-1).
Photo by Courtany Jensen; Model: Hudson Jensen
FIGURE 1-3: The image window displays an open file undocked within the Elements workspace.
Notice that in Figure 1-1, filenames appear as tabs above the image window when the windows are docked and not appearing as floating windows. Additionally, photo thumbnails appear in the Photo Bin. To bring a photo forward, click the filename in a tab or simply click a thumbnail in the Photo Bin. To close a photo, click the X adjacent to the filename or choose File ⇒ Close.
To close a photo in the image window but keep it open in the Panel Bin, click the Minimize button on a floating document window in the top-right corner (Windows) or the center button in the top-left corner (Mac). Note that in order to minimize the photo and keep it in the Photo Bin, you must set the General Preferences (Ctrl/⌘+K) to Allow Floating Documents in Advanced Mode. Make sure the documents are in floating windows and then you can minimize them individually.
By default, all document windows are attached within the Elements document window. You can change the document windows to floating windows (meaning that they are free floating and unattached to the document window) by choosing Preferences and, in the General Preferences, selecting the Allow Floating Documents in Advanced Mode check box. Floating windows are available only when you're using the Advanced mode in the Photo Editor.
Here’s a look at important items in the image window, as shown in Figure 1-3:
Filename:
Appears above the image window for each file open in the Photo Editor.
Close button:
Click the
X
to the right of the filename (Windows) or the left of the filename (Mac) to close the file.
Scroll bars:
These become active when you zoom in on an image. You can click the scroll arrows, move the scroll bar, or grab the Hand tool in the Tools panel and drag within the window to move the image.
Magnification box:
See at a glance how much you’ve zoomed in or out.
Information box: You can choose what information this readout displays by choosing one of the options from the pop-up menu, which we discuss in more detail later in this section.
When you’re working on an image in Elements, you always want to know the physical image size, the image resolution, and the color mode. (Size is the physical size of the image. Image resolution is the number of pixels in your image. Color mode is a mode such as RGB for red, green, and blue, grayscale for black and white, and so on.) Regardless of which menu option you select from the status bar, you can quickly glimpse these essential stats by clicking the Information box (not the right-pointing arrow but the box itself), which displays a pop-up menu like the one shown in Figure 1-4.
Sizing the Window:
You can also resize the window by dragging any corner in or out when the image is undocked and not viewed as a tab.
To undock windows, press Ctrl+K (⌘ +K on the Mac) to open the Photo Editor Preferences. Click General in the Left pane and select the box where you see Allow Floating Documents in Advanced Mode. You must be in Advanced mode to view documents undocked.
FIGURE 1-4: Click the readout on the status bar to see file information.
Now that you’re familiar with the overall image window, we want to introduce you to the Information box’s pop-up menu, which enables you to choose what details appear in the Information box. Click the right-pointing arrow to open the menu, shown in Figure 1-5.
Here’s the lowdown on the options you find on the pop-up menu:
Document Sizes:
Shows you the saved file size.
Document Profile:
Shows you the color profile used with the file. Understanding color profiles is important when printing files. Turn to
Chapter 13
for more information on using color profiles.
Document Dimensions:
When selected, this option shows you the physical size in your default unit of measure, such as inches.
Current Selected Layer:
When you click a layer in the Layers panel and choose Current Selected Layer, the layer name appears as the readout.
Scratch Sizes:
Displays the amount of memory on your hard drive that’s consumed by all documents open in Elements. For example, 20M/200M indicates that the open documents consume 20 megabytes and that a total of 200 megabytes is available for Elements to edit your images. When you add more content to a file, such as new layers, the first figure grows while the second figure remains static. If you find that Elements runs slowly, check your scratch sizes to see whether the complexity of your file is part of the problem. If so, you might clear some of your history or merge a few layers (see
Chapter 7
) to free space.
Efficiency: Indicates how many operations you’re performing in RAM, as opposed to using your scratch disk (space on your hard drive). When the number is 100 percent, you’re working in RAM. When the number drops below 100 percent, you’re using the scratch disk.
If you continually work below 100 percent, it’s a good indication that you need to buy more RAM to increase your efficiency. If you have multiple applications open, quit all other programs to conserve RAM.
Timing:
Indicates the time it took to complete the last operation.
Current Tool:
Shows the name of the tool selected from the Tools panel.
FIGURE 1-5: From the pop-up menu on the status bar, choose commands to show more information about your file.
Why is the information in this pop-up menu important? Suppose you have a great photo you want to add to your Facebook account and you examine the photo to find the physical size of 8 x 10 inches at 300 pixels per inch (ppi). You also find that the saved file size is more than 20MB. At a quick glance, you know you want to resize or crop the photo to perhaps 4 x 6 inches at 72 ppi. (Doing so drops the file size from more than 20MB to around 365K.) Changing the resolution dramatically reduces the file size. For now, realize that the pop-up menu shows you information that can be helpful when preparing files for print and display.
Don’t worry about trying to understand all these terms. The important thing to know is that you can visit the pop-up menu and change the items at will during your editing sessions.
Uncovering the contextual menus
Contextual menus are common to many programs, and Photoshop Elements is no exception. They’re those little menus that appear when you right-click, offering commands and tools related to whatever area or tool you right-clicked. If you have a one-button mouse on the Mac, press Ctrl+click to open a context menu.
The contextual menus are your solution when you’re in doubt about where to find a command on a menu. You just right-click an item and a pop-up menu opens.
Because contextual menus provide commands related to the tool you’re using or the object or location you’re clicking, the menu commands change according to the tool or feature you’re using and where you click at the moment you open a contextual menu. For example, in Figure 1-6, you can see the contextual menu that appears after we create a selection marquee using the Rectangular Marquee Selection tool and right-click anywhere in the image window. Notice that the commands are all related to selections. Other selection tools, like the Quick Selection tool and Magic Wand, offer you different menu choices from a contextual menu.
FIGURE 1-6: A contextual menu for a selection.
Selecting the tools
More often than not, clicking a tool on the Tools panel is your first step in editing operations. (If you’re not familiar with the Tools panel, refer to the upcoming Figure 1-8.) In panel hierarchy terms, you typically first click a tool on the Tools panel and then use another panel to fine-tune how the tool works.
Sometimes when you select a tool in the Tools panel, you find additional tools in the Tool Options area. For example, you may click the Rectangular Marquee tool in order to access the Elliptical Marquee tool in the Tool Options, directly below the image window. The Brush tool, Impressionist Brush, and Color Replacement tool, plus the Brush Mode and Airbrush Mode, are all shown in Figure 1-7 and are all in the Tools panel; and the Rectangular Marquee tool and Elliptical Marquee tool appear in the Tool Options panel when one of those tools is selected. See the following section for more about the Tool Options area.
FIGURE 1-7: Additional tools within a tool group are available in the Tool Options.
An additional tool that makes use of artificial intelligence in Photoshop Elements is the Remove tool. The tool appears in the same area as the Spot Healing Brush. Click the Spot Healing Brush and, in the Tool Options, select the Remove tool. To remove an object in a photo, draw with the Remove tool around the item you want to remove. When you release the mouse button, click the check mark, and the Photo Editor does its best to fill the removed area with the background. For more on the Remove tool, see Chapter 10, which covers artificial intelligence (AI) tools.
Keep in mind that if you don’t find a tool in the Tools panel, look in the Tool Options for additional tools within a tool group.
You can easily access tools in Elements by pressing shortcut keys on your keyboard. For a quick glance at the key that selects each tool in the Tools panel, look over Figure 1-8.
The following tips can help you find your way around the Tools panel with keyboard shortcuts:
To select tools within a tool group by using keystrokes, press the respective key to access the tool.
For example, press the L key to select the Lasso tool. Press L again to select the Magnetic Lasso tool — the next tool in the group. Press L again and you select the Polygon Lasso tool.
Whether you have to press the Shift key to select tools is controlled by a preference setting.
To change the default setting so that you need to press Shift, choose Edit ⇒ Preferences ⇒ General or press Ctrl+K. (Choose Adobe Photoshop Elements Editor ⇒ Preferences ⇒ General or press ⌘+K on the Mac.) Then, in General Preferences, deselect the Use Shift Key for Tool Switch check box.
The shortcuts work for you at all times, except when you’re typing text with the cursor active inside a text block.
Be certain to click the Tools panel to select a tool when you finish editing text, or select the Commit blue check mark to end using the Text tool.
The tools are varied, and you may find that you don’t use all the tools in the Tools panel in your workflow. Rather than describe the tool functions here, we address the tools in the rest of this book as they pertain to their respective Elements tasks.
Selecting from the Tool Options
When you click a tool on the Tools panel, the Tool Options box appears at the bottom of the workspace and offers you choices specific to the selected tool. (Refer to Figure 1-7, which shows the Brush tool options.) In addition to providing you with choices for selecting tools within a tool group, you can adjust settings for a selected tool.
You can find many of these fine-tuning adjustments in the Tool Options for most of the tools you select in the Tools panel.
FIGURE 1-8: The Tools panel with keystroke equivalents to access a tool from the keyboard.
Playing with Panels
The panels are where you control features such as layers, effects, and more. In the Photo Editor, you open these panels in the Panel Bin:
Layers: The Layers panel displays all the layers you’ve added to a photo. We talk much more about layers in Chapter 7. For now, look at how the different panels are designed. In the Layers panel, you find various tools at the top left and an icon with horizontal dots in the top-right corner, to the right of the Trash icon (as shown in Figure 1-9).
You can select multiple layers and click the folder icon at the top of the Layers panel to create a new layer group. All the grouped layers are nested in a folder.
When you click the icon at the top right, a pop-up menu appears (see Figure 1-10), which shows menu items supporting the tasks you perform in the Layers panel.
Effects:
At the bottom of the Panel Bin, click the
fx
button to open the Effects panel. The Effects panel contains tabs offering a number of choices for applying a number of different effects to your pictures. You simply click an effect thumbnail you want when you edit the photo. We cover applying effects in
Chapter 11
.
Filters:
Click Filters to open the panel where you can apply a number of different filter effects to the open image. For more on using Filters, see
Chapter 11
.
Styles:
Click Styles, and you find a drop-down menu listing numerous styles. Open a category and click a style to apply to an image. In some respects, this panel behaves similarly to Filters. For more on Styles, see
Chapter 11
.
FIGURE 1-9: The Layers panel with a Background and three layers.
FIGURE 1-10: The Layers panel pop-up menu.
Graphics:
