
24,99 €
Mehr erfahren.
- Herausgeber: John Wiley & Sons
- Kategorie: Wissenschaft und neue Technologien
- Sprache: Englisch
Learn the tips and tricks used by a top photographer in the digital photography industry in Rick Sammon's Top Digital Photography Secrets. Filled with beautiful photographs and the techniques Rick Sammon used to capture them, this book offers you motivation to capture stunning photographs and the tools and tricks you need to capture them. With more than 100 techniques for use behind the camera, this book will improve the camera skills of both amateur and experienced photographers. Additionally, this book includes a chapter on post-production secrets, and a Rick Sammon DVD Guide lighting, camera, and digital photography basics. In this 1-hour DVD, Rick shows you how to get great photos using a variety of lighting sources, camera-specific techniques, and basic rules of photography.
Sie lesen das E-Book in den Legimi-Apps auf:
Seitenzahl: 219
Veröffentlichungsjahr: 2011
Ähnliche
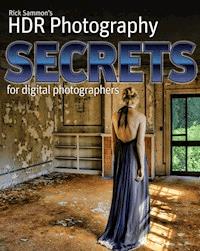


Rick Sammon’s Digital Photography Secrets
Rick Sammon
Wiley Publishing, Inc.
Rick Sammon's Digital Photography Secrets
Published by Wiley Publishing, Inc.10475 Crosspoint Boulevard Indianapolis, IN 46256www.wiley.com
Copyright © 2009 by Wiley Publishing, Inc., Indianapolis, Indiana
Published simultaneously in Canada
ISBN: 978-0-470-42873-3 Manufactured in the United States of America
10 9 8 7 6 5 4 3 2 1
No part of this publication may be reproduced, stored in a retrieval system or transmitted in any form or by any means, electronic, mechanical, photocopying, recording, scanning or otherwise, except as permitted under Sections 107 or 108 of the 1976 United States Copyright Act, without either the prior written permission of the Publisher, or authorization through payment of the appropriate per-copy fee to the Copyright Clearance Center, 222 Rosewood Drive, Danvers, MA 01923, (978) 750-8400, fax (978) 750-4744. Requests to the Publisher for permission should be addressed to the Legal Department, Wiley Publishing, Inc., 10475 Crosspoint Blvd., Indianapolis, IN 46256, (317) 572-3447, fax (317) 572-4355, or online at http://www.wiley.com/go/permissions.
Limit of Liability/Disclaimer of Warranty: The publisher and the author make no representations or warranties with respect to the accuracy or completeness of the contents of this work and specifically disclaim all warranties, including without limitation warranties of fitness for a particular purpose. No warranty may be created or extended by sales or promotional materials. The advice and strategies contained herein may not be suitable for every situation. This work is sold with the understanding that the publisher is not engaged in rendering legal, accounting, or other professional services. If professional assistance is required, the services of a competent professional person should be sought. Neither the publisher nor the author shall be liable for damages arising herefrom. The fact that an organization or Web site is referred to in this work as a citation and/or a potential source of further information does not mean that the author or the publisher endorses the information the organization or Web site may provide or recommendations it may make. Further, readers should be aware that Internet Web sites listed in this work may have changed or disappeared between when this work was written and when it is read.
For general information on our other products and services or to obtain technical support, please contact our Customer Care Department within the U.S. at (800) 762-2974, outside the U.S. at (317) 572-3993 or fax (317) 572-4002.
Wiley also publishes its books in a variety of electronic formats. Some content that appears in print may not be available in electronic books.
Library of Congress Control Number: 2008938484
Trademarks: Wiley and the Wiley Publishing logo are trademarks or registered trademarks of John Wiley and Sons, Inc. and/or its affiliates. All other trademarks are the property of their respective owners. Wiley Publishing, Inc. is not associated with any product or vendor mentioned in this book.
About the Authors
Rick Sammon
(lower tandem jumper), falling to earth at 125 miles per hour, during one of the few times that he was not photographing, writing a book, leading a workshop or giving a seminar.
Wiley publishes in a variety of print and electronic formats and by print-on-demand. Some material included with standard print versions of this book may not be included in e-books or in print-on-demand. If this book refers to media such as a CD or DVD that is not included in the version you purchased, you may download this material at http://booksupport.wiley.com. For more information about Wiley products, visit www.wiley.com.
Credits
Acquisitions EditorCourtney Allen
Project Editor Mimi Brodt
Technical Editor Joe Farace
Copy Editor Mimi Brodt
Editorial ManagerRobyn Siesky
Business ManagerAmy Knies
Senior Marketing ManagerSandy Smith
Vice President and Executive Group PublisherRichard Swadley
Vice President and PublisherBarry Pruett
Book DesignerErik Powers
Proofreader Laura Sinise
Media Development Project ManagerLaura Moss
Media Development Assistant Project ManagerJenny Swisher
Acknowledgments
As you saw on the cover of this book, I get credit for writing this book. Sure, I put a ton of work into it, but the truth is I had a lot of help – just like every author. It’s the same for all artists. Take Tom Cruise, for example, he gets top billing, but he has dozens and dozens of people – including make-up artists, lighting directors, set designers, acting coaches and so on – who make him look good.
So I thought I’d take this opportunity to thank the folks who helped put together this work, as well as those who have helped me along the path to producing this book, which is my 31st.
The guy who initially signed me up for this book is the same guy who made my Canon Digital Rebel and Basic Lighting DVDs happen: Barry Pruett, Vice President and Publisher at Wiley. Barry has a quality that every author needs: faith in the author’s belief that someone actually wants to hear what he or she has to say!
Once I was signed up, Courtney Allen, an Acquisitions Editor at Wiley, took over the project, helping me big time with everything that you see between the front and back covers. Not an easy task, especially considering that the book was produced in just a few months.
More help was on the way! Joe Farace, my technical editor, also added his expertise, especially in the digital darkroom section. Thanks, Joe!
Getting back to Wiley, I also want to thank Mimi Brodt, freelance editor, for her work as Copy Editor and Project Editor, Erik Powers of Creative Powers for his phenomenal job at designing and producing the book, and Mike Trent for his work on the front and back cover design. Thank you all for your eagle eyes and artistic flair!
Someone who has been helping me for 58 years also worked on this book. My dad, Robert M. Sammon, Sr., who is 90, actually read each and every word, using his wordsmith skills to improve my words! I could not have done it without you, Dad.
Two more Sammons get my heartfelt thanks: my wife, Susan, and son, Marco. For years, they both supported my efforts and helped with the photographs. Thanks, Susan and Marco, for all your help and love.
Julieanne Kost, Adobe Evangelist, gets a big thank you for inspiring me to get into Photoshop in 1999. Addy Roff at Adobe also get my thanks. Addy has given me the opportunity to share my Photoshop techniques at trade shows around the country.
Some friends at Apple Computers also helped me during the production of this book by getting me up to speed with Aperture 2, the application I use most often to import and edit my photographs. So, more thank you notes go to Don Henderson, Fritz Ogden and Kirk Paulsen.
Other friends in the digital imaging industry who have helped in one way or another include David Leveen of MacSimply and Rickspixelmagic.com, Mike Wong and Craig Keudell of onOne Software, Wes Pitts of Outdoor Photographer and PCPhoto magazines, Ed Sanchez and Mike Slater of Nik Software, Scott Kelby of Photoshop User magazine and Chris Main of Layers magazine.
At Mpix.com, my on-line digital imaging lab, I’d like to thank Joe Dellasega, John Rank, Dick Coleman and Richard Miller for their on-going support of my work.
Rick Booth, Steve Inglima, Peter Tvarkunas, Chuck Westfall and Rudy Winston of Canon USA have been ardent supporters of my work, as well as my photography seminars. So have my friends at Canon Professional Service (CPS). My hat is off to these folks, big time! The Canon digital SLRs, lenses and accessories that I use have helped me capture the finest possible pictures for this book.
Jeff Cable of Lexar hooked me up with memory cards (4GB and 8GB because I shoot RAW files) and card readers, helping me bring back great images from my trips.
I’d also like to thank Christine Keys of ExOfficio for supplying me with clothing for keeping me comfortable in the field, which is actually very important to me – because I went to Catholic grammar school and was very uncomfortable in my uniform for years (which seemed like a lifetime).
Of course, all my photographer friends who sent me photographs and tips for the “With a Little Help from My Friends” chapter get a warm thank you. Don’t miss a single tip here!
My photo workshop students were, and always are, a tremendous inspiration for me. Many showed me new digital darkroom techniques, some of which I used in this book. During my workshops, I found an old Zen saying to be true: “The teacher learns from the student.”
So thank you, one and all. I could not have done it without you!
Dedicated to the four people from whom I have learned the most in life. In order of appearance . . . My mother, Josephine, and dad, Robert. My wife, Susan, and son, Marco. “We are a part of everyone we meet.”
TABLE OF CONTENT
About the Author
Credits
Acknowledgments
Foreword
Preface
intro
A Digital Photography Recipe for Smokin' Photos
Interesting Subject
Good Composition
Creative Cropping
Careful Focus
See the Light
Fine-Tune Your Exposure
Control the Light
Check Your Camera Settings
Work and Play with Light
Have Fun
Part I: Digital SLR Must-Know Info
Data Contacts and Mirror
Auto Focus vs. Manual Focus
Be Sensitive to Your Image Sensor
A Shutter's "Mileage"
Your Eyes vs. Your Camera's "Eye"
Brightness Values and the +/– Exposure Compensation Control
Control What Your Exposure Meter "Sees"
LCD Monitor Info
Customize Your Camera
Cooling Off and Warming Up Images
sRGB vs. Adobe RGB and RAW vs. sRAW
Get It All in Focus
F-stop Info
Internal Filter Flare
When Pixels Bloom
Memory Card Info
Full-Frame Image Sensor Advantage
Firmware Updates
Camera Care
Check Out Your Camera's Software
Recovering "Lost" Files
Cameras Don't Take Pictures, People Do
The Camera Looks Both Ways
Part II: Landscape and Scenic Photography
Be Prepared, Be Patient
Get It All in Focus
Pack a Polarizing Filter
Establish a Sense of Place
Think in Three Dimensions
Watch the Edges and Know Your Boundaries
Crop Creatively
Watch the Horizon Line
By the Light of the Moon
Shooting Sunrises and Sunsets
More Tips on Sunrise and Sunset Shots
After the Sun Sets
When It's Hazy, Hot and Humid
Golden Hours
Favorite Wide-Angle Zoom
Favorite Telephoto Zoom
Rules of Composition
Shooting from Above
Compose for a Cover or E-Card
Move Around a Subject
RAW Rules
Play with Picture Styles
Shooting on Overcast Days
Must Use a Lens Hood
Take Fun Shots
Using ND Graduated Filters
Convert to IR
Check Out a Postcard Stand and Get a Guide
Shooting by the Sea
Shooting at Night
Blurring Night Lights
Shoot for a Panorama
Don't Forget the Details
Envision the End Result
Photographing Fireworks
Always Look Up, Down and Back – and be Careful!
The Self-Assignment
Landscapes in HDR
Take HDR Inside
Part III: Photographing People
Fun Facts for Better People Pictures
Drag the Shutter to Create a Sense of Motion
Fine-Tune Flash Exposures with Exposure Compensation
Nice Nighttime Shots Using the Night Portrait Mode
Make Pictures, Don't Just Take Pictures
Position the Subject in the Foreground
Go with the Grain
Wonderful Window Light Pictures
Daylight Fill-in Flash Photos
Painting with Light
Soften the Light with a Diffuser
Fill in Shadows with a Reflector
Get Everything in Focus
The Classic Head Shot
Watch the Background
Capturing Sports Action
Always Look Back
Get Up Close and Personal
Add Catch Light to the Subject's Eyes
Don't Crop at the Joints
Choosing a Background
Pan to Create a Sense of Action
Avoid Hard Flash Shadows
Dress for Success
Evaluate Shooting at Eye Level
Break the Rules
When You Hand Over Your Camera
Don't Be a Dummy
The Home Studio
Get Involved
Create the Dis-Equilibrium Effect
Part IV: Picturing Animals
Stopping Action
Focus Tracking Mode
See Art in Nature
Shoot for the Peak of Action
When Bracketing is a Good Idea
Make Fences Disappe
Place the Subject Off-Center
Steady as You Shoot
My Favorite Wildlife Telephoto Zoom Lens
My Favorite Wildlife Wide-Angle Zoom Lens
Shooting Silhouettes
Using Tele-converters
Noise and Sharpness
Don't Cheap Out on a Telephoto Lens
Shoot Sharper Pictures with a High Frame Rate
Expose for the Highlights
Shoot RAW Files
The Eyes Have It
Shooting in the Snow
Keep Both Eyes Open
Displaying Your Prints
Envision the End-Result
Play with Plug-ins
Part V: Exposure Fusion with Photomatix
Launching Exposure Fusion
Adjusting Your Images: Highlights & Shadows Adjust
Adjusting Your Image Part II
Exposure Fusion with Help from Photoshop
True HDR with Help from Photoshop
Look Closely and Carefully
Part VI: Get the Best Image Quality: RAW and JPEG
When RAW Rules
When JPEGs are Okay
Settings for JPEG Image Quality/Compression
The Importance of Seeing the Light
RAW Really Rules with Panoramas
Part VII: A Case for White Balance
Individual White Balance Settings
Auto White Balance
When White Balance Goes Wrong
When the Wrong White Balance Can Actually be Right
Correcting White Balance in Camera RAW
Part VIII: Flash Settings: On, Off and Partial
Sunny Day Flash Shots
Fill Flash Outdoors in the Shade
Add Just a Touch of Flash
When Flash May Not Be Good
Adding an Accessory Flash
Part IX: The Zoom Lens Advantage
Closer or Wider, It's Your Choice
Compose Creatively
Blur the Background
Blur the Background by Changing Position
Cool Close-Ups
Part X: Setting the Mode
Fully Automatic Picture/Exposure Modes
Full Auto Mode
Portrait Mode
Sports Mode
Landscape Mode
Close-up Mode
Night Portrait Mode
Flash-Off Mode
Creative Exposure Modes
Program Mode
Shutter-Priority (Tv) Mode
Aperture-Priority (Av) Mode
Manual Exposure (M) Mode
Exposure Bracketing
Metering Modes
Average
Center-weighted Average Metering
Spot Metering
Focus Modes
One-Shot
Focus Lock
Focusing Tracking
Manual
Drive Modes
Single Frame Advance
Rapid Frame Advance
Self-Timer
Part XI: The Wonders of Infrared Imaging
From Drab to Fab
Black-and-White IR
Have Fun with Filters, Too!
Seeing in IR
Panos in IR
Part XII: Photoshop Elements Confessions
#1: Quick Look at the Quick Mode
#2: The Full Mode is Full-Featured
#3: Save a Copy
#4: Crop Creatively
#5: Love Those Adjustment Layers
#6: The Touch of a Brush
#7: A Look at Levels
#8: Brightness/Contrast Basics
#9: See What Hue/Saturation Can Do For You
#10: The Super Shadow/Highlight Control
#11: Select Your Selections Carefully
#12: Do It with the Dodge/Burn/Sponge Tool
#13: Resize the Right Way
#14: Check-Out Canvas Size
#15: Heal with the Spot Healing Brush
#16: Copy and Fix with the Clone Stamp Tool
#17: Wow 'em with Black-and-White Images
#18: Have Fun with Effects
#19: Play With Plug-ins
#20: Sharpen as the Final Step
#21: Reward of RAW Files
Part XIII: Expand Your Vision with HDR Imaging
Take at Least Three Shots
Generate HDR
Do It with Details Enhancer
The Fun Never Stops
Take HDR Inside, Too
Part XIV: Shooting Panoramas
Getting Started
Pano from Adobe Bridge
Shoot Verticals
More Fun Awaits You
Expect Surprises, Too
A Truly Amazing Match
Shooting Panos in a Tight Spot
Experiment with Layouts
Expect to Crop
Shooting for an HDR Pano
Generate an HDR Image for Each Set of Images
Enter Photoshop Elements
Play in Photoshop Elements
Part XVI: Make a Better Print
Shoot It Right
Calibrate Your Monitor
Adjust Your Photo
Size your Photo for Printing
Sharpen your Photo
Working with the Printer
Test Your Print
Wiley Publishing, Inc. End-User License Agreement
Download CD/DVD content
Foreword
For most of us, daily reality includes raising children, mortgage payments, aging parents and career obligations. To balance these demands, many of us enjoy creative pursuits including photography, painting, gardening or visiting museums and galleries. Have you ever wondered, “What would it take to leave your day job and dedicate yourself to making art full-time?” If this seems like a drastic move, consider developing a parallel professional career that allows you to follow your dreams. Whatever your profession, leading a dual life allows you to experience the best of both worlds – financial security and ongoing creative development. Teaching is a natural pursuit for many artists, but sadly being a talented artist doesn’t mean that the person is an equally talented teacher.
I’ve had the pleasure of meeting Rick Sammon and more importantly, seeing him teach. The man is a lightning-fast, silver-haired energy bundle, and the first thing that strikes you is his sparkling eyes and ready smile. Rick loves life, which is very apparent in his passion for music, travel, family and photography. But Rick has one more passion we all benefit from – teaching. He loves to inform, inspire and enlighten, and the idea that this book is called Rick Sammon’s Top Digital Photography Secrets is wonderfully absurd. Rick doesn’t believe in secrets; if he did he wouldn’t have written this book! Part of enjoying life for Rick is inspiring and sharing with others, and as an educator I know how much he benefits from teaching. Perhaps Rick wrote this book for himself – that is how much he loves to teach and share!
In exchange for reading this book, I challenge you to share one “secret” you learned that helped you to make better images with two other people. Show, explain and inspire your passion to your friends and family with the same energy that Rick put into these pages. Believe me – teaching will make you a better photographer and image-maker.
Best regards,
Katrin Eismann Artist, Author and Educator Chair, MPS Digital Photography School of Visual Arts
Preface
First off, thank you for picking up a copy of this book/DVD set. Your interest in my ideas about taking digital pictures is much appreciated. I hope you learn a lot, and I hope you have a lot of fun capturing your reality with your imagination.
Reality leaves a lot to the imagination. – John Lennon
Let's talk about the book first.
This book is packed with more than 200 ideas for taking pictures indoors, outdoors, in bright light and in low light, with and without a flash and with reflectors and diffusers. I’ll also share some ideas on how to take pictures by candlelight and how to paint with light.
You’ll find one tip per page. How easy and cool is that!
In some cases, I’ve included two or more pictures per page to illustrate a before-and-after technique or how an effect can enhance a series of pictures.
You may want to start with the Introduction, where you’ll find my Digital Photography Recipe for Smokin’ Photos. If you want camera tech talk, I think you’ll enjoy the Digital SLR Must Know Info chapter.
If you like photographing landscapes, animals, close-ups and people, you may want to jump to those chapters. I’ve included my favorite tips and techniques to get you started.
I’ve also included chapters on My Photo Gear and on Home and On-Location Digital Darkrooms. Check ‘em out to learn about the kind of gear I use and the gear I recommend.
And speaking of the digital darkroom, the chapter Top Digital Darkroom Techniques includes, that’s right, my top tips for digitally enhancing pictures. What I’ve done here is to make the enhancements as easy to follow as possible. After you learn my techniques, experiment with them on your images.
One of my favorite chapters in this book is With a Little Help from My Friends. There you’ll find great tips from great photographers whom I am lucky – very lucky – to call my friends. Don’t stop with their tips! Check out their Web sites to continue your digital photography learning experience.
Also check out the Web sites in the chapter, Cool Web Sites. Yup! More photo – and digital darkroom – learning and fun!
Okay, here’s the scoop on the DVD.
Pop the DVD into your computer’s DVD drive, click on the different QuickTime movies, and you’ll get personal digital photography lessons from yours truly. Hey, it’s the next best thing to taking a workshop with me (which I hope you can do someday).
Because they are QuickTime movies, you can start and stop them whenever you like, and even fast-forward and rewind if you want to skip or review a segment.
The movies – which cover flash, focus, lenses, portraits, shooting in low light and more – are a sampler of the videos from some of my other Wiley DVDs, which cover lighting and how to use Canon Digital Rebel cameras. Check them out at www.wiley.com. If you shop at amazon.com, you can find my DVDs by typing in Rick Sammon in the Search window.
So, you’ll find a ton of tips, tricks and technique in this book and on the DVD. You’ll also learn about some of my favorite photo philosophies.
In going through the material, please keep this adage in mind: I hear, I forget. I see, I remember. I do, I understand.
Hey, you will hear me say a lot and you’ll see a lot in the book and on the DVD. The real magic happens when you start to “do” and understand.
So go out and do it – and don’t forget to have fun in the process.
I began this preface with a favorite quote and a photograph I felt illustrated the quote, so I thought I’d end with another favorite quote, illustrated by two pictures. The idea is that as a photographer, it’s important to keep changing, growing and evolving.
Rick Sammon Croton-on-Hudson, NY October 2008
Intro
A Digital Photography Recipe for Smokin’ Photos
10 Ingredients for Dishing Up Successful Images
Hey all, as you’ll see on the following pages, I’ve packed this book with my favorite digital photography secrets – a full-course meal on digital photography, if you will.
But if you can’t wait to dig in, and want to quickly cook up some sumptuous photographs, here’s a quick, 10-step recipe that I think you’ll find appetizing.
To illustrate the results of my recipe, I’ll use some photographs that I took on a recent trip to Papua New Guinea. My guess is that many of you probably will not get to (or even want to go to) that exotic destination, but that’s okay. The same ingredients can be used to create images that will quench your photographic thirst in any location around the world.
Let’s dig in!
Interesting Subject
I know it sounds simple, but having an interesting subject, such as this Huli Wigman posed by a remote waterfall, is important in the making of a good photograph. For example, a photo of me watering my lawn in my shorts would not be as interesting as this exotic-looking image. Seek out interesting subjects, and they will add interest to your photographs.
Good Composition
A well-balanced photograph is like a well-balanced meal: very satisfying. Placing the main subject off-center is usually more interesting than placing the subject dead center in the middle of the frame. Experiment with positioning the subject in different parts or sections of the frame to find the best composition for a particular scene. Usually, dead center is deadly.
In addition, carefully compose your pictures so the background elements complement the main subject. In people photography, for example, the subject should stand out from the background in the frame. That can be accomplished by using a long lens (200mm or more) and shooting at a wide aperture (around f/2.8) and focusing on the subject. With that lens/f-stop combination, the subject will be sharp and the background will be blurred. In addition, the closer you are to the subject, the more blurred the background becomes. You can also make the subject stand out by composing your picture so that a relatively plain background, or darker background, allows your subject to stand out.
Creative Cropping.
Getting the best possible crop in-camera is a good idea. However, sometimes that’s not possible due to the lens you are using or the camera-to-subject distance. What’s more, after you take a picture, you may see a picture within a picture, which you can create by simply cropping in the digital darkroom. I like the full-frame image of these sing-sing (festival) performers. However, the tighter crop draws more interest to the main subject, as well as cropping out the spectators in the background on the left side of the frame.
Careful Focus
Having an Auto Focus (AF) camera does not mean the camera knows where to focus within a specific scene. Carefully use the AF focus points in your camera’s viewfinder and make sure the most important part of the scene is selected. When it comes to a person (or an animal) the main focusing point is usually the eyes. Also don’t overlook the importance of the Focus Lock feature on your camera, which lets you lock in focus for a particular part of the scene, after which you can recompose and take the picture. Refer to your camera’s manual to learn more about how your specific camera’s Auto Focus and Focus Lock features function.
See the Light
Our eyes have the ability to sense light. In photographic terms, our eyes have a dynamic range of about 11 f-stops, which is why, in a high-contrast scene, we can see details in shadow areas and why highlight areas are not washed out. Our cameras, however, don’t “see” exactly what and how we see. They have a dynamic range of about five or six f-stops. Therefore, we need to be able to see and understand the contrast range of a scene, from the brightest area to the darkest area, and know what our camera can and can’t capture in order to make a good exposure decision. Read on for more details.
Fine-Tune Your Exposure
In most cases, when thinking about the exposure, we want to expose for the highlights (the brightest parts of the scene). That’s because when highlights in a digital file are “washed out” or overexposed by more than one f-stop, they are difficult (or impossible) to recover later in the digital darkroom. RAW files offer more exposure latitude (are more forgiving) than JPEG files, making it easier to recover seemingly lost highlights. As a general rule, to avoid washed-out areas in a scene, I use the Exposure Compensation (+/-) feature on my camera and reduce the exposure in the Average Metering Mode (when my camera is set on the Aperture Priority or Shutter Priority exposure mode) by – 1/3


