38,39 €
Mehr erfahren.
- Herausgeber: Packt Publishing
- Kategorie: Wissenschaft und neue Technologien
- Sprache: Englisch
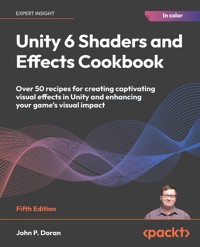
Shaders enable game developers to craft visually stunning experiences, but their complexity and mathematical and technical challenges make it hard to achieve the desired level of realism. Written by a top-selling author with extensive hands-on expertise in game development, this latest edition is your indispensable guide to mastering the art of shaders within this evolving landscape.
Through meticulously curated recipes, this book takes a practical approach to equip you with the knowledge and tools necessary to elevate your game visuals to unmatched sophistication. In this updated edition, you’ll gain invaluable insights into leveraging Unity’s latest tools, including Unity Muse for advanced AI-powered texture creation. From fully grasping Shader Graph to harnessing the power of vectors and textures, this Unity cookbook covers all the aspects of shader development without the need for elaborate mathematical calculations. You'll also discover practical techniques for achieving stunning visual effects with ease when creating 2D or 3D elements.
Das E-Book können Sie in Legimi-Apps oder einer beliebigen App lesen, die das folgende Format unterstützen:
Veröffentlichungsjahr: 2025
Ähnliche
Unity 6 Shaders and Effects Cookbook
Fifth Edition
Over 50 recipes for creating captivating visual effects in Unity and enhancing your game’s visual impact
John P. Doran
Unity 6 Shaders and Effects Cookbook
Fifth Edition
Copyright © 2025 Packt Publishing
All rights reserved. No part of this book may be reproduced, stored in a retrieval system, or transmitted in any form or by any means, without the prior written permission of the publisher, except in the case of brief quotations embedded in critical articles or reviews.
Every effort has been made in the preparation of this book to ensure the accuracy of the information presented. However, the information contained in this book is sold without warranty, either express or implied. Neither the author, nor Packt Publishing or its dealers and distributors, will be held liable for any damages caused or alleged to have been caused directly or indirectly by this book.
Packt Publishing has endeavored to provide trademark information about all of the companies and products mentioned in this book by the appropriate use of capitals. However, Packt Publishing cannot guarantee the accuracy of this information.
Portfolio Director: Rohit Rajkumar
Relationship Lead: Neha Pande
Program Manager: Sandip Tadge
Content Engineer: Shreya Sarkar
Technical Editor: Tejas Mhasvekar
Copy Editor: Safis Editing
Indexer: Manju Arasan
Proofreader: Shreya Sarkar
Production Designer: Aparna Bhagat
Growth Lead: Lee Booth
Marketing Owner: Nivedita Pandey
First published: June 2013
Second edition: February 2016
Third edition: June 2018
Fourth edition: October 2021
Fifth edition: July 2025
Production reference: 1020725
Published by Packt Publishing Ltd.
Grosvenor House
11 St Paul’s Square
Birmingham
B3 1RB, UK.
ISBN 978-1-83546-857-9
www.packtpub.com
For Johanna, my little game designer in the making, and to my wonderful wife, Hannah, my co-op partner in this great adventure. May our lives always be filled with love, learning, and the joy of creating together.
– John P. Doran
Contributors
About the author
John P. Doran is a passionate and seasoned technical game designer, software engineer, and author who is based in Songdo, South Korea. His passion for game development began at an early age. He graduated from DigiPen Institute of Technology with a Bachelor of Science in Game Design and a Master of Science in Computer Science from Bradley University.
For over a decade, John has gained extensive hands-on expertise in game development, working in various roles ranging from game designer to lead UI programmer in teams ranging from just himself to over 70 people in student, mod, and professional game projects, including working at LucasArts on Star Wars: 1313. Additionally, John has worked in game development education teaching in Singapore, South Korea, and the United States. To date, he has authored over 10 books pertaining to game development.
John is currently an Instructor at George Mason University Korea. Prior to his present ventures, he was an award-winning videographer.
This book would not have been possible without the unwavering support of my wife, Hannah, and my daughter, Johanna. Your love, patience, and encouragement mean everything to me.
A special thanks to everyone at Packt, especially Neha, Shreya, Arul, and Mark, for your patience, guidance, and invaluable feedback throughout this journey. Balancing a full-time job, a PhD, and writing this book has been no small feat, and I deeply appreciate your flexibility and support in making this project a reality.
About the reviewers
Alejandro Diaz is a seasoned game programmer with extensive experience in remote and international environments. Specializing in mobile game development, he excels in mechanics, systems, UI design, and optimization. Alejandro’s career includes significant contributions to renowned projects such as Roller Coaster Tycoon Touch. His strong foundation in Unity development and interest in shaders and effects make him a valuable contributor to projects exploring these technical areas. With proficiency in creating tools for game designers and managing complex development systems, Alejandro continues to shape the future of interactive experiences.
Shailja Shrivastava is a game developer and software engineer with extensive experience in Unity, Unreal Engine, and multiplayer game architecture. With a background in backend development, networking, and rendering optimizations, she has contributed to various game projects across mobile, web, and console platforms. She has worked with multiple publishers worldwide and has experience developing API backends, CI/CD pipelines, and AR applications. Her expertise also includes shader programming, gameplay mechanics, game optimization, and server-side development.
Obinna Akpen is a senior Unity developer with over 6 years of experience, specializing in Unity, C# scripting, and shader development. He has worked on multiple successful titles, including Who Dies First, a globally acclaimed mobile game with millions of downloads and top chart rankings. Obinna is known for his strong grasp of game mechanics, delivering immersive gameplay and polished experiences. A former e-sports champion, he thrives under pressure, adapts quickly to challenges, and actively mentors aspiring developers, fostering growth in the game development community.
Contents
Preface
Part I: Foundations of Shading and Rendering in Unity
Using Post-Processing with URP
Technical requirements
Setting up post-processing
Getting ready
How to do it...
How it works…
Achieving a filmic look using grain, vignetting, and depth of field
Getting ready
How to do it...
How it works…
Simulating realistic effects with bloom and motion blur
Getting ready
How to do it...
How it works...
Enhancing the atmosphere with color grading
Getting ready
How to do it...
How it works…
Creating a horror game look with fog
Getting ready
How to do it...
How it works...
Creating Your First Shader with Shader Graph
Technical requirements
Implementing a simple Shader Graph
Getting ready
How to do it...
How it works…
Adding properties to a shader
Getting ready
How to do it…
How it works…
Using properties in a Surface Shader
Getting ready
How to do it…
How it works…
Working with Surfaces
Technical requirements
Implementing diffuse shading
Getting ready
How to do it...
How it works…
Accessing and modifying packed arrays
How to do it…
How it works…
There’s more…
Creating a shader with normal mapping
Getting ready
How to do it…
How it works…
There’s more…
Creating a holographic shader
Getting ready
How to do it…
How it works…
There’s more…
Working with Texture Mapping
Technical requirements
Adding a texture to a shader
Getting ready
How to do it…
How it works…
There’s more…
See also
Scrolling textures by modifying UV values
Getting ready
How to do it…
How it works…
Creating a transparent material
Getting ready
How to do it…
How it works…
There’s more…
Packing and blending textures
Getting ready
How to do it…
How it works…
Creating a circle around your terrain
Getting ready
How to do it...
How it works…
There’s more…
Enhancing Realism: Unity Muse and Physically Based Rendering
Technical requirements
Utilizing generative AI for texture creation
Getting ready
How to do it...
How it works…
Utilizing the Refinements menu on Muse materials
Getting ready
How to do it…
How it works…
Understanding the metallic setup
Getting ready
How to do it…
How it works…
See also
Adding transparency to PBR
Getting ready
How to do it…
Using semi-transparent materials
Creating fading objects
Creating solid geometries with holes
Creating mirrors and reflective surfaces
Getting ready
How to do it…
How it works…
See also
Baking lights into your scene
Getting ready
How to do it...
Configuring the static geometry
Configuring the light probes
Baking the lights
How it works…
See also
Join our community on Discord
Part II: Advanced Shader Effects and Geometry Manipulation
Using Vertex Functions
Technical requirements
Accessing a vertex color in a Shader Graph
Getting ready
How to do it…
How it works…
There’s more…
Animating vertices in a Shader Graph
Getting ready
How to do it…
How it works…
Extruding your models
Getting ready
How to do it…
How it works…
There’s more…
Implementing a snow shader
Getting ready
How to do it…
How it works…
Coloring the surface
Altering the geometry
Implementing a volumetric explosion
Getting ready
How to do it…
How it works…
There’s more…
Using Grab Passes
Technical requirements
Using grab passes to draw behind objects
Getting ready
How to do it…
How it works…
There’s more…
Implementing a glass shader
Getting ready
How to do it…
How it works…
Distortion magnitude
Combining the effects
There’s more…
Implementing a water shader for 2D games
Getting ready
How to do it…
How it works…
Part III: Performance Optimization and Fullscreen Effects
Optimizing Shaders
Technical requirements
Techniques to make shaders more efficient
Getting ready
How to do it...
How it works…
There’s more…
Profiling your shaders
Getting ready
How to do it…
How it works…
There’s more…
Modifying our shaders for mobile
Getting ready
How to do it…
How it works…
Creating Screen Effects with Fullscreen Shaders
Technical requirements
Creating a simple fullscreen shader
Getting ready
How to do it…
How it works…
Creating a custom fullscreen camera depth effect
Getting ready
How to do it…
How it works…
Customizing brightness, saturation, and contrast with a fullscreen shader
Getting ready
How to do it…
How it works…
Making Photoshop-like Blend modes with a fullscreen shader
Getting ready
How to do it…
How it works…
There’s more…
Enabling and disabling render features with script
Getting ready
How to do it…
How it works…
Gameplay and Screen Effects
Technical requirements
Creating an old movie screen effect
Getting ready
How to do it...
How it works…
Creating a night vision screen effect
Getting ready
How to do it…
How it works…
Part IV: Section Custom Lighting and Advanced Shader Programming
Understanding Lighting Models
Technical requirements
Creating a custom diffuse lighting model
Getting ready
How to do it...
How it works…
Creating a toon shader
Getting ready
How to do it…
How it works…
There’s more…
Adding shadows with custom functions
Getting ready
How to do it…
How it works…
There’s more…
Adding support for multiple lights and a Blinn-Phong specular
Getting ready
How to do it…
How it works…
See also
Creating an anisotropic specular type
Getting ready
How to do it…
How it works…
Developing Advanced Shading Techniques
Technical requirements
Using the Universal Render Pipeline’s shader library files
Getting ready
How to do it...
How it works…
Shader code structures
Shader code functions
There’s more...
Making your shader modular with HLSL include files
Getting ready
How to do it...
How it works…
Implementing a Fur shader
Getting ready
How to do it...
Expanding the Fur shader with a fur layer generator
How it works…
There’s more…
See also
Implementing heatmaps with arrays
Getting ready
How to do it…
How it works…
Note on SetVectorArray
Calculating heatmap contributions
Utilizing the HDRP
Technical requirements
Implementing a glowing highlight system
Getting ready
How to do it...
How it works…
Introduction to interfaces
Unity’s Event System
Putting it all together
Using Portal Shaders in Unity
Getting ready
How to do it...
How it works…
Other Books You May Enjoy
Index
Landmarks
Cover
Index
Share Your Thoughts
Once you’ve read Unity 6 Shaders and Effects Cookbook, Fifth edition, we’d love to hear your thoughts! Please click here to go straight to the Amazon review page for this book and share your feedback.
Your review is important to us and the tech community and will help us make sure we’re delivering excellent quality content.
Download a free PDF copy of this book
Thanks for purchasing this book!
Do you like to read on the go but are unable to carry your print books everywhere?
Is your eBook purchase not compatible with the device of your choice?
Don’t worry, now with every Packt book you get a DRM-free PDF version of that book at no cost.
Read anywhere, any place, on any device. Search, copy, and paste code from your favorite technical books directly into your application.
The perks don’t stop there, you can get exclusive access to discounts, newsletters, and great free content in your inbox daily
Follow these simple steps to get the benefits:
Scan the QR code or visit the link belowhttps://packt.link/free-ebook/9781835468579
Submit your proof of purchaseThat’s it! We’ll send your free PDF and other benefits to your email directlyPart 1
Foundations of Shading and Rendering in Unity
The world of real-time rendering is built on shaders — specialized programs that define how objects appear in a game. Unity 6 has shifted its default render pipeline to Universal Render Pipeline (URP), making Shader Graph a key tool for developers looking to create stunning visual effects. This part introduces the fundamental building blocks of shaders, helping you establish a strong foundation in shader development.
We will begin with post-processing effects in URP, exploring how Unity’s built-in screen shaders can be used to refine a game’s style. Without writing custom shaders, you will learn how to apply grain, vignetting, depth of field, bloom, motion blur, color grading, and atmospheric fog to achieve cinematic visuals. From there, we will introduce Shader Graph, a visual tool that allows developers to create shaders without needing to write HLSL code.
Once you understand the basics, we will dive into surface materials and texture mapping, where you’ll learn how to define material properties such as diffuse color, transparency, and reflectivity. We will explore UV mapping, blending multiple textures, and animating texture properties using C# to create dynamic visual effects. The part concludes with Physically Based Rendering (PBR), where we will explore how light interacts with surfaces in a realistic way and how Unity Muse, a generative AI tool, can assist in rapid material creation and refinement.
By the end of this part, you will have a solid grasp of Shader Graph fundamentals, texture mapping techniques, and PBR principles, equipping you with the knowledge needed to move into advanced shader effects and real-time geometry manipulation.
This part has the following chapters:
Chapter 1, Using Post-Processing with URPChapter 2, Creating Your First Shader with Shader Graph Chapter 3, Working with SurfacesChapter 4, Working with Texture MappingChapter 5, Enhancing Realism: Unity Muse and Physically Based Rendering1
Using Post-Processing with URP
Custom shaders allow you to fine-tune visuals, achieving a unique look for your project. This book focuses on writing shaders and effects, but it’s worth noting that Unity’s Universal Render Pipeline (URP) provides built-in solutions for common visual enhancements. Prebuilt shaders like the Standard Shader and configurable lighting and shadows offer a solid foundation.
For quick and effective visual improvements, URP’s integrated post-processing features provide effects such as bloom, depth of field, color grading, ambient occlusion, and motion blur. These can enhance your game’s aesthetics without requiring additional coding while offering insight into how shaders work. URP applies these effects via screen shaders, which not only save development time but also introduce key shader concepts.
This chapter covers enabling and configuring post-processing in URP, using grain, vignetting, and depth of field for a filmic look, applying bloom and motion blur for dynamic visuals, and exploring color grading to adjust scene tone. We conclude by using fog to create immersive atmospheres, ideal for horror games.
By leveraging URP’s post-processing tools, you can refine your game’s style, experiment with effects, and gain a deeper understanding of professional-quality rendering. In this chapter, we will be covering the following recipes:
Setting up post-processingAchieving a filmic look with grain, vignetting, and depth of fieldSimulating realistic effects with bloom and motion blurEnhancing the atmosphere with color gradingCreating a horror game look with fogTechnical requirements
For this chapter, you’ll need Unity Editor version 6 Preview 6000.0.4f1. The instructions should remain mostly applicable in future URP-based projects. The sample project was created using the Universal 3DCore template, which includes URP preconfigured but is otherwise minimal, requiring additional content.
Figure 1.1 – Universal 3D Core template
The provided code files for the book on GitHub include a Unity package named Chapter1_StartingPoint.unitypackage, located in the Unity Packages folder (https://github.com/PacktPublishing/Unity-6-Shaders-and-Effects-Cookbook/tree/main/Unity%20Packages). This package contains a basic scene and assets necessary to experiment with post-processing techniques. All recipes in this chapter rely on this environment to demonstrate their effects.
Setting up post-processing
In this recipe, you’ll learn how to set up a Unity project and enable post-processing effects in a URP project. Once enabled, you’ll gain greater control over your game’s visual style.
Earlier editions of this book used the Built-in Render Pipeline, requiring the post-processing stack from the Package Manager. However, URP includes post-processing by default, simplifying setup and allowing you to apply effects quickly.
Getting ready
To begin, launch Unity and create a 3D template project. This chapter requires an environment to observe post-processing effects. If you prefer to use the scene on its own within your own project rather than working directly from the example code, you can import the Chapter1_StartingPoint.unitypackage (found in the Unity Packages folder) which includes a basic scene and supporting assets.
For those using the example code, open Chapter 1/Starting Point from Assets/Chapter 01/Scenes folder from the Project window. If all goes well, you should see something like this in the Scene view:
Figure 1.2 – Starting Point scene
This is a simple environment that will allow us to easily see how changes that have been made with post-processing effects can modify how things are drawn on the screen.
Note
If you are interested in learning how to create the environment we are going to be using here, you can check out one of my previous books, Unity 5.x Game Development Blueprints, (2016) also available from Packt Publishing.
How to do it...
To get started, follow these steps:
Select the object in your scene with a camera. In this case, go to the Hierarchy window and expand the FPSController object. From there, select the FirstPersonCharacter object.Figure 1.3 – Selecting the FirstPersonCharacter object
Next, go to the Inspector window. From there, scroll down to the Camera component and check the Post Processing option.Figure 1.4 – Enabling Post Processing
From the top bar, select GameObject | Volume | Global Volume. This will add a new object to the Hierarchy window.How it works…
Enabling Post Processing on a camera activates post-processing effects for that camera. If your project has multiple cameras, ensure this option is enabled for each one.
Unity’s URP uses the Volume framework for post-processing, allowing effects to be applied globally or within specific areas. A Volume defines a space in the scene where post-processing settings take effect. Global Volumes apply to the entire scene, while Local Volumes affect only designated areas.
To set up post-processing, create an empty GameObject and add a Volume component. When Post Processing is enabled on a camera, it will use the settings inside the assigned volume. Since we are using a Post Processing, its Mode is set to Global, meaning it has no boundaries and affects all cameras in the scene.
At runtime, URP evaluates all active Volume components, using the camera’s position and volume properties to determine their impact on the final scene rendering.
Achieving a filmic look using grain, vignetting, and depth of field
Now that we have finished setting up our project to utilize post-processing, we can create our first Post Processing Volume Profile. A volume profile is an asset that contains the settings URP uses to render a scene.
One of the most common appearances people like their projects to have is that of a film. This is used quite frequently in titles such as Red Dead Redemption 2 (2018) and The Last of Us Part II (2020). It’s also used quite effectively in Resident Evil Village (2021), as its creators aimed to emulate the cinematic horror atmosphere that the game is based on.
Figure 1.5 – Final result of the filmic look
Getting ready
Make sure you have completed the Setting up post-processing recipe before starting this one.
How to do it...
Follow these steps to get a filmic look using grain, vignetting, and depth of field:
First, we must create a new volume profile by going to the Project window. From there, right-click within the Assets/Chapter 01 folder and then select Create | Rendering | Volume Profile.Figure 1.6 – Creating a volume profile
Once selected, we can rename the item. Go ahead and set the name to FilmicProfile.Note
If you don’t enter a name correctly, you can rename an item from the Project window by clicking on the name and then clicking it again. Alternatively, you can right-click on the item and select Rename or hit F2 on your keyboard with an item selected.
Figure 1.7 – Assigning the filmic profile
Note
Alternatively, you can also click on the New button, which will automatically create an object for you with the name of the scene. This method works well if you only want to have one profile. However, since we are going to be using several profiles over the course of this chapter, I wanted to ensure that you know the entire process by doing it manually.
Figure 1.8 – Adding the Film Grain effect to post-process volume
By default, all options will appear grayed out. To activate any of the options, you need to click the checkbox on the left side of each option. You can also quickly enable or disable all options at once by clicking the All or None options, respectively, located at the top-left side of the override that we just added.
To view the changes in a way that resembles the finished game, switch to the Game view by selecting the Game tab. Next, check the Intensity option and set it to 1.0. Then, check the Type property and set it to Medium 1. Afterward, hit the Play button to see a representation of what the tweaks have done:Figure 1.9 – Result of the Film Grain effect
You will notice thatthe screen has become much fuzzier than before.
We want to have a more subtle effect here, so we will decrease Intensity to 0.2 and set Type to Thin 2:Figure 1.10 – Altering the Film Grain effect
This will alter the grain effect so that it looks like this:
Figure 1.11 – Altered result
Note
Unlike how users typically work in Unity, due to Post Processing Profiles being asset files, you can modify them while playing your game and, upon stopping the game, the values are still saved. This can be useful for tweaking values to achieve the exact look that you’re after.
The next property we want to tweak is the Vignette property, which will add blackened edges around the screen.
Click on Add Override and select Post-processing | Vignette. Open the properties, enable the Intensity property, and set it to 0.5. Afterward, enable and set Smoothness to 0.35:Figure 1.12 – Creating a vignette effect
Adding this effect will make the screen look like this:
Figure 1.13 – Visual of vignette effect
Next, select Add Override again and, this time, select Post-processing | Depth of Field. Check the Mode property and change it to Gaussian. Then set the Start property to 20:Figure 1.14 – Setting Depth Of Field values
Afterward, if you look at the Scene view, you should notice that while things in front of the player are perfectly visible, as things get further away, they are now blurred:
Figure 1.15 – Result of depth of field effect
Now, if we go into the game itself and move around, we should see our filmic look in action:
Figure 1.16 – Final result of the filmic look
And with that, we now have a scene that looks much more like a film than what we had to begin with!
How it works…
Each time we add an effect to a post-processing volume, we are overriding what would normally be put onto the screen.
If you’ve been to a movie theater that still uses film, you may have noticed how there were little specks in the filmstock while the film was playing. The Film Grain effect simulates this film grain, causing the effect to become more pronounced the more the movie is played. This is often used in horror games to obscure the player’s vision.
Note
For more information about the Film Grain effect, check out https://docs.unity3d.com/Packages/[email protected]/manual/Post-Processing-Film-Grain.html.
In the film world, vignetting can be an unintended effect of using the wrong type of lens for the type of shot you are trying to achieve or the aspect ratio that you are shooting for. In game development, we typically use vignetting for dramatic effect or to have players focus on the center of the screen by darkening and/or desaturating the edges of the screen compared to the center.
Note
For more information about the Vignette effect, check out https://docs.unity3d.com/Packages/[email protected]/manual/post-processing-vignette.html.
The Depth Of Field setting determines what is blurry and what isn’t. The idea is to have items of importance in focus while items in the background are not. In this version, we are using Gaussian, which is the fastest and best mode of the depth of field effect to use for lower-end platforms.
Note
For more information about the Depth of Field effect, check out https://docs.unity3d.com/Packages/[email protected]/manual/post-processing-depth-of-field.html.
Simulating realistic effects with bloom and motion blur
The bloom optical effect aims to mimic the imaging effects of real-world cameras. In real life, when a camera captures bright lights, the light can bleed over into adjacent areas, creating a glow around the edges of bright objects. This effect can make scenes look more vivid and dynamic, as it simulates the way cameras and the human eye perceive intense light sources. The bloom effect is very distinctive and is often used in games to create a magical or ethereal atmosphere. You’ve likely seen it employed in areas of a game that are magical, heaven-like, or otherworldly. Popular titles such as Cyberpunk 2077 (2020) and Final Fantasy XV (2016) make extensive use of bloom to enhance their visual storytelling and immerse players in their fantastical worlds.
Motion blur is another effect used to mimic real-life camera behavior. It simulates the blurring that occurs when objects move quickly within the frame, replicating the effect seen in both cinematography and real life. This effect can make fast movements appear smoother and more realistic, enhancing the sense of speed and motion. Motion blur is commonly used in action-packed games to provide a more immersive experience and to visually communicate the intensity of fast-paced sequences. Recent games such as Marvel’s Spider-Man 2 (2023), developed by Insomniac Games, and Forza Horizon 5 (2021), developed by Playground Games, use motion blur to great effect, making their high-speed action sequences more dynamic and engaging.
By combining bloom and motion blur, developers can create visually stunning and more lifelike scenes, enhancing the overall gaming experience.
Figure 1.17 – The final result of using bloom and motion blur
Getting ready
Make sure you have completed the Setting up post-processing recipe before starting this one.
How to do it...
To add the bloom and anti-aliasing effect, follow these steps:
First, we must create a new volume profile by going to the Project window. From there, right-click within the Assets/Chapter 01 folder and then select Create | Rendering | Volume Profile.Once selected, set the name to RadiantProfile.From the Hierarchy window, select the Global Volume object. In the Inspector window, locate the Volume component and assign the profile property to our newly created profile.Afterward, select the Game tab (if it hasn’t been selected already) to see the results of the changes we are about to make.In the Inspector window, go to Volume, select the Add Override button, and select Post-processing | Bloom. Check the Intensity property and set it to 12. Afterward, check and set Threshold to 0.5:Figure 1.18 – Adding a Bloom effect
This will give us the following effect:
Figure 1.19 – Visual of the bloom effect
In the Inspector window, go to Volume, select the Add Override button, and select Post-processing | Motion Blur. Check the Intensity property and set it to 0.5. Afterward, check and set Clamp to 0.2:Figure 1.20 – Adjusting the Intensity and Clamp values of Motion Blur
Afterward, save your scene and hit the Play button to check out your project:Figure 1.21 – The final result of using bloom and motion blur
You should notice that whenever you turn the camera, there will be a subtle blur effect.
How it works...
As we mentioned previously, the bloom filter will make bright things even brighter while adding a glow to lighter areas. In this recipe, you may have noticed that the path is much lighter than it was previously. We can do this to ensure that players will follow the path to get to the next section of gameplay.
Note
For more information about Bloom, check out https://docs.unity3d.com/Packages/[email protected]/manual/post-processing-bloom.html.
Motion blur attempts to simulate the effect of motion in real life, where objects moving quickly within the frame appear blurred. This effect occurs because the camera (or the human eye) cannot capture the fast-moving objects in sharp detail, resulting in a smeared appearance. Motion blur can make fast movements appear smoother and more natural, enhancing the overall realism and immersion in a game.
When a game character or object moves rapidly, the display may struggle to render each frame with perfect clarity, especially at lower frame rates. Motion blur helps mitigate this by blending frames together, creating a trail of blur that mimics the natural way our eyes perceive motion. This can be particularly effective in action-packed sequences, racing games, or any scenario involving high-speed movement.
However, it’s important to use motion blur judiciously. While it can enhance realism, excessive use can lead to a loss of visual clarity, making the game appear overly blurred and reducing the sharpness of the scene.
Note
For more information about Motion Blur and what each property means, check out https://docs.unity3d.com/Packages/[email protected]/manual/Post-Processing-Motion-Blur.html.
Enhancing the atmosphere with color grading
One of the best ways to easily change the mood of a scene is by changing the colors a scene uses. One of the best examples of this can be seen in TheMatrix series of films, where the real world is always blue-tinted, while the computer-generated world is always tinted green. We can emulate this in our games by using color grading:
Figure 1.22 – The final result of using color grading
Getting ready
Make sure you have completed the Setting up post-processing recipe before starting this one.
How to do it...
To add color grading, follow these steps:
First, we must create a new volume profile by going to the Project window. From there, right-click within the Assets/Chapter 01 folder and then select Create | Rendering | Volume Profile.Once selected, we can rename the item. Go ahead and set the name to ColorGradingProfile.From the Hierarchy window, select the Global Volume object. In the Inspector window, locate the Volume component and assign the profile property to our newly created profile.Afterward, select the Game tab (if it hasn’t been selected already) to see the results of the changes to be made.Select the Add Override button and select Post-processing | White Balance. Check the Temperature property and set it to 30. Afterward, check and set Threshold to 0.5.Select the Add Override button and select Post-processing | Color Grading. Check the Hue Shift property and set it to -20 and the Saturation property to 15.Figure 1.23 – Adjusting the properties of Color Grading
From the Scene view, you may see some changes; but to get a better feel dive into the game and move around to see what it looks like when playing it:
Figure 1.24 – The final result of using color grading
Notice how the previously very green environment is now much warmer and more yellow than before. Using techniques like this, environments can simulate different times of the year, such as fall, with minimal effort when it comes to creating new art assets.
How it works…
White balance attempts to correct the color cast in your scene so that objects that appear white in real life also appear white in your game. This adjustment compensates for the color temperature of the light source, which can range from the warm tones of incandescent lighting to the cool tones of daylight. In our case, we are shifting the temperature to make the game have warmer tones than it would normally.
Note
For more information about the White Balance effect, check out https://docs.unity3d.com/Packages/[email protected]/manual/Post-Processing-White-Balance.html.
Color adjustments modify the hue, saturation, and brightness of the colors in your scene. These adjustments are vital for correcting any color discrepancies and achieving the desired look and feel for your game. You can enhance the vibrancy of certain colors, tone down others, or completely shift the color palette to fit a particular mood or theme. In our case, we shifted the hue to move all colors slightly toward the opposite side of the color wheel. We also increased the saturation, which made the colors more vibrant.
Note
For more information about the Color Adjustments effect, check out https://docs.unity3d.com/Packages/[email protected]/manual/Post-Processing-Color-Adjustments.html.
Creating a horror game look with fog
One of the genres of games that best utilizes the features of the post-processing stack is the horror genre. Using things such as depth of field to hide scary objects, as well as static to make the screen more menacing, can help set your game firmly in the right place and provide the mood you are going for.
Figure 1.25 – The final result of our horror look
Getting ready
Make sure you have completed the Setting up post-processing recipe before starting this one.
How to do it...
To add color grading, follow these steps:
First, we must create a new volume profile by going to the Project window. From there, right-click within the Assets/Chapter 01 folder and then select Create | Rendering | Volume Profile.Once selected, we can rename the item. Go ahead and set the name to HorrorProfile.From the Hierarchy window, select the Global Volume object. In the Inspector window, locate the Volume component and assign the profile property to our newly created profile.Unlike the previous settings, though, the fog settings are located in the Lighting window, which can be accessed by going to Window | Rendering | Lighting Settings.Tip
You may see the Lighting window open as a separate window on your screen. If you would like, you can drag and drop the top tab into another section of the Unity Editor to dock it to another section. I place it next to the Inspector window so that I can easily switch between the various options.
Figure 1.26 – The Color menu
Note
If you know the hex values of the color from your graphic editing software, such as Photoshop, you can just type it in the Hexadecimal property of the Color window, but I just clicked on the eye dropper and then clicked on the skybox.
Figure 1.27 – Enabling Fog in our scene
As you can see, it’s already much more spooky than it was previously, but there are still more options that we can change:
Figure 1.28 – Visual of fog in our scene
Go to the Project window, and select the Assets\Settings folder. From there, select the PC_Renderer object. From the Inspector window, go to the Screen Space Ambient Occlusion component. Afterward, change Intensity to 2 and Radius to 20:Figure 1.29 – Adjusting the Screen Space Ambient Occlusion effect
This will provide us with the following visual change:
Figure 1.30 – Viewing the Screen Space Ambient Occlusion effect
Lighting often has a big effect on the theme of a scene as well. If you are using the example map, select the Directional Light object in the Hierarchy tab and, from the Inspector tab, under the Light component, change Intensity to 0.5 and adjust Color to something darker. (I used the same color that I used in step 5, with a HEX of 5C7290.)Open HorrorProfile again by selecting it from the Project window and then go to the Assets\Chapter 01 folder and then the Inspector window. Click the Add Override button and select Post-processing | Depth of Field. Check the Mode property and select Gaussian.Figure 1.31 – Viewing the depth of field effect
Click the Add Override button and select Post-processing | Shadows Midtones Highlights. Check the Shadows property and drag the trackball on the slider at the bottom section to the left until the values are at 0.63:Figure 1.32 – Adjusting Shadow lightness
Save your game and then start it to see the effect of all of these changes:Figure 1.33 – The final result of our horror look
How it works...
Ambient occlusion is a shading and rendering technique that’s used to calculate how exposed each point in a scene is to ambient lighting. In this instance, the Ambient Occlusion option will calculate areas that should have additional shadows. Since our scene is filled with trees, this will make the undersides much darker than they were previously.
