8,49 €
Mehr erfahren.
- Herausgeber: The History Press
- Kategorie: Geisteswissenschaft
- Sprache: Englisch
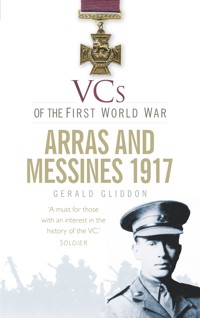
For much of the First World War, the opposing armies on the Western Front were at a stalemate, with an unbroken line of fortified trenches stretching from the Belgian coast to the Swiss border. The Allied objective after the bloody Battle of the Somme drew to a close in November 1916 was to decisively break through the German 'Hindenburg Line' and engage the numerically inferior German forces in a war of movement. The Arras offensive was conceived to achieve this breakthrough and was planned for early 1917 after considerable pressure from the French High Command. Commonwealth Forces advanced on a broad front between Vimy in the northwest and Bullecourt in the southeast, with the French Army attacking 80km further south in the Aisne area. Initial successes, albeit costly, were followed by a reversion to the previous stalemate and lead to a change of focus, with an assault on the Messines Ridge, near Ypres, beginning in June 1917. By the end of July, on the eve of the Third Battle of Ypres, a total of fifty Victoria Crosses had been awarded, including many troops from the Australian, Canadian and New Zealand Forces. This includes Captain Robert Greive, who single-handedly silenced two enemy machine-gun nests at Messines, and L/Cpl James Welch, who captured four prisoners with an empty revolver. The courage, determination and sacrifice of their generation should never be forgotten.
Das E-Book können Sie in Legimi-Apps oder einer beliebigen App lesen, die das folgende Format unterstützen:
Veröffentlichungsjahr: 2011
Ähnliche
CONTENTS
Title Page
Acknowledgements
Preface to the 2012 edition
Introduction
E.J. Mott
H.W. Murray
F.W. Palmer
G.E. Cates
C.A. Cox
P.H. Cherry
F.M.W. Harvey
J.C. Jensen
F.W. Lumsden
W. Gosling
J.E. Newland
T. Bryan
H. Cator
T.J.B. Kenny
T.W. MacDowell
W.J. Milne
E.W. Sifton
E. Sykes
J.W. Whittle
J.G. Pattison
H. Waller
D. Mackintosh
H.S. Mugford
J. Cunningham
J.W. Ormsby
C. Pope
A. Henderson
D.P. Hirsch
E. Foster
E. Brooks
R.L. Haine
A.O. Pollard
J. Welch
R.G. Combe
J. Harrison
G. Jarratt
M.W. Heaviside
G.J. Howell
T. Dresser
R.V. Moon
A. White
T.H.B. Maufe
J. Carroll
S. Frickleton
R.C. Grieve
W. Ratcliffe
J.S. Dunville
F.B. Wearne
F. Youens
T. Barratt
Sources
Bibliography
Plates
Copyright
ACKNOWLEDGEMENTS
I would like to thank the staff of the following institutions for their assistance during the six-month research for this book: the Commonwealth War Graves Commission, the Imperial War Museum, the National Army Museum and the National Archives. In addition, I would also like to thank the archivists and curators of the many regimental museums and libraries who have responded to my requests for information.
Where recently taken photographs have been included, their owners have been acknowledged with each individual illustration.
As was the case with my earlier books in the VCs of the First World War series, Donald C. Jennings of Florida has been immensely kind in supplying me with pictures of many of the graves or memorials included in this book.
Many of the maps used in this book are from the British military history, Military Operations France and Belgium, 1914–1918, edited by J.E. Edmonds and published by Macmillan/HMSO from 1922 to 1949.
Maurice Johnson has once again spent many hours in the National Archives in Kew on my behalf, checking the War Diaries of the units involved with the men who won the VC in the first half of 1917. Other individuals who have also given help in many ways include Peter Batchelor, who also compiled the index, Brian Best, John Cameron, Jack Cavanagh, Colonel Terry Cave CBE, Karen Dennis, Bill Fulton, Peter Harris, Steve Snelling, Anthony Staunton and Iain Stewart. Other people who provided either material or assistance but whose names are not mentioned here have been acknowledged in the Sources section at the end of the book.
PREFACE TO THE 2012 EDITION
The History Press has decided to re-issue the VCs of the First World War series in new editions and I have taken advantage of this decision by revising and updating the texts of the current volume.
Since the initial research for this book was carried out nearly fifteen years ago there has been an increasing interest in and awareness of the stories and lives of the men who were awarded the nation’s and the Commonwealth’s highest military honour. Evidence of this can be found in the amount of new books being published on the subject, as well as the re-issuing of servicemen’s records by the National Archives and the accessibility of other records of family history, which are now available via Ancestry, the family history magazine. The internet has also played a major part, although information received using this method should always be verified by cross-checking. Finally, the founding of the Victoria Cross Society in 2002 by Brian Best has encouraged further research and publication of informative articles on the holders of the Victoria Cross.
One of the heartening consequences of this new interest in the subject is in the erection of new or replacement headstones on some of the graves of these brave men, and it is hoped that in time every man who has a grave will have it properly marked.
Gerald Gliddon
Brooke, Norfolk
September 2011
INTRODUCTION
At the Allied Conference at Chantilly in November 1916 it was agreed by the British and French delegations that a joint Allied offensive would be carried out in the New Year, beginning on or about 1 February 1917. However, in December certain political changes took place which affected this agreement. First, David Lloyd George replaced Herbert Asquith as British prime minister, and in France General Joffre was replaced by General Nivelle as Commander-in-Chief of the French Northern Armies. The latter had become a new French hero owing to his recent success at Verdun.
While it was always the intention of Field Marshal Haig, who was Commander-in-Chief of the British Expeditionary Force, to conduct a campaign in Flanders, General Nivelle, seemingly brimming with confidence, had other ideas. He wanted the British to take over another 20 miles of front and to relegate them to carrying out a secondary role containing the German Army. While this was happening, Nivelle’s army would deliver a knock-out blow against the German Army on the Aisne with the use of twenty-seven divisions.
In Germany the politicians were in favour of negotiating a peace, while Marshal Hindenburg and General Ludendorff wished to bring the Allies to their knees. The German Army had also decided to change their tactics and planned a new line of defence in depth, divided up into a series of zones which they would ‘invite’ their opponents to attack, thus luring them into a trap that would be difficult to escape from. This line was known to the Germans as the ‘Siegfrid Stelung’.
Work on the new line had been progressing for several months and on 4 February 1917 orders were given to the German troops to begin to retreat to this new defence line. Five days later a ‘scorched earth policy’ was introduced in order to hinder the Allies, who naturally pursued the enemy to their new positions. The Germans took considerable care in destroying road and rail systems, burning and destroying buildings, cutting down trees and poisoning water supplies. In addition, hundreds of mines and booby traps were put in place to hinder the Allied advance. Even dead bodies were ‘wired’ up with deadly devices for any person who tried to move or bury a corpse. As a result of its retreat to this new line, the German Army reduced its front line by 25 miles and released fourteen extra divisions. Possibly, and of most importance, the new tactic upset the Allies’ own plans and caused confusion to the High Command.
While General Nivelle was planning his ‘breakthrough’ on the Aisne, the British and Canadians were to move eastwards from Arras in early April and capture Hill 145, better known as Vimy Ridge. The Third Army under General Allenby was to attack the German lines to the east of Arras, which would involve penetrating part of the newly constructed Hindenburg Line. General Sir Henry Horne’s First Army, which included the Canadian Corps, was to take Vimy Ridge and forty-eight tanks as well as 2,800 guns were to be used in the attack. To the south, the German vacation of the Bapaume Salient led to problems for the British artillery, which now had to move across an area devastated by the departing German Army.
The battle of Arras was delayed by one day and began on 9 April – Easter Monday. Weather conditions could not have been worse and included snow, sleet and sheer cold. Despite this, the initial progress of the Allied Army was successful. In the centre of the battlefield the 12th and 15th Divisions managed to advance up to 2 miles. To the left the Canadian Corps had secured Vimy Ridge, their main objective, and they now had observation over the German-held plain of Douai. It was a magnificent achievement and one which has been written about in countless books. To the right of the line the fortified village of Neuville-Vitasse also fell to the Allies.
At Bullecourt, though, things had gone desperately wrong and General Gough’s late decision to use tanks to break down the German wire, without adequate preparation or rehearsal, turned out to be a major blunder. One feels that after Bullecourt, which was basically an Australian affair, General Gough would not be trusted again. Men had been needlessly sacrificed owing to sheer incompetence.
On 11 April, two days after the attack began, the British managed to capture the strategically important hill village of Monchy-le-Preux, a major achievement. Nevertheless, the German Army was recovering, and gaps were being plugged and reinforcements brought up. Using hindsight, it might well have been sensible to have stopped the advance there and then. However, Haig was committed to supporting the Nivelle Offensive and really had little choice; the attack had to continue. Unfortunately, the Nivelle Offensive on the Aisne turned out to be a disaster, caused largely by the French general’s over-optimism. He promised to deliver a victory and he did not succeed. French casualties numbered 187,000 compared to a German total of 163,000. As a result of this defeat Nivelle was replaced by General Pétain, and General Foch was appointed Chief of General Staff.
In the Arras sector Haig learnt of the failure of the French offensive and decided to ‘draw breath’ and take stock. Consequently, a new offensive was planned for 23–24 April; named the second battle of the Scarpe, this was to be carried out to the north and south of the river of that name. This time the attack was to be on a 9-mile front, following the line Gavrelle–Roeux–Guémappe–Fontaine-lès-Croisilles. The German Army, under the command of Col F. Lossberg (CGS First Army), had learnt how to use the Hindenburg Line to the best advantage. The British artillery was still finding it difficult to provide adequate support over the soft and devastated ground. The fortified village of Roeux proved to be a very difficult place to take, but the British did manage to capture Gavrelle and Guémappe.
On 3 May a third battle of the Scarpe was launched, with the use of British divisions that were already in the area. Bullecourt and Roeux were both finally taken by the British. On the minus side, the Germans managed to re-take the village of Fresnoy.
After the second battle of Bullecourt in the first half of May, the campaign shifted northwards to the Franco-Belgian border. For some time a plan had been formulated to capture the high ground of Messines Ridge. This battle began with high hopes on 7 June, but despite initial success the gains were not fully exploited. As at Arras, and at Cambrai later in the year, it appears that the Allies were so unused to a successful advance that they were unable to capitalise upon it when one occurred.
The present book in the VCs of the First World War series is chronologically the follow-up to the volume on the Somme battle of 1916. The last man to be written about in that book was Lt Col B.C. Freyberg, who won his VC in November during the capture of the village of Beaucourt. The first member of the British Army on the Western Front to win the coveted medal in 1917 was Sgt E.J. Mott on 27 January, nearly eleven weeks later. By the end of July, on the eve of the third battle of Ypres and Passchendaele, another forty-nine soldiers had won the VC on the Western Front.
Finally, a note about decorations: most of the men written about in this book shared certain medals, although several differences and variations occur. The 1914 Star (or Mons Star) covers active military service for the period August–November 1914. The 1914–15 Star was awarded to men who served actively up to 31 December 1915 and who had not already been awarded the 1914 Star. The British War Medal was given to soldiers who served overseas in the period 1914–18. The Victory Medal was awarded to soldiers who served in an overseas theatre of war. Any VC holder mentioned in this book who survived the First World War, and was still alive in 1937, would have been entitled to a George VI Coronation Medal, and the same applied for the coronation of Queen Elizabeth II in 1953.
Gerald Gliddon
Brooke, Norfolk
January 1998
Map showing the attack on Vimy Ridge, April 1917
Map showing the battle of Arras, 1917
Map showing the area around Messines, 1917
E.J. MOTT
South of Le Transloy, France, 27 January
Fighting on the Western Front had virtually ended for the year in mid-November 1916 when the British captured the Somme village of Beaumont-Hamel, a success which seemed to come as a surprise to the British High Command. Several attacks were carried out in the Beaucourt valley of the Somme region during the winter months. In early January 1917 the British were requested by the French High Command to extend their line of responsibility to 5 miles south of the Oise, below Barisis.
The first VC won by a soldier on the Western Front in 1917 was awarded to Sgt Edward Mott of the 1st Battalion, the Border Regiment (87th Bde) 29th Division. The operation he was involved in was described as a minor one and was one of a series carried out by Gen. Rawlinson under the instructions of Sir Douglas Haig, the Commander-in-Chief. The main purpose of these secondary operations was to encourage the enemy to think that the Somme operations of the year before were to continue now that the new year had begun.
The first of the secondary operations was planned to take place on 27 January by the 87th Brigade of the 29th Division on the front of XIV Corps. It was to be launched in a northerly direction and would be 750 yards wide, astride the Frégicourt–Le Transloy road; the German name for the position was Landwehr Trench. Frégicourt was about a mile to the east of Combles and Le Transloy was about 3 miles to the south-east of the German-held town of Bapaume. The final objective was 400 yards distant from the centre of this frontage.
In the early morning, the first of two British barrages fell on the German front line and lasted for five minutes. The second, overlapping the first by one minute, fell just in front of the enemy front line and then the two lifted off to a position 100 yards northwards. Australian artillery also assisted the British barrage.
The 1st Royal Inniskilling Fusiliers, also of the 87th Brigade, were on the right of the attack and the 1st Borders on the left. The attack, which began at 5.30 a.m., took the enemy by considerable surprise and the frosty ground helped the attackers to move forward quickly. The enemy surrendered without putting up much of a fight, although a machine gun in a strongpoint offered opposition. It was at this point that Mott, although wounded in the eye, worked round the flank and rushed forward. In a hand-to-hand struggle he overcame the gun crew. The trench map reference for the strongpoint was N36d 3 2 N36 c 6 0. All objectives were taken and there was a considerable haul of prisoners – 368 were captured and taken back to Antelope Trench where the headquarters of the operation was positioned. Mott was awarded the VC for his bravery; it was the thirteenth VC won by the 29th Division.
His VC was gazetted on 10 March 1917:
For most conspicuous gallantry and initiative when in an attack the company to which he belonged was held up at a strongpoint by machine-gun fire. Although severely wounded in the eye, Sergt. Mott made a rush for the gun, and after a fierce struggle seized the gunner and took him prisoner, capturing the gun. It was due to the dash and initiative of this non-commissioned officer that the left flank attack succeeded.
After their involvement in this successful attack, the 1st Borders marched back to the village of Carnoy where they were thanked by the Divisional Commander for their excellent work on the 27th. For most of the next two months the battalion remained in the training area around the village of Bussy.
Edward John Mott was born at Drayton near Abingdon in Berkshire on 4 July 1893. He was the son of a labourer, John Mott, and attended the local council school in Abingdon. When he was only seventeen years old he enlisted in the 1st Border Regiment; his service number was 9887. He took part in the Dardanelles landing in April 1915, and on the 28th of that month he won the DCM (London Gazette, 3 June 1915), which he subsequently received from the hands of the King in Liverpool. The citation read:
… during operations south of Krithia for gallant conduct in leading his company to successive fire positions, and again for conspicuous bravery and good service in attacking over difficult country.
He was evacuated to Egypt from the Gallipoli peninsula and left for service in France in March 1916. On 4 April 1917 he received his VC from the hands of the King at at Buckingham Palace.
After the war Mott became a commissionaire at Selfridges in Oxford Street, London, then in 1926 he returned to Berkshire, his home county. At some time he became a warden at an RAF depot, a position which he left in October 1940. During his life Mott regularly attended VC functions, including the 1920 VC garden party at Buckingham Palace and the VC centenary in Hyde Park in 1956. In 1962 he was among the 151 VC holders who attended a garden party at Buckingham Palace; he was accompanied by his daughter, Edna, and his granddaughter, Jennifer Stone. From 1959 he had lived with his wife, Evelyn Maud, at 38 New Yatt Road, Witney, which was the home of Mrs Rona Stone, another daughter. In 1964 Mott was Guest of Honour at the ABC cinema in Oxford for a showing of the film Zulu, being the story of the battle at Rorke’s Drift in 1879 in which no fewer than eleven VCs were won.
The Mott family ran a building firm which employed Bernard Mott and his father Edward who owned the firm.
Edward Mott died at home on 20 October 1967, leaving a widow, four sons and four daughters. His body was cremated at the Oxford Crematorium, Reference 32633. His ashes were placed close to an oak tree in the Garden of Remembrance and in cloister three space 1 there is a plaque to his memory and to his wife who died on 7 March 1979. The original house in Witney where Mott died had been built as a home for foremen who were employed at the local blanket factory. It was formerly named Pendennis.
Mott’s VC and medals, including the DCM, 1914–15 Star, VM, WM and Coronation medals for King George VI and Queen Elizabeth II, appear to have been stolen in the 1930s and in September 1937 he was issued with replacements. It would now seem that the original ‘stolen’ decorations ended up in the London auction houses, where prior to 1928 they were acquired by Mr Lester Watson, an American investment banker. In 2006 this original group was donated by Mr Watson’s son, Hoyt Watson as part of his father’s collection to the Fitzwilliam Museum in Cambridge. Meanwhile the replacement set had previously been purchased by the Border Regiment from Glendinings in March 1976 for £1,950.
H.W. MURRAY
Stormy Trench, France, 4/5 February
At the end of January 1917 the 4th Australian Brigade (4th Australian Division) was ordered to capture an enemy position called Stormy Trench, north-east of Gueudecourt, towards the village of Le Transloy, in what was another minor operation. It was a position of great tactical importance around 1,000 yards from Gueudecourt village and from it one had a view that stretched for miles. At the beginning of February the 15th Australian Battalion attacked it and although they were partially successful on the left flank they were held up on the right. The attack was a failure and the men of the 15th Battalion fell back to Shine and Grease Trenches where the 13th Battalion relieved them. The knowledge gained from the raid helped the 13th Battalion to capture the position a few days later, on the night of 4/5 February.
In preparation for the second attack, Capt. Henry Murray of the 13th Battalion and his scouts crawled out into no-man’s-land in order to examine the terrain over which they were to attack; especially, of course, they needed to find out about the condition of the German wire. Within a couple of days Murray had a very accurate knowledge of the position that they were ordered to capture. The greatest worry was how to hold it against counter-attacks once they had taken it. There was to be no shortage of armament: 20,000 Mills bombs and 1,000 rifle grenades were requested, along with artillery support. To the south of Shine Trench was a position called the Chalk Pit where much of this ammunition was initially dumped; the pit was also the advance position of Col Durrant, who was in charge of the operation. In order to keep the enemy in ignorance it was decided not to send men up to the advance positions until after dark. Murray’s A Company was to the right of the proposed attack with the other companies to their left. The forward positions occupied by the Australians were, in effect, a maze of old saps. It was extremely cold and the Australians wrapped their feet in sandbags to prevent the sound of tramping on the frozen ground alerting the enemy.
Map showing the battle for Stormy Trench, 4 February 1917
Murray’s A Company was one of four companies which went into the attack preceded by a fierce artillery barrage at about 10.00 p.m. The company began with 140 men. They made good progress, moving quickly over the hard ground, but were held up on the right as the 15th Battalion had previously been. The enemy was very much on the alert, although some of them were slow to emerge from their dug-outs. They sent over showers of hundreds of ‘eggs’ (grenades) and ‘potato-mashers’. This impeded the Australians’ progress and Murray sent an SOS to the artillery which brought a quick response. Despite this, the German counter-attack continued and a group of bombers under Murray and Pte Robinson managed to push the attackers back towards their original positions. In the small hours the firing died down, but at 3.00 a.m. the enemy made one more attempt to turn the Australians out of their positions and fierce hand-to-hand fighting took place before the Germans decided that they had had enough for one night. After twenty-four hours Murray’s A Company was reduced to fifty-eight men and they sought relief, which was supplied by members of the 16th Battalion who took over from their victorious colleagues in the 13th Battalion.
Not only had Murray’s fighting ability and planning been outstanding, but Col Durrant had been an inspired commander. The colonel visited the captured Stormy Trench soon after it was taken and went backwards and forwards over the surrounding ground in order to align the new positions and communication trenches. Many of the men who fought were taking part in battle for the very first time. On 22 February the 4th Australian Brigade moved back over snow-covered roads to Ribemont. Although it had been cold for most of February, at the start of March the weather turned even colder. At this time rumours were circulating that the Germans were about to leave their Somme positions and retreat to the newly built Hindenburg Line. Open warfare training was subsequently carried out during March.
There was great rejoicing in the 13th Battalion when Murray’s VC was announced on 12 March. It was gazetted on 10 March:
For most conspicuous bravery when in command of the right flank company in attack. He led his company to the assault with great skill and courage, and the position was quickly captured. Fighting of a very severe nature followed, and three heavy counter-attacks were beaten back, these successes being due to Capt. Murray’s wonderful work. Throughout the night his company suffered heavy casualties through concentrated enemy shell fire, and on one occasion gave ground for a short way. This gallant officer rallied his command and saved the situation by sheer valour. He made his presence felt throughout the line, encouraging his men, heading bombing parties, leading bayonet charges, and carrying wounded to places of safety. His magnificent example inspired his men throughout.
Henry William Murray was the son of Edward Kennedy Murray, a farmer, and his wife Clarissa, née Littler. He was born at ‘Clairville’, near Evandale on 1 December 1880 at Evandale, Launceston, Tasmania and was the eighth of nine children. After he left the state school at Evandale at the age of thirteen or fourteen, his family moved to ‘Northcote’ close to St Leonards where his father died.
Murray’s connection with the army began when he joined the Australian Field Artillery (militia) at Launceston, with whom he trained for six years. At the end of his teens he moved to Western Australia and worked in the goldfields as a mail courier. His method of transport was either bicycle or horseback.
Two months after the war began Murray, already a trained soldier, enlisted in Perth, Western Australia as a private in the Australian Imperial Forces on 13 October 1914. He was thirty-four years of age, 5 foot 8½ inches tall and gave his occupation as ‘bushman’. He had employed men to cut timber for use in the railways in the south-west of the state. At the time of his entering the army, Murray was said to be a tall, well-built man with dark hair, and a natural leader of men. He was sent to Blackboy Hill Camp close to Perth, where the 16th Battalion was being formed and which he joined. During his training period Murray teamed up with a man called Percy Black and they were destined to become great friends.
When the 16th Battalion landed at Gallipoli on 25 April 1915 Murray was a member of one of its machine-gun crews. His friend L/Cpl Black was serving with him as Number 1 gunner. The day after the landing the two gun crews were on the rear side of Pope’s Hill, sniping at Turkish soldiers who were moving on to Russell’s Top. Later, both men, although wounded, refused to leave their posts during the following week’s fighting. On 13 May Murray won the DCM (as did Black) for ‘exceptional courage’ in the period 9–13 May and was also promoted to lance corporal. Murray and Black had both been wounded during this action. Murray was wounded again on 30 May and was evacuated to hospital and declared unfit for further service. He was evacuated to Australia and returned to duty on the peninsula on 3 July 1915. On 8 August he was wounded yet again when his machine-gun section was covering the withdrawal after the attack on Hill 971. Five days later he was made up to sergeant, and was subsequently commissioned as a second lieutenant and transferred to the 13th AIF.
In September Murray had an acute attack of dysentery and was evacuated to Alexandria and then taken to Mudros; he subsequently returned to duty two months later. After having left the peninsula and while still in Egypt he was promoted to lieutenant on 20 January 1916 and then to captain in the following March. The story behind this rapid success was that the commander of the 13th Battalion, Col L.E. Tilney, was short of a machine-gun officer and Gen. Monash agreed to Murray’s speedy promotion. In March the 13th Battalion moved to France
Murray was involved in most of the fighting that his battalion experienced; in addition to the operations at Stormy Trench in February 1917, Mouquet Farm, Pozières and Bullecourt all featured in his military career. In particular, in August 1916 Murray stormed the ruins of Mouquet Farm on the Somme with fewer than a hundred men. After seeing off the German counter-attackers four times he ordered his group to withdraw. Eventually the farm was recaptured by a force of 3,000 men. Murray was rewarded with the DSO (London Gazette, 14 November 1916):
For conspicuous gallantry in action. Although twice wounded, he commanded his company with the greatest courage and initiative, beating off four enemy counter-attacks. Later, when an enemy bullet started a man’s equipment exploding, he tore the man’s equipment off at great personal risk. He set a splendid example throughout.
Murray rejoined his battalion on 19 October, once his wounds had healed.
After the recapture of Stormy Trench in February 1917, at the end of the following month the 13th Battalion moved to Fricourt, Méaulte, Bazentin and Warlencourt, and then to dug-outs between Favreuil and Biefvillers. From 3 April the unit was at Favreuil during a period of sleeting wind, and worked for a week at road-making and cable-burying and carrying. The Hindenburg Line was studied from high ground close to Noreuil and on 8 April the Australian Brigade was planning an attack against it which would take place on the 11th in a battle which was to become the first battle of Bullecourt. The 13th Battalion was to move up to Noreuil and there it would join the rest of the brigade. The Hindenburg Line was to be broken through with the use of tanks and infantry only; artillery was not to be used. Scouts advised against the wisdom of this plan, but it was seemingly too late to halt or change it.
In the fighting that followed, Murray’s unit was supporting the 16th Battalion. He could see the men ahead being held up by wire and cut down by machine-gun fire. The tanks which were supposed to deal with the wire were soon knocked out and the artillery cover was non-existent. In this fighting Black was killed. Despite the conditions a small group of 4th Brigade men managed to squeeze through the enemy wire and into the first two lines of German trench lines. At 7.15 a.m. Murray sent back for more grenades and ammunition which were vital if they were to have any chance of holding their positions. However, communication was inadequate and conflicting reports led to the artillery not firing, enabling the Germans to take advantage of the situation. The follow-up British reinforcements were wiped out and a heavy German barrage began. In addition, enemy small-arms fire swept the Australian positions on three sides. By 8.00 a.m. communications were completely cut off. The few survivors had no choice but to try to struggle back to their original lines, taking cover in the shell holes on the way back. It was a question of ‘every man for himself’.
Murray played a leading role in getting his men out of a very dangerous situation. It was the last time that he was to lead as a company commander in an offensive action, and it seems that his experience at Bullecourt had deeply distressed him. He must have been appalled at the idea of trying to capture a section of the Hindenburg Line without the use of artillery.
Murray won a Bar to his DSO for his role at Bullecourt:
For conspicuous gallantry and devotion to duty. He gallantly led his company over 1,200 yards of fire-swept ground. Later, he went along the whole frontage, organizing the defence, encouraging the men of all units by his cheerfulness and bravery, and always moving to the points of danger. He is not only brave and daring, but a skilful soldier, possessing tactical instinct of the highest order.
Murray was promoted to temporary major on 11 April, a position confirmed on 12 July and he was now in temporary command of the 13th Battalion. During a spell of leave Murray had been presented with his VC along with two DSOs from the King during an open-air investiture in Hyde Park on 2 June 1917. On 8 March 1918 he was promoted to lieutenant colonel and given the command of the 4th Machine-Gun Battalion, a role that he played until the end of the war a few months later. He was described as being ‘cool, determined and confident’. He believed strongly in discipline, but also cared very much for the welfare of the troops under his command. His nickname was ‘Mad Harry’ as he had been fearless in his patrol work.
In January 1918 he was awarded the French Croix de Guerre and in May 1919 and was made a Companion of the Order of St Michael and St George. During the period from 1917 to 1919 he was Mentioned in Despatches on four occasions.
While waiting to return to Australia at the end of the war Murray, along with another holder of the VC, W.D. Joynt, was in charge of various men who were aspiring farmers, and they studied agricultural methods both in the United Kingdom and in Denmark before leaving for Australia.
Murray left for Australia on the Ormonde, a ship which had many senior Australian officers on board including Generals Birdwood and Monash. The ship reached Fremantle where they were given a tremendous welcome home as well as a civic reception. The always modest Murray was one of those called upon to make a speech, an invitation to which he responded briefly. He later returned to Launceston for six months, having been discharged from the AIF on 9 March 1920. He remained in Tasmania for six months before moving to Queensland and becoming a grazier in Blairmack, Muckadilla.
He married Constance Sophia Cameron, an estate agent, on 13 October 1921 at Bollon. They lived in the town for four years after which they separated when Murray moved to New Zealand. Their marriage was dissolved on 11 November 1927 and nine days later he married Ellen Purdon Cameron at the Auckland Registrar’s Office. Murray returned to Queensland with his new wife and purchased a 74,000-acre property called Glenlyon Station near Richmond. He was to live there for the next thirty-eight years. During this time he occasionally wrote articles about his experiences in Gallipoli and France during the First World War which were published in Reveille (1929–1939) and have recently been reprinted.
During the Second World War, when there was a real risk of a Japanese invasion of North Australia, Murray returned to the Active List on 21 July 1939 and commanded the 26th Battalion (the Logan and Albert Regiment) in North Queensland until February 1942. Murray later became the lieutenant colonel of his local battalion of the Volunteer Defence Corps and commanded the 23rd Regiment. Nearly two years later he retired from military service, on 8 February 1944.
Murray was a member of the Australian VC contingent to London in 1956. He lived on at Glenlyon for nearly ten more years and died of heart failure in Miles District Hospital on the Darling Downs in Brisbane, on 7 January 1966, after a car accident the previous day. When on holiday in the Gold Coast as a passenger in a car driven by his wife Nell, the couple were involved in a serious accident after one of the tyres blew and the vehicle skidded and overturned. Nell was injured and thrown out, and her husband was severely injured and trapped in the vehicle until released by a passer-by. Known during the First World War as ‘the man the enemy could not kill’, it was ironic that such a warrior should die as a result of a car accident. His body was cremated at Mount Thompson after a funeral service with full military honours at St Andrews Presbyterian Church, Ann Street, Brisbane, on 14 January. At the funeral his medals were carried behind the coffin by Maj. D. Kayler Thomson and dozens of wreaths were sent to the service along with sheaves of flowers. The Last Post and Reveille were sounded at the cremation by members of the 18th Field Squadron. Murray left a widow, a son and daughter. His portrait by George Bell is in the Australian War Memorial in Canberra. His medals, which are not publicly held, include the VC, CMG (1918), DSO and Bar, DCM, Croix de Guerre and George VI Coronation Medal.
It will come as no surprise to learn that Murray was the most decorated Australian soldier of the First World War and his name is frequently mentioned in C.E.W. Bean’s Official History of Australia in the War.
Murray is commemorated with a memorial tablet in Mount Thompson Crematorium; with a wall plaque in the Garden of Remembrance in Pinaroo Cemetery, Albany Creek, Queensland and with a crescent named after him in Canberra, the city where his life and career is featured as part of the display at the Australian War Memorial. He is also remembered in the Victoria Cross Memorial in Victoria Cross Park in Canberra and at the Victoria Cross Building, Sydney.
F.W. PALMER
North of Courcelette, France, 16/17 February
On 28 January 1917 the 22nd Royal Fusiliers (99th Brigade, 2nd Division) moved into Wolfe Huts, Ovillers on the Albert–Bapaume road. They were in support of the 23rd Royal Fusiliers of the same brigade and A Company was based in Courcelette at the Red Château. The area in which the battalion found itself was part of the battlefield that had been taken from the enemy during the battle of the Somme the previous year. According to the regimental historian, Christopher Stone, the landscape was ‘desolate, treeless, a mass of mine craters, shell holes and wire entanglements, with a few repaired roads and beaten tracks to link up with the front area. The trenches in front of Courcelette were isolated fragments of old battered trenches reclaimed …’. It was extremely cold throughout February and ‘trench foot’ was combated by a plea for extra socks to be sent from the regimental depot in Middlesex.
On 17 February the 22nd and 23rd Royal Fusiliers of the 99th Brigade were both involved in the fighting. With headquarters established in West Miraumont dug-out, the 22nd Battalion assembled in positions between East and West Miraumont Roads. A and B Companies began the attack at 5.45 a.m. while D Company formed a defensive flank stretching from the former British line to the final objective south of Miraumont, a village to the south-west of Bapaume. When moving forward, D Company advanced along the right side of East Miraumont Road but soon came under heavy machine-gun fire from the right. The enemy were alert, having had an early warning of the attack as they had been given the information by deserters.
It was at this point that Sgt Frederick Palmer took a hand as all the officers in his company had become casualties, including Maj. Walsh who had been with the 22nd for two years. Against point-blank machine-gun fire, Palmer managed to cut through the wire entanglements and, together with six men, rushed the enemy machine-gun post which had been holding up the advance. He then established a block. His group was able to repel at least seven determined enemy counter-attacks, which were accompanied by a continuous barrage of bombs and grenades. At one point, when Palmer left the position in order to collect some more bombs from headquarters, he returned to find that the enemy had managed to drive a wedge into his position which threatened the whole flank. Exhausted though he was, Palmer managed to rally his men and together they forced the enemy back.
Meanwhile, A and C Companies found that the wire in front of them was uncut and one platoon on the left side of West Miraumont Road was captured. However, the troops reached South Miraumont Road, although an outflanking movement on the right forced them to fall back to their first objective. The enemy was prevented from emerging on the East Miraumont Road, but at a cost: the battalion casualties were eighty-five killed. A week later the enemy retired in this area anyway, to new and stronger positions in the new Hindenburg Line.
According to Christopher Stone, when the battalion was billeted in Fiefs on 4 April 1917 news came through that Palmer, a bombing sergeant in Major John Walsh’s D Company, had won a VC on 17 February; the other survivors of his attacking party won either DCMs or MMs.
Palmer’s citation was gazetted on 3 April:
For most conspicuous bravery, control and determination. During the progress of certain operations, all the officers of his company having been shot down, Sergt. Palmer assumed command, and, having cut his way, under point-blank machine-gun fire, through the wire entanglements, he rushed the enemy’s trench with six of his men, dislodged the hostile machine-gun which had been hampering our advance, and established a block. He then collected men detached from other regiments, and held the barricade for nearly three hours against seven determined counter-attacks, under an incessant barrage of bombs and rifle grenades from his flank and front. During his temporary absence in search of more bombs an eighth counter-attack was delivered by the enemy, who succeeded in driving in his party and threatened the defences of the whole flank. At this critical moment, although he had been blown off his feet by a bomb, and was greatly exhausted, he rallied his men, drove back the enemy and maintained his position. The very conspicuous bravery displayed by this non-commissioned officer cannot be over-stated, and his splendid determination and devotion to duty undoubtedly averted what might have proved a serious disaster in this sector of the line.
On the night of 25/26 April 1917 the battalion moved into the front-line trenches opposite the enemy-held Oppy Wood and during the following days 2nd Lt Frederick Palmer (by now commissioned) was once again in the thick of the fighting. Stone noted that in the small hours of 29 April during the desperate fighting for Oppy Wood that:
On the left D Company came up against uncut wire. 14,15 and 16 platoons were cut down with only 2nd Lieutenant Palmer VC managing to survive in a shell-hole in the enemy wire, but 13 platoon succeeded in slipping to the left, in getting into the enemy trench and in getting in touch with the Royal Berks, on their left. They then shared the fate of the [1st] Berkshires.
On relief of the 22nd Royal Fusiliers, Stone noted that only the Headquarters Officers and forty men marched out. A few others including Palmer struggled in later. Despite considerable courage of the Royal Berkshires the wood remained in German hands and would do so until 28 June.
To quote Christoper Stone again:
