
4,99 €
Mehr erfahren.
- Herausgeber: BookRix
- Kategorie: Geisteswissenschaft
- Sprache: Englisch
Unlock the Full Potential of Your Canon EOS R50
Whether you're picking up your first mirrorless camera or upgrading to the EOS R50, this comprehensive handbook transforms you from beginner to confident photographer.
Written in clear, jargon-free language, this guide walks you through every button, menu, and creative feature with step-by-step instructions and visual tutorials.
Inside You'll Discover:
• Complete setup and configuration for optimal performance from day one
• Mastering shooting modes—Auto, Manual, Aperture Priority, and Shutter Priority explained
• Professional composition techniques and lighting strategies for stunning photos
• Video recording tips to capture cinematic 4K footage
• Customizing controls and shortcuts to match your shooting style
• Troubleshooting common issues and maximizing battery life
• Creative filters, effects, and post-processing recommendations
• Lens selection guidance and accessory recommendations
Stop feeling overwhelmed by complex menus and confusing settings.
This illustrated guide gives you the confidence to capture breathtaking images and videos in any situation—from family portraits to action shots, landscapes to low-light photography.
Buy your copy now and start creating amazing photos today!
Das E-Book können Sie in Legimi-Apps oder einer beliebigen App lesen, die das folgende Format unterstützen:
Veröffentlichungsjahr: 2026
Ähnliche


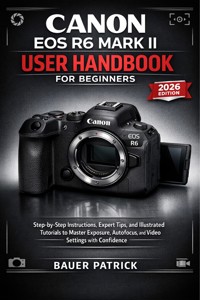


Canon EOS R50 User Handbook for Beginners
Step-by-Step Instructions, Expert Shooting Tips, and Illustrated Tutorials to Master Your Camera
Bauer Patrick
Copyright © 2026
All rights reserved. No part of this publication may be reproduced, stored in a retrieval system, or transmitted in any form or by any means—electronic, mechanical, photocopying, recording, or otherwise—without the prior written permission of the publisher.
All inquiries should be directed to the publisher through official author correspondence channels.
First Edition – 2026Printed in the United States of America
Disclaimer
This guide is an independent publication and is not affiliated with, authorized, endorsed, or sponsored by Canon Inc. Canon, EOS, and related trademarks are the property of their respective owners.
While every effort has been made to ensure accuracy, the author and publisher make no warranty regarding the completeness or accuracy of the information contained herein and accept no liability for errors, omissions, or damages resulting from the use of this guide.
Introduction
Every photographer has a beginning — a single moment that draws them to the beauty of capturing light, emotion, and memory through a lens. Maybe you’re holding your Canon EOS R50 for the first time, feeling the smooth contour of its grip, the weight of its promise, and the quiet thrill that comes with unboxing a tool that can transform the way you see the world. Or perhaps you’ve been using your smartphone for years and finally decided it’s time to step up — to control your photos instead of letting an algorithm decide for you.
No matter how you arrived here, you’ve chosen wisely. The Canon EOS R50 isn’t just another digital camera; it’s a modern bridge between simplicity and sophistication — a mirrorless marvel that combines Canon’s world-class imaging technology with beginner-friendly usability. Compact yet powerful, intuitive yet full of depth, it represents Canon’s dedication to helping every aspiring creator take their first confident steps toward mastery.
This handbook is written to be your trusted companion in that journey — clear, patient, and practical. It’s not a technical manual written for engineers or professional photographers; it’s a learning guide crafted specifically for beginners who want to truly understand their camera, not just press buttons. Whether your goal is to capture family moments, record travel adventures, create content for social media, or begin a serious photography hobby, this book is designed to help you master your Canon EOS R50 step-by-step, without confusion or overwhelm.
When you finish this guide, you won’t just know what each setting does — you’ll know why it matters, when to use it, and how it can help you express your vision. Because photography isn’t only about exposure and sharpness — it’s about emotion, storytelling, and the quiet satisfaction of crafting something that feels alive.
The Philosophy Behind This Book
If you’ve ever opened a camera manual, you probably know what happens next: a flood of diagrams, specifications, and menus that read more like a technical blueprint than a creative invitation. While these documents are useful for reference, they often leave new users frustrated, confused, or worse — intimidated.
This guide takes a different path. It’s built on three simple principles: clarity, confidence, and creativity.
Clarity: Every concept is explained in plain language — no jargon, no unnecessary complexity. When a technical term is used (like “aperture,” “ISO,” or “white balance”), it’s immediately broken down into what it means and how it affects your photos in real life. You won’t be left guessing.
Confidence: Learning photography is like learning to drive. At first, it feels overwhelming — so many buttons, numbers, and options! But with guidance, practice, and small victories, confidence builds quickly. This handbook follows a logical sequence, guiding you from basic setup to more advanced techniques. By Chapter 3, you’ll feel at home behind the viewfinder.
Creativity: Photography is both a science and an art. Once you understand how to control light, focus, and motion, you can begin experimenting — bending the rules, playing with composition, and using the camera as a storytelling tool. Every chapter includes insights that encourage you to see creatively, not just technically.
You’ll also notice that this book doesn’t rush. Each chapter unfolds naturally, giving you space to experiment with your camera before moving forward. By the end, you’ll be using manual controls, shooting video with confidence, and even understanding how to care for your camera long-term.
Why the Canon EOS R50 Is the Perfect Beginner’s Camera
Before diving into settings and techniques, it’s worth understanding why the Canon EOS R50 has become such a beloved choice among beginners, vloggers, and hybrid shooters.
Canon designed the R50 as part of its mirrorless R-series, which uses the new RF mount system. This means faster communication between lens and camera, better autofocus performance, and a smaller, lighter design compared to older DSLR models. But what makes the R50 special isn’t just technology — it’s the way it balances simplicity and capability.
Let’s explore what makes it shine:
Compact, Lightweight Design: Weighing less than 375 grams (body only), the R50 is perfect for everyday carry. It’s ideal for travel, hiking, or casual street photography, offering professional performance in a body that fits in your bag or even a large pocket.
24.2-Megapixel APS-C Sensor: Canon’s advanced APS-C sensor delivers crisp, detailed images with excellent color accuracy and dynamic range. It captures more information than a smartphone sensor ever could, giving you richer tones and editing flexibility.
Dual Pixel CMOS AF II: This autofocus system, inherited from Canon’s higher-end cameras, provides lightning-fast and reliable focus tracking. It recognizes faces, eyes, animals, and even vehicles — ensuring your subjects are always sharp.
4K Video Without Crop: Unlike many entry-level models, the R50 offers uncropped 4K recording, giving you a true cinematic frame. It’s perfect for vlogging, YouTube content creation, or personal filmmaking.
Creative Assist and Guided Modes: For absolute beginners, the R50 includes intuitive features like Guided UI (User Interface) and Creative Assist, which explain settings on-screen in simple terms. It’s like having a built-in photography tutor.
Seamless Connectivity: Built-in Wi-Fi and Bluetooth allow you to share photos instantly or control your camera remotely using the Canon Camera Connect app.
This combination of features makes the EOS R50 not only approachable but genuinely powerful. It’s the kind of camera that grows with you — simple enough for your first shots, yet advanced enough to stay relevant as your skills evolve.
Who This Book Is For
This handbook was written for anyone who wants to make photography feel simple again. You might fit into one (or more) of these categories:
The Complete Beginner: You’ve never used a real camera before. You’re ready to learn what all those buttons and terms mean — in plain English — and start shooting confidently.
The Smartphone Photographer: You’re comfortable framing shots and using filters on your phone, but you’re ready to upgrade to a real camera that gives you true creative control.
The Returning Photographer: You used to shoot on film or older DSLRs, but haven’t touched a modern mirrorless camera yet. The menus, modes, and new features feel foreign — and this book will bring you up to speed.
The Aspiring Creator: You want to capture professional-quality photos and videos for social media, YouTube, or personal projects. You’ll learn how to optimize the R50 for both stills and video workflows.
No matter your background, this guide meets you where you are and walks beside you. The writing style is conversational and encouraging — you’ll never feel lectured or rushed. Each chapter is filled with real-world examples, relatable analogies, and occasional humor to make learning enjoyable.
How to Use This Book
Think of this handbook as a journey in eight chapters, each building on the last. It’s not meant to be skimmed — it’s meant to be used. Keep your camera nearby while reading, and follow along as you explore menus, practice exposure changes, or experiment with creative techniques.
Here’s how to make the most of it:
Read One Chapter at a Time: Don’t skip ahead — each chapter lays a foundation for the next. For example, mastering the exposure triangle in Chapter 2 will make the focusing concepts in Chapter 3 much easier to grasp.
Practice Immediately: Every chapter includes practical exercises and shooting suggestions. The only way to learn photography is to shoot. Mistakes are your teachers.
Take Notes: The R50’s menu is deep, and you’ll discover personal preferences as you go. Use a small notebook or your phone to jot down favorite settings, lens combinations, and exposure recipes.
Refer to Sketch Prompts: At the end of each chapter, you’ll find a Sketch Illustration Prompt — a visual cue that helps reinforce what you’ve learned. These prompts are perfect for those who like visual learning.
Experiment Beyond the Book: Once you’ve mastered a topic, push yourself further. Try creative compositions, use manual mode, or shoot in different lighting conditions.
By the end of this book, you’ll have more than knowledge — you’ll have muscle memory. Your hands will instinctively know where the buttons are, your eyes will anticipate exposure, and your creative instincts will start guiding your technical decisions.
What You’ll Learn in This Guide
Here’s a quick overview of what each chapter will help you accomplish:
Chapter 1 – Getting Started: Learn how to unbox, charge, set up, and explore your camera’s interface.
Chapter 2 – Understanding Exposure: Master aperture, shutter speed, and ISO — the three pillars of great photography.
Chapter 3 – Mastering Focus: Discover how to capture sharp, well-focused images in any condition.
Chapter 4 – Exploring Shooting Modes: Move from Auto to Manual with confidence, understanding what each mode does.
Chapter 5 – Video Mastery: Learn how to shoot beautiful cinematic footage, adjust frame rates, and manage audio.
Chapter 6 – Lenses and Connectivity: Explore compatible lenses, accessories, and wireless features.
Chapter 7 – Image Review and Editing: Learn how to manage, transfer, and edit your photos effectively.
Chapter 8 – Maintenance and Troubleshooting: Keep your R50 in perfect condition for years to come.
Each chapter has five subchapters, carefully balanced between explanation, demonstration, and creative insight. This ensures that both theory and practice work hand in hand.
Bridging the Gap Between Technology and Creativity
Many new photographers worry that they’re “not technical enough” to use a real camera. The truth is, the Canon EOS R50 was designed specifically to bridge that gap. It invites creativity through simplicity — and that’s where this handbook becomes essential.
Understanding how exposure, focus, and color work isn’t about memorizing numbers; it’s about learning to see differently. You’ll start to notice how soft morning light flatters a subject’s face, how fast shutter speeds freeze motion, or how depth of field isolates emotion in a portrait.
When you pair that awareness with the R50’s powerful features, you’ll gain the ability to shape reality intentionally — not just capture it.
In other words, this isn’t just about learning a camera. It’s about discovering a new way to interact with the world.
Photography as an Act of Mindfulness
The Canon EOS R50 isn’t merely a piece of equipment — it’s a mindfulness tool. Each time you lift the viewfinder to your eye, you pause the rush of daily life. You notice details: the texture of a leaf, the reflection on a window, the fleeting expression of a loved one.
Photography teaches patience. It encourages observation. It rewards curiosity.
This book celebrates that spirit. While you’ll certainly learn technical mastery — how to control ISO, tweak shutter speeds, or clean your sensor — you’ll also be reminded of photography’s deeper joy: connection. Every photo is a conversation between your eye, your heart, and your subject.
When used with purpose, your Canon R50 becomes more than a camera — it becomes a creative extension of yourself.
Common Beginner Fears — and Why You Can Overcome Them
Let’s be honest: the first few days with any camera can feel overwhelming. There are menus you’ve never seen, abbreviations you don’t understand, and settings that seem to change the entire photo with one wrong press. Don’t worry — every professional photographer once stood exactly where you are now.
Some common fears you might encounter:
“I’m afraid I’ll break something.” Cameras are more durable than they appear. You won’t ruin your R50 by exploring menus or trying different settings. Curiosity is the key to mastery.
“My photos don’t look professional yet.” Great photography isn’t about the camera — it’s about light, timing, and storytelling. With patience, your results will improve faster than you think.
“Manual mode seems too complicated.” You’ll learn that manual mode is simply giving you full control over light — and once you understand it, it becomes freeing, not intimidating.
“I don’t have an artistic eye.” Everyone does. This book helps you see — patterns, symmetry, emotions, and the beauty in ordinary things.
By the time you complete this guide, those fears will be replaced by curiosity, confidence, and creative joy.
Why Learning Photography Today Is Easier Than Ever
In the past, photographers had to wait days to develop film and check their results. Now, the Canon EOS R50 gives you instant feedback. You can experiment, fail, adjust, and improve — all within seconds.
Add to that Canon’s intuitive menus, real-time exposure preview, and Wi-Fi sharing options, and you have one of the most beginner-friendly learning environments ever created.
This book leverages that advantage by turning every chapter into an interactive lesson. You’ll learn by doing — not by memorizing.
A Note from the Author
When I first picked up a Canon camera years ago, I was overwhelmed. I spent hours watching videos, reading technical manuals, and making every possible mistake. But each mistake taught me something — and eventually, the camera became an extension of my eye and hand.
This book exists to save you that frustration. I’ve written it the way I wish someone had taught me — clear, step-by-step, encouraging, and focused on results.
If there’s one thing I want you to take away from this guide, it’s this: You can do this.
Photography isn’t about having the perfect gear or years of training — it’s about curiosity and intention. The Canon EOS R50 gives you all the tools you need; this handbook teaches you how to use them confidently.
Before You Begin
Before moving into Chapter 1, take a few minutes to prepare yourself and your camera:
Charge your battery fully.
Insert a memory card (preferably Class 10 or UHS-I).
Attach your lens carefully (aligning the white or red dots).
Turn on your camera and set the language, date, and time.
Take a few test shots — even if you don’t know the settings yet.
You’re not expected to understand everything right away. This is your playground now — a place to explore, learn, and grow.
Keep your curiosity alive, and let this book be your roadmap.
What Awaits You in the Next Chapter
Chapter 1 begins with your very first hands-on interaction with the camera — Unboxing and Identifying Camera Components. You’ll learn what each button, dial, and port does, why it matters, and how it contributes to your shooting experience. You’ll also explore the menus, firmware, and initial setup so that you can start shooting immediately.
From there, each chapter will take you deeper into your Canon EOS R50’s potential, transforming confusion into clarity and hesitation into confidence.
By the final page, you’ll not only know your camera inside out — you’ll know yourself as a photographer.
So, take a deep breath, hold your camera in your hands, and turn the page. Your journey toward confident photography starts here.
Getting Started with Your Canon EOS R50
There’s something magical about unboxing a brand-new camera. The rustle of packaging, the smooth click of the lens cap, the faint scent of new electronics — it feels like holding a blank canvas, waiting to be filled with light and memory. For most beginners, this is both exciting and intimidating: so many buttons, ports, and pieces that seem to have their own secret language.
This chapter will transform that uncertainty into confidence. You’ll learn exactly what comes in the box, what each component does, how to assemble your setup correctly, and how to perform your first power-on sequence. We’ll move slowly and clearly, so by the time you reach the next chapter, your Canon EOS R50 will already feel like an old friend.
Unboxing and Identifying Camera Components
When you first open the Canon EOS R50 box, do so on a flat, clean surface with good lighting. A desk or sturdy table covered with a soft cloth is ideal — this protects delicate parts from scratches and gives you space to organize everything neatly.
What’s Inside the Box
Depending on whether you purchased a body-only kit or a kit with lens, your box will include slightly different items. Canon’s packaging is precise; every item has its place. Inside you should find:
Canon EOS R50 Camera Body (wrapped in clear protective film)
Kit Lens — often the RF-S 18-45 mm f/4.5-6.3 IS STM
Battery Pack LP-E17
Battery Charger LC-E17 (or LC-E17E in some regions)
Camera Strap (EOS R50 branded)
Body Cap (protecting the sensor mount)
Lens Cap and Rear Lens Cap
Printed Quick Start Guide and Warranty Card
Optional Accessories (USB cable or promotional items in some bundles)
Lay these out in front of you. It helps to keep the body on one side and accessories on the other so nothing rolls or drops.
Understanding the Camera Body
The Canon EOS R50 is compact but thoughtfully designed. Let’s identify each key section so that every button and port makes sense later.
Front View
When facing the lens mount:
Lens Mount (RF Mount): The circular metal ring where lenses attach. Notice the white alignment dot — it matches with the same mark on RF-S lenses. The R50 uses Canon’s RF-S mount, compatible with RF and RF-S lenses, and adaptable to EF/EF-S lenses via adapter.
Lens Release Button: Located to the right of the mount (your left hand’s position when holding the camera). Press this to detach the lens.
Grip and Shutter Button Area: The protruding handle makes the R50 comfortable to hold. At the top of this grip is the shutter button — the one you’ll press halfway to focus and fully to capture.
Self-Timer/AF-Assist Lamp: A small round light used for autofocus assist or countdown indication.
Microphone and Infrared Receiver (hidden near the logo): These assist with sound recording and remote triggering.
Top View
Flip the camera slightly upward and look at the top panel — this is the command center.
Mode Dial: Circular dial with icons (M, Av, Tv, P, Auto, SCN, Creative Filters). Turning this changes shooting modes instantly.
On/Off Switch: A lever adjacent to the mode dial — we’ll return to this soon when powering on.
Main Dial (Control Dial): Just behind the shutter button; used to adjust settings such as aperture, shutter speed, or menu navigation.
Multi-Function (M-Fn) Button: Gives quick access to ISO, white balance, and drive mode depending on configuration.
Hot Shoe Mount: The metal rail in the center — used to attach external flashes, microphones, or triggers.
Built-In Flash (Pop-Up): Hidden above the Canon logo; press the flash release to raise it. It’s useful for fill-light in low-light scenes.
Rear View
Turn the camera around — this is where most of your interaction happens.
Electronic Viewfinder (EVF): Allows you to compose shots directly through the lens with real-time exposure simulation. It offers about 2.36 million dots of resolution.
Diopter Adjustment Dial: Small wheel next to the viewfinder that adjusts for your eyesight.
Vari-Angle Touchscreen (LCD): 3-inch fully articulating display that flips outward and rotates — perfect for selfies, vlogging, or overhead angles.
Menu and Quick Menu (Q): Two essential buttons for accessing deeper settings and the customizable quick control screen.
AF-ON / AE Lock / Playback / Delete Buttons: Clustered for easy thumb access. Each performs focus control, exposure lock, review, and deletion respectively.
Joystick/D-Pad / Set Button: Central navigation control for menus and AF point movement.
Info Button: Cycles through display overlays during shooting or playback.
Side Panels
On the right (from rear view):
SD Card Slot Compartment: Opens via small flap; supports UHS-I SD cards up to high capacities.
On the left:
Ports Panel:
Microphone input (3.5 mm)
USB-C port (for file transfer and charging in some regions)
HDMI micro (D) port for external monitors or capture devices
Bottom Side
Tripod Socket: Standard ¼-inch thread for attaching tripods, gimbals, or plates.
Battery Compartment: Houses the LP-E17 battery and, on its lid, a small rubber flap leading to the card slot (if combined door design in your region).
Understanding the Kit Lens
If you purchased the RF-S 18-45 mm f/4.5-6.3 IS STM, this is Canon’s lightweight starter lens — perfect for everyday use. Key features include:
Zoom Ring: adjusts focal length between 18 mm (wide) and 45 mm (short telephoto).
Focus Ring: near the front; controls manual focus when AF/MF is set to manual.
Image Stabilization (IS): built-in; helps reduce blur from hand movement.
Lens Mount Mark: white dot that aligns with the camera’s white dot.
Lens Cap: protects the front element — remove only when ready to shoot.
Rear Cap: covers the lens mount when detached from camera.
Attaching the Lens for the First Time
Ensure the camera is turned off.
Remove the body cap from the camera and the rear cap from the lens.
Find the white dot on both the camera mount and lens.
Align and insert the lens straight in; rotate clockwise until it clicks.
To remove, press the lens release button and twist counter-clockwise.
Never force the lens — if it doesn’t seat smoothly, check alignment. Always attach or detach while holding the camera facing slightly downward to avoid dust entering the sensor.
Touring the User Interface
The Canon R50’s interface was built for learners. Once you power it on, you’ll encounter the Guided UI, which uses visuals and short explanations for each mode. For instance, when switching to Aperture Priority, a small pop-up explains that “Lower f-numbers blur the background.”
You can switch between Guided UI and Classic UI in the setup menu later, but for now, leave the Guided mode active — it’s like having hints on-screen as you learn.
Getting Comfortable with the Feel
Before moving on, hold your camera as you would during shooting.
Rest your right index finger lightly on the shutter button.
Support the lens from beneath with your left hand.
Keep elbows close to your torso for stability.
Balance matters. Even though the R50 is small, correct posture reduces blur and fatigue. Spend a few minutes just handling the camera — rotating the dials, flipping the screen, and pressing buttons gently. You’re training muscle memory.
Charging, Inserting, and Powering On the Camera
Once familiar with the components, it’s time to bring your camera to life. The R50’s battery and memory system are straightforward, but understanding their care and sequence will save you headaches later.
Charging the Battery
The Canon R50 uses the LP-E17 lithium-ion battery, the same type used in several other Canon models. It’s compact but efficient, rated for roughly 370 shots per charge (using the LCD).
Unwrap the Battery and Charger. The battery will have a protective plastic cover — remove it carefully. The charger comes with a fold-out plug (LC-E17) or a detachable cord (LC-E17E version).
Insert the Battery into the Charger. Align the ridges; it fits only one way. You’ll hear a soft click when seated correctly.
Plug into a Wall Outlet. The charging indicator lamp glows orange while charging and turns green when complete.
Charging Time: A full charge typically takes around 2 hours. For longevity, allow the battery to cool slightly after long use before recharging.
Pro Tip: Avoid leaving the battery on charge overnight or for days. Once the light turns green, unplug it. Over-charging shortens lifespan over time.
Inserting the Battery into the Camera
Make sure the camera is off.
Flip open the battery compartment door on the bottom.
Insert the battery with the Canon logo facing up (toward the LCD side). Push until it clicks into place.
Close the door firmly — the camera will not power on unless it’s latched correctly.
When removing, slide the orange release lever beside the battery; it pops out slightly.
Inserting the Memory Card
Your R50 records photos and video onto a single SD card (UHS-I). Use reputable brands (SanDisk, Lexar, Kingston, etc.) rated V30 or higher for smooth 4K video.
Open the card slot door (on the right side or within the battery compartment depending on region).
Insert the SD card label facing you (when LCD facing up).
Push gently until it clicks and locks.
Close the door securely.
You can format the card later through the Menu → Setup → Format Card option. Formatting ensures the card is optimized for your specific camera.
Caution: Formatting deletes all data — always back up important files before formatting.
Powering On the Camera for the First Time
Now comes the moment of truth — waking your Canon R50.
Move the On/Off switch to ON.
The LCD screen illuminates, displaying a startup logo.
The camera may prompt you for:
Language Selection
Date and Time
Time Zone
Guided Interface option
Use the touchscreen or navigation buttons to set these. Accurate time stamps help organize photos later.
Once configured, you’ll see the Live View screen, showing what the lens sees in real time. You’re now officially ready to shoot!
Understanding Battery Indicators and Power Management
At the top of the LCD or in the viewfinder, you’ll see a battery icon with segments:
Full: 3 bars – Healthy charge
Medium: 2 bars – Plan for recharge
Low: 1 bar – Keep spare ready
Empty Blinking: Auto shut down imminent
To conserve power:
Dim the LCD or shorten screen timeout (Menu → Display settings).
Use Auto Power Off (1–2 minutes is ideal).
Keep Wi-Fi/Bluetooth off when not transferring files.
In cold weather, keep spare batteries warm in your pocket; lithium-ion cells lose efficiency below 10 °C (50 °F).
Checking Firmware Version
Before diving into menus, check that your camera is up-to-date. Navigate to: Menu → Wrench Icon (tab 6) → Firmware Ver.
If a newer version exists on Canon’s support site, you can update it via SD card. Firmware updates fix bugs and sometimes add new lens compatibility or autofocus improvements. Follow Canon’s official steps precisely; never remove the battery mid-update.
The First Shot
With charged battery and inserted card:
Turn the mode dial to Auto (A +).
Remove the lens cap.
Half-press the shutter button to focus — you’ll hear a soft beep and see the focus frame turn green.
Fully press to capture.
A brief click of the shutter curtain — your first photo! Review it by pressing ▶ (Play) on the back.
Optional: Attaching the Strap
Thread the strap through the metal eyelets on both sides, loop it back through the plastic buckle, and tighten. Always double-check the security before carrying the camera around your neck.
Optional: Attaching a Lens Hood
If your kit lens includes one, align the bayonet mount and twist clockwise until it locks. The hood reduces lens flare in bright sunlight and offers extra front-element protection.
Practical Tips for Your First Day with the R50


