20,99 €
Mehr erfahren.
- Herausgeber: Crowood
- Kategorie: Lebensstil
- Sprache: Englisch
This practical new paperback edition explains the full process of etching, covering traditional techniques in depth and introducing modern ideas when they add to mark-making capabilities. Illustrated with lavishly finished examples and clear step-by-step sequences, this beautiful book covers the basics of etching - the materials required, how to prepare a plate, and ways of making marks using hard ground, soft ground and aquatint. Other etching techniques are covered including spit-bite and sugar lift, and how to transfer images onto the plate using photo etching. Engraving techniques are shown with various ways of making the plate without acid: drypoint, line engraving, stipple engraving and mezzotint. Advice on printing is given including papers and inks, the printing process and more advanced techniques such as colour printing and editioning.
Das E-Book können Sie in Legimi-Apps oder einer beliebigen App lesen, die das folgende Format unterstützen:
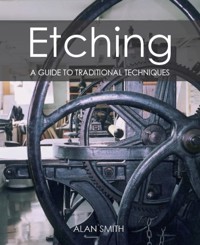
Seitenzahl: 281
Veröffentlichungsjahr: 2020
Ähnliche


Etching
A GUIDE TO TRADITIONAL TECHNIQUES
Norman Ackroyd, CARTMEL FELL, 560 × 760mm (22 × 30in), 1997. Aquatint printed in graphite with some black and a little carmine to soften the image.
Etching
A GUIDE TO TRADITIONAL TECHNIQUES
ALAN SMITH
First published in 2004 byThe Crowood Press LtdRamsbury, MarlboroughWiltshire SN8 2HR
www.crowood.com
Paperback edition 2020
This e-book first published in 2020
© Alan Smith 2004Illustrations © individual artists 2004
All rights reserved. This e-book is copyright material and must not be copied, reproduced, transferred, distributed, leased, licensed or publicly performed or used in any way except as specifically permitted in writing by the publishers, as allowed under the terms and conditions under which it was purchased or as strictly permitted by applicable copyright law. Any unauthorised distribution or use of this text may be a direct infringement of the author’s and publisher’s rights, and those responsible may be liable in law accordingly.
British Library Cataloguing-in-Publication DataA catalogue record for this book is available from the British Library.
ISBN 978 1 78500 770 5
DedicationIn memory of my late mother and father, Dorothy and Sonny, also to my wife Helen without whose patience this work would never have seen the light of day.
AcknowledgementsI am indebted to all the artists who have been generous enough to freely let me use their work to illustrate this book; to Chris Orr and John Hewitt for their support; to Anthony Dyson for setting me off on a voyage of discovery many years ago; all the artists that I have worked with and learnt from over these years; Neil Woodall for his unstinting enthusiasm; Hilary Wells for the majority of the studio shots; and finally to Dominic Sweeney who photographed most of the artworks, and the artists who provided the rest.
CONTENTS
Foreword
Introduction
The Intaglio Family Tree
1 A SHORT HISTORY
2 TOOLS AND MATERIALS
3 PLATE PREPARATION
4 HARD GROUND ETCHING
5 SOFT GROUND ETCHING
6 AQUATINT
7 PHOTO-ETCHING
8 ENGRAVING
9 PRINTING PAPERS AND INKS
10 THE PRINTING PROCESS
11 COLOUR PRINTING AND EDITIONING
Appendix: Sample COSHH Assessment
Glossary
Bibliography
Resources
Index of Artists
Index
David Borrington, RIVER DRELERS.
FOREWORD
Print and printmaking are at the heart of our culture. From Gutenberg to Gates, print technology has been at the core of human development providing the means for accurately communicating the ever increasing complex web of knowledge. Etching and intaglio techniques, that seem to have begun with the alchemists and armourers, have been a vital method of securing images and diagrams so that they can be made in multiple form. Etching from its earliest days fascinated artists and as industrial print technology progressed they have become the principal users.
It remains the supreme method for those artists whose interests are primarily in draughtsmanship, because etching delineates and describes in an almost sculptural way allowing freedom of expression with substance and gravitas. It can also be ‘painterly’, fluid and profoundly tonal. There is no doubt that many of the greatest artists of the past few hundred years have made intaglio prints that are central to their output – Goya, Blake, Motherwell, Hogarth, Oldenburg, Paladino, Picasso, Beckman, Hayter and Chagall to name but a few.
In etching we are close to the elements of earth, fire and water. The core technology may be ancient but it still retains its relevance today. It offers contemporary artists a vivacious, expressive medium that can be used for utterly contemporary ideas, for example the recent etchings by the Chapman brothers. The passing on of the methods and recipes of etching is a vital business. It is possible to lose hundreds of years of accumulated experience by simply ignoring the process of writing down or teaching the process. Many industrial and pre-industrial skills have disappeared. Etching may look archaic but is alive and well.
In this book, Alan Smith, who learnt his craft from Philip McQueen, one of the last, great commercial intaglio printers in London, communicates from his wealth of knowledge and technique the details that underpin the successful exploration of this wonderful medium. For the past twenty years he has been ‘master copper-plate printer’ and technical instructor at the Royal College of Art, where he has introduced and guided generations of students to the practicalities which allow them to use the power of the medium. No writing can substitute for the actual experience of dealing with those elements but this book will, I’m sure, extend those with some knowledge, intrigue those who are curious and explain to those who appreciate the results, how etchings are made.
PROFESSOR CHRIS ORR RASeptember 2003
John Hewitt, THE ETCHING ROOM AT THE RCA – DOUBLE PORTRAIT OF ALAN SMITH.
The figure on the left is testing the dampness of the paper before printing this plate, whilst the figure on the right is wearing the appropriate safety equipment to process a Neg Jet photo-etching in a separate room.
INTRODUCTION
At the turn of recent centuries there has been a renewed interest in arts and crafts, particularly skills-based arts such as the ancient art of etching. The end of the last century was no exception, but printmaking has been affected by two new developments that were not present a hundred years before. The first is the birth of the computer. Whilst nobody can deny the usefulness of computers, especially when used for word processing or mathematical calculation, many artists have been seduced by the apparent speed and ease of digital imagery and turned their backs on the more traditional imagemaking techniques. Digital imagery is still in its infancy and as such is rapidly changing and exciting. Some of the most interesting work occurs when artists mix the old and new technologies. The second major difference that affected etching at the birth of this century is the increased interest in safe printmaking techniques that has grown since the early 1980s. Etching techniques have evolved over a period of several centuries, not only becoming generically safer as we learn more about the dangers of specific chemicals but also enabling artists to make a wider variety of marks. Almost all the older techniques used in etching are, or can be made, safe with a little thought and money. In Great Britain ‘risk assessments’ have to be carried out by law to see what precautions are needed to minimize any risks that may be present. This applies equally to established techniques and the newer ‘safe’ methods of etching. Whilst this book concentrates on the traditional techniques the newer technologies are included where they add to the etcher’s repertoire and mark-making capabilities.
To be told by people that there are two (or more) completely different ways of achieving the same result is one of the most confusing things imaginable. With etching, however, there are usually several ways of approaching the same problem. There is no definitive right, or wrong, way to make an etching plate. The ultimate test is if the plate works well and the artist is happy with the results. Unintentional results can often be used to the benefit of the final work and are usually referred to as ‘happy accidents’. Many experienced etchers have developed unique methods that invariably work for them but more often than not end in failure when tried by others. The techniques described in this book have stood the test of time and, if followed, will consistently work well.
Every shared workshop, of whatever type, will have developed its own way of working. This is usually due in part to the shape or size of the available space and the amount of people using it at any one time. Communal etching studios are even more disparate than most other forms of workshop. Be aware of this when you begin working in a different etching room and find out how each one works.
Composition is of the utmost importance if any piece of art is going to work. This is equally true of an etching as a painting or drawing, the main difference being that an etching is usually printed on a piece of paper that is larger than the plate, thereby leaving a border of clean paper outside the plate-mark. There is no universal formula relating to the size of the paper in relation to the plate. It really is a question of personal taste, the only ‘rule of thumb’ being that the border at the bottom of the print should be larger than the one at the top, otherwise the print looks as if it has somehow slipped down the sheet of paper and is trying to escape. The borders of prints are not shown in this book. This allows us to see how the artists have composed their images in relation to the plate. Some of the works used as illustrations in this book have been chosen because they show good use of a particular technique. All the prints included show good composition by effective use of the space available on the plate.
Many books on etching assume a familiarity with technical terms. In this book such terms have been avoided wherever possible to aid accessibility for the beginner or indeed for people with language difficulties.
Janice Fisher, MAUD,c.800 × 1,520mm (31.5 × 60in), 2000.
Photo-etching on nine plates. Each plate was printed individually then ‘tiled’ together after each piece had been heated and waxed to obtain an almost translucent and aged quality.
Glen Marston, untitled, 870 × 1,180mm (34 × 46in), 1997.
Etching on steel plates.
An attempt has been made to explain unavoidable technical terms in the surrounding text. Where this has not proved possible the word or phrase appears in italic the first time it occurs in each section. Words that are in italics can be found in the glossary.
Apologies to all the artists with whom I have worked with over the years and whose work is not included. There is no reflection on the composition or standard of work omitted, but only the practical consideration of how many works one book can contain.
The size of the work given in the captions is the plate size rather than the paper size, unless the paper is smaller than the plate. The size of work quoted is approximate, it being more important to have an idea of the scale of the work rather than a definitive catalogue entry. All measurements are given width first followed by height.
Health and Safety is always important, especially when dealing with chemicals. Whilst common sense is the basis of safe working practice (for example using plastic pipework to extract acid fumes as the fumes would etch through metal, and metal to carry solvent fumes as some vapours could weaken the solvent welded joints), it is always important to find out which local Health and Safety laws apply and follow them.
Health and Safety laws in Great Britain are underpinned by the Health and Safety at Work Act 1974 (HSW) that places a duty of care on employers, employees and the self-employed to have regard for their own safety and that of those around them. Under HSW the duty to assess risks and take appropriate action is fundamental and absolute.
Risk assessment is the first requirement of another law called Control of Substances Hazardous to Health 2002 (COSHH). The requirements to comply with COSHH are:
■assess the risks;
■decide what, if any, precautions are needed;
■prevent or adequately control exposure;
■make sure that control measures are used and maintained;
■monitor any exposure if necessary;
■carry out appropriate health surveillance if necessary;
■prepare plans to deal with accidents, incidents and emergencies;
■inform, train and supervise.
This list may sound daunting, but do not be put off, it can only raise your awareness of potential dangers and enable you to deal with otherwise hazardous substances in a safe manner. COSHH must be followed when using any substance that:
■has an occupational exposure limit (OEL), or
■legally requires a warning label under CHIP, or
■any kind of dust if its average concentration in the air exceeds specified legal levels, or
■any other substance that may create a risk to health.
Chemical Hazards Information and Packaging 2002 (CHIP) is a most useful piece of legislation in Great Britain for people who handle chemicals. Other European member states have similar laws, as they are all based on EC measures. CHIP obliges suppliers of chemicals to identify any hazards, for example, flammability or toxicity and so on. This information must be passed on to the people they supply the chemicals to. This is usually done by means of package labels and safety data sheets. Always read the safety data sheets, sometimes called hazard data sheets, and then decide whether you need to undertake a written COSHH assessment. COSHH assessments can be produced for each specific chemical or for a complete process that uses, or produces, several chemicals. You will find a specimen process-based COSHH assessment at the back of this book. There is also a blank copy that you can photocopy if you want.
CHAPTER 1
A SHORT HISTORY
How Etching Started
Probably the earliest examples of etching on metal are to be found on suits of armour. Armour was originally decorated with lines engraved by hand. Armourers then found they could etch these crests, coats of arms and decoration instead of hand engraving them. This was less time-consuming, and obviously cost-effective. When the armour was handed over to the purchaser the craftsmen had no record of the quality of work they could produce. This almost certainly led to them filling the lines with ink and pressing dampened paper onto the work to create a sample book. It was only a matter of time before artist craftsmen recognized the potential of this technique for producing prints from flat plates of metal.
The earliest engraved prints on paper were probably produced in Germany about 1445.
John Hoyland, TIGER’S EYE, 340 × 400mm (131⁄2 × 153⁄4in), 1983.
Two-plate lift aquatint. The first plate is open bite and printed in burnt umber. The yellows, orange, violet, black and the red background are all on the second plate. Both plates were steel-faced copper.
Allen Jones RA, GRENADA, 196 × 196mm (71⁄2 × 71⁄2in), 1987.
Hard ground etching.
The earliest known signed and dated etching was produced by Urs Graf in 1513. It was etched onto a steel plate with only one weight of line. All of the earliest etchings were linear work, and the plate was etched evenly all over. It wasn’t until thirty-five years later that Augustus Hirshvogel thought of a way to make lines of different weight. This was, and still is, done in one of two ways. Either by drawing the darker passages first and then etching them, then drawing the medium areas of the line and etching the plate again and finally drawing the lighter lines and etching the plate yet again. Or by drawing up the whole plate in one go, etching it for a short while, then painting the lightest lines with an acid-resist – now known as stopping out varnish – etching again for the medium weight lines and so on. This second method remains the most common way of etching progressively darker areas.
Haydn point (heavy drypoint), three types of burin, etching needle, plate polisher, water of Ayr stone, scraper and burnisher, double-ended curved burnisher, straight burnisher, ball burnisher, roulette wheel, mezzotint rocker, échoppe.
Intaglio as a Means of Reproduction
It was not long before the commercial potential of this new medium was exploited. Artisans were employed to copy or interpret famous paintings, drawings and even sculptures. A whole trade appeared – engravers, publishing houses, printers, papermakers, print finishers, picture framers. By the middle of the nineteenth century there were over 150 such intaglio printers and publishers in London alone. People no longer had to be rich to afford a Landseer or Turner for their drawing room wall. Art that only the very wealthy, landed gentry, royalty or churches could previously afford, now came within the reach of many more pockets. It was in the interest of these firms to develop the way in which intaglio prints could be made. Colour printing, mezzotint and photogravure all owe much to these firms. Processes such as steel facing would probably have been invented much later if it had not been for commercial pressure. This is not to say that intaglio techniques owe everything to their commercial heritage. Far from it, numerous artists have made great advances in technique and knowledge from Urs Graf to the present day. Rembrandt, Dürer, Piranesi and Goya are but a few of the early great names.
Ron Sandford, THE THAMES AT BANKSIDE,c.1,100 × 500mm (44 × 20in), 2002.
Copper plate worked with hard ground, aquatint and spit bite.The plate was wiped selectively during printing to bring out the highlights.
The advent of photolithography sounded the death knell for intaglio as a means of reproduction, and left a rich variety of techniques in the hands of creative artists.
Steel and copper plates were used for both etching and engraving. A steel plate was capable of producing many more prints than a similarly worked copper plate. On the other hand, copper produced a finer line and much sweeter aquatints when etched. In the late nineteenth century, a technique was invented that laid an extremely thin layer of iron on top of a previously etched copper plate. This iron layer is so thin it does not fill in the finest line or aquatint. This process is an early form of electro-plating and is still in use today. It is called steel facing and enables the finest of work on copper to produce as many prints as a work made on steel. If the steel face starts to wear and copper can be seen, the steel can be removed and replaced allowing large quantities of prints to be made from a finely etched copper plate.
There are other advantages to steel facing copper. The surface of copper is ‘oleophilic’ meaning that it traps oil and grease. This makes it much harder to totally remove the ink from a polished copper plate compared to a polished steel plate. Steel facing an etching plate makes the copper wipe as easily as steel.
CHAPTER 2
TOOLS AND MATERIALS
For All Intaglio Techniques
Plates, copper, zinc, or steel all between 1mm and 1.6mm (19swg and 16swg) thick. Aluminium doesn’t etch well, but is superb for drypoint, used photo litho plates are excellent if available (use the shiny side).
Guillotine, draw tool, electric jigsaw or other method of cutting and trimming your plates.
Metal polish, for polishing zinc and copper plates.
Jeweller’s rouge, for polishing zinc and copper plates quickly and easily.
Wet and dry paper, 240, 360 and 400 grit for polishing steel.
Engineer’s hand files, preferably set of three, 8in or 10in; rough (called a ‘bastard’ file), medium (‘second-cut’) and fine (‘smooth’) for filing plate edges.
Etching press, or plaster if you do not need to see your print on paper.
Press blankets, minimum of one thick ‘swanskin’ and two finely woven ‘fronting’.
Ink slab, old litho stone if available or plate glass.
Jigger, wooden box for inking the plate on.
Palette knife/knives
Etching ink, either ready-made or home-made.
Pigments, if you are making your own inks.
Muller, for grinding ink (only if you are making your own inks).
Copperplate oil, weak (or thin) is the most used then medium and a small amount of heavy (or strong).
Dabber, roller, or squeegee, for applying ink.
Scrim/tarlatan/mull, for wiping the ink from the plate. Whiting, preferably made into a block, for ‘hand-wiping’. Good quality printing paper, acid-free for conservation.
Acid-free tissue.
Acid-free blotting paper.
White spirit or turps substitute or paraffin, for cleaning up.
Rubber gloves, for when using solvents.
Rags, for wiping plate edges and cleaning up.
Cotton apron, to keep you clean.
Barrier cream, for your hands.
Hand cleaner, heavy duty, non-solvent base.
Chris Orr, FARM FRIENDS, 600 × 600mm (24 × 24in), 2002.
Hard ground, soft ground, aquatint including sugar lift, drypoint and scraping. The print was first printed in a strong brown ink and then flattened until both the paper and ink were dry. A sheet of acetate was then cut to the size of the plate-mark and inked up in a loose translucent creamy yellow colour. This was carefully placed inked side down onto the print that was face up on the press bed. The blankets were protected with tissue paper and the whole lot was wound through the press under light pressure.
For All Etching Techniques
Whiting powder, for degreasing plate.
Ammonia, for degreasing plate.
Small thick felt pad, for degreasing plate.
Ferric chloride, for etching copper.
Nitric acid, for etching zinc or steel or copper.
Stopping out varnish, turps based, for the front of the plate.
Straw Hat Varnish, dark, for the back of the plate, or large areas on the front.
Methylated spirit, for thinning and cleaning Straw Hat Varnish and shellac.
Brushes, selection of small artist’s brushes, for stopping out varnish.
Brushes, larger housepainter’s brushes, for backs of plates, and acid.
Acid baths, photographic trays or similar.
Funnel/s, for returning acids to storage containers.
Graduated jugs/cylinders for measuring acids when mixing.
Rubber gloves, for handling acid.
Goggles, for handling acid.
Plastic/rubber apron, for handling acid.
Fume cupboard or respirator fitted with inorganic fume filters, for using acids.
Derek Boshier, TWO PEOPLE DANCING IN MEXICAN MASKS, c.150 × 200mm (6 × 8in), 1983.
Hard ground etching.
For Hard Ground
Hard ground, to put on plate. This is sold as a ‘ball’ or as a ‘liquid hard ground’.
Hot plate, to melt hard ground ball and heat etching plate (unless you are only using liquid ground).
Roller, preferably leather covered, for applying hard ground.
Etching needle, to draw into ground.
Wax tapers, to ‘smoke’ hard ground.
Asphaltum, resin and wax, if you are going to make your own hard ground.
For Soft Ground
Soft ground, sold as a ‘ball’, for covering plate.
Roller, preferably leather covered, for applying soft ground.
Vaseline, if you want to make the soft ground even softer.
Greaseproof paper, to protect the blankets if you use the press to force thin objects through the ground.
Hard ground and tallow, if you are going to make your own soft ground.
For Aquatint
Not all of the items listed are essential to make an aquatint – seeChapter 6 for more information.
Aquatint box
Rosin, preferably collophony resin and/or
Car spray paint and/or Airbrush.
Glass jar, with various meshes to be used for ‘pepper pot’ aquatint.
Electric coffee grinder, or pestle and mortar, for grinding rosin.
Mark Harris, COCKY BOY, 210 × 290mm (81⁄4 × 111⁄2in), 1998.
Hard ground and sugar lift aquatint.
For Photo-Etching
SeeChapter 7 to find what you need from this list.
Film positive, on lith film or acetate.
Pre-sensitized plates, such as Neg Jet or Aqua Jet.
Neg Jet Developer (also gloves, goggles and organic fume respirator) if using Neg Jet.
Photo polymer emulsion film, such as Riston, Photec or Image-on.
Sodium carbonate (or Washing Soda crystals) for developing Riston or Photec.
Lazertran.
Pure turpentine, if using Lazertran.
Potassium dichromate, for photogravure and making your own emulsion (ammonium dichromate can be substituted) and
Distilled water.
Photo engraving glue, for making your own emulsion.
Carbon tissue, for photogravure.
Printing down frame/Exposure unit or
clean piece of plate glass and ultraviolet lamp/sunlamp.
For Engraving
Burin, for line and stipple engraving.
Dry point.
Roulette wheels/drums.
Mezzotint rockers.
Scraper, also used to rework all types of metal plates.
Burnisher, also used to rework all types of metal plates.
Useful but not Essential
Soft brush, for brushing printing paper.
Foam rubber, 50mm thick, to use in place of press blankets, if blankets may be damaged, when printing carborundum prints for example.
Hydrochloric acid, for cleaning rust/ferric, and if you want to make Dutch mordant.
Potassium chloride crystals, for making Dutch mordant.
Acetic acid, for degreasing after drawing but before etching.
Sodium chloride (common salt) to add to acetic acid.
Straight edge, for tearing paper.
The Etching Press
The press is probably going to be the most expensive piece of equipment that you buy. It is therefore worth looking around and choosing the right press for you.
The oldest and most traditional style of press that is still in use is the ‘heavy rolling press’. These are made of cast iron and exert the tremendous amount of pressure needed to print etchings and engravings. The very first etching presses were made of wood. These usually had oak sides, rollers made of lignum vitae, and a press bed made from a plank of elm about 50mm (2in) thick. Many printers still call a metal press bed the ‘plank’. These wooden presses and even early iron presses had no gears. The press was turned by moving a series of poles attached to the shaft of the top roller. These poles were arranged in the shape of a star, and this type of press is still known as a ‘star wheel’ press. Iron star wheel presses were in production by 1730. Etching presses produced during and since the industrial revolution were made with gears enabling far more pressure to be exerted.
Heavy Rolling Presses
Harry F. Rochat Ltd is still making heavy rolling presses and has been doing so since about 1971. The style of these presses is very similar to those made in the mid-nineteenth century. This type of press is extremely versatile. They are easily adjusted to take plates of different thickness, including litho plates and thin lino blocks. Thicker materials can also be printed although the use of runners to support both sides of the top roller is advised. These runners should be the same thickness as the job to be printed and have a gradual slope at each end of both of them. This slope is to allow the top roller to be gradually lifted and lowered to and from the printing level.
Heavy rolling presses do need a little maintenance, all turning bearings should be regularly oiled and the gears should occasionally be re-greased.
To set the pressure (sometimes also called ‘nip’ or ‘pinch’) on a rolling press is a simple task. First you must make sure that the top roller is directly over the centre of the length of the press bed. Secondly, you tighten both the pressure screws as much as they will go. It is now a good idea to mark the tops of the pressure screws so that you will know where they should be in relation to each other until the next time you need to reset the press from scratch. You then release the pressure from each screw by three complete turns. Wind out the press bed to one end of its travel and put a set of three blankets, consisting of two frontings and one swanskin, onto the middle of the press bed and turn the wheel to roll them under the top roller. Have an etching plate that you are familiar with inked up and some paper properly damped, and try a print to check the pressure. If you have followed these instructions the pressure will be even side to side, but may be a little light or too heavy for the plate. Adjust the screws up or down accordingly.
Nearest press made by Harry Rochat, 1971, further one by John Haddon, 1851.
Heavy presses were traditionally packed with cardboard between the metal blocks that transfer the pressure from the screws to the top roller. This was to build in a little give in case someone was to wind too thick a plate through the press. A thick piece of zinc (between 1.6 and 2mm) was also commonplace on top of the press bed, as zinc is softer than steel and would gradually get thinner in the middle thereby protecting the steel press bed from undue wear. The zinc would also prevent damage to the gears or rollers should an object such as a key or dinner fork be wound through the press! To damage a set of blankets would be bad enough but to break part of the press would be worse and more expensive. Hardboard or plywood are more commonly used in between the pressure blocks now. If you were to print repeatedly on one side of the press you would soon see that the packing in between the blocks gets much thinner on that side. The press would then need resetting in order to print a plate in the centre of the bed with equal pressure on both sides.
Other Rolling Presses
Many other press engineers are making lighter versions of rolling presses. The weight of a press can be a serious consideration if you want to install it upstairs. A lot of these presses have a gearbox with a small handle or wheel that you turn the press with. Charles Brandt Inc. in America makes one of the most popular presses of this type. These presses will print the vast majority of etchings extremely well. There is only one minor drawback to them. If you are trying to print a very deeply engraved or etched plate you may need more pressure than can be easily obtained from a lighter weight press with a gearbox. Setting this type of rolling press follows the same principles as described above under ‘Heavy rolling presses’.
Hydraulic Presses
Dedicated hydraulic presses for printmaking are just about the only technological breakthrough in fine art printmaking in recent decades. The presses are safe and easy to use. They print etchings including blind embossing, with the advantage of printing with the plate face up or face down which is a distinct plus for multi-plate registration. They also give excellent results from plate lithography, and are ideal for any form of relief print, including type, lino and wood (cuts and engraving). Carborundum prints and collographs both print well. Even gelatine collotypes are printable. These presses really come into their own with the increasing desire for ever larger prints, as relief prints or lithographs can both be printed on continuous lengths of paper.
All these methods of printing are possible one after another in any order with no pressure adjustment needed to the press! Beevers Engineering Ltd make and supply this type of press.
Metals for Etching Plates
Copper, zinc and steel are the three metals that are most commonly used for etching. Each metal has its own advantages and disadvantages. Copper will always be smoother at the edge of an etched line. Steel will always give the roughest edge on an etched line. This is because the different metals have molecules of different sizes. When you draw a line through a wax ground and put the plate into acid, the acid will etch out every molecule that it comes into contact with whether it is in contact with 90 per cent of the molecule’s surface or just 2 or 3 percent. A molecule of zinc is about four times larger than a molecule of copper. A molecule of steel is about four times the size of a molecule of zinc.
The metal you choose could be determined by the colours that you want to print. Many artists have believed that there is a chemical reaction between some metals and some pigments that discolours bright inks. What is actually happening is that a small amount of the metal is being polished off from the plate, by the scrim, and mixed with the ink. When you polish zinc with metal polish, the metal polish quickly turns dark grey or even black. This is the colour caused by particles of zinc mixing with the metal polish. It is this black zinc that you are adding to your colour when wiping the surplus ink from your plate. This will turn yellow to green and red to brown. It is possible to reduce the discoloration by wiping the plate with scrim for less time, but this will lead to a much longer tissue-wipe. When you polish copper with metal polish it takes longer to discolour compared to zinc. This is because copper is harder than zinc. The discoloration from copper is green rather than black. Whilst it does still discolour the ink there is less of it and it is a lighter colour. When you try to polish a piece of steel with metal polish, the metal polish will not change colour unless the steel was not clean. Copper can have a very thin layer of steel put on it electrically. This is called ‘steel facing’. Steel facing means that the finest of lines can be printed in the brightest of colours, as well as increasing the number of prints that can be made before the plate wears out.
Mary Anne Aytoun-Ellis, THE STEPS WITHIN, 990 × 480mm (39 × 19in), 1992.
The drawing of this plate was begun by using the hard ground directly onto the steel plate whilst it was on the hotplate to create the white areas. The colour was rolled directly onto the plate just before it was printed.
Paul Sparrow, THIRD PARTY, 300 × 300mm (12 × 12in), 1998.
Hard ground on Jet-plate zinc. This was printed in black ink that was warmed by adding some bright red. The plate was selectively wiped and then the image softened by ‘canvassing over’ before printing.


