29,99 €
Mehr erfahren.
- Herausgeber: Packt Publishing
- Kategorie: Wissenschaft und neue Technologien
- Sprache: Englisch
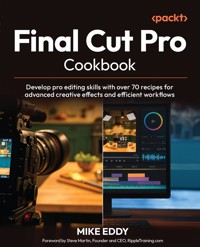
Develop pro editing skills with over 70 recipes for advanced creative effects and efficient workflows.
Das E-Book Final Cut Pro Cookbook wird angeboten von Packt Publishing und wurde mit folgenden Begriffen kategorisiert:
video editing software;video editing;FCP;Final Cut Pro software;mac video;final cut pro efficient editing;Final Cut Pro X
Das E-Book können Sie in Legimi-Apps oder einer beliebigen App lesen, die das folgende Format unterstützen:
Seitenzahl: 416
Veröffentlichungsjahr: 2025
Ähnliche
Final Cut Pro Cookbook
Develop pro editing skills with over 70 recipes for advanced creative effects and efficient workflows
Mike Eddy
Final Cut Pro Cookbook
Copyright © 2025 Packt Publishing
All rights reserved. No part of this book may be reproduced, stored in a retrieval system, or transmitted in any form or by any means, without the prior written permission of the publisher, except in the case of brief quotations embedded in critical articles or reviews.
Every effort has been made in the preparation of this book to ensure the accuracy of the information presented. However, the information contained in this book is sold without warranty, either express or implied. Neither the author nor Packt Publishing or its dealers and distributors will be held liable for any damages caused or alleged to have been caused directly or indirectly by this book.
Packt Publishing has endeavored to provide trademark information about all of the companies and products mentioned in this book by the appropriate use of capitals. However, Packt Publishing cannot guarantee the accuracy of this information.
Portfolio Director: Pavan Ramchandani
Relationship Lead: Alok Dhuri
Content Engineer: Mohd Hammad
Technical Editor: Vidhisha Patidar
Copy Editor: Safis Editing
Indexer: Manju Arasan
Proofreader: Mohd Hammad
Production Designer: Nilesh Mohite
Growth Lead: Priya Bhanushali
First published: July 2025
Production reference: 2010725
Published by Packt Publishing Ltd.
Grosvenor House
11 St Paul’s Square
Birmingham
B3 1RB, UK.
ISBN 978-1-83588-846-9
www.packtpub.com
This book is dedicated to my wife and family, who have supported me throughout my career, and most recently, during the writing of this book. Also, to the many students I have enjoyed teaching the coolness of Final Cut Pro.
In addition, I testify to the deep love of Jesus that has saturated my life.
Taste and see that the Lord is good – Psalm 34:8
Foreword
I first met Mike Eddy nearly 20 years ago when I was serving as a Master Trainer for Apple’s inaugural Final Cut Pro certification program. During one of our early four-day Train-the-Trainer workshops in Cupertino, I had the opportunity to see Mike in action. Even then, it was clear – Mike wasn’t just another editor. He was a born educator.
With a rare blend of technical precision, creative insight, and a gift for simplifying the complex, Mike had the ability to make even the most advanced workflows feel accessible. Watching him train others reminded me why we teach in the first place: to equip and empower people to tell meaningful stories.
Fast-forward to today, and the demands on editors have only increased. In a fast-paced content landscape, speed and efficiency are everything. Turnaround times are tighter. Expectations are higher. Editors don’t just need knowledge – they need clarity, confidence, and shortcuts that work.
That’s exactly what Final Cut Pro Cookbook delivers. Whether you’re brand new to Final Cut Pro or a seasoned pro looking to refine your workflow, this book offers practical, well-structured solutions to everyday editing challenges. From importing and organizing to editing, sweetening audio, and color correction, each “recipe” is built for the way modern editors actually work: fast, focused, and under pressure.
What I admire most is how approachable this guide is. Mike doesn’t just walk you through the buttons – he explains the purpose behind each step and shows how it fits into a larger editorial strategy. The tone is friendly, the instructions are crystal clear, and the layout is designed for quick reference and immediate application.
After more than two decades in the world of editing and training, I can tell you this: truly great resources are rare. This book is one of them. Whether you’re cutting a short film, a YouTube series, or a corporate piece, Final Cut Pro Cookbook deserves a permanent spot on your desk – or better yet, within arm’s reach of your edit bay.
Steve Martin
Founder and CEO, RippleTraining.com
Contributors
About the author
Mike Eddy is an Apple Certified Final Cut Pro Trainer with over 30 years of experience in video production, photography, print, web, and stage productions. Mike was a 2023 National Teacher of the Year finalist for the Association of Career and Technical Educators. He is a retired instructor from Century College in Minnesota, where he taught filmmaking and video production since 2007. Mike got his start scripting interactive projects in HyperCard on a Mac II. He has had the privilege to work with General Mills, Federated Insurance, 3M, Andersen Windows, Apple, Compassion International, 5 Eyewitness News, and many other leading companies.
I would like to extend my thanks to my family for the time to work on this book, which seemed to grow larger the more time I spent on it. I would like to thank Mohd Hammad for his patience. Special thanks to Alok Dhuri and the entire Packt team for their support during the course of writing this book, developing a cover image, and creating a marketing plan.
About the reviewers
Maarten J. Boer is a video editor, director, and Final Cut Pro specialist with over 20 years of experience in filmmaking. As an editor, he loves shaping stories, isn’t afraid to make tough decisions, and is obsessed with clean timelines. He currently works for the largest museums in the Netherlands and produces numerous documentary portraits of international artists. A Final Cut Pro user since 2003, he was among the first FCP X specialists in the country.
Jonathan Mercieca is a Maltese freelance video content creator with 20 years of experience, specializing in Final Cut Pro. An Apple Certified Pro User in FCPX since 2019, he has worked on documentaries, TV productions, commercials, and international events, collaborating with major names such as Euronews and IMG Media. Jonathan is passionate about crafting high-quality visual stories that engage and inspire audiences.
Contents
Preface
Who this book is for
What this book covers
To get the most out of this book
Disclaimer about AI usage
Get in touch
Download a Free PDF Copy of This Book
Utilizing the Final Cut Pro Interface for Workflow Success
Technical requirements
Working with the Final Cut Pro interface and workspaces
Getting ready
How to do it…
Changing the Event Browser’s appearance
Getting ready
How to do it…
Customizing the Event Browser’s filtering order
Getting ready
How to do it…
There’s more…
Taking advantage of the Magnetic Timeline and the Position tool
Getting ready
How to do it…
There’s more
Working with the Precision Editor view
How to do it…
Organizing Media and Using the Event Browser Effectively
Technical requirements
Creating a camera archive
Getting ready
How to do it…
There’s more…
Importing media into Final Cut Pro
How to do it…
There’s more…
Importing media with drag and drop
Getting ready
How to do it…
Understanding optimized versus proxy media
How to do it…
There’s more…
Using keywords
Getting ready
How to do it…
Using the Event Browser List view
Getting ready
How to do it…
Making an assembly edit
Getting ready
How to do it…
Creating Smart Collections
Getting ready
How to do it…
Relinking media
Getting ready
How to do it…
There’s more…
Sculpting Clips in the Final Cut Pro Timeline
Technical requirements
Appending, inserting, connecting, and overwriting clips
How to do it…
There’s more…
Quickly selecting clips with keyboard shortcuts
Getting ready
How to do it…
There’s more…
Adjusting the timeline’s appearance
Getting ready
How to do it…
There’s more…
Replacing clips
Getting ready
How to do it…
Adding transitions
How to do it…
There’s more…
Creating secondary storyline transitions
Getting ready
How to do it…
There’s more…
Using the Blade tool
Getting ready
How to do it…
Changing a clip’s duration
How to do it…
There’s more…
Improving Your Editing Efficiency
Getting to grips with ripple, roll, slip, and slide edits
Getting ready
How to do it…
Using gap clips and placeholder clips
How to do it…
There’s more…
Creating J- and L-cuts
Getting ready
How to do it…
There’s more…
Using markers and the Timeline Index
How to do it…
Creating an audition
Getting ready
How to do it…
Creating compound clips
How to do it…
Color coding your clips
How to do it…
Using multicam editing
Getting ready
How to do it…
Exploring Color Correction and Stylizing
Utilizing white balance
Getting ready
How to do it…
How it works…
There’s more…
Using the Match Color feature
Getting ready
How to do it…
Using Color Board, Wheels, and Curves
Getting ready
How to do it…
There’s more…
Using Shape Masks and Color Masks
How to do it…
Fixing exposure with the luma waveform monitor
Getting ready
How to do it…
Adding secondary color corrections
How to do it…
There’s more…
Applying LUTs to raw files
Getting ready
How to do it…
Applying Visual Effects
Stacking visual effects
How to do it…
There’s more…
Stacking adjustment clips
How to do it…
Creating a custom Color Board preset effect
How to do it…
There’s more…
Using the Color Adjustments effect
Getting ready
How to do it…
There’s more…
Using the Custom LUT effect
Getting ready
How to do it…
Using blend modes
Getting ready
How to do it…
Creating a freeze-frame effect
How it works…
Transforming Visual Elements
Unmasking the mystery of masks
How to do it…
Using the Green Screen Keyer effect
Getting ready
How to do it…
There’s more…
Using the Magnetic Mask effect
Getting ready
How to do it…
Keyframing clip position and effects
How to do it…
There’s more…
Retiming clips
How to do it…
Stabilizing clips
Getting ready
How to do it…
There’s more…
Reframing clip resolution
Getting ready
How to do it…
Cropping, distorting, and who is Ken Burns anyway?
Getting ready
How to do it…
Correcting and Enhancing Audio
Technical requirements
Setting audio roles
Getting ready
How to do it…
There’s more…
Using the Range Selection tool to duck audio
How to do it…
Adjusting levels with keyboard shortcuts
Getting ready
How to do it…
Keyframing audio spikes
Getting ready
How to do it…
Using the Audio Enhancement functions
How to do it…
There’s more…
Syncing audio from an external recorder
Getting ready
How to do it…
There’s more…
Recording scratch audio
Getting ready
How to do it…
See also
Using audio effects
How to do it…
Fixing a mono recording
Getting ready
How to do it…
Building Titles
Customizing titles
How to do it…
Replacing titles
How to do it…
Using safe zones
How to do it…
Using themes in titles and generators
How to do it…
There’s more…
Creating a title object tracker
Getting ready
How to do it…
There’s more…
Revealing text animation
Getting ready
How to do it…
There’s more…
Accelerating Real-World Projects
Creating assets for a workgroup
Getting ready
How to do it…
Controlling project versions
Getting ready
How to do it…
Planning for project versatility
Getting ready
How to do it…
Creating a repeatable project intro and outro
Getting ready
How to do it…
There’s more…
Creating closed captions
Getting ready
How to do it…
Gathering accurate client feedback
Getting ready
How to do it…
Sharing Your Projects
Technical requirements
Sharing for Apple devices
How to do it…
Sharing for other devices
How to do it…
There’s more…
Customizing share settings
How to do it…
There’s more…
Sharing roles
Getting ready
How to do it…
Sharing closed and burned-in captions
Getting ready
How to do it…
There’s more…
Exporting an XML project
Getting ready
How to do it…
Saving a project archive
How to do it…
How it works…
Other Books You May Enjoy
Index
Download a Free PDF Copy of This Book
Landmarks
Cover
Index
Preface
Final Cut Pro is an incredible piece of software. It’s built for fast, focused, digital video production. From the single main viewer window to its database-driven clip tagging, every tool is designed with one central goal: smooth, efficient, digital delivery. Is it perfect for every project? No – but I believe Final Cut Pro does 98% of what 98% of people need.
The inspiration to write this book came from my students at Century College in St. Paul, MN. Teaching Final Cut Pro has always been a joy – it’s intuitive enough to dive into right away, yet deep enough to keep revealing new possibilities the more you use it. I wanted this book to reflect that balance in a format that supports learning at your own pace.
This book is structured into chapters of recipes. The content generally builds on itself: we begin with the interface and importing media, then move into editing clips, adding effects, and beyond. But each recipe also stands on its own – you can jump in anywhere to learn a specific technique and apply it immediately.
I hope you enjoy the cooking metaphors peppered throughout. I’ve kept the tone conversational and included plenty of supporting screenshots to guide the way.
Unlike the how-to videos scattered online, this cookbook brings everything together in one place. It’s organized, practical, and designed with real-world editing scenarios in mind. You won’t waste time digging through tutorials – you can head straight to a clear, step-by-step recipe and work at your own tempo.
My aim was to explain techniques and tools through specific examples, hoping you will be inspired to explore similar features and apply them to your own projects. This book isn’t meant to be an exhaustive reference of every possible function or effect – it’s a starting point. A sharpened chef’s knife.
After 17 years of teaching Final Cut Pro at the college level, I feel confident sharing what I’ve learned. I hope this book helps you get creative, get editing, and get cooking.
Who this book is for
Among others, this book will be especially helpful for the independent producer – the kind of person who wears all the hats on a video project. Whether they are a freelancer juggling multiple clients or the one-person video department inside a company, this guide will get them cooking.
What this book covers
Chapter 1, Utilizing the Final Cut Pro Interface for Workflow Success: Just as a chef arranges their kitchen setup for each recipe, this chapter shows how customizing Final Cut Pro’s interface and using features such as tagging, the Magnetic Timeline, and the Precision Editor view can help you cook up a smoother, more flavorful editing workflow.
Chapter 2, Organizing Media and Using the Event Browser Effectively: Just as a great chef preps their ingredients before the heat is on, this chapter shows how organizing and importing media sets the stage for an efficient and stress-free edit.
Chapter 3, Sculpting Clips in the Final Cut Pro Timeline: Like a seasoned chef perfecting a signature dish, this chapter focuses on refining your edit with advanced trimming, transitions, and timeline tools to shape your project into a polished creation.
Chapter 4, Improving Your Editing Efficiency: Just as a skilled chef prepares ingredients with precision and speed, we’ll uncover time-saving shortcuts as this chapter serves up advanced editing techniques and workflow strategies to help you slice through projects with precision and speed.
Chapter 5, Exploring Color Correction and Stylizing: Just as a skilled chef uses spices to transform a dish, this chapter explores how to use Final Cut Pro’s powerful color tools to elevate your footage with emotion and visual flair.
Chapter 6, Applying Visual Effects: Just as a chef layers flavors to craft a signature dish, this chapter shows how to apply visual effects to enhance storytelling with precision, style, and purpose.
Chapter 7, Transforming Visual Elements: Just as a chef perfects a dish with careful plating and garnish, this chapter teaches how to refine and position visual elements to enhance clarity, motion, and storytelling impact.
Chapter 8, Correcting and Enhancing Audio: Just as a master chef balances flavors for a perfect dish, this chapter shows how to shape, enhance, and refine audio in Final Cut Pro to create a rich and immersive storytelling experience.
Chapter 9, Building Titles: Just as an event chef ensures every place setting is picture-perfect, this chapter teaches you how to craft and finesse titles to add clarity, personality, and polish to your video productions.
Chapter 10, Accelerating Real-World Projects: Just as a master chef shares secret recipes to perfect their dishes, this chapter offers essential practical tips and workflow strategies to help you efficiently manage and elevate your projects.
Chapter 11, Sharing Your Projects: Just as a great chef presents a carefully prepared feast to guests, this chapter guides you through sharing your Final Cut Pro projects with the world using tailored export and collaboration techniques.
To get the most out of this book
We are going to assume you are at least a little familiar with Final Cut Pro. The first chapters explore the interface and organizing clips, so you should know how to import clips and add them to a project in the Timeline panel.
You will also need some footage to work with. You will need a variety of clips, including some action, someone talking, and clips that need color correction. Most can be obtained from stock media websites, but you can also use clips from your smartphone camera.
Software/hardware covered in the book
Operating system requirements
Final Cut Pro version 11.1 or later
macOS 14.6 or later
A Mac with 8 GB of memory (16 GB recommended) – some features require a Mac with Apple Silicon
Disclaimer about AI usage
The author acknowledges the use of ChatGPT during the development of this book. It was used to generate some text, which was later edited, as well as to rewrite certain passages that the author may have further refined, thereby ensuring a smooth reading experience for readers. ChatGPT was also used in designing the book cover; however, no images within the chapters were created using AI. It’s essential to note that all content and ideas were crafted by the author and refined by a professional publishing team.
Download the color images
We also provide a PDF file that has color images of the screenshots/diagrams used in this book. You can download it here: https://packt.link/gbp/9781835888469.
Conventions used
There are a number of text conventions used throughout this book.
CodeInText: Indicates code words in text, database table names, folder names, filenames, file extensions, pathnames, dummy URLs, user input, and Twitter handles. For example: “Note that .cube files are the files that will work as LUTs.”
Bold: Indicates a new term, an important word, or words that you see on the screen. For instance, words in menus or dialog boxes appear in the text like this. For example: “Go to the Window menu and select Show in Workspace.”
Warnings or important notes appear like this.
Tips and tricks appear like this.
Get in touch
Feedback from our readers is always welcome.
General feedback: If you have questions about any aspect of this book or have any general feedback, please email us at [email protected] and mention the book’s title in the subject of your message.
Errata: Although we have taken every care to ensure the accuracy of our content, mistakes do happen. If you have found a mistake in this book, we would be grateful if you reported this to us. Please visit http://www.packtpub.com/submit-errata, click Submit Errata, and fill in the form.
Piracy: If you come across any illegal copies of our works in any form on the internet, we would be grateful if you would provide us with the location address or website name. Please contact us at [email protected] with a link to the material.
If you are interested in becoming an author: If there is a topic that you have expertise in and you are interested in either writing or contributing to a book, please visit http://authors.packtpub.com/.
Share your thoughts
Once you’ve read Final Cut Pro Cookbook, we’d love to hear your thoughts! Scan the QR code below to go straight to the Amazon review page for this book and share your feedback.
https://packt.link/r/183588847X
Your review is important to us and the tech community and will help us make sure we’re delivering excellent quality content.
Download a Free PDF Copy of This Book
Thanks for purchasing this book!
Do you like to read on the go but are unable to carry your print books everywhere?
Is your eBook purchase not compatible with the device of your choice?
Don’t worry, now with every Packt book you get a DRM-free PDF version of that book at no cost.
Read anywhere, any place, on any device. Search, copy, and paste code from your favorite technical books directly into your application.
The perks don’t stop there, you can get exclusive access to discounts, newsletters, and great free content in your inbox daily.
Follow these simple steps to get the benefits:
Scan the QR code or visit the link below:https://packt.link/free-ebook/9781835888469
Submit your proof of purchase.That’s it! We’ll send your free PDF and other benefits to your email directly.Share your thoughts
Once you’ve read Final Cut Pro Cookbook, we’d love to hear your thoughts! Please click here to go straight to the Amazon review page for this book and share your feedback.
Your review is important to us and the tech community and will help us make sure we’re delivering excellent quality content.
1
Utilizing the Final Cut Pro Interface for Workflow Success
Just like a chef meticulously plans each ingredient for a delectable dish, a skilled editor carefully crafts every element of a video to tell a compelling story. The Final Cut Pro interface is straightforward yet seasoned with special features that will help you with all kinds of different tasks.
In this chapter, we will explore how the Final Cut Pro interface can be changed to your advantage during different editing tasks. We will start with pre-set and custom workspaces and how to change the appearance of the Event Browser panel. But we will also tap into the power of tagging footage, as well as the benefit of the Magnetic Timeline and the unique Precision Editor view.
Throughout, you’ll discover the essential ingredients for a successful workflow, so get ready to whip up cinematic masterpieces as we uncover the recipe for editing success in Final Cut Pro.
In this chapter, you will complete the following recipes:
Working with the Final Cut Pro interface and workspacesChanging the Event Browser’s appearanceCustomizing the Event Browser filtering orderTaking advantage of the Magnetic Timeline and the Position toolUsing the Precision Editor viewTechnical requirements
For this chapter, you will need a Mac running Final Cut Pro version 11.1 or higher.
Working with the Final Cut Pro interface and workspaces
Just as a chef might customize their work surface for a specific task, Final Cut Pro allows you to arrange tools, timelines, and media in a way that best fits your editing style and workflow needs. By configuring your workspace, you can keep essential tools accessible and minimize distractions, making it easier to focus on creative tasks without getting bogged down by interface clutter. The advantage of setting up personalized workspaces is improved efficiency and a smoother editing process, as you can switch between layouts that suit different phases of your project, from organizing assets to initial edits and color correction.
In this recipe, we’ll explore the Final Cut Pro interface, unlocking its intuitive design and powerful features. We will see how workspaces help you concentrate on specific tasks and how they can be customized and saved.
Getting ready
Create a new library and import some sample footage or open an existing video project. If you need more information about importing footage, see Chapter 2 and the recipe called Importing media into Final Cut Pro.
How to do it…
Let’s get cooking with the Final Cut Pro interface:
Open Final Cut Pro, and you will be greeted with its interface – it is essentially one window with different panes.Figure 1.1: Note the panels of the Final Cut Pro interface
You can explore the interface as a single window by dragging the top window frame to see that the whole interface is made up of smaller panels that all stay together. Personally, I am not a big fan of the Mac’s single window “fullscreen mode” as I like to have the menus visible and adjust the size of the window to my preference. Depending on the size of your monitor, you can adjust the Final Cut Pro interface window by dragging the lower-right corner.
Let’s break down some of the panels:
Sidebar: This panel holds libraries and events:Libraries are the largest containers of media. They are essentially Final Cut Pro documents that are used in the Finder. Libraries can contain multiple events, which is why their icon looks like four event icons in a group.Events are organized inside libraries. Their icon looks like a square with a star in the middle. They contain footage and projects (projects essentially being edited timelines).When an event is created, the default name is the current date, which is often how footage is organized.
Figure 1.2: A library selected in the sidebar displaying its contained events
You may see the terms projects and timelines used interchangeably.
The panels have tool icons right above them that are associated with things that you can do within that panel. We will get into more detail about the tools and settings in later chapters and recipes.
Figure 1.3: Note the tool icons for each panel
Different panes can be changed in size by moving your mouse between the panels and dragging them to make them bigger/smaller.Figure 1.4: Drag the edges of panels to resize them
Don’t hesitate to quickly change the size of panels to suit your editing task.
By clicking on the icons in the upper-right corner of the interface, you can hide or show three of the main panels of the interface – the Library Sidebar, the Timeline, or the Inspector (note that the Viewer always remains active).Figure 1.5: Use the icons to hide or show the main panels
Final Cut Pro also has different looks, called workspaces. Click on the Window menu, scroll down, and select Workspaces. Currently, we’re looking at the Default workspace; however, let’s select the Organize workspace.Figure 1.6: Select Organize from the Workspaces menu
You’ll see that the interface hides the Timeline panel and lets you focus on the Event Browser, Viewer, and Inspector.
Figure 1.7: Note the Organize workspace interface
Now, from Windows | Workspaces, select Color & Effects. This hides the Event Browser and lets you work with the color scopes associated with the clips that you skim over with your mouse in the project timeline.It also opens up the Effects Browser panel and keeps the Inspector open.
Figure 1.8: Note the Color & Effects workspace interface
It is also possible to make your own custom workspace.
Go to the Window menu and select Show in Workspace. From there, you can check the interface panels that you want to make visible/invisible.Figure 1.9: Explore the panel layout with the Show in Workspace menu
With the panels selected, resize them to your preference.Then, from the Window menu, select Workspaces and Save Workspace as....Figure 1.10: Save your custom workspace
Once you have created a workspace, you can update it by clicking Update ‘…’ Workspace (where … would be your workspace name).In addition, you can use this menu to open the Workspace folder in the Finder, copy your custom workspace, and transfer it to a different computer so you always have your screen preference readily available.Changing the Event Browser’s appearance
Changing the Event Browser’s appearance in Final Cut Pro lets you customize how your clips are displayed, making it easier to locate and organize your clips. By using the Clip Appearance menu, you can tailor the clips and layout to fit your workflow. You can adjust the height and length of clips, as well as how they are grouped and sorted, making it easier to manage your media efficiently and speeding up the process of selecting and preparing footage for the timeline.
In this recipe, we’ll see how to adjust the height and length of clips and how to sort and group media in the Event Browser.
Getting ready
We are going to practice sorting a variety of types of media. If you don’t have project footage already, import a variety of footage, including clips that have audio. Clips with dialogue and music will be needed. You could get sample footage for free from any of the main stock media websites. If you need more information about importing footage, see Chapter 2 and the recipe called Importing media into Final Cut Pro.
How to do it…
Creating your signature dish is easier when your ingredients are laid out and displayed in order. Let’s explore how to customize the way your clips are displayed:
Along the top edge of the Event Browser, click on the Clip Appearance menu icon (the one that looks like a filmstrip). The Clip Appearance window will drop down, which contains controls that help you visualize your clips better and organize them in ways that will help you edit faster.Figure 1.11: Click on the Clip Appearance button to see the drop-down window
Click and drag on the first slider – the Clip Height slider – to increase or decrease the size of the thumbnail that we’re viewing in the Event Browser.Figure 1.12: Drag the Clip Height slider
You can also change the amount of footage seen – that is, the number of thumbnail images per clip. To do so, click the second slider – the Duration slider – and move it to the right. This essentially zooms into the clip.Figure 1.13: Drag the Duration slider
As we zoom into clips, note the jagged edge on the right end of the clip that matches with the jagged edge on the left of the next line – this shows that it is one continuous clip. In my case, as the Duration slider is set to 5s, and because my clip has six images, I know the total length of the clip is about 30 seconds.
Figure 1.14: Note the jagged edges indicating a long clip in the Event Browser
Now click and drag the Duration slider to the right, so that the setting changes from 5s to 10s. In my case, I will see that the clip is represented by just three thumbnail images.So, using this slider can help quickly visualize the approximate length of your clips to help organize your footage.
What is also useful is the ability to group and sort your footage. Currently, the Group By drop-down menu shows the default option, File Type – which will separate video clips from photos and audio files, but there are other options, such as Content Created and Date Imported, that you could group footage by instead.Figure 1.15: Select from the Group By drop-down menu
Within these groups, clips can be sorted using the Sort By drop-down menu. If you are familiar with your footage and know the order in which it was shot, it might make sense to sort by the date it was created (Content Created). But you can also sort by Name, Take, or Duration.Figure 1.16: Select from the Sort By drop-down menu
There are two more options in the Clip Appearance menu you can use: The Waveforms checkbox shows the audio visualization waveforms within our clips, to give us an idea of the dialogue or the audio levels.The Continuous Playback checkbox allows you to play clips one after another in the Event Browser. This becomes something of an “assembly edit” (more on that in Chapter 2).Customizing the Event Browser’s filtering order
When working in the Event Browser, you can rate your clips as Favourites or Rejected. Then, you can customize the Browser’s filtering order to quickly find and categorize your media to suit the unique needs of each project, reducing the time spent searching for clips. This personalized approach enhances efficiency and ensures that the most relevant footage is always at your fingertips, making the editing process smoother and more intuitive.
In this recipe, we will learn how to rate clips and then explore several ways to display clips based on our rating system.
Getting ready
Import some sample footage or open an existing video project. If you need more information about importing footage, see Chapter 2 and the recipe called Importing media into Final Cut Pro.
How to do it…
Like a stack of your favorite recipe cards, let’s rate and filter your clips:
Click on the Clip Filtering menu at the top of the Event Browser. From the list, you can choose which items you want to view and hide.Figure 1.17: Select from the Clip Filtering menu
At the moment, All Clips is selected, but let’s change that.
Click on a clip or a portion of a clip in the Event Browser. Then give it a Favorite rating by simply clicking on the F key as a keyboard shortcut. You could also use a menu command by going to the Mark menu and selecting Favorite.Select another clip, and press the Delete key shortcut. Don’t freak out – it doesn’t delete the clip; it just rates the clip as rejected! Again, you could use a menu command by going to the Mark menu and selecting Reject.Now, looking at the clips, the Favorite rating is indicated by a green bar above the clip, while the Rejected rating is indicated by a red bar:
Figure 1.18: Note the green Favorite and red Rejected rating bars on clips
How you choose to create favorites is up to you. You can favorite all of the clips that you like, even if you don’t end up using them, or you can reserve the favorite function for just those things that you’re absolutely sure you’re going to use. The same goes for rejecting clips. Remember that they are not gone, but rather easier to hide.
Figure 1.19: Re-select the rated portion of a clip by clicking on the rating bar
Now, from the Clip Filtering menu, click Rejected to view just the clips, or portions of clips, rated as Rejected. We can also keep rejected clips from cluttering up the Event Browser by selecting the Hide Rejected option instead.Here are some final notes on the Clip Filtering menu:Sometimes, with large projects, there are so many clips that it is good to review which clips have not been used in the timeline. You can specifically filter clips that are marked as Unused. Also, if you have used all of your favorite clips, try viewing clips using the No Ratings or Keywords option. Finally, if you want to remove a Favorite or Rejected rating, select the clip and simply use the keyboard shortcut U. Or, from the Mark menu, select Unrate.There’s more…
There are two other sets of media that share the sidebar and browser panels: Photos, Videos, and Audio, and Titles and Generators.
In the upper-right corner of the Final Cut Pro interface, click on the Photos, Videos, and Audio icon that looks like a musical note in a circle on top of a camera. This tab gives you a quick link to the Apple ecosystem and access to the photos you have taken, as well as media you have purchased from Apple Music and Apple TV. There is also a variety of sound effects.
Figure 1.20: Select Sound Effects in the Photos, Videos, and Audio Browser
Take some time to explore the media available in this tab. We will be using some sound effects in Chapter 7.
Also located in the upper-right corner of the Final Cut Pro interface, click on the Titles and Generators icon that looks like a capital T in a square on top of a film countdown frame. Titles and generators are pre-built assets such as animated text, backgrounds, textures, and elements, allowing for seamless integration of additional visual content.
0Figure 1.21: Select Backgrounds in the Titles and Generators Browser
Again, take some time to explore the possibilities available to you in this tab. We will be using some generators in Chapter 6, and we will have an entire chapter on titles in Chapter 9.
Overall, these tabs provide a quick and efficient way to enrich your project with diverse visual components, saving time while expanding your creative possibilities.
Taking advantage of the Magnetic Timeline and the Position tool
Instead of tracks, Final Cut Pro uses the metaphor of primary and secondary storylines:
The primary storyline is the main stream of video. It is what drives the timing of the story. Secondary storylines are sequences of connected clips. These secondary storylines are stacked on top of the primary storyline.Now, the primary storyline is a Magnetic Timeline. This means that, starting at the beginning of the timeline, clips simply snap together, so you don’t have to worry about black gaps or missing frames between clips. This ensures your edits stay perfectly synchronized and your workflow remains smooth.
Meanwhile, the Position tool allows an editor to seamlessly position clips anywhere on the Magnetic Timeline. You can build portions of your story at any point in time that you choose.
We’ll look at both of these features in this recipe.
Getting ready
Import some sample footage or open an existing video project. If you need more information about importing footage, see Chapter 2 and the recipe called Importing media into Final Cut Pro.
How to do it…
The Magnetic Timeline is the non-stick skillet of video editing–ingredients stay in order, even when you shake things up. Let’s explore it:
Take a clip from the Event Browser and drag it into the primary storyline. When you release the mouse, the clip will snap toward the left and connect to the right of an existing clip.Figure 1.22: Note how a new clip snaps into place on the Magnetic Timeline
In addition, when you move clips to a different place on the timeline, other clips will shift position to allow the clip to snap into a new location without any gaps.Figure 1.23: Note how the moved clips snap into place within the Magnetic Timeline
Besides the behavior of the Magnetic Timeline, you can also turn on Snapping. This option can be found above the timeline and looks like two clips clicking together. Alternatively, you can use the keyboard shortcut N for “snnnnaping”.Figure 1.24: Click on the Snapping function icon
With Snapping turned on, clips and edit points will snap to the edges of your playhead, markers, or other connected clips in the timeline. Besides the magnetic behavior of the primary storyline, Snapping keeps other clips and edit points neat and tidy.
Moving on, sometimes you want to work on a portion of your project that’s nearer the end of the project than the start. Perhaps you have an idea for a dramatic ending to your story and want to edit that together. That’s possible in Final Cut Pro while keeping the Magnetic Timeline functioning perfectly. Enter the Position tool:
Above the Timeline panel, toward the right-hand side, is the Tools dropdown menu. The Select tool (with the keyboard shortcut A) is the most common tool people use while editing, but the Position tool (shortcut P) is what we’re going to use right now.Figure 1.25: Select from the Tools menu or use the quick keyboard shortcuts
Using the Position tool, select a new clip or a portion of a clip from the Event Browser panel, and drag it to the primary storyline, making sure to place the clip toward the end of your project. Once done, Final Cut Pro will automatically make a gap clip (a blank clip, sometimes called a slug) between your new clip and where you left off in the Magnetic Timeline. Now you can build a new portion of your project, further down the timeline.Figure 1.26: Note the Timeline with a gap clip created by the Position tool
As you build the project with the Position tool, you can put clips anywhere inside that gap clip. Be careful though, because the Position tool will also automatically override clips that you already have in your timeline. You can switch back to the Select tool, and your clips will work magnetically and not be overridden.There’s more
Let’s explore continuous timeline scrolling, which means the timeline will keep scrolling as the video is played. You can find this option in the timeline control icons. It looks like a playhead over two clips. Or, you can use the keyboard shortcut Option + Shift + S to toggle the option on or off.
Figure 1.27: Select Continuous Scrolling from the Timeline panel control icons
So, with continuous scrolling turned off, the clips in the timeline stay where they are, and the playhead moves to the right.
Figure 1.28: Note how the playhead scrolls to the right with continuous scrolling off
With it turned on, while located in the first half of the timeline, the playhead moves to the right as it normally would, but when it reaches the center of the timeline, the playhead remains where it is, and the clips scroll continuously to the left.
Figure 1.29: Note how clips scroll to the left with continuous scrolling on
Interestingly, if continuous scrolling is turned on and the clips start playing while the playhead is in the left half of the timeline, both the playhead and the clips will scroll to the left until the playhead is in the center of the panel, where it will remain while the clips continue to scroll to the left.
Working with the Precision Editor view
Just as a master chef might use an extremely sharp knife to make precision slices, the Precision Editor is a tool designed for careful clip trimming. Although an advanced tool, we are exploring its use to visualize how clips are interlinked in the Magnetic Timeline. This view lets you see extra footage on either side of a cut, so you can precisely trim, extend, or shorten clips to perfect the pace and enhance your storytelling.
In this recipe, we’ll explore the Precision Editor view and the relationship between clips in the primary storyline.
How to do it…
Sharpen your editing knives and let’s start cutting with the Precision Editor:
In the timeline, we can normally look at the edit point of two clips next to each other. Each clip can be adjusted in relation to the other, having its in and out points changed by dragging the edge of the clip.Figure 1.30: Note the normal view of an edit point
But if you double-click on the edit point, you open up the view of the Precision Editor. This view expands the timeline and shows you the two clips – the first at the top and the second at the bottom. It also shows the point at which the clips have their edit point and what footage is tucked underneath (this is footage that exists, but it is not visible).
Figure 1.31: Note the Precision Editor view of an edit point
In the Precision Editor view, the cursor changes to a small hand with arrows on it. If we click and hold the mouse, the cursor changes to an icon of a hand gripping the clip. Now we can move the clip in relation to the edit point.Figure 1.32: Note how the hand cursor animates to “grip” footage when moving left or right
Move the mouse to the right side of the edit point for the top footage that is tucked underneath. Click, hold, and slide to see that the hand can grip and move the footage on either side of the edit point. This is in contrast to the regular view of editing where you can only change the edit point from the footage you can see.Figure 1.33: Grip and adjust the edit point with the hidden footage
This is also the case with the clip on the bottom layer. Click, hold, and grab the footage with the hand cursor, then move it in relation to the edit point, which will remain in the center of the timeline.Figure 1.34: Note how the center edit point remains still as clips move
Note that when you are moving a clip, the Viewer changes to a two-up display, showing the out point of the top layer and the in point of the bottom layer.
Figure 1.35: Note how the Viewer panel window changes to a two-up display when editing the center point
You can also click, hold, and drag the edit point from the center of the panel. This is known as a rolling edit and changes the out point of the first clip and the in point of the second clip simultaneously. This allows you to adjust both clips at once, instead of individually, saving you time while editing.Figure 1.36: Roll the edit point by dragging the center edit point
Once done, to close the Precision Editor panel, double-click on the edit point in the center of the timeline.You may or may not incorporate the Precision Editor into your everyday workflow, but again, we are exploring it here to visualize how clips are interlinked in the Magnetic Timeline. This view lets you see the footage on either side of an edit point. This visualization will be helpful in advanced recipes such as Getting to grips with ripple, roll, slip, and slide edits in Chapter 4.