20,99 €
Mehr erfahren.
- Herausgeber: John Wiley & Sons
- Kategorie: Wissenschaft und neue Technologien
- Sprache: Englisch
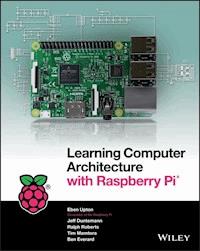
Use your Raspberry Pi to get smart about computing fundamentals
In the 1980s, the tech revolution was kickstarted by a flood of relatively inexpensive, highly programmable computers like the Commodore. Now, a second revolution in computing is beginning with the Raspberry Pi. Learning Computer Architecture with the Raspberry Pi is the premier guide to understanding the components of the most exciting tech product available. Thanks to this book, every Raspberry Pi owner can understand how the computer works and how to access all of its hardware and software capabilities.
Now, students, hackers, and casual users alike can discover how computers work with Learning Computer Architecture with the Raspberry Pi. This book explains what each and every hardware component does, how they relate to one another, and how they correspond to the components of other computing systems. You'll also learn how programming works and how the operating system relates to the Raspberry Pi's physical components.
- Co-authored by Eben Upton, one of the creators of the Raspberry Pi, this is a companion volume to the Raspberry Pi User Guide
- An affordable solution for learning about computer system design considerations and experimenting with low-level programming
- Understandable descriptions of the functions of memory storage, Ethernet, cameras, processors, and more
- Gain knowledge of computer design and operation in general by exploring the basic structure of the Raspberry Pi
The Raspberry Pi was created to bring forth a new generation of computer scientists, developers, and architects who understand the inner workings of the computers that have become essential to our daily lives. Learning Computer Architecture with the Raspberry Pi is your gateway to the world of computer system design.
Sie lesen das E-Book in den Legimi-Apps auf:
Seitenzahl: 853
Veröffentlichungsjahr: 2016
Ähnliche


Learning Computer Architecture with Raspberry Pi®
Published byJohn Wiley & Sons, Inc.10475 Crosspoint BoulevardIndianapolis, IN 46256www.wiley.com
Copyright © 2016 by John Wiley & Sons, Inc., Indianapolis, Indiana
Published simultaneously in Canada
ISBN: 978-1-119-18393-8
ISBN: 978-1-119-18394-5 (ebk)
ISBN: 978-1-119-18392-1 (ebk)
No part of this publication may be reproduced, stored in a retrieval system or transmitted in any form or by any means, electronic, mechanical, photocopying, recording, scanning or otherwise, except as permitted under Sections 107 or 108 of the 1976 United States Copyright Act, without either the prior written permission of the Publisher, or authorization through payment of the appropriate per-copy fee to the Copyright Clearance Center, 222 Rosewood Drive, Danvers, MA 01923, (978) 750-8400, fax (978) 646-8600. Requests to the Publisher for permission should be addressed to the Permissions Department, John Wiley & Sons, Inc., 111 River Street, Hoboken, NJ 07030, (201) 748-6011, fax (201) 748-6008, or online at http://www.wiley.com/go/permissions.
LIMIT OF LIABILITY/DISCLAIMER OF WARRANTY:THE PUBLISHER AND THE AUTHOR MAKE NO REPRESENTATIONS OR WARRANTIES WITH RESPECT TO THE ACCURACY OR COMPLETENESS OF THE CONTENTS OF THIS WORK AND SPECIFICALLY DISCLAIM ALL WARRANTIES, INCLUDING WITHOUT LIMITATION WARRANTIES OF FITNESS FOR A PARTICULAR PURPOSE. NO WARRANTY MAY BE CREATED OR EXTENDED BY SALES OR PROMOTIONAL MATERIALS. THE ADVICE AND STRATEGIES CONTAINED HEREIN MAY NOT BE SUITABLE FOR EVERY SITUATION. THIS WORK IS SOLD WITH THE UNDERSTANDING THAT THE PUBLISHER IS NOT ENGAGED IN RENDERING LEGAL, ACCOUNTING, OR OTHER PROFESSIONAL SERVICES. IF PROFESSIONAL ASSISTANCE IS REQUIRED, THE SERVICES OF A COMPETENT PROFESSIONAL PERSON SHOULD BE SOUGHT. NEITHER THE PUBLISHER NOR THE AUTHOR SHALL BE LIABLE FOR DAMAGES ARISING HEREFROM. THE FACT THAT AN ORGANIZATION OR WEBSITE IS REFERRED TO IN THIS WORK AS A CITATION AND/OR A POTENTIAL SOURCE OF FURTHER INFORMATION DOES NOT MEAN THAT THE AUTHOR OR THE PUBLISHER ENDORSES THE INFORMATION THE ORGANIZATION OR WEBSITE MAY PROVIDE OR RECOMMENDATIONS IT MAY MAKE. FURTHER, READERS SHOULD BE AWARE THAT INTERNET WEBSITES LISTED IN THIS WORK MAY HAVE CHANGED OR DISAPPEARED BETWEEN WHEN THIS WORK WAS WRITTEN AND WHEN IT IS READ.
For general information on our other products and services please contact our Customer Care Department within the United States at (877) 762-2974, outside the United States at (317) 572-3993 or fax (317) 572-4002.
Library of Congress Control Number: 2016945538
Trademarks: Wiley and the Wiley logo are trademarks or registered trademarks of John Wiley & Sons, Inc. and/or its affiliates, in the United States and other countries, and may not be used without written permission. All other trademarks are the property of their respective owners. John Wiley & Sons, Inc. is not associated with any product or vendor mentioned in this book.
Publisher’s Acknowledgements
VP Consumer and Technology Publishing Director:Michelle Leet
Professional Technology & Strategy Director:Barry Pruett
Marketing Manager:Lorna Mein
Acquisitions Editor:Jody Lefevere
Project Editor:Charlotte Kughen
Copy Editor:Grace Fairley
Technical Editor:Omer Kilic
Editorial Manager:Mary Beth Wakefield
Editorial Assistant:Matthew Lowe
About the Authors
EBEN UPTON is a founder of the Raspberry Pi Foundation, serves as the CEO of Raspberry Pi (Trading) Ltd, its trading arm, and is the co-author, with Gareth Halfacree, of the Raspberry Pi User Guide. In an earlier life, Eben founded two successful mobile games and middleware companies (Ideaworks 3d and Podfun), held the post of Director of Studies for Computer Science at St John’s College, Cambridge and wrote the Oxford Rhyming Dictionary with his father, Professor Clive Upton. He holds a BA in Physics and Engineering, a PhD in Computer Science, and an Executive MBA, from the University of Cambridge.
JEFF DUNTEMANN has been professionally published in both technical nonfiction and science fiction since 1974. He worked as a programmer for Xerox Corporation and as a technical editor for Ziff-Davis Publishing and Borland International. He launched and edited two print magazines for programmers and has 20 technical books to his credit, including the best-selling Assembly Language Step By Step. He wrote the “Structured Programming” column in Dr. Dobb’s Journal for four years and has published dozens of technical articles in many magazines. With fellow writer Keith Weiskamp, Jeff launched The Coriolis Group in 1989, which went on to become Arizona’s largest book publisher by 1998. He has a longstanding interest in “strong” artificial intelligence, and most of his fiction (including his two novels, The Cunning Blood and Ten Gentle Opportunities) explore the consequences of strong AI. His other interests include electronics and amateur radio (callsign K7JPD), telescopes and kites. Jeff lives in Phoenix, Arizona with Carol, his wife of 40 years, and four bichon frise dogs.
RALPH ROBERTS is a decorated Vietnam Veteran who worked with NASA during the Apollo moon-landing program and has been writing about computers and software continuously since his first sale to Creative Computing magazine in 1979. Roberts has written more than 100 books for national publishers and thousands of articles and short stories. In all, he’s sold more than 20 million words professionally. His best sellers include the first U.S. book on computer viruses (which resulted in several appearances on national TV) and Classic Cooking with Coca-Cola®, a cookbook that has been in print for the past 21 years and has sold 500,000 copies.
TIM MAMTORA works as a master engineer in IC Design for Broadcom Limited and is currently the technical lead for the internal GPU hardware team. He has worked in mobile computer graphics for nearly seven years and previously held roles developing internal IP for analog TV and custom DSP hardware. Tim holds a Masters in Engineering from the University of Cambridge, and he spent his third year at the Massachusetts Institute of Technology, which sparked his interest in digital hardware design. He is passionate about promoting engineering and has dedicated time to supervising undergraduates at the University of Cambridge and giving talks about opportunities in engineering to his old school. Outside of work he enjoys a variety of sports, photography and seeing the world.
BEN EVERARD is a writer and podcaster who spends his days tinkering with Linux and playing with robots. This is his second book; he also wrote Learning Python with Raspberry Pi (Wiley, 2014). You can find him on Twitter at @ben_everard.
About the Technical Editor
OMER KILIC is an embedded systems engineer who enjoys working with small connected computers of all shapes and sizes. He works at the various intersections of hardware and software engineering practices, product development and manufacturing.
In memory of Alan Drew, without whom I would have stopped before I got started.—Eben Upton
To the eternal memory of Steve Ostruszka 1917-1990, who gave me his daughter’s hand and honored me with his friendship.—Jeff Duntemann
Learning Computer Architecture with Raspberry Pi®
Table of Contents
Cover
Introduction
Cambridge
Cut to the Chase
The Knee in the Curve
Forward the Foundation
Chapter 1: The Shape of a Computer Phenomenon
Growing Delicious, Juicy Raspberries
System-on-a-Chip
An Exciting Credit Card-Sized Computer
What Does the Raspberry Pi Do?
Meeting and Greeting the Raspberry Pi Board
The Future
Chapter 2: Recapping Computing
The Cook as Computer
The Box That Follows a Plan
Voltages, Numbers and Meaning
Operating Systems: The Boss of the Box
Chapter 3: Electronic Memory
There Was Memory Before There Were Computers
Rotating Magnetic Memory
Magnetic Core Memory
Static Random Access Memory (SRAM)
Address Lines and Data Lines
Combining Memory Chips into Memory Systems
Dynamic Random Access Memory (DRAM)
The Raspberry Pi Memory System
Cache
Virtual Memory
Chapter 4: ARM Processors and Systems-on-a-Chip
The Incredible Shrinking CPU
Digital Logic Primer
Inside the CPU
Rethinking the CPU: CISC vs. RISC
ARMs from Little Acorns Grow
ARM11
Coprocessors
ARM Cortex
Systems on a Single Chip
Chapter 5: Programming
Programming from a Height
How Native-Code Compilers Work
Pure Text Interpreters
Bytecode Interpreted Languages
Data Building Blocks
Code Building Blocks
Object-Oriented Programming
A Tour of the GNU Compiler Collection Toolset
Chapter 6: Non-Volatile Storage
Punched Cards and Tape
Magnetic Recording and Encoding Schemes
Magnetic Disk Storage
Partitions and File Systems
Optical Discs
Ramdisks
Flash Storage
Chapter 7: Wired and Wireless Ethernet
The OSI Reference Model for Networking
Ethernet
Routers and the Internet
Wi-Fi
Chapter 8: Operating Systems
Introduction to Operating Systems
The Kernel: The Basic Facilitator of Operating Systems
Enablers and Assistants to the Operating System
Operating Systems for Raspberry Pi
Chapter 9: Video Codecs and Video Compression
The First Video Codecs
Changing with the Times
Motion Search
Chapter 10: 3D Graphics
A Brief History of 3D Graphics
The OpenGL Graphics Pipeline
Modern Graphics Hardware
Open VG
General Purpose GPUs
Chapter 11: Audio
Can You Hear Me Now?
Analog vs. Digital
Sound and Signal Processing
1-Bit DAC
I
2
S
Raspberry Pi Sound Input/Output
Sound on the Raspberry Pi
Chapter 12: Input/Output
Introducing Input/Output
I/O Enablers
Raspberry Pi GPIO
End User License Agreement
Guide
Cover
Table of Contents
Begin Reading
Pages
iii
iv
v
vi
vii
viii
ix
x
xi
xii
xiii
xiv
xv
xvi
xvii
xviii
1
2
3
4
5
7
8
9
10
11
12
13
14
15
16
17
18
19
20
21
22
23
24
25
26
27
28
29
30
31
32
33
34
35
36
37
38
39
40
41
42
43
44
45
46
47
48
49
50
51
52
53
54
55
56
57
58
59
60
61
62
63
64
65
66
67
68
69
70
71
72
73
74
75
76
77
78
79
80
81
82
83
84
85
86
87
88
89
90
91
93
94
95
96
97
98
99
100
101
102
103
104
105
106
107
108
109
110
111
112
113
114
115
116
117
118
119
120
121
122
123
124
125
126
127
128
129
130
131
132
133
134
135
136
137
138
139
140
141
142
143
144
145
146
147
148
149
150
151
152
153
154
155
156
157
158
159
160
161
162
163
164
165
166
167
168
169
170
171
172
173
174
175
176
177
178
179
180
181
182
183
184
185
186
187
188
189
190
191
192
193
194
195
196
197
198
199
200
201
202
203
204
205
206
207
208
209
210
211
212
213
214
215
216
217
218
219
220
221
222
223
224
225
226
227
228
229
230
231
232
233
234
235
236
237
238
239
240
241
242
243
244
245
246
247
248
249
250
251
252
253
254
255
256
257
258
259
260
261
262
263
264
265
266
267
268
269
270
271
273
274
275
276
277
278
279
280
281
282
283
284
285
286
287
288
289
290
291
292
293
294
295
296
297
298
299
300
301
302
303
304
305
306
307
308
309
310
311
312
313
314
315
316
317
318
319
320
321
322
323
324
325
326
327
328
329
331
332
333
334
335
336
337
338
339
340
341
342
343
344
345
346
347
348
349
350
351
352
353
354
355
356
357
359
360
361
362
363
364
365
366
367
368
369
370
371
372
373
374
375
376
377
378
379
380
381
382
383
384
385
386
387
388
389
390
391
392
393
394
395
396
397
398
399
400
401
402
403
404
405
406
407
408
409
410
411
412
413
414
415
416
417
418
419
420
421
422
423
424
425
427
428
429
430
431
432
433
434
435
436
437
438
439
440
441
442
443
444
445
446
447
448
449
450
451
452
453
454
455
456
457
458
459
460
461
462
463
464
465
466
467
468
469
470
471
472
473
474
475
476
477
478
479
480
Introduction
WHEN I WAS 10 years old, one of my teachers sat me down in front of a computer at school. Now, this isn’t what you think. I wasn’t about to be inducted into the mysteries of computer programming, even though it was a BBC Micro (the most programmable and arguably the most architecturally sophisticated of the British 8-bit microcomputers, on which I would subsequently cut my teeth in BASIC and assembly language). Instead, I was faced with a half-hour barrage of multiple choice questions about my academic interests, hobbies and ambitions, after which the miraculous machine spat out a diagnosis of my ideal future career: microelectronic chip designer.
This was a bit of a puzzler, not least because what I really wanted to be was a computer game programmer (okay, okay, astronaut) and there was nobody in my immediate environment who had any idea what a 10-year-old should do to set him on the path to the sunlit uplands of microelectronic chip design. Over the next few years, I studied a lot of maths and science at school, learned to program (games) at home, first on the BBC Micro and then the Commodore Amiga, and made repeated, not particularly successful, forays into electronics. As it turned out, and more by luck than judgment, I’d happened on a plausible road to my destination, but it wasn’t until I arrived at Cambridge at the age of 18 that I started to figure out where the gaps were in my understanding.
Cambridge
Cambridge occupies a special place in the history of computer science, and particularly in the history of practical or applied computing. In the late 1930s, the young Cambridge academic Alan Turing demonstrated that the halting problem (the question “Will this computer program ever terminate, or halt?”) was not computable; in essence, you can’t write a computer program that will analyse another arbitrary computer program and determine if it will halt. At the same time, working independently, Alonzo Church proved the same result, which now shares their names: the Church-Turing thesis. But it is telling that while Church took a purely mathematical approach to his proof, based on recursive functions, Turing’s proof cast computation in terms of sequential operations performed by what we now know as Turing machines: simple gadgets that walk up and down an infinite tape, reading symbols, changing their internal state and direction of travel in response, and writing new symbols. While most such machines are specialised to a single purpose, Turing introduced the concept of the universal machine, which could be configured via commands written on the tape to emulate the action of any other special-purpose machine. This was the first appearance of a now commonplace idea: the general-purpose programmable computer.
After the outbreak of the Second World War, Turing would go on to play a central role in the Allied code-breaking effort at Bletchley Park, where he was involved (as a member of a team—don’t believe everything you see at the movies) in the development of a number of pieces of special-purpose hardware, including the electromechanical bombe, which automated the process of breaking the German Enigma cipher. None of these machines used the specific “finite state automaton plus infinite tape” architecture of Turing’s original thought experiment; this turned out to be better suited to mathematical analysis than to actual implementation. And not even the purely electronic Colossus—which did to the formidably sophisticated Lorentz stream cipher what the bombe had done to Enigma—crossed the line into general-purpose programmability. Nonetheless, the experience of developing large-scale electronic systems for code-breaking, radar and gunnery, and of implementing digital logic circuits using thermionic valves, would prove transformative for a generation of academic engineers as they returned to civilian life.
One group of these engineers, under Maurice Wilkes at the University of Cambridge’s Mathematical Laboratory, set about building what would become the Electronic Delay Storage Automatic Calculator, or EDSAC. When it first became operational in 1949, it boasted a 500kHz clock speed, 32 mercury delay lines in two temperature-controlled water baths for a total of 2 kilobytes of volatile storage. Programs and data could be read from, and written to, paper tape. Many institutions in the U.S. and UK can advance narrow claims to having produced the first general-purpose digital computer, for a particular value of “first”. Claims have been made that EDSAC was the first computer to see widespread use outside the team that developed it; academics in other disciplines could request time on the machine to run their own programs, introducing the concept of computing as a service. EDSAC was followed by EDSAC II, and then Titan. It was only in the mid-1960s that the University stopped building its own computers from scratch and started buying them from commercial vendors. This practical emphasis is even reflected in the current name of the computer department: Cambridge doesn’t have a computer science faculty; it has a computer laboratory, the direct descendant of Wilkes’ original mathematical laboratory.
This focus on the practical elements of computer engineering has made Cambridge fertile ground for high-technology startups, many of them spun out of the computer laboratory, the engineering department or the various maths and science faculties (even our mathematicians know how to hack), and has made it a magnet for multinational firms seeking engineering talent. Variously referred to as the Cambridge Cluster, the Cambridge Phenomenon or just Silicon Fen, the network of firms that has grown up around the University represents one of the few bona fide technology clusters outside of Silicon Valley. The BBC Microcomputer that told me I should become a chip designer was a Cambridge product, as was its perennial rival, the Sinclair Spectrum. Your cell phone (and your Raspberry Pi) contains several processors designed by the Cambridge-based chip firm ARM. Seventy years after EDSAC, Cambridge remains the home of high technology in the UK.
Cut to the Chase
One of the biggest missing pieces from my haphazard computing education was an idea of how, underneath it all, my computer worked. While I’d graduated downwards from BASIC to assembly language, I’d become “stuck” at that level of abstraction. I could poke my Amiga’s hardware registers to move sprites around the screen but I had no idea how I might go about building a computer of my own. It took me another decade, a couple of degrees and a move out of academia to work for Broadcom (a U.S. semiconductor company that came to Cambridge for the startups and stayed for the engineering talent) for me to get to the point where I woke up one morning with “microelectronic chip designer” (in fact the fancier equivalent, “ASIC architect”) on my business card. During this time, I’ve had the privilege of working with, and learning from, a number of vastly more accomplished practitioners in the field, including Sophie Wilson, architect (with Steve Furber) of the BBC Micro and the original ARM processor, and Tim Mamtora of Broadcom’s 3D graphics hardware engineering team, who has graciously provided the chapter on graphics processing units (GPUs) for this book.
To a great degree, my goal in writing this book was to produce the “how it works” title that I wish I’d had when I was 18. We’ve attempted to cover each major component of a modern computing system, from the CPU to volatile random-access storage, persistent storage, networking and interfacing, at a level that should be accessible to an interested secondary school student or first-year undergraduate. Alongside a discussion of the current state of the art, we’ve attempted to provide a little historical context; it’s remarkable that most of the topics covered (though not, obviously, the fine technical details) would have been of relevance to Wilkes’ EDSAC engineering team in 1949. You should reach the end with at least a little understanding of the principles that underpin the operation of your computer. I firmly believe that you will find this understanding valuable even if you’re destined for a career as a software engineer and never plan to design a computer of your own. If you don’t know what a cache is, you’ll be surprised that your program’s performance drops off a cliff when your working set ends up larger than your cache, or when you align your buffers so that they exhaust the cache’s associativity. If you don’t know a little about how Ethernet works, you’ll struggle to build a performant network for your datacentre.
It’s worth dwelling for a moment on what this book isn’t, and what it won’t tell you. It isn’t a comprehensive technical reference for any of the topics covered. You could write (and people have written) whole volumes on the design of caches, CPU pipelines, compilers and network stacks. Instead, we try to provide a primer for each topic, and some suggestions for further study. It is concerned primarily with the architecture of conventional general-purpose computers (in essence, PCs). There is limited coverage of topics like digital signal processing (DSP) and field-programmable gate arrays (FPGAs), which are primarily of interest in special purpose, application-specific domains. Finally, there is little coverage of the quantitative decision-making process that is the heart of good computer architecture: how do you trade off the size of your cache against access time, or decide whether to allow one subsystem coherent access to a cache that forms part of another component? We can’t teach you to think like an architect. For the advanced reader, Hennessy and Patterson’s Computer Architecture: A Quantitative Approach remains an indispensable reference on this front.
The Knee in the Curve
With that last disclaimer in mind, I’d like to share a couple of guiding principles that I have found useful over the years.
In computer architecture, as in many things, there is a law of diminishing returns. There are, of course, hard limits to what can be accomplished at any given moment, whether in terms of raw CPU performance, CPU performance normalised to power consumption, storage density, transistor size, or network bandwidth over a medium. But it is often the case that well before we reach these theoretical limits we encounter diminishing returns to the application of engineering effort: each incremental improvement is increasingly hard won and exacts a growing toll in terms of cost and, critically, schedule. If you were to graph development effort, system complexity (and thus vulnerability to bugs) or cash spent against performance, the curve would bend sharply upward at some point. To the left of this “knee”, performance would respond in a predictable (even linear!) fashion to increasing expenditure of effort; to the right, performance would increase only slowly with added effort, asymptotically approaching the “wall” imposed by fundamental technical limitations.
Sometimes there is no substitute for performance. The Apollo lunar project, for example, was an amazing example of engineering that was so far to the right of the “knee” (powered by the expenditure of several percent of the GDP of the world’s largest economy) that it fundamentally misled onlookers about the maturity of aerospace technology. It is only now—after 50 years of incremental advances in rocketry, avionics and material science—that the knee has moved far enough to permit access to space, and maybe even a return to the Moon, at reasonable cost. Nonetheless, I have observed that teams that have the humility to accurately locate the knee bring simple, conservatively engineered systems to market in a timely fashion and then iterate rapidly, tend to win over moon-shot engineering.
Conservatism and iteration are at the heart of my own approach to architecture. The three generations of Raspberry Pi chips that we’ve produced to date use exactly the same system infrastructure, memory controller and multimedia, with changes confined to the ARM core complex, a small number of critical bug fixes and an increase in clock speed. There is a tension here: engineers (myself included) are enthusiasts and want to push the boundaries. The job of a good architect is to accurately assign a cost to the risks associated with radical change, and to weigh this against the purported benefits.
Forward the Foundation
We founded the Raspberry Pi Foundation in 2008, initially with the simple aim of addressing a collapse in the number of students applying to study Computer Science at Cambridge. We’re seeing encouraging signs of recovery, both at Cambridge and elsewhere, and applicant numbers are now higher than they were at the height of the dotcom boom in the late 1990s.
Perhaps the most striking aspect of the change we’ve witnessed is that the new generation of young people is far more interested in hardware than we were in the 1980s. Writing an assembly language routine to move a sprite around on the screen clearly isn’t quite as much fun as it used to be, but moving a robot around the floor is much more exciting. We see 12-year-olds today building control and sensing projects that I would have been proud of in my mid-20s. My hope is that when some of these young people sit down in front of the distant descendants of the BBC Micro careers program of my childhood, some of them will be told that they’d make great microelectronic chip designers, and that this book might help one or two of them make that journey.
—Eben Upton, Cambridge, May 2016
Chapter 1
The Shape of a Computer Phenomenon
THAT OLD SAYING about good things coming in small packages describes the Raspberry Pi perfectly. It also highlights an advance in computer architecture—the system-on-a-chip (SoC), a tiny package with a rather large collection of ready-to-use features. The SoC isn’t so new—it’s been around a long time—but the Raspberry Pi’s designers have put it into a small, powerful package that is readily available to students and adults alike. All for a very low price.
A tiny piece of electronics about the size of a credit card, the Raspberry Pi single-board computer packs very respectable computing power into a small space. It provides tons of fun and many, many possibilities for building and controlling all sorts of fascinating gizmos. When something is small, after all, it fits just about anywhere. The Raspberry Pi does things conventional computers just can’t do in terms of both portability and connectivity. Things you will find inspire your creativity—fun things!
What’s not to like? Get ready for some truly exciting computer architecture.
In this chapter introducing the truly phenomenal Raspberry Pi line of computer boards, we look first at the Raspberry Pi’s goals and history. We include the history of the Raspberry Pi’s development and the visionary people at the Raspberry Pi Foundation who dreamed up the concept and achieved the reality, and we look at the advantages this tiny one-board computer has over much larger computers. We then take a tour of the Raspberry Pi board.
Growing Delicious, Juicy Raspberries
As significant advances in computing go, the Raspberry Pi’s primary innovation was the lowering of the entry barrier into the world of embedded Linux. The barrier was twofold—price and complexity. The Raspberry Pi’s low price solved the price problem (cheap is good!) and the SoC reduced circuit complexity rather dramatically, making a much smaller package possible.
The road to the development of the Raspberry Pi originated at a surprising point—through a registered charity in the UK, which continues to operate today.
The Raspberry Pi Foundation, registered with the Charity Commission for England and Wales, first opened its doors in 2009 in Caldecote, Cambridgeshire. It was founded for the express purpose of promoting the study of computer science in schools. A major impetus for its creation came from a team consisting of Eben Upton, Rob Mullins, Jack Lang and Alan Mycroft. At the University of Cambridge’s Computer Laboratory, they had noted the declining numbers and low-level skills of student applicants. They came to the conclusion that a small, affordable computer was needed to teach basic skills in schools and to instill enthusiasm for computing and programming.
Major support for the Foundation’s goals came from the University of Cambridge Computer Laboratory and Broadcom, which is the company that manufactures the SoC—the Broadcom 2835 or 2836, depending on the model—that enables the Raspberry Pi’s power and success. Later in this chapter you will read more on that component, which is the heart and soul of the Raspberry Pi.
The founders of the Raspberry Pi had identified and acted on the perceived need for a tiny, affordable computer. By 2012, the Model B had been released at a price of about £25. The fact that this represented great value for money was recognised immediately, and first-day sales blasted over 100,000 units. In less than two years of production, more than two million boards were sold.
The Raspberry Pi continued to enjoy good sales and wide acceptance following the highly successful release of the Model B+ (in late 2014). And in 2015, the fast, data-crunching Raspberry Pi 2 Model B with its four-core ARM processor and additional onboard memory sold more than 500,000 units in its first two weeks of release. Most recently, the Raspberry Pi Zero, a complete computer system on a board for £4—yes, £4—was released. It’s an awesome deal if you can get one—the first batch sold out almost immediately.
In 2016, the Raspberry Pi Model 3 Model B arrived. It sports a 1.2GHz 64-bit quad-core ARMv8 CPU, 1 GB RAM, and built-in wireless and Bluetooth! All for the same low price.
The original founders of the Raspberry Pi Foundation included:
Eben Upton
Rob Mullins
Jack Lang
Alan Mycroft
Pete Lomas
David Braben
The organisation now consists of two parts:
Raspberry Pi (Trading) Ltd. performs engineering and sales, with Eben Upton as CEO.
The Raspberry Pi Foundation is the charitable and educational part.
The Raspberry Pi Foundation’s website at www.raspberrypi.org (see Figure 1-1) presents the impetus that resulted in the Raspberry Pi. This is what they say on the About Us page:
The idea behind a tiny and affordable computer for kids came in 2006, when Eben Upton, Rob Mullins, Jack Lang and Alan Mycroft, based at the University of Cambridge’s Computer Laboratory, became concerned about the year-on-year decline in the numbers and skills levels of the A Level students applying to read Computer Science. From a situation in the 1990s where most of the kids applying were coming to interview as experienced hobbyist programmers, the landscape in the 2000s was very different; a typical applicant might only have done a little web design.
FIGURE 1-1: The Raspberry Pi official website
As a result, the founders’ stated goal was “to advance the education of adults and children, particularly in the field of computers, computer science and related subjects”.
Their answer to the problem, of course, was the Raspberry Pi, which was designed to emulate in concept the hands-on appeal of computers from the previous decade (the 1990s). The intention behind the Raspberry Pi was to be a “catalyst” to inspire students by providing affordable, programmable computers everywhere.
The Raspberry Pi is well on its way to achieving the Foundation’s goal in bettering computer education for students. However, another significant thing has happened; a lot of us older people have found the Raspberry Pi exciting. It’s been adopted by generations of hobbyists, experimenters and many others, which has driven sales into new millions of units.
While the sheer compactness of the Raspberry Pi excites, resonates and inspires adults as well as youngsters, what truly prompted its success was its low price and scope of development. Embedded Linux has always been a painful subject to learn, but the Pi makes it simple and inexpensive. Continuing education in computers gets just as big a boost as initial education in schools.
System-on-a-Chip
An SoC or system-on-a-chip is an integrated circuit (IC) that has the major components of a computer or any other electronic system on a single chip. The components include a central processing unit (CPU), a graphics processing unit (GPU) and various digital, analogue and mixed signal circuits on just one chip.
This SoC component makes highly dense computing possible, such as all the power that is shoehorned into the Raspberry Pi. Figure 1-2 shows the Broadcom chip on the Raspberry Pi 2 Model B. It’s a game-changing advance in computer architecture, enabling single-card computers that rival and often exceed the capabilities of machines that are many times their size. Chapter 8, “Operating Systems”, covers these small but mighty chips in detail.
FIGURE 1-2: Broadcom chip on the Raspberry Pi 2 Model B
The Raspberry Pi features chips that are developed and manufactured by Broadcom Limited. Specifically, the older models as well as the latest (the £4 Raspberry Pi Zero) come with the Broadcom BCN2835 and the Raspberry Pi 2 has the Broadcom BCM2836, and the new Model 3 uses the Broadcom BCM2837. The biggest difference between these two SoC ICs is the replacement of the single-core CPU in the BCM2835 with a four-core processor in the BCM2836. Otherwise, they have essentially the same architecture.
Here’s a taste of the low-level components, peripherals and protocols provided by the Broadcom SoCs:
CPU:
Performs data processing under control of the operating system (a CPU with a single core on most of the Raspberry Pi models and a CPU with four cores on the Raspberry Pi 2 and Raspberry Pi 3).
GPU:
Provides the operating system desktop.
Memory:
Permanent memory used as registers for CPU and GPU operation, storage for bootstrap software, the small program which starts the process of loading the operating system and activating it.
Timers:
Allow software to be time-dependent for scheduling, synchronising and so on.
Interrupt controller:
Interrupts allow the operating system to control all the computer resources, know when the CPU is ready for new instructions and much more (this is covered in
Chapter 8
).
General purpose input output (GPIO):
Provides layout and enables control of connections, input, output and alternative modes for the GPIO pins that enable the Raspberry Pi to manage circuits, devices, machines and so on. In short, it turns the Raspberry Pi into an embeddable control system.
USB:
Controls the USB services and provides the Universal Serial Bus protocols for input and output, thus allowing peripherals of all types to connect to the Raspberry Pi’s USB receptacles.
PCM/I
2
S:
Provides pulse code modulation (PCM, which converts digital sound to analogue sound such as speakers and headphones require) and known as Inter-IC Sound, Integrated Interchip Sound, or IIS, a high-level standard for connecting audio devices).
Direct memory access (DMA) controller:
Direct memory access control that allows an input/output device to bypass the CPU and send or receive data directory to the main memory for purposes of speed and efficiency.
I
2
C master:
Inter-integrated circuit often employed for connecting lower-speed peripheral chips to control processors and microcontrollers.
I
2
C/SPI (Serial Peripheral Interface) slave:
The reverse of the preceding bullet point. Allows outside chips and sensors to control or cause the Raspberry Pi to respond in certain ways; for example, a sensor in a motor detects it’s running hot and the controller chip causes the Raspberry Pi to make a decision on whether to reduce the motor’s speed or stop it.
SPI Interface:
Serial interfaces, accessed via the GPIO pins and allowing the daisy chaining of several compatible devices by the use of different chip-select pins.
Pulse width modulation (PWM):
A method of generating an analogue waveform from a digital signal.
Universal asynchronous receiver/transmitter (UART0, UART1):
Used for serial communication between different devices.
An Exciting Credit Card-Sized Computer
Just how powerful is the Raspberry Pi compared to a desktop PC? Certainly, it has far more computational ability, memory and storage than the first personal computers. That said, the Raspberry Pi cannot match the speed, high-end displays, built-in power supplies and hard-drive capacity of the desktop boxes and laptops of today.
However, you can easily overcome any disadvantages by hanging the appropriate peripherals on your Raspberry Pi. You can add large hard drives, 42-inch HDMI screens, high-level sound systems and much more. Simply plug your peripherals into the USB receptacles on the board or via other interfaces that are provided, and you’re good to go. Finish it off by clicking an Ethernet cable into the jack on the Raspberry Pi or sliding in a wireless USB dongle, and worldwide connectivity goes live.
You can duplicate most features of conventional computers when you attach peripherals to a Raspberry Pi, such as in Figure 1-3, and you also gain some distinct advantages over large computers, including:
The Raspberry Pi is
really
cheap—£25 retail or just £4 for the Raspberry Pi Zero.
It’s
really
small—all models are credit-card sized or smaller.
You can replace the operating system in seconds simply by inserting a new SD or microSD card for almost instant reconfiguration.
The Broadcom SoC gives the Raspberry Pi more interfaces, communications protocols and other features out of the box than conventional computers that sell for many times the price.
The GPIO pins (see
Figure 1-4
) allow the Raspberry Pi to control real-world devices that have no other method of computer input/output.
FIGURE 1-3: Peripherals attached to a Raspberry Pi 2 Model B
FIGURE 1-4: GPIO pins enable control of real world devices.
What Does the Raspberry Pi Do?
The Raspberry Pi excels as the brains for all sorts of projects. Here are some examples randomly picked from the many thousands of documented projects on the Internet. This list may inspire you in choosing some projects of your own:
Home automation
Home security
Media centre
Weather station
Wearable computer
Robot controller
Quadcopter (drone) controller
Web server
Email server
GPS tracker
Web camera controller
Coffee maker
Ham radio EchoLink server and JT65 terminal
Electric motor controller
Time-lapse photography manager
Game controller
Bitcoin mining
Automotive onboard computer
This list just scratches the surface of possible uses for the Raspberry Pi. There’s not enough room to list everything you could do, but this book gives you the information you need to come up with your own ideas. Let your own desires, interests and imagination guide you. The Raspberry Pi does the rest.
Meeting and Greeting the Raspberry Pi Board
This section begins with an introduction to the features, components and layout of the Raspberry Pi board. We show contrasts between the various models but with an emphasis on the Raspberry Pi 2. Reading this section and examining the Raspberry Pi board is like looking at a map before setting off on a journey—it gives you the lay of the land. If you know where the various important parts of the board are and how they work, it makes imagining and creating projects a lot easier because you understand the board better.
We begin with the Raspberry Pi 2 Model B (there was no Model A in the 2 series or the new 3 series). After introducing you to the Raspberry Pi 2, we’ll look at the other versions, including the Raspberry Pi 3 Model, which includes more processor speed, onboard Wi-Fi and Bluetooth.
If you want to follow along with your own board, orient it as shown in Figure 1-5, with the two rows of GPIO pins at the upper left.
GPIO Pins
The GPIO pins—the row of pins at the top of the board as it’s oriented in Figure 1-5—perform magic in tying the Raspberry Pi to the real world. Through these pins, you program the Raspberry Pi to control all sorts of devices. Chapter 12, “Input/Output”, looks at programming the Raspberry Pi and helps you understand inputs and outputs and shows methods of controlling various devices. Let’s examine these pins and get an understanding of how simple and powerful they are.
FIGURE 1-5: The Raspberry Pi 2 board with the GPIO pins at the upper left
Real-world devices—doorbells, light bulbs, model aircraft controls, lawn mowers, robots, thermostats, electric coffeepots and motors of all sorts, to name a few things—cannot normally connect to a computer or follow its orders. Through GPIO, the Raspberry Pi can do neat stuff with these real-world objects! That’s why we’re emphasising the GPIO pins; the pins enable you to do things with the Raspberry Pi that you can’t do with conventional computers.
NOTE
Being able to interface with real-world devices is not a distinction that’s unique to the Raspberry Pi; embedded computers are able to bridge this gap whereas conventional computers can’t.
We have 40 pins—two rows of 20. The bottom row of pins (left to right) consists of odd numbers: 1, 3, 5, 7, 9, 11, 13, 15, 17, 19, 21, 23, 25, 27, 29, 31, 33, 35, 37 and 39. The top are numbered 2, 4, 6, 8, 10, 12, 14, 16, 18, 20, 22, 24, 26, 28, 30, 32, 34, 36, 38 and 40.
These pins are programmable; you can even change the layout of most of the pins! The power pins cannot be rerouted.
When you add simple external circuits, it becomes possible for the Raspberry Pi to switch all sorts of things on or off. It can also sense input from devices and respond accordingly. Thanks to the Raspberry Pi’s ability to communicate in various ways—such as by wireless, by Bluetooth or on the Internet—inputs and outputs do not even have to be local. With some additional hardware, you can control devices, programs and so forth from anywhere in the world.
NOTE
Read Chapter 12 to learn about the several modes of operation for GPIO pins. The majority of the pins can be input, output or one of six special modes.
Status LEDs
The status light-emitting diodes (LEDs) are to the lower left of the GPIO pins. These tiny babies put out a good deal of light. On the Raspberry Pi 2, they are labelled (from top to bottom) PWR (power) and ACT (activity); PWR lights red and ACT lights green.
Whenever power is present to the board (that is, a micro USB plug provides 5 volts direct current (VDC) from a USB source or a wall adapter), the PWR light glows red. The ACT LED indicates that a microSD card is available, and only lights up when the Raspberry Pi accesses the card.
The Model B+ has the same arrangement as on the Model B except that the LED status lights are located on the opposite side of the board, and there are five LEDs:
ACT
(activity, green): Indicates an SD card is plugged in and accessible
PWR
(power, red): Indicates power is present
FDX
(full duplex, green): Indicates a full duplex local area network (LAN) is connected
LNK
(link, flashing green): Indicates activity is happening on the LAN
100
(yellow): Indicates a 100-Mbit/s LAN is connected (as opposed to a 10-Mbit network)
With the Model B+, the last three LEDs functions were moved to the Ethernet jack, with the FDX and 100 being combined into one LED. So flashing green on the jack shows network activity on the right LED and either solid green or yellow on the left, showing a 10-Mbits/s (megabits per second) or 100-Mbits/s network connections, respectively.
NOTE
All the Raspberry Pi models actually have five status lights; it’s just that on the B+ and Raspberry Pi 2 there are two LEDs (PWR and ACT) on one side of the board, and the network indicators are on the other side as part of the Ethernet jack.
The status LEDs give you a quick picture of what transpires on your Raspberry Pi board, especially during the boot-up process. It goes like this:
When you plug in the microUSB connector (there’s no on/off switch), the PWR LED lights red to show that power is present. The PWR LED stays lit so long as power is flowing to the board.
The ACT LED flashes green a couple of times or so, indicating an SD card is present and readable. After boot-up, this green light flashes whenever SD card access occurs.
As the powering-up process continues, the green light on the right of the Ethernet jack (Model B+ and later) come on if a network is present. The light flashes whenever there is traffic on the network. The left LED flashes green for a slow network and is solid yellow if you are connected to a 100Mbit/s network.
So, at a glance, the status LEDs tell us the board has power, the SD card is working and the network is active.
USB Receptacles
On the right-hand side of the board are the Raspberry PI 2 Model B’s four USB 2.0 ports, as shown in Figure 1-6.
FIGURE 1-6: USB 2.0 ports and Ethernet port
NOTE
The ports appear in the same way on the Model B+ but the older Model B provides only two USB receptacles.
USB receptacles—or ports, as some people incorrectly call them—allow you to plug in and run a keyboard, mouse and all sorts of other devices—even big hard drives!
Ethernet Connection
All sorts of Raspberry Pi tasks require a connection to both your local network and the Internet itself. Upgrading the operating system and the Raspberry Pi’s firmware requires Internet access. Networking is a necessity for downloading and installing programs, web surfing, using the Raspberry Pi as a media centre to deliver movies to your humungous flat-screen TV and many more reasons.
Fortunately, you have two ways of achieving network connectivity with the Raspberry Pi. The first is a wired connection using the Ethernet socket on the lower-right corner (as the board is oriented in Figure 1-5). Refer to Figure 1-6 to see what this socket looks like.
The second way of connecting involves the USB receptacles. You can use a wireless USB dongle (a dongle being a plug-in device) or a USB-to-Ethernet adapter. If you use the latter method, you can connect the Raspberry Pi to more than one network. One reason for doing this would be a typical server setup where the Raspberry Pi connects to both the Internet and a more secure local network. Using Raspbian, for example, you can turn your Raspberry Pi into a classic LAMP (standing for Linux, Apache, mySQL, PHP) server. The Raspberry Pi serves up websites with database back ends and so on, just like on much larger servers using the same software.
Using a wireless USB dongle comes in handy if you want your Raspberry Pi to be portable. With an external battery power supply and wireless access, you can carry it anywhere! Or at least anywhere with wireless access, which is true of more and more places these days.
Audio Out
On the bottom of the board is the 3.5 millimetre (mm) audio input/output jack (see Figure 1-7). Here you can plug in headphones, a computer sound card, speakers or anything thing else that takes and plays audio input.
NOTE
The Model A and Model B did not have this feature but instead had separate connectors for video and audio.
The plug that goes into the socket on the Raspberry Pi board is a four-pole plug—in this case, a tip with three rings. However, it also accepts and works with a standard three-pole mini plug like those often found on headphones and computer speakers.
NOTE
Poles are the tip and rings of conductors. Four-pole had a tip and three rings; three-pole a tip and two rings.
Figure 1-7 shows how the connector appears on the Model B+ and later, and Figure 1-8 shows the connector’s wiring.
FIGURE 1-7: The audio output socket
FIGURE 1-8: Connector for audio socket
Another of the Raspberry Pi limitations concerns quality of sound. The audio out from this connector is 11-bit (for truly good sounding music you’d want 16-bit). The High-Definition Multimedia Interface (HDMI) connector, which is described later in this chapter, has better audio but, of course, you have to have an HDMI device (like a big-screen TV) that has good speakers attached.
No worries, folks—like the limitations in Raspberry Pi power, solutions abound. For example, Adafruit sells a USB audio adapter, which works on the Raspberry Pi, for a very low price. It puts out better sound and allows for microphone input as well. This lets you use the Pi as a voice or music recorder or teach it to work via voice commands. Various computer soundboards designed specifically for the Raspberry Pi are also available
Even better, you can obtain high-quality sound using the I2S interface into an external digital-to-analogue convertor (DAC). Chapter 11, “Audio”, covers all that good stuff.
Composite Video
Using the same 3.5mm socket described in the last section, old-style composite video is also available.
When it boots up and finds a composite video device attached, the Raspberry Pi attempts to select the right resolution. Mostly it gives a usable display but sometimes it gets things wrong.
Having video composite output may seem old school in light of the modern era’s profusion of HDMI devices hanging off every wall, but it fits in with the design philosophy Raspberry Pi Foundation co-founder Eben Upton recently described. He said, “It’s a very cheap Linux PC device in the spirit of the 1980s, a device which turns your TV into a computer; plug in to TV, plug a mouse and a keyboard in, give it some power and some kind of storage, an operating system and you’ve got a PC”.
CSI Camera Module Connector
Camera modules for the Raspberry Pi give you 5-megapixel stills and 1080 high-definition video for about £16. The Camera Serial Interface (CSI) connector shown in Figure 1-9 (located between the HDMI socket and the 3.5mm audio socket) provides a place to plug the camera module into the Pi.
FIGURE 1-9: CSI and HDMI connectors
CSI connects the camera module via a 15-conductor flat flex cable. Getting this cable connected and the camera module working is a bit tricky sometimes. You can find a how-to video on the Raspberry Pi website at https://www.raspberrypi.org/help/camera-module-setup/.
However, after the cable sits in the socket properly, the camera works great. You can program it to do all sorts of neat stuff, such as take time-lapse photos and motion-triggered shots or record video footage.
HDMI
There’s nothing as fine as a nice big display showing the colourful graphical user interface (GUI) of the Raspberry Pi. A display enables you to surf the web, watch videos, play games—all the stuff you expect a computer to do. The best solution for that involves HDMI.
High-Definition Multimedia Interface (HDMI) allows the transfer of video and audio from an HDMI-compliant display controller (in our case, the Raspberry Pi) to compatible computer monitors, projectors, digital TVs or digital audio devices.
HDMI’s higher quality provides a marked advantage over composite video (such as what comes out of the audio socket on the Raspberry Pi board). It’s much easier on the eyes and provides higher resolution instead of composite video’s noisy and sometimes distorted video.
The HDMI connector on the Raspberry Pi Model B is approximately centred on the lower edge of the Raspberry Pi board (as we have it positioned in Figure 1-5). See Figure 1-9 for what it looks like.
Micro USB Power
The micro USB power connector is on the bottom left edge of the Raspberry Pi, as shown in Figure 1-10.
FIGURE 1-10: Micro USB connector used for obtaining power
The micro USB adapter brings power into the Raspberry Pi board. You might know that most smartphones use this connector type, which means you can find usable cables and wall adapters all over the place. (This is one example of how the Raspberry Pi Foundation takes users’ need for inexpensive operation into consideration.)
NOTE
You can also get a mobile version of a micro USB charging cable with an automotive power adaptor so you can power your Raspberry Pi in a car, using the built-in car power socket.
The micro USB cable supplies 5VDC to the Raspberry Pi at about 1 ampere (1A) of current for the model B. Some recommendations for the B+ mention 1.5A, but if you’re pushing heavy current through the USB ports (remember, four instead of two on the B+ and later), a 2A supply is smarter. For the Raspberry Pi 2, get at least a 2.4A supply.
Remember, there’s no switch for turning the Raspberry Pi on and off (another saving to keep the price down). You just plug and unplug the micro USB connector. Of course, with a bit of tinkering and soldering, you could add a switch to the power cable easily enough.
Storage Card
Applying power to the Raspberry Pi causes a bit of computer code stored on the board, the bootloader, to check for the presence of the SD or (in newer Raspberry Pi versions) microSD card in its slot (see Figure 1-11) and look for code on the card telling it how to start and what to load into its RAM. If no card is there or that card has no information on it (because it’s blank or corrupted) the Raspberry Pi does not start. Read more on the boot process in Chapter 8.
FIGURE 1-11: The micro SD slot on the bottom side of the Raspberry Pi 2
WARNING
Do not insert or remove an SD card while the Raspberry Pi has power attached. Doing so has a very good chance of corrupting the SD card, causing you to lose the data and programs on it.
The usual minimum size recommended for earlier editions of the Raspberry Pi was 8 gigabytes (8GB), although the original recommendation was 4GB. However, a number of people on the Internet report using 32GB cards, and at least one person even boasted of using a 128GB card. It seems, though, that any card larger than 32GB, under Raspbian at least, requires partitioning (using a software to specially format the SD).
Of course, you can hang just about any size of USB drive from one of the USB receptacles, if you use an external power supply. A terabyte would be a good start. The SD card is still needed to boot.
DSI Display Connection
Just right of the SD card slot but on top of the board is the Display Serial Interface (DSI) display connector. The DSI connector’s design accommodates a flat 15-conductor cable that drives liquid crystal display (LCD) screens. Figure 1-12 shows the connector.
FIGURE 1-12: DSI display connection
Mounting Holes
It might seem minor, but the Model B+ and later models have four mounting holes—those reinforced holes in the board. The Model B only has two. Mounting holes come in handy when you want to secure the Raspberry Pi inside a box or case with other devices.
When you add four standoff insulators, you can use these insulted holes for fastening the board with screws to the standoffs to have a nice, safe installation.
The Chips
There are two large chips situated roughly on the centre of the left of the board (when the board is oriented with the GPIO pins at the top left; see Figure 1-13). The larger one shown is the Broadcom BCM2835 or BCM2836 on the Raspberry Pi 2 or BCM2037 on the Raspberry Pi 3. The other chip provides the Ethernet protocols for networking. You’ll find more information about the what these systems-on-a-chip do in Chapter 12.
FIGURE 1-13: The SoC and USB/Ethernet chips
The Future
From its inception, the guiding principle of the Raspberry Pi was to enable and revolutionise the teaching of computer science by providing affordable, accessible hardware. It is certainly achieving this goal successfully through the widespread adoption of the Raspberry Pi as a teaching tool in schools worldwide.
The inspiration and excitement young people find, the lessons they learn and the experiments and projects they complete are significant. We are seeing the birth of a new generation of computer experts.
Something else has also happened. Those of us from prior generations—sometimes called “adults” and sometimes not—discovered the Raspberry Pi. Millions of us enthusiastically explore its incredible power and build various projects using its control functions. We, too, are learning things from this tiny computer, which takes the term “microcomputer” to a much smaller scale than those now-huge old desktops. Consequently, we are setting an example for our children. If adults can have so much fun with the Raspberry Pi, younger people realise they can as well, and so they do.
So the Raspberry Pi not only inspires the younger, student generation; it makes older generations better and more computer literate. That’s quite a gift.
What happens next? The next great movement, already in progress, is the Internet of Things. Using the Raspberry Pi, your refrigerator, your car—just about every device you can think of—can become wireless and be controlled by small, easily embedded computerised controls. More and more people will continue to adopt and adapt the means of making this automation a reality. With every new release, demand grows for the Raspberry Pi and the things it can do.
In the next few years, computer architecture will continue to shrink while it grows more capable. We yearn for a thumb drive–sized device that has a 24-core CPU running at 15GHz with 10GB of fast memory and a terabyte solid state drive, all on an SoC.
We anticipate that such a device will sport a purple Raspberry logo. It won’t be long now. The future rushes toward us.


