Preadjusted Edgewise Fixed Orthodontic Appliances E-Book
89,99 €
Mehr erfahren.
- Herausgeber: John Wiley & Sons
- Kategorie: Fachliteratur
- Sprache: Englisch
Preadjusted Edgewise Fixed Orthodontic Appliances
Explore the possibilities of preadjusted edgewise appliances in orthodontics with this essential resource
Preadjusted Edgewise Fixed Orthodontic Appliances: Principles and Practice comprehensively covers the increasingly popular preadjusted edgewise technique in orthodontics.
The book integrates clinical practice and research findings, focusing on the biomechanics and clinical management of patients with preadjusted edgewise appliances. A unique learning resource for specialists and trainees in orthodontics, the book is highly illustrated and broad in scope, covering everything from informed patient consent to clinical techniques to information about how to manage patient malocclusions. Core topics include:
- A thorough introduction to the principles of treatment planning, orthodontic biomechanics, anchorage, informed patient consent, and the dentolegal aspects of orthodontic treatment
- An exploration of the preadjusted edgewise appliance, including bracket design, bracket placement, orthodontic bonding and debonding, archwires, mini-implants (TADs) and auxiliaries
- Comprehensive description of the stages of treatment with preadjusted edgewise appliances, including alignment and levelling, controlled space closure, finishing and retention
- Information on the management of the major malocclusions (Class II, Class III, anterior open bite, deep overbite and transverse problems) with preadjusted edgewise appliances
Perfect for postgraduate dentists undergoing specialist training in orthodontics, specialist practitioners, and hospital consultant orthodontists, Preadjusted Edgewise Fixed Orthodontic Appliances: Principles and Practice will also be useful to dentists with a special interest in orthodontics, orthodontic therapists, and orthodontic nurses who seek a comprehensive manual of the most popular fixed orthodontic appliance technique.
Sie lesen das E-Book in den Legimi-Apps auf:
Seitenzahl: 1151
Veröffentlichungsjahr: 2021
Ähnliche


Table of Contents
Cover
Title Page
Copyright
Dedication
Preface
Acknowledgements
Contributors
Introduction: What is the Preadjusted Edgewise Appliance?
What Does ‘Edgewise’ Mean
What Does ‘Preadjusted’ Mean
Preadjusted Edgewise Appliance Components
Bracket Design Features
Bracket Positioning
Stages of Treatment
Conclusion
References
Section I: Principles
1 Principles of Treatment Planning
Introduction
Patient Concerns
Patient Motivation and Compliance
Handling Patient Expectations
Medical History
General Dental Health
Previous Orthodontic Treatment
Treatment Timing: When Should Treatment be Undertaken?
Problem List
Treatment Aims
Presenting the Treatment Options
How do we decide whether or not to Extract Teeth?
Space Analysis and Space Planning
Informed Consent
What Should be Included in a Treatment Plan
Treatment Mechanics
References
2 Principles of Orthodontic Biomechanics
Introduction
Basic Concepts and Principles
Newton's Laws of Motion and Static Equilibrium
Displacement of Rigid Bodies
Control of Tooth Movement
Types of Tooth Movement
Clinical Applications and Relevance
Conclusion
References
3 Anchorage
Introduction
Anchorage Value
Assessment of Anchorage Need
Classifications of Anchorage
Anchorage Control with Fixed Appliances
Anchorage Creation
Anchorage Loss
References
4 Consent
Introduction
Types of Consent
Valid Consent
Withdrawal of Consent
Treatment Options
Key Factors to be Communicated with Patients
Treatment Benefits
Treatment Risks
Effective Communication
Conclusions
References
5 Dentolegal Aspects of Orthodontic Treatment
Introduction
Advertising
The Initial Consultation
Pretreatment Records
Dentolegal and Ethical Issues that may Arise During Treatment Planning
Obtaining Consent
Dentolegal Issues Arising During Active Orthodontic Treatment
Retention
Relapse
Duty of Candour
Responding to a Complaint
References
Section II: The Preadjusted Edgewise Appliance
6 Bracket Design
The Origins of Fixed Appliance Bracket Design
Preadjusted Edgewise Straight‐wire Appliance
Straight‐wire Appliance: Bracket Prescriptions
Straight‐wire Appliance: Bracket Modifications
Acknowledgements
References
7 Bracket Placement
Introduction
Design Features of Preadjusted Edgewise Appliance Brackets
Direct versus Indirect Bonding
Direct Bonding Technique
Indirect Bonding Technique
Banding Molars and Premolars
Tips for Bracket Selection in Certain Situations
References
8 Bonding in Orthodontics
History
Bonding Procedure
Bonding to Artificial Substrates
Indirect Bonding
Bonding Adhesives
Health Risks Associated with Bonding
Effectiveness of Adhesives
Debonding
Bonded Retainers
Additional Uses of Bonding in Orthodontics
Future Possibilities of Orthodontic Bonding
Summary
Acknowledgements
Further Reading
References
9 Debonding
Introduction
Preparation
Stainless Steel Brackets
Ceramic Brackets
Self‐ligating Brackets
Lingual Appliances and Bite Turbos
Solvent Use
Electrothermal Debonding
Laser Debonding
Band Removal
Composite Resin Removal
Finishing Techniques
Iatrogenic Damage
Particulates
Conclusions
References
10 Archwires
Introduction
Properties of Archwires
Archwire Shape and Arch Form
Archwire Materials
Aesthetic Archwires
Fatigue
Corrosion of Metal Alloys
Which is the Best Aligning Archwire or Archwire Sequence?
Pain from Initial Archwires
Root Resorption from Different Archwires
Allergy to Nickel
Acknowledgements
References
11 The Use of Auxiliaries in Orthodontics
Introduction
Anchorage and Space Management
Class II Correction
Tooth Movement
Conclusion
References
12 Optimising Fixed Appliance Treatment with Orthodontic Mini‐implants
Introduction
OMI Advantages
OMI Disadvantages
Where Does OMI anchorage Come From?
Anchorage Options: Direct Versus Indirect
Key Clinical Steps Involved in OMI Usage with Fixed Appliances
Three‐dimensional Anchorage Applications
References
13 Care of Fixed Appliances
Introduction
Before Fixed Appliance Treatment
During Fixed Appliance Treatment
After Fixed Appliance Treatment
Conclusions
References
Section III: Stages of Treatment with Preadjusted Edgewise Appliances
14 Alignment and Levelling
Introduction
Anchorage Requirements and Preparation
Arch Form
Tooth Movement with Preadjusted Fixed Appliances
Alignment
Levelling
Conclusion
References
15 Controlled Space Closure
Introduction
At Completion of Alignment and Levelling
Objectives during Space Closure
Classification of Anchorage
Types of Space Closure
Sliding Mechanics with the Preadjusted Edgewise Appliance
Frictionless Mechanics with the Preadjusted Edgewise Appliance
Monitoring Space Closure
Conclusion
References
16 Finishing
Introduction
Aims and Objectives of Orthodontic Treatment
Common Errors Encountered at the Finishing Stages of Treatment
Efficient Finishing: the Importance of Diagnosis and Treatment Planning
Conclusion
References
17 Retention
Introduction
Historical background
Aetiology of Post‐treatment Changes
Reducing Relapse During Treatment
Choice of Retainers
Fixed Retainers
Removable Retainers
Responsibilities in Retention
Conclusions
Acknowledgements
References
Section IV: Management of Malocclusions with Preadjusted Edgewise Appliances
18 Management of Class II Malocclusions
Introduction
Management Options
Growth Modification
Orthodontic Camouflage
Orthodontics and Orthognathic Surgery
References
19 Management of Class III Malocclusions
Introduction
Treatment Timing for Class III Malocclusion in Relation to Facial Growth
Comprehensive, Camouflage or Compromise Treatment for Class III Cases
Managing the Class III Surgical/Orthodontic Patient with Fixed Appliances
Class III Malocclusion Occurring with Cleft Lip and/or Palate
References
20 Management of Deep Incisor Overbite
Introduction
Aetiology
Indications for Treatment
Considerations in Treatment Planning
Methods of Overbite Reduction
Appliances and Techniques for Overbite Reduction
Stability of Overbite Correction
Conclusion
References
21 Management of Anterior Open Bite
Introduction
Prevalence and Incidence
Aetiology
Characteristics
Clinical Treatment
Retention and Stability
Conclusion
References
22 Management of the Transverse Dimension
Introduction
Crossbites
Indications for Maxillary Expansion
Removable Appliances
Functional Appliances
Aligners
Fixed Appliances
Mid‐Palatal Suture
Surgical Expansion
Retention
References
Section V: Appendices
Appendix 1 Orthodontic Instruments
Appendix 2 Orthodontic Elastics and Elastomeric Materials
Introduction
Intraoral Elastic Configurations
Points of Application
Instructions for Use of Intraoral Elastics
Elastomeric Materials
Index
End User License Agreement
List of Tables
Introduction
Table 1 Design features of the Andrews straight‐wire appliance (the original...
Table 2 Vertical clearance between archwires of different dimensions and an ...
Chapter 1
Table 1.1 Information required to generate a problem list for a standard ort...
Table 1.2 Summary of space requirements in space analysis.
Table 1.3 What to include in the definitive treatment plan.
Chapter 3
Table 3.1 Force levels required for different orthodontic tooth movements (...
Chapter 6
Table 6.1 Average angulation values for Andrews' 120 naturally optimal occl...
Table 6.2 Average inclination values for Andrews' 120 naturally optimal occ...
Table 6.3 Average mesiodistal rotation values for Andrews' 120 naturally op...
Table 6.4 Straight‐wire appliance arch forms for the bracket prescriptions.
Table 6.5 Recommended vertical bracket positions for MBT Versatile+ prescri...
Chapter 7
Table 7.1 Bracket positioning chart.
Chapter 8
Table 8.1 Currently used band cements and their properties.
Table 8.2 Advantages and disadvantages of bonding over banding.
Table 8.3 Recommended methodology of bonding to composite, amalgam, gold an...
Chapter 10
Table 10.1 General ideal properties of orthodontic archwires.
Table 10.2 Table of nickel free alternatives to commonly used components dur...
Chapter 12
Table 12.1 Factors affecting OMI success rates.
Table 12.2 A comparison of direct and indirect OMI anchorage configurations.
Table 12.3 OMI usage according to three planes of anchorage.
Chapter 13
Table 13.1 Basic Periodontal Index (BPE) scoring codes.
Table 13.2 Guidance on interpretation of BPE scores.
Chapter 14
Table 14.1 Stages of preadjusted edgewise appliance treatment.
Table 14.2 Local variations in bracket positioning.
Table 14.3 Archwire cross‐sectional dimensions.
Table 14.4 Methods of space creation in orthodontics.
Chapter 15
Table 15.1 Some principles of anchorage management where the molar position ...
Table 15.2 Advantages and disadvantages of loop and sliding mechanics.
Chapter 16
Table 16.1 Parameters assessed in the ABO Grading System for Cast and Radio...
Table 16.2 Common causes of impaired space closure.
Chapter 17
Table 17.1 Advantages and disadvantages of removable and fixed retainers.
Chapter 19
Table 19.1 Factors involved in treatment planning decisions for Class III m...
Table 19.2 Tip and torque values for anterior teeth for common fixed applia...
Chapter 20
Table 20.1 Appliances and techniques for overbite reduction.
Chapter 21
Table 21.1 Average open bite for Americans aged 8 to 50 years, 1988–1991.
Table 21.2 The seven features of backward rotators.
Chapter 22
Table 22.1 Comparison of slow and rapid maxillary expansion.
Appendix 2
Table A2.1 Internal diameter of intraoral orthodontic elastics.
Table A2.2 Force exerted by intraoral elastics in use (i.e. when stretched t...
List of Illustrations
Introduction
Figure 1 Edward Hartley Angle (1855–1930). Angle was born on 1 June in the t...
Figure 2 Pierre Fauchard (1678–1761) is widely regarded as the pioneer of mo...
Figure 3 Edward Angle's ribbon arch appliance, described in 1915. The ribbon...
Figure 4 Angle's edgewise arch and bracket. The vertical slot used with the ...
Figure 5 The original alignment bracket was intended for use on the incisors...
Figure 6 The tie brackets were originally intended for use on the premolar t...
Figure 7 (a) The rectangular slot had its greatest dimension in the horizont...
Figure 8 Charles Henry Tweed (1895–1970). In addition to Dr Angle, the name ...
Figure 9 A rectangular archwire stressed in torsion, i.e. torque has been ap...
Figure 10 (a) Key I: molar relationship. (b) Key II: crown angulation. Crown...
Figure 11 (a) In–out bracket thickness. The buccolingual (labiopalatal) thic...
Figure 12 Second molar tube offsets.
Figure 13 The original Andrews bracket had the mesiodistal crown tip built i...
Figure 14 With many modern bracket systems, the tip is now built into the an...
Figure 15 (a) Torque in the face of a bracket. (b) Torque in the base of the...
Figure 16 Andrews favoured torque in the base of the bracket as it allowed a...
Figure 17 Modern preadjusted edgewise systems predominantly use twin bracket...
Figure 18 Archwire cross‐sections commonly used with preadjusted edgewise ap...
Figure 19 Components of modern preadjusted edgewise brackets. Lateral and fr...
Figure 20 Bracket clearance (play): (a) first‐order clearance; (b) second‐or...
Figure 21 The bearing points are the points at which an archwire transmits f...
Figure 22 The mesiodistal play for a wide twin bracket will be less than for...
Figure 23 The facial axis (FA)‐point and the long axis of the clinical crown...
Figure 24 Andrews plane. Assuming a level sagittal occlusal curve (relativel...
Chapter 1
Figure 1.1 Algorithm for devising a definitive treatment plan. The adage ‘If...
Figure 1.2 Clear masks negate some of the problems with communication during...
Figure 1.3 (a–d) Pretreatment photographs and lateral cephalometric radiogra...
Figure 1.4 The nasolabial angle (NLA) may be divided into an upper component...
Figure 1.5 (a) Retroclined upper lip, which is usually a sign of lack of sup...
Figure 1.6 (a) Maxillary incisor exposure in relation to the upper lip in re...
Figure 1.7 A maxillary occlusal plane cant, which is down on the patient's r...
Figure 1.8 (a) The inclination of the labial crown face of the maxillary inc...
Figure 1.9 Mandibular dental midline is significantly to the right of the ma...
Figure 1.10 (a) Mandibular incisor mesiodistal angulation is significantly a...
Figure 1.11 Patients with a thin gingival biotype often present with a ‘wash...
Figure 1.12 Gingival recession evident in the central incisor region and buc...
Figure 1.13 A relatively well‐interdigitated dental occlusion.
Figure 1.14 (a) Missing maxillary lateral incisors, with treatment undertake...
Figure 1.15 Dental arch crowding should be measured in relation to the arch ...
Figure 1.16 Increased occlusal curves are due to slipped contact points in t...
Figure 1.17 Bodily incisor retraction by a distance requires the same amount...
Figure 1.18 Correcting the inclination of retroclined maxillary incisors req...
Figure 1.19 Teeth that are angulated tend to occupy slightly more space in t...
Chapter 2
Figure 2.1 Three‐dimensional spatial planes and axes of rotation as a frame ...
Figure 2.2 Vector addition with forces working along the same line of action...
Figure 2.3 Vector addition with forces acting along different lines of actio...
Figure 2.4 Force vector components may be analysed and their directions iden...
Figure 2.5 Leonardo da Vinci studied the flight of birds in terms of biomech...
Figure 2.6 Professor Charles J. Burstone (1928–2015).
Figure 2.7 A force acting through the centre of mass of a free body in a vac...
Figure 2.8 In a hypothetical situation, if a single force was able to act di...
Figure 2.9 Location of the centre of resistance (CR). Analytical investigati...
Figure 2.10 Location of the centre of resistance (CR) depends on alveolar bo...
Figure 2.11 A force acting at a distance from the centre of mass of a free b...
Figure 2.12 The moment of a force (MF) is equal to the product of the force ...
Figure 2.13 The direction of the moment may be found by following the line o...
Figure 2.14 The perpendicular distance from the line of action of the force ...
Figure 2.15 The magnitude of a force couple is the product of the magnitude ...
Figure 2.16 (a) The moment created by a force couple is always round the cen...
Figure 2.17 The magnitude of the couple depends on the magnitude of the forc...
Figure 2.18 Two lines may be constructed from equivalent points of the tooth...
Figure 2.19 Sir Isaac Newton (1642–1727).
Figure 2.20 Leonhard Euler (1707–1783).
Figure 2.21 Michel Chasles (1793–1880).
Figure 2.22 A single point force applied to the crown of a maxillary canine ...
Figure 2.23 Portrait of Professor Richard Evelyn Donohue Bishop (1925–1989)....
Figure 2.24 Translation (bodily movement) of a rigid body by first rotating ...
Figure 2.25 Bodily tooth movement along an archwire with edgewise appliances...
Figure 2.26 (a) Simple tipping of the maxillary incisor from a single point ...
Figure 2.27 Extension hook integrated into a canine bracket. Theoretically, ...
Figure 2.28 Moment‐to‐force ratios. The force applied to a tooth (F) will le...
Figure 2.29 Relationship between moment‐to‐force ratio and the type of tooth...
Figure 2.30 The concept of bodily movement from a force couple applied to th...
Figure 2.31 (a, b) Palatal root ‘torquing’ auxiliaries on the maxillary inci...
Figure 2.32 Types of tooth movement. The centre of rotation is shown as a bl...
Figure 2.33 Burstone's intrusion arch is an example of a one‐couple force sy...
Figure 2.34 Bracket width has important biomechanical considerations for too...
Figure 2.35 Applying space‐closing forces by sliding mechanics on an arch th...
Figure 2.36 Tooth movement along an archwire with sliding mechanics. The dia...
Figure 2.37 During sliding mechanics, when the bracket slots are moving alon...
Figure 2.38 In sliding mechanics for space closure, the applied space‐closin...
Figure 2.39 Critical contact angle for binding (θc). The important parameter...
Figure 2.40 Comparison of sliding mechanics and closing loop mechanics for s...
Figure 2.41 (a) The T‐loop is a favoured closing loop design. Its design per...
Figure 2.42 (a) When a closing loop is activated and tied into position, if ...
Chapter 3
Figure 3.1 Fauchard's ‘Le Bandeau’ arch.
Figure 3.2 Intermaxillary anchorage can be achieved by using intraoral elast...
Figure 3.3 Forsus™ appliance, a non‐compliance auxiliary, for the treatment ...
Figure 3.4 A stainless steel ligature wire (in green) can be used to increas...
Figure 3.5 Piggyback NiTi wire (in green) to align upper canine.
Figure 3.6 A two‐spur torque auxiliary by TP Orthodontics™ (a) can be used t...
Figure 3.7 Retraction of upper anterior teeth: (a) en masse retraction; (b) ...
Figure 3.8 The PASS technique. (a) The cross buccal tube. (b) When the archw...
Figure 3.9 (a) High‐pull headgear; (b) low‐pull headgear; (c) straight‐pull ...
Figure 3.10 Facemask appliance.
Figure 3.11 Push mechanics by using open coil spring to move upper left cani...
Figure 3.12 Hugo space bar auxiliary (a) can be used to create space for the...
Figure 3.13 Binding of archwire (BI) with the bracket corners starts when th...
Figure 3.14 When θ is much greater than θc, sliding and tooth movement will ...
Figure 3.15 Non‐sliding mechanics by using T‐loop for retraction of upper ca...
Figure 3.16 Non‐sliding mechanics by using T‐loops for en masse retraction o...
Figure 3.17 Segmental arch mechanics for retraction of upper anterior teeth....
Figure 3.18 Lip bumper appliance.
Figure 3.19 Lingual arch appliance.
Figure 3.20 Arch stop.
Figure 3.21 Nance palatal arch appliance.
Figure 3.22 Chromosome arch.
Figure 3.23 Pendulum appliance.
Chapter 4
Figure 4.1 Class I typodont models.
Figure 4.2 Incisors with tapered crown morphology.
Figure 4.3 Interproximal spaces, particularly evident between the lower inci...
Figure 4.4 Enamel decalcification.
Figure 4.5 Mild root resorption.
Figure 4.6 Severe root resorption.
Figure 4.7 Susceptible root morphologies with a tendency towards external ap...
Figure 4.8 Gingival recession.
Figure 4.9 Gingivitis.
Figure 4.10 Periodontally compromised teeth.
Figure 4.11 Non‐vital tooth.
Figure 4.12 Patient information leaflets. Source: British Orthodontic Societ...
Figure 4.13 Kesling (diagnostic) set‐up plaster models.
Figure 4.14 Three‐dimensional images. Source: based on Barreto MS, Faber J, ...
Chapter 5
Figure 5.1 Complaints received about orthodontic treatment by members of Den...
Chapter 6
Figure 6.1 Le Bandeau (diminutive of the French word
bande
, which translates...
Figure 6.2 Appareil de Schangé. Jean M.A. Schangé used the features of a met...
Figure 6.3 Edward H. Angle (1855–1930) known as the father of orthodontics....
Figure 6.4 Angle's E‐Arch appliance. Developing on the features of the Appar...
Figure 6.5 Andrews defined the facial axis (FA) point as the target for brac...
Figure 6.6 Dr Andrews acknowledged that there was a range of normal and this...
Figure 6.7 The measurements made by Andrews of each tooth in the sample of 1...
Figure 6.8 The average values for angulation (tip) and inclination (torque) ...
Figure 6.9 Upper typodont with conventional ligation brackets ligated with b...
Figure 6.10 Damon Q self‐ligating lower right canine bracket showing sliding...
Figure 6.11 Examples of stainless steel brackets. Note that images are not t...
Figure 6.12 Examples of ceramic brackets. Note that images are not to scale;...
Figure 6.13 Adhesive pre‐coated APC bracket options from 3M. Note that image...
Figure 6.14 Examples of molar tubes. Note that images are not to scale; plea...
Figure 6.15 Typodont with Quick ligature on the upper left central incisor a...
Chapter 7
Figure 7.1 Key components of an orthodontic bracket.
Figure 7.2 (a) Upper right central incisor demonstrating the long axis of th...
Figure 7.3 (a) Upper right first permanent molar demonstrating the LACC (blu...
Figure 7.4 Slot siting features in mid‐transverse plane.
Figure 7.5 (a) Slot siting features in the mid‐sagittal plane of a premolar....
Figure 7.6 Slot siting features in the mid‐sagittal plane of a molar.
Figure 7.7 Bracket positioning of the right maxillary central incisor in the...
Figure 7.8 Bracket height gauge to determine the vertical position of the br...
Figure 7.9 Upper right central incisor Damon bracket with a jig to determine...
Figure 7.10 (a) A premolar bracket placed too far mesially on the upper righ...
Figure 7.11 (a) Brackets placed in ideal positions using bonding resin. (b) ...
Figure 7.12 Elastomeric separators may be placed with separating pliers (see...
Figure 7.13 Buccal view of a molar band in the correct vertical position wit...
Figure 7.14 Occlusal view of a well‐adapted molar band with the buccal tube ...
Chapter 8
Figure 8.1 Bands cemented to upper first and second permanent molars with GI...
Figure 8.2 Chronological evolution in orthodontic bonding (1970 to present)....
Figure 8.3 (a) Brackets: lower arch, stainless steel; upper arch, ceramic. (...
Figure 8.4 Dri‐Aids used to control saliva flow from the parotid duct.
Figure 8.5 Scanning electron microsopy image of typical etch surface with 37...
Figure 8.6 Bonding sequence: (a) enamel etching with 37% phosphoric acid gel...
Figure 8.7 Adhesive pre‐coated (a) stainless steel bracket base (MBT prescri...
Figure 8.8 Bracket height measuring gauges: (a) Boone; (b) 3M.
Figure 8.9 Light source positioned close to bracket for curing of adhesive....
Figure 8.10 (a) Maxillary right lateral incisor in crossbite. (b) Temporary ...
Figure 8.11 Fluoride mouthrinse.
Figure 8.12 Brackets and molar tubes positioned in thermoplastic tray prior ...
Figure 8.13 Examples of (a) chemical‐cured (Rely‐a‐bond) and (b) light‐cured...
Figure 8.14 (a) Conventional and (b) resin‐modified glass ionomer cements.
Figure 8.15 Self‐etching primer.
Figure 8.16 Tungsten carbide bur.
Figure 8.17Figure 8.17 Tubes bonded to lower first and second permanent mola...
Figure 8.18 Debonding sequence: (a) debonding pliers applied to bracket; (b)...
Figure 8.19 Stainbuster burs.
Figure 8.20 Enamel demineralisation visible on several teeth following brack...
Figure 8.21 Fluoride varnish.
Figure 8.22 Tooth Mousse.
Figure 8.23 Upper bonded retainer.
Figure 8.24 Light‐cured adhesive for bonded retainer.
Chapter 9
Figure 9.1 Debonding pliers being used to remove metal brackets with the bea...
Figure 9.2 The entire archwire and brackets can be removed in one piece. Not...
Figure 9.3 (a) Band‐removing pliers can be placed on the buccal aspect to br...
Figure 9.4 A slow‐speed handpiece with a tungsten carbide bur is used parall...
Figure 9.5 This patient had been lost to follow‐up and attended requesting d...
Figure 9.6 Pre‐existing enamel defects prior to bond‐up.
Chapter 10
Figure 10.1 Stress–strain curves, force‐deflection curve and the physical pr...
Figure 10.2 (a) Cantilever test: this is the simplest beam test and involves...
Figure 10.3 Force deflection curve comparing stainless steel, nitinol (marte...
Figure 10.4 Stress–strain curve showing superelasticity due to a stress‐indu...
Figure 10.5 Loading and unloading curves of austenitic active nickel titaniu...
Chapter 11
Figure 11.1 Class II (
left
) and Class III (
right
) elastics.
Figure 11.2 Class II elastics with vertical component to extrude molars (
lef
...
Figure 11.3 Asymmetrical elastics including anterior cross elastic for corre...
Figure 11.4 Vertical elastics for finishing and detailing occlusion.
Figure 11.5 Transpalatal arch (
left
) and variation to allow greater activati...
Figure 11.6 Transpalatal arch with Nance acrylic button.
Figure 11.7 Use of a hay‐rake palatal arch to discourage a digit‐sucking hab...
Figure 11.8 Bluegrass appliance.
Figure 11.9 Fixed space maintainers to hold space for eruption of ectopic se...
Figure 11.10 Same case as Figure 11.9showing successful eruption of the uppe...
Figure 11.11 Lingual arch used in case with mild to moderate crowding in low...
Figure 11.12 Use of headgear to create space for unerupted canine.
Figure 11.13 Use of Herbst appliance for correction of a Class II malocclusi...
Figure 11.14 Forsus™ appliance.
Figure 11.15 Powerscope 2™ appliance.
Figure 11.16 Use of nickel titanium push coil to create space for a palatall...
Figure 11.17 An activated elastomeric ligature (
left
) and nickel titanium cl...
Figure 11.18 L loop (
left
) and Sandusky loop (
right
) for space closure.
Figure 11.19 Use of double delta loop for simultaneous overjet and overbite ...
Figure 11.20 Ricketts utility arch (
left
) and Burstone intrusion arch (
right
Figure 11.21 Use of sectional mechanics in a case with root resorption of th...
Figure 11.22 Use of TMA sectional archwires to erupt impacted maxillary cani...
Figure 11.23 Begg‐type torquing auxiliary being used in third stage of treat...
Figure 11.24 Use of torquing spurs to apply palatal root torque to upper cen...
Figure 11.25 Kobayashi hook being ligated with figure‐of‐eight tie.
Figure 11.26 Soldered and crimpable hooks used in a case being prepared for ...
Figure 11.27 Use of ballista spring to mechanically erupt a palatally impact...
Figure 11.28 Piggyback archwire to align canine once erupted in palate in ca...
Chapter 12
Figure 12.1 (a) Reformatted CBCT view used to assess the lower premolar root...
Figure 12.2 Pretreatment panoramic radiograph of the same patient as Figure ...
Figure 12.3 (a) Photograph of elastomeric traction between a buccal OMI (ins...
Figure 12.4 Photograph of indirect anchorage of the upper central incisor to...
Figure 12.5 (a) Photograph at the start of ‘oblique’ elastomeric traction be...
Figure 12.6 (a) Photographs of a patient with hypodontia requiring protracti...
Figure 12.7 (a) Photograph of a patient requiring protraction of the second ...
Figure 12.8 (a) Intraoral scan of a dental model of the maxillary arch inclu...
Figure 12.9 Reformatted view of a maxillary CBCT where a virtual OMI (cyan) ...
Figure 12.10 Photograph of a mid‐palate anchored appliance used to protract ...
Figure 12.11 (a, b) Pretreatment photograph and lateral cephalogram of an ad...
Figure 12.12 (a, b) Photographs of a 17‐year‐old male patient with a recentl...
Figure 12.13 (a) Photograph of an orthognathic patient requiring substantial...
Figure 12.14 Photographs of an adult female with a downwards cant of the max...
Figure 12.15 Photographs taken (a) on insertion of a MSE rapid maxillary exp...
Chapter 13
Figure 13.1 The anatomy of a smooth surface enamel white spot lesion (early ...
Figure 13.2 (a–c) Extensive white spot lesions with poor oral hygiene, follo...
Figure 13.3 Gingival inflammation with fixed appliances
in situ
.
Figure 13.4 Orthodontic Plaque Index (OPI) scores (after Berberhold et al.
5
)...
Figure 13.5 Miller's classification of recession defects. Class I: recession...
Figure 13.6 (a, b) Example of a rotation–oscillation electric toothbrush for...
Figure 13.7 (a, b) Example of rotation–oscillation electric toothbrush aimed...
Figure 13.8 Toothbrush incorporating a ‘bracket groove’, a special groove de...
Figure 13.9 (a) A toothbrush with the bristles arranged into a V‐shape can f...
Figure 13.10 Travel toothbrush.
Figure 13.11 (a) Disclosing tablets. (b) Visible feedback of brushing effect...
Figure 13.12 Interdental cleaning aids, such as interdental brushes (a, b), ...
Figure 13.13 Various chlorhexidine formulations.
Figure 13.14 Duraphat high‐fluoride toothpaste (2800 or 5000 ppm), Fluorigar...
Figure 13.15 GC Tooth Mousse (CPP‐ACP for application twice a day after brus...
Figure 13.16 Orthodontic relief wax. These are available in different flavou...
Chapter 14
Figure 14.1 (a) Bimaxillary dental proclination with spacing in the dental a...
Figure 14.2 (a, b) Pretreatment views demonstrating proclined maxillary cent...
Figure 14.3 Comparative root surface area (mm
2
) of the permanent dentition, ...
Figure 14.4 Headgear, including safety features. (a) Headgear components: he...
Figure 14.5 The three standard arch forms: Bonwill–Hawley, catenary, and tri...
Figure 14.6 Arch forms described by Chuck: tapered, square, and ovoid.
Figure 14.7 (a) Tipping movements result from compressive forces on diagonal...
Figure 14.8 (a) Frontal resorption occurs when using light orthodontic force...
Figure 14.9 Multiloop archwire: this image shows classic Begg treatment.
Figure 14.10 Archwire reinforcing sleeves. (a) Closed coil spring is very th...
Figure 14.11 The maxillary dental arch is relatively well aligned and a stif...
Figure 14.12 (a, b) A stiff 0.018‐inch stainless steel base archwire has bee...
Figure 14.13 Crimpable split tubes, which may be crimped onto the archwire w...
Figure 14.14 A small bead of flowable composite resin, known as a composite ...
Figure 14.15 Anterior bite opening turbos (turbo props).
Figure 14.16 Glass ionomer cement bonded to (a) occlusal surfaces of maxilla...
Figure 14.17 (a) Deep incisor overbite malocclusion. (b) Mandibular arch has...
Figure 14.18 Bracket slot dimensions and rectangular archwire dimensions in ...
Figure 14.19 (a) Multistrand stainless steel archwire showing cross‐section....
Figure 14.20 Laceback placement. (a) Long ligatures are used, and tied with ...
Figure 14.21 A laceback will serve to maintain the sagittal position of the ...
Figure 14.22 A twisted tie‐back.
Figure 14.23 (a) Coon's ligature‐locking pliers. (b) These have a reverse ac...
Figure 14.24 Elastomeric chain that is slightly active may be used to tie ba...
Figure 14.25 (a) To align teeth that are vertically out of position, an elas...
Figure 14.26 The Kobayashi ligature's legs are welded together to form a hel...
Figure 14.27 (a) A severely rotated lower left first premolar, with the brac...
Figure 14.28 A cinch refers to the placement of an acute bend (usually at ap...
Figure 14.29 Cinching an archwire without exposing the end to an open flame....
Figure 14.30 Cinching an archwire with exposure of the end to an open flame....
Figure 14.31 (a) A distal‐end bend back in a vertical and gingival direction...
Figure 14.32 A split stop, which may be crimped onto the archwire as it exit...
Figure 14.33 (a, b) The distal ends of the archwire are cut to the appropria...
Figure 14.34 (a) Upper archwires tend to have three identifying marks, with ...
Figure 14.35 Elastomeric modules are available in different colours. Silver ...
Figure 14.36 Pre‐stretching elastomeric modules. (a) Whilst holding the modu...
Figure 14.37 (a) Correct holding of an elastomeric module requires the mosqu...
Figure 14.38 (a–g) Standard ligation of elastomeric modules, placing it arou...
Figure 14.39 (a–f) Figure‐of‐eight ligation of elastomeric module.
Figure 14.40 (a) Stainless steel ligatures are held in Mathieu pliers. (b) T...
Figure 14.41 (a) Lower left lateral incisor is mesiolingually rotated. (b) T...
Figure 14.42 (a, b) Elastomeric modules may be removed carefully using a den...
Figure 14.43 Stainless steel ligatures may be removed by cutting the plain s...
Figure 14.44 (a, b) With the pivot point between the posterior teeth, the pl...
Figure 14.45 (a) Non‐extraction alignment of the lower arch on initial bondi...
Figure 14.46 Interproximal or interdental enamel reduction (IPR or IDR), als...
Figure 14.47 A transpalatal arch (TPA) with an omega loop is shown combined ...
Figure 14.48 A lingual arch.
Figure 14.49 (a, b) Sectional lower fixed appliance to retract the forward a...
Figure 14.50 A stopped arch. (a) A chinagraph pencil is used to mark the pos...
Figure 14.51 (a) Space creation for upper left lateral incisor, which was in...
Figure 14.52 (a) Upper second premolar crowded palatally and in crossbite. (...
Figure 14.53 (a–g) Some patients present with a reverse incisor overjet that...
Figure 14.54 (a) Narrow V‐shaped maxillary arch. (b) Following active rapid ...
Figure 14.55 (a, b) Hypoplastic maxilla in a severe skeletal Class III with ...
Figure 14.56 Transpalatal arch (TPA) with hooks soldered to its arms, which ...
Figure 14.57 (a) Maxillary canines being aligned with elastomeric thread/str...
Figure 14.58 Vertical steps bent into the base archwire adjacent to the brac...
Figure 14.59 (a) An auxiliary cantilever spring may be used to generate the ...
Figure 14.60 (a) Ligature cutters may be used to peel back and remove the bu...
Figure 14.61 (a, b) A low (inferiorly attached), thick and fleshy frenal att...
Figure 14.62 (a, b) A low, thick frenal attachment with maxillary dental mid...
Figure 14.63 (a) First‐order horizontal bend to buccally offset a maxillary ...
Figure 14.64 (a–c) Third‐order ‘torquing’ bends for individual teeth may be ...
Figure 14.65 (a) Light‐wire pliers. These pliers have two slender beaks, one...
Figure 14.66 Continuous buccal segment torque. (a) Tweed torquing pliers are...
Figure 14.67 Progressive buccal segment torque. (a) This torquing activation...
Figure 14.68 Bending a reverse curve of Spee in mandibular steel archwire. (...
Figure 14.69 (a) Piezo‐cut in the buccal cortical plate. (b) Piezo‐cuts in t...
Chapter 15
Figure 15.1 Ideal aesthetic upper incisor inclination. Judged clinically, wi...
Figure 15.2 A 0.19 × 0.025‐inch archwire in a 0.022‐inch slot. (a) Theoretic...
Figure 15.3 Extension hooks, shown anteriorly on the maxillary archwire, are...
Figure 15.4 A central incisor bracket viewed in profile view with an engaged...
Figure 15.5 Customisation of the arch form is facilitated by the use of clea...
Figure 15.6 (a) Rigid archwires help to control mesial molar tipping and mes...
Figure 15.7 Space closing forces are usually applied between a hook on the a...
Figure 15.8 Space closing forces can be applied using a number of methods. (...
Figure 15.9 A force measuring gauge. This device can be used to measure the ...
Figure 15.10 (a) The single traction technique. (b) The double traction tech...
Figure 15.11 (a) A TAD has been placed high to generate a larger component o...
Figure 15.12 Various loop designs, other than the T‐loop, exist: (a) reverse...
Figure 15.13 The shape and size of a simple T‐loop made from 0.017 × 0.025‐i...
Figure 15.14 Activation of a T‐loop is achieved by pulling the wire through ...
Figure 15.15 If gable bends (arrows) are placed into a passive T‐loop as sho...
Figure 15.16 If gable bends (arrows) are placed into a passive T‐loop as sho...
Chapter 16
Figure 16.1 Alignment errors evident, especially the incisor and premolar re...
Figure 16.2 Case photographs demonstrating the successful use of asymmetrica...
Figure 16.3 Sufficient space has been created in the upper lateral incisor r...
Figure 16.4 (a) An incisor or canine torquing auxiliary can be formed at the...
Chapter 17
Figure 17.1 Original Hawley design: (a) occlusal view; (b) anterior view to ...
Figure 17.2 Clear plastic retainer: (a) occlusal view; (b) anterior view.
Figure 17.3 Twistflex retainer bonded to every tooth. This is a flexible ret...
Figure 17.4 Canine and canine‐only retainer: a stiffer stainless‐steel wire ...
Figure 17.5 Nickel titanium CADCAM retainer. This is very well customised to...
Figure 17.6 Articulated stainless steel chain. This is easy to place at chai...
Figure 17.7 Hawley retainer: (a) upper; (b) lower.
Figure 17.8 Hawley retainer with prosthetic tooth replacing the upper right ...
Figure 17.9 Hawley retainer with aesthetic Clearbow®.
Figure 17.10 Spring‐type retainer called a ‘barrer appliance’ with active fo...
Figure 17.11 Positioner.
Chapter 18
Figure 18.1 Class II division 1 (
top
) and Class II division 2 (
bottom
) maloc...
Figure 18.2 Treatment strategies in the management of Class II malocclusion....
Figure 18.3 Cephalometric radiographs showing the correction of a Class II d...
Figure 18.4 Management of a Class II division 1 malocclusion in the late mix...
Figure 18.5 Treatment of a severe Class II division 2 case with a Twin Block...
Figure 18.6 An 11‐year‐old girl with a significant Class II division 1 maloc...
Figure 18.7 A 14‐year‐old male presented with a Class II division 1 malocclu...
Figure 18.8 The Forsus™ module comprises right and left springs inserted int...
Figure 18.9 When using the Forsus™ module the position of the lower male com...
Figure 18.10 A 12‐year‐old female presented with a Class II division 1 maloc...
Figure 18.11 A 13‐year‐old male presented with a Class II division 2 maloccl...
Figure 18.12 A 13‐year‐old male presented with a Class II division 1 maloccl...
Figure 18.13 Twelve‐year‐old identical twin girls with significant Class II ...
Figure 18.14 A 15‐year‐old case with Class II division 2 on a mild Class II ...
Figure 18.15 A 14‐year‐old female in the permanent dentition with a Class II...
Figure 18.16 Average post‐treatment displacement and angular changes followi...
Figure 18.17 Typical sequence of Pendulum appliance effects. Panels are arra...
Figure 18.18 A 14‐year‐old female in the permanent dentition presented with ...
Figure 18.19 A 14‐year‐old female in the permanent dentition presented with ...
Figure 18.20 A 15‐year‐old female presented in the permanent dentition with ...
Figure 18.21 An adult patient presenting with a Class II division 2 type mal...
Figure 18.22 An adult patient presenting with a Class II division 1 type mal...
Chapter 19
Figure 19.1 (a, b) Class III malocclusion associated with maxillary retrusio...
Figure 19.2 (a, b) Class III malocclusion associated with mandibular prognat...
Figure 19.3 Class III malocclusion associated with reduced vertical facial h...
Figure 19.4 Class III malocclusion associated with increased vertical facial...
Figure 19.5 Class III malocclusion associated with facial asymmetry due to u...
Figure 19.6 Crowding, rotations, spacing and impacted UR3, UL3 in a patient ...
Figure 19.7 Class III malocclusion that had relapsed following treatment due...
Figure 19.8 Growth in a patient with Class III malocclusion from age 14 (a) ...
Figure 19.9 A 15‐year‐old patient with a Class III malocclusion where furthe...
Figure 19.10 A 13‐year‐old patient with a Class III malocclusion and hypodon...
Figure 19.11 Lower canine brackets swapped to reverse tip values in a case b...
Figure 19.12 Self‐ligating brackets being used for Class III camouflage trea...
Figure 19.13 Class III case in the space closure stage following extraction ...
Figure 19.14 Class III patient at the end of camouflage orthodontic treatmen...
Figure 19.15 Compromise treatment with space closure being undertaken on a r...
Figure 19.16 A 16‐year‐old patient with cephalometric prediction of outcome ...
Figure 19.17 Patient on completion of presurgical orthodontics. Note the int...
Figure 19.18 Patient following bimaxillary surgery with lateral cephalogram ...
Figure 19.19 Patient on completion of post‐surgical orthodontics (same patie...
Figure 19.20 Patient at two years post surgery showing good stability (same ...
Figure 19.21 Class III malocclusion in a patient with unilateral cleft lip a...
Chapter 20
Figure 20.1 (a) A Class I incisor relationship with a normal overbite. (b) T...
Figure 20.2 (a) Mandibular incisors impinging on the palatal mucosa. (b) Max...
Figure 20.3 (a, b) Traumatic overbite with mandibular incisors causing traum...
Figure 20.4 (a) Lateral cephalometric radiograph of a patient with a forward...
Figure 20.5 Retroclination of proclined maxillary incisors towards the corre...
Figure 20.6 The anterior bite plane works by allowing eruption of the poster...
Figure 20.7 The Nudger appliance. Finger springs, in addition to headgear, a...
Figure 20.8 (a) Pretreatment Class II malocclusion with increased incisor ov...
Figure 20.9 Banding the mandibular second molars to aid in arch levelling.
Figure 20.10 (a) If the canine teeth are distally angulated, engagement of t...
Figure 20.11 Counterforce nickel titanium archwire.
Figure 20.12 The relationship between an intrusive force to the centre of re...
Figure 20.13 Ricketts' utility arch.
Figure 20.14 Burstone's intrusion arch.
Figure 20.15 Bite turbos (turbo props) are bonded to the palatal aspect of t...
Figure 20.16 (a) Maintaining or creating an increased curve of Spee prior to...
Figure 20.17 (a, b) Pretreatment photographs of a patient with a severe Clas...
Figure 20.18 (a) Lower labial segment subapical setdown osteotomy. (b) Mandi...
Figure 20.19 Incisor edge–centroid relationship. The dot in the maxillary in...
Chapter 21
Figure 21.1 Saddle angle.
Figure 21.2 An 18‐year‐old male presenting with a typical long face (increas...
Figure 21.3 Same patient as in Figure 21.2 showing anterior open bite with a...
Figure 21.4 An 11‐year‐old patient with an anterior open bite. High‐pull hea...
Figure 21.5 An 11‐year‐old patient with an anterior open bite. An attempt at...
Figure 21.6 Patient with an anterior open bite treated with Invisalign thera...
Figure 21.7 Patient with an anterior open bite. Reverse‐curve nickel titaniu...
Figure 21.8 Management of a patient with anterior open bite using temporary ...
Figure 21.9 Adult patient with a skeletal and dental open bite. Maxillary de...
Figure 21.10 Surgical glossectomy of the tongue. Anterior open bite controll...
Chapter 22
Figure 22.1 (a–c) A bilateral buccal crossbite with anterior crossbite, with...
Figure 22.2 Upper removable appliance with a split acrylic plate and midline...
Figure 22.3 Upper removable appliance with a Coffin spring for transverse ar...
Figure 22.4 (a) A Function Regulator type II (FR‐II) appliance, part of a gr...
Figure 22.5 If headgear is to be used for extraoral anchorage or traction, c...
Figure 22.6 (a–d) A 1‐mm diameter round stainless steel jockey arch
in situ
...
Figure 22.7 Transpalatal arch (TPA) with arms extended to the premolars.
Figure 22.8 A cross elastic applied from the buccal hook of the upper right ...
Figure 22.9 The W‐arch (Porter expansion arch). The appliance may be activat...
Figure 22.10 Three‐pronged pliers.
Figure 22.11 A quadhelix appliance in a cleft patient. The appliance has bee...
Figure 22.12 A removable quadhelix appliance. This appliance inserts into tu...
Figure 22.13 The activating key of an RME appliance may be attached to a han...
Figure 22.14 (a) Upper standard occlusal radiograph taken before treatment. ...
Figure 22.15 Hyrax screw with laser‐marked directional arrow and maximum pit...
Figure 22.16 (a, b) A banded RME appliance on the working model and fitted i...
Figure 22.17 (a–d) The same appliance following three weeks of activation. T...
Figure 22.18 A bone‐borne transverse palatal expander.
Figure 22.19 Intraoperative view of SARPE procedure.
Figure 22.20 A large maxillary dental midline diastema occurs with the expan...
Figure 22.21 Segmental palatal osteotomies following a Le Fort I maxillary o...
Appendix 1
Figure A1.1 Adams pliers. Also known as universal pliers, these were designe...
Figure A1.2 Band crimping pliers. These are designed to crimp the gingival m...
Figure A1.3 (
Top
) Band pusher. Developed by the orthodontist John Valentine ...
Figure A1.4 Bracket placement tweezers. Used to hold, position and place bra...
Figure A1.5 Bracket‐removing pliers. Anterior bracket‐removing pliers have a...
Figure A1.6 Contouring pliers. A convex tip fits into an opposing concave ti...
Figure A1.7 Coon's ligature locker. These pliers tie a metal ligature with t...
Figure A1.8 Crimpable hook pliers. These are used to hold, position and crim...
Figure A1.9 De La Rosa contouring pliers with grooves. These may be obtained...
Figure A1.10 Distal end cutter. This useful wire cutter has its cutting edge...
Figure A1.11 Dividers. This is a type of compass with two pointed arms joine...
Figure A1.12 Flat plastic. This instrument is designed for placing and conto...
Figure A1.13 Hammerhead NiTi distal end bend back pliers. These may be used ...
Figure A1.14 Individual torquing pliers. A pair of pliers with one fitting r...
Figure A1.15 Ligature cutter. This wire cutter has two tapering pointed oppo...
Figure A1.16 Ligature director (tucker). This instrument has a straight tip ...
Figure A1.17 Light wire pliers. These have a round beak and opposing pyramid...
Figure A1.18 Loop‐forming pliers. These were developed by Charles Tweed. The...
Figure A1.19 Loop‐forming pliers (large). These larger loop‐forming pliers a...
Figure A1.20 Mathieu pliers. These are used predominantly to hold and tie st...
Figure A1.21 Mauns wire cutter. These relatively heavy‐duty wire cutters are...
Figure A1.22 Mirror, probe and tweezers. A dental mirror, dental probe (norm...
Figure A1.23 Mitchell's trimmer. This versatile instrument was developed by ...
Figure A1.24 Mosquito pliers. Also termed haemostats or mosquito forceps, th...
Figure A1.25 Periodontal probe. (
Top
) This graduated pocket‐measuring period...
Figure A1.26 Ruler. (
Top
) A metal ruler is useful for measuring facial (e.g....
Figure A1.27 Separator pliers. These pliers have two long angled beaks conne...
Figure A1.28 Triple beak pliers. Also termed three prong pliers, these have ...
Figure A1.29 Tube placement tweezers. Used to hold, position and place molar...
Figure A1.30 Turret. Also known as a torquing turret, this tubular metal dev...
Figure A1.31 Tweed torquing pliers. They are also termed Tweed arch‐forming,...
Figure A1.32 Weingart pliers. These pliers have long slender beaks usually s...
Appendix 2
Figure A2.1 Orthodontic elastics may be described in relation to their inter...
Figure A2.2 Correx bidirectional tension gauge.
Figure A2.3 Dontrix tension gauge.
Figure A2.4 Elastomeric chain.
Figure A2.5 Elastomeric thread/string.
Figure A2.6 Elastomeric E‐links®.
Figure A2.7 An elastomeric E‐link placed from the buccal hook on the maxilla...
Guide
Cover
Table of Contents
Title Page
Copyright
Dedication
Preface
Acknowledgements
Contributors
Introduction: What is the Preadjusted Edgewise Appliance?
Begin Reading
Appendix 1 Orthodontic Instruments
Appendix 2 Orthodontic Elastics and Elastomeric Materials
Index
WILEY END USER LICENSE AGREEMENT
Pages
iii
iv
v
xxi
xxii
xxiii
xxiv
xxv
xxvi
xxvii
xxix
xxx
xxxi
xxxii
xxxiii
xxxiv
xxxv
xxxvi
xxxvii
xxxviii
xxxix
xl
xli
xlii
xliii
xliv
xlv
1
3
4
5
6
7
8
9
10
11
12
13
14
15
16
17
18
19
20
21
22
23
24
25
26
27
29
30
31
32
33
34
35
36
37
38
39
40
41
42
43
44
45
46
47
48
49
50
51
52
53
54
55
56
57
58
59
60
61
62
63
64
65
66
67
68
69
70
71
72
73
74
75
76
77
78
79
80
81
82
83
84
85
86
87
88
89
90
91
93
94
95
96
97
98
99
100
101
102
103
104
105
106
107
108
109
110
111
113
114
115
116
117
118
119
120
121
122
123
124
125
126
127
128
129
130
131
132
133
134
135
136
137
138
139
140
141
142
143
144
145
146
147
148
149
150
151
152
153
154
155
156
157
158
159
160
161
162
163
165
166
167
168
169
170
171
172
173
174
175
176
177
178
179
180
181
182
183
184
185
186
187
188
189
190
191
192
193
194
195
196
197
198
199
200
201
202
203
204
205
206
207
208
209
210
211
212
213
214
215
216
217
218
219
219
220
221
222
223
224
225
226
227
228
229
230
231
232
233
234
235
235
236
237
238
239
240
241
242
243
244
245
246
247
247
249
250
251
252
253
254
255
256
257
258
259
261
260
262
263
264
265
266
267
268
269
270
271
272
273
274
275
276
277
278
279
280
281
282
283
284
285
286
287
288
289
290
291
292
293
294
295
296
297
298
299
301
302
303
304
305
306
307
308
309
310
311
312
314
315
316
317
318
319
320
321
322
323
324
326
327
328
329
330
331
333
334
335
336
337
338
339
340
341
342
343
344
345
346
347
348
349
350
351
352
353
354
355
356
357
358
359
360
361
362
363
364
366
367
368
369
370
371
372
373
374
375
376
377
378
379
380
381
382
383
384
385
386
387
388
389
390
391
392
393
394
395
396
397
398
399
400
401
402
403
404
405
406
408
409
410
411
412
413
415
416
417
418
419
420
421
423
424
425
426
427
428
429
430
431
432
433
434
435
Preadjusted Edgewise Fixed Orthodontic Appliances
Principles and Practice
Edited by
Farhad B. NainiBDS (Lond.), MSc (Lond.), PhD (KCL), FDS.RCS (Eng.), M.Orth.RCS (Eng.), FDS.Orth.RCS (Eng.), GCAP (KCL), FHEA, FDS.RCS.EdConsultant OrthodontistDepartment of OrthodonticsKingston Hospital NHS Foundation TrustSt George's University Hospital NHS Foundation TrustLondon, UK
Daljit S. GillBDS (Hons), BSc (Hons), MSc (Lond.), FDS.RCS (Eng.), M.Orth.RCS (Eng.), FDS (Orth) RCS (Eng.), FHEAConsultant OrthodontistDepartment of OrthodonticsGreat Ormond Street Hospital NHS Foundation Trust and UCLH Eastman Dental HospitalLondon, UK
This edition first published 2022© 2022 John Wiley & Sons Ltd.
All rights reserved. No part of this publication may be reproduced, stored in a retrieval system, or transmitted, in any form or by any means, electronic, mechanical, photocopying, recording or otherwise, except as permitted by law. Advice on how to obtain permission to reuse material from this title is available at http://www.wileay.com/go/permissions.
The right of Farhad B. Naini and Daljit S. Gill to be identified as the authors of the editorial material in this work has been asserted in accordance with law.
Registered OfficesJohn Wiley & Sons, Inc., 111 River Street, Hoboken, NJ 07030, USAJohn Wiley & Sons Ltd, The Atrium, Southern Gate, Chichester, West Sussex, PO19 8SQ, UK
Editorial Office9600 Garsington Road, Oxford, OX4 2DQ, UK
For details of our global editorial offices, customer services, and more information about Wiley products visit us at www.wiley.com.
Wiley also publishes its books in a variety of electronic formats and by print‐on‐demand. Some content that appears in standard print versions of this book may not be available in other formats.
Limit of Liability/Disclaimer of WarrantyThe contents of this work are intended to further general scientific research, understanding, and discussion only and are not intended and should not be relied upon as recommending or promoting scientific method, diagnosis, or treatment by physicians for any particular patient. In view of ongoing research, equipment modifications, changes in governmental regulations, and the constant flow of information relating to the use of medicines, equipment, and devices, the reader is urged to review and evaluate the information provided in the package insert or instructions for each medicine, equipment, or device for, among other things, any changes in the instructions or indication of usage and for added warnings and precautions. While the publisher and authors have used their best efforts in preparing this work, they make no representations or warranties with respect to the accuracy or completeness of the contents of this work and specifically disclaim all warranties, including without limitation any implied warranties of merchantability or fitness for a particular purpose. No warranty may be created or extended by sales representatives, written sales materials or promotional statements for this work. The fact that an organization, website, or product is referred to in this work as a citation and/or potential source of further information does not mean that the publisher and authors endorse the information or services the organization, website, or product may provide or recommendations it may make. This work is sold with the understanding that the publisher is not engaged in rendering professional services. The advice and strategies contained herein may not be suitable for your situation. You should consult with a specialist where appropriate. Further, readers should be aware that websites listed in this work may have changed or disappeared between when this work was written and when it is read. Neither the publisher nor authors shall be liable for any loss of profit or any other commercial damages, including but not limited to special, incidental, consequential, or other damages.
Library of Congress Cataloging‐in‐Publication Data
Names: Naini, Farhad B., editor. | Gill, Daljit S., editor.Title: Preadjusted edgewise fixed orthodontic appliances : principles and practice / edited by Farhad B. Naini, Daljit S. Gill.Description: First edition. | Hoboken, NJ : Wiley-Blackwell, 2022. | Includes bibliographical references and index.Identifiers: LCCN 2021014308 (print) | LCCN 2021014309 (ebook) | ISBN 9781118817698 (paperback) | ISBN 9781118817582 (adobe pdf) | ISBN 9781118817599 (epub)Subjects: MESH: Orthodontic Appliances, FixedClassification: LCC RK521 (print) | LCC RK521 (ebook) | NLM WU 426 | DDC 617.6/43--dc23LC record available at https://lccn.loc.gov/2021014308LC ebook record available at https://lccn.loc.gov/2021014309
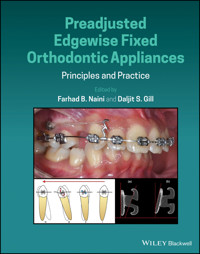
Cover Design: WileyCover Image: (Top) Courtesy of Richard Cousley; (Bottom) Courtesy of Farhad B. Naini
To our families and our profession
Preface
‘We find that the very principle upon which teeth are made to grow irregularly is capable, if properly directed, of bringing them even again. This principle is the power which many parts (especially bones) have of moving out of the way of mechanical pressure.’
John Hunter (1728–1793), Chapter VI, Irregularities of the teeth, History of the Human Teeth (1771)
Sustained mechanical pressure will move teeth that are not ankylosed. Needless to say, placing a fixed appliance, ligating an archwire and watching the teeth move over time may appear relatively easy to the uninitiated. However, planned and guided movement of teeth into their ideal aesthetic, functional and stable positions, whilst mitigating the undesirable effects of treatment, and achieving this in a reasonable time frame with minimum patient discomfort, is far from easy.
Dental students and orthodontic trainees in their early years will often observe their teachers assessing a patient's teeth intently, deep in thought. It is no coincidence that orthodontics has long been known as the ‘thinking person's specialty’, and is, in fact, the first established specialty in dentistry and one of the first throughout medicine. Orthodontics is a complex and multifaceted specialty, requiring, amongst other things, a thorough understanding of normal and aberrant craniofacial growth and development, dentofacial aesthetics and function, and the biomechanical principles and utilisation of a variety of appliances. As such, learning orthodontics requires dedication and hard work – there is no effortless path and no available shortcuts.
Most credible graduate orthodontic specialty training programmes now run over three years full‐time (this has been the UK model for many years), or a part‐time equivalent. In the UK, those desiring to learn more about multidisciplinary care, orthognathic surgery, and cleft and craniofacial surgery require an additional two years of full‐time training and further examinations. First‐year graduate trainees in orthodontics often feel like outsiders, overwhelmed by the highly esoteric and technical language being used around them, new concepts and even new instruments. Confusion is the order of the day. It takes sustained effort to assimilate and grasp the significance of all the factors required in orthodontic treatment, particularly with fixed appliances. However, over time, and usually by the middle to the end of the second year, through practice and immersion, the language becomes comprehensible, the concepts understandable, and the invisible connections between the various aspects of orthodontics become visible.
Modern preadjusted edgewise bracket designs can trace their ancestry to the original edgewise appliance, designed by Dr Edward H. Angle, and first introduced on 2 June 1925 at the Fourth Annual Meeting of the Edward Angle Society of Orthodontists. Interestingly, initially Angle did not name the appliance. The term ‘edgewise’ refers to the archwire, meaning that a rectangular archwire is placed into a horizontal bracket slot via its narrower edge, such that it has a larger buccolingual dimension compared with its occlusogingival dimension. A number of important advances in orthodontics followed; however, from a technical perspective, the next notable advance was the introduction, by Dr Lawrence Andrews, of preadjusted brackets to be used with straight wires. Added to this was the development of the acid‐etch bonding technique and its subsequent application in orthodontics, together with developments in archwire materials, all of which have advanced fixed appliance therapy significantly.
Preadjusted edgewise orthodontic appliances provide the clinician with the unique ability to control tooth movement reliably, in the three planes of space and round the three axes of rotation. This three‐dimensional control over tooth movement requires expertise, discretionary judgement and finesse, and is subject to misapplication in untrained hands.
Didactic teaching of orthodontics can only be delivered in segments, each of which, metaphorically speaking, is analogous to the fragments of a jigsaw puzzle. No matter in which order the segments are presented to the student, until all the segments have been


