28,99 €
Mehr erfahren.
- Herausgeber: Packt Publishing
- Kategorie: Wissenschaft und neue Technologien
- Sprache: Englisch
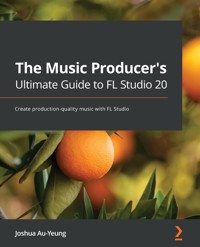
FL Studio is a cutting-edge software music production environment and an extremely powerful and easy-to-use tool for creating music. This book will give you everything you need to produce music with FL Studio like a professional.
You'll begin by exploring FL Studio 20's vast array of tools, and discover best practices, tips, and tricks for creating music. You'll then learn how to set up your studio environment, create a beat, compose a melody and chord progression, mix sounds with effects, and export songs. As you advance, you'll find out how to use tools such as the Piano roll, mixer console, audio envelopes, types of compression, equalizers, vocoders, vocal chops, and tools for increasing stereo width. The book introduces you to mixing best practices, and shows you how to master your songs. Along the way, you'll explore glitch effects and create your own instruments and custom-designed effect chains. You'll also cover ZGameEditor Visualizer, a tool used for creating reactive visuals for your songs. Finally, you'll learn how to register, sell, and promote your music.
By the end of this FL Studio book, you'll be able to utilize cutting-edge tools to fuel your creative ideas, mix music effectively, and publish your songs.
Das E-Book können Sie in Legimi-Apps oder einer beliebigen App lesen, die das folgende Format unterstützen:
Veröffentlichungsjahr: 2021
Ähnliche


The Music Producer's Ultimate Guide to FL Studio 20
Create production-quality music with FL Studio
Joshua Au-Yeung
BIRMINGHAM—MUMBAI
The Music Producer's Ultimate Guide to FL Studio 20
Copyright © 2021 Packt Publishing
All rights reserved. No part of this book may be reproduced, stored in a retrieval system, or transmitted in any form or by any means, without the prior written permission of the publisher, except in the case of brief quotations embedded in critical articles or reviews.
Every effort has been made in the preparation of this book to ensure the accuracy of the information presented. However, the information contained in this book is sold without warranty, either express or implied. Neither the author(s), nor Packt Publishing or its dealers and distributors, will be held liable for any damages caused or alleged to have been caused directly or indirectly by this book.
Packt Publishing has endeavored to provide trademark information about all of the companies and products mentioned in this book by the appropriate use of capitals. However, Packt Publishing cannot guarantee the accuracy of this information.
Group Product Manager: Ashwin Nair
Publishing Product Manager: Aaron Tanna
Senior Editor: Hayden Edwards
Content Development Editor: Abhishek Jadhav
Technical Editor: Shubham Sharma
Copy Editor: Safis Editing
Project Coordinator: Kinjal Bari
Proofreader: Safis Editing
Indexer: Pratik Shirodkar
Production Designer: Alishon Mendonca
First published: February 2021
Production reference: 2050421
Published by Packt Publishing Ltd.
Livery Place
35 Livery Street
Birmingham
B3 2PB, UK.
ISBN 978-1-80056-532-6
www.packt.com
Contributors
About the author
Joshua Au-Yeung (professionally known as Chester Sky) is a music producer, composer, director, and software developer. He has published more than nine albums, directed and composed for short films, created board games, and hosts a podcast. He's an instructor for several online courses, including bestselling courses on music production and composing for films.
About the reviewer
Shaun Friedman is a music artist and composer from Cleveland, Ohio whose instrumentals have been played on NBC, CBS, MTV, and Animal Planet, to name a few. He also has hundreds of beats that are being utilized on YouTube by various content creators. He is an educator who works in public, private, and religious schools. He founded his company, Unbelievable Beats LLC, in 2006 and has previously authored FL Studio Cookbook, published by Packt in 2014.
Table of Contents
Preface
Section 1: Getting Up and Running with FL Studio
Chapter 1: Getting Started with FL Studio
Technical requirements
Exploring the music production landscape
The musician's career path
Steps in composing a song
What is FL Studio?
Exploring the FL Studio workspace
Making your first song
Creating a drum beat with the Channel Rack
Adding an instrument to the Channel Rack
Creating a melody with the Piano roll
Routing channels to the Mixer
Exporting the song
Summary
Chapter 2: Exploring the Browser, Playlist, and Channel Rack
Technical requirements
Introducing the FL Studio workbench
Getting the most out of your samples
Using the Browser
Locating a sample's file location
Searching for samples
Adding your own samples to the Browser
Swapping samples
Using the Channel Rack
Channel Rack option features
The Channel Rack Rename, color and icon option
Instrument options
Detaching windows
Installing new instruments
Using layers
Using the Playlist
Playlist Toolbar
Element pattern options
Using the main header Toolbar features
Version control
Revert to last backup
Audio Stream Input/Output (ASIO)
Purge unused audio clips
Undo and redo
Viewing project info
Summary
Chapter 3: Composing with the Piano Roll
Using the Piano roll
Choosing an instrument
Adding notes in the Piano roll
Selecting multiple notes
Deleting notes
Muting and unmuting notes
Slicing notes
Sliding notes
Using the stamp tool to get assistance with scales
Composing great chord progressions
Recording into the Piano roll with MIDI instruments
The snap to grid (magnet) tool
Quantizing notes
Editing note articulations with the Event Editor
Using Piano roll velocity
Comparing instrument melodies with ghost notes
Exporting sheet music
Using and exporting MIDI scores
Summary
Chapter 4: Routing to the Mixer and Applying Automation
What is mixing?
Routing audio to the Mixer
Navigating the Mixer console
Understanding the insert mixer track
Understanding the master channel
Understanding the effects rack
Applying an effect
Applying automation
Applying automation to external third-party plugins
Freezing Audio Clips
Summary
Section 2: Music Production Fundamentals
Chapter 5: Sound Design and Audio Envelopes
What is sound?
What causes a note's pitch?
How do we hear things?
How do instruments create sound with different pitches?
Why do different instruments playing the same pitch sound different?
Modifying sound envelopes
Using Mod X and Mod Y for automation
Summary
Chapter 6: Compression, Sidechaining, Limiting, and Equalization
Understanding compression
Applying compression with Fruity Limiter
Applying gates and expanders
When to use gating
Applying sidechaining
Using limiters
Applying equalization
EQ best practices
EQ general rules
Summary
Chapter 7: Stereo Width – Panning, Reverb, Delay, Chorus, and Flangers
Panning audio
Panning best practices
Using reverb
Applying digital reverb with Fruity Reeverb 2
Applying convolution reverb with Fruity Convolver
Using delay effects
Applying delay effects with Fruity Delay 3
Delay effect best practices
Using chorus effects
Chorus effect best practices
Using flanger effects
Using phaser effects
Understanding mix buses
Mix bus best practices
Summary
Chapter 8: Recording Live Audio and Vocal Processing
Technical requirements
Understanding microphones
Dynamic microphones
Condenser microphones
Ribbon microphones
USB microphones
Setting up your recording environment
Recording instruments
Recording drum kits
Preparing to record vocals
Recording audio into FL Studio
Recording with Edison
Using pitch correction with Newtone
Pitch correction best practices
Vocals effect processing best practices
Backing vocals effects best practices
Summary
Chapter 9: Understanding Vocal Effects
Understanding vocoders
Understanding MIDI
Using vocoders
Harmonizing vocals with Pitcher
Using Vocodex
Vocoder best practices
Creating vocal chops
Using Slicex to create vocal chops
Vocal chopping considerations
Summary
Section 3: Postproduction and Publishing Your Music
Chapter 10: Creating Your Own Instruments and Effects
Understanding glitch effects
Creating glitch effects with Gross Beat
Mapping time and volume effects to a sample
Gross Beat sequencer
Creating instruments with DirectWave
Creating effects with Patcher
Creating custom dashboards in Patcher
Summary
Chapter 11: Mastering Fundamentals
What is mastering?
Can you master music yourself?
When should you master your music?
How do I get good at mastering?
What equipment do I use to master music?
Equalization in mastering
Diagnosing frequency problems
Understanding spectrograms
Adjusting dynamics
Using multiband compressors
Applying multiband compression with Maximus
What are saturators/harmonic exciters?
Understanding limiters
Understanding stereo imaging with vectorscopes
Stereo imaging best practices
Exporting audio for third-party mixing and mastering
Summary
Chapter 12: Branding, Promotion,and Marketing
Marketing essentials
Creating a brand
Choosing your artist name
Creating a website
Making the most of your live performances
Booking your first gigs
Filming your shows
Streaming performances online
Collaborating with others to promote yourself
Advice for creating content on social media
Getting more views on YouTube
What about YouTube video titles and thumbnails?
Creating music visuals with ZGameEditor Visualizer
Summary
Chapter 13: Publishing and Selling Music Online
Registering your music
Tagging your music in preparation for distribution
Selling music on online stores and streaming services
DistroKid walk-through
Claiming revenue from songs on YouTube using AdRev
What are ISRC, ISWC, and UPC codes?
Summary
Further reading
Share your music
More from the author
Conclusion
Why subscribe?
Other Books You May Enjoy
Preface
FL Studio is a cutting-edge software music production environment. It's an extremely powerful and easy-to-use tool for creating music. This book will cover everything you need to know to produce music with FL Studio at a professional level.
You'll begin by exploring FL Studio 20's vast array of tools and discover best practices, tips, and tricks for creating music. You'll learn how to set up your studio environment, create a beat, compose a melody and chord progression, mix sounds with effects, and export songs. You'll learn how to use tools such as the Piano roll, the Mixer console, audio envelopes, types of compression, equalizers, vocoders, vocal chops, and tools for increasing stereo width. The book also introduces you to mixing best practices and how to master your songs. Along the way, you'll explore glitch effects and create your own instruments and custom-designed effect chains. We'll also cover ZGameEditor Visualizer, a tool for creating reactive visuals for your songs. Finally, you'll learn how to register, sell, and promote your music.
By the end of this FL Studio book, you'll be able to utilize cutting-edge tools to fuel your creative ideas, mix music effectively, and publish your songs.
Who this book is for
This book is for music producers, composers, songwriters, DJs, and audio engineers interested in creating their own music, improving their music production skills, mixing and mastering music, and selling songs online. To get started with this book, all you need is a computer and FL Studio.
What this book covers
Chapter 1, Getting Started with FL Studio, introduces you to music production and FL Studio. You'll be given a high-level overview of the music career you can take and will look at the steps involved. You'll create your first song and learn how to export music.
Chapter 2, Exploring the Browser, Playlist, and Channel Rack, helps you learn about the main features in the Browser, Playlist, and Channel Rack. These, along with the Piano roll and Mixer, are the core tools of FL Studio.
Chapter 3, Composing with the Piano Roll, helps you understand how the Piano roll adds melody notes, arranges them, adjusts the inflection of notes, and easily moves notes between instruments. You'll learn tips for creating excellent chord progressions from scratch. Once you know how to use the Piano roll, you'll be able to compose melodies for any instrument.
Chapter 4, Routing to the Mixer and Applying Automation, gets you familiar with the process of how audio is passed around the Mixer in order to mix music. We'll explore methods of automating effects and how to freeze audio.
Chapter 5, Sound Design and Audio Envelopes, lays the foundation of how sound works. We'll learn what it is, how it's manipulated, and how instruments create sounds. We'll learn how to use Mod X and Mod Y as another method of applying automation.
Chapter 6, Compression, Sidechaining, Limiting, and Equalization, teaches you mixing techniques with compressors and equalizers. We'll explore the Fruity Limiter and Fruity Parametric EQ 2 plugins.
Chapter 7, Stereo Width: Panning, Reverb, Delay, Chorus, and Flangers, explores tools to increase stereo width. We'll explore the Reeverb 2, Fruity Convolver, Fruity Delay 3, Fruity Chorus, Fruity Flanger, and Fruity Phaser plugins.
Chapter 8, Recording Live Audio and Vocal Processing, discusses the setup and preparation you need before recording. We'll learn how to record into FL Studio, how to mix your vocals, and best practices for applying effects to vocals. We'll also explore microphones and the Edison and Newtone plugins.
Chapter 9, Understanding Vocal Effects, teaches you about special effects that can be used on vocals. We'll discuss how to create vocal harmonies and how to use vocoders to modulate your vocals with an instrument. We'll explore the Pitcher, Vocodex, and Slicex plugins.
Chapter 10, Creating Your Own Instruments and Effects, teaches you how to create glitch effects with sounds, transform samples into playable instruments, and create custom instruments and effect chains that can be reused in any project. We'll explore the Gross Beat, DirectWave, and Patcher plugins.
Chapter 11, Mastering Fundamentals, helps you understand the mastering process. This will help your music get to production-level quality and be ready for distribution. We'll explore the Maximus plugin.
Chapter 12, Branding, Promotion, and Marketing, will help you learn about developing your brand, marketing/promoting yourself, and tips for creating online content for social media. We'll explore the ZGameEditor Visualizer plugin.
Chapter 13, Publishing and Selling Music Online, helps you understand how you can release your music online to the world and collect royalty revenues.
Download the color images
We also provide a PDF file that has color images of the screenshots/diagrams used in this book. You can download it here: https://static.packt-cdn.com/downloads/9781800565326_ColorImages.pdf.
Conventions used
There are a number of text conventions used throughout this book.
Code in text: Indicates code words in text, database table names, folder names, filenames, file extensions, pathnames, dummy URLs, user input, and Twitter handles. Here is an example: "Mount the downloaded WebStorm-10*.dmg disk image file as another disk in your system."
Bold: Indicates a new term, an important word, or words that you see onscreen. For example, words in menus or dialog boxes appear in the text like this: "Select System info from the Administration panel."
Tips or important notes
Appear like this.
Get in touch
Feedback from our readers is always welcome.
General feedback: If you have questions about any aspect of this book, mention the book title in the subject of your message and email us at [email protected].
Errata: Although we have taken every care to ensure the accuracy of our content, mistakes do happen. If you have found a mistake in this book, we would be grateful if you would report this to us. Please visit www.packtpub.com/support/errata, selecting your book, clicking on the Errata Submission Form link, and entering the details.
Piracy: If you come across any illegal copies of our works in any form on the Internet, we would be grateful if you would provide us with the location address or website name. Please contact us at [email protected] with a link to the material.
If you are interested in becoming an author: If there is a topic that you have expertise in and you are interested in either writing or contributing to a book, please visit authors.packtpub.com.
Reviews
Please leave a review. Once you have read and used this book, why not leave a review on the site that you purchased it from? Potential readers can then see and use your unbiased opinion to make purchase decisions, we at Packt can understand what you think about our products, and our authors can see your feedback on their book. Thank you!
For more information about Packt, please visit packt.com.
Section 1:Getting Up and Running with FL Studio
In this section, we will get up and running with FL Studio. We will learn how to navigate the FL Studio workspace, compose melodies, and route tracks to the Mixer.
We will cover the following chapters in this section:
Chapter 1, Getting Started with FL StudioChapter 2, Exploring the Browser, Playlist, and Channel RackChapter 3, Composing with the Piano RollChapter 4, Routing to the Mixer and Applying AutomationChapter 1: Getting Started with FL Studio
Think about your favorite songs. What makes you like them? Is it the melody, the chords, the catchy rhythm? Maybe a combination of a whole bunch of things that fit together perfectly. Perhaps you've tried making songs at home and realized there's a big difference between the sound you're making and the level of professionalism you hear from your favorite musicians.
In the pages ahead, you'll learn the ins and outs of music production and be well on your way to making music similar to your favorite songs. You'll learn about tools used for composing, mixing, mastering, and publishing your music. By the time you've finished reading this book, you'll have all the tools you need to create music at a professional level.
In this chapter, you'll be introduced to music production and FL Studio. You'll be given a high-level overview of the music career you can take and we will introduce you to the steps involved. Lastly, you'll create your first song.
This chapter comprises the following topics:
Exploring the music production landscapeA musician's career pathSteps in composing a songWhat is FL Studio?Making your first songTechnical requirements
In this chapter, we'll be using FL Studio. You can download a free trial version or a paid version of FL Studio from https://www.image-line.com/.
Exploring the music production landscape
Music production has changed significantly in the last two decades. Before, a musician required the assistance of a music producer. You'd go to a studio to meet with a series of technicians who'd play around with mixing equipment that cost as much as your car or house. Then, you'd sign a deal locking you into a music contract for the foreseeable future. The studio would control how your album got released and what royalties you got paid. You had very little negotiating power.
Digital Audio Workstations (known as DAWs) changed everything. Software came out that revolutionized the music playing field. It became possible to be a music producer in your bedroom using just your computer. Nowadays, most music producers create music on their own long before they venture into a recording studio (if they do at all).
Studios started to decrease their investment in developing artists from scratch. They preferred artists that already had success and popularity with fans before considering them. iTunes appeared, along with iPods and smartphones that could hold an entire music catalog in your pocket. Consumers wanted to get their music online instead of from physical stores so that they could download music directly onto their phones. Independent artists gained the ability to sell their music online on their own. Artists could now release their own music and collect their own royalties.
Music streaming platforms such as Spotify and YouTube became mainstream. Why buy individual songs when you could access all of them, all the time, anywhere you go? Consumers now have their own personalized playlist recommendations, filled with songs that suit their own personal taste. New artists could find their way onto a playlist by accident, subject to the whims of mystical algorithms behind the scenes.
All of this poses a powerful opportunity for the independent artist. You can promote yourself using tools equivalent to what record companies use. You can produce a song on your own, get your music into households around the world, and market your own brand. That's what this book is about. It's a handbook to show you the ins and outs of music production and jump-start your musical career. By the end of this book, you will know how to compose, record vocals, master and market your music, and sell it online. This can all be done from home on a minimal budget.
The DAW we'll use in this book is FL Studio. FL Studio is a music software suite that contains all the tools you'll need to produce music. It's one of, if not the leading music production workstation software currently on the market and is used by professional musicians all around the world.
The musician's career path
Many of you reading this book will be looking for guidance on how to begin your music career. You've come to the right place. Whether you are a musician, DJ, composer, or music producer, this book will provide you with a how-to guide to get started with making music.
Let's briefly look at your career path ahead. First, you'll spend some time getting familiar with your DAW. You'll come up with song ideas, record, and learn mixing techniques. You might invest in music plugins, synthesizers, hardware, and samples to play with.
At a certain point, you'll feel comfortable with your tools. It's here when you'll realize that knowing how to use your tools is only one part of coming up with music. You need to develop a unique sound for yourself. To do this, you'll go out and listen to lots of music you like. You'll watch successful musicians and learn to create similar sounds. You'll experiment with genres to find one or a combination that resonates with you. You'll begin to come up with ideas of your own that combine many influences.
You'll share your music with friends and colleagues. Likely, you'll want feedback from people who have some experience. You'll reach out to local musician groups in your community and attend their meetings. If you stay on course, this cycle of inventing and feedback will shift your music from amateurish to something that other people will enjoy listening to.
You'll get a few songs under your belt, perhaps have an album ready to go. You'll post your music online and come to the realization that even though your music is amazing, you don't have many fans yet. How come? People don't know about you yet. You'll need to cultivate a brand that fans can relate to and get excited about. You'll need to spend time thinking about the type of brand persona that you want to be recognized for. You'll look into artwork and visuals. You might make them yourself or outsource the art creation to a third party. You'll spend time on social media and websites, researching what other musicians are doing and try out their marketing techniques yourself.
You'll have to figure out what kind of equipment you need to perform live. You'll also need to come up with something visually impressive to entertain audiences. This could include costumes or some sort of game or gimmick that can be repeated with different crowds. You'll spend time thinking about banter and jokes that you can use to tie the gap between your songs. Once again, you'll research what other musicians have done on stage and try out their techniques yourself. You'll discover that in order to have success getting booked at venues, it helps to have associated acts with you. You'll team up with other bands to create a whole packaged performance that you can present to a venue. Congratulations, you now have a show that you can take on the road! You're now a working musician. We've seen the big picture. It might seem like a lot now, but the good news is that most of the steps along the way are small and easy to do.
Steps in composing a song
Here's a roadmap that you can keep in the back of your mind as you journey through making your songs. Rest assured it's easier than it sounds and is actually a lot of fun.
First, decide the parameters of the song. What mood, genre, emotion do you want? Once your criteria are decided, come up with a melody and accompanying chords. Usually, the melody is experimented on with an instrument such as a keyboard or a guitar. You will likely go through a few iterations and drafts until you find a combination you like.
Now we have a melody and some accompanying chords. The melody notes are fed into a DAW as MIDI notes. From there, we select an instrument plugin to play the notes. This usually involves experimenting with different instrument plugins and possibly some sound design.
We add accompanying melodies and additional verses. We layer our instruments to thicken the sound. We add drums and percussion instruments to complement our melody. We add sound effects. This is a mix of single sound samples that could include percussion, rising and falling sounds, glitch effects, impacts, and drum fills.
If the song requires it, we record vocals. A vocalist is sought out and the song instrumental is sent to the singer to work on. Lyrics are written, and several vocal melody combinations are experimented with. The vocalist records the vocals. The singer and the music producer make adjustments to the song and go back and forth a few times, providing feedback to each other. The vocals are processed, usually separately from the instrumental at first before adding the finished vocals back into the mix. Effects are applied to enhance the vocals.
We have our melodies, instruments, percussion, sound effects, and vocals. Now it's time to begin mixing. Mixing is a process you take to polish your music and give it a professional feel. It requires understanding how instruments and sounds complement each other in a song and knowing how effects can enhance them. This part gets very technical. This book will give you lots of tips and tricks to help you with mixing.
Our song is exported and shared with all parties involved. We give and collect feedback from each other and make adjustments.
Now it's time for mastering. Mastering is what you do after you have a mixed song that has been mixed. The goal is to make the song sound consistent regardless what device you use to play the song. A song benefits from mastering in several aspects. It allows you to form a second opinion when listening to your song by forcing you to take a step back and re-evaluate your music from a distance. Instead of tweaking individual notes and instruments, you're now forced to think about how the song sounds as a whole package. What is the overall effect of the song on a listener? One way to think about mastering is that you're thinking from a sales perspective. What will make this song have the widest appeal to listeners? This book will give you mastering tips and techniques.
Congratulations, you have a production-ready song! You register your music with necessary organizations for your territory to prove your copyright ownership and that any rights and royalties belong to you.
You create music videos and cover art to give your audience something to look at while listening. Often, a song's success is made or broken by the choice of visuals used.
You upload your music to an online distributor to sell your music on online stores and streaming platforms such as Spotify, Amazon, and so on. You upload your music videos to YouTube.
You leverage your social media and the existing fanbase you've been curating ahead of time (hopefully). You self-promote your upcoming music release, tell everyone you know, and reach out to local outlets to play your music. Congratulations, you've published a song!
Composing a full song may seem like a lot of steps and quite technical, but rest assured, by the time you've finished this book, you'll have a solid grasp of how to execute each of these steps. Hopefully, after going through this process, you'll find it intuitive, fulfilling, and profitable.
So far, we've learned about music production from a high-level perspective. Now it's time to get our hands dirty and start making music with FL Studio.
What is FL Studio?
FL Studio is a music production software. It's a DAW consisting of tools, effects, and synthesizers designed to compose, mix, and master music. It's a collection of software plugins that can handle all your audio production needs whether you are a musician, a film or video game composer, or a music producer. It has been designed to be quick to pick up and provides enough features to satisfy sound designers. Once you get comfortable with the main workflow, you'll find it intuitive and easy to learn. Most importantly, in my opinion, using FL Studio is fun and a delight to play with. I frequently find myself losing track of time having fun with it.
You can download a free trial version of FL Studio, which allows you to try out all the features of the software; however, it won't let you reopen your saved projects until you purchase a paid version.
FL Studio comes in several paid tiered versions with more features for the higher tiers. A user can upgrade from a cheaper tier to a higher tier to unlock more features. If you are unsure of what version you need, you can start with the cheapest tier and upgrade later to a higher tier. There is a $10 additional charge for upgrading. Here are the different editions:
The Fruity Edition is the cheapest. It includes all the basic features, such as access to the Playlist, Channel Rack, and Piano roll. It includes the Autogun, BassDrum, BeepMap, Drumpad, FLEX, Fruity Kick, Fruity DX10, Groove Machine Synth, and MiniSynth plugins. It does not include audio recording.The Producer Edition includes all features in the Fruity Edition plus audio recording and post-production tools. It includes the Edison, Slicex (loop slicer and re-arranger), Sytrus, Maximus, Vocodex, and SynthMaker plugins. In this book, we include an introduction to the Edison, Slicex, Maximus, and Vocodex plugins.The Signature Bundle includes everything in the Producer Edition plus Fruity Video Player, the DirectWave sampler, Harmless, NewTone, Pitcher, Gross Beat, and the Hardcore guitar effects suite. Fruity Video Player allows you to see videos in sync with your music, which is handy for film composers. In this book, we include an introduction to the DirectWave, NewTone, Pitcher, and Gross Beat plugins.The All Plugins Bundle includes all possible plugins and features, including a large selection of synthesizers.To see a full comparison of features offered in the different tiers, visit https://www.image-line.com/fl-studio/compare-editions/.
We have been briefly introduced to FL Studio. Now, it's time to begin exploring the FL Studio workspace.
Exploring the FL Studio workspace
FL Studio is a software work environment. It comes equipped with tons of tools to assist you with your music creation. In order to create a song, you need to understand the basic workflow. When you first open FL Studio, you will be greeted with a workspace similar to the following screenshot:
Figure 1.1 – FL Studio workspace
It's possible that you may see a slightly different landing screen depending on what version of FL Studio you are using. To ensure that we are all seeing the exact same workspace, open a new template using Basic with limiter:
Figure 1.2 – Basic with limiter
You'll notice that there are lots of other templates to get you up and running quickly. I encourage you to explore the other available templates as well if you're curious.
The FL Studio workbench is divided up into five panel sections:
Figure 1.3 – Toolbar
These panels can be opened or hidden by left-clicking the icons in the Toolbar. The first five buttons on the Toolbar open up the main sections of FL Studio. They can be opened or hidden by clicking on the tool symbol.
Here are the buttons in the order they appear from left to right:
Playlist: Used to arrange your song compositions.Piano roll: Used to compose melodies.Channel Rack: Used to load your instruments and compose percussive rhythms.Mixer: Used to route your instruments and apply effects for mixing and mastering.Browser: Contains all your files. It's an organizer used to navigate through your samples.The Playlist, Piano roll, Channel Rack, Mixer, and Browser are the foundational building blocks of FL Studio. Using these five tools, you'll be able to create, organize, and apply effects to your music.
Making your first song
FL Studio is a tool and the best way to learn it is to just jump in and make something with it. To make our first song, we'll do the following:
Create a drum beat with the Channel Rack.Add an accompanying instrument.Route the drum beat and instrument to the Mixer.Export the song.Let's get started.
Creating a drum beat with the Channel Rack
One of the key features of the Channel Rack is that it allows you to create percussive patterns with ease. To create a drum pattern in the Channel Rack, you need drum sound samples and notes to indicate when to play the sound samples. To do this, take the following steps:
Open the Channel Rack by selecting the Channel Rack icon:Figure 1.4 – Toolbar, including the Channel Rack
Here, you'll see the following window. Since we used a template, we already have four sound samples preloaded into the Channel Rack for us:
Figure 1.5 – Channel Rack opened
Extend the window by clicking the right edge of it to make it longer.The Channel Rack allows you to view and load up all of your instruments and samples. Here, we can see that four instruments have been preloaded for us. In this case, they are single percussive sound samples.
Add notes by left-clicking on any of the gray and red buttons to the right of the instrument, so your Channel Rack looks like the following:Figure 1.6 – Channel Rack
Select PAT (short for pattern) and press play (the triangle symbol) or hit the spacebar so that you can listen to your drum beat:Figure 1.7 – Player menu
So far, we have created a drum beat by adding notes for our percussion samples to play. In a real-life scenario, you'll want to swap out the samples used (for example, Kick, Clap, Hat, or Snare) with other samples. A drum beat on its own is pretty boring though, so let's look into adding an accompanying instrument.
Adding an instrument to the Channel Rack
We've created our first drum beat pattern. A drum beat isn't very interesting on its own. Music in general always needs a melody to give the song a sense of progression. To create a melody, we need an instrument that can play notes of different pitches. FL Studio has lots of instruments available. Let's add a simple bass guitar instrument to our composition:
To create a new pattern, left-click on the plus icon next to the word Pattern 1 in the top Toolbar:Figure 1.8 – New pattern
Pattern is the name that FL Studio uses to refer to a sequence of notes. Give it a name such as Bass melody and press Enter.
Back in the Channel Rack, hover your cursor over one of the instruments (Kick, Clap, Hat, or Snare) and right-click, or select the plus symbol at the bottom of the Channel Rack. A list of instruments will open up. Insert the one called BooBass:Figure 1.9 – Inserting an instrument
The BooBass instrument will load up and you'll see the following:
Figure 1.10 – BooBass
Let's add some notes for our BooBass instrument to play. Right-click on BooBass and select Piano roll:Figure 1.11 – Opening Piano roll
The Piano roll will open, and you'll see the following window:
Figure 1.12 – Empty Piano roll
The Piano roll is designed to combine a piano with a timeline from left to right. On the left, you'll see black and white rectangular boxes to represent piano keys. If you know how to play the piano, this will feel very intuitive to you. To the right of it, you'll see a series of blue boxes in what resembles a spreadsheet table. These boxes indicate a position in time. By adding notes, you are telling the instrument to play a certain pitch at a certain time.
Creating a melody with the Piano roll
So far, we've loaded up an instrument. It's time to give the instrument some notes to play:
You can add notes by left-clicking in the blue boxes. Add notes to the Piano roll to create a melody similar to the following:Figure 1.13 – Added notes to the Piano roll instrument
Great, we've now created a simple bass melody.
Let's add the drum beat and our bass melody to our Playlist. The Playlist is where you can arrange the timing of your music patterns. Open the Playlist by selecting the Playlist icon:Figure 1.14 – Playlist icon
The Playlist will now open and you'll see a window similar to the following:
Figure 1.15 – Playlist
On the left side, you'll see Pattern 1 and Bass melody. Pattern 1 is our drum beat. Bass melody is the melody that we just created. You can add the patterns to the Playlist by left-clicking the patterns on the left and dragging them onto the blue grid on the right. Once done, it will look like the following:Figure 1.16 – Added patterns to the Playlist
Let's play our entire arrangement and see how the patterns sound when played at the same time. Ensure that the setting is set to SONG instead of PAT and press the play symbol (triangle symbol) at the top of the screen. You will now be able to hear both of your music patterns being played at the same time:Figure 1.17 – Player menu
So far, we have created a drum pattern, added an accompanying instrument, and added both patterns to the Playlist. Now we need to route these instruments to the Mixer.
Routing channels to the Mixer
It's time to think about mixing our music. Mixing is where we can add effects to our music to enhance it. We need to send our sounds to the Mixer in order to apply effects to them. This is known as routing to the Mixer. We will go into the details of the mixing effects that we can apply in later chapters.
Let's route our instruments and samples to the Mixer:
Open up the Channel Rack:Figure 1.18 – Selecting channels in the Channel Rack
In the preceding screenshot, we can see that Kick has the number 1 beside it by default. This means that it is currently routed to mixer track channel 1. Clap is routed to track 2 and Hat is routed to track 3.
Our BooBass instrument has no Mixer channel number assigned. Let's route it to the Mixer. Double-left-click the rectangle buttons directly to the right of the instruments. This will highlight all of the available instruments with a green outline, as in the preceding screenshot. This indicates that they are selected.


