116,99 €
Mehr erfahren.
- Herausgeber: John Wiley & Sons
- Kategorie: Wissenschaft und neue Technologien
- Sprache: Englisch
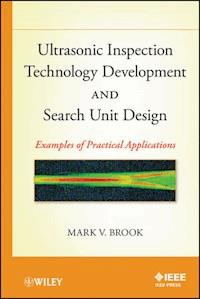
Ultrasonic testing is a relatively new branch of science and industry. The development of ultrasonic testing started in the late 1920s. At the beginning, the fundamentals of this method were borrowed from basic physics, geometrical and wave optics, acoustics and seismology. Later it became clear that some of these theories and calculation methods could not always explain the phenomena observed in many specific cases of ultrasonic testing. Without knowing the nuances of the ultrasonic wave propagation in the test object it is impossible to design effective inspection technique and search units for it realization. This book clarifies the theoretical differences of ultrasonics from the other wave propagation theories presenting both basics of physics in the wave propagation, elementary mathematic and advanced practical applications. Almost every specific technique presented in this book is proofed by actual experimental data and examples of calculations.
Sie lesen das E-Book in den Legimi-Apps auf:
Seitenzahl: 285
Veröffentlichungsjahr: 2012
Ähnliche
Table of Contents
Cover
IEEE Press
Title page
Copyright
Foreword
Preface
List of Figures
List of Tables
CHAPTER 1: Introduction
1.1. GENERAL CHARACTERISTIC OF NONDESTRUCTIVE TESTING (NDT) METHODS
1.2. ULTRASONIC WAVE TYPE OVERVIEW
CHAPTER 2: Introduction to Search Unit Design
2.1. PRINCIPLES OF SEARCH UNIT DESIGN
2.2. CONSIDERATIONS FOR TRANSDUCER SELECTION
2.3. CALCULATION OF STRAIGHT BEAM TRANSDUCER DIRECTIONAL CHARACTERISTIC
CHAPTER 3: Single Angle Beam Probe Design
3.1. BASICS OF PROBE DESIGN
3.2. CONSIDERATIONS RELATED TO THE PRACTICAL CONCEPT OF WEDGE DESIGN
3.3. MEASUREMENT OF REFRACTED ANGLES
3.4. DEVIATION OF REFRACTED ANGLE RELATED TO THICK WALL TEST OBJECT INSPECTION
CHAPTER 4: Dual Straight and Angle Beam Probe Design
4.1. PRINCIPLES OF DUAL STRAIGHT BEAM PROBE DESIGN
4.2. SEQUENCE OF WEDGE CALCULATION
4.3. SENSITIVITY CURVES
4.4. EXAMPLE OF DUAL STRAIGHT BEAM PROBE DESIGN
4.5. BASICS OF DUAL ANGLE BEAM PROBE DESIGN
4.6. WEDGE CONCEPTUAL DESIGN
4.7. WEDGE DESIGN FOR INSPECTION OF A TEST OBJECT WITH FLAT AND PARALLEL SURFACES
4.8. WEDGE DESIGN FOR THE INSPECTION OF A TEST OBJECT WITH A CURVED SURFACE
CHAPTER 5: Multiple Crystal Probe Design
5.1. CONCEPT OF “PACKAGING”
5.2. EXAMPLE OF TRIPLEX PROBE DESIGN
CHAPTER 6: Technique Development and Probe Design for TOFD Method Application
6.1. INTRODUCTION TO TECHNIQUES BASED ON DIFFRACTION PHENOMENA
6.2. TOFD FORWARD SCATTERING TECHNIQUE
6.3. EXAMPLES OF PROBE CALCULATION FOR CURVED SURFACE TEST OBJECT INSPECTION
6.4. PROBE DESIGN FOR TOFD BACK SCATTERING TECHNIQUE
CHAPTER 7: Technique Development and Probe Design for Cylindrical Rod Inspection
7.1. BOUNDARY EFFECT
7.2. SYMMETRIC AND ASYMMETRIC CYLINDRICAL ROD-GUIDED WAVES
7.3. TECHNIQUE DEVELOPMENT AND PROBE DESIGN FOR INSPECTION OF STEPPED SHAFT
7.4. TECHNIQUE DEVELOPMENT AND PROBE DESIGN FOR STUD INSPECTION
7.5. NOTCH DIMENSION CALCULATION FOR STUD CALIBRATION STANDARDS
CHAPTER 8: Technique Development and Probe Design for Hollow Cylinder Inspection
8.1. LAMB WAVE GENERATION
8.2. TECHNIQUE DEVELOPMENT AND PROBE DESIGN FOR THE INSPECTION OF HOLLOW CYLINDERS FROM THE INSIDE SURFACE
8.3. TECHNIQUE DEVELOPMENT AND PROBE DESIGN FOR THE INSPECTION OF HOLLOW CYLINDERS FROM THE OUTSIDE SURFACE
CHAPTER 9: Technique Development and Focused Probe Design for Immersion Method Inspection
9.1. BASICS OF FOCUSED IMMERSION PROBE DESIGN
9.2. GEOMETRIC AND ACOUSTIC PARAMETER CALCULATION
9.3. STRAIGHT BEAM SPHERICAL FOCUSED PROBE DESIGN
CHAPTER 10: Technique Development and Probe Design for Reactor Pressure Vessel Nozzle Inner Radius Inspection
10.1. INSPECTION ZONE CONFIGURATION
10.2. INSPECTION FROM THE OUTSIDE NOZZLE SURFACES: CONTACT METHOD
10.3. EXAMPLE OF WEDGE DESIGN FOR INNER RADIUS INSPECTION FROM THE OUTER SURFACE
10.4. INSPECTION FROM THE INSIDE NOZZLE SURFACE: IMMERSION METHOD
CHAPTER 11: Search Unit Functioning Test
11.1. EVALUATION OF CERTAIN CHARACTERISTICS OF A SEARCH UNIT
11.2. MEASUREMENT OF SPECIFIC PARAMETERS OF SELECTED SEARCH UNITS
APPENDIX A: System of Units and Symbols That Are Accepted for This Book
APPENDIX B: American Societies Engaged in Activities Related to Nondestructive Testing and Serving the Needs of NDT Professionals
APPENDIX C: An Example of Applying the Third Critical Angle
APPENDIX D: WesDyne International Computer Program for Lamb Wave Dispersion Curve Calculation
Glossary of Terms Specific to This Book
NOTE
Bibliography
About the Author
Index
IEEE Press
445 Hoes Lane
Piscataway, NJ 08854
IEEE Press Editorial Board
Lajos Hanzo, Editor in Chief
R. Abari
M. El-Hawary
S. Nahavandi
J. Anderson
B. M. Hammerli
W. Reeve
F. Canavero
M. Lanzerotti
T. Samad
T. G. Croda
O. Malik
G. Zobrist
Kenneth Moore, Director of IEEE Book and Information Services (BIS)
Copyright © 2012 by the Institute of Electrical and Electronics Engineers, Inc.
Published by John Wiley & Sons, Inc., Hoboken, New Jersey. All rights reserved.
Published simultaneously in Canada
No part of this publication may be reproduced, stored in a retrieval system, or transmitted in any form or by any means, electronic, mechanical, photocopying, recording, scanning, or otherwise, except as permitted under Section 107 or 108 of the 1976 United States Copyright Act, without either the prior written permission of the Publisher, or authorization through payment of the appropriate per-copy fee to the Copyright Clearance Center, Inc., 222 Rosewood Drive, Danvers, MA 01923, (978) 750-8400, fax (978) 750-4470, or on the web at www.copyright.com. Requests to the Publisher for permission should be addressed to the Permissions Department, John Wiley & Sons, Inc., 111 River Street, Hoboken, NJ 07030, (201) 748-6011, fax (201) 748-6008, or online at http://www.wiley.com/go/permissions.
Limit of Liability/Disclaimer of Warranty: While the publisher and author have used their best efforts in preparing this book, they make no representations or warranties with respect to the accuracy or completeness of the contents of this book and specifically disclaim any implied warranties of merchantability or fitness for a particular purpose. No warranty may be created or extended by sales representatives or written sales materials. The advice and strategies contained herein may not be suitable for your situation. You should consult with a professional where appropriate. Neither the publisher nor author shall be liable for any loss of profit or any other commercial damages, including but not limited to special, incidental, consequential, or other damages.
For general information on our other products and services or for technical support, please contact our Customer Care Department within the United States at (800) 762-2974, outside the United States at (317) 572-3993 or fax (317) 572-4002.
Wiley also publishes its books in a variety of electronic formats. Some content that appears in print may not be available in electronic formats. For more information about Wiley products, visit our web site at www.wiley.com.
Library of Congress Cataloging-in-Publication Data:
Brook, Mark V.
Ultrasonic inspection technology development and search unit design : examples of practical applications / Mark V. Brook.
p. cm.
ISBN 978-0-470-87434-9 (hardback)
1. Ultrasonic testing. 2. Ultrasonic waves—Industrial applications. I. Title.
TA417.4.B76 2011
681'.2–dc22
2011008871
oBook ISBN: 978-1-118-10478-1
ePDF ISBN: 978-1-118-10480-4
ePub ISBN: 978-1-118-10479-8
Foreword
It is a great privilege to prepare the Foreword for Dr. Mark Brook’s book on ultrasonic probe designs. Before we get into the technical aspects of this work, it is worthwhile to discuss some background on how he came to work in our laboratory. Dr. Brook was a professor at the Leningrad Transportation Institute and specialized in the design and implementation of ultrasonic testing methods for propulsion system and hulls of transport ships. He emigrated from the Soviet Union after obtaining an exit visa under the Helsinki Accord in 1979 and moved to Boston, Massachusetts, with the support of the Jewish Family Services organization. While at an American Society for Non-Destructive Testing meeting, an anonymous person (to whom we are forever grateful) suggested that he apply for a position in the fledgling NDE Development Laboratory at Combustion Engineering. The interview was a fascinating experience in which we conversed primarily in the universal language of mathematics. It was obvious at the conclusion of this discussion that Dr. Brook had more knowledge of ultrasonic testing theory than the collective assembly of the other engineers. He settled in quickly in his new environs, but there were a few humorous moments, such as when he came to my office and asked for a permission slip to drive across state lines so he could visit his wife, who was still in Boston.
Over the span of three decades, Dr. Brook’s contribution to the application of ultrasonic testing has been immeasurable. His transducer designs were instrumental in many diverse and difficult inspection issues involving such diverse applications as nuclear power plant components and aerospace components (including the design of the inspection system for solid rocket motors for the space shuttle program after the Challenger disaster). In every case, he started first with principles and theory to design a precise transducer concept customized for the job at hand. He consistently brought theoretical concepts to a practical conclusion with a variety of novel transducer designs. His work included breakthrough designs for creeping wave, refracted longitudinal, and, most notably, Lamb wave transducers. The majority of all the transducer designs that we successfully deployed in the field were based directly or indirectly on his teachings, from which we benefited greatly. It has truly been an honor to work with and learn from Dr. Brook over all these years. This educational work is an excellent blueprint for future endeavors in ultrasonic testing applications.
J. P. LareauChief Engineer, NDE TechnologyWestinghouse Electric Company
Preface
My many years in ultrasonic nondestructive testing (NDT) as an engineer and a teacher have given me the opportunity to understand what NDT practitioners, technicians, and engineers need to know for everyday activity in an ultrasonic inspection technology development, search unit design, and application.
Ultrasonic nondestructive testing is a relatively new branch of science and industry. The development of ultrasonic testing began in the late 1920s [1]. Initially, the fundamentals of this method were borrowed from basic physics, geometric and wave optics [2], and acoustics and seismology [3]. It later became evident that some of these theories and calculations could not always explain the phenomena observed in many instances during an ultrasonic test. Without understanding the nuances of “ultrasonic” wave propagation in the test object, it is impossible to design an effective inspection technique and search units to accomplish the task. “The devil is in the details.”
The development of calculation methods, specifically for ultrasonic testing, began in the 1950s. At first, the development of the ultrasonic field for angle beam probes was addressed to satisfy the practical application of ultrasonics to weld joint inspection [4]. Many methods of calculation were developed and specific calculations were performed and compared with experimental results. Most of these methods were complicated and not suitable for routine inspection procedure development and search unit design. But the results achieved enable an understanding of the acoustic field structure in the test object and of ray tracing methods. This knowledge now permits the use of much less complicated equations for everyday calculations, followed by, if necessary, correction of test results using experimental data. As we all know, the experiment is the criterion of truth.
By writing this book I have tried to combine basic physics of wave propagation, elementary mathematics, and advanced practical application. Almost every case of a specific technique development and probe design is confirmed with experimental data and examples of the appropriate calculations.
Chapter 1 begins with an NDT methods overview. Short descriptions of NDT methods include physical phenomenon that forms the basis of each method, along with the basic facts about the advantages and limitations. It is apparent from this overview that the ultrasonic method is much more versatile than other methods.
This chapter includes ultrasonic wave type overview of the major parameters of waves most commonly used in the inspection of test objects. The parameters include direction of wave propagation and particle oscillation, as well as their propagation velocity.
Chapter 2 discusses the principles of search unit design and focuses on probes for automated inspection. Description of acoustic properties of crystal materials and, especially, wedge materials, are followed by modern methods of velocity and attenuation measurements and calculation. Practical considerations are given for crystal size selection relative to frequency and test object wall thickness. The chapter includes calculations of a transducer’s directional characteristics and main lobe profile. Special attention is given to the near field acoustic structure and major discrepancies between theory and reality. This is illustrated by the field structure of a straight beam transducer obtained by C-scan.
Chapter 3 is dedicated to a single angle beam probe design. It is shown that the main lobe profile calculated by using Snell’s law differs from empirically obtained results. Practical concepts of wedge design are based on an imaginary crystal size and its location on a wedge. The phenomenon of the probe’s exit point and lobe’s central ray deviation leads to the necessity of a wedge angle correction.
Dual straight and angle beam probe design is discussed in Chapter 4. Sequence of wedge calculations for a dual longitudinal wave angle beam probe is presented along with examples of probe design. Two concepts of wedge calculation and design for dual angle beam probes are presented. Special attention is given to probe design for the inspection of test objects with concentric surfaces including wedge calculations for phased array probes. Description of sensitivity curve construction concludes this section of the chapter.
In Chapter 5 the concept of “packaging” for multi-crystal probe design is discussed. Many variations of probe design are presented. Detailed calculations of the triplex probe are followed by the example of the design.
Technique development and probe design for time of flight diffraction (TOFD) techniques application is the topic of Chapter 6. Forward and back scattering techniques are discussed for inspection of test objects with flat and curved surfaces. Examples of probe calculation and design for both cases are presented in detail. Special attention is given to Tandem probes with examples of signals obtained from different reflectors. A short description of gliding diffracted waves and probe design for their generation is included.
Chapter 7 is dedicated to technique development and probe design for the inspection of cylindrical rods of several types. A description of boundary effects serves as a guideline for generation of symmetrical and asymmetrical rod-guided waves. Technique development and probe design for stud inspection from the stud end surface reveals problems associated with beam propagation. Stud inspection from the center-drilled bore is discussed. Probe design in this case is more complicated, but the results prove to be superior. Particular emphasis has been placed on the convex mirror calculation of probes designed for detection of small reflectors on the outside surface of studs and relatively thick wall cylinders. The end of this chapter includes examples of how to calculate the dimensions and types of reflectors to be machined in stud calibration standards.
Chapter 8 is dedicated to technique development and probe design for the inspection of hollow cylinders by Lamb-type guided waves. The chapter begins with a description of the necessary conditions to create Lamb waves. The concept of phase and group velocities is presented in accordance with physical optics. A list of Lamb wave propagation parameters is illustrated by analysis of dispersion curves. The key features of Lamb wave propagation are very helpful in understanding wave propagation in thin wall hollow circular cylinders. Principles for selecting the best modes and frequencies for detection of reflectors in water-loaded test objects are correct for both thin plates and hollow cylinders. Several examples are given of how the general rules for Lamb-type guided wave propagation can be applied to technique development and probe design for inspection of different types of hollow cylinders. Experimental results are presented to demonstrate the energy distribution along a hollow cylinder.
Attention is given to experiments and explanation of how a water layer thickness in contact with a plate or hollow cylinder influences the wave propagation.
In Chapter 9, technique development and probe design for immersion methods of inspection is presented. Equations are given for geometric and acoustic parameter calculation. Practical assessment of design feasibility is followed by the example of immersion focused probe calculation with a single-surface lens.
Chapter 10 presents technique development and probe design for reactor pressure vessel nozzle inner radius inspection. The nozzle inner radius region is a unique test configuration. It can be inspected from the outside surface of the nozzle or from its inside surface. Both techniques, contact and immersion, are discussed. Principles of technique development and probe design are discussed, and practical probe design for each of the methods is presented.
Chapter 11 explains how to evaluate probes. The acquired parameters will help the probe designer to assess the correctness of the design. It will also be useful for the technician to avoid using inappropriate probes. Two main parameters measured during the probe evaluation, that is, time response and frequency response, allows the possibility to calculate all other necessary parameters. The choice and design of the appropriate reference blocks is discussed.
The book also includes four appendixes.
ACKNOWLEDGMENTS
My first intention was to substitute the traditional personal acknowledgments with humor, as published in The Journal of Irreproducible Results. For example, in the first issue published in 1960, from an article named “How to Read Technical Publications,” the following quote, still applies:
If it is written:
It means:
I thank Mr. A and Mr. B for help in conducting experiments and making measurements.
Mr. A made all the experiments and Mr. B processed the data.
I thank Mr. C for useful discussions.
I have shown to Mr. C the results obtained by Mr. A and Mr. B, and he explained to me what it means.
I thank Mr. D for the opportunity to carry out this project.
Mr. D gave me time and money to do what I really like to do.
Humor aside, I would like to express my sincere gratitude to all my colleagues for their valuable professional and human support. My special appreciation is for what I call the “Old Guard”—people with whom I have been working in the NDT Products & Technology department of Westinghouse Electric Company Nuclear Services for more than 30 years: From Jack Lareau I have received the project ideas; Vincent LaDuca and Marc Camerline managed to schedule them and make them pay off; Russell Devlin shared his enormous experience in technique application and troubleshooting; Mike Concordia, Brian Smith, and Glen Gagner were a great help with instrumentation, and Mark Kirby has his wonderful intuition for solving a variety of computer problems. George Rowland made the prototype of each idea work, thanks to his intelligent approach to mechanical challenges. I have learned a lot from all of them, and wish to pass it all on to the next generation of NDT specialists.
And finally, thanks are to my wife, Nora, and grandson, Thomas—my first editors and supporters of my endeavor.
MARK V. BROOKWest Hartford, ConnecticutOctober 2011
List of Figures
Figure1.1 Basic types of discontinuities
Figure1.2 Vertically polarized shear waves
Figure1.3 Horizontally polarized shear waves
Figure1.4 Schematic representation of symmetric and asymmetric modes
Figure1.5 Structure of the waves propagating in a test object at the first critical angle according to Snell’s law
Figure1.6 Real structure of waves propagating at the first critical angle in a test object with flat front surface
Figure2.1 A typical angle beam probe: a transducer attached to a wedge
Figure2.2 Conceptual design of triplex probe wedges
Figure2.3 Wave reflection and refraction at the wedge–steel interface
Figure2.4 Wave propagation at the critical angles
Figure2.5 Diagram related to a delay line calculation
Figure2.6 A delay line height, according to the concept of the imaginary crystal
Figure2.7 Diagram of an entire quadrant coverage
Figure2.8 Internal reflections in a wedge for single angle beam probe
Figure2.9 Examples of probe and wedge for automated inspection
Figure2.10 Combined wedges for 45°S and 60°S refracted angles
Figure2.11 Surface wave probe conceptual design
Lesen Sie weiter in der vollständigen Ausgabe!
Lesen Sie weiter in der vollständigen Ausgabe!
Lesen Sie weiter in der vollständigen Ausgabe!
Lesen Sie weiter in der vollständigen Ausgabe!
Lesen Sie weiter in der vollständigen Ausgabe!
Lesen Sie weiter in der vollständigen Ausgabe!
Lesen Sie weiter in der vollständigen Ausgabe!
Lesen Sie weiter in der vollständigen Ausgabe!
Lesen Sie weiter in der vollständigen Ausgabe!
Lesen Sie weiter in der vollständigen Ausgabe!
Lesen Sie weiter in der vollständigen Ausgabe!
Lesen Sie weiter in der vollständigen Ausgabe!
Lesen Sie weiter in der vollständigen Ausgabe!
Lesen Sie weiter in der vollständigen Ausgabe!
Lesen Sie weiter in der vollständigen Ausgabe!
Lesen Sie weiter in der vollständigen Ausgabe!
Lesen Sie weiter in der vollständigen Ausgabe!
Lesen Sie weiter in der vollständigen Ausgabe!
Lesen Sie weiter in der vollständigen Ausgabe!
Lesen Sie weiter in der vollständigen Ausgabe!

