34,79 €
Mehr erfahren.
- Herausgeber: Packt Publishing
- Kategorie: Wissenschaft und neue Technologien
- Sprache: Englisch
ZBrush is a fantastic tool for creating models for use in computer games. Using a wide range of powerful tools you can create models for vehicles, props, environments, and characters.
This book makes creating game art in ZBrush fast and easy. It covers everything you need to create models of all kinds for your game projects, even if you've never used ZBrush before.
Built around four complete ZBrush projects, the book gives you everything you need to sculpt props, vehicles, and creatures in ZBrush. You'll start by creating a "spooky tree" model, mastering the sculpting, texturing, and decoration skills that are essential for all ZBrush topics. Next you'll move to man-made objects with a sci-fi drone. Next you'll see how to sculpt monsters and other creatures, deal with cloth and other soft materials, and prepare the model to become an animated, controllable character in a game. The final project returns to machines, building a complete, detailed spaceship for use in your sci-fi games.
Das E-Book können Sie in Legimi-Apps oder einer beliebigen App lesen, die das folgende Format unterstützen:
Seitenzahl: 320
Veröffentlichungsjahr: 2011
Ähnliche


Table of Contents
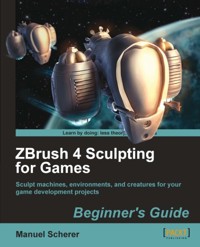
ZBrush 4 Sculpting for Games
Beginner's Guide
Copyright
Copyright © 2011 Packt Publishing
ZBrush 4 Sculpting for Games
Beginner's Guide
All rights reserved. No part of this book may be reproduced, stored in a retrieval system, or transmitted in any form or by any means, without the prior written permission of the publisher, except in the case of brief quotations embedded in critical articles or reviews.
Every effort has been made in the preparation of this book to ensure the accuracy of the information presented. However, the information contained in this book is sold without warranty, either express or implied. Neither the author, nor Packt Publishing, and its dealers and distributors will be held liable for any damages caused or alleged to be caused directly or indirectly by this book.
Packt Publishing has endeavored to provide trademark information about all of the companies and products mentioned in this book by the appropriate use of capitals. However, Packt Publishing cannot guarantee the accuracy of this information.
First published: March 2011
Production Reference: 1090311
Published by Packt Publishing Ltd. 32 Lincoln Road Olton Birmingham, B27 6PA, UK.
ISBN 978-1-849690-80-5
www.packtpub.com
Cover image model rendering, painting by Manuel Scherer on a starry background from Hubble Heritage Project, NASA
Credits
Author
Manuel Scherer
Reviewers
Ryan Bailey
Glauco Longh
Vivek Ram
Luke M. Steichen
Acquisition Editor
David Barnes
Development Editor
Susmita Panda
Technical Editors
Paramanand Bhat
Namita Sahni
Aditi Suvarna
Copy Editor
Laxmi Subramanian
Editorial Team Leader
Aditya Belpathak
Project Team Leader
Priya Mukherji
Project Coordinator
Shubhanjan Chatterjee
Proofreader
Linda Morris
Indexers
Rekha Nair
Monica Ajmera Mehta
Graphics
Geetanjali Sawant
Production Coordinator
Alwin Roy
Cover Work
Alwin Roy
About the Author
Manuel Scherer is a German game developer who has worked in the games industry and in the fields of visual computing. He is currently teaching real-time visualizations at the Offenbach Academy of Art and Design.
Apart from his beloved work, he writes as a freelance journalist about the games industry from major events such as the Game Developers Conference Europe.
First, I would like to thank my parents, especially my father who continuously supported me on the long way of creating such a book. Furthermore, I would like to thank my love for her unmatched amount of support and motivation.
Also the team at Packt did an amazing job on setting everything up, thank you. My special thanks go to my friend and author Felix Kerger who inspired me to write this book. Last but not the least, let me thank Prof. Rolf Schubert and Michael Margraf, Alban Voss, and Fabian Schempp for their infinite amount of constructive feedback and their everlasting good mood.
About the Reviewers
Ryan Bailey is a Senior-Level CG Artist working in the Animation and Video Game industry for over six years. Having a talent for art at a young age and parents that supported this, helped to nurture and grow his skills and talents as an illustrator and sculptor. Realizing that the only way to progress as an artist he moved onto the 3D Animation and Visual Effects Program at Vancouver Film School after four years of Fine Arts schooling.
Ryan's work experience includes Lead ZBrush Artist at Electronic Arts Canada, Senior Character Artist at Rainmaker Entertainment Inc., ZBrush Instructor at the Art Institute of Vancouver, and currently, he is working at Tecmo-Koei Canada as a CG Artist for their upcoming title Warriors—Legends of Troy. Even with his busy workload and family life, Ryan still finds time to do freelance work on the side.
Glauco Longhi is a sculptor, both traditional and digital, working for the cinema and television industry, also doing some toys and collectible works.
His passion for sculpture started in 2006, when he was working with After Effects for Motion Graphics for TV advertisement. At the studio, he met a guy who worked with something called 3Dmax, and then he fell in love with this brand new world.
After some basic courses, he chose the modeling area. And then, realized that only 3D wouldn't be enough for creating some nice characters, so he started sculpting in clay. After some months, his life was changed.
In the meantime, he worked for several 3D companies and studios, mainly focused on modeling and sculpting, but he decided to get some time and dedicate it to his own life, starting the freelancer living.
Now, sculpting maquettes, garage kits, prosthetic appliances, busts, halloween masks, props, and animatronics, his life is starting to make sense.
"Since I was 10 years old, my relation with arts was zero. I only wanted to be a pro skateboarder, and that was all I cared about. But I was very interested in how everything works—the mechanisms, the fx, the magic, and illusion. Now, working with prosthetic fx, animatronics and so on, it's like I'm putting everything that I always loved together. Everything is starting to make sense—that's awesome! I love this…."
Glauco Longhi is always doing workshops around Brazil. He likes to teach and talk about sculpture and character design, creatures, monsters, and also studying hard. Almost every day, free time is spent, sculpting, drawing, or reading some new stuff.
"My relation with skateboarding can be easily seen through my art and my passion, my study routine. When I was trying to do right some trick, I never stopped until I could do that on the right and style way. Since I was a child, my brain chose this path to see things, and that's what I do with my art. I'm obsessed with human anatomy, so I'm always trying to see things better, but with time, I can see that this is an infinite journey…That's good, so I'll be searching for learning forever, and this will keep me on the right path, hope so."
Vivek Ram began his career 10 years ago as a freelancer dabbling in all the various segments of 3D animation. He has worked with Rhythm and Hues as a Senior Digital Artist for a few years before moving on to the Dreamworks Dedicated Unit as a Modeling Lead, where he wore multiple hats and moved between many departments during his tenure. He currently works as an independent animation consultant, again playing the role of VFX Supervisor, Designer, or Art Director on both feature and game projects for a variety of studios and production houses. For more information and to view his gallery of work, please visit www.markeviv.com.
Luke M. Steichen is a character artist working in the video game industry in Seattle, Washington. He spent four years in the United States Army, which gave him the opportunity to pursue his dream of making video games by letting him attend the Art Institute of Seattle to earn his Bachelors of Fine Arts in Game Art and Design. Through hard work, dedication (and many all-nighters) he landed an internship as a character artist which marked the beginning of a successful career in the games industry.
Luke is currently working at Sucker Punch Productions as a character rigger and assistant technical director on inFamous 2. Previously, Luke worked at WB Games in Kirkland, Washington as an Associate World Artist for "Lord of the Rings: War in the North" and F.E.A.R. 3. Before that he worked as a Contract Character artist at Surreal Software on "This Is Vegas" and "Lord of the Rings: War in the North."
Luke's interests include sculpting, tabletop wargaming, playing guitar, and general geekiness.
Luke would like to thank his amazing wife for all her love and support (and patience).
www.PacktPub.com
Support files, eBooks, discount offers and more
You might want to visit www.PacktPub.com for support files and downloads related to your book.
Did you know that Packt offers eBook versions of every book published, with PDF and ePub files available? You can upgrade to the eBook version at www.PacktPub.com, and as a print book customer, you are entitled to a discount on the eBook copy. Get in touch with us at <[email protected]> for more details.
At www.PacktPub.com, you can also read a collection of free technical articles, sign up for a range of free newsletters, and receive exclusive discounts and offers on Packt books and eBooks.
http://PacktLib.PacktPub.com
Do you need instant solutions to your IT questions? PacktLib is Packt's online digital book library. Here, you can access, read, and search across Packt's entire library of books.
Why Subscribe?
Free Access for Packt account holders
If you have an account with Packt at www.PacktPub.com, you can use this to access PacktLib today and view nine entirely free books. Simply use your login credentials for immediate access.
Preface
Since ZBrush was released, it dramatically changed the way game art is created. It is unmatched in its speed for creating highly detailed models and thus, is widely used in the games and film industry. We could even say that if you want to be a game artist today, ZBrush is considered a standard.
A few years ago, ZBrush was used only for organic modeling. With ZBrush 4.0 this changed dramatically and you can now sculpt mechanical spaceships as well as organic creatures. And that's exactly what we're going to do—in the course of this book we'll complete four modeling tasks, covering the complete range of organic and mechanical sculpting. After you've completed this book, you will know all the techniques necessary to sculpt detailed game assets and view it in a game engine of your choice.
What this book covers
Chapter 1, Getting Started, will cover all the preparatory steps of working with ZBrush. We'll get a quick overview about what we will learn in this book and how ZBrush is used in a model creation process. After that we'll quickly go over the basic terminology and finally talk about working in the field of digital art.
Chapter 2, Learning the Interface, will introduce you to the interface and the basic modeling concepts in ZBrush. After we're done with that, we are ready to start our first model in the next chapter.
Chapter 3, Modeling a Spooky Tree with ZSpheres, deals with model creation from ZSpheres in ZBrush. This is a powerful technique in ZBrush that's very useful for quickly blocking out volumes for our models. We'll use it to create a spooky tree from scratch and finally prepare it for sculpting in the next chapter.
Chapter 4, Adding Details to the Tree, covers the sculpting features of ZBrush. In this chapter, we'll take our tree from a rough model to the final stage. We'll learn about the different brushes in ZBrush and how we can use them to detail our model of the tree.
Chapter 5, Texturing the Tree with Polypaint, shows how we can texturize our models inside ZBrush. The cool thing is that in ZBrush we can paint our colors directly onto the model, which is a lot more fun than painting textures in a 2D image editor. We'll also take advantage of all the sculpted details and use them to quickly add color variations to our model.
Chapter 6, Adding an Environment to the Tree, will introduce subtools to compose a model out of multiple parts. We'll add a hill for the tree and detail it by adding some mushrooms and rocks.
Chapter 7, Modeling a Sci-Fi Drone, will introduce a new workflow, starting a model in an external modeling application such as Blender. We'll then see how we can transfer models between ZBrush and other modeling software.
Chapter 8, Sci-Fi-Drone: Hard Surface Sculpting, covers the new mechanical sculpting techniques of ZBrush. In this chapter, we'll finish our second model and learn a lot about detailing mechanical objects with the new brushes.
Chapter 9, Sci-Fi-Drone: Creating a Normal Map, discusses the different texture types commonly used in games. After that we'll take our detailed drone from the previous chapter and create a normal map from it so we can view all the fine details inside a game engine.
Chapter 10, Modeling a Creature with ZSketch, starts off with our third model—the brute. We'll use ZSketching to bring our character to life. This technique builds upon ZSpheres and allows us to paint muscles on top of a skeleton. This is incredibly fast for organic meshes. Once we're done with that, we'll convert our ZSketch into a mesh for further sculpting.
Chapter 11, Sculpting the Creature's Body, discusses the key steps involved in sculpting an organic creature. We'll have a closer look at sculpting anatomical details and will learn how to add additional props to our character, like a belt.
Chapter 12, Sculpting Fur and Accessories, introduces alphas to achieve realistic-looking material such as fur or feathers. We'll not only use alphas, but also talk about how to create custom alphas on our own. After that we'll use these custom alphas to add the final polish to our creature.
Chapter 13, Preparing the Creature for Games, covers the needed steps to bring our detailed creature from the last chapter into a game. This involves creating a low-poly version of it and transferring the surface details. Finally, we'll unwrap the creature so we can bake a normal map, like we did for the drone in Chapter 9.
Chapter 14, Modeling the Harvester Ship, will start off with our fourth model—the harvester ship. We'll start this complex spaceship directly inside ZBrush with a new technique called ShadowBox. This allows us to create mechanical shapes in no time, so we can assemble our complex ship. We'll then refine these shapes with the new clipping brushes that allow us to create crisp mechanical surfaces.
Chapter 15, Detailing the Harvester Ship, covers the creation of more complex parts like a clamshell with ShadowBox and the clipping brushes. We'll also use Booleans to combine or subtract meshes to create forms that were out of reach before.
Chapter 16, Finishing the Harvester Ship, will draw together all the techniques learned before to add the final polish to our ship. We'll also learn how we can grab sculpted geometry and use it as a brush to quickly add fine details.
Who this book is for
This book is for aspiring (game-) artists who want to dig deeper into highly detailed game model production. It's good if you have a basic understanding of 3D and its possibilities and are also familiar with other 3D-software like Maya, 3D-Studio Max, Softimage, Blender, and others, which are good companions for ZBrush. Also, for someone looking for a more intuitive way of creating 3D models, this book and ZBrush are the right tools to start with.
Conventions
In this book, you will find a number of styles of text that distinguish between different kinds of information. Here are some examples of these styles, and an explanation of their meaning:
Code words in text are shown as follows: "So we'll concentrate on the .obj format, which can be read by almost any 3D application."
New terms and important words are shown in bold. Words that you see on the screen, in menus or dialog boxes, for example, appear in the text like this: "Pick the Move brush and make sure that the fur forms a closed volume around the body, as shown in the next screenshot ".
Note
Warnings or important notes appear in a box like this.
Tip
Tips and tricks appear like this.
Reader feedback
Feedback from our readers is always welcome. Let us know what you think about this book—what you liked or may have disliked. Reader feedback is important for us to develop titles that you really get the most out of.
To send us general feedback, simply send an e-mail to <[email protected]>, and mention the book title via the subject of your message.
If there is a book that you need and would like to see us publish, please send us a note in the SUGGEST A TITLE form on www.packtpub.com or e-mail <[email protected]>.
If there is a topic that you have expertise in and you are interested in either writing or contributing to a book, see our author guide on www.packtpub.com/authors.
Customer support
Now that you are the proud owner of a Packt book, we have a number of things to help you to get the most from your purchase.
Tip
Downloading the example files and colored graphics for this book
You can download the example files for all Packt books you have purchased from your account at http://www.PacktPub.com. If you purchased this book elsewhere, you can visit http://www.PacktPub.com/support and register to have the files e-mailed directly to you.
Errata
Although we have taken every care to ensure the accuracy of our content, mistakes do happen. If you find a mistake in one of our books—maybe a mistake in the text or the code—we would be grateful if you would report this to us. By doing so, you can save other readers from frustration and help us improve subsequent versions of this book. If you find any errata, please report them by visiting http://www.packtpub.com/support, selecting your book, clicking on the errata submission form link, and entering the details of your errata. Once your errata are verified, your submission will be accepted and the errata will be uploaded on our website, or added to any list of existing errata, under the Errata section of that title. Any existing errata can be viewed by selecting your title from http://www.packtpub.com/support.
Piracy
Piracy of copyright material on the Internet is an ongoing problem across all media. At Packt, we take the protection of our copyright and licenses very seriously. If you come across any illegal copies of our works, in any form, on the Internet, please provide us with the location address or website name immediately so that we can pursue a remedy.
Please contact us at <[email protected]> with a link to the suspected pirated material.
We appreciate your help in protecting our authors, and our ability to bring you valuable content.
Questions
You can contact us at <[email protected]> if you are having a problem with any aspect of the book, and we will do our best to address it.
Chapter 1. Getting Started
In this chapter, we will discuss who this book is for and what will be covered. We'll also discuss why we use ZBrush and why it is so important nowadays. After that we'll go over the basic terminology and preparatory steps for this book and finally talk about some basics of working in the field of digital art.
Who this book is for
This book is for aspiring (game-)artists who want to dig deeper into highly detailed game model production. It's good if you have a basic understanding of 3D and its possibilities and are also familiar with other 3D-software like Maya, 3D-Studio Max, Softimage, Blender, and others, which are good companions for ZBrush. Also, for someone looking for a more intuitive way of creating 3D models, this book and ZBrush are the right tools to start with.
What we will learn in this book
In this book, we'll focus on learning how to use ZBrush for creating models for game production. We'll start with a quick look at the interface and then immediately start learning by solving little exercises. All these exercises will be based on fictional tasks to explain things in context. This means you'll not only be able to choose the appropriate solution for your task, but also consider the creative process as a whole. This is especially important if you do not only work on your own, but in a team of maybe a hundred or more people.
By the end of the book, you would have finished four complete game-specific modeling tasks, which will walk you through all the essentials of using ZBrush in a game production pipeline. Here's one of the four models we'll create:
Why ZBrush?
Why do we use ZBrush and why is it so widely used in the game and film industry? Because it is very good for creating highly detailed models in a very short time. This may sound trivial, but it is very sought-after and if you have seen the amazing detail on some creatures in Avatar (film), The Lord of the Rings (film) or Gears of War (game), you'll know how much this adds to the experience. Without the possibilities of ZBrush, we weren't able to achieve such an incredible level of detail that looks almost real, like this detailed close-up of an arm:
But apart from creating hyper-realistic models in games or films, ZBrush also focuses on making model creation easier and more lifelike. For these reasons, it essentially tries to mimic working with real clay, which is easy to understand. So it's all about adding and removing digital clay, which is quite a fun and intuitive way of creating 3D-models.
Yet it is important to know that ZBrush is a very specialized tool, so it is mostly used in conjunction with other 3D Software to animate or export the models into a game engine, for example. Still, specialization comes along with efficiency and you will be amazed how easily we can realize our ideas with ZBrush in no time.
How ZBrush is used in a game's production
To better understand the workflow using ZBrush, let's think of a simplified way a 3D model is created to be used in our game. As always, there are many ways of doing the same thing, and many companies do it differently. By the end of this book, you will know some of the different ways of model creation, to blend into an existing workflow or to even create your own.
It all starts with an idea or ideally a concept drawing. This 2D concept is then roughly created in 3D, often in a 3D software such as Maya, 3D Max, Blender, Softimage, and others. Once this is done, ZBrush comes into play to detail the model and finish the digital sculpture, which is the fun part, but may also easily consume most of the time during model creation. After that, you may have something like a very detailed and lifelike sculpture of Caesar, but it has no color variation, it is just stone gray. So you paint it, usually in a 2D application like Photoshop or GIMP. This process of applying color to a model is called texturing. Depending on whether you would like to create a stiff statue or a walking Caesar, you may want to animate your creation, which is again done in a 3D software like Maya. With this step done, you're all set to export your model into any game engine you like, to make your own game or just view your model.
So in short, a simplified pipeline of creating a model using ZBrush, Maya, and Photoshop would look like this:
As shown in the previous image, there is more than one way of creating game models. We'll see in the later chapters that ZBrush could even be used for all of the first four steps, covering more than half of the workflow for game model production, as shown in the second diagram.
Here's another highly detailed example we're going to sculpt and view in real time:
What you'll need for this book
First of all, make sure, you have at least ZBrush version 4.0 installed on your computer.
Tip
ZBrush is very fast, but still requires a computer with a bit of horsepower. It takes full advantage of multiple cores in your computer or more RAM-Memory, the more the better. Still, a dual core processor with 1 or better 2 GB of RAM will probably be sufficient to work you through this book. If this is all Greek to you, but your computer isn't age-old, it will probably work out well, too.
Another important point to mention are pen tablets. They usually consist of a tablet and a pen, imitating real drawing on your computer. You can still work in ZBrush just with your mouse, but it is highly recommended to use a pen tablet. They are affordable, depending on the working size you choose. Using ZBrush with a pen tablet not only saves you a lot of time, but is also more fun, because it feels very intuitive and natural.
If you ever tried to paint with a mouse, you know that it's a lot faster with a pencil.
Tip
If you think of buying a pen tablet www.wacom.com is a very well-known manufacturer.
This book assumes you're working with ZBrush on Windows. So if you're on a Mac, remember that the Control Key (Ctrl) we'll refer to is the Command Key (Cmd) on your keyboard instead.
Terminology
There are six terms we will refer to most of the time in this book: Vertex, Edge, Polygon, Quad, Triangle, and Mesh. Let's see, how we can use them to describe a model of a hand, as shown in the following image:
Let's see what they mean in detail:
Working in the field of digital art
The most important thing about working in digital art seems to be very obvious but is often overlooked. It's a form of art and it should also be treated this way. This is something that you should have in mind when working on 3D game models or even concept art, because things such as color and composition will always be part of your work, even if not addressed explicitly.
This doesn't mean that you have to be the world's best painter to start in game art, but just think of your work as art, and also apply the rules of art to it.
Although job positions in game production include the term "artist", for example "concept artist" or "character artist", it is still a field that combines technical and artistic knowledge, and sometimes one outweighs the other.
ZBrush is a very good example of how creating digital art becomes less technical, so more and more people are able to give it a try. As this becomes easier and easier, the real distinction between digital artists will lie in their artistic capability, not their technical knowledge.
If you already have some experience in drawing or painting or even sculpting, it will be even easier for you to use ZBrush. I personally believe that if you can draw it, you can also sculpt it in ZBrush, because both mediums have so much in common.
Like every skill, creating art requires practice. We'll address decisions made out of artistic reasons in this book, so you can decide if you follow them, or alter the examples to your own imagination. Because at the end of the day, it all comes down to being able to give reasons for your decisions.
The concept
The concept is quite an important step in the creative process. Some people like to do it in writing to maybe share it with others, some just do it for themselves. Like the preceding paragraph stated, it's important to be able to explain your decisions. So at first, you need to know the purpose of your 3D-model. Sometimes, you may get such a concept from your Art Director, or you're given the freedom to create your own. To illustrate the latter case, let's imagine a character and do this process in short, so you can see how much this first concept can improve the process and the resulting piece of work.
This example will be written like a really short background story for the character, to give it some personality. Again, there are many ways of doing this and you are encouraged to find the ones that work best for you, because it depends on your personal style of working.


