30,99 €
Mehr erfahren.
- Herausgeber: John Wiley & Sons
- Kategorie: Wissenschaft und neue Technologien
- Sprache: Englisch
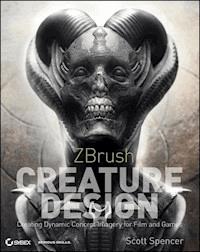
ZBrush's popularity is exploding giving more CG artists the power to create stunning digital art with a distinctively fine art feel. ZBrush Character Creation: Advanced Digital Sculpting is the must-have guide to creating highly detailed, lush, organic models using the revolutionary ZBrush software. Digital sculptor Scott Spencer guides you through the full array of ZBrush tools, including brushes, textures and detailing. With a focus on both the artistry and the technical know-how, you'll learn how to apply traditional sculpting and painting techniques to 3D art while uncovering the "why" behind the "how" for each step. You'll gain inspiration and insight from the beautiful full-color illustrations and professional tips from experienced ZBrush artists included in the book. And, above all, you'll have a solid understanding of how applying time-honored artistic methods to your workflow can turn ordinary digital art into breathtaking digital masterpieces.
Sie lesen das E-Book in den Legimi-Apps auf:
Seitenzahl: 509
Veröffentlichungsjahr: 2011
Ähnliche
Table of Contents
Cover
Title Page
Copyright
Publisher's Note
Dedication
Acknowledgments
Foreword
About the Author
Introduction
Who Should Read This Book
How to Use This Book
How to Contact the Author
Chapter 1: Sculpting, from Traditional to Digital
Gesture, Form, and Proportion
ZBrush Interface General Overview
Using the ZBrush Tools
Chapter 2: Sculpting in ZBrush
An Approach to Sculpting
The Brush Manager
Sculpting the Skull
Chapter 3: Designing a Character Bust
ZBrush and Working with Imported Meshes
Importing and Preparing a Mesh for Sculpting
Editing the Mesh in Maya
Working Back in ZBrush
Chapter 4: ZBrush for Detailing
Form and Details
Alphas
Details and Layers
Another Take on Detailing
Chapter 5: Texture Painting
UVs in ZBrush
The Texture Menus
What Is PolyPainting?
Painting a Creature Skin
ZAppLink
Chapter 6: ZSpheres
Introducing ZSpheres
Building a ZSphere Biped
Chapter 7: Transpose, Retopology, and Mesh Extraction
Moving and Posing Figures with Transpose
Transpose Master
Retopology
Using the Topology Tools
Building Accessories with Topology Tools and Mesh Extraction
Chapter 8: ZBrush Movies and Photoshop Composites
ZMovie
ZBrush to Photoshop
Photoshop Compositing
An Alternative Approach to Compositing: The Making of “Fume”
Chapter 9: Rendering ZBrush Displacements in Maya
What’s a Difference Map?
Exporting Your Model from ZBrush
Generating Displacement Maps
Setting Up Your Scene for Displacement
Applying Bump Maps in Maya
Common Problems When Moving into Maya
Chapter 10: ZMapper
Normal Maps
ZMapper
Arbitrary Meshes
Cavity Maps
Rendering Normal Maps in Maya
ZMapper for Blend Shapes
Raycasting Plateaus and Silhouette
Chapter 11: ZScripts, Macros, and Interface Customization
Contrasting ZScripts and Macros
Anatomy of a ZScript
Hotkeys
Customizing the Interface
Making a Custom User Menu
Appendix: About the Companion DVD
What You’ll Find on the DVD
System Requirements
Using the DVD
Troubleshooting
Index
End-User License Agreement
Acquisitions Editor: Mariann Barsolo
Development Editor: Pete Gaughan
Technical Editor: Ryan Kingslien
Production Editor: Elizabeth Ginns Britten
Copy Editor: Elizabeth Welch
Production Manager: Tim Tate
Vice President and Executive Group Publisher: Richard Swadley
Vice President and Executive Publisher: Joseph B. Wikert
Vice President and Publisher: Neil Edde
Media Associate Project Manager: Laura Atkinson
Media Associate Producer: Angie Denny
Media Quality Assurance: Josh Frank
Book Designer and Compositor: Chris Gillespie, Happenstance Type-O-Rama
Proofreader: Nancy Bell
Indexer: Nancy Guenther
Cover Designer: Ryan Sneed
Cover Image: Scott Spencer, Hector Delatorre
Copyright © 2008 by Wiley Publishing, Inc., Indianapolis, Indiana
Published simultaneously in Canada
ISBN: 978-0-470-24996-3
No part of this publication may be reproduced, stored in a retrieval system or transmitted in any form or by any means, electronic, mechanical, photocopying, recording, scanning or otherwise, except as permitted under Sections 107 or 108 of the 1976 United States Copyright Act, without either the prior written permission of the Publisher, or authorization through payment of the appropriate per-copy fee to the Copyright Clearance Center, 222 Rosewood Drive, Danvers, MA 01923, (978) 750-8400, fax (978) 646-8600. Requests to the Publisher for permission should be addressed to the Legal Department, Wiley Publishing, Inc., 10475 Crosspoint Blvd., Indianapolis, IN 46256, (317) 572-3447, fax (317) 572-4355, or online at http://www.wiley.com/go/permissions.
Limit of Liability/Disclaimer of Warranty: The publisher and the author make no representations or warranties with respect to the accuracy or completeness of the contents of this work and specifically disclaim all warranties, including without limitation warranties of fitness for a particular purpose. No warranty may be created or extended by sales or promotional materials. The advice and strategies contained herein may not be suitable for every situation. This work is sold with the understanding that the publisher is not engaged in rendering legal, accounting, or other professional services. If professional assistance is required, the services of a competent professional person should be sought. Neither the publisher nor the author shall be liable for damages arising herefrom. The fact that an organization or Website is referred to in this work as a citation and/or a potential source of further information does not mean that the author or the publisher endorses the information the organization or Website may provide or recommendations it may make. Further, readers should be aware that Internet Websites listed in this work may have changed or disappeared between when this work was written and when it is read.
For general information on our other products and services or to obtain technical support, please contact our Customer Care Department within the U.S. at (800) 762-2974, outside the U.S. at (317) 572-3993 or fax (317) 572-4002.
Wiley also publishes its books in a variety of electronic formats. Some content that appears in print may not be available in electronic books.
Library of Congress Cataloging-in-Publication Data:
Spencer, Scott, 1975–
ZBrush character creation : advanced digital sculpting / Scott Spencer. — 1st ed.
p. cm.
ISBN 978-0-470-24996-3 (paper/dvd)
1. Computer graphics. 2. ZBrush. I. Title.
T385.S662 2008
006.6’93—dc22
2008009613
TRADEMARKS: Wiley, the Wiley logo, and the Sybex logo are trademarks or registered trademarks of John Wiley & Sons, Inc. and/or its affiliates, in the United States and other countries, and may not be used without written permission. All other trademarks are the property of their respective owners. Wiley Publishing, Inc., is not associated with any product or vendor mentioned in this book.
10 9 8 7 6 5 4 3 2 1
Dear Reader,
Thank you for choosing ZBrush Character Creation: Advanced Digital Sculpting. This book is part of a family of premium-quality Sybex books, all of which are written by outstanding authors who combine practical experience with a gift for teaching.
Sybex was founded in 1976. More than thirty years later, we’re still committed to producing consistently exceptional books. With each of our titles we’re working hard to set a new standard for the industry. From the paper we print on, to the authors we work with, our goal is to bring you the best books available.
I hope you see all that reflected in these pages. I’d be very interested to hear your comments and get your feedback on how we’re doing. Feel free to let me know what you think about this or any other Sybex book by sending me an email at [email protected], or if you think you’ve found a technical error in this book, please visit http://sybex.custhelp.com. Customer feedback is critical to our efforts at Sybex.
Best regards,
Neil Edde
Vice President and Publisher
Sybex, an Imprint of Wiley
To my parents, for making all things possible, and to Bill Johnson and Paul Hudson for their guidance, inspiration, and friendship.
Acknowledgments
There are so many people who bring a book like this to life; I would like to try and thank each of them here. This includes those with a direct hand in the editing and layout as well as those whose support makes this kind of endeavor possible. First off I’d like to thank Karl Meyer, Brian Sunderlin, and Gentle Giant Studios for giving me a place to learn and grow as well as make cool stuff; Meredith Yayanos for her loving support, Jim McPherson for his keen eye and expert artistic guidance. Thanks to Richard Taylor, Tania Rodger, and the gang at Weta Workshop for their friendship and constant inspiration. I would also like to thank Andrew Cawres and Freedom of Teach for the tools and assistance to grow as an artist.
Thanks to Ryan Kingslien for serving as tech editor and a constant source of information on the inner workings of ZBrush as well as his keen eye for sculptural form. Ofer Alon, and Jaime Labelle at Pixologic; Kyle McQueen who will forever be renaming .tif files in his sleep, Alex Alvarez, and everyone at Gnomon. Thanks also go to Belinda Heywood and the team at Secret Level.
I’d also like to thank Rick Baker and Dick Smith for inspiring me to pick up clay for the first time. I must also thank those friends who have shared techniques and critiques; Zack Petroc, Meats Meier, Scott Patton, Cesar Dacol, Ian Joyner, JP Targete, Mark Dedecker, Stefano Dubay, Hector Delatorre, Nobu Sasagawa, Bill Spradlin, and Ricardo Ariza.
A very special thanks to Eric Keller for his input and bringing this book to me. I also must thank the wonderful team at Wiley who helped me through the process and were always professional, patient, attentive, and helpful to the process. Thanks to Mariann Barsolo for starting the process and helping it along. Thanks to Pete Gaughan for guiding the direction of the book and helping to keep it on track and clear. Thanks to Liz Britten for her masterful copyediting and layout, bringing the final product to light.
Foreword
There are rare moments in history when a renaissance is conceived and the whole paradigm of a particular medium is changed forever. Through the celebration of subtractive carving or additive sculpting, these various art mediums have established a whole new cultural iconography and have created treasures through the art of sculpture.
A new artistic renaissance is quietly unfolding around us, establishing a medium of art no less powerful than those that have developed before it. As the unique artistic tools that are Photoshop, Painter, the tablet, and the stylus have forever changed the conceptual designer’s palette of techniques and injected a freedom and spontaneity into artists’ work, so has the development of 3D modeling packages allowed sculptors another wonderful tool in their equipment.
As each new renaissance delivers to the world master craftspeople and artisans operating at the pinnacle of their chosen discipline, Scott Spencer has chosen to master the medium of 3D digital modeling and become a master craftsman in his own right. Scott is an exceptionally talented person who draws from an innate gift and understanding of the sculpted form and pairs this with his complete grasp of the technical complexities of software packages, digital technology, and cutting-edge 3D software. Scott has become well recognized for his work within the high-end creative merchandising field, primarily working within Gentle Giant (one of the world’s leading merchandising and collectibles business), but he has also carved his own distinct career with the tutoring of 3D digital modeling and sculpture to students and professionals alike.
I have had the great pleasure of getting to know Scott over the past four years and have watched in awe as his skill and artistry has tasked the 3D modeling tools at his fingertips into creating dynamic figurative sculptures worthy of any gallery.
It is, therefore, a wonderful thing to be invited to write a foreword for Scott’s book on ZBrush and the art of 3D modeling. I find Scott to be an inspiration as he wields his craft. It is Scott who I have turned to when considering our own artists at Weta Workshop becoming proficient in the field of 3D digital modeling, as I know there is no better tutor from whom we can all learn and who is part of this amazing new renaissance within the art of sculpture.
—Richard Taylor
Weta Workshop
Miramar, Wellington, New Zealand
Richard Taylor and his partner Tania Rodger began what would become Weta Workshop Ltd. in New Zealand in 1994. Taylor won four Academy Awards for his work on The Lord of the Rings trilogy, for which Weta performed the gamut of digital production from compositing to animation of CG creatures. Over the past 20 years, the company has provided physical and digital effects for many films, advertisements, and television shows, including the Hercules and the Xena series, as well as feature films including Master and Commander; I Robot; Van Helsing; The Last Samurai; The Chronicles of Narnia: The Lion, the Witch, and the Wardrobe; The Legends of Zorro; and King Kong.
About the Author
My name is Scott Spencer, I am the Digital Art Director at Gentle Giant Studios in Burbank, California. At Gentle Giant I work in various media, creating digital characters for film, broadcast, and games as well as physical sculptures for concept design, promotion, and other applications. Over the past few years I have worked on various projects in both film, broadcast, and games, from the remake of the classic game “Golden Axe” to the Iron Man movie, Pumpkinhead 3, Species 3, as well as several collectible figures and statues sold on the commercial market.
In approaching this book I tried to take lessons from the teachers that most influenced my own education. The two instructors are Bill Johnson and Paul Hudson. Bill Johnson is the owner of Lone Wolf FX, a makeup effects company, and my first employer. From Bill I learned an enormous amount not just about sculpting and creature design but also about thinking and seeing like an artist. I also found in Bill a great friend whom I count as one of my closest to this day.
At Bill’s urging I went to art school at The Savannah (Georgia) College of Art and Design. I studied animation with a minor in drawing and anatomy, and I met my second great artistic influence. Paul Hudson teaches perspective, anatomy, and illustration; he is an accomplished illustrator, painter, sculptor, and general Renaissance man. Paul teaches his students by example to be passionate about the continuous process of learning that is to be an artist.
While at SCAD I noticed ZBrush and a light went off for me. Here was a program that would let me do what I do in clay on the computer. I had used Maya and 3ds Max but never felt the same seamlessness as in ZBrush. This software helped me be a better artist; it didn’t fight me into a technical corner.
ZBrush can be a hard nut to crack. I wanted to learn this program desperately, so I worked many an endless night, with the help of the user base at ZBrushCentral, which is extremely supportive to artists. I wrote what is now the official ZBrush to Maya ZPipeline guide, available with some of my other tutorials on ZBrush.info.
After SCAD I attended the Florence Academy of Art summer sculpting session, then I found my way to California and to Gentle Giant Studios, which seemed to be one of just a few companies seamlessly blending traditional and digital art techniques. It was a fertile ground for ZBrush. In two short years we had built an entire digital sculpting team from the ground up that included many traditional sculptors who migrated from clay into ZBrush. Today we handle a large volume of projects from toys and collectibles to life-size figures and models for video games and film.
In the years since I started using ZBrush, my passion for the program and the approach of applying sculptural approached to a 3D world has led me to teach a selection of classes at the Gnomon School of Visual Effects as well as release several video tutorials for Gnomonology.com and Pixologic.com.
Along the way I have made a lot of sculptures, taught a lot of classes, and met some amazing artists who continue to inspire and influence me. I have taught at the Weta Workshop in Wellington, New Zealand, where I had the rare opportunity to meet and get to know some of the best creature and character artists in the world. Overall I consider myself very fortunate to have the opportunity to do what I always dreamed of doing—sculpting characters for a living.
I have included several guest artists in this book to help offer more variety in style and approach. Here I would like to introduce you to these amazingly talented individuals who were kind enough to include their thoughts and work in this book.
Cesar Dacol
Cesar Luis Dacol has worked in the film industry for nearly 20 years, having started his career in the makeup effects industry and transitioning to computers effects in the mid-1990s.With a background in anatomy and traditional sculpting, he quickly adapted to the 3D world of computers. For the past five years Cesar has worked primarily as lead and modeling supervisor, contributing to many feature films such as 300, Barnyard, and Fantastic Four.
Ian Joyner
Ian Joyner has been a character modeler for more than five years. In that time he has worked on everything from feature films, ride films, and critically acclaimed video game cinematics. Ian’s work can be seen in many projects including BioShock, Marvel Ultimate Alliance, Hellgate: London, Warhammer: Age of Reckoning and Halo Wars, the feature films Rocky 6 (Rocky Balboa) and James Cameron’s Aliens of the Deep, as well as the award-winning short A Gentlemen’s Duel by Blur Studio.
Jim McPherson
Starting in the 1980s in the makeup and special effects industry, Jim has worked with Rick Baker’s Cinovation Studios on Gremlins 2, The Nutty Professor, Matinee, Men in Black, and Planet of the Apes. Rick’s philosophy of sculptural character design has been a huge influence in Jim’s work. The opportunity to design characters under his tutelage was an educational experience that cannot be matched. Previous to the dragon tutorial in this book, Jim has sculpted for designer Miles Teves on a dragon maquette for the film Reign of Fire.
Jim currently works with the team at Gentle Giant Studios. The digital sculpting team has completed work on many of the characters in Sega’s “Golden Axe.” The digital artists work in close proximity with a brilliant team of traditional sculptors. This is the correct atmosphere to meet the challenge of applying the principles of sculpture in digital modeling.
Zack Petroc
Zack Petroc has a bachelor of fine arts degree from the Cleveland Institute of Art with a major in sculpture and dual minor in drawing and digital media. Additionally, he studied anatomy at Case School of Medicine and figure sculpture in Florence, Italy. Zack uses his strong design background for both his traditional and digital work. This allows him to contribute to the artistic vision of a project not only during the concept design stage, but also throughout production. Zack is currently working as a freelance art director and concept designer for feature film and video games. He is also a member of the Art Directors Guild Technology Committee.
Alex Alvarez
Alex is founder and director of the Gnomon Workshop and of the Gnomon School of Visual Effects in Hollywood. Having dedicated the last decade to educating students and professional artists around the world, Alex has helped change the face of computer graphics and design education. He has been published in industry magazines, websites, and books, and he has taught courses at several major trade conferences. Alex is president of the Los Angeles Maya Users Group and sits on the Advisory Boards for Highend3D.com and CGsociety. He continues to work on personal and professional projects, recently as a creature development artist on the James Cameron film Avatar. Prior to Gnomon, Alex worked for Alias|Wavefront as a consultant and trainer for studios in the Los Angeles area. Alex is an alumnus of the Art Center College of Design and the University of Pennsylvania.
Ryan Kingslien
Ryan Kingslien is a senior Pixoltician at Pixologic, where he works with programmers and artists to fuse art and technology for ZBrush’s cutting-edge digital art tools. He studied traditional art at the Pennsylvania Academy of Fine Art and digital art at the Gnomon School of Visual Effects, and earned his degree in liberal arts with a focus on creative writing at Antioch University.
Svengali
As a leading creator of some of the most useful plug-ins for ZBrush, Svengali can be found at www.zbrushcentral.com.
Fabian Loing
Fabian Loing is 26 years old. He was born in Jakarta, Indonesia, and is currently a character artist, living in Canada, and working for Pandemic Studios.
Image Contributors
In addition, I would like to thank the following for consenting to include images of their work in the book. I hope you find these images as compelling and inspiring as I do.
Alex Oliver, “The Mummy”Arran Lewis, “ZSphere anatomy”Magdalena Dadela, “Old woman”Steve Jubinville, “The darkness monster”Joel Mongeon, “Studio Wall series”Introduction
Welcome to ZBrush Character Creation: Advanced Digital Sculpting. I wrote this book to pull together the tools and techniques I have gathered over the past few years as a digital sculptor from both personal experience and the openness and sharing of other ZBrush artists. It is my hope that this book will help build on your experience with ZBrush and open up new and exciting techniques using the program.
This book focuses specifically on character sculpting and painting with ZBrush. Creature and character work has been the focus of my career for the past 10 years, and since moving into a digital workflow with ZBrush, I have seen the possibilities for artists explode. We will cover topics from basic sculpting to more advanced techniques of building form and character. We will also look at painting skin and adding fine details to our characters. Throughout the book, I have invited some friends to add their own experience with ZBrush in the sidebars. Every artist works differently, and we can learn so much from seeing other approaches to the same problems.
In addition to working as a digital sculptor, I have been an instructor at the Gnomon School of Visual Effects in Hollywood teaching ZBrush for the past two years. In this time I have seen a variety of students, from beginner to advanced, approach ZBrush and learn the toolset. This experience has helped me craft this book in a way that I hope will be most beneficial to you, the reader.
In my experience teaching, I have found that it is important to learn the ins and outs of the software. Knowing how to find the tools is, of course, necessary. I have also seen that just as important is an understanding of what to do with the tools you learn. It is easy to find the Standard brush, for instance, but I illustrate how to use the brushes to build a character with sound structure, form, and an eye toward sculptural anatomy. These foundation artistic principles are the core of good work whether you are making it in ZBrush or in clay.
Who Should Read This Book
This book is for anyone who wants to sculpt creatures and characters in ZBrush. It is best to work from the first exercises through the book if you are new to ZBrush. You may also skip to the section specific to your center of interest. For this reason I have sought to include many examples of how to approach digital sculpting from an artistic perspective in the book. It is not by any means the last word on the subject, but I find that my own experience in traditional media has helped me in ZBrush. I hope that by applying the same principles of gesture, form, and proportion to this book it will help you as well. It is easy to become preoccupied with the technology, so we often need to step back and look at the art itself. Because this is a sculptural medium and a series of still images can only show so much, I have included most of the exercises on the DVD in video form. You can watch these and see the steps performed in real time.
This book is for the intermediate ZBrush user. I assume a certain amount of experience but I have also been careful to include enough information that a new user can grasp the topics quickly. For a more foundational introduction to the tools, I recommend looking at Eric Keller’s Introducing ZBrush, also from Sybex.
What You Will Learn
In this book you will learn how to work with the ZBrush sculpting and painting toolset to create believable characters. We will also look at how to get your work out of ZBrush into a third-party application for rendering using either displacement or normal mapping techniques. We will look at anatomy and how it affects the form of the head and explore how to use anatomical knowledge to assist in sculpting a human head. We will talk about color theory and how it influences color choices when painting a creature skin from scratch. We will also discuss how to create your own base geometry in ZBrush using ZSpheres, as well as how to remesh a ZTool into an animation-ready base topology. Other topics include posing in ZBrush, using alphas and stencils for detailing, understanding ZScripting, and customizing your interface. Over the course of the book, we will also look at production considerations and how to get the most flexibility from ZBrush in a work pipeline.
Hardware and Software Requirements
To complete the core exercises of this book, you need ZBrush version 3.1 or higher. Some sections also include material related to Photoshop and Maya and using these programs together with ZBrush. Hardware requirements are a PC or Mac running ZBrush with a gigabyte or more of RAM. The more RAM you have, the better results you can get with ZBrush.
It is also imperative that you have a Wacom tablet. While it is possible to use a mouse with ZBrush, it is like drawing with a brick. A Wacom or other digital tablet will open the doors for you to paint and sculpt naturally. Personally I recommend a Wacom Cintiq. There are two variations of this tablet screen available at the time of this writing. The desktop model with a 21˝ screen as well as a smaller 12˝ portable model. The Cintiq allows you to sculpt and paint directly on the screen and can vastly improve the speed and accuracy with which you can use ZBrush. It is essential to use some form of Wacom tablet be it a Cintiq or a standard Intuos with ZBrush.
How to Use This Book
I have structured the text to start from a basic look at the ZBrush toolset and progress through the entire program into more advanced concepts and tools. Although there is an open and thriving user community, there was a need for a physical manual for working with ZBrush. This book seeks to fill that void and offer a training solution for users who prefer to work from a printed material at their own pace. I also recommend you read Eric Keller’s Introduction to ZBrush published by Wiley.
This book will be especially useful to those who are coming to digital sculpting with no previous 3D experience. I have tried to communicate the ZBrush workflow with examples from traditional sculpting and painting technique. To me, ZBrush is not only its own medium as much as it is an extension of paint and clay, much in the same way that Corel Painter extends and improves on paint and canvas, thus allowing the artist to use traditional techniques in new ways. Because of this, I believe it is just as important to discuss where to find the tools as it is to illustrate how to use them effectively to create compelling creatures and characters.
Chapter 1: Sculpting, from Traditional to Digital introduces the ZBrush interface and working methods. In this chapter we create a doorknocker from a primitive plane.
Chapter 2: Sculpting in ZBrush further explores the ZBrush sculpting toolset.Starting with a ZBrush primitive sphere, we block in the skull, facial muscles, and then skin of the human head.
Chapter 3: Designing a Character Bust applies what we have learned about sculpting in ZBrush to an imported polygon mesh. Using a generic human head model, we sculpt two different character busts. Advanced techniques for transferring sculpted details are also examined.
Chapter 4: ZBrush for Detailing In this chapter we look at creating high-frequency details in ZBrush. By using alphas and strokes, we can detail a character with a realistic skin texture.
Chapter 5: Texture Painting Using PolyPaint we paint a creature skin texture from scratch. This chapter introduces ZBrush texture applications as well as some important color theory to assist you in texturing your own characters.
Chapter 6: ZSpheres explores ZBrush’s powerful mesh generation tool. Using basic and advanced ZSphere techniques, we create a biped base mesh.
Chapter 7: Transpose, Retopology, and Mesh Extraction examines the ZBrush posing tool called Transpose. In this chapter we also look at ZBrush’s retopology tools for generating new base meshes from existing ZTools. Finally we look at making accessories with retopology tools and mesh extraction.
Chapter 8: ZBrush Movies and Compositing looks at a unique technique of rendering multiple materials passes from ZBrush and compositing them in Photoshop. We also look at capturing video directly in ZBrush.
Chapter 9: Rendering ZBrush Displacements in Maya is an extensive look at displacement mapping with ZBrush. Techniques for exporting both 16- and 32-bit maps are covered. This chapter also examines how to render your displacement map in mental ray for Maya.
Chapter 10: ZMapper covers the robust normal mapping plug-in ZMapper. Techniques for displaying and rendering normal maps in Maya are also covered. Other applications of ZMapper examined here include cavity mapping and blend shape animation.
Chapter 11: ZScripts, Macros, and Interface Customization concludes the book with a look at ZBrush interface customization. Custom menu sets, hotkeys, and custom macros are all examined. The chapter includes an introduction to ZScripting by guest artist Svengali.
The Companion DVD Videos
On the DVD I have included several support files for each chapter. Many tutorials have video files accompanying them. In addition to videos, I have included supplementary text materials expanding on certain concepts as well as sample meshes, materials, and brushes. The video files were recorded using the TechSmithscreen capture codes (www.techsmith.com) and compressed with H.264 compression.
The videos included I hope will help further illustrate the sculptural approach I take in ZBrush. Being able to see a tool in use can better illustrate the concepts than still images alone. On my website www.scottspencer.com you will find more tutorials expanding on the content of this book.
How to Contact the Author
I welcome feedback from you about this book or about books you’d like to see from me in the future. You can reach me by writing to [email protected]. For more information about my work, please visit my website at www.scottspencer.com.
Sybex strives to keep you supplied with the latest tools and information you need for your work. Please check their website at www.sybex.com, where we’ll post additional content and updates that supplement this book if the need arises. Enter ZBrushCharacter Creation in the Search box (or type the book’s ISBN: 9780470249963), and click Go to get to the book’s update page.
In conclusion, thank you for buying this book. I hope you enjoy the exercises within as much as I have enjoyed putting this book together. Being surrounded by likeminded artists who all have something to contribute makes every day a learning experience. It is an honor for me to share some of what I have learned with you. I hope you enjoy this book. Happy sculpting!
Chapter 1
Sculpting, from Traditional to Digital
One of the most exciting aspects of ZBrush is the way it allows the artist to interface directly with the model and create in a spontaneous and organic fashion, just as if working with balls of digital clay. Thousands of years of artistic tradition have given us a wealth of technique when it comes to the discipline of sculpting. While traditional painters have had applications like Painter and Photoshop to open the doors to the digital realm, sculptors were out in the cold—until ZBrush.
Gesture, Form, and Proportion
When learning to become a better digital sculptor, you will benefit from the same traditions and tenets that guided traditional sculptors for centuries. Just like drawing and painting, all the fundamental artistic lessons applicable to sculpting are true on the computer as well. Whether we are sculpting an alien, a princess, a warrior, a horse, or abstract form exploration, our primary concerns will always be the same (Figure 1-1).
Gesture
Gesture represents the dynamic curve of the figure. In life drawing, these lines are quickly laid down on paper and do not necessarily seek to describe the contour or form of the figure at all (Figure 1-2). The function of the gesture drawing is to capture the rhythm and motion of the pose, the thrust of the figure, and the action inherent in its posture (Figure 1-3). Keeping a sketchbook of quick, loose sketches you don’t intend to show is a great way to train yourself to find the gesture and rhythms in a figure. These kinds of exercises help sharpen your eye, and this translates into better figures when sculpting from the imagination.
Figure 1-1: Examples of traditional clay sculpture
Figure 1-2: A selection of gesture sketches
Gesture is the source of the life of a drawing or sculpture. It must be addressed from the outset—if the gesture is poor, it can be difficult to introduce it later into the process. If you start with a strong gesture, the sculpture will be appealing and alive from the start. A wooden, stiff pose with a poor gesture can have acceptable anatomical form and skin details while still being fundamentally unappealing (Figure 1-4).
The rules of gesture apply to even a sculpture that is not a figure. Notice in the lion’s head how the gesture of the lines in the mane serve to create a sense of flowing action down toward the ring (Figure 1-5). These lines are more of a graphic consideration and can almost be considered in the abstract. Their presence serves to strengthen the visual impact.
Figure 1-3: An example of gesture and action
Figure 1-4: This Hercules from the Piazza della Signora in Florence, Italy, is an example of bad gesture in an otherwise good sculpture.
Figure 1-5: Lion head sculpture
Closely linked to gesture is the concept of rhythm. Master draughtsman George Bridgman describes rhythm as “in the balance of masses the subordination of the passive or inactive side to the more forceful and angular side in the action.” That is to say, the interplay between the active and passive curves in the body combines to create a sense of rhythm in your sculpture (Figure 1-6).
Gesture is an important consideration no matter what you may be sculpting. It is gesture that makes a sculpture exciting, whether it is a door knocker, a monster, or a human. Especially when dealing with figurative sculpture, a well-executed gesture with special attention to rhythm helps establish a sense of weight and balance to the figure.
Figure 1-6: In this image of Celini’s Perseus, I have indicated the alternating curves that establish a sense of rhythm down the length of the figure. Notice how they alternate, as in the inset image.
Form
Although ZBrush excels at adding fine details to a model, form is always of primary concern when sculpting. Many sculptors rush to the detailing phase while overlooking the importance of developing the form, anatomy, and structure of the model. This makes for a weaker sculpture overall. Take Michelangelo’s David, for instance; it’s a perfect example of a masterful sculpture but there is not a single pore or wrinkle on the body. The figure lives and breathes because the interplay of forms of the surface gives the impression of skin, fat, and bone. David appears to be a living being in an inanimate material. This is true even when you are working on a completed 3D model from a third-party application. There is no replacement for the subtle variations in surface shadow and transitions you can add with ZBrush’s sculpting tools. Adding a more organic sense of the artist in the work will create a far more appealing character. It may not seem like much, but taking away the perfect parametric nature of a polygon model can push a character’s believability well into the next level before the first wrinkle or pore is applied.
Form in general refers to the external shape, appearance, and configuration of an object. In drawing and painting, you are describing form by directly applying light and shadow—from the highlight to the midtone to the core of the shadow. In sculpture, you are creating these halftones and value changes by altering the shadow casting surface. By altering the underlying shape, you can model the way light plays on the surface. Without shadow, there is no form. You can see this if you turn on Flat Render in the ZBrush window, thus removing all the shadows and highlights. Only a flat silhouette remains (see Figure 1-7).
Figure 1-7: Notice how when light and shadow are removed, only a silhouette remains.
It can be helpful when sculpting to remember that the shapes you are making with your brush will affect how light and shadow interact on the surface. That is how the shapes are created. If the light is turned off, all form goes away. Creating good form as you sculpt it requires an understanding of both the shape itself as well as the quality of the shadows created by that shape under different lighting conditions. As a further example of how shadow describes form, we can take a lesson from painting and drawing. Here is a photograph of a face next to the same photo posterized. With all the midtones removed so only the extreme highlights and shadows remain, you can still identify the fact that this is a face. When you’re reading a surface, the shadows tell you everything about what you are looking at (Figure 1-8).
Figure 1-8: Even with just the shapes of the shadows, this face is still recognizable.
This gradient between the lightest light and darkest dark is called value. Paintings and drawings have what’s called a key or value range—the set number of steps from lightest light to darkest dark found within the image. When you’re sculpting, it is good practice to be sensitive to these gradations on the surface of your own work. Even though you are not applying value directly, you are affecting the values the eye perceives by the height of the shape you are sculpting or the depth of the recess. Examine how the shadows interact on the surface; to darken a shadow, you may deepen the crevasse or add to the mass of the adjacant shape. Moving the light often as you work can help you spot these value changes from different lighting conditions.
You can move the light interactively in ZBrush. Set your material to one of the standard materials and choose ZPlugin ⇒ Misc Utilities ⇒ Interactive Light from the main menu. Move the mouse to see the light moving around your sculpture as you work. See the DVD for a video showing this feature in action.
When you’re dealing with form, it also becomes important to address transitions that create space between forms and how one feeds into another. Figure 1-9 shows how deepening a crevasse or raising a high point can darken your shadow and give it a harder edge. This will change the character of the transition.
Try to be sensitive to the transitions between your forms and the variation you create. If the transitions between all your shapes are the same hard edged shadows the figure will be visually bland.
Figure 1-9: By deepening the furrow next to the deltoid, the character of the shadow changes, changing the feeling of the transition. Notice how the relative darkness of the shadow changes from the clavicle to the arm in the first image. Also note how in the second image this value has now become one consistent value and thus less visually interesting.
An important concept to bear in mind while you sculpt is to reduce everything to its base form and work on big shapes first. Just as a painter will tackle the big shadows and big lights first, then work down to details, the same is true in sculpting. This is one of the most important aspects of this section to remember—by working on big shapes and then refining, not only do you ensure that you resolve the major shapes first, but it helps your mind organize the complex forms of the figure into easy-to-manage sections. The final result may appear complex and intricate, but you approached it in small portions one at a time (Figure 1-10).
Figure 1-10: These images show the progression of the lion head sculpture from the most basic, broad strokes down to the finer lines.
All forms can be broken down to their base shapes and planes. Complex shapes like the face mass can be reduced to aggregate planes for easier study and execution. This is called planar analysis. While sculpting you will find it helpful to always be thinking of what the basic forms are in your character and how they relate to one another (Figure 1-11). The viewer will have different reactions to a character based on the relationships between its basic forms. This relationship between forms is called proportion.
Figure 1-11: By reducing this creature to its most basic shapes, the form relationships and proportions become apparent.
The proportions between the basic forms have a visual impact on the viewer. These reactions can change based on how the artist manipulates these relationships. For example, a character with a huge, bulbous head on a small body will create a different reaction than one with a tiny head and an oversized body.
I often get asked how densely to subdivide the model while working. This is never a set number. The subdivisions you can get on your machine will vary depending on how much RAM is installed. The polygon count of your level 1 mesh will also influence how densely you can subdivide.
Artistically the best approach in my opinion is to divide to the lowest level at which you can represent the shapes you are trying to sculpt. By avoiding detailing too early and refining the basic forms of the character you will find that excellent results can be attained from lower polygon counts. Only then, when the form is resolved, are you ready to detail. The fine detail passes need to be done at the highest possible subdivision levels. In most cases this is 2million or more polygons. Later in this book we will look at detailing characters and ways to get sharper details from lower polygon counts.
Proportion
Proportion refers to the relationship between the overall size of an object and the relative sizes of its parts. Many books have been written on the balance of these measures, and the fundamental rules of proportion have been understood as far back as the ancient Egyptians.
When you’re sculpting a figure, it is important to understand proportion as it pertains to the human form. Proportional canons are sets of rules to help guide artists in creating a specific type of figure.
There are many systems, or canons, of proportion. Michelangelo often used a heroic eight heads to measure the figure, while a more ordinary human measure is 71⁄2 heads high. No proportional system is “law,” and there are variations in all people. These are intended as an idealized system of measure. Straying too far will result in a figure that looks “off.”
By understanding the proportional canon you are working with, you can make educated decisions about the character you are creating by changing the proportion.
Best Practices for Digital Sculpting
Use these guidelines as you sculpt:
Work from big to small; focus on the basic shapes first, then refine the details.Move the light often to check the shadows on your form.Don’t feel the need to outline every muscle or shape with a recess—some shapes can and should be subtler than others. This adds variety and interest to the surface.Smooth as you work—by building up form and then smoothing back, you can create a subtler surface and avoid the “lumpy” look.Try to use the largest sculpting brush size for a particular shape; this helps keep you focused on the big forms first and ensures you don’t get bogged down in details too soon.Work at the lowest subdivision that can support the form you are trying to make. This also keeps you focused on big shapes over details, and it helps avoid the lumpy look of some digital sculptures.Step up and down your subdivision levels often. Don’t work at the highest the whole time unless you are working with the Rake and Clay tools.Rotate the figure often and work on all areas at once. You shouldn’t finish the head before the arms; each part should always be at the same level of finish. This keeps you from having to match one area of the sculpture to another, creating disconnection between the shapes.Another Take: Gesture, Rhythm, Proportion
Featured Artist: Zack Petroc
You don’t have to worry about gesture, rhythm, and proportion in all of your sculpts—only in the ones that you don’t want to look lifeless.
Being aware of these foundational concepts, and what they can bring to your art, marks the first step down the endless path that leads toward perfecting your skills. I say endless because the more you learn about these concepts, the more you will realize just how complex and intricate their execution can be. To infuse your work with gesture and rhythm is to give it life, and to give it life is to create a work that can transcend its basic visual concept and become a true masterpiece.
No matter the subject—from animal, to human, to creature, to foliage—I always start by trying to understand its gesture and, more importantly, what its gesture is going to convey about the character. A powerful superhero archetype will have a distinctly different gesture than a cowering villain. There are countless conscious and subconscious gesture cues that give instant insight into the nature of your character. Hero types lead with their chest; from a side view, the character’s chest is the farthest point forward on the figure. The head is typically pulled back creating a straighter line from the base of the skull to the upper area of the back where the neck inserts into the torso. By pulling the head back and pushing the chest forward, you are automatically creating a larger distance between the front and back of the arm. This allows our hero character to have wider shoulders and larger-than-life upper arms. It’s the setup of the gesture, from the head to the chest, that allows all of these proportional cues to be possible. In this respect, the gesture truly is the foundation for our character to be built on.
Rhythm is linked directly with gesture and refers to the visual lines that flow through your character. Increasing your awareness of this concept is the first step toward mastering it. These rhythms are what lead your eye around the form and, when executed properly, convey a sense of movement and direction, even in a static sculpture.
Proportion is a relative thing. When I stand next to Hulk Hogan, my gigantic and, if you will, super-toned upper body might make him appear small. However, we all know that relative to the general public, this is not the case. He is indeed a large man. The same philosophy about relative size can be applied to individual parts that make up a character. For example, one way to make a character appear taller is to make its head smaller. Other, subtler cues to let our viewer know the innately taller stature of our character might be to widen the shoulders while keeping their overall mass smaller. We can also add a slight downward angle to the clavicle as it goes from the sternum to its end at the top of the shoulder. These cues are all taken from real-life proportions of extremely tall people and are therefore subconscious traits that can help convey the believability that our character is indeed tall.
Remember, mastering these concepts can take a lifetime, but becoming aware of them can happen as soon as you would like, and that’s all it takes to begin the journey. (Well, that and a gnarly-looking old walking stick. Preferably one with some kind of killer animal head carved into the handle. I would suggest an Orca or some form of rogue badger. This will help get you there in style.)
In the following example, from my sculpting the female figure tutorial on Gnomonology.com, I’ve drawn black lines over the form to represent the gesture. These long, flowing curves are what the forms were developed around and help give the sculpture character. I typically start by visualizing these curves on screen while I sculpt, then try to push and pull the forms to match them.
In the next example, we can see the lines of rhythm that flow throughout the sculpture. Note their interaction as they overlap and traverse the form. Even in this somewhat standard pose, the rhythms should be visible and help to indicate a sense of movement.
Proportion plays a key role in defining the “character” of any design. The final image shows how enlarging the head on this sculpture affects the viewer’s impression of it. The design appears more childlike, and seems to have a smaller overall stature. An important part of this exercise is to also be aware that none of the finite details were changed. This shows us just how secondary and inconsequential the finite surface details can be if we don’t first establish the proper foundation.
ZBrush Interface General Overview
At first glance, the ZBrush interface (see Figure 1-12) can be a daunting sight, especially if you have previously worked in software like Autodesk Maya, 3ds Max, or XSI. The truth is, it looks far more complex than it actually is. Many menus you won’t often visit, and a few will form the backbone of your workflow. In this section, I will give you a brief overview of the interface and the location of some of the major palettes and their functions. This tutorial is designed to introduce you to the sculpting brushes and some of their basic settings. We’ll also explore ZBrush’s 2.5D Illustration brushes and briefly discuss lighting and rendering within ZBrush. By completing an illustration in ZBrush, we’ll touch on each facet of the program and introduce tools and workflows that will be valuable as you progress through the book. We’ll delve into each menu in more depth as it becomes pertinent. To begin, it will be good to have a fundamental understanding of what is where and why.
Upon opening ZBrush, you will see the default interface. The central window is called the document window. This is where all the sculpting and painting takes place. In ZBrush you import OBJ files as “tools” and sculpt them in the document window. OBJ files are a standard polygon model format most 3D applications will export. For more information on importing to ZBrush see Chapter 3.
Flanking the document window are two columns that contain some quick links to other menus. The left side has fly-out icons linked to the brush, stroke, alpha, texture, and materials menus. Here you will also find a color picker for selecting colors while painting.
The right side contains a selection of icons primarily concerned with navigating the document window and the display of your active tool. It is important to note all these options are available in the top row menus and often the menus (as in the case of Brush, Stroke, Alpha, Texture, and Material) are abridged in the form found here. For all the options, visit the full menu at the top of the screen (the area marked “Brush controls” in Figure 1-12).
Figure 1-12: The ZBrush interface
The top menu bar allows you to change the various aspects of your active sculpting tool. It contains an alphabetized list of the complete ZBrush menus. The ZBrush interface allows you to work in a circular fashion, picking menus and options as needed. Any main menu can be torn off and docked on the side of the screen by clicking the round radial button. Table 1-1 provides a breakdown of each menu and its major contents.
Table 1-1: ZBrush Menus
MenuDescriptionAlpha Options to import and manipulate alphas, grayscale images primarily used as brush shapes, stencils, and texture stamps. Brush Contains the 3D sculpting and painting tools. Color Options for selecting colors as well as filling models with color or material. Document Options for setting document window size as well as exporting images from ZBrush. Draw Settings that define how the brushes affect surfaces. These include ZIntensity, RGB Intensity, ZAdd, ZSub, as well as settings that are specific to 2.5D brushes. This menu also contains the perspective camera setting. Edit Contains the undo and redo buttons. Layer Options for the creation and management of document layers. These differ from sculpting layers and are typically only used in canvas modeling and illustration. Light Create and place lights to illuminate your subject. Macro Records ZBrush actions as a button for easy repetition. Marker This menu is for MultiMarkers, a legacy ZBrush function that is mostly obsolete with the advent of Subtools. Material Surface shaders and material settings. These include both standard materials and MatCap (Material Capture) materials. Movie This menu allows you to record videos of your sculpting sessions as well as render rotations of your finished sculptures. Picker Options pertaining to how the brushes deal with the surfaces on which they are used. Flatten is one sculpting brush that will be affected by the Once Ori and Cont Ori buttons. For the most part, these options are not used in sculpting. Preferences Options to set up your ZBrush preferences. Everything from interface colors to memory management is handled here. Render Options for rendering your images inside ZBrush. This menu is only used when doing 2.5D illustration. Stencil A close associate of the Alpha menu. Stencil allows you to manipulate alphas you have converted to stencils to help in painting or sculpting details. Stroke Options governing the way in which the brush stroke is applied. These options include freehand and spray strokes. Texture Menu for creating, importing, and exporting texture maps with ZBrush. Tool This is the workhorse of the ZBrush interface. In this menu you will find all options that affect the current active ZTool. Here you will find Subtools, Layers, Deformation, Masking, and Polygroup options as well as many other useful menus. This is the menu in which you are likely to spend the most time (next to Brush). The Tool menu allows you to select tools on which to sculpt as well as select the wide variety of 2.5D tools for canvas modeling and illustration. Transform Contains document navigation options such as Zoom and Pan and buttons to alter the model’s pivot point as well as sculpting symmetry settings and poly frame view. Zoom Shows an enlarged view of portions of the canvas. This menu is not often accessed other than to find the Zoom and AAHalf buttons to affect document display size. These buttons are usually available to the screen right menu. ZPlugin For accessing plug-ins loaded into ZBrush. Here you will find MD3, which is used for creating displacement maps, as well as ZMapper and other useful utilities. ZScript Menu for recording saving and loading ZScripts.At any time while you are working on a model in Edit mode, right-clicking the mouse will open a pop-up menu at your cursor location. Here you can quickly access your ZIntensity, RGB Intensity, Draw Size, and Focal Shift settings.
Draw Size and Focal Shift control the size of your brush. Draw Size, as is apparent, controls the overall size of the brush, while Focal Shift adjusts the inner ring of your brush icon. This inner circle defines the falloff of the tool or the general hardness of softness of the brush. Falloff means how quickly or gradually the effect of the tool fades at the edges of the stroke. A smaller ring is a much more gradual falloff while a bigger one is an abrupt falloff. If an alpha is selected, the Focal Shift slider acts as a modifier on the alpha softness. Figure 1-13 shows the effects of several Draw Size and Focal Shift combinations. If you want to enter a value manually to the curve, use the slider for brush control at the top shelf of the ZBrush interface.
Figure 1-13: Brushes with various falloff settings
Brushes can be set to several modes, which determine how they affect the surface. At the top of the screen are buttons for MRGB, RGB, M, Zadd, ZSub, and ZCut. ZAdd and ZSub control whether the brush adds material or takes away with the stroke. MRGB adds material and RGB color, while RGB adds only color and M adds only material. Typically the brushes are set to ZAdd when you are sculpting. It is easy to switch to ZSub by simply holding down the Alt key while you sculpt. This will temporarily swap the modes while the key is pressed. ZCut is used in Pixol (2.5D) mode.
Alt and Shift
The Alt key activates the alternate mode for nearly all ZBrush brushes. When sculpting with ZAdd on, holding down Alt will cause the brush to dig in instead of building up form.
Shift serves as a shortcut to the smooth brush. When sculpting, be sure to press Shift to enter Smooth mode. Your draw circle will become blue while Shift is pressed to let you know you are smoothing the surface; typically it is helpful to have a larger smoothing brush than sculpting brush. To change the default size of the Shift smooth brush, adjust the Alt Brush slider at the bottom of the Brush menu.
When a tool is loaded in the document window and you are in Edit mode, navigation is accomplished through a variety of mouse and key combinations.
Rotating is the simplest movement to accomplish. With the mouse off your model in the document window, notice that it becomes a circular arrow. Left-click and drag, and the model will rotate with your movements. To zoom in and out from the model, hold down the Alt key and left-click somewhere on the document window other than the model, release the Alt key, and move the mouse up and down. The object will now appear to zoom in and out. In reality it is scaling, but this differentiation is not important when navigating a ZTool. Panning is accomplished by the same combination of Alt and left-click but you don’t release Alt. Simply move the mouse and the object moves with you.
If your model is off center and you want to return to the default view, press the F key to bring it back into focus. Another useful option is the Local button found on the right side of the screen or under the Transform menu. Click Local and your rotations will occur around the last point you edited on the model.
These movements and combinations may take some practice and may seem strange if you are used to other programs, but with a little experience you’ll find they become second nature. You can always use the quick navigation icons at the right side of the screen if the button combinations are too difficult.
Customizing the Interface
The ZBrush interface can be fully customized and saved for later sessions. To drag any interface option and dock it elsewhere in the UI, select Preferences ⇒ Custom UI ⇒ Enable Customize. Now when you hold down Ctrl and click and drag a button from any menu to another part of the interface, you can dock it there for easy access. To save your custom UI for later use, press Ctrl+Shift+I or select Preferences ⇒ Config ⇒ Store Config. If at any time you want to restore the default interface, select Preferences ⇒ Restore Standard UI. For more information on interface customization, see Chapter 4.
Using the ZBrush Tools
In this section we’ll explore the ZBrush sculpting tools by creating a lion head door knocker from a 3D Plane tool. This tutorial will expose you to many of the ZBrush sculpting brushes, modifiers, and masking tools.
In ZBrush you can work with models, tools, or documents. For sculpting characters we’ll focus on tools and models. When creating final rendered images in ZBrush, you make use of the Document settings.
Creating a 2.5D Pixol Illustration
