Erhalten Sie Zugang zu diesem und mehr als 300000 Büchern ab EUR 5,99 monatlich.
- Herausgeber: Creative Homeowner
- Kategorie: Lebensstil
- Sprache: Englisch
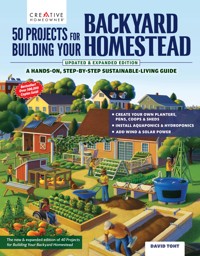
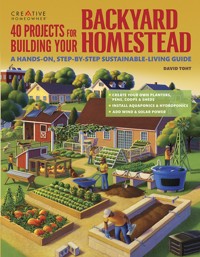
Ready for new 10 new practical ideas for creating your backyard homestead? 50 Projects for Building Your Backyard Homestead: A Hands-On, Step-By-Step Sustainable-Living Guide updates one of the most popular books on the subject with the addition of 10 new projects to help your homestead thrive. Inside, experienced homesteader and contractor, David Toht, will teach you backyard homestead project ideas like accessible garden paths, insulated chicken coops, and backyard essentials from fences to feeders. Are you a beginner? Don't worry; you'll learn how to handle simple builds like raised gardens. Getting a little more advanced as a homesteader? Learn how to build a drought-resistant landscape or build passive ventilation systems to keep your chickens comfortable. Gardens, gates, PVC, pens, aquaponics, hydroponics, wind turbines, solar panels, roofing--it's all here. No matter what your homestead looks like, you'll come away from 50 Projects for Building Your Backyard Homestead, Updated Edition with encyclopedic knowledge and inspiration for what project to tackle next. This is an all-encompassing, comprehensive guide for those looking to expand their current homestead or embark on a more self-sustaining lifestyle.
Sie lesen das E-Book in den Legimi-Apps auf:
Seitenzahl: 301
Veröffentlichungsjahr: 2025
Das E-Book (TTS) können Sie hören im Abo „Legimi Premium” in Legimi-Apps auf:
Ähnliche


This book may not be reproduced, either in part or in its entirety, in any form, by any means, without written permission from the publisher, with the exception of brief excerpts for purposes of radio, television, or published review. All rights, including the right of translation, are reserved. Note: Be sure to familiarize yourself with manufacturer’s instructions for tools, equipment, and materials before beginning a project. Although all possible measures have been taken to ensure the accuracy of the material presented, neither the author nor the publisher is liable in case of misinterpretation of directions, misapplication, or typographical error.
Creative Homeowner® is a registered trademark of New Design Originals Corporation. Lincoln Logs® is a registered trademark of Hasbro, Inc.
50 Projects for Building Your Backyard Homestead, Updated & Expanded Edition
Managing Editor: Gretchen Bacon
Acquisitions Editor: Lauren Younker
Editor: Joseph Borden
Designer: Mike Deppen
Proofreader: Kelly Umenhofer
Indexer: Jay Kreider
Printed in China
ISBN 978-1-58011-610-7
eISBN 978-1-63741-376-0
Cataloging-in-Publication data is on file with the Library of Congress
We are always looking for talented authors. To submit an idea, please send a brief inquiry to [email protected].
CREATIVE HOMEOWNER®
www.creativehomeowner.com
Creative Homeowner books are distributed exclusively by Fox Chapel Publishing 903 Square Street Mount Joy, PA 17552
www.FoxChapelPublishing.com
DAVID TOHT has more than 60 how-to books to his credit. He considers harvesting a sun-warmed tomato from his own garden one of life’s sweetest pleasures. He and his wife, Rebecca, live in Minnesota.
Acknowledgments
Special thanks to those who generously shared their time and expertise, including Luis Apolinar, David and Heather Armitage, Dan Aulwurm, Chuck Bauer, Mike Bergey Marc Bernard, Sylvia Bernstein, Dr. Sally Brown, Kurt Hollis, Daniel Hull, Rebecca Brody Kamerman, Adam Matthews, Roy Stark McGarrah, Sean Millhorn, Ray Rasmussen, John Redd, Wes Shank, Terry and Jennifer Shaw, Ernie Schmidt, Adam Toht, and Robin Forsythe and Becky and Paul Tuttle.
Safety First
Though all concepts and methods in this book have been reviewed for safety, it is not possible to overstate the importance of using the safest working methods possible. What follows are reminders—do’s and don’ts for yard work and landscaping. They are not substitutes for your own common sense.
■Always use caution, care, and good judgment when following the procedures described in this book.
■Always determine locations of underground utility lines before you dig, and then avoid them by a safe distance. Buried lines may be for gas, electricity, communications, or water. Start research by contacting your local building officials. Also contact local utility companies; they will often send a representative free of charge to help you map their lines. In addition, there are private utility locator firms that may be listed in your Yellow Pages or online. Note: previous owners may have installed underground drainage, sprinkler, and lighting lines without mapping them.
■Always read and heed the manufacturer’s instructions for using a tool, especially the warnings.
■Always ensure that the electrical setup is safe; be sure that no circuit is overloaded and that all power tools and electrical outlets are properly grounded and protected by a ground-fault circuit interrupter (GFCI). Do not use power tools in wet locations.
■Always wear eye protection when using chemicals, sawing wood, pruning trees and shrubs, using power tools, and striking metal onto metal or concrete.
■Always read labels on chemicals, solvents, and other products; provide ventilation; heed warnings.
■Always wear heavy rubber gloves rated for chemicals, not mere household rubber gloves, when handling toxins.
■Always wear appropriate gloves in situations in which your hands could be injured by rough surfaces, sharp edges, thorns, or poisonous plants.
■Always wear a disposable face mask or a special filtering respirator when creating sawdust or working with toxic gardening substances.
■Always keep your hands and other body parts away from the business ends of blades, cutters, and bits.
■Always obtain approval from local building officials before undertaking construction of permanent structures.
■Never work with power tools when you are tired or under the influence of alcohol or drugs.
■Never carry sharp or pointed tools, such as knives or saws, in your pockets. If you carry such tools, use special-purpose tool scabbards.
Contents
Introduction
Garden Structures
Building a Wooden Raised Bed
Constructing a Concrete Block Raised Bed
Irrigating a Raised Bed
Building Keyhole Garden
Making a Bottom-Watered Container Garden
Making a Vertical Planter
Accessible Gardens and Paths
Building an Inclined Planter
Building an Arbor
Adding a Trellised Arbor
Building a Cucumber Trellis
Installing a Tool-Storage Rack
Making a Grow Light Stand
Making Soil Blocks
Fences and Pens
Post Foundations
Installing Posts
Notching Posts
Installing a Picket Fence
Choosing a Horizontal-Board Fence
Installing a Horizontal-Board Fence
Installing a Vertical-Board Fence
Installing a Wood-and-Wire Fence
Choosing Gate Latches
Making a Picket Gate
Stretching a Fence
Adding a Gate
Installing a Solar-Powered Electric Fence
Making a PVC Hen Pen
Making a PVC Hurdle
Housing Chickens
Building a Chicken Coop and Run
Building an A-frame Chicken Tractor
Coping with the Cold
Prepping for Extreme Heat
Building Sheds
Building Basics
Saltbox Shed
Goat Shed
Roofing Alternatives
Setting Up a Backyard-Homestead Shop
Wind and Solar Power
Installing a Pump or Aeration Windmill
Installing Solar Power
Wind Turbines for Electricity
How Wind Systems Work
Hybrid Systems
Aquaponics & Hydroponics
Understanding Aquaponics
Understanding Hydroponics
Assembling a Hydroponic System
Building Beehives
Building a Langstroth Hive
Making a Warré Hive
Building a Top Bar Hive
Plumbing & Wiring
No-Sweat Sweating
Water Where You Need It
Installing an Anti-Freeze Spigot
Repairing a Freeze-Proof Spigot
Adding a Freeze-Proof Yard Hydrant
Your Friend, the GFCI Receptacle
Installing a GFCI Receptacle
Running Outdoor Conduit and Cable
Outdoor Electrical Boxes
Installing Outdoor Receptacles and Switches
Conduit and Fittings
Installing UF Cable
Installing a Stand-Alone Receptacle
Adding Supplemental Light for Poultry
Resources
Introduction
When I was young, my grandparents owned a 240-acre diversified farm in west-central Illinois. For us kids, too young to pitch in with the chores, it was a wonderful playground. If we weren’t hanging on the fence staring down steers (with one prodigy always coming forward to have his forehead scratched), we were gingerly reaching under hens for eggs or slapping the dusty backs of piglets. The haymow, redolent of alfalfa, was a wonderful jungle gym for climbing, building forts, or swinging Tarzan-style on the dusty old ropes. Our sandbox was a pile of sawdust—hen-house litter—hauled in from a local whiskey-barrel factory. On a hot day, we could cool off in a bin of shelled corn.
We also got to hang around as Grandpa did the necessary building and repair jobs between regular chores. Fence repair was a constant. For that, he carried the necessary tools, including an early multitool, a hammer-like object that was also a pair of pliers and a pry bar all in one, in a metal box attached to the rear mudguard of his tractor. The repairs had to be quick and effective to keep the livestock penned. Extending the concrete pad for the hog shed involved the backbreaking labor of filling a borrowed concrete mixer with sand, gravel, and Portland cement. Poured incrementally over many days, the pad was neither exactly square nor perfectly level, but it served. There just wasn’t time for architectural perfection; there were animals to feed and fields to cultivate. I came to admire the solid, no-frills skills required in farming.
One major project took place before my time. The farm centered on a 1910-vintage barn. As the years wore on, the barn started to lean away from its brown-glazed-brick silo. My grandfather hired a carpenter who was a genius with large wooden structures, though not highly skilled at interior work. He spent a couple of days prepping the barn, stringing pulleys and ropes throughout the haymow. He prepared splints and cross braces, pounding the nails partway in so they would be ready for quick installation. He pounded out some of the pegs locking hand-cut mortise-and-tenon joints. Last of all, he ran several ropes out of the entrance and had Grandpa back his orange Allis-Chalmers tractor up to the barn.
With the ropes tied to the hitch, Grandpa wrestled the tractor into gear and eased forward. With great creaking and groaning, the barn began to right itself, easing back into its original shape, old joints finding their way back home. While the tractor held the tension, the carpenter scrambled over the interior, fastening splits and braces in place. The result: a barn renewed.
I hope you don’t have to tackle something that massive on your backyard homestead, but the story always reminds me that with farm structures, perfection is not the goal. What we aim for is solid, utilitarian effectiveness. That makes backyard-homestead projects a great way for beginners to learn carpentry and other how-to skills. A wall slightly out of plumb or a rip cut that wanders a bit aren’t that important as long as the structure you are building stands firm and keeps out the weather. After all, chickens are not bothered if a coop door doesn’t fit perfectly; goats don’t mind if a fence post leans a bit.
This new edition includes 10 brand-new projects, several of which include ideas that have come into their own since the book first published more than 10 years ago. For example, the keyhole garden (here), pioneered in Africa, was little known in the wider world. Wind turbines (here) are more efficient and reliable than ever. And then there are projects that are just flat-out good ideas—things like the stacked tray vertical planter (here). Who knows what the next 10 years will bring?
About the Projects in This Book
Because we know that your time is valuable and your skill level may be only average (or a bit above), the projects in this book are designed with simplicity in mind. If we introduce a somewhat challenging technique—like plunge cuts to make the openings in the coop-and-run project beginning on here—it is because, in the long run, it is the simplest, quickest way to get the job done.
A few chapters necessarily focus on what is involved in building the project rather than step-by-step instructions in exactly how to build it. Aquaponics is one example. Whole books and manuals are available on the topic; our chapter equips you with a fundamental understanding of the subject so that you will have a leg up should you want to pursue it.
We also designed these projects with your budget in mind. Each makes the most out of basic materials. There are plenty of gorgeous chicken houses out there, for example (some that would make a decent little cottages for human habitation, complete with clapboard siding, window boxes, Dutch doors, and cupolas), but we went a more utilitarian route, leaning heavily on exterior plywood and simple detailing.
And we paid attention to the human factor—making the finished project convenient to use. Feeding, freshening the water, mucking out, changing litter, egg gathering—all will, we hope, happen more often and be done better because the structure is designed with easy access in mind. You will also find help on how to expand or contract the projects to suit your needs.
Getting Started
Here are some friendly-neighbor-over-the-fence tips that may help as you plunge into a project:
■Make the exterior screw your default fastener. Predrilling and driving screws takes a bit longer than nailing, but screws hold much better, and you can back them out if you make a mistake.
■If a circular saw seems too much machine for you to handle, use a saber saw instead. With a square or other straightedge as a guide, it yields a neat, true cut.
■Measure twice, and cut once.
■Support your work when sawing so that the material will not bind when cut.
■Set up a clutter-free work area. It will save time in the long run, produce better work, and keep you safe.
■Never cut all of your components in advance in kit-like fashion. Instead, work from your project to make sure the measurements for the new piece suit what you have done thus far. Why? Dimensional lumber may vary in size. In addition, small variations as you cut will compound themselves, affecting other areas of the project.
■Wear eye, ear, and respiratory protection.
■Gloves make heavy chores seem to go easier because you are not concerned about splinters and abrasions.
■Improvise! Backyard homesteading is a great laboratory for trying new ideas. If something does not quite work as planned, you can always undo it . . . that is part of the fun.—David Toht
CHAPTER 1
Garden Structures
Building a Wooden Raised Bed
Constructing a Concrete Block Raised Bed
Irrigating a Raised Bed
Building Keyhole Garden
Making a Bottom-Watered Container Garden
Making a Vertical Planter
Accessible Gardens and Paths
Building an Inclined Planter
Building an Arbor
Adding a Trellised Arbor
Building a Cucumber Trellis
Installing a Tool-Storage Rack
Making a Grow Light Stand
Making Soil Blocks
THE HEART OF ANY BACKYARD HOMESTEAD is its garden. While the jury is out on whether the household budget benefits from keeping chickens or goats, there is no doubt that a garden does not just provide you with a bounty of fresh vegetables—it saves you money. (Keep a record of the produce you harvest, adding up what you would pay for that produce at the farmer’s market or grocery store, and you will be amazed.) Add to that the opportunity to grow otherwise unobtainable heritage varieties, and you will understand why a backyard homesteader looks first to upgrading the garden.
This chapter offers projects that suit large and small spaces, country and urban. We have tried to cover the basics, like the simple raised bed that leads off this chapter, as well as ideas that are a little out of the norm. The emphasis is on projects that will make the most of your limited space, including a couple of arbors for putting overhead space to good use.
The chapter also deals with that ultimate overhead space, your rooftop. If you are an urban gardener with a building-shaded strip of backyard—or no backyard at all—the roof might be your only recourse. Rooftop gardening means coming up with container systems that are light in weight and easy to hydrate: keeping your plants watered in the face of intense sun, radiating heat from the building, and wind can be a challenge.
The chapter also includes a simple grow-light stand to help you get the jump on the season with plants of a type and nourished in a way that the nursery or home center can’t supply. You will discover that for a modest investment you can produce hundreds of starts and save greatly on store-bought starts, which typically cost $4 to $8.
Climbers
Poles, cages, and trellises are the simplest structures you need to add to your garden. Come harvest time, they carry a heavy load and, as anyone who has had a robust tomato plant bring down a store-bought wire cage knows, aren’t always up to the job. Here are just a few better ideas:
A bent section of hog fence (those handy grids made of galvanized ¼-in. (6mm) steel rod), above left, stands on its own to support tomatoes or other heavy crops.
If your beans can spread upward, there is less of a chance that you will overlook ripe pods. This simple rig made of 2x2s and twine, above right, gives runners room for growth.
This wooden trellis, right, lets you walk underneath for harvesting. Its simple construction lets you dismantle it for storage: the crosspieces (inset) slide off to release the grids.
A good, strong limb with splaying branches, far right, is tailor-made for supporting a heavy harvest. A bonus is the attractive way it stands in as a trunk for the plant.
Building a Wooden Raised Bed
It’s no surprise that the raised bed is a fixture of most backyard farms. At 4 feet (1.2m) wide, the generally accepted width, it lets you easily reach into the bed for planting, cultivating, and harvesting without compacting the soil. It does so at a convenient height and limits the incursion of creeping weeds. The length is up to you, though boards longer than 16 feet are expensive and hard to find.
There is also the notion that the soil in that box is yours to take care of. Sequestered as it is, the soil is not going to run off into the pathway. You can nurture it with plenty of fresh compost and all the amendments it needs. You can dig deeply and plant with greater density than with row crops.
This project shows how to stack planks for extra depth. It uses 2x8s, but you could use the same technique to stack two 2x12s to yield a bed nearly 2 feet (61cm) tall—a handy working height. Should you lengthen the bed, be sure to add stakes or pound in rebar alongside the planks to keep them from bowing. The hydrostatic pressure of soil loaded with water can be powerful.
Tools
• Shovel
• Rake
• Wheelbarrow
• Measuring tape
• Level
• Circular saw
• Cordless drill-driver, bits
• Framing square
• Speed square
• Spring clamps
• Baby sledge
• Sawhorses
Materials
• 2x8, 2x10, or 2x12 pressure-treated lumber
• 2x4 pressure-treated lumber
• 2 ½-in. (6.4cm) deck screws
• 3-in. (7.6cm) deck screws
A raised bed makes planting easy by raising the work surface and guards the soil from compaction because the gardeners walk on the path, not the garden—both helpful things when you want to get the kids involved.
Raised Bed, Exploded View
Stakes have the dual purpose of strengthening the corner joints and anchoring the raised bed in position. In addition, they help reinforce the walls of the bed. The 2x4 cap is optional, but it helps stiffen the walls and is a comfy place to sit while weeding.
Is Pressure-Treated Lumber Safe?
Many gardeners shun the use of any pressure-treated (PT) lumber, fearing that their produce will pick up harmful chemicals. The good news is that chemicals used in the treatment have changed over the years.
Prior to 2003, chromated copper arsenic (CCA) was the prime ingredient for protecting wood from rot. It was more than up to the job but toxic to people and animals. The Environmental Protection Agency (EPA) banned it.
Suppliers turned to two alternative preservatives—alkaline copper quat (ACQ) and copper azole (CA-B). Both contain copper and a fungicide but no arsenic. Does that make PT lumber safer?
Dr. Sally Brown, Research Associate Professor at the University of Washington, makes a study of soil health and how toxins are transmitted to living things. She emphasizes that leaching, if any, is extremely minimal—something on the order of 2 millimeters from the source of the toxin—about the width of a lower case E on this page. “Copper is a necessary nutrient,” she emphasizes. “And our bodies are really good at getting rid of extra copper.” She has studied plants growing on land covered with copper mine tailings and found little absorption of copper.
She also points out that even if plants next to pressure-treated wood pick up copper, it wouldn’t pass beyond the root system. “If this is something that concerns you, don’t plant potatoes or root crops along the edge of the raised bed.”
That said, if you are commercially growing certified organic produce, be aware that the OEFFA (Ohio Ecological Food and Farm Association) allows only grandfathered PT lumber on structures already on a property but no new construction with PT. Though free of arsenic, the newer copper-based preservatives are not acceptable for soils growing certified organic produce.
The choice is up to you, but bear in mind that unprotected wood will eventually succumb to rot if untreated. That potentially puts to waste your time, effort, and materials.
Pressure-treated (PT) lumber comes in two colors, tan and the greenish hue shown in the following project. The type of lumber ranges from 2-bys to fence planks and even plywood. The parallel incisions let the preservative penetrate the wood.
Building a Wooden Raised Bed
Smooth and level the site, clearing an area a bit larger than needed for the raised bed. Remove any obstructing roots or rocks.
Cut the side and end boards to length. For an absolutely square corner, you may need to trim the ends. For a straight cut, use a speed square as a guide or clamp a framing square in place (inset). If you are cutting long boards in half, support each half well.
The Stacked-Beam Approach
By stacking 4x6s Lincoln Log fashion, you can achieve a substantial bed that will have no problem holding its own without bowing. Side-bolting with 8-inch gutter screws holds this bed together.
Fasten the corners of the 2x8s, 2x10s, or 2x12s with 3-in. (7.6cm) deck screws. Drill pilot holes to avoid splitting.
Drive a pointed 2x4 stake about 2 ft. (61cm) long at the highest corner, leaving enough sticking up for the second course, plus a bit more that you’ll trim off later. Attach boards to the 2x4 using 2½-in. deck screws.
Square up the corners using a framing square. With the first stake serving as an anchor, work your way around the box, tapping the boards into square.
Pound a stake into each of the remaining three corners. Level each side, and fasten it to the stake with a single 2½-in. (6.4cm) deck screw. Work your way around to the starting point. If you are satisfied that it is level, finish fastening to each stake.
Cut and add the second course of boards. For a tight joint, fasten the corners first (inset); then attach them to the corner stakes.
Add 2x4 stakes midway along the length of the board to avoid bowing when it is filled with soil. If you leave a bit protruding above the board, you can trim it later, as with the corner stakes.
Fasten the stakes using 2½-in. (6.4cm) deck screws. In some cases you may have to use a clamp to draw the stake up to the planks.
Trim all of the 2x4 stakes flush with the sides using a handsaw. If you use a circular saw, cut from the stake side with the blade extended just enough to cut through the 2x4.
Make a 45-degree angle cut on the ends of the 2x4 caps using a speed square as a guide. Miter one end at a time; position the miter; then mark for the cut at the opposite end.
Fasten the caps using 3-in. (7.6cm) deck screws. Fasten the ends first to fit the miters; later, you will fasten every 12–16 in. (30.5–40.6cm) along the run of the cap.
Refine the miter joint if necessary by temporarily fastening the mitered 2x4 caps. Then run a handsaw or circular saw (inset) through the joint so that the blade cuts both sides of the miter joint.
Fasten the miter joint from the side using a 3-in. (7.6cm) deck screw to draw up and hold the joint. Drill a pilot hole first.
The Quickest Raised Bed
For a fast solution ideal for putting a portion of a driveway or patio to productive use, try a straw-bale garden. Buy several bales of straw (make sure you specify straw, not hay), and push them as close together as possible. Thoroughly soak the bales with water over several days. Chop out the straw where you want your plants, and add topsoil. A straw-bale garden lasts a couple of years before beginning to rot down into great compost fodder.
Fasten the 2x4s to the raised bed using a 3-in. (7.6cm) deck screw every 12–16 in. (30.5–40.6cm) or so.
Fork up the ground thoroughly so that earthworms and other beneficial creatures will have access to the bed.
Fill the raised bed with well-amended soil. A few days later, top it off to make up for the inevitable settling of the soil.
Use Exterior Fasteners
An outdoor project is only as good as the fasteners that hold it together, so be sure to use fasteners intended to withstand prolonged contact with moisture. Exterior screws are your best bet because you can easily back them out if you make a mistake—and they hold like crazy. Deck screws are the best choice because their epoxy coating makes them easy to drive. Galvanized (zinc-coated) screws bear up fine, but are more difficult to drive. Where nails are called for, use only hot-dipped, not electro-plated, galvanized fasteners.
Constructing a Concrete-Block Raised Bed
If using pressure-treated (PT) wood concerns you or if you are looking for a truly permanent raised bed, consider using 4-inch (10.2cm)-wide concrete blocks. (See here for more on PT lumber.) By stacking the blocks and filling the voids with concrete, you can construct a handsome bed that will give decades of service.
The greatest advantage to using concrete blocks is that you can build high for a comfortable working arrangement. In addition, blocks and the gravel footing beneath them do a better-than-average job of protecting from creeping weeds—at a cost comparable with lumber.
Prepare for this project by leveling an area about 2 ft. (61cm) wider and longer than your proposed raised bed. The bed shown in this project is 4 × 12 feet (1.2 × 3.7m). The two courses of block add up to a bit more than 16 inches (40.6cm) once you have added the concrete cap—something unachievable with the 2x8s typically used for raised beds. To gain more depth, dig an area about 6 in. inside of the blocks and frame it using 1x4s or 1x6s. Build the frame so that it can be lifted out and used again. (See Step 14.) Lay down a bed of gravel—⅝-inch (1.6cm) crushed gravel was used in this project. In cold regions, include a trench 6–12 inches (15.2–30.5cm) deep and fill it with gravel for drainage. If you plan to add drip irrigation, run the supply lines before laying block.
Tools
• Shovel
• Rake
• Fork
• Tamper
• Measuring tape
• Carpenter’s level
• Torpedo level
• Speed square or framing square
• Mason’s line and stakes
• Circular saw
• Work gloves
• Eye and ear protection
• Baby sledge
• Mallet
• Cordless drill-driver
• Mixing tub
• Large caulking gun
• Trowel
• Edger
Materials
• ⅝-in. (1.6cm) crushed gravel
• 44 4 × 8 × 16-in. (10.2 × 20.3 × 40.6cm) blocks (4 × 12-ft. [1.2 × 3.7m] bed)
• 4 4 × 4 × 16-in. blocks (4 × 12-ft. [1.2 × 3.7m] bed)
• Construction adhesive
• 2 2-ft. (61cm) rebars
• 2 8-ft. (2.4m) 1x4s
• 4 12-ft. (3.7m) 1x4s
A raised bed made of concrete block provides a lifetime of convenience and productivity. This project is made without mortared joints—ever the nemesis of do-it-yourselfers. Instead, blocks are joined using construction adhesive and concrete fill.
The 1½-in. (3.8cm) concrete cap finishes off the block and adds structural strength. Formed using 1x4s, it is easily finished using a trowel and edger.
Block Options
A standard concrete block is 8 × 8 × 16 (20.3 × 20.3 × 40.6cm)—7⅝ × 7⅝ × 15⅝ (19.4 × 19.4 × 39.7cm) to be exact. A block 6 or even 4 (15.2 or even 10.2cm) wide is more than up to the job. Half blocks are needed because of the Lincoln Log overlap at the corners. Some 6- and 8-inch-wide (15.2 and 20.3cm) blocks come with three voids in them.
Constructing a Concrete-Block Raised Bed
Prepare the site by leveling the area and digging down a few inches to deepen the bed. Install a temporary 1x4 frame as shown, and level it. With the frame in place, spread gravel for the paths and a footing for the block. Using stakes or rebar, reinforce the frame.
Check the frame for level. Check between frames, too; use a straight plank to extend the level’s reach if necessary. You need at least 3 ft. (91.4cm) for a pathway between the beds—enough room for your wheelbarrow or garden cart. Using the frame as a guide, rake the gravel level.
Screed the gravel using a 2x6. Place the plank on the frame, and push it to level out the gravel.
How to Set a Block
Take the time to set each first course precisely, leveling in two directions with a torpedo level. Get them right, and the second course will be a breeze. Here’s how:
1. Level across the width of the block. Rock the block to settle it in. Add additional gravel as needed.
2. Level the length of the block. Make sure it is tight against the adjacent block.
3. Use a mallet to make adjustments. A hard rubber or wooden mallet will persuade the block without chipping it.
Tamp around the frame, filling in with extra gravel as needed. Tamping will compact the gravel a bit below the frame edge. Keep it as smooth and even as possible.
Begin laying the blocks, leveling and adjusting as you go. (See “How to Set a Block,” left.) Begin at one of the ends, aligning the blocks carefully.
Knock out any excess concrete in the second-course blocks. A little buildup occurs in manufacturing, and you must tap it away using a steel stake or piece of rebar so that the concrete you pour will fill the voids completely.
Build up one end by applying construction adhesive before setting the second-course blocks in place. Note that you will need a half block (inset). Use a masonry level or carpenter’s level on a straight plank to confirm that both sides are even. Stagger every joint.
Complete both ends of the raised bed, seating each block in the adhesive with a few taps of the mallet. The second course will be about ½ in. (1.3cm) longer—a result of the blocks being designed for mortar joints.
Finish the first course of both long sides, using masonry string as a guide. If all goes well, you will need to just ease in the final block.
Add the second course, using construction adhesive to seal the blocks in place. The second course goes quickly because you don’t need to level the blocks.
A strap with a ratchet is ideal for cinching things up and stabilizes the block as you add concrete. Use a length of rope as an alternative. Now is the time for dealing with any gaps between blocks.
Pound in a 2-ft.-long (61cm) piece of rebar to stabilize the midsection of both long sides. Do not add rebar to the corners—the bars will clog the voids, keeping them from being filled with concrete.
Fill the voids in the blocks with concrete, mixed with enough extra water so that it works easily. Stop an inch short of completely filling each void—the concrete cap will make up the difference. Use a piece of rebar (inset) to work in the concrete.
While the concrete is setting up, remove the frame (inset) and thoroughly fork up the ground. Add soil, and spread it evenly.
Cover the ground with a sheet of commercial-grade weed block, cutting it large enough so that it covers the interior wall by about 6 in. (15.2cm).
Make a form for the cap by cutting 1x4s to fit the interior and exterior edge of the bed. Use a scrap of 2x4 as a guide for positioning them as you clamp them in place (inset).
Shovel concrete into the form, and smooth it using a masonry trowel. Tap the forms to eliminate voids.
Starting Right
To get your raised bed off to the best possible start, mix compost, chopped peat moss, and sand, as well as amendments (as needed) such as kelp meal, bone meal, colloidal phosphate, lime, and greensand. This light and absorbent mix provides a great medium for your plants and will be easy to fork over next season. Because of the depth of the bed, plants will send their roots down deeply. Some gardeners plant beets and onions in double rows 4 inches apart every 12 inches (shown). The soil medium will compress over time, so plan on adding to it each season.
Round the edges of the cap by working an edger along the inside of the form. Let the cap cure overnight before removing the form. Give the entire project a few days to set up before filling the raised bed with soil.
Irrigating a Rooftop Raised Bed
Any rooftop gardener will tell you that keeping raised beds adequately hydrated is a constant battle. The sun, heat radiating from the roof, and wind conspire to evaporate water. The result is soil much thirstier than that of a ground-level garden.
This inexpensive scheme not only puts water where it can do the most good but reduces the amount, and therefore the weight, of soil required—an important consideration for rooftop gardeners. It does so with buried drain tubing, easily filled thanks to a cutoff plastic bottle that funnels water to the tubing. A weep hole prevents overwatering. Weed block keeps the soil from clogging the tubing. With plenty of water at root level, plants flourish.
Brooklyn apartment dweller Adam Matthews fills his raised bed once a week, looking down the plastic bottle to check the water level in the bed. “The dirt basically functions like a sponge,” he says. “The places where the landscaping fabric dips down between the drain tubes is where the dirt sucks up the water.”
Tools
• Utility knife
• Shears
• Stapler
• Drill-driver and ½-in. (12mm) bit
Materials
• Heavy-duty plastic
• 4-in. (102mm) corrugated and perforated drain tubing
• Weed-block fabric
• Plastic bottle
• ½–in. (12mm) tubing
Despite the evaporation from heat and wind, this rooftop raised bed grows water-intensive crops like kale and cabbage with ease, thanks to buried drain tubing that slowly releases water to plant roots.
Irrigated Raised Bed, Cross Section
As one drainpipe is filled, water migrates to the others. Weed block keeps the soil from clogging the tubes. A short length of plastic tubing set in the side of the bed signals overfilling.
Irrigating a Rooftop Raised Bed
Spread plastic sheeting and a 1-in. (2.5cm) layer of soil on the floor of the bed to cushion the plastic and avoid punctures. Check for rocks, nails, and splinters—anything that might pierce the plastic.
Lay in another sheet of thick plastic and run it up the sides of the bed. Staple only along the top edge of the bed.
Add perforated drainpipes to the bottom of the bed. Using a utility knife, cut them so they fit tightly against the ends of the bed.
Cover the pipes with weed-block fabric, tucking the fabric between the tubes. Staple the fabric to the walls, and trim away any excess. At the end of one pipe, use the utility knife to cut an “X” through the fabric and pipe wall. Cut off the bottom of a plastic bottle. Push it upside down into the hole.
Test-fill the bed, and note the point at which the pipes seem to fill completely. Check for any leaks.
Bore a hole in the side of the bed, and insert ½-in. (12mm) tubing as an overflow.
Keep It Light
Rooftops can bear only so much. Don’t tempt fate by using plain backyard soil. Instead, lighten soil or good compost with absorbent materials like pumice, coconut fiber, peat moss, perlite, expanded slate, or vermiculite. It’s possible to blend these materials with as little as 25 percent soil or compost to come up with suitable rooftop soil.
Fill the bed with your soil medium of choice. Plant sets and seeds as you normally would. Be careful not to pierce the plastic when adding poles, stakes, or cages.
Building a Keyhole Garden
Form and function come together in the keyhole garden. Designed for ease of gardening and water conservation, a keyhole garden can be a good-looking, highly effective addition to your backyard homestead.
Designed for intensive gardening in arid regions, a keyhole garden combines several attributes. First, it is a raised bed, easily accessible, and because it is not stepped on, it has little of the soil compaction of a typical garden. Second, it has a ground-level layer of stones and twigs that store excess moisture for the dry season. Finally, accessed by a “keyhole” pathway, it incorporates a compost bin to leech goodness into the surrounding garden.
Keyhole Garden Origins
Based on a design that originated in Zimbabwe, keyhole gardens were adapted in Lesotho, South Africa to meet a special need. Lesotho had an exceptionally high number of HIV/AIDS sufferers who couldn’t manage the usual digging, planting, and weeding required by a conventional garden. The keyhole scheme put everything within reach, even if the gardener was seated. In addition, it conserved precious rainwater. The method proved so productive they caught on as kitchen gardens for the broader population and soon spread throughout the region.


