Erhalten Sie Zugang zu diesem und mehr als 300000 Büchern ab EUR 5,99 monatlich.
- Herausgeber: The History Press
- Kategorie: Geisteswissenschaft
- Sprache: Englisch
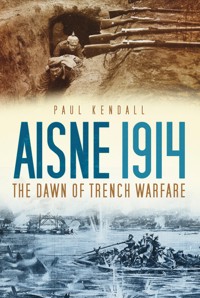
The Battle of the Aisne fought in September 1914 introduced a new and savage mode of warfare to the soldiers of the British Expeditionary Force, their French allies and to the German Army. Both officers and men were trained to fight mobile wars. When they reached the north bank of the Aisne, the 'Old Contemptibles' would be stopped by the Germans entrenched on high ground, armed with machine guns and supported by heavy artillery. The British commanders would naively send their troops on futile assaults up slopes devoid of cover to attack the German lines dug in on the ridges along the Chemin des Dames and concealed by woodland. The British did not even have grenades. The BEF suffered 12,000 casualties. Their commanders, who were not trained to fight a modern war, were lost for a solution or even a strategy. It was on the Chemin des Dames that the first trenches of the Western Front were dug and where the line that would stretch from the Swiss frontier to the North Sea began. The Battle of the Aisne saw the dawn of trench warfare and a stalemate that would last for the next four years. Wide-ranging archival research by author Paul Kendall makes this the first in-depth study of the battle in print. His correspondence with surviving relatives of those who fought brings a human face to the terrible casualty statistics that would come to define the trenches.
Sie lesen das E-Book in den Legimi-Apps auf:
Seitenzahl: 1022
Veröffentlichungsjahr: 2012
Das E-Book (TTS) können Sie hören im Abo „Legimi Premium” in Legimi-Apps auf:
Ähnliche


The author is always looking to gather more information about the Battle of the Aisne for revised editions of this volume. If you are related to any of the participants of the battle and have photographs, personal testimonies, letters, diaries or any relevant information, please contact Paul Kendall at [email protected].
This book is dedicated to my uncles Ted Whiley and John Whiley and to the Old Contemptibles who fought at the Battle of the Aisne in 1914.
It was in the fighting on that river that the eyes of all of us began to be opened.
Field Marshal Sir John French
The river is 50 yards wide and we had to cross on a single girder about 9 inches wide. It was a feat of tightrope that never fell to the lot of a British soldier before. The bullets were as numerous as hailstones and the shells, well, they defy description. The cries of the wounded who had been knocked off the girder and drowning enough to turn a man’s brain.
Private Heys, 1st King’s (Liverpool) Regiment
The Victoria Cross is won over and over again in a single day. They are brave! What if you were to see how the wounded act after the excitement of battle! They suffer their wounds, great and small, without a murmur; they get their wounds dressed, take chloroform, give consent to have their limbs amputated, just as if they were going to have their hair cut. They are gloriously brave.
MO of the 14th Field Ambulance
CONTENTS
Title
Dedication
Acknowledgements
Introduction
PART 1 THE ROAD TO THE AISNE
Chapter 1 The Opposing Armies in 1914
Chapter 2 The Commanders
Chapter 3 The Path to the Aisne
Chapter 4 Arrival at the River Aisne
Chapter 5 Crossing the Aisne, I Corps Sector
Chapter 6 Crossing the Aisne, II Corps Sector
Chapter 7 The Crossing Continues, 14 September
PART 2 BATTLE OF THE AISNE
Chapter 8 Battle for the Sugar Factory at Cerny
Chapter 9 They Fought for the Sugar Factory at Cerny
Chapter 10 The 1st Guards Brigade Thrust upon the Chemin Des Dames at Cerny
Chapter 11 Soldiers of the 1st Guards Brigade who Fought along the Chemin des Dames at Cerny
Chapter 12 The Welsh Battalions’ Assault on Chivy
Chapter 13 They Fought in the Chivy Valley
Chapter 14 Verneuil
Chapter 15 They Fought at Verneuil
Chapter 16 The Battle for Cour de Soupir Farm
Chapter 17 They Fought at Cour de Soupir Farm
Chapter 18 The Battle for Rouge Maison Farm, Jouy Spur and La Fosse Marguet
Chapter 19 They Fought at Rouge Maison Farm and La Fosse Marguet
Chapter 20 La Montagne Farm
Chapter 21 The Battle for the Chivres Heights
Chapter 22 The Position at the End of 14 September
PART 3 DESCENT INTO STALEMATE AND TRENCH WARFARE
Chapter 23 La Fosse Marguet and Rouge Maison
Chapter 24 Chivres Spur
Chapter 25 Chivy Valley
Chapter 26 Sugar Factory, Cerny
Chapter 27 La Cour de Soupir Farm
Chapter 28 16 September
Chapter 29 17 September
Chapter 30 German Deception at Troyon
Chapter 31 18 September
Chapter 32 19 September
Chapter 33 Holding the Line at Troyon
Chapter 34 Rouge Maison and Tilleul Spur
Chapter 35 Chavonne and Vailly
Chapter 36 Adapting to Trench Warfare
Chapter 37 Stalemate, 21/25 September
Chapter 38 Cave Tragedy for the Cameron Highlanders
Chapter 39 Defence of Mont Faucon Ridge
Chapter 40 Winston Churchill and Two Victoria Crosses
Chapter 41 The First Trench Raid
Chapter 42 Dealing with the Wounded
Chapter 43 Assessment
Chapter 44 Memorials and Cemeteries
Appendix 1 British Expeditionary Force Order of Battle
Appendix 2 German Imperial Army Order of Battle
Appendix 3 BEF Soldiers Listed on La Ferté-Sous-Jouarre Memorial
Appendix 4 BEF Soldiers Buried in Moulins New Communal Cemetery
Appendix 5 BEF Soldiers Buried in Paissy Churchyard
Appendix 6 BEF Soldiers Buried in Soupir Churchyard
Appendix 7 BEF Soldiers Buried in Soupir Communal Cemetery
Appendix 8 BEF Soldiers Buried in Vailly British Cemetery
Appendix 9 BEF Soldiers Buried in Vendresse British Cemetery
Appendix 10 BEF Soldiers Buried in Vendresse Churchyard
Bibliography
Copyright
ACKNOWLEDGEMENTS
This volume is the result of several years of research. I am indebted to many individuals without whose assistance producing such a work would be impossible. I would like to thank Yves Fohlen, battlefield guide, Caverne du Dragon Museum, for proofreading and for his continued friendship and support. I have known him as a friend for many years and I have spent time walking the Chemin des Dames with him. I value his guidance, knowledge and tutelage regarding the Aisne and all First World War subjects. Walking the Aisne battlefield with Yves was an awe-inspiring experience, to follow in the footsteps of the soldiers of the BEF brought home to me the enormity of their task – to cross the Aisne and assault the ridge of the Chemin des Dames when they were totally exhausted and under constant, heavy enemy fire. Even today, the Chemin des Dames is a dangerous place to walk; there are wooded ridges, bluffs and spurs that conceal deep dugouts. I was glad to have Yves as my guide, who was able to show me these extraordinary places safely.
I would like to thank the Trustees of the Imperial War Museum, London, for permission to use material from the Department of Documents and Sound Collections, in particular Anthony Richards and Simon Offord at the IWM Department of Documents and Margaret Brooks from the IWM Sound Archives for assisting me in contacting copyright holders. Every effort has been made, but if anyone has not been credited the publishers apologise and will correct the omission on reprint.
I am grateful to Nicholas Coney at the National Archives for advising me on copyright and Judy Noakes of the Office of Public Sector Information for confirming copyright status of London Gazette material.
I thank Richard Davies at the Liddle Collection for assisting me in contacting copyright holders for the material within their archives and for arranging for transcripts of interviews to be sent to me.
I would like to thank Ann Dennison, Community History Manager, Preston District, Shona Milton, History Centre Officer, Brighton History Centre, John-Paul Carr, Northamptonshire Studies Manager, Gail Priddice at Inverness Library, Eileen Moran at Dundee Central Library, Edith Wemyss at Aberdeen Central Library, Nigel Lutt at the Bedfordshire and Luton Archives, Adrian Wilkinson at Lincolnshire Libraries, Gwilym Games, Local Studies Librarian at Swansea Library & Information Services and Mary Bradley of the Ballymena Library.
I extend my thanks to Pamela Clark, Registrar, Royal Archives, for allowing me to quote from a letter written by Field Marshal French to King George V.
The administrators of the website www.memoiredeshommes.sga.defense.gouv.fr kindly gave permission for reproduction of a map of Soupir.
I also thank Major W.H. White, DL at Cornwall’s Regimental Museum, Thomas Smyth, archivist at The Black Watch Museum and for the Trustees of the Black Watch Museum, Mr I.G. Edwards from the Sherwood Foresters Museum, Colonel Seymour at the RHQ Grenadier Guards Archives, Major Robert de L. Cazenove at the RHQ Coldstream Guards Archives, Dominic Kearney at the RHQ Irish Guards Archives, Major Ken Gray (ret’d.) at the Royal Green Jackets Museum, Jane Davies, curator and Dorothy Williams, researcher, at the Museum of the Queen’s Lancashire Regiment, Terence Nelson, curator at the Royal Ulster Regiment Museum, Oliver Fallon, Chairman and archivist of the Connaught Rangers Association, Karen O’Rourke, Curator of Social History, National Museums Liverpool, Rachel Holmes at the Royal Hampshire Regiment Museum, Major (ret’d) J.H. Peters MBE at the Rifles (Berkshire & Wiltshire) Museum, Martin Everitt at the Museum of the Royal Welsh and Lauren Jones at the Royal Engineers Museum, Library and Archive. (We have had a debate as to how the Welsh Regiment, known as the Welch in the Great War and beyond, should be spelled in this book and were advised by a curator of the Royal Regiment of Wales that the spelling ‘Welsh’ is more commonly used today, regardless of period. There is no easy answer and if anyone is offended by the adopted spelling we apologise.)
The reader will find short biographies and photographs of soldiers who fought at the Battle of the Aisne throughout this book. While it is perfectly possible to follow the narrative without reference to these, it is hoped that they will provide the reader the opportunity to take time to reflect upon their lives and their sacrifice. The short entries are intended to be a kind of wholly inadequate memorial to these men in themselves.
I am indebted to all the following relatives who have kindly provided photos and information, as well as giving their time to review the relevant draft pieces. I thank them for their generosity and for allowing me to pay homage to their brave forebears.
LANCE CORPORAL ALFRED ALDRIDGE, 2nd Royal Sussex Regiment: Neil Aldridge, (grandson).
PRIVATE JAMES BALLARD, 2nd Royal Sussex Regiment: Paul Ballard (grandson).
PRIVATE HERBERT BARKS, 1st Coldstream Guards: Trudie Brace (great granddaughter)
PRIVATE ERNEST BUCKLAND, 2nd Coldstream Guards and Private William Buckland 1st Coldstream Guards: Dick Monk (relative)
SERGEANT ARTHUR BURCHETT, 3rd Coldstream Guards: Keith Burchett (great nephew) and Debbie Jackson (great niece).
PRIVATE THOMAS CLULOW, 2nd South Lancashire Regiment: Steven Thompson (great grandson).
DRIVER THOMAS COFFIN, 11th Field Company, Royal Engineers: Kelly Howie (great niece)
PRIVATE WALLACE CLISSOLD, 2nd Grenadier Guards: Martin Clissold (great nephew).
PRIVATE HARRY DUNCOMBE, 3rd Coldstream Guards: Cynthia Bone (granddaughter). Derek Duncombe (nephew).
SAPPER ALBERT GUMM, At Cable Section, Royal Engineers: Brian Gumm (son).
CAPTAIN A.H. HABGOOD, 9th Field Ambulance: The Right Reverend Lord Habgood (son).
PRIVATE HEYS, 1st King’s Liverpool Regiment: Mrs S. Palin (granddaughter).
RIFLEMAN JOHN ILES, 2nd King’s Royal Rifles Corps: Keith Iles (grandson).
PRIVATE ERNEST KEATES, 2nd Royal Sussex Regiment: Mary Miles (great niece).
SERGEANT ARTHUR LANE, 2nd Coldstream Guards: Arthur Lane and Brian Lane (sons).
PRIVATE MICHAEL LEE, 1st Cameron Highlanders: Maureen McAuley (great niece).
SERGEANT WALTER LEDBURY, 1st Loyal North Lancashire Regiment: Shelia Linton (relative).
CAPTAIN L.A. KENNY, 47th Battery, 44th Brigade, Royal Field Artillery: Jenny Ballantyne (great niece).
PRIVATE HENRY MACKENZIE, 1st Cameron Highlanders: Stuart Kilminster (great nephew) and Margaret Mackenzie (great granddaughter).
LANCE CORPORAL HARRY MCGREVY, 1st Northumberland Fusiliers: Theresa Newbegin (granddaughter).
SERGEANT JOHN MCLLWAIN, 2nd Connaught Rangers: Mrs M. Mcllwain (granddaughter).
SAPPER CLAUDE MERCHANT, 5th Field Company, Royal Engineers: Robert Merchant (great nephew)
SAPPER EDWARD MERCHANT, 11th Field Company, Royal Engineers: Robert Merchant (grandson).
PRIVATE ROBERT MILLAR, 1st Cameron Highlanders: Scott Millar (great nephew).
LIEUTENANT BERNARD MONTGOMERY, 1st Royal Warwickshire Regiment: Viscount Montgomery of Alamein (son)
CAPTAIN HUBERT REES, 2nd Welsh Regiment: Diana Stockford (granddaughter).
CORPORAL JOHN STENNETT, 1st Northamptonshire Regiment: Peter Statham (great grandson) and Brian Statham (grandson).
PRIVATE FREDERICK STOTTER, 2nd South Lancashire Regiment: Michael Stotter (grandson).
LIEUTENANT RICHARD WELBY, 2nd Grenadier Guards: Sir Bruno Welby (nephew).
PRIVATE ARTHUR WIDDOWSON, 3rd Coldstream Guards: Roy Widdowson (grandson).
PRIVATE CHRISTOPHER WHELAN and PRIVATE THOMAS WHELAN, 2nd Royal Irish Regiment: William Whelan (grandson).
2ND LIEUTENANT ALEXANDER WILLIAMSON, 2nd Battalion Seaforth Highlanders: Dr James Williamson (great nephew).
PRIVATE ALFRED YARHAM, 2nd Battalion 1st Queen’s (Royal West Surrey Regiment): Mike Yarham (grandson).
I am grateful to Mark Hifle, Patricia and David Shackleton for the information that they have provided and to Sandy Sell for the photos and information that she sent to me regarding Private Ernest Keates. I acknowledge the generosity of Jean-Pierre Boureux who kindly allowed me to use images of Vailly Bridge prior to the Battle of the Aisne.
I extend my thanks to Shaun Barrington and the team at Spellmount for their continued support and enthusiasm for my third project. I appreciate the support given by my friends and colleagues Gary Shaw and Peter Metcalfe, who have taken a keen interest in this project. Peter kindly took on the daunting task of proofreading the manuscript. I thank my parents, David and Sylvia, for the wonderful decade we have spent touring the battlefields of the First and Second World Wars in Europe. I also thank my partner Tricia Newsome for her continued encouragement and support.
Please note that when referring to the men who took part in the Battle of the Aisne I have referred to the ranks that they held at the time of the battle.
INTRODUCTION
The British Expeditionary Force arrived at the southern banks of the river Aisne on 12 September 1914 after marching approximately 160 miles over three weeks from Mons in Belgium. They endured their baptism of fire at Mons on 23 August, fighting rearguard actions as they retreated south towards the banks of the Marne. Between 5 and 10 September they assisted the French Army in turning the tide of the war and inflicted a defeat upon German forces, compelling them to withdraw to the river Aisne. The Germans entrenched themselves along the wooded heights of the Chemin des Dames, north of the river Aisne, which is approximately 60 miles north east of Paris. It was an arduous journey for the soldiers serving with the BEF who were demoralised, suffering from exhaustion, hunger, sore backs and blistered feet by the time they reached the banks of the river.
The majority of crossings over the Aisne had been destroyed or partially destroyed by German engineers with explosives, so it was a massive engineering challenge for the sappers of the Royal Engineers to either repair damaged bridges or build pontoons, which they did under enemy shell fire. It was also a great challenge, mindful of the physical condition and mental state of the soldiers of the BEF, to get across the river and establish a bridgehead on the north banks. The odds were heavily stacked against these soldiers of the ‘contemptible little army’.
The exhausted soldiers of the BEF had to cross this swollen river under German artillery shells and machine guns. The 11th Infantry Brigade led the BEF during the night of 12/13 September, with only a single lamp to guide them from the north bank. One wrong step could result in these weary soldiers, who had endured so much during the first weeks of the war, falling into the river and drowning.
By the morning of 14 September General Sir Douglas Haig’s I Corps and General Sir Horace Smith-Dorrien’s II Corps had successfully crossed the river Aisne. It was an enormous gamble for Field Marshal Sir John French, commander of the BEF, to push his soldiers perhaps beyond their limits of physical endurance to cross the Aisne and establish a bridgehead. French did not know whether General von Kluck’s First German Army was going to continue to withdraw northwards or establish a defensive line amongst the Chemin des Dames ridge and hold its ground.
Unbeknownst to Field Marshal French, he was sending his exhausted troops into a battle where the enemy were entrenched on the high ground, supported by heavy howitzers. The calibres of these guns ranged from 15cm to 21cm (6 to 8 inches). German 8-inch howitzers were deployed to the Aisne sector and were concealed along the Chemin des Dames or behind its northern ridge. Fired at a high angle, the projectiles could reach targets behind crests and drop into trenches or enemy positions behind a hill or ridge, causing craters 20 feet wide and 10 feet deep. These howitzers could reach targets not reached by flat trajectory guns. The German defences, concealed from the eyes of the BEF along the wooded ridges, would prove impregnable. Waves of British soldiers advanced uphill through muddy beet fields, as heavy rain blew into their faces and shell fire of an unprecedented magnitude was brought down on them. The first day of the Battle of the Aisne was 14 September; it would last until the end of the month.
The Battle of the Aisne was significant because it brought the war of movement to an end. It was a ghastly show stopper. With German forces strongly fortified along the wooded heights, the British and French forces could not break through. Every wave of infantry sent forward would stumble through a maelstrom of machine-gun fire and high explosive shells. The Battle of the Aisne would end in the stalemate of trench warfare. It was here that the first trenches of the Western Front were dug, the starting point of the line of trenches that would eventually stretch from the Swiss frontier across France and Belgium to the North Sea. Trench warfare had been conducted during the American Civil War of 1861–65 and during the Russo-Japanese War of 1902–05; but this time it would be fought on an enormous, unprecedented scale. One line of trenches would prevent all sides from moving forward across the entire continent of Europe. The Western Front was born at Aisne and the trenches would determine the defensive strategy of the war for the next four years. The battle demonstrated to commanders that the spade would be as important as the rifle.
The appearance of lines of trenches, defended by machine guns and heavy artillery, would force commanders on both sides to reconsider their strategies. This was the first major war fought by British soldiers in Europe since the Battle of Waterloo. British commanders could not foresee the impact that modern weapons would have on how the war would be fought. They had been brought up during the Victorian era; they were trained to fight colonial wars with weapons from the Victorian age. They were taught offensive tactics and that the only way to win a battle was to advance and attack. British commanders in 1914 had no conception of how to use the modern rifle, machine guns, heavy calibre artillery and aeroplanes to fight and win a war.
At Aisne, the allied commanders would send their troops into futile assaults up slopes devoid of cover to attack the hidden lines. Each assault would fail with heavy casualties and an inevitable retreat to start lines. The BEF officially lost 561 officers and 12,980 men during the battle, over ten per cent of the force. It would leave their commanders lost for a solution or strategy to deliver a decisive victory.
The loss of 13,541 cas-ualties was difficult for communities in Britain to comprehend. Many homes in Britain would receive news that their loved ones had died during this awful battle via telegrams or in letters from comrades who saw them fall in battle. Journalists reported from the battlefield and from the hospitals where the wounded were taken across Britain. Their articles would appear in British newspapers daily, on occasion detailing potentially strategically sensitive information relating to the progress of the campaign.
The losses incurred jeopardised the operational effectiveness of the BEF. Some battalions who fought at the Aisne were completely annihilated and their losses equalled the tragic casualty rates seen during the first day of the Somme two years later, in July 1916. It was indeed a national tragedy. The battle was etched into the consciousness of the British public to such an extent that many babies born during the last months of 1914 would be christened with ‘Aisne’ as a middle name. As the Battle of the Aisne was being fought, Lord Herbert Kitchener, who could foresee that it would take years to defeat Germany, was already proactive in the recruitment of soldiers to replace those men lost at Mons, during the retreat to the Marne and at the Aisne.
The Battle of the Aisne was fought on a 100-mile front from Compiègne to Tahure, east of Rheims. The French 6th Army led by General Maunoury held the line along the Compiègne-Soissons sector. The British Expeditionary Force led by Field Marshal Sir John French advanced upon the Soissons–Vauxcéré sector. General Franchet d’Esperey’s French 5th Army held the line between Vauxcéré and Berry-au-Bac; the 9th French Army commanded by General Ferdinand Foch advanced along the front near Rheims and the French 4th Army led by General Ferdinand Langle de Cary held the line close to the upper Suippe.
They were opposed by four German armies. The German 1st Army, commanded by General Alexander von Kluck, held the Compiégne-Soissons sector. The German 2nd Army commanded by General Karl von Bülow was deployed between Soissons and Craonne. The German 3rd Army led by General Max von Hausen formed a defensive line between Craonne and Rheims; The German 4th Army commanded by the Duke of Württemberg held the line between Rheims and Suippe.
This book focuses upon the efforts of the BEF to cross the Aisne within their sector and their brave but futile attempts to dislodge their enemy from the Chemin des Dames. Six Victoria Crosses were awarded to individuals serving with the BEF for their courage during the battle, four of those for heroic acts carried out on 14 September. The Victoria Cross was surely earned by many other soldiers during those terrible weeks, unrecognised by any award. This is a story of endurance, fortitude and courage and demonstrates the determined spirit of the British soldier in the face of overwhelming odds. Perhaps the massive losses suffered by the British Expeditionary Force at Neuve Chapelle and Loos in 1915, the Somme in 1916 and Passchendaele in 1917 have overshadowed the carnage at Aisne. I hope that this book highlights the importance of the battle and raises awareness of the sacrifices of those men who fought and died on the Chemin des Dames.
PART ONE
THE ROAD TO THE AISNE
1
THE OPPOSING ARMIES IN 1914
The British Army in 1914 was a small, professional army comprised of volunteers. It was a tiny army in comparison to other European powers, which relied on conscription. The officers were almost exclusively from affluent backgrounds, motivated by patriotism, a sense of duty, and family reputation. The ranks were recruited from the poor, for whom the Army offered a rough sanctuary. Providing they could pass through the training they could look forward to a uniform, being fed three meals a day, accommodation and after completion of 20 years service, a modest pension.
When war broke out in August, the British Army would assemble a force of six infantry divisions and one cavalry division – the British Expeditionary Force – amounting to 100,000 soldiers. Many of the officers and men who would form the BEF had served during the Boer War of 1899–1902. The British campaign in South Africa had highlighted weaknesses within the British Army. Field craft skills were lacking and the men could not even shoot effectively. The cavalry were tactically limited and did not fight with the same flexibility as the South African horsemen, who were trained to dismount and fight. The Boer War had demonstrated that the British Army was not prepared for modern warfare. As a consequence, during the first decade of the new century, there would be a restructuring and transformation of training. A General Staff was created to coordinate command and operational planning. Soldiers were trained to shoot at a target at a rate of 15 rounds per minute. Cavalry were trained to fight while dismounted, the artillery was modernised with updated artillery pieces. The Royal Horse Artillery used the 13-pounder and the Field Artillery was equipped with the 18-pounder and the 4.5-inch howitzer.
British troops on manoeuvres. These soldiers were trained to fire their Short Magazine Lee Enfield rifles at fifteen rounds per minute. (Author)
Grenadier Guards training prior to the First World War. (Author)
German soldier wearing the uniform worn during the 1914 campaign including the Pickelhaube helmet. These helmets worn in 1914 would be used by British and French riflemen as targets. (Author)
The opening months of the war in 1914 and in particular the experience at the Battle of the Aisne would show that the initiatives taken were not enough. The impassable Western Front demonstrated that both sides were unable to win a modern war. It would take four years for the Allies to find a way of making a decisive breakthrough.
The German Army was not strictly a single unified force. Each monarchy, such as the Dukedom of Baden, had its own army, though the Kaiser was commander-in-chief. Dfferent units even had their ownseitengewehr(bayonets). (Author)
The British Army from which the BEF was drawn had a strength of 250,000 in 1914, 50 per cent serving overseas in the colonies. In a time of national crisis the British Army was reliant upon reserves and territorial forces. Just over 60 per cent of the BEF that was sent to France were reservists. Reservists were soldiers who had completed their service as regulars and returned to civilian life who could be called to serve at the outbreak of war. Territorial units were civilians who trained at weekends and their primary role was to defend the British Isles while the regular army fought overseas. The Territorial units comprised six divisions and 140,000 men in 1914.
In 1914 the French Army consisted of 76 infantry divisions and ten cavalry divisions, which numbered 2 million men. These men were conscripts. On mobilisation in August the German Imperial Army amounted to an awesome 9.9 million men. The German Army was also of course formed of conscripted men. On reaching the age of 17 German males were liable for conscription to serve between two to three years in the army. After completing this mandatory service they joined the reserves.
The European armies were dressed in the uniforms of the previous century. British officers, like French and German officers, continued to carry swords during the first months of the war. The officers and men serving with the French Army wore blue tunics, bright red trousers and red caps covered with a blue cover, easily identifiable targets for German machine gunners and snipers. Similarly, the German infantry were not dressed for trench warfare. The Pickelhaube helmet, originally designed in 1842 and made from leather, afforded no protection from flying shrapnel and made a good target.
The three armies used different rifles. The Tommy was armed with the Short Magazine Lee-Enfield rifle. Each magazine carried ten rounds. Regarded as an effective service weapon in both the First and the Second World War, British infantrymen were trained to fire this weapon at 15 rounds per minute and hit their target at an effective range of 550 yards. The French Army was armed with a magazine rifle which contained 8 cartridges in the butt, the Lebel Rifle. German soldiers used the Mauser Gewehr 98 rifle, which had been in service since 1898 and was the most common armament throughout the First World War. Its bolt action precluded rapid fire and it was limited to five rounds per magazine. Bullets fired from these rifles would travel at twice the speed of sound and the unfortunate soul who was hit would not have heard the sound of the bullet until after it had hit him.
A German Maxim machine gun and British Vickers machine gun on display at the Mons Museum. These guns were used at the Battle of the Aisne to devastating effect, and would play a major part in enforcing a stalemate on the Western Front. (Author)
This image of a German machine-gun crew was taken in a studio in 1914. These soldiers were regarded as the elite of the German Army. (Author)
British artillery at the Battle of the Aisne. (Author)
Machine guns would dominate the battlefield and help to instigate the stalemate of trench warfare. This formidable weapon was developed by American inventor Hiram Maxim in 1884, and demonstrated its deadly capability to stop waves of advancing infantry during the Battle of the Aisne. The British Army placed an order for three machine guns to test during 1887, and surprisingly, despite a successful demonstration, the British never adopted the Maxim.
The German Imperial Army placed orders for the Maxim machine gun in 1887 and after testing, Kaiser Wilhelm II realised the potential of the machine gun and placed further orders. In 1901 the Germans had established a machine-gun branch. When war broke out the German Army had 12,500 Maxim machine guns in operation. The official name was the Maschinen Gewehr 08. It was fixed on a tripod, belt fed, water-cooled and fully automatic. The disadvantage was that these water-cooled machine guns would emit steam, which gave away the machine-gun’s position. British and French soldiers would then target the barrel jacket. The Maschinen Gewehr 08 could fire 7.92 mm rounds at a rate of 600 rounds per minute to a maximum distance of 4000 yards, but was deadly at 2200 yards. The bullets travelled at three times the speed of sound. Their crews were specially selected and were regarded as an elite force.
The British Army were late in realising the potential of the machine gun. When war broke out there were only two Vickers machine guns allotted to each infantry battalion. The Vickers machine gun was an advanced, lighter version of the Maxim, with improved mechanisms. However British soldiers did not receive adequate training in how to operate the Vickers. The Vickers used .303 ammunition and could fire 450 rounds a minute, but with few of these guns available, being operated by inexperienced soldiers, they did not make any impact during the early stages of the war and especially at the Aisne. If a Vickers machine gun was fired continually for an hour the barrel would be worn out and had to be replaced, a difficult operation in the heat of battle. It was not until October 1915 that the British Army established the Machine Gun Corps, training soldiers to specialise in the use of the machine gun.
Modern artillery would of course have an enormous impact on the course and conduct of the war. All field artillery guns were flat trajectory and their purpose was to subdue enemy assaults and to support infantry advances at short range.
The British Army used the 18-pounder, which was produced in 1904. It was developed from lessons learnt during the Boer War and would become the standard British field gun. By August 1914 the British Army had 1226 in service. By the end of the war 9424 were in operation. The 18-pounder had a calibre of 3.3 inches; it could fire shells weighing between 4.6kg and 8.4kg and had a range of 6525 yards. It had a rate of fire of 8 rounds per minute.
The French Army used the 75mm (2.9 inch) field gun, which incorporated a buffer recoil action that enabled it to fire repeatedly without relaying. The French 75 mm field gun was first produced in 1897 and by 1914 the French Army had approximately 4000 in service. The gun weighed 1,143kg and had a range of 7500 yards. It was able to fire a 5.2kg high explosive shell and a 7.2kg shrapnel shell. It could fire at a rate of 15–20 rounds per minute and was used throughout the war.
The British flat trajectory field guns used by the Royal Artillery during the Battle of the Aisne were no match for the German howitzers. It was also impossible for the British guns to locate and target these formidable German weapons. (Author)
150 mm (6 inch) German howitzer used at the Battle of the Aisne. The high angle elevation meant that these large calibre artillery pieces could be positioned beneath a ridge and could fire upon enemy targets on the other side. (Author)
The German Army used the 77 mm (3 inch) field gun, which could fire high explosive shells with a range of 11,264 yards. However they also possessed more formidable examples of artillery in the form of howitzers, which could project heavy shells that could cause large craters. German artillery used the 10.5cm (4 inch) Feldhaubitze 98/09 during the Battle of the Aisne, which fired the Feldhaubitzgranate 98, a 15.8 kilogram high explosive shell, or the Feldhaubitzschrapnel 98, a 12.8 kilogram shrapnel shell. German artillery also used the 21-cm Langer Morser (long mortar) with a calibre of 8.3 inches and range between 10,280 and 11,155 yards. It could be fired at a high angle of elevation, which meant that it could be positioned behind hills and ridges. It would fire various types of shell during the Battle of the Aisne including high explosive shrapnel, small, high-velocity shells known as ‘whizz-bangs’ or ‘Jack Johnsons’. The HE shell fired by German 21cm howitzers, which would emit black smoke, would cause the most devastation. Causing an enormous impact, they could destroy villages, level trees and vapourise men.
German 21cm (8.3-inch) howitzer. The shells fired from these guns were known as Jack Johnsons and could create a massive crater. The ferocity of these high calibre howitzers would force the BEF to dig deeper trenches in an attempt to provide more effective shelter from shrapnel. (Author)
2
THE COMMANDERS
FIELD MARSHAL SIR JOHN FRENCH
COMMANDER-IN-CHIEF BRITISH EXPEDITIONARY FORCE
John Denton Pinkstone French was born in Deal, Kent, on 28 September 1852. French joined the Royal Navy as a cadet in August 1866 when he began his training on HMS Britannia at Dartmouth. On completing his training he served as a midshipman on the iron-clad HMS Warrior, which is now moored in Portsmouth Dockyard. Life at sea did not agree with French and after resigning from the Royal Navy he joined the Suffolk Artillery Militia and on 28 February 1874 joined the Army. French was gazetted to the 8th (Queen’s Royal Irish) Hussars as a Lieutenant. He would transfer to the 19th Hussars weeks later. In 1885 he was promoted to Major and was in command of a squadron from the 19th Hussars in the Sudan during the Gordon Relief Expedition. He took part in the action at Abu Klea during January 1885 against Mahdist forces. French was promoted to Lieutenant-Colonel the following month and was mentioned in despatches for his role in the campaign. In 1895 French was transferred to a post in the War Office where he produced a cavalry training manual and became acquainted with a junior officer, Douglas Haig. During 1897 French was appointed commander of 2nd Cavalry Brigade with the rank of temporary Major-General. At this period in his life French was facing financial difficulty and had to borrow money from his affluent subordinate, Haig, in order to pay his debts. French was appointed commander of the Cavalry Division in 1899 and commanded them during various actions during the Boer War. In July 1900 French was awarded the KCB and was now Sir John French. French returned home during 1902 and on 15 September he was appointed commander of I Army Corps and promoted to Lieutenant General. Appointed as Chief of the Imperial General Staff in March 1912, French oversaw changes to the structure of the British Army and was responsible for the transformation of infantry battalions from eight small companies into four large companies. On 3 June 1913 Sir John French was elevated to the rank of Field Marshal.
Field Marshal Sir John French, commander of the BEF.
French was appointed commander of the British Expeditionary Force on 4 August 1914. He sailed from Dover aboard HMS Sentinel arriving in Boulogne on 14 August. Within ten days his force was engaged with the German Army at Mons. Vulnerable to being overrun by the far larger German army, French became unnerved and ordered a retreat from Mons. Another battle was fought at Le Cateau on 26 August and the BEF continued its retreat to the Marne. Devastated by the casualties at Mons and Le Cateau, French decided to preserve his force and retire from the area of operations to buy time to refit and reorganise. The British Government disagreed with French’s decision and sent Lord Kitchener, the Secretary of State for War, to Paris to order French to keep the BEF in line with movements made by their French allies.
French was instructed to take orders from General Joffre, his junior in rank and with less combat experience. Resentful, Field Marshal French nevertheless complied with orders from London and from General Joffre. He ordered the BEF to pursue the German Imperial Army to the river Aisne. It was here that the BEF’s advance came to an immediate halt. He had to reorganise his force and introduce reinforcements into their ranks swiftly. It was an incredible logistical and organisational challenge. French was deeply worried about the lack of battlefield experience of the officer replacements. He was also deeply frustrated in not being able to advance beyond the Chemin des Dames. When there was no prospect of further advance he ordered the BEF to dig in. Anxious to shorten lines of communication and supply from the Channel Ports, he convinced General Joffre that it would be prudent to transfer the BEF to the left flank of the French Army and during October 1914 they were deployed to the Flanders sector at Ypres.
Field Marshal Sir John French sailed from Dover aboard HMSSentinel. He is pictured arriving at Boulogne at 5.00pm on 14 August 1914.
At the beginning of 1915, Joffre pressured French into launching offensives despite a shortage of shells and the inability to launch preparatory barrages. French launched an assault at Neuve Chapelle in March 1915. Haig’s British First Army took the German Army by surprise and broke through German lines to capture Neuve Chapelle. The initiative was lost when Haig hesitated and refused to send infantry into the breach until reinforcements arrived. While Haig waited for reinforcements, General Erich von Falkenhayn sent in his own reinforcements to secure the German line. British infantry tried to recapture the ground gained but to no avail. They had lost the momentum. The British Army lost a further 13,000 casualties. Field Marshal French blamed a lack of resources and a shortage of shells. The lack of artillery ammunition caused a scandal in Britain and seriously undermined Lord Kitchener’s role as Secretary of State for War. The Ministry of Munitions, led by David Lloyd George, was established as a result of the ‘Shell Scandal’. Infantry reinforcements poured into France and by August 1915 Field Marshal French was in command of 28 divisions, some 900,000 men.
During the period 25 September to 8 October 1915 French launched another offensive in the Artois sector at Loos. General Joffre chose the ground for this assault without considering the viability of launching such an operation across coalfields and the ruins of houses and mining equipment. Field Marshal French was ordered to comply with Joffre’s decision despite having reservations. This was the first occasion when poison gas was used by the British Army upon German forces. The initiative was disastrous because a change in wind direction blew the gas upon the British infantry, but despite this, battalions from Haig’s First Army managed to capture some ground, breaking through the first German line and making limited gains in the second line. Haig requested more reinforcements in order to consolidate their gains, but Field Marshal French kept the reserves so far back from the front that they were too late to assist Haig and when the Germans counter attacked, the initiative was lost. The Battle of Loos resulted in the loss of 50,000 British troops. General Haig was critical of Field Marshal French’s poor performance and blamed the failure at Loos on French holding the reserves too far back. Sir Douglas Haig was corresponding with King George V, Herbert Asquith, the Prime Minister and Lord Kitchener and expressed his opinion that Field Marshal French did not have the capability to deliver a victory; that he was out of his depth and was not fit to command the British Army in France. French was regarded as erratic and indecisive. Within weeks of sustaining heavy losses at Loos he was ordered to relinquish command of the BEF and hand over command to General Sir Douglas Haig. The relationship between French and Haig would become one of mutual contempt. French continued to serve in other military positions throughout the war. He was appointed Commander-in-Chief Home Forces and in February 1916 he was given a peerage as Viscount French of Ypres and High Lake. On 22 May 1925, Viscount French died of cancer of the bladder at Deal Castle in Kent.
GENERAL JOSEPH JOFFRE
CHIEF OF STAFF, FRENCH ARMY
Joseph Jacques Joffre was born in Rivesaltes, Roussillon in the Eastern Pyrenees on 12 January 1852.He studied at the Ecole Polytechnique from 1870 and would serve in the French Army as a career officer. Joffre saw active service at the siege of Paris during the Franco-Prussian War. Joffre was a military engineer and spent much of his career serving in the French colonies. He saw action during the Keelung Campaign in the Sino-French War from August 1884 until April 1885. With no experience of commanding an army or knowledge of the workings at Staff level, Joffre was appointed Commander-in-Chief of the French Army during 1911. Joffre established Plan XVII, which was an offensive strategy to be implemented in the event of a future war with Germany. The plan would be implemented if Germany invaded Belgium and involved driving a French assault through the Ardennes at Sedan and at Mulhouse into the bitterly contested territory once owned by France called Alsace Lorraine and then into Germany. Joffre launched Plan XVII, which in effect was the Lorraine Offensive, during the middle of August 1914. Overwhelmed by superior German forces Joffre had to withdraw. When the war began Joffre had in mind ‘the cult of the offensive’. His strategy would result in severe losses for the French Army, which he commanded from August 1914 until December1916. French losses on his watch amounted to about 454,000 men killed or missing. His worst day was 22 August 1914, with 27,000 official fatalites.
General Joseph Joffre, Chief of Staff of the French Army.
Joffre was able to maintain composure despite the heavy losses and the mounting pressure of the German invasion advancing towards Paris. He was technically minded and successfully planned the logistical movements of French infantry and kept French artillery supplied. This enabled him to regroup and reorganise his forces for a victorious counter attack on the River Marne. This would be his only victory and he would be credited as the individual responsible for saving France during those dark days. The French Army, together with the BEF, would pursue the German Army to the Aisne valley. Desperate to make a breakthrough and force the German invaders from French soil, Joffre launched assaults upon German lines in Artois in May 1915 and in Champagne during September 1915; both failed. In order to secure the French lines he ordered the dismantling of the heavy artillery guns that defended the fortress at Verdun and their distribution along the French lines. This proved to be Joffre’s greatest error of judgment, when German forces attacked Verdun in 1916. On 13 December 1916 the French Prime Minister Aristide Briand dismissed Joffre from his position and General Robert Nivelle was appointed Commander-in-Chief of the French Army.
Joffre was appointed Marshal of France, which was no more than a ceremonial role. In June 1917 he was appointed Head of the French Military Mission to the US and during the final year of the war Leader of the Supreme War Council. Joffre died in Paris on 3 January 1931.
GENERAL SIR HORACE SMITH-DORRIEN
COMMANDER BRITISH II CORPS
Horace Smith-Dorrien was born near Berkhamstead, Hertfordshire on 26 May 1858. He was educated at Harrow and Sandhurst. On 26 February 1876 he was gazetted as a Lieutenant to the 95th (Derbyshire) Regiment of Foot. Smith-Dorrien fought in the Zulu War, distinguishing himself at the Battle of Isandlwana on 22 January 1879.
As Zulu forces overwhelmed the British lines, Smith-Dorrien escaped from the battlefield and was recommended for the Victoria Cross for helping others to escape. He was one of approximately 50 survivors from this battle, but the recommendation for the prestigious award was never processed and he never received it. He was mentioned in dispatches when he took part in the Battle of Ulundi on 4 July 1879, which resulted in defeat for the Zulus.
General Sir Horace Smith-Dorrien, Commander British II Corps.
He was an observer at the Battle of Glennis on 30 December 1885, which was the last time that the British Army fought wearing scarlet tunics. During the following day Smith-Dorrien was involved in an action which resulted in him being awarded the Distinguished Service Cross.
In 1898 he fought at the Battle of Omdurman in Sudan and during the following year he was sent to South Africa to fight in the Boer War. On 2 February 1900 Smith-Dorrien was appointed commander of the 19th Brigade and seven days later he was promoted to Major-General. In 1911 he was appointed Aide-de-Camp to King George V. On 1 March 1912 he was appointed GOC Southern Command and later that year he was promoted to General.
At the outbreak of the First World War Smith-Dorrien was appointed commander-in-chief of the Home Defence Army, but after the death of Sir James Grierson Lord Kitchener offered him the role of commander of II Corps. Kitchener advised Smith-Dorrien that Field Marshal Sir John French nursed a vehement dislike for him and asked if that would pose a problem. Smith-Dorrien was a professional soldier and told Kitchener that he did not bear any ill feeling towards French and it would not interfere with him carrying out his duty. French had requested Sir Herbert Plumer, but Kitchener appointed Smith-Dorrien because he had the strength of character to stand up to French when the need arose.
The animosity that French felt for Smith-Dorrien was apparent when French accused him of jeopardising the BEF by fighting a rearguard action at Le Cateau. French had ordered II Corps to retire earlier that morning, but Smith-Dorrien ignored French’s orders and fought. Smith-Dorrien would continue to command II Corps during the Battle of the Marne, the Aisne and at Ypres during the 1914 campaign.
On 26 December 1914 Smith-Dorrien was given command of the British Second Army. The second Battle of Ypres began on 22 April 1915 when German forces unleashed poison gas upon British and French lines in Flanders.
This was the first use of gas in war and would cause a breach in the allied lines. On 27 April Smith-Dorrien recommended that the Second Army withdraw to a better defensive position. Field Marshal Sir John French used Smith-Dorrien’s recommendation in contravention of his orders as a reason to remove him from his command and replace him with Sir Hubert Plumer as commander of Second Army. French’s decision was based on his own personal feelings towards Smith-Dorrien – Sir Hubert Plumer recommended a course of action similar to Smith-Dorrien’s withdrawal strategy, which French accepted.
Smith-Dorrien was sent to serve in the East African Campaign but illness meant that he could not continue. He returned to Britain where on 29 January 1917 he was appointed Lieutenant at the Tower of London. After the war he served as Governor of Gibraltar from 1918 until May 1923.
Smith-Dorrien died on 12 August 1930 after being injured in a car accident at Chippenham in Wiltshire. He was aged 72 when he died and was buried at Three Close Lane Cemetery, Berkhamsted.
GENERAL SIR DOUGLAS HAIG
COMMANDER BRITISH I CORPS
Douglas Haig was born in Edinburgh on 19 June 1861. He was educated at Clifton College and in 1880 went up to Brasenose College, Oxford. Haig was a diligent student and excelled in horsemanship, particularly polo. He joined the Army and went to the Royal Military College at Sandhurst in 1883. On 7 February 1885 he was commissioned as a lieutenant in the 7th (Queen’s Own) Hussars. He served nine years in India. He took part in the campaign to reconquer Sudan in 1898 and fought at the Battle of Omdurman. He saw active service during the Boer War from 1899 when he acted as assistant adjutant general to General John French who commanded the Cavalry Division. He was mentioned four times in despatches during that war.
When the First World War broke out he was appointed commander of I Corps. Haig’s I Corps covered the retreat from Mons and took part in the advance to the Aisne. The battalions under his command secured a bridgehead north of Bourg-et-Comin during the Battle of the Aisne during September 1914. When the BEF were transferred to Flanders his single Corps resisted four German Corps and prevented them from making a breakthrough at Ypres. Haig was promoted to General on 16 November 1914 and with the restructuring of the BEF into two armies, Haig was appointed commander of the First Army, which was comprised of I, IV and Indian Corps. In March 1915 Field Marshal French deployed Haig’s First Army in costly, ineffective attacks upon German lines at Neuve Chapelle on 10–13 March 1915, at Festubert between 15–25 May and at Loos during the period 25 September to 14 October.
Lieutenant General Sir Douglas Haig, Command British I Corps.
The failure of these operations during 1915 resulted in French being dismissed by Prime Minister Herbert Asquith and replaced by Haig as Commander-in-Chief of the BEF on 19 December 1915. On 1 July 1916 during the first day of the Somme Campaign Haig lost 57,470 casualties, which is remembered as, unsurprisingly, the greatest loss ever suffered by the British Army in a single day. The campaign was fought for a further four months resulting in the loss of approximately 420,000 for small gains. On 1 January 1917 Haig was elevated to Field Marshal and promised the British Cabinet a victory over Germany that year. Instead he committed the BEF to another arguably wasteful campaign at Ypres with the loss of 400,000 men.
Haig held onto his command until the end of the war. He retired from the British Army in June 1921 and was elevated to the peerage as Earl Haig of Bemersyde. He died on 30 January 1928 in London and was buried at Dryburgh Abbey, Bemersyde.
GENERAL OBERST ALEXANDER VON KLUCK
COMMANDER FIRST GERMAN ARMY
Alexander von Kluck was born on 20 May 1846. He saw active service with the Prussian Army during Austro-Prussian War in 1866. He sustained two wounds at the Battle of Colombey-Neuilly in the Franco-Prussian War during 1870. He was a career officer and when war broke out in August 1914 General von Kluck was appointed commander of the First German Army.
General von Kluck’s First German Army swept through Belgium capturing Brussels before driving forward through the BEF’s position at Mons on 23 August and at Le Cateau on 26 August. Instead of advancing into France south of the Channel ports and enveloping Paris as per the Schlieffen Plan he ordered the First Army to advance east of the French Capital in a drive to meet the French armies at Sedan. It was originally intended that the First Army would attack Paris from the west while General von Bülow’s Second Army would attack from the east. Von Kluck had changed the plan and left his flank and the flank of von Bülow exposed. Von Kluck was not aware that the French General Michel-Joseph Maunoury had assembled and organised the French Sixth Army in Paris. On 1 September a French patrol had seized a German dispatch car with a map containing General von Kluck’s plans showing he had discarded the original Schlieffen Plan and was advancing southeast. Bypassing Paris, the German First Army and Second Army were exposed during September as General Maunoury’s French Sixth Army and General Louis Franchet d’Esperey’s French Fifth Army seized the opportunity to attack and defeated them at the Marne. The German armies withdrew 40 miles north to the heights overlooking the river Aisne. It was here that General von Kluck’s First Army defended the ridges of the Chemin des Dames against the determined efforts of the BEF. General von Kluck suffered a serious wound to his leg from shrapnel in March 1915 and was retired from active service. Alexander von Kluck died in Berlin on 19 October 1934.
General von Kluck, Commander of the First German Army.
3
THE PATH TO THE AISNE
A brief reminder of just why the BEF found itself crossing the Channel might be of benefit to some readers; to those for whom this summary is redundant, I apologise. Following the assassination of Archduke Franz Ferdinand, Kaiser Wilhelm II had proclaimed the drohende Kriegsgefahr on 31 July, which alerted Germany to the imminent danger of war. Precautionary measures were implemented within all German Army Corps districts, which meant all German soldiers on leave were recalled to barracks. All important communication infrastructures such as roads, railway lines, bridges and tunnels, together with railway stations, received protection. Soldiers guarding the German border were put on a state of high alert and vigilance.
On that same day Kaiser Wilhelm II warned Russia that Germany would mobilise her forces to counter any acts of aggression directed towards Austria. Russia was hoping that a diplomatic solution to the impending crisis could be achieved, but this hope was extinguished when Germany declared war upon Russia on 1 August. France was a Russian ally and Germany requested that she remain neutral in the eventual Russian–German conflict. France declined and on 3 August Germany declared war on France on the false premise that French patrols had violated their borders and that French aeroplanes had crossed into German airspace.
German infantry advance during the 1914 campaign. (Author)
The Belgian Army was mobilised on 1 August 1914 in anticipation of an attack. At 7.00pm on 2 August the German ambassador to Belgium gave an ultimatum demanding free access for the German army through Belgium and to its railway network, with a 12-hour time limit for a response. If Belgium agreed to the German proposal, she would no longer be considered a neutral country, making her vulnerable to a French attack. If she refused the German demand, there was the inevitable risk that Germany would send her armies through Belgium anyway. Belgium was trapped in a precarious, no win situation. At 8.02am on 4 August, advance columns of the German Army comprising six infantry brigades and the German II Cavalry Corps commanded by General Otto von Emmich entered Belgium. They were implementing the Schlieffen Plan and by sweeping across the Belgian frontier they were securing the right flank of the German First and Second Armies. The Schlieffen Plan was devised by German General Count Alfred von Schlieffen and involved the mass movement of four German Army Corps by rail to the German frontier. Each Army Corps would require 280 trains to expedite the mobilisation. This meant that a rigid, precise timetable had to be devised to ensure that they would be moved to the German frontier, together with supplies. These trains would travel at 20 miles per hour and there was a precise ten-minute gap between each train moving west.
German soldiers dressed in the uniforms worn during the 1914 campaign with Mauser 98s. (Author)
They would swiftly sweep through neutral Belgium in an attempt to outflank the French Army’s fortifications along her eastern border. After passing through Belgium into France they would cut off the Channel ports at Dunkirk, Calais and Boulogne, then turn south in an audacious drive for Paris. German commanders hoped that the implementation of Schlieffen’s plan would mean the capture of the French capital 39 days after the initial mobilisation, which would result in the capitulation of France within six weeks. Count Alfred von Schlieffen died aged 80 in 1913 and did not live to see his plan being implemented.
Britain did not have any formal treaties or alliance with France and was under no obligation to get involved in this international crisis on her behalf. However, the German invasion of Belgium would draw Britain into the First World War. Britain had signed a treaty in 1839, the Treaty of London, which meant that she would stand by Belgium against an aggressor. Kaiser Wilhelm II did not relish going to war with Britain and made an unsuccessful attempt to prevent General von Moltke’s armies from invading Belgium in order to avoid one.
The German armies were mobilised on trains adorned with political slogans and flowers; their troops were confident that the French Army would be defeated and the war would be over before the autumn leaves dropped.
The speed with which these men could be mobilised meant that once the button for mobilisation was pressed, it was virtually impossible to reverse the decision. As soon as Germany entered Belgium, Britain honoured its obligations under the Treaty of London signed six decades before and declared war upon Germany. At 4.00pm on 4 August 1914 the British Army was ordered to mobilise.
Anticipating war, Prime Minister Herbert Asquith had sent a message to Lord Kitchener on 3 August offering him the position of Secretary of State for War, with responsibility for that role shared with Lord Richard Haldane, the Lord Chancellor. Asquith was conscious of people’s wariness of unelected soldiers holding positions in government, ingrained since the days after the English Civil War when Oliver Cromwell governed the country. He therefore offered dual responsibility with a cabinet member to allay public alarm.
Kitchener was aged 64 and something of a national hero after his victory at the Battle of Omdurman in 1898. He was British Consul-General of Egypt when war broke out. He was in London on leave at this time. Kitchener initially declined Asquith’s offer of dual appointment with Lord Haldane as Secretary of State for War, for he could foresee the enormity of the job ahead of him and it was his view that he could only succeed in this role and do what was necessary to win the war if he had total control. Kitchener then headed for Dover to embark for Egypt on 4 August to return to his role as British Consul-General. Just before embarkation he received a telegram from Asquith recalling him to London. Kitchener was offered sole responsibility as Secretary of State for War, which he accepted. He was the first serving officer in the British Army to be a member of the British Cabinet since George Monck, Duke of Albemarle, in 1660. There was no political opposition to Kitchener’s appointment and the nation greeted his appointment with enthusiasm.
A Council of War was convened at Number 10 Downing Street on 5 August chaired by Herbert Asquith, the Prime Minister, with the majority of his cabinet in attendance including Winston Churchill in his capacity as First Lord of the Admiralty. Military leaders were ordered to attend the meeting including Field Marshal Sir John French, Lord Roberts, Lord Kitchener, Sir Charles Douglas, Sir Douglas Haig, Sir James Grierson and General Henry Wilson. It was at this meeting that Kitchener forcibly argued that millions of men would have to be recruited and deployed for the war, which might take several years to win. Kitchener foresaw that the British Army would need to initiate a recruitment campaign on a massive and unprecedented scale immediately. It was his opinion that the war would be fought for at least three years and would require 70 divisions in order to fight it. The cabinet was shocked by Kitchener’s view and thought that the war would only last from three to six months, but they placed their trust in him at this time of international crisis.


