22,49 €
Mehr erfahren.
- Herausgeber: Crowood
- Kategorie: Lebensstil
- Sprache: Englisch
Applique is the fascinating and versatile technique of applying one fabric to another. This beautiful book covers the principles within the technique, from the design stage through to padding, edgings and decorative stitches. It explains how to use a great collection of materials and threads, along with a rich array of stitches and textures to give dimension and contrast, thereby creating a unique piece of art. It is lavishly illustrated with 450 colour photographs. Written by a widely respected teacher, the book draws on her extensive examples to illustrate various applications and designs within this specialized and delightful area of embroidery. It is a book to be kept close and treasured.
Das E-Book können Sie in Legimi-Apps oder einer beliebigen App lesen, die das folgende Format unterstützen:
Veröffentlichungsjahr: 2019
Ähnliche


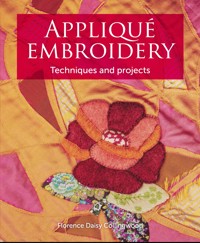
APPLIQUÉ
EMBROIDERY
Techniques and projects
Florence Daisy Collingwood
CROWOOD
First published in 2019 by
The Crowood Press Ltd
Ramsbury, Marlborough
Wiltshire SN8 2HR
www.crowood.com
This e-book first published in 2019
© Florence Daisy Collingwood 2019
All rights reserved. This e-book is copyright material and must not be copied, reproduced, transferred, distributed, leased, licensed or publicly performed or used in any way except as specifically permitted in writing by the publishers, as allowed under the terms and conditions under which it was purchased or as strictly permitted by applicable copyright law. Any unauthorised distribution or use of this text may be a direct infringement of the author’s and publisher’s rights, and those responsible may be liable in law accordingly.
British Library Cataloguing-in-Publication Data
A catalogue record for this book is available from the British Library.
ISBN 978 1 78500 540 4
CONTENTS
Acknowledgements
Introduction
CHAPTER 1 Design, Colour and Planning
CHAPTER 2 Materials
CHAPTER 3 Backgrounds
CHAPTER 4 Padding
CHAPTER 5 Edges
CHAPTER 6 Stitches on Edge
CHAPTER 7 Other Appliqué Techniques
CHAPTER 8 Finishing Off
Bibliography
Further Reading
Materials and Supplies
Index
ACKNOWLEDGEMENTS
With special thanks to my family: Ben, Minnie, Kitty and Rusty Collingwood, Dr Penelope Cave and Walter and Julianna Heale. Also to Sue and Donald Collingwood. Patience is often said to be essential when doing embroidery, but I think perhaps an embroiderer’s family often shows the most patience, particularly when needles are found in the most obscure places!
Rabbit applied cushion cover with machine stitch and Suffolk puffs.
Thank you to my good friend Patricia Herbig for all the wonderful proofreading and super stitching, and to Patricia Young for marvellous help with quotes and continuous encouragement. Joyce Spearing’s support has also been invaluable. I am very grateful to the lovely people who have given work for the book, friends as well as being colleagues or students; Jenny Adin-Christie, Nettie Rowsell, Jennifer Donovan, Rosie McKellar, Mags McCosher, Yana Krizka, Luisella Strona, Yvonne Rogers, Dee Jackson and Jackie Thompson. Sincere thanks go also to my dear friends, especially Emma Sneller and Helen McTeer, and also to Jo Scott and Becky Quine for all their advice on layouts and computer-related matters! Holly Cowan, Verity Overton-Smith, Claire Allfrey, Sammi Leese and Kirsty Chadwell who have supported in numerous ways.
With big thanks to professional photographer, Chris Orange, who took the wonderful full-size images in the book. I am also grateful to Rachel Midgley, at Gawthorpe Hall in Lancashire, for showing me around; I spent an inspiring few hours researching and looking through many appliqué pieces including those by Alice Edna Smith and Kathleen Mann, from their vast collection of over 38,000 embroidery pieces from the Rachel Kay Shuttleworth collection. A sincere and heartfelt thank you also to Margaret Harper who set me off on the journey of embroidery, as a profession, introducing me to the RSN many years ago.
Finally, I acknowledge the considerable influence of the Royal School of Needlework for all the inspiring and informative teaching and training I received during my apprenticeship, within the commercial studio and beyond, as I continue to teach and learn.
The hope is that this book may inspire and inform, and perhaps set the reader off on their own adventure into appliqué embroidery.
Florence Daisy Collingwood
INTRODUCTION
The way to beauty is not by the broad and easy road; it is along difficult and adventurous paths. Every piece of craft work should be an adventure.
– ETHEL MAIRET, 1916
Appliqué is a wonderfully diverse subject that uses lots of different embroidery techniques and is also often included in quilted pieces of work. Although it is, at its most basic, simply a way of attaching or applying one fabric to another, within this there are many exciting ways to use this technique. The word originally comes from the Latin applicare and subsequently from the French appliquér, ‘to apply’. The word is pronounced two different ways and it seems to be up for debate as to which is the correct pronunciation: either ‘applique’ or ‘applique’ seem to be the two variations, perhaps depending whether the French or English slant is chosen.
A more modern design has been worked using traditional crewelwork stitches, in stranded cottons with metalwork and applied fabrics.
Within the whole area of textiles, appliqué is best categorized as ‘surface decoration’, in contrast to a technique for example like pulled or drawn whitework embroidery, which is more of a ‘surface forming’ technique, which produces a fabric rather than decorating it. The basic prerequisite of appliqué is a background fabric – this could be anything from wool, linen, cotton or felt to fur or leather – which can then be decorated with additional materials. Appliqué therefore follows a similar process to surface embroidery, i.e. working with appropriate materials on a background fabric. For both processes the type of stitch chosen is an important factor in the effectiveness of the motif and both appliqué and surface embroidery stitches work beautifully together, complementing one another and adding depth and texture to a design.
THE HISTORY OF APPLIQUÉ
The ‘B’ letter is part of a children’s book of the alphabet, applied very simply using buttonhole stitch, with surface stitches to decorate.
Appliqué developed in different ways, in different countries. In England it developed with surface embroidery as a way of decorating a design further; not only would patchwork be used but it might have a motif applied to it and then extra embroidery stitches added on top to create layers of interest and texture. But each country had different designs, colours and fabrics that they used and therefore different ways of using the basic idea of applying one fabric to another. The Egyptians are thought to have been the first to give it a go; here it was a practical technique being used on items for the home and for garments to wear. In the Middle Ages it was also used on ecclesiastical banners and clothing. In France fabric was glued to thin paper and then pressed until dry (a little like we use Bondaweb now) and then the motif was cut out, glued again and fixed to the background with simple stitches – surface stitches being intrinsic to the technique from the very beginning, even with the use of lots of glue! A cord was then laid around the edge, much as we use couching on the transfer method of appliqué, and stitched invisibly in place. In Germany and Austria many wall coverings were made using appliqué techniques, a particular feature in the seventeenth and eighteenth centuries. Silk fabrics and ribbons were glued behind cut-outs from a cardboard stencil, the solid stencil parts becoming the fabric motif and a relief effect being created. Decoration – beads, metal foil and metallic threads – was added afterwards to give a richness to the work. Peasant clothing was also often covered with embroidery and appliqué; the traditional Austrian brown dirndl skirt, gold Linz cap and silk aprons were covered with decoration, and the use of appliqué on women’s dresses developed from a basic craft to a sophisticated way of showing an increase in wealth and standing.
This stitched heart by Yana Krizka shows folk art influence, creating bold patterns and designs, often mirrored on either side, and often using just two colours such as red and white, which the Swedish particularly enjoyed.
Attaching a mirror to fabric
Work the first grid, so that short not long stitches are worked on the underneath.
The second grid forms a star shape.
The needle comes up on the outside of the mirror, passes underneath all the threads from the centre of the star and down at the dot, next to where the thread started.
Come out at the square, through the loop and pull tight.
Repeat with the stitch going underneath the grid/star and pull tight, but go down into the previous chain stitch and out of the loop as before.
Once completed, repeat the process around the middle, always coming underneath as many threads of the star as needed.
A completed Shisha mirror, from a 1970s skirt. Roughly stitched but note the combination of herringbone and chain stitch that is also used.
Indian appliqué is fairly flat so can be used in various ways, from cushion covers, bed-linen and quilts to garments.
Indian appliqué often used Shisha mirrors, small irregular edged pieces of mirror that were attached to the fabric using embroidery thread. The mirrors originally contained a small piece of silver, blown by mouth and were said to keep evil spirits at bay. Now manufactured mirror glass or mica is used and fixed with a cross stitch which is sewn over in different patterns, usually with a bright, contrasting coloured thread. There are a few different methods of attaching the mirror to the fabric, but the method described here is quite commonly used.
An example of a quilt by Mags McCosher showing a traditional floral motif.
Indian appliqué also often used cut-work and reverse appliqué techniques (seeChapter 7), using cottons in various bright colours and fine repetitive patterns. In Romania, mirrors were also used, combined with punched leather, which was applied onto coats and waistcoats; in Hungary the traditional sheepskin waistcoats called kodmon (worn by the women) and the coats called szur (worn by the men when courting for a wife) were decorated with appliqué. Just as birds plume their feathers to attract a partner, we used decoration too in the form of applied design and decoration! In Siberia, the Ghiliak tribe used intricate appliqué onto the skins of salmon to make into bridal wear, the motif often being a tree of life carried by birds, as a sign of fertility.
Close-up of traditional crewelwork design showing areas of appliqué combined with wool, cotton and metal threads.
In Hawaii, English missionaries taught the women how to make quilts from scraps of fabrics. Inspired by natural forms where they live, motifs often included pineapples, figs and other fruit but also included mythological subjects. They developed a library of motifs to reproduce in appliqué and the leis – garlands of bright red on a white background – are typical of the island. Large quilted bedcovers are decorated with bright green on white and red and yellow – the royal colours, usually with a single intricate motif cut from one piece of fabric. In North America the patchwork developed into true folk art, also using scraps of fabric for bedspreads. These quilts were often based on more geometric designs and shapes, but the appliqué technique did allow much greater freedom; contours could be more varied and separate sections could be brought out or made to recede simply by overlapping fabrics and padding. During the eighteenth and nineteenth centuries this was particularly popular and really a necessity in the eighteenth century where textiles had to be transported over long distances, making them expensive and difficult to come by. The settlers valued any scraps of fabric, which they joined together to make new large pieces, often using birds, flowers and trees as their templates and motifs, and there is therefore a strong link between patchwork/quilts and appliqué from the beginning.
Appliqué based on a folk art design. Paper designs can be cut out much like a snowflake or doily, or cut like a stencil, then cut out in fabric, and then applied to a background. The use of bold colour and the contrast between the two fabrics and the couching thread is typical in these designs.
Appliqué can be used to create all sorts of different images: flat pictures with patterns or three-dimensional, sculptural pictures, depending on whether the fabric is applied and stitched flat onto another fabric or if it is applied on top of padding, which can create the extra depth and height. Because of this it is sometimes used in raised and stumpwork embroidery to give backgrounds perspective, by using layered fabrics, for example. Applied fabrics can also be used within flatter embroidery pieces such as traditional crewelwork or within embroidered pictures that use simple embroidery stitches. Combining techniques within a design can be really effective and for large areas or shapes that would benefit from a colour that is different to the background, but are too big to be filled in completely with stitch, appliqué can be a great alternative. Or the design might just need a bit more depth – this is easy to create by adding and applying other fabrics with colour or pattern, flat or padded.
One of the lovely things about appliqué is that it can be used in combination with lots of other embroidery techniques and can add a real accent or depth to a piece of work. Over the years appliqué has been used by many countries, each with their own style of embroidery and identity. And each style, be it Art Deco or Hungarian folk art, uses appliqué in its own way, using different fabrics and threads as well as different processes of adding or cutting away fabric, turning under edges or using stitch to create texture.
A TIMELINE OF EMBROIDERY ARTISTS
A drawing in the style of a Thompson design.
Drawing taken from two of Alice Edna Smith’s designs.
Many artists, past and present, use appliqué within their work in lots of different ways. Kathleen Mann, Alice Edna Smith and Rebecca Crompton were some of the earlier embroiderers using this technique in the early 1900s. Their designs often included faces and figures with foliage in the background, using a mixture of fabrics and surface stitches.
In the 1920s, Rebecca Crompton challenged the practice of embroidery of the time, which promoted technical precision and historical design. Crompton’s work combined hand and machine stitching with different fabrics and threads, promoting a more lively and creative approach than had previously been seen.
Alice Edna Smith’s work was greatly influenced by Crompton, Thompson and Mann. She believed that it was always better that the person who worked the embroidery should also make the design.
Drawing in a similar style to Constance Howards’s bold pair of white birds, which she worked as a panel in 1950.
Elizabeth Grace Thompson, having trained as a painter, became one of Crompton’s students and subsequently passed on many of Crompton’s ideas in her own teaching. She was also part of the team that worked on the Overlord Embroidery, which used mainly appliqué methods of embroidery.
Constance Howard is particularly remembered for her bold designs of faces and animals from the 1950s and 1960s. Her work was like those of her earlier counterparts in the methods and materials that she used, but her designs were very much of the period in which she was living: shapes and squares of colour were often used.
Constance Howard was born in 1910 and from an early age always wanted to go to art school. She joined the Royal College of Art after finishing at the Northampton School of Art and was taught by Rebecca Crompton, whom she considered highly influential. She taught at various art schools and embroidery was part of her work within her art. Many of her later pieces of embroidery were more abstract than the earlier ones, showing shapes and squares of colour applied to a background fabric. Couching and surface stitches were worked in a variety of threads, and the colour of the fabric, or the weight of it next to another, was perhaps more important than what it was made from. Machine stitching was combined with hand stitches, and she had a liking for the use of just one stitch, but in a variation of threads and size. Constance believed it would be possible to work with just running stitch and variations on it for ever: ‘Work it in a range of threads, positions and spacing or in thick or thin stripes.’ Endless possibilities! Howard herself went on to teach Diane Bates and Richard Box, who often use machine embroidery over applied fabrics within their work.
Born in 1911, the textile artist Beryl Dean also used appliqué techniques within her designs and was probably best known for her ecclesiastical works. Beryl Dean studied at The Royal School of Art Needlework, as it was then known, and at the Bromley School of Art before winning a scholarship to the Royal College of Art. Some years later she wrote:
Realising suddenly in about 1952 that ecclesiastical embroidery was totally uninfluenced by the tremendous change in secular embroidery that had been brought through the approach of Rebecca Crompton, I decided to concentrate entirely upon trying to bring church needlework up to date.
Machine-embroidered appliqué has been used by many textile artists over applied fabrics. This example just uses very simple, free straight stitch on top of cotton, linen and lace.
Dean was also a student of Elizabeth Grace Thompson and for the next twenty years she ran the Ecclesiastical Embroidery course as well as writing many books on the subject. The Windsor Panels for St George’s Chapel at Windsor Castle and the Jubilee Cope for St Paul’s Cathedral are both great examples of her work, both of which include wonderful appliqué techniques.
This monkey was inspired after looking at Karen Nicol’s work, where bold animal designs have applied fabrics that stand proud as well as flat.
Many wonderful textile artists have come along since those just mentioned, including Jan Beany and Jean Littlejohn (also known as ‘Double Trouble’), who were guided and influenced by Howard and Dean’s teaching and work. They create beautiful, more abstract pieces of textured embroideries that are full of stitch and can provide wonderful inspiration for one’s own work. Audrey Walker and Alice Kettle are artists who work large-scale figurative embroideries, also often using machine stitching to create texture over fabrics. Walker’s embroideries explore colour and light within figures and still life, and are often quiet, contemplative pieces of work. Kettle’s more recent work is all machine based but as a painter first, her work is a feast of colour and tone, in the way in which it is put together. Karen Nicol is another embroidery and mixed media artist who uses stitching as a texture over applied fabrics, but also uses paper and creates more three-dimensional pieces of work. Animals are beautifully worked in bold, large designs in bright colours using an array of fabrics and materials, offering inspiration galore.
Mandy Pattullo puts together quilted collages of fabric, paper and thread. They include animal motifs, flowers and natural forms as well as more abstract pieces, some of which make up pictures; garments are also sometimes put together in this way. Christine Kelly, maker of ‘gentlework’, produces ethereal, natural coloured pieces that use vintage finds and reuse pre-loved objects and materials. Primmy and Jessie Chorley also follow this theme within their work of beautifully stitched samplers that include found objects and reused fabrics with hand-embroidered stitching, often based on family memories. Many of these artists use the Kantha method of quilting, where running stitch connects layers of fabric, usually without any wadding. Designs can be minimal, using just straight lines, or patterns can be formed in the background using threads that blend or contrast, as desired.
This book aims to explore these different methods of appliqué, designs that work well within it and how these methods can be used in all sorts of different techniques and designs. Fabrics can be layered to create effective backgrounds onto which embroidery can be added; different types of padding can be used to create height, perspective and three-dimensional effects; and fabrics of all types – subtle or bold – can be used on top of these paddings and by themselves. Lots and lots of different edging stitches can be used around the fabrics to give a heap of different effects, using a variety of threads. And it is of course a great way to use up little bits of fabric and explore using all sorts of threads and materials that might not be as appropriate in other embroidery techniques.
This work, with its muted colours and found, reused materials, was inspired by the collage-based pieces of some of the artists mentioned here.
BASIC RULES OF APPLIQUÉ
There are some basic rules that apply to appliqué when using it within your embroidery. These will all come up within each process and chapter; from design through to application, but here is a summary:
Designs should consist of bold shapes, which can then be detailed with stitchery.
Paint or draw only the main lines onto the background, as the details can be painted or drawn onto the individual pieces to be applied.
It can be helpful sometimes to label a copy of the design with colour references and numbers, with a straight grain guide on any tracing paper patterns.
Always slacken the frame when applying fabrics, unless using a turned under edge or applying felt.
Unless the design requires fabrics to go in different directions, it is advisable to make sure the grain of the applied pieces is the same as the grain of the background fabric. There are occasions where this may not be necessary, e.g. where fabric manipulation is used or when applying confetti-like pieces of fabric.
Always pin the pieces (remembering to use appropriate size pins so as not to mark the fabric) and tack for larger pieces of fabric or where fabric is fine and pins may mark it.
Always tighten the frame before adding embroidery or edging stitches.
Start with the piece of the design furthest away, then work to the front of the design.
There are various methods of padding to use as the design requires, including felt, carpet felt, wadding, pelmet Vilene, string and stuffing; all, some or none can be used within a piece of appliqué work to give depth and perspective.
During application, the needle should always be brought up on the outside of the shapes and down into the applied fabric.
Always choose a needle size that is suitable for the threads and fabrics being used. A small needle is useful for fine threads on light and heavyweight fabrics. A thicker needle is more suitable for thicker threads and fabrics.
Surface embroidery stitches can be useful to add to the applied shapes and motifs or backgrounds for dividing and highlighting areas.
Stitchery, couching and cords can soften and neaten the edges of the applied pieces.
Some decoration, hand stitching or machine embroidery can be worked on the fabric before applying it to the main design.
This example shows how a variety of different threads can be used to edge and decorate both the silk and cotton lawn, and also the background.
CHAPTER 1
DESIGN, COLOUR AND PLANNING
Colour above all is a means of liberation.
– HENRI MATISSE (1869-1954)
Before beginning any piece of embroidery it is essential to have first an idea, then a design and a plan of action or order of work! An order of work is particularly important for complex or detailed pieces of appliqué work that may include several padding areas, different materials and various edging techniques within the one piece. For simpler pieces of work, where perhaps only one method or stitch is being used, it is not so vital to have a detailed order of work; nevertheless, it can still be a really good habit to get into before commencing any project, because it really does help to highlight any issues or dilemmas, or processes that may have been overlooked.
Colour wheel, worked in silks and cottons.
DESIGN AND LAYOUT
Designs for appliqué can be varied and wide in their subject matter: figurative, abstract, natural forms and more industrial sources all work well and the success of a piece can depend also on which appliqué technique is chosen. For example, cutwork may work well for a background or pattern while broderie perse is great for natural images, such as flowers and leaves. Transfer appliqué works well for bold images without too much detail; simple and uncomplicated shapes work well for straightforward appliqué embroidery, fabric on top of fabric. Often but not by any means exclusively, this technique is chosen particularly for designs with bold images, simple shapes that can then be given definition by layers of padding, added stitches and by the materials and threads chosen for the piece of work.
Fabric with a bold, simple pattern can be a great starting point for appliqué.
It can also be used within a shape or motif, such as this letter ‘M’.
A simple rose motif can be most effective as a starting point for an appliqué design.
‘Pink Rose’ appliqué piece, which shows different padding techniques, to give height variations within the design and also demonstrates a variety of materials and edging stitches. Based on a drawing from an industrial still life including wires, metal mesh and plugs, the choice of colour and materials shows how a design can be completely changed into something more floral and soft.
A simple pencil sketch.
Sunflower worked in pencils.
The same subject matter worked in charcoal.
Abstract shapes can help keep designs simple.
Letters are another good source of inspiration.
This painting shows simple shapes and imagery that could be picked out and included within an appliqué piece of work; alternatively, the whole design could be used.
The leaf shapes have been taken from the original painting and used as a starting point for this appliqué piece.
There are lots of ways to begin to design your piece. Paintings can be great sources of inspiration: the works of Elizabeth Blackadder, Mary Fedden, John Knapp-Fisher and Alfred Wallis are among many that are particularly suitable for this technique because of their simple shapes and clear imagery; other painters, such as Picasso, Mondrian and the Bauhaus school, provide a source of simple shapes and vivid, complementary colour choices. One’s own paintings or drawings can also be a great starting point: a simple doodle or abstract pattern, a still life, a drawing of a boat, a flower, a view, a portrait – the list is pretty endless!
Photo of paper template, arrangement A.
Photo of paper template, arrangement B.
Photo of paper template, arrangement C.
Pictures or motifs from a book or magazine, or a photograph, may also be useful starting points, but they need to be fairly straightforward and simple in shape, not too intricate or too busy. Smooth and simple shapes usually work best, especially while getting to grips with the basic technique.
Wallpapers or patterned prints found on cards or in colouring books can also be good starting points. Overlapping shapes can also work but need careful consideration of the order of work once stitching has begun.
Once a design gets too complicated or the images become very small and detailed, then the question arises whether appliqué is the right technique to use, rather than stumpwork and raised work for example. These techniques also apply pieces to a background fabric, but may be better for depicting fine detail and small scale, especially if a more three-dimensional effect is required.
Another fun way to begin a design is to cut paper templates out and arrange them on a different coloured paper. This method was advocated by embroiderer Kathleen Mann in the 1930s; she found it effective because it kept shapes simple. Padding could be used underneath chosen shapes (although Mann usually applied pieces flat), and stitches could then be added as required to give further detail and to cover edges as necessary – although they could be left frayed or turned under to give a smooth, clean line.
The initials F, B and C have been designed to sit within each other and a black and white drawing is a good way to see these patterns and lines most clearly.


