39,59 €
Mehr erfahren.
- Herausgeber: Packt Publishing
- Kategorie: Fachliteratur
- Sprache: Englisch
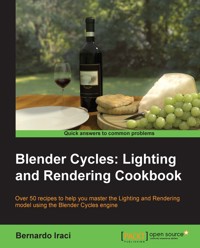
Blender provides a broad spectrum of modeling, texturing, lighting, animation and video post-processing functionality in one package. It provides cross-platform interoperability, extensibility and a tightly integrated workflow. Blender is one of the most popular Open Source 3D graphics applications in the world.
Modern GPUs (Graphics Processing Unit) have some limitations for rendering complex scenes. This is mainly because of limited memory, and interactivity issues when the same graphics card is also used for displaying and rendering frames. This is where Cycles rendering engine comes into play. Cycles is bundled as an add-on with Blender. Some of the features of Cycles is its quality, speed and having integrated industry standard libraries.
This book will show you how to carry out your first steps in Cycles - a brand new rendering engine for Blender. In a gradual and logical way, you will learn how to create complex shaders and lighting setups to face any kind of situation that you may find in Computer Graphics.
This book provides information on how to setup your first application in Cycles. You will start by adding lights, materials, and textures to your scene. When it's time for the final render, you will see how to setup Cycles in the best way. You will learn about a wide variety of materials, lighting, techniques, tips, and tricks to get the best out of Cycles. Further on in the book, you will get to know about animation and still shots, and learn how to create advanced materials for realistic rendering, as well cartoon style shaders.
This cookbook contains a wide range of different scenes, proposed in a structured and progressive order. During this journey, you will get involved in the concepts behind every step you take in order to really master what you learn.
Das E-Book können Sie in Legimi-Apps oder einer beliebigen App lesen, die das folgende Format unterstützen:
Seitenzahl: 354
Veröffentlichungsjahr: 2013
Ähnliche


Table of Contents
Blender Cycles: Lighting and Rendering Cookbook
Blender Cycles: Lighting and Rendering Cookbook
Copyright © 2013 Packt Publishing
All rights reserved. No part of this book may be reproduced, stored in a retrieval system, or transmitted in any form or by any means, without the prior written permission of the publisher, except in the case of brief quotations embedded in critical articles or reviews.
Every effort has been made in the preparation of this book to ensure the accuracy of the information presented. However, the information contained in this book is sold without warranty, either express or implied. Neither the author, nor Packt Publishing, and its dealers and distributors will be held liable for any damages caused or alleged to be caused directly or indirectly by this book.
Packt Publishing has endeavored to provide trademark information about all of the companies and products mentioned in this book by the appropriate use of capitals. However, Packt Publishing cannot guarantee the accuracy of this information.
First published: December 2013
Production Reference: 1191213
Published by Packt Publishing Ltd.
Livery Place
35 Livery Street
Birmingham B3 2PB, UK.
ISBN 978-1-78216-460-9
www.packtpub.com
Cover Image by Bernardo Iraci (<[email protected]>)
Credits
Author
Bernardo Iraci
Reviewers
Patrick Boelens
Fernando Castilhos Melo
Acquisition Editors
Akram Hussain
Luke Presland
Lead Technical Editor
Amey Varangaonkar
Technical Editors
Tanvi Bhatt
Kapil Hemani
Akashdeep Kundu
Shiny Poojary
Faisal Siddiqui
Copy Editors
Roshni Banerjee
Brandt D'Mello
Deepa Nambiar
Karuna Narayanan
Shambhavi Pai
Alfida Paiva
Adithi Shetty
Project Coordinator
Navu Dhillon
Proofreaders
Lucy Rowland
Elinor Perry-Smith
Indexer
Priya Subramani
Graphics
Ronak Dhruv
Yuvraj Mannari
Abhinash Sahu
Production Coordinator
Shantanu Zagade
Cover Work
Shantanu Zagade
About the Author
Bernardo Iraci was born in Livorno, Italy in 1985. He followed a standard education career until he graduated in Economics in 2009. He always had a great passion for computers, especially gaming. During the latter part of his studies, he also developed a passion for 3D graphics, and this soon became the main focus of his career. It was at this time that he came to understand that his passion was the most important thing to pursue, more important than even attending university.
Even though Bernardo later participated in various online courses teaching the different aspects of computer graphics, he has been largely self-taught. In 2010, he moved to Warsaw, Poland, where he was finally able to start working full-time in computer graphics as a 3D generalist in the field of movies VFX and advertisments. He also started work as a freelancer.
Bernardo constantly works to improve his skills and knowledge about computer graphics and thinks that this is the only way to keep pace with this field. When he is not busy with graphics, he likes to travel, watch movies, and play the guitar.
I would like to thank my family because they gave me the tools and the spirit to pursue my dreams. It is thanks to them that I am able to do what I do today.
I would also like to thank my girlfriend as she constantly supports, pushes, and inspires me every day of my life.
About the Reviewers
Patrick Boelens is a 3D content creator, programmer, and game designer with a passion for anything in which these fields meet. While studying Communication and Multimedia Design, he started producing video tutorials for the CG Cookie Network, showing people how to make custom scripts and add-ons for the open source software Blender. He was also a part of the team behind the studio's first iOS game, Eat Sheep. He has since worked on a wide variety of projects, including client- and server-side web development, games, and applications.
Fernando Castilhos Melo lives in Caxias do Sul, Brazil, and works in a software house as a software developer and systems analyst. Since 2009, he has been working on 3D modeling in his spare time using the software Blender. He has conducted some lectures on Blender and 3D modeling in several Brazilian free software events such as FLISOL and TcheLinux. Fernando is majoring in Computer Science at the UCS (University of Caxias do Sul). He is developing an integration between Blender and Kinect to generate a 3D animation as his coursework in the university. For more information, access his webpage: http://www.fernando.melo.nom.br/.
I want to thank my fiancée Mauren, my parents Eloir and Miriam, my friends, and my teachers from the university, for the support during the review of |this book.
www.PacktPub.com
Support files, eBooks, discount offers and more
You might want to visit www.PacktPub.com for support files and downloads related to your book.
Did you know that Packt offers eBook versions of every book published, with PDF and ePub files available? You can upgrade to the eBook version at www.PacktPub.com and as a print book customer, you are entitled to a discount on the eBook copy. Get in touch with us at <[email protected]> for more details.
At www.PacktPub.com, you can also read a collection of free technical articles, sign up for a range of free newsletters and receive exclusive discounts and offers on Packt books and eBooks.
http://PacktLib.PacktPub.com
Do you need instant solutions to your IT questions? PacktLib is Packt's online digital book library. Here, you can access, read and search across Packt's entire library of books.
Why Subscribe?
Free Access for Packt account holders
If you have an account with Packt at www.PacktPub.com, you can use this to access PacktLib today and view nine entirely free books. Simply use your login credentials for immediate access.
Preface
One of the most advanced 3D packages on the scene, Blender now has a powerful new tool to allow its users to achieve even more astonishing results: the Cycles rendering engine. Cycles is based on an accurate lighting model and realistic shaders. It is also blazing fast thanks to the fact that it can take advantage of modern GPUrendering capabilities. Cycles is definitely a modern and effective tool that every Blender user wants to know in order to get the best results. Blender Cycles: Lighting and Rendering Cookbook will take you a journey through the new great Blender rendering engine Cycles. We will start with understanding the fundamental concepts of this rendering engine, and use them to learn the creation of any kind of lighting, material, texture and setup. At the end of the book, both beginners and more advanced users will not only be able to create virtually any kind of shader and lighting, but will also be able to find and experiment with new techniques on their own. Thanks to the logical way in which the topics are presented in the book readers will be able to create their work without additional tutorials just using the knowledge they will master by reading this book.
What this book covers
Chapter 1, Key Holder and Wallet Studio Shot, will highlight the fundamentals of lighting with the creation of materials in Cycles. Finally this chapter will teach you how to set up the render parameters in Cycles
Chapter 2, Creating Different Glass Materials in Cycles, will help us create from the most basic to really advanced glass materials. To achieve this we will go deeper into the Cycles material creation, learning interesting node trees and techniques.
Chapter 3, Creating an Interior Scene, will help us with the creation of an interior scene, a situation that can be quite challenging without proper knowledge. You will learn how to light a scene in an efficient way, along with new materials and advanced techniques.
Chapter 4, Creating an Exterior Scene, will help you learn the secrets of exterior lighting. Here we will learn how to create a flawless natural exterior lighting using different advanced techniques together with the creation of new materials.
Chapter 5, Creating a Cartoonish Scene, will teach you how to create stylized yet appealing lighting materials, for example a fake subsurface scattering and hair material, ideal for a cartoon scene.
Chapter 6, Creating a Toy Movie Scene, will show you how to create a lighting setup that will resemble a movie set, together with highly realistic materials. Moreover you will learn different techniques to give our image an even closer look to that of a cinema movie.
Chapter 7, Car Rendering in Cycleswill help you set up great studio lighting to make the car look great and of course, will show you how to create complex and captivating car paint material.
Chapter 8, Creating a Car Animation, will help you deal with your first animation and explain to you how to setup Cycles at its best for this purpose. You will optimize the scene to lower render times while maintaining a high quality and detail level, and learn how to deal with a huge project.
Chapter 9, Creating an Iceberg Scene, will highlight some really advanced material creation in Cycles, and some greatly advanced techniques about seamlessly mixing two materials inside the same mesh. Moreover you will learn to use information from scene objects to use for even more advanced materials.
Chapter 10, Creating Food Materials in Cycles, the final chapter, will talk about the creation of food, one of the most challenging topics to deal with in Computer Graphics. This chapter will teach you the creation of highly realistic and complex Cycles materials.
What you need for this book
The only program needed to follow the recipes of this book is Blender, which can be freely downloaded from the official Blender foundation website www.blender.org.
Who this book is for
This book is aimed at both beginners and more advanced Cycles users, as it will take you from the very first steps up to quite advanced techniques. Even more advanced users could pickup several new things reading this book.
Although every topic is described in detail, some basic knowledge of Blender as a package is advisable.
Conventions
In this book, you will find a number of styles of text that distinguish between different kinds of information. Here are some examples of these styles, and an explanation of their meaning.
Code words in text are shown as follows: "Again we will have to duplicate the material and name it Rim_Light."
New terms and important words are shown in bold. Words that you see on the screen, in menus or dialog boxes for example, appear in the text like this: "Let's start by going to the System tab, and in the lower-left corner, you will see the Compute Device setting area."
Note
Warnings or important notes appear in a box like this.
Tip
Tips and tricks appear like this.
Reader feedback
Feedback from our readers is always welcome. Let us know what you think about this book—what you liked or may have disliked. Reader feedback is important for us to develop titles that you really get the most out of.
To send us general feedback, simply send an e-mail to <[email protected]>, and mention the book title via the subject of your message.
If there is a topic that you have expertise in and you are interested in either writing or contributing to a book, see our author guide on www.packtpub.com/authors.
Customer support
Now that you are the proud owner of a Packt book, we have a number of things to help you to get the most from your purchase.
Downloading the example code and colored graphics
You can download the example code files for all Packt books you have purchased from your account at http://www.packtpub.com. If you purchased this book elsewhere, you can visit http://www.packtpub.com/support and register to have the files e-mailed directly to you.
We also provide you a PDF file that has color images of the screenshots/diagrams used in this book. The color images will help you better understand the changes in the output. You can download this file from: https://www.packtpub.com/sites/default/files/downloads/4609OS_ColoredImages.pdf.
Errata
Although we have taken every care to ensure the accuracy of our content, mistakes do happen. If you find a mistake in one of our books—maybe a mistake in the text or the code—we would be grateful if you would report this to us. By doing so, you can save other readers from frustration and help us improve subsequent versions of this book. If you find any errata, please report them by visiting http://www.packtpub.com/submit-errata, selecting your book, clicking on the erratasubmissionform link, and entering the details of your errata. Once your errata are verified, your submission will be accepted and the errata will be uploaded on our website, or added to any list of existing errata, under the Errata section of that title. Any existing errata can be viewed by selecting your title from http://www.packtpub.com/support.
Piracy
Piracy of copyright material on the Internet is an ongoing problem across all media. At Packt, we take the protection of our copyright and licenses very seriously. If you come across any illegal copies of our works, in any form, on the Internet, please provide us with the location address or website name immediately so that we can pursue a remedy.
Please contact us at <[email protected]> with a link to the suspected pirated material.
We appreciate your help in protecting our authors, and our ability to bring you valuable content.
Questions
You can contact us at <[email protected]> if you are having a problem with any aspect of the book, and we will do our best to address it.
Introduction
Welcome to the Blender Cycles: Lighting and Rendering Cookbook. Before we start, I would like to talk about the new Blender rendering engine.
Cycles is a brand new unbiased rendering engine based on the path tracing algorithm that Blender has provided to users. It is still under heavy development but is growing really fast and is already capable of creating astonishing images.
Path tracing is an algorithm that computes how light travels in an environment in a very accurate way. For this reason, it is also a pretty heavy rendering algorithm. The good news is that Cycles can rely on modern video card power to make rendering times shorter.
Cycles also has a Global Illumination (GI) system. GI is a system that is used to simulate the bouncing of light different different surfaces. Earlier, to achieve similar effects with Blender internal renderer, it was necessary to manually fake it. Now, Cycles will do this for us. GI changes a lot in the way we can set up lighting for our scenes, as now each object's color influences and is influenced by other objects around it and in general everything will behave in a way closer to reality.
Another new key feature is the accompanying node-based shader system. It is a really powerful tool that will allow us to create a great variety of shaders, from the simplest to really advanced ones.
One could already be used to working with nodes, since the Blender Internal engine can also use nodes to set up shaders, not to mention the Blender compositing system, which is also based on nodes.
Anyway, the first approach with this system can be a bit hard sometimes. This is why I believe that a brief introduction, where we can see the concepts behind the usage of nodes, will be very useful to fully master the recipes that we are going to see in this book.
Just as a cook must know the ingredients at his/her disposal in order to cook tasty food, we too have to know which tools we can use to achieve the renders we want. When we cook our recipes later in the book, we will cover everything with the attention it deserves. If some passage is not perfectly clear, you can always come back to this introduction in order to understand how the tools that we will use will work.
So, let's see these concepts together!
Knowing your ingredients
Using nodes mainly means one thing: mixing different elements such as shaders, images, colors, and values. What makes nodes so powerful is that we can balance the mix of these elements as we like. We can use a simple value, images, colors, or even complex mathematical operations to decide how much of either value we want to see in our final material. The good thing is that we can repeat this process as many times as we want. However, we cannot mix things randomly. Nodes are powerful, but we need to follow a certain logic in order to make them work properly. To better understand the philosophy behind nodes, I have given an example that I hope will help.
Let's think of a node this way: nodes are like food processors. I am talking about blenders, mixers, and machines to make tomato sauce; ovens and stoves to make pasta, and so on. To use a food processor, you put in some ingredients and it does its work. Then, you take what the food processor has produced and use it in a different food processor until you get the final meal ready. Of course, you cannot put tomatoes directly in the oven to make a pizza. You have to first put them in the tomato sauce machine and only when you have the sauce, can you put it on the pizza.
Well, nodes work exactly the same way. Each node is like a different food processor specialized for doing different things. We will put in some information to the left as inputs and the node will give us an output to the right. When we think that our meal is ready, we will put the result of the nodes' work inside the output node and get our final material.
As I am sure you are eager to start, let's jump straight into Blender! Blender Internal is still the default engine in Blender, so we will first need to select Cycles from the render menu. Now open up a node editor in a separate window and with the default cube selected, select the Use Nodes checkbox by clicking on it in the materials menu.
Here you have them... nodes! What you see there is a diffuse node and an output node. The output node is quite important as it will always be the last node of a material but is also quite self-explanatory. So, now let's focus on the Diffuse BSDF node for a moment. As you can see, we have some small colorful circles on the left-hand side (inputs) and some on the right-hand side (outputs). You may also notice that these inputs and outputs have different colors. Just as with the food example, we can't just plug any node anywhere. We need to adhere to certain rules. Colors will help us distinguish between the various ingredients in order to mix them in the correct way. Here we have the following types of inputs:
On the right-hand side, we have the output values. In this case, there's only one: a shader (the green circle). We are using the Diffuse BSDF node as an example, but each node has a different combination of inputs and outputs. In Cycles, you will find only these four aforementioned kinds of nodes.
As a general rule, we should always connect nodes by following their colors. Green with green, yellow with yellow, and so on. We will see, however, that it is possible to convert some of these values from where it comes from in order to use them inside an input of a different kind.
Now let's see what kind of ingredients we can find inside each color group:
As we will see in our recipes, these groups are not completely separate from each other, but there are many ways to convert the information in order to use them for our needs.
Now, let's have a look at the concept of the sequence that a material node tree should usually follow. In the rest of this chapter, we have to picture a node setup. Let's analyze it to better understand what's going on.
We always start from the left-hand side. The first node you see in the following screenshot is a Texture Coordinate node, and it is needed to tell Cycles what kind of texture coordinates we want to use for the textures of the material we are creating. This node belongs to the input nodes group. These kinds of nodes (inputs), as the name says, are used to generate some kind of input (values, colors, and so on); so, they only have output sockets. They are used to provide information about the object on which we want to apply the material we are creating.
Proceeding to the right, we can see that there is a Wave Texture node. This is a procedural texture built in into Cycles. It receives the information about the vector from the Texture Coordinate node. Looking at the node, we can see that there are several empty sockets on the left-hand side. We can change the values manually, but each of these sockets can also receive information from other nodes just as we are doing for the Vector socket.
From the right-hand side of the node, you can see that we are plugging the Wave Texture node's Color output into the Color input of a diffuse shader and a Bump node. The Bump node will convert the color information of the Color output of the Wave Texture node into vector information, which is used to give a bump effect to the surface of our object.
Moving further to the right, we find two shaders. As we saw earlier, the Diffuse BSDF node takes the Color input from Wave Texture, while the glossy shader has a plain white color. Note that more input sockets are left empty so that we can manually change the values instead of using other nodes as input information.
These two shaders are then mixed using a Mix Shader node with a factor of 0.2. This means that the output of this mix node will take 80 percent of the information from the upper input socket (in this case, the diffuse) and 20 percent from the lower one (the glossy).
Lastly, the result is plugged into a Material Output node. As said before, this is always the last node of a material.
Looking at the node setup, we can see that each output has the same color as the input into which it is plugged, with the exception of the Bump node. This node takes the values from the color information (the node automatically converts any color information into a black and white format) and converts it into vector information.
This simple material setup is helpful in understanding a correct sequence of nodes:
A look at the hardware
As said before, Cycles is a pretty heavy render engine and needs the appropriate hardware to work correctly. Moreover, it gives us the possibility to use the power of modern graphic cards to speed up render time. Not every card will work with Cycles, so I thought it'd be worth it to say a couple of words about this topic.
Cycles can render on both CPU and GPU, even if at the moment it cannot use them at the same time. That being said, GPU render is faster than CPU (at least for the same amount of money spent on these two items), but the first one presents some limitations.
First of all, GPU rendering with Cycles works only with CUDA at the moment. CUDA is a proprietary technology of NVIDIA. This means that at the current state of its development, GPU rendering with Cycles only works with cards equipped with an NVIDIA chip, such as GeForce, Quadro, or Tesla cards. A similar technology that will allow Cycles to take advantage of video cards is OpenCL. This is an open source technology, which is supported also by AMD (and others, but AMD is the main NVIDIA competitor) cards, but unfortunately at the time of writing, developers have still not managed to implement these libraries in a usable way mainly due to the fact that OpenCL is still under heavy development.
So, to summarize, it is good to repeat it once again. At the time of writing these lines if you want to use a GPU to render in Cycles you need an NVIDIA card, and it looks like things are not going to change any time soon.
Now, what video card should we buy to get the best out of Cycles? I guess you are not new to computer graphics, so you may already have guessed the answer. The more you are willing to pay, the better the performance you will get. There are, however, some important points to keep in mind.
First of all, Cycles will load up all the information needed to render the scenes onto the video card memory. When the VRAM (video RAM) is full, your render will fail. This should make you understand the first important point—Performance is really important, but if you cannot render a scene at all, it is quite useless.
The second important point is that developing features for the GPU is much more difficult than developing them for the CPU. As I am writing these lines for example, new Cycles features such as strand rendering and SSS are available only for the CPU.
The third important point is that new Cycles releases often brought two things, among others, until now—Faster CPU rendering and slower GPU rendering. At the moment, GPU rendering still has the best performance/price ratio, but it's important to keep in mind the preceding three points while choosing the right hardware.
Choosing the CPU for Cycles is pretty straightforward. Any CPU will work fine, and the faster the CPU, the faster the render time will be. Keep in mind that there are fairly big differences between operating systems here as well. Both Linux and OS X are much faster than Windows while rendering on the CPU. The only way to get similar performances in Windows is by using a MinGW (Minimalist GNU for Windows) or the Visual Basic 2012 build of Blender. These are Blender versions built using a different compiler from the default one used, and they provide similar render times to Linux and OS X while using the CPU. The problem is that the stability of this version is not guaranteed.
Speaking of video cards, performances among operating systems is quite similar. Here is a brief list of some of the best video cards to use with Cycles in the order of performance. I will not list professional video cards such as Quadro or Tesla as they would require a more in-depth analysis. In my humble opinion, most Cycles users will not benefit from their usage:
As you can see, apart from TITAN, the fastest single chip video card is still a 580 GTX. Despite the fact that the 6xx is newer, the rendering performance remains the same, or in some cases even got worse than the older 5xx. However, the 6xx comes with a higher amount of memory on board, which is an advantage on its side.
It is important to notice that the GTX x90 models are double chip versions of the x80 cards. They are faster, but the real amount of memory is half of how much is written. This is because the total amount has to be divided between the two chips, so Cycles will only be able to use half of the memory.
Some less powerful video cards than the ones listed here will usually still be faster than many CPUs, so in case you don't want to change the whole computer, it can still be a good deal to buy a cheap video card if you have an old CPU. Anyway, I advise you to always check benchmarks for the specific CPU or video card you are looking for. Keep in mind however, that a new high-end CPU (such as the Intel i7-4770K) under Linux will perform almost as fast as any lower-level card, other than the ones listed before.
Before moving on to the first chapter of this book, I would like to provide you with a useful link where Blender users upload their performance results with Cycles:
http://blenderartists.org/forum/showthread.php?239480-2.61-Cycles-render-benchmark
In the first post you will find a link to the benchmark used, another one where you can upload your results, and a last link that will open up a page with a result summary.
Chapter 1. Key Holder and Wallet Studio Shot
In this first chapter we will learn how to set up Cycles. Then, we will create our first materials and lights in Cycles. We will cover the following topics:
Introduction
Here we are at the beginning of our journey. In a short time we are going to set up our first Cycles scene. We will start with some basic lighting and materials, but at the end of this chapter we will have already learned a good amount of knowledge, which we will use to proceed with the other chapters and the creation of more and more complex things in Cycles.
Setting up Cycles for the first run
In this recipe we will see how to set up Cycles for the first run.
Getting ready
Let's open Blender and set Cycles as the rendering engine. If you are using the CPU to render, you are pretty much ready to go. If you want to use your video card, we need to change a couple of settings.
How to do it…
Tip
If you are working with Blender 2.66 or newer, the user settings and the startup scene are kept separate. If on the other hand you are using an older version, clicking the Save User Settings button will also save the scene that you have in the viewport at the moment, and it will become the startup scene of Blender. To save the startup scene in version 2.66 or newer, go to File | Save Startup File.
Tip
Downloading the example code
You can download the example code files for all Packt books you have purchased from your account at http://www.packtpub.com. If you purchased this book elsewhere, you can visit http://www.packtpub.com/support and register to have the files e-mailed directly to you.


