20,99 €
Mehr erfahren.
- Herausgeber: Crowood
- Kategorie: Lebensstil
- Sprache: Englisch
This fascinating and detailed book is essential reading for all those railway modellers who wish to build their own wagons and vans. After examining the types of modelling materials that are available and discussing the basic tools that are required, the author demonstrates how the modeller can move on from building simple kits to constructing more complicated kits in a variety of materials, including plastic, white metal and brass. He then considers how kits can be detailed, converted and significantly modified (often referred to as 'kit bashing') before covering the ultimate in rolling stock construction - scratch building. Brimming with practical advice and tips, this remarkable book uses worked examples and step-by-step photographs to show what can be achieved with the application of research, patience and modelling skill. Moreover, although the volume deals with 00 gauge, the ideas and techniques discussed can easily be applied to other gauges/scales.
Das E-Book können Sie in Legimi-Apps oder einer beliebigen App lesen, die das folgende Format unterstützen:
Seitenzahl: 342
Veröffentlichungsjahr: 2015
Ähnliche


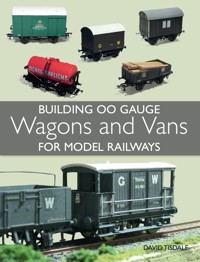
BUILDING OO GAUGE
Wagons and Vans
FOR MODEL RAILWAYS
DAVID TISDALE
First published in 2015 byThe Crowood Press LtdRamsbury, MarlboroughWiltshire SN8 2HR
www.crowood.com
This e-book published 2015
© David Tisdale 2015
All rights reserved. No part of this publication may be reproduced or transmitted in any form or by any means, electronic or mechanical, including photocopy, recording, or any information storage and retrieval system, without permission in writing from the publishers.
British Library Cataloguing-in-Publication DataA catalogue record for this book is available from the British Library.
ISBN 978 1 84797 984 1
DisclaimerThe author and the publisher do not accept any responsibility in any manner whatsoever for any error or omission, or any loss, damage, injury, adverse outcome, or liability of any kind incurred as a result of the use of any of the information contained in this book, or reliance upon it. If in doubt about any aspect of railway modelling readers are advised to seek professional advice.
CONTENTS
DEDICATION AND PREFACE
CHAPTER 1: WHY BUILD YOUR OWN ROLLING STOCK?
CHAPTER 2: KITS, MATERIALS AND TOOLS
CHAPTER 3: BUILDING A WAGON KIT
CHAPTER 4: DETAILING KITS
CHAPTER 5: KIT CONVERSIONS
CHAPTER 6: SCRATCH BUILDING WAGONS AND VANS
CHAPTER 7: SCRATCH BUILDING: WHAT CAN YOU ACHIEVE?
APPENDIX 1: SCALE 4MM:1FT CONVERSION TABLE
APPENDIX II: LIST OF MATERIAL AND COMPONENT SUPPLIERS
BIBLIOGRAPHY
INDEX
DEDICATION
I would like to dedicate this book to my family for tolerating my model railway stuff all over the house and especially to my understanding and loving wife Tracey – thank you for the support and encouragement during the preparation of this book.
PREFACE
The idea for writing this book came to me whilst writing short magazine articles about the construction of a number of pieces of rolling stock. It seemed to me that there was not a simple, single source text on the subject that a newcomer to the hobby, or someone wanting to think beyond just ready-to-run and kit building, could turn to for ideas and guidance. An opportunity presented itself when by accident I came across a note in one of the popular monthly railway magazines to contact The Crowood Press if you had an idea for a book on model railways. A preliminary exchange of letters and emails ensued, followed by the submission of a book proposal, which was accepted and this book is the end result. I hope the book lives up to my original concept idea.
ACKNOWLEDGEMENTS
I would like to convey my thanks to my fellow railway modellers at the Jersey Model Railway Club for their support, advice and encouragement over the past few years that I have been a member.
As a railway modeller, a builder of kits and a scratch builder, I would like to give a special mention to the numerous dedicated and enthusiastic suppliers of kits and components on whom I and many others rely for supplies to feed our hobby. Without these people the railway modelling hobby would be a poorer place, so thank you for your industry and long may it continue.
CHAPTER ONE
WHY BUILD YOUR OWN ROLLING STOCK?
READY-TO-RUN OR BUILD-YOUR-OWN?
Given the quality of OO gauge ready-to-run (RTR) models available today from the likes of Bachmann, Dapol, Heljan and Hornby, where the level of fine detail is excellent, you might well ask why build your own rolling stock? You might also question as to whether you can achieve the same level of detail, running quality and overall finish to the model as can be achieved by the commercial manufacturers.
The answers depend on the level of skill and patience applied to the process. For me, the development of skills with practice gives me a great sense of satisfaction, when I have created something myself, rather than buying it from the shop, lifting it out of the box and playing with it. It is a sense of achievement to create something and, in my case, I enjoy striving to produce as high a quality model as my limited skills afford.
I have been asked a number of times over the years as to why I should want to build my own rolling stock when, especially in the last five to ten years, the quality of the RTR models on the market is very good. The answer is, I think, that it is the desire to create some examples of rolling stock that are not readily available as RTR models and the desire to have something just that little bit different or unique running on my layout.
TRAIN SET TO MODEL RAILWAY
Many of us, I am sure, will have been initiated to the hobby by the childhood train set as a Christmas or birthday present set on a flat board, with a loco and a couple of carriages and wagons trundling around in a circle. If you were very lucky and had the space, you may have had the opportunity to construct a more extensive train set in a spare room or loft. Over time this develops with the addition of more track, sidings, maybe some buildings and the start of scenery, and very soon the train set starts to become a more serious model, which could be termed a model railway layout rather than a train set. Maybe as one develops from a train set, the application of additional details – loads for wagons, weathering, etc. – to RTR items is the first step down the road to building your own rolling stock.
The first step commonly taken after the train set stage is to look to build a layout that is a little more realistic, or representative, of your chosen railway company, geographical area of country, or specific operation or activity served by a railway. It is at this stage that it usually becomes apparent that the rolling stock produced by the RTR manufacturers might not meet your requirements.
The RTR range of models may not have all the necessary examples of rolling stock that would be relevant to the period being modelled, the area that you are trying to create or a specific industrial use, and thus kit building becomes the favoured option. In fact thinking about it, the next logical extension of the development of your model railway after creating the scenery, permanent way and buildings or structures, is to put your own interpretation and skill in to the rolling stock to run on the layout.
The model railway press regularly includes articles about building kits, converting ready-to-run models and scratch building rolling stock, and these can be a source of inspiration and guidance for those considering undertaking any of these projects.
BUILDING YOUR OWN ROLLING STOCK
In the following chapters I will consider the options available for building your own rolling stock, in the case of this book in terms of OO gauge, although the ideas and techniques discussed in this book can easily be applied to any scale/gauge combination. I have myself applied this to N gauge, OO9 and O-16.5 scale modelling, having built kits and scratch built rolling stock in all three of these scale/gauge combinations, using skills that I have learnt from my OO gauge modelling.
Before diving into the construction of kits, I will look at the selection of material types and some basic tool requirements in Chapter 2, and will provide some guidance as to what different material types can be used for different modelling tasks and what tools you should consider purchasing before embarking on creating your own rolling stock. Once you have assembled a basic toolkit and a supply of materials, component parts and kits, it is then time to begin.
KIT BUILDING
In Chapter 3, I will show, using worked examples, how you can move from building simple kits to more complicated kits in a variety of material types, including plastic, white metal and brass, similar to the range of kits shown in Figs 1 and 2. kit building may not be everyone’s cup of tea, but if you have the basic skills from putting together a model plane or tank kit, such as those produced by Airfix, then this need not be seen as a huge step up in ability.
Kit building provides the opportunity to develop and hone your modelling skills using commercially produced kits, typically in plastic (see Fig. 3) or metal (for example, white metal or brass) to develop your rolling stock inventory, as shown in the examples in Figs 4 and 5. Other examples of materials less commonly used for kits, including wood and resin, are discussed in more detail in Chapter 2.
Over time and with experience it will become apparent that even kit building has its limitations. This will be even more apparent if your chosen prototype era, locality, line-side industrial use or railway company is not one of the more widely known or supported examples in terms of trade suppliers of kits and components.
Fig. 1 Some examples of plastic wagon and van kits available for the modeller as currently produced kits or available second-hand.
Fig. 2 Examples of etched brass kits currently available for the modeller to build, or use as replacement parts to plastic kits.
Fig. 3 A typical example of an extruded plastic wagon kit, in this case requiring the modeller to provide paint, decals and wheels to complete.
Fig. 4 An example of relatively simple white metal open wagon kit, with etched brass fine detail components and plasticard sections for the floor.
Fig. 5 Etched brass wagon kits available from manufacturers such as Falcon Brassworks, are typically provided with white metal components and for the modeller to provide wheels.
KIT DETAILING AND CONVERSION
The next logical step after kit building is to detail and convert (often referred to as kit bashing) existing kits and then to consider the ultimate in rolling stock construction: scratch building. So what is kit conversion and scratch building? Well kit conversion, I would define, although I am sure not all would agree, is where you take an available model kit similar to the prototype you are looking to create and then modify it significantly to produce a model of the exact prototype you wish to create.
This is different from detailing a kit where you are sticking with the original prototype on which the kit is based and maybe adding additional details that the kit does not include; for example, fitting the correct pattern of wagon buffers (a common problem in some commercially produced kits) or adding wagon loads and tarpaulins.
Fig. 6 Adding detail to a plastic van kit, including the underframe and brake gear as shown here, greatly enhances the basic kit.
Fig. 7 Using a variety of materials, including brass sheet, plasticard and wire, it is possible to scratch build a reasonable representation of a bogie goods van.
In Chapter 4, I will look at detailing kits, working through an example of what can be achieved with detailing a van kit (see Fig. 6) and I will provide hints and tips as to what may or may not be possible. I will also look at the creation of different types of loads for open wagons and how these can be covered and secured.
In Chapter 5, I will discuss the options available for the conversion of kits, as well as the possibilities for converting RTR models, using some worked examples of conversions that I have carried out, to provide a guide to the possible methods and techniques that can be employed.
SCRATCH BUILDING
Scratch building is another area where there is likely to be some dispute over the definition, so to avoid controversy and protracted debate, I will provide my own definition here as the basis on which this book has been put together and leave it to the reader to decide whether this sits comfortably with them or not. To my mind scratch building is the creation of a model of a prototype from scratch using the ‘raw’ materials (seeChapter 2) with or without the use of small component parts; for example, the use of etched brass wagon strapping or ‘W’ irons.
In Chapters 6 and 7, I will look at what can be achieved by scratch building rolling stock and will show that this need not necessarily be the preserve of the highly skilled or professional modeller. I will discuss in Chapter 6 the use of materials and techniques that can be used for scratch building; whilst in Chapter 7, I will provide a number of worked examples of scratch building to demonstrate what can be achieved with the application of research, patience and modelling skills. One of the examples I have described is the scratch building of a bogie goods van using plasticard and brass, which shows what can be achieved in these materials.
To aid the scratch builder, there is a plethora of suppliers around today that can provide all sorts of small component parts that will save the scratch builder from having to fabricate every tiny piece of detail for a particular prototype subject being modelled. Having said that, I see no problem, if you feel you have the time, desire, skill level and tools to do the job, with fabricating all these components yourself.
Now having set the scene, it is time to get on with the modelling and I hope that the hints, tips and worked examples presented in this book provide a useful reference for you to develop your modelling skills and will inspire you to have a go.
CHAPTER TWO
KITS, MATERIALS AND TOOLS
INTRODUCTION
Before we delve into the detail of kit building and scratch building rolling stock, I will provide a quick review and summary of the types of kits, materials and tools that are available today for the railway modeller to use. This subject has been covered many times before by others, so I plan to provide a brief summary and comments based on my own experience that will be of use to others starting out in this area.
I have found that the quality of kits and components can be extremely variable, and this is not always related to the cost of the items purchased. The production of kits and components for the railway modeller is an area of significant business, covering all the more common and less common railway companies, and through the pre-grouping, grouping, nationalization and privatization periods of British railway heritage.
I have not prepared an exhaustive list of suppliers of kits and components, as that would take a book in its own right; suffice to say that there are many suppliers producing all manner of products to assist the modeller looking to build kits, modify RTR and kit built rolling stock or even scratch building. I have included a short list of the suppliers that I have used in my work in Appendix II, but I must emphasize that I have no connection to any of the suppliers listed, other than as a satisfied customer.
The best advice that I could provide to a beginner starting out would be to carry out some research on your prototype period, company and/or region, and then search the modelling press and internet, and visit railway exhibitions where traders are present, to see what is on offer, decide on what you need and, most importantly, what you can afford.
You might also wish to consider what you can fabricate from raw materials or adapt from spare parts from other kits. This depends on the level of accuracy of fine detail that you wish to achieve, but it is perfectly possible to create many components yourself using basic tools. There is no right or wrong answer, it is what you feel comfortable with and what you have time to achieve (remember life is short!). Set out to achieve a realistic impression at moderate cost rather than set standards so high that you might be unable to attain them first time out. You can improve your skill levels and raise your standard with experience.
Fig. 8 For the beginner wanting to build wagon and van kits, a simple plastic kit, such as one from the selection shown, is a good place to start.
Fig. 9 Tackling a more complicated plastic kit, such as one of those shown here, provides more of a challenge to the budding rolling stock modeller.
As a modeller you need to build up your skill levels and confidence, starting with more straightforward or simpler kits (see Fig. 8), then move to more complicated kits (see Fig. 9) as you develop your skills and confidence in your ability. It is important to remember when building a kit that you can always add more detail at a later date, if and when your skills or requirements for accuracy of finer detail have increased; you could see this as a future upgrade, a bit like the software and hardware for a home PC.
KITS AND MATERIALS
Beginning with kit types, the following provides a summary guide to the most common types of kits available, together with some comments based on my experiences of working with the material types employed.
PLASTIC
This medium is by far the most common material type used for model kit production at the present time. Typically this is extruded plastic derived using moulds to produce a range of parts and components to construct with liquid polystyrene cement. Plastic is a more forgiving material type to use than some materials, especially for the beginner, as it is relatively simple to correct mistakes or to fabricate a replacement part should anything untoward happen during the construction process.
These types of kits can be produced relatively cheaply, as compared to an etched brass kit, and consequently the price of these types of kits is less. The level of detail on early plastic kits was limited, but the more recent kits available from the likes of Parkside Dundas and Cambrian Models, to name but two suppliers, are significantly improved on earlier examples (see Fig. 11). The level of fine detail on many of the plastic kits available today is excellent and I find plastic kits are easy to work with and, having built many plastic model tanks, boats and aircraft kits as a child, it is the material I am most comfortable using and this is probably my favourite material type for building.
Fig. 10 Examples of basic plastic wagon and van kits such as these provide a useful source of kits for the modeller to develop model building skills.
Fig. 11 The kits shown here are examples of more complicated plastic kits available to the model rolling stock builder and require more advanced model building skills.
Fig. 12 Pre-printed wagon kits, such as the Ratio van kit, allow the modeller to provide examples of private owner rolling stock for their layout that may not be available RTR.
Fig. 13 The Slater’s Plastikard range of pre-coloured open wagons, such as this coal wagon kit, is unfortunately only available second-hand at the time of writing.
An advantage of using plastic is that this can be produced in a variety of pre-coloured parts to help with the construction sequence or to represent colour schemes of the prototypes being modelled. One example of this type of flexibility is the older kits produced by Ratio, which unfortunately are no longer available new but it is possible to pick them up second-hand, to represent specific company brands, such as the Harvey’s Bristol Cream wagon (see Fig. 12); a 10-ton van produced in company colours and pre-printed sides with the company branding.
Slater’s OO gauge wagons, now produced under the Cooper Craft banner, also adopted a similar approach to the production of private owner wagons with pre-coloured body and printed sides for the company being represented (see Fig. 13). These wagon kits are relatively easy to make and with pre-coloured and printed sides mean that the keen modeller can have a train of private owner wagons built and running on the layout in a relatively short period of time, without worrying about identifying and applying the somewhat complicated liveries and branding used by some private organizations.
On the negative side, the one big disadvantage of using plastic is that the kits tend to be extremely light and, for good track adhesion and running, ballast will have to be added to all the models. To address the lightweight nature of plastic kits, some kit manufactures provide ballast weights with the kits, but some do not. I have always added ballast, whether provided or not, using a combination of steel weights, white metal and even nails as ballast in wagons.
In vans or covered wagons this is easy to hide within the body. In open wagons this can be a little trickier, but some ballast can be hidden under the floor and some disguised and added in the form of wagon loads – you just have to use your imagination.
Many of the older plastic kits were also produced with plastic wheels; for example, the early keyser plastic kits and early Cooper Craft kits. The use of plastic wheels only exacerbated the poor running problems of a lightweight body. The keyser kits are no longer in production and the Cooper Craft kits have been upgraded and are now sold with metal wheel sets running in brass bearings. I have always fitted metal wheel sets to my kit-built wagons, typically using keen Maygib, Romford or Alan Gibson fine-scale wheel sets running in brass bearings. It is relatively simple to adapt your wagon kit to take metal wheel sets; this will be discussed further in Chapters 3 and 4.
The cost of plastic kits, starting at around £7 for the more basic, simple wagon kit, is the ideal starting point for the beginner. My advice would be to consider plastic kits as a place to cut your teeth at kit building. Start with a simple four-wheel open wagon or box van; for example, the kits produced by Cooper Craft for Great Western rolling stock. These kits comprise only a few main components; a selection of detailed pieces and the new versions of the kits include a set of metal wheels and brass bearings to provide good running. Once you have mastered this type of kit, then graduate to the more complicated plastic kits and then the metal kits; this is discussed further in Chapter 3.
Fig. 14 A simple white metal kit of a Cambrian Railway’s slate wagon produced by 51L, is a good example of the type of kit available in this medium.
WHITE METAL
The use of white metal for producing kits was once more common, but has been replaced to a large degree by the developments in the production of extruded plastic kits. That is not to say that all white metal kit production has stopped – far from it. White metal kits are still available from some suppliers, such as ABS, 51L and David Green, particularly for the more obscure prototype wagons or, less commonly, modelled railway companies.
However, there is one area where white metal is still in common use: that is for the production of wagon components, as shown in Fig. 15. These types of components are used by the modeller looking to modify a kit to a different prototype, or the modeller considering scratch building. Suppliers, such as ABS, Mainly Trains, 51L and others, produce a wide range of parts to assist the railway modeller in this regard.
The level of detail available with both white metal kits and components can be variable and is governed by the quality of the mould used for the cast production. In my experience, some of the casting is excellent and is ready to use straight from the box or packet, whilst some requires a fair degree of fettling to remove flash and casting lines.
It is important to remember that white metal is a soft metal alloy and thus it is prone to easy damage or deformation from bending and even breakage if not handled carefully. It can be soldered using a low melt solder, but unless you are confident in your ability and competent at soldering, you do run the risk of your component or kit turning into a deformed molten lump, only good enough to use as ballast for your next plastic wagon kit! I tend to use an impact adhesive, such as UHU, or a cyanoacrylate adhesive (super glue) to bond white metal parts and kits, as I do not consider my soldering abilities are up to the mark for construction of these types of kits.
On the basis of my experience, the use of a liquid cyanoacrylate (super glue) type adhesive works extremely well with white metal, especially if you apply a small spot on the contact surfaces first, press together and then, once this sets, use a fine wire (such as a straightened paperclip) to apply more adhesive liquid to the join and allow capillary action to draw the liquid into the joint. Once left to harden off, I have found this approach provides a very strong joint.
Fig. 15 Detailing wagon and van kits can be achieved simply using white metal components, such as the selection of components available from ABS Models.
The main advantage of using white metal as the principal material for a wagon kit is that the wagons produced are much heavier and are unlikely to require additional ballast (as noted previously for plastic kits). This weight advantage, combined with the use of metal wheel sets, leads to good track adhesion and better running qualities for the rolling stock.
The key point to be aware of that I have found with the construction of white metal kits is that the construction process needs to be carried out carefully and progress checked regularly to ensure that the body is square and level. This applies to all types of kits, but more so with white metal, as the material is less flexible or readily adjusted once the joint has been fixed, without the risk that the parts might deform or break.
BRASS
The production of brass kits using etching techniques has been around for many years. For many people, the level of fine detail achievable, combined with the weight advantage over plastic kits, makes the brass kit the pinnacle of model building. The level of detail and degree of accuracy attainable from etched brass kit construction is excellent, although this all comes at a modest cost premium. Brass kits tend to be much more expensive than the equivalent plastic kits and for someone starting out kit building, there is often the fear of spending a considerable sum of money on a kit and then ruining it by making a mistake that cannot be undone.
The skill level required for brass kit construction is higher and the kits tend to be more complicated than plastic or white metal kits. Having said all of this though, the modeller should not be put off from using brass kits. From my experience, it is better to start with the plastic and white metal kits and build up your modelling skills and understanding of how rolling stock kits are put together, before moving on to the brass kits.
Some suppliers produce part-brass components to modify existing plastic kits, whilst others produce brass body kits to fit on plastic underframes, such as the Shire Scenes range of etched brass bodies for wagons and four-wheel coaches designed to fit on to modified Ratio plastic coach chassis (see Fig. 17). These part-brass kits are probably a good place to start to get the feel of how to work with brass before moving on to the more complicated full-brass kits.
With brass kits it is essential to read through the instructions fully before commencing any construction and it is also advisable to carry out dry runs of key elements of the assembly process before fixing. This will be discussed in more detail later. Brass kits can be fixed together by soldering or by the use of an adhesive, such as cyanoacrylate, depending on personal preference. Once constructed, brass kits provide strong models with a sufficient degree of weight that ensures excellent running qualities, especially when combined with good quality metal wheel sets.
Fig. 16 An example of the type of etched brass kit available is the Great Western Railway fruit van kit produced by Falcon Brassworks.
Fig. 17 A number of conversions for the Ratio plastic four-wheel coach kit can be achieved utilizing the Shire Scenes range of etched brass body kits.
RESIN
The use of resin for rolling stock construction provides an alternative to the use of plastic or metal. Typically these types of kits are produced as a single cast of the body with a small number of parts for the underframe. Alternatively, resin kits are produced as a one-piece body casting designed to fit on a plastic underframe provided separately, or for the modeller to provide from a source of preference.
Resin is a light material and unless weights are cast into the body during the casting process, then the modeller needs to add ballast. Resin is popular amongst modellers who want to produce their own limited runs of a particular prototype. The level of detail achievable in resin kits can be the same as, if not better than, that achievable with extruded plastic kits. The quality of the casting, as with white metal, is governed by the quality of the mould.
Whilst I have not yet used resin kits for OO gauge wagons and vans, I have used resin kits for the construction of a fleet of London Underground tube and surface rolling stock for a friend and fellow modeller constructing a model of Gant’s Hill Station. I have also used resin kits for the construction of O-16.5 rolling stock, running on OO gauge plastic underframe kits, for one of my own layouts at home.
WOOD
The use of wood as a base material type for constructing rolling stock is not common today in terms of commercially produced kits. Historically, wooden kits were produced by suppliers such as Ratio for wagons and carriages, but these have been superseded by the use of plastic. Although I have not constructed a rolling stock kit from wood, I have used wood as a material for the construction of parts of wagons, wagon loads, buildings and other scenic items for the model railway, including a scratch built Clyde Puffer to 4mm scale to sit in the harbour on the layout of a friend.
MATERIALS FOR SCRATCH BUILDING
There are no hard and fast rules about the choice of material for the project that you wish to undertake and in my opinion you should not rule anything in, or out, at the beginning until you have decided what your subject matter is going to be. It may, for example, be necessary to consider the use of a number of different material types in the same project to achieve the look and feel of the prototype that you intend from the model. I have used wood, plastic, metal and card for the projects that I have undertaken and each has its own advantages and disadvantages, a summary of which has been produced in the table Pros and Cons of Material Types.
For the construction of wagons and vans I have tended to use a mix of plasticard and brass sheet for the main body sections, whereas I have used plastic, brass and white metal to form the finer detailed components. Plasticard is readily workable to form the shape of the wagons, particularly the wagon and van ends, and this material can be sanded and carved as required. The brass sheets provide strength combined with a relatively thin profile and this has proved to be particularly useful for the formation of van roofs; for example, the roof of the GWR Mink F van described in more detail in Chapter 7.
MODELLERS’ TOOLS FOR KIT BUILDING
Having looked at the range of material types available for kit building and scratch building, it is perhaps worth making some comment on the types of tools that would be beneficial for the modeller to have to hand before starting to construct your own rolling stock. To some degree the types of tools required vary for material types, but many are common to all material types, therefore I have approached this on the basis that the modeller requires tools to build kits.
BASIC TOOLS
For the modeller considering the construction of plastic or resin kits, the following basic tools are recommended:
● Good quality sharp craft knife, with a selection of blades (seeFig. 18)
● Needle files (see Fig. 19)
● Fine drill bits: 0.5mm, 1mm and 2mm are the most commonly used sizes, but sets of drill bits from 0.3mm to 2mm are available relatively cheaply
● Pin vice or Archimedes’ drill for use with the fine drill bits
● Steel straight edge (seeFig. 20)
● Small set square or similar
● Tweezers (seeFig. 21)
All of the above typically costs less than £20, the cost of a couple of kits, and is well worth the investment. If you can afford the additional expense, then the purchase of a cutting mat I have found to be essential, especially if you have to share the kitchen table as a work bench. I use an A2-size mat, but mats are available in sizes from A5 to A0; it depends on what space you have available for working.
PROS AND CONS OF MATERIAL TYPES
Material
Pros
Cons
Brass
● Excellent fine detail
● Provides weight to improve running
● More complicated detail easier to fabricate by etching than casting
● Difficult to modify
● More complicated, higher skill levels required
● Relatively more expensive
● Can be more difficult to work
Plastic
● More forgiving of mistakes
● Good for beginners
● Relatively cheap
● Good fine detail (on modern kits)
● Easy to work/modify
● Level of detail sometimes limited; new kits excellent
● Lightweight so requires ballasting to improve running
Resin
● Good level of detail
● Cast in one piece for easier construction
● Can be used by the modeller to cast limited run/bespoke components
● Easier to modify than metals
● Lightweight model requires ballasting to improve running
● Not as easy to work with as plastic
White metal
● Provides weight to the model for good running qualities
● On older kits/components the casting is poor and requires a lot of preparation and fettling
● Prone to deformation
Wood
● Heavy material gives good running qualities
● Realistic natural material
● Can be relatively easily worked with the correct tools
● Limited level of detail possible at this scale
● Not often used, limited supply of suitable good quality materials
The A2 mat is big enough to lay out kit components so that you can work through dry runs and have space to set sections aside whilst working on something else; but at the end of the day it is down to personal preference and what space you have available in which to work.
SPECIALIST TOOLS
Beyond basic tool requirements, the following additional tools might be considered as investments and some will probably be essential when considering the construction of metal kits:
● Mini-drill with accessories such as cutting discs, grinding tips, drill bits (Rotacraft or similar), as shown in Fig. 22
● Engineer’s square
● Scissors – several pairs for cutting paper, card and removing fine brass components from etches (seeFig. 23)
Fig. 18 Essential tools for the model maker include a good craft knife with a selection of blades and a scalpel blade for fine detail work.
Fig. 19 Useful additions to the modeller’s toolbox include a set of needle files in a range of shapes for fine adjustments; whilst for drilling holes, a box of fine drill bits (0.3mm to 1.6mm) used with either a pin vice or Archimedes’ drill comes in handy.
Fig. 20 To ensure accurate cutting and setting out, a steel rule/straight edge and a set square are required; the glass tile is ideal for a flat surface on which to set your parts.
Fig. 21 For placing parts, making fine adjustment or holding small items during painting and fixing, a selection of tweezers is invaluable.
Fig. 22 A luxury item, but extremely useful if you can afford it, would be a boxed mini-drill and accessories, such as the Rotacraft one shown here.
Fig. 23 It is useful to keep several pairs of sharp scissors in your toolbox for removing parts from brass etch and for cutting card.
Fig. 24 One of the more unusual tools available is this tool for marking and cutting circles, available cheaply from most good stationery suppliers.
Fig. 25 A selection of pliers, side cutters and hard wire cutters are useful; and for brass kits, a pair of flat-faced pliers for bending and shaping brass components is essential.
● Scalpel blade for cutting out transfers and clear plastic glazing (see Fig. 18)
● Device for cutting circles, which I found in a card-making shop; this works on paper, card and thin plasticard and is very useful for scribing the curves for van end-walls when scratch building (see Fig. 24)
● Mini-vice for which I have built a small wooden stand and which is extremely useful when a ‘second pair of hands’ is required
● A good pair of mini-pliers and side-cutters (see Fig. 25)
● Square, flat-face pliers for folding brass parts (seeFig. 25)
● Set of small screwdrivers, both flat head and cross head
● Brass back-to-back OO wheel gauge for checking the metal wheel sets to ensure good running (seeFig. 26)
● Razor saw and selection of blades can be useful for cutting metals and plastic components (see Fig. 27)
● Glass-fibre stick
● Soldering iron – for use with brass kits, but also for more general electrical works on your model railway
A number of suppliers offer ‘Modeller’s Toolsets’ that include much of the basic and more specialist tools in one box, as well as some other tools of perhaps less obvious necessity. These sets can be a good way of getting together most of the tools that you are likely to need at some point in one go, but the toolsets can be relatively expensive and it might be more sensible to buy the minimum basics first to see if kit building is what you want to do, before spending significant sums on tools that you will never, or only very occasionally, utilize.
Fig. 26 To check the wheels are to the correct gauge, a brass OO gauge back-to-back tool, such as the one here supplied by Mainly Trains, helps solve poor running rolling stock.
I have built up my toolset over time, buying pieces as and when required, shopping around DIY stores for bargains, as well as antiques markets for old tools. I managed to pick up an engineer’s square and a selection of screwdrivers from an antiques market, all in perfectly good working condition and for a fraction of the cost of buying them new.
To ensure smooth running of the rolling stock that I make, whether from kits or scratch building, I make use of a brass back-to-back gauge to check all the wheel sets before installing them into the underframe. I have found that even RTR rolling stock can have back-to-back dimensions slightly ‘off-gauge’ straight out of the box, so the brass gauge comes in handy for checking these also. The brass gauge I use came from Mainly Trains (seeFig. 26), was relatively inexpensive at about £5, but has proved its value in resolving poor running problems with stock.
OTHER USEFUL BITS AND PIECES
As well as the list of tools I have provided, there are some things that can be utilized to help in the construction of kits that are not necessarily tools but which I have found can provide invaluable assistance in the construction of kits. The following items can be found around the house, or picked up cheaply from second-hand shops or market stalls:
● Glass tile – a machined piece of glass should be perfectly flat and is ideal for kit construction when assembling components that need to be kept absolutely square whilst the adhesive hardens off (seeFig. 20)
● Small off-cuts of timber, cut with 90-degree corners are also an excellent addition to your model-making toolbox – I make use of offcuts of 2 × lin timber and plywood of varying lengths for all sorts of uses including:
Fig. 27 For the removal of parts from sprues or heavier duty cutting requirements, the use of a fine razor saw with a variety of blades and a cutting block could be of assistance.
○ To support pieces of a kit during construction
○ Wedge parts bits together whilst adhesive hardens
○ Props for kits during construction whilst the adhesive is setting
○ Weigh down items fixed together
○ Protection of parts when using a clamp
○ As a block to rest parts on when soldering
● Clothes pegs can serve the same purpose and are extremely useful when needing to hold parts together with pressure whilst the adhesive sets
● A selection of elastic bands is always handy, particularly for holding a van roof in place on the body whilst the adhesive sets to ensure that it binds and fixes squarely
FURTHER COMMENTS ON TOOLS


