28,49 €
Mehr erfahren.
- Herausgeber: Crowood
- Kategorie: Lebensstil
- Sprache: Englisch
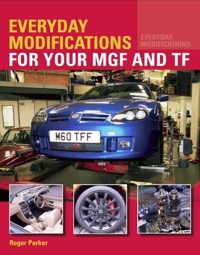
The books in the Everyday Modifications series from Crowood are designed to guide classic car owners through the workshop skills needed to make their cars easier to use and enjoy. MG expert Roger Parker offers his advice on a range of modifications and changes that can be applied to the MGF and MG TF, which will enhance the practical daily use of the cars. With important and specific safety information and advice throughout, the book also covers: body and interior changes; brake, suspension and steering upgrades; wheel and tyre options; powertrain upgrades; electrical system upgrade options and finally, setting up and specific maintenance aspects. Illustrated with over 450 images, this is a valuable technical resource for the MGF and TF owner.
Das E-Book können Sie in Legimi-Apps oder einer beliebigen App lesen, die das folgende Format unterstützen:
Seitenzahl: 428
Veröffentlichungsjahr: 2018
Ähnliche


EVERYDAY
MODIFICATIONS
FOR YOUR MGF
AND TF
How to Make Your Classic CarEasier to Live With and Enjoy
Roger Parker
THE CROWOOD PRESS
First published in 2018 by
The Crowood Press Ltd
Ramsbury, Marlborough
Wiltshire SN8 2HR
www.crowood.com
This e-book first published in 2018
© Roger Parker 2018
All rights reserved. This e-book is copyright material and must not be copied, reproduced, transferred, distributed, leased, licensed or publicly performed or used in any way except as specifically permitted in writing by the publishers, as allowed under the terms and conditions under which it was purchased or as strictly permitted by applicable copyright law. Any unauthorised distribution or use of thistext may be a direct infringement of the author’s and publisher’s rights, and those responsible may be liable in law accordingly.
British Library Cataloguing-in-Publication Data
A catalogue record for this book is available from the British Library.
ISBN 978 1 78500 430 8
Disclaimer
Safety is of the utmost importance in every aspect of an automotive workshop. The practical procedures and the tools and equipment used in automotive workshops are potentially dangerous. Tools should be used in strict accordance with the manufacturer’s recommended procedures and current health and safety regulations. The author and publisher cannot accept responsibility for any accident or injury caused by following the advice given in this book.
contents
1 Introduction
2 Body and Interior Changes
3 Brakes, Suspension and Steering
4 Wheels
5 Powertrain (Engine and Transmission)
6 MGF and TF Electrical Systems
7 Setting Up and Maintenance
8 Appendix: Technical and Performance Data
Index
1
introduction
The MG marque’s history is littered with many ups and downs, and it has rightly gained a reputation for being a survivor, having come through many ‘near-death’ situations: these include the change of direction dictated by Lord Nuffield in the mid-1930s, and the demise of the MGB and the closure of the MG factory in 1980, leading to the presumed death of the marque – only for it to be revived with the MG Metro in 1982, and the follow-on MG Maestro and Montego. In more recent times we saw the collapse of MG Rover in 2005, and the subsequent Chinese purchase of the remaining MG assets. This was followed by the restart of MG TF production in 2008, followed in turn by the growing range of MG-badged cars in recent years.
MGF 1.6 model. This is an MG Rover press image from when the base 1.6-litre model was introduced. MG ROVER
The most prolific TF was the 135 model; this is an MG Rover press image when the 2005 model-year cars were launched.MG ROVER
Indeed it is perhaps the collapse of MG Rover and the subsequent Chinese ownership of the marque, and their apparent misunderstanding of our view of MG’s values, which has led to the current range of cars being short of what many believe is the sporting nature of an MG. As a consequence this has focused more attention on the MG TF as possibly the last true MG two-seat open-top sports car, along with its close older sibling, the MGF. Not that this has significantly helped the values of these cars, at least not yet, but they certainly represent really good value for money – and most interestingly, this doesn’t stop many owners spending disproportionately high amounts of money maintaining and personalizing them. It is the focus of this book to look at some of the wide range of tuning and personalizing options available, and where it is beyond its scope to investigate them in detail, it will at least give an idea what these might be, and where to get more information.
One advantage of the cars having a relatively low value means that more owners are prepared to experiment, as their financial exposure is less. This also means that as most of these experiments have some success, the actual value of the cars can be increased – if the cars were worth much more, then originality would have a much higher priority when considering values.
Of course, originality does have its place, and very early MGFs in excellent original condition with a low mileage have seen a slow but clear increase in value, all connected to their originality – but that still leaves very many MGFs and TFs that are good value and can provide an excellent economic base for modification.
The 1999 MGF 75th Anniversary car came with three different exterior colour schemes, red or black for the UK, and silver or black for export, along with 16in Multispoke wheels and special badges.
The interior of the black 75th Anniversary cars came with a striking red full leather treatment.
In 2004 the MG TF 80th Anniversary model came in contemporary and classic formats with individual numbering, together with different trim and badges.MG ROVER
The interior of 80th Anniversary cars was individual and with monogrammed ‘1924–2004’ seat decoration.MG ROVER
By 2009 we had entered the Chinese ownership period of MG and they decided to introduce a limited run of fifty 85th Anniversary cars in three external colours: Ice White, Intense Cassis and Enigmatic Silver.MG MOTOR
The interior of all 85th Anniversary cars used this colour of leather and pleasant minor touches, including the chunky, UK made, one-off alloy gear knob.MG MOTOR
The 85th Anniversary car did boast a significant suspension upgrade to provide the best ride/handling road set-up of any TF, capped off by an exotic new wheel design called ‘Twist of Pepper’.MG MOTOR
There were also a number of different ‘Limited Edition’ MGF and TF models, although most were nothing more than a selection of ‘cosmetic’ additions, many of which were already listed factory options or accessories. The main advantage of these was for the original purchaser, as on average the increased cost of the LE model would only be around 50 per cent of the cost of the extra parts fitted to an individually ordered standard car plus those added parts. Of all the LE models produced, only the 75th, 80th and 85th Anniversary cars had an MG-related historic connection, and only the 85th had an attractive and effective mechanical upgrade.
Various subjects in this book will refer to aspects of maintenance that can’t be covered in the space available, but these aspects are usually covered in the official MG workshop manual. To expand on the latter’s clinical approach there is also my book, MGF and TF Restoration Manual (published by The Crowood Press), which gives an owner’s perspective without the facility of a fully equipped dealer workshop. Workshop manuals as supplied to MG dealers are, at the time of writing, once again available from XPart, commonly under the title of ‘RAVE’ discs.
In the following chapters there will be some basic references to car specifications which assume readers have a good understanding of MGF and TF history – and if they do not, and if they want to add to their knowledge, then a number of good books cover this subject. For example, David Knowles’s MGF and TF (published by The Crowood Press) relates the history of MGF and TF from their concept to when the last TF came off the Longbridge assembly line in spring 2010. For immediate reader assistance, refer to the sidebar for a very brief history of MGF and TF.
When talking about MGFs or TFs one can’t avoid mentioning the reputation their Rover K-series engines gained for problems concerning head gasket failure (HGF); certainly this is a case where time hasn’t changed that reputation, but engineering changes most certainly have. Whilst engines suffering head gasket failure may still be found, cars that have survived for ten years and more would probably not have done so had they succumbed to repeated head gasket failure, as the ‘doom mongers’ claimed they would. Certainly the story surrounding the K-series engine issues is one that could justify a book in its own right, such were the twists and turns of internal company politics and moves to avoid potential litigation.
However, the simple and pertinent fact is that the MLS (multi-layer steel shim) head gasket arrived in late 2005 through Land Rover, and whilst this MG Rover powertrain development was to be part of the Euro IV specification update along with the uprated lower rail, it didn’t apply to any MG or Rover production cars, as the company had collapsed the previous April. It is, however, the most effective cure, and is retro applicable to all earlier K-series engines, and has provided the biggest boost to reliability.
MG and Rover car values plummeted when MG Rover collapsed, and one of the main reasons was the widespread and incorrect perception that parts would no longer be available. MG Rover’s 2003 sale of its parts division, XPart, to Caterpillar Logistics was seen negatively at the time as a sale of the ‘family jewels’ to raise money, but ironically this insulated XPart from the MG Rover collapse, and XPart’s access to parts designs and suppliers has ensured that, generally speaking, parts supply has continued normally.
XPart today remains in rude health, although now under new ownership, and continues to supply original MG and Rover parts. Certainly initially they had difficulty maintaining stocks of certain parts, as some suppliers were originally supplying tens of thousands of parts per annum to the production lines, and after MG Rover collapsed were then asked to cut that down to perhaps a few hundred just to service the spares market. In some cases they simply couldn’t do such small numbers, whilst others were owed considerable sums and refused to deal further, so new suppliers had to be found. Where new parts are not available there is currently a very healthy selection of MG specialists who provide many second-hand spares – use eBay or Google to find them.
A BRIEF HISTORY OF MGF AND TF
In January 1996 this pre-production MGF VVC is in the hands of the author and his wife prior to the official launch in March 1996.
Officially revealed at the spring 1995 Geneva Motor show, the MGF didn’t see first deliveries until September of that year. Initially this was just the 120ps 1.8i, as the more powerful 145ps VVC (variable valve control) -engined version didn’t arrive until March 1996.
Little changed until 1999 when the 2000 model-year (2000MY) upgrades were announced, along with the Steptronic auto gearbox version. Steptronic changed to Stepspeed the following year when BMW departed and took their registered name ‘Steptronic’ with them, but mechanically Steptronic and Stepspeed cars are identical.
One of the benefits of the creation of MG Rover was freedom from BMW control to create additional models of MGF: this was the new, top-ofthe-range Trophy 160 SE.MG ROVER
MGF production ceased in December 2001, but not before a run-out model using some appendages of the Trophy 160 appeared under the title of ‘Freestyle’.MG ROVER
The last MGFs were made in the second week of December 2001, the same time as the production changeover to TF, in preparation for the official unveiling of TF in the second week of January 2002. This meant that many late-build MGFs were not sold until well into 2002, some with later ‘02’ registrations.
In April 2005 when MG Rover collapsed, the production line was full of unfinished cars, most of which were finished by the administrators in May or early June that year. Many were not registered for several years.
TF assembly continued until the production lines stopped on 6 April 2005, and only during May and early June of that year were partly built cars that had been stranded on the production line, completed by the Administrators. Not all cars were sold immediately, and certainly some were not registered until 2007 – but note they are still 2005-built cars.
In August 2008 MG Motor relaunched the MG TF with the LE500, which not surprisingly was a run of 500 cars with a single 135 mechanical spec.
MG Motor (the UK arm of the Chinese owner, SAIC) started to build TFs again in August 2008, although some earlier engineering cars were built and registered the previous year. The first 500 production cars were the LE500 models, followed by the TF135 and 85th Anniversary models. The last MG Motor TF was built in May 2010, but the official demise of the model wasn’t announced until April 2011 – and once again, many unsold cars were not registered for several years.
MODIFICATIONS – LEGAL AND OTHER CONSIDERATIONS
Fitting non-standard parts on any car is simple, but a degree of thought must be given to the consequences, both with respect to how the car performs and, very importantly, regarding the legal aspects of such changes. All countries where the MGF and TF were sold have complex road traffic legislation, and whilst the focus of this book will be on the UK, the general principle of ensuring that the car always remains totally safe and complies with all relevant traffic law is an integral part of the traditional MG motto, ‘Safety Fast’.
A simple example where changes conflict with legislation is the retro fit and use of LED or HID light conversions: these are widely available, but certainly in the UK it is made clear why these are illegal (for further information, seeChapter 6).
Legal considerations also apply regarding insurance, and it is important to ensure that any changes to the car are notified and agreed with the insurance company before it is used on public roads. Many insurance companies in the UK specifically exclude any modifications, and sometimes this applies not just to performance enhancements, but cosmetic ones, too. Why cosmetic improvements should fall foul of insurers is actually quite simple to understand, as these will make the car stand out more and can therefore make it more attractive to thieves.
Attractively modified cars also become more of a temptation to criminals, so insurance companies will tend to raise premiums.
Modified cars will usually attract a premium increase, but experience shows that many insurance companies/ brokers may not fully understand some modifications. It is therefore important to ensure that any changes are fully explained, and are even backed up by written submissions from qualified people/companies so that an accurate assessment of the possible increased risks leads to a fair premium. Alternatively it is worth noting that there are insurers who specialize in modified cars.
It is interesting to note that when the MGF was initially introduced it was the only ‘new’ MG available, so many insurance companies grouped the car alongside classic MGs such as the MGB; this led to lower premiums, with other benefits only seen on classic policies. However, the arrival of the MG Zed saloon car ranges in 2001 meant there was then a full range of new MG cars, and this softer approach was dropped. But now that well over ten years have passed since the collapse of MG Rover, there is a clear shift back towards the classic viewpoint for MGF and TF insurance, and this policy is developing for the Zed ranges as well. This can include benefits such as limited mileage policies and agreed value, a very important aspect of ensuring that cars in really good condition are adequately covered.
If you are planning modifications to the car’s running gear, do give some thought to the possible effects on fuel consumption and emissions. The fuel consumption of all MGFs and TFs is still very good compared with more modern machinery, and inappropriate modifications to the engine can easily affect this badly.
Directly connected to fuel consumption are exhaust emissions, since in simple terms whatever fuel/air goes in one end, partly comes out as exhaust gases at the other. The more fuel used means higher emissions, and all MGFs and TFs are subject to annual testing, which includes measuring emissions and the effectiveness of the exhaust catalyst. Some will consider fitting a catalyst by-pass pipe in place of the cat, as this may appear to offer a power gain (seeChapter 5 for some surprising results) – but it is always guaranteed that the car will fail the annual test.
Owners often fall into the trap of doing modifications on an almost spur-of-the-moment basis: when they see something new or different they decide to fit it, even though it may conflict with a previous change and necessitate removal of the earlier part, or its operation will be compromised. Clearly the ideal is to plan what you want from your car, and then look at how best to achieve that, so hopefully avoiding the pitfalls of incompatible changes – and when the plan is formatted, stick to it! It is also important to look closely at what you want to change, to ensure that when faced with several suppliers of a similar product you get the best value/effect for your money (air filters come to mind here).
The modified car’s intended use should be a guide as to the type of modifications chosen. Clearly there is a huge difference between the changes needed to make a car an effective and pleasurable road machine as compared to producing a track-day special; and while sophisticated modern engine management systems can make even the more highly strung engines road drivable, the car will not usually be ideal for daily use. Once again this focuses on the advanced planning that is needed to ensure you get the spec right for the car’s intended use, and with it the best and most cost-effective performance.
Today it is very easy to tune to frankly ridiculous power and torque levels using forced induction. Whilst many will be really tempted to do this, some of the best modified cars I have ever experienced are not the most powerful, nor those with the biggest engines, but the ones that have been carefully crafted and developed for a specific area of use. They are characterized by a range of well-balanced changes that work together, and not against each other, resulting in a car that is greater than the sum of its parts.
SECURITY
It is an unfortunate aspect of our times that I have to mention security so early in this book, but the reality is that car crime is well established, and in many areas quite sophisticated (films such as Gone in Sixty Seconds do represent a degree of realism).
Car crime is much more than so-called ‘joy riding’, so it is perhaps fortunate that if a car is low in value this tends to reduce its attractiveness to the criminal – excepting modified cars, as mentioned above. Standard security on the MGF and TF differs between cars made before June 2003 and those made after. The earlier cars have a Lucas 5AS security system that provides an alarm and engine immobilization, with what is known in the UK as Thatcham Category 2 accreditation (just immobilization); the newer cars have the Pektron SCU (security control unit) system that gives a greater degree of alarm and immobilization, so it achieves the higher Thatcham Category 1 accreditation.
These systems are generally effective, although the protection level of the Lucas system is certainly lower than that of the SCU – but the SCU is far more than an alarm controller, and covers most of a car’s other electrical functions, aside from engine management. Unfortunately it has generated a poor reputation for reliability, and too often suffers from on-board relay failures, and sometimes other circuit-board component failure too. One positive to be had from this situation is that with so many cars with problems, a cottage industry has developed to provide economic repairs – so when dealing with an SCU problem, Google ‘MG Rover SCU repairs’ for a selection of people who can offer a good, cost-effective service.
Additional security may be appropriate for some cars, and is sometimes required by insurers before they accept theft cover. This can certainly give added reassurance to owners and provide an extra deterrent to thieves. For example, GPS tracking is a most effective back-up system to help recover your stolen car quickly, while a professional twenty-four-hour security monitor will sound an alarm should there be any unauthorized movement of the car; this will be responded to immediately, and hopefully the thieves will be caught even before they have managed to remove the car, or before they have got far.
MGF and TF have different specs of electronic security, but both mount the ECU control in the same place, behind the centre console, as indicated here.
Highly visible security measures may be advisable to thwart criminal attack: this wheel clamp was very effective in securing the author’s frequently targeted MG Maestro Turbo. Modified MGF/TFs will be more attractive, so this sort of approach may be prudent.
There are many security products on the market, but before buying it is always advisable to speak with your insurers, and possibly your local Police Crime Prevention Department. Some insurers will actually stipulate certain types of security equipment before they will accept any risk of theft of the car itself, or of property from inside it, and usually they will have a long list of approved products that will have to be professionally installed to obtain the required certification.
Probably the best security advice is to try and avoid leaving the car unattended in any obviously vulnerable position, and to take reasonable precautions to reduce the attractiveness of either the car or its contents. Then, of course, wherever the car is normally parked, consider what additional security can be added around it, such as security lighting, a gated drive, the addition of anti-ram raid posts, or using a wheel clamp.
SAFETY CONSIDERATIONS
It is appropriate to consider safety before discussing any work procedures on cars, in order for everyone to benefit safely from the suggestions and to enjoy their cars. Many jobs will involve raising and working under a vehicle, and for some readers this may well be their first project. So before commencing any work on your car consider the following points:
• Buy a copy of the car’s workshop manual and read the sections relevant to the areas you are going to work on before touching the car. Knowing the measures you will need to take will help you tackle the job safely and efficiently
• Electrical safety demands careful consideration, with the logical step of disconnecting the battery, earth lead first, before any electrical work is commenced. (When reconnecting a battery it is always earth lead last.) Also note the radio code and the method to input this. On Lucas 5AS cars check the ignition key operates central locking when used in the driver’s door external lock so you can remobilize the security system following battery reconnection
A safety pre-requisite for any electrical work is to disconnect the battery. Furthermore it is advisable to leave the car for fifteen minutes before starting any airbag system work.
• The MGF and TF are equipped with explosive airbags and seatbelt pre-tensioners, so before starting work on these you must disconnect the battery and wait for at least fifteen minutes to allow any residual current in the system to dissipate before disconnecting or removing them. When working on or removing these items, treat them with respect. Think of them as a wasp: annoy a wasp and it stings, annoy an airbag and it goes off and can cause serious injury!
When preparing to work on any car the wheels should always be chocked, with solid blocks if purpose-made chocks – as shown here – are not available.
• Before raising your car, always park on level ground with a solid material base, such as concrete or blockwork, and set the handbrake. Chock the wheels that are not being raised to prevent the car moving, especially if raising the rear, which would make the handbrake ineffective
• Tarmac drives can be hard enough where the tarmac used is good quality, but home driveway tarmac will often not be able to support spot loads from jack or axle stand feet and will sink, especially in hot weather. In this case you will need to use some load-spreading ‘pads’, such as pieces of 12mm or 19mm thick plywood sheet
• It is useful to have a full size (generally 8 × 4ft) sheet of plywood: you can drive the car on to it and it will provide a firm base beneath it. Good quality, waterproofed builder’s plywood lasts very well and can give years of good service
• Always place the jack under a ‘hard point’ on the car’s under-structure. These generally include subframes, jacking points and chassis sections
Axle stands make a superb, secure and safe support for a raised car, but only when they sit on a solid surface, such as the patterned concrete drive in this photo. Always place the stand under a solid part of the car, such as the subframe, as shown here.
An alternative ‘hard point’ that can be used to jack or place an axle stand on an MGF or a TF is under the sill jacking point; here this method has allowed the rear of the car to be raised sufficiently to remove and refit the whole subframe/engine/gearbox assembly.
• The positioning of axle stands follows the same general rule of fitting under any ‘hard point’ of the car. Ensure that the stand’s saddle (the top of the stand that has the car resting on it) is in a position where it can’t slip, and when placing stands under the car, do it one at a time with an outstretched arm, and don’t be tempted to crawl under the car taking both stands with you to save time. Place one stand under one side, then walk round to the other side and place the other under the car; then lower the jack slowly, watching how the car and stand saddles engage with each other, stopping and adjusting the stand position if the stands are seen to tilt or ‘lift a foot’, to ensure a solid contact and safe support
Place the jack under a solid structural part of the underside of the car where the jack saddle can’t slip.
• Also remember when lifting a car that it is better to lift and then adjust the height of each stand in small increments, rather than going for a full lift in one go. This is especially valid when using four stands to lift a car fully off the ground, as once one end is raised and on stands, and you start to jack up the other end, it is normal to find that as you raise the car the jack pulls on it, and one foot of the stands already placed may start to lift. It is a simple matter to readjust stands as needed, which is why it is safer to raise and lower the jack in small incremental stages, rather than doing the whole lift in one go
• The positioning of the tyres on the ramps is fairly obvious, but nevertheless it is important to ensure that the tyre is centralized, fully on the top of the ramp, and, if appropriate, in contact against the raised stop bar
One further non-safety related consideration is that if you are working on an expensively laid drive, then not only does the use of plywood spread the load and make a safer lift, it also partially insulates the driveway from damage and from any leaking fluids.
Driveway preservation can be taken a stage further by placing a large section of builder’s plastic sheeting on the drive under the plywood before you start work: this will catch all the debris and make cleaning up simple and easy when you have finished. If you are planning to rust proof the car (recommended for the subframes especially) and to treat the underside with anti-rust treatment, then buy a sheet big enough to have at least a two-foot overlap beyond the edges of the car all around.
Personal Protection
Once the car is raised sufficiently to give you good access underneath, it is time to look at your personal protection; depending on the nature of the work, this will mean goggles, and usually gloves, and at times ear plugs (those who have experienced a bit of debris drop in their ears when crawling under a car will really appreciate.) There is of course a limit to where you will be able to access, but for most anticipated jobs this will be good enough.
It is very important to take precaution against the possibility of fire: here the main cause will be from fuel leaks. I always have at least two currently in-date fire extinguishers to hand in the garage. When working on a car’s fuel system, or if any part of the fuel system is exposed, then ideally do the work outside, which provides the best ventilation possible, or ventilate the garage as well as you can, and don’t have any exposed heating element on, which could be a source of ignition.
It is also logical to say don’t smoke anywhere near the car or garage – but it is remarkable how many drivers pull in at a petrol station puffing away at a cigarette, and then look affronted when the station staff shout at them over the PA system. So heed this warning!
Here the axle-stand saddle sits under the rear subframe just forward of the rear cross-brace.
Having an in-date working fire extinguisher to hand is something we would hope is never needed, but if it were, then its presence is so much more valuable than its modest cost.
ADDITIONAL CONSIDERATIONS
As mentioned earlier, in the MGF and TF Lucas 5AS alarm systems the synchronization between the fobs and the car will be lost as soon as the battery is disconnected on the car or fob, so owners need to know how to resynchronize the fobs to the car. This also means confirming that operating the key in the driver’s door actually works the central locking of the passenger door before disconnecting the battery, otherwise the owner will have no way of ‘opening the electronic door’ to re-synchronize the fobs, and will have to get professional diagnostic help. As regards radio codes, not all cars had these, mainly the early cars, and those cars still with these will usually have the code to hand; however, many cars have had replacement systems with no codes.
Some of these vehicles will be equipped with air conditioning, and if work involves dismantling any part of these systems, the responsible approach to depressurizing them and recovering the refrigerant would be to use the appropriate servicing equipment. In this case plan ahead and have the system evacuated whilst you can still drive the car to the local garage with the equipment, or get a mobile agent to visit.
Fluids and other hazardous substances or parts that have been removed from the vehicle – such as oils, batteries or tyres – should be disposed of responsibly: take them to the collection points at local authority recycling centres, even though there may be a charge for this service.
Finally, let it be said that adopting a safe approach will not inhibit work on the car: it will ensure that the chances of accident are minimized, and will allow you to enjoy to the full the whole process of working on your car.
2
body and interior changes
This section discusses everyday modifications for your MGF and MG TF. It covers a wide variety of potential changes, from full body kit to fluffy mice swinging from the interior mirror – which reminds me to mention that if a car is to be stored for long periods, precautions should be taken against real mice getting in, as they usually cause huge damage.
The MGF standard grille to the front and side air vents is simply painted black steel mesh.
Personalizing a car is very much dictated by individual taste, but many owners do wish to give their cars a personal touch; Rover, and then MG Rover, recognized this and offered a wide range of options for the original car buyer, and post registration accessories for all owners.
COSMETIC ENHANCEMENTS
The optional factory MGF bright mesh kit covers the upper and lower front bumper apertures (plus side vents); it is a woven stainless-steel mesh.
The finished look is significantly improved.
The TF bright-finish mesh has a different pattern and is only fitted in the front lower air intake (lower grille), side vents and rear bumper.
The TF front bumper with the bright grille.
Factory options and accessories were all relatively simple, often using bright finish parts to replace plain painted ones, and higher quality trim materials, leaving the more radical changes directly in the hands of individual owners. Even so, the factory range of options and accessories was always sought after. One of the most popular included a ‘Chrome Pack’ for early cars that evolved into the ‘Bright Kit’ for later cars: it offered an attractive stainless-steel grille mesh material that replaced the standard car’s somewhat plain, black-painted mesh fitted in the bumper air intakes, the two side air intakes and a rear bumper mesh (only on the TF). The later Bright Kit also included bright-finish (chrome-effect plastic) door handles, plus a stainless-steel ashtray (actually from the Jaguar XJS), a matching bright-finish metal cigar lighter, and – perhaps surprisingly – a bright-finish handbrake button.
Pre-2000 cars often had adhesive-backed imitation wood or a silver-finish centre console and air-vent adhesive cover trims; in fact these were not as unattractive as they sound, at least not until they were a few years of age, or had been exposed to the sun. You can still find companies that specialize in making and selling these for a wide variety of cars, including MGFs and TFs – though in my personal opinion the factory options for the 2000 model-year on MGFs and all TFs are better. This is because the whole panel moulding has the various finishes integral to the surface finish and not as an added moulding – but note that this finish didn’t extend to air vents.
The Mk1 MGF often had stick-on imitation wood for the centre console and air vents – which actually is not as unattractive as it sounds.
Updating Early Models with Later Parts
The Mk2 MGF centre console featured a solid centre console which, whilst not wood, was more integrated than the stick-on trim of earlier models.
The introduction of the 2000 model-year MGFs led to a surge of earlier car owners wishing to update to the later look using later parts. This is certainly possible, although the demand for this has very significantly dropped off, and more recently there is a move back towards original specifications. Whilst not all parts, especially trim, are available new, good second-hand stocks of parts are widely available, both new and from MGF and TF breakers, the latter reflecting a continuing unhealthy rate of cars being broken up.
If you take your car to pieces and there will be a long period before it goes back together, then I suggest that you take many images from different angles of the various parts, and how they fitted for future reference. In addition I suggest bagging up parts from different areas separately so that in the future there is less chance of any mix-up.
The arrival of interior colour options to supplement the standard dark grey significantly lifted the ambience of the inside.
Standard door trims used a silver-finish waist rail that was the same finish as the centre console.
A popular option was the wood-effect finish waist rails that went well with the wood-effect centre console seen opposite, bottom left.
Changing the waist rail is simplicity itself, as once the door card is removed from the door there are just six star binders, four bent clips and one stud and nut.
Once the rear fixings are removed, the centre trim panel and waist rail can be removed and replaced easily.
Fitting Switches
Updating a Mk1 MGF centre console face from this format involves some detail work on the wiring plugs of switches.
The centre console face removed, showing what lies behind. The face of the heater control conversion must be changed as well as the control knobs.
This 1998 MGF is sporting a 2005 model look and controls.
Some later parts require more than just a simple ‘remove from the donor car and fit straight to yours’, the centre console and specifically the switches being amongst these. Usefully the window lift switches can stay, as they fit the later console, and that is a bonus. The other switches sitting between the two window lift switches are a different shape, so have to be changed. Pre-2000 and post-2000 switch plugs at the end of the wiring appear to be the same, but are not. For example, the early and late type HRW and rear fog-lamp switches have the same basic pattern of plug, but each has a specific keyway moulding to ensure it fits only the ‘correct’ switch. The keyway is a simple plastic moulded protrusion in the switch moulding, and a corresponding groove in the wiring plug that allows only matching switch and plug to engage.
The oddity is that the keyway for the fog and HRW switches is swapped between the early and late cars so you can fit the late HRW switch to the early rear fog-lamp plug, and vice versa. Obviously the switch face will be wrong, but this means nothing, since the switches are physically different in operation: the fog lamp switch is a latch-type click-on, and it latches in the on position until pressed again to unlatch it, whereas the HRW switch doesn’t latch, but is just a spring-return type. The simple solution is that the switches can be modified by having the plastic keyways carefully cut off with a sharp blade so they can be fitted in the correct wiring plug for normal operation.
Alternatively, and my preferred choice, is to note the individual wire colour codes and positions in the plug, then carefully remove them and fit them in the other plug: this means that everything remains factory spec. The electrical pins can be removed relatively easily with the right tool, or with a small, opened-up split pin in lieu of the tool, and this can be applied to the optional front fog lamp and air-con switch plugs as well, if they are fitted.
Hard Trim Updates
The Mk1 MGF door trims are quite plain, as can be seen here.
The Mk2 MGF and TF door cards – two of many options.
Standard 2000 model-year on the door card; the focus here is the standard oval interior door handle – compare with the image below, with the modified ZT handle fitted.
Model-year 2000 on the door card of a 1997 MGF, where the door handle was changed to a modified ZT handle.
The 2000MY door-card design has also been a common change as it has a little more ‘bling’ about its look due to the oval interior door handle, the flowing shape of the trim rail, and the use of leather or other contrasting trim in the door centre. Finally the later card also carries the facility for additional tweeter speakers that were fitted to all 2000 model-year and later cars, except MGF 1.6 and TF 115, although many owners opted to have them fitted – and they can be easily retrofitted for those cars without.
Indeed, some owners have taken the similar sized and shaped oval door handle and bright finish surround from the MG ZT, and modified these to fit to the later door cards for an even plusher look. The ZT ones have a curved handle against the angular original, and the bright finish of both adds a classy look. Fitting requires a minor degree of modification, meaning the end result can have a variable finish depending on the skill and effort of the converter.
Grenadine (deep red) interior colourway.MG ROVER
Light Smokestone (light grey) interior colourway.MG ROVER
Tan interior colourway.MG ROVER
As most cars came with the dark grey ‘Ash’ colourway (the moulded plastic facia and associated plastic interior trim), the interior can often be a little dark; some owners have decided to change this by taking advantage of interiors removed from later cars that have been broken for spares. The main alternative options are Tan, Grenadine (deep red) and Light Smokestone (light grey), with the latter being the most effective to lighten the interior. Specialists and owners have gone further in having their facias trimmed in leather or Alcantara, a man-made suede.
The Seats
Attention next moves to the seats. It has to be said that the original cloth seat materials on the standard MGF were a little plain, and this was only slightly improved on the VVC with the standard addition of black leather bolters (outer sections). Overall this, and the Ash Grey coloured plastics for the hard trim, did make for a rather dark interior, which was why the Abingdon LE model was so popular when it arrived in 1998 with light-coloured full leather seats, and why, when its production run finished, so many cars were built using its interior (over 10,000, actually).
Alternative seats need to be of a type that are approved for taking seatbelt loads, as the belt anchors on the seat frame.
Changing the seats for a pair from another MGF or TF of any year is quite simple, but do remember to take heed of the needs for specific operating procedures that must be adopted when working with any part of the SRS (airbag) system, which in this case includes seatbelt pre-tensioners attached to the seats (seeChapter 1 ‘Safety Considerations’).
One of the early comments levelled at the MGF was that when you are in the car you tend to sit ‘on’, rather than ‘in’ the car. At the 2000 model-year facelift the seats changed and you sat slightly lower as a result. For the earlier MGFs, and indeed for later cars if desired, around 25mm (1in) additional seat lowering can be achieved by fitting springs that allow the seat cushions to sink further, yet still allow the seat to retain the standard look and stance when it is not occupied.
Carpets
With the seats removed there is almost total access to the carpet, and aside from ‘historical’ finds such as old receipts and a few coins, there is the opportunity to fully remove it once the centre console is also removed. This allows the underlying insulation to be checked to see how wet it is, as some rainwater always gets past the various seals. The fact that there is some dampness or wetness will come as a shock for most owners, but it then gives focus to the common sources of rainwater leaks that often are present only when the car is parked. Critically, now is the time to take the opportunity to dry carpets and insulation out before refitting them. This is also the obvious time to do an internal spring clean on the car and carpets – or simply change the carpets if the original ones are in poor condition or you fancy a change.
Changing the seats provides a good opportunity to ‘spring clean’ and collect dropped coins. Early carpets are thinner and of poorer quality than later ones and most aftermarket replacements.
The original carpet as seen in the MGF opposite is here replaced with one from a late TF.
Up until mid-2003 the one shot down driver’s window control was located to the right of the driver’s foot behind the carpet.
Earlier carpets had a recess in the foam backing, but if you use a later carpet in an earlier car you will have to make this cut-out.
There is a definite advantage in using good condition later TF carpet on earlier cars, subject to what is available, but the quality and fit of the later carpet is better. The later carpet also comes as a single piece, whilst earlier TF and all MGF carpets come as separate carpets for the driver’s and the passenger sides, so to fit a later carpet in an earlier car does ideally demand the removal of the centre console, although it could be cut into two sides and treated like the original. As time goes by the availability of good secondhand carpets from late cars being broken for spares diminishes, so the focus will move towards specialist trimmer’s carpet kits. The quality and the accuracy of the fit varies, so check it out before buying.
One specific issue that applies when fitting a later carpet to a car with a VIN lower than RD620549 (pre SCU) is that the carpet’s backing foam in the driver footwell has to be cut out, as the later cars did not have the separate window lift controller mounted there. These later cars had this function taken over by the SCU. The modification is easy: using the original carpet as a template makes simple work of marking the foam that needs to be cut out with a sharp craft knife.
Steering Wheel
Lastly in this area are options relating to steering wheel, instruments and heater controls. Many base model cars came with a soft touch plastic steering wheel that is actually better than it sounds – but it falls short of the quality feel of leather. Fortunately there are very many original MG leather wheel options, and even if the wheel has been handled for very many years and multi thousands of miles, it is an item that is easily professionally re-trimmed if cleaning and feeding the leather fails to bring it to the required level. Fitting an aftermarket steering wheel creates MOT test difficulties if the original airbag can’t be used, which is the case on every non-original wheel I have seen, so I see non-original wheels for track use only.
Instruments
This new instrument pack was introduced in 2008 in the MG Motor-revived TF.
Instruments are a little more difficult to deal with, because whilst earlier cream-finished packs on the pre-2000 model-year cars can be replaced by the brighter finished 2000 model-year versions, there are some differences in function and wiring. Not least of these is the change from mechanical speedo cable drive to electronic sensed operation, and with that come different connections. With the right degree of commitment almost anything is possible, but this is one area where perhaps changing the face of the original instrument pack with one of the custom aftermarket options is the simpler route. For added bling you can also buy chrome or stainless trim rings that surround each of the four separate dials within the main instrument pack.
A more recent instrument pack change option has been the use of the pack fitted to all of the MG Motor TFs, which has a very different look to that of any preceding pack. Whilst fitting it is a simple plug and play with the last MG Rover TFs, it becomes more difficult, and even impractical, for older cars. More detail on this change – or not, as is usually the case – is found later in Chapter 6.
Heater Controls
A selection of standard Mk2 MGF and TF heater control knobs; all are plastic.
Many alternative aftermarket heater-control knobs can be found, usually in alloy as here, but with a variety of different designs.
Heater controls have seen several changes to the face and control knobs. All factory knobs were plastic, and there are different lengths to the main shaft, shorter on cars up to the 2000 model-year, and longer for the later cars and TF. The actual heater controls behind these are the same, but the early cars had the heater panel slightly sunken; in 2000 model-year cars and later the panel was spaced outwards, giving a smoother look, and of course the reason for the longer main shaft. Obviously for this reason you can’t use early pattern knobs on a later heater facia, and vice versa, but then, not many would want to, and would prefer to use some of the quality polished alloy aftermarket items that add a quality touch.
EXTERIOR CHANGES
Since the car’s exterior experiences a significantly more hostile environment to the interior, any changes outside must be very robust in order to survive. Most owners will generally only commit to smaller changes, though a few will go for major changes that involve complete panel replacement and other additions that come with complete body kits. Whilst one of the main attractions of moving into an MGF or a TF is the simple fact that it is already a very individual car, it has to be said that significantly changing the style of a car by adding a body kit generally reduces the car’s value – but since values are already low at the time of writing, this may not be a major issue. Even so, whilst this may not be a consideration for some, remember that beauty is in the eye of the beholder, and that future resale may not be possible.
Front Spoilers
Smaller changes can be easily reversed if needs be, but a few changes have a wider appreciation – for example front splitters/spoilers, which are functional as well as cosmetic. MGFs and TFs have little frontal weight, and the car’s aerodynamics do generate some front lift during driving over about 50mph (80km/h), which can reduce stability, especially in crosswinds. (See text box ‘Aerodynamic Effects’ for a general description of MGF and TF aerodynamics and the effects of body changes.)
The first MGF factory front splitter was seen on the Trophy 160SE; being a different colour, as here, the additional panel can be seen clearly.
The splitter seen in the illustration above now painted body colour and fitted.
When introducing the MGF Trophy 160 SE model, MG Rover recognized the aerodynamic shortcomings of the MGF and added an integral front spoiler moulding: this is attached to the lower part of the front bumper panel, and aims to reduce some air from passing under the car. The Trophy splitter, as it is known, does offer a small aerodynamic advantage, but to ensure that it wasn’t vulnerable to being damaged by contact with low kerbs, its profile was very modest, so the cosmetic benefits outweighed the aerodynamic benefits. Reducing the volume of air passing under the front of the car is further reduced in the Trophy 160 SE with its 20mm lower stance, which increases with further lowering. (SeeChapter 3 for more detail.)
Many aftermarket copies of the plastic moulded Trophy splitter have been made, but note here that fibreglass demands a thicker profile if it is to have adequate strength. This can be seen in a bigger lip where the splitter top edge joins the front panel.
The Trophy splitter limitations do not apply to what is known as the Krafthaus or KH front splitter, now widely copied, which has a three-point fixing to the underside of the front bumper panel. This has a much stronger aerodynamic effect, but is seriously vulnerable to careless parking, and many owners will be on their second or third splitter, especially on lowered cars. When this happens owners are often keen to fit another to regain the advantages as soon as possible, which illustrates how effective this splitter is in providing greater frontal stability.
Probably the most effective, if the most vulnerable, additional front splitter was the Krafthaus (KH) design. Just how vulnerable it is can be seen in the kerb damage just left of centre. This design has been widely copied.
A KH-design front splitter fitted and painted body colour.


