22,49 €
Mehr erfahren.
- Herausgeber: Crowood
- Kategorie: Lebensstil
- Sprache: Englisch
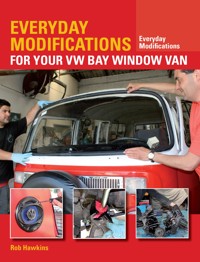
The books in the Everyday Modifications series from Crowood are designed to guide classic van and car owners through the workshop skills needed to make their vehicles easier to use and enjoy. Camper van enthusiast Rob Hawkins gives practical advice on modernizing and improving a VW Bay Window camper van. With over 700 colour photographs, the book provides step-by-step guides on how to fit a wide range of simple and more sophisicated upgrades to bring a Bay Window into the 21st century. With safety information throughout, the book covers: upgrading the interior - front bench seats, trimming panels, LED lighting, sound proofing and fitting a budget sound system; improving the ride quality - how to improve the suspension, change dampers, assess wheels and tyres and fit uprated anti-roll bars; better brakes - Bay Window brakes can be as good as a modern vehicle's, and this book shows how to do it. Also covered is information on updating the electrics, engine preservation and upgrades including removing and rebuilding an engine.
Das E-Book können Sie in Legimi-Apps oder einer beliebigen App lesen, die das folgende Format unterstützen:
Veröffentlichungsjahr: 2015
Ähnliche


EVERYDAY MODIFICATIONS FOR YOUR VW BAY WINDOW VAN
How to Make Your Classic Van Easier to Live With and Enjoy
Rob Hawkins
THE CROWOOD PRESS
First published in 2015 by
The Crowood Press Ltd
Ramsbury, Marlborough
Wiltshire SN8 2HR
www.crowood.com
This e-book first published in 2015
© Rob Hawkins 2015
All rights reserved. No part of this publication may be reproduced or transmitted in any form or by any means, electronic or mechanical, including photocopy, recording, or any information storage and retrieval system, without permission in writing from the publishers.
British Library Cataloguing-in-Publication Data
A catalogue record for this book is available from the British Library.
ISBN 978 1 84797 914 8
Disclaimer
Safety is of the utmost importance in every aspect of an automotive workshop. The practical procedures and the tools and equipment used in automotive workshops are potentially dangerous. Tools should be used in strict accordance with the manufacturer’s recommended procedures and current health and safety regulations. The author and publisher cannot accept responsibility for any accident or injury caused by following the advice given in this book.
Photography by and © Rob Hawkins.
Acknowledgements
Rob Hawkins would like to thank Herbie Hospital of Leeds, Leon Niemczyk, Dubtricks of Harrogate and Dave Bogg of Bogg Bros in North Yorkshire for their help and expertise in fitting parts and showing how to modify a VW Bay Window. He would also like to thank everyone mentioned in this book who has supplied parts, including VW Heritage, Vee Wee (GSF), Firetrace, SaveMyBug, Just Kampers and H&H Ignition Solutions.
contents
1
Safety and Security
2
Interior Upgrades
3
A Better Ride
4
Better Brakes
5
Noise Reduction
6
Updating the Electrics
7
Engine Preservation
8
Engine Upgrades
9
Other Accessories
Useful Contacts
Index
1
safety and security
Safety precautions
Common disasters
Firefighting and prevention
How to fit an automatic fire extinguisher
How to renew fuel lines and fit a new fuel tank
How to fit a battery cut-off switch
How to fit a battery quick-release clamp
Security options
Before contemplating a long list of desirable improvements for a Bay Window camper van, a sensible and worthwhile starting point is to reduce the risk of it catching fire, to make sure it is in good working order and to ensure that it is difficult to steal. This chapter deals with these issues and many more that most of us do not want to consider, but regret not paying attention to when a disaster occurs.
SAFETY PRECAUTIONS
This book provides many step-by-step guides that show how to modify a Bay Window camper van using tools which can be dangerous if they are operated incorrectly. For example, an electric drill can slip and slice through skin, or the panels of your camper van. Sparks from an angle grinder can set fire to upholstery, damage glass or injure your eyes if you do not wear protective goggles. Nuts and bolts that are not fully tightened can loosen and result in an accident, such as a road wheel that falls off.
When following the instructions in this book, be aware of the safety aspects of the work involved and do not rush any of the tasks that are outlined. If you are at all unsure about any of the information covered, seek further advice before proceeding.
Always wear suitable goggles and gloves when using an angle grinder for protection against hot sparks and debris.
Some of the tools covered in this book require protective clothing to be worn and parts of the camper van may also need to be protected. For instance, when using an angle grinder, metal sparks and debris will fly in all directions, so make sure you are wearing a suitable pair of goggles, thick gloves and that most of your body is covered in clothing to avoid being burnt by the hot sparks. Grinding sparks can also damage the camper van, especially glass and upholstery, so protect it with thick blankets or cardboard.
If you need to weld, the same rules apply to using an angle grinder, except that you will need a suitable welding mask to avoid damaging your eyes – and also make sure there is nobody nearby who could look at the light created when welding and potentially damage their eyesight.
When using an electric drill, wear goggles to avoid debris from the drill hitting your eyes. Always use the correct drill bits for the job and do not forget they can get hot after drilling.
You may not think there are any potential dangers from drilling a hole, but metal particles can easily fly into your eyes, so always wear goggles.
Do not take shortcuts when working on your camper van. It may save time, but accidents can be fatal. The cause of many accidents is careless use of the trolley jack when raising the camper van to remove a road wheel or to work underneath it. First, make sure the vehicle is on level ground and that at least one of the wheels which will remain on the floor is chocked with a block of wood or a brick. If one of the rear wheels remains on the floor, apply the handbrake and select first gear (applies to manual gearboxes).
When raising the vehicle with a trolley jack or similar device (bottle jack or scissor jack for instance), position it under a jacking point or chassis leg, but make sure this area is solid and not heavily corroded. If the area is infested with corrosion, the jack could collapse if the metalwork breaks up when supporting the weight of the vehicle. So always check the condition of the jacking point first.
Always support the vehicle when it is raised with at least one axle stand.
Once the vehicle has been raised with a jack, do not proceed until it is supported by at least one axle stand positioned underneath a chassis leg or similar part of the vehicle. This is very important and whilst it takes a minute or two more to find a suitable position for the axle stand, it can save your life. Never rely upon a jack to support a vehicle; it could slip or drop and cause severe injury.
Another equally important safety aspect concerns the tightening of nuts and bolts, especially those for the road wheels, suspension components and brakes, which must be correctly tightened to avoid accidents. It is worthwhile purchasing a torque wrench to tighten nuts and bolts, for the reassurance that critical parts have been correctly secured.
Use a torque wrench to tighten safety-critical nuts and bolts.
COMMON DISASTERS
A number of problems can arise with a classic Bay Window camper van, so the following section outlines many of the typical ones and explains why they occur. Details on how many of these problems can be avoided are covered later in this chapter.
If you are unsure whether an electrical component has been correctly fitted to your camper van, have it checked by a professional or remove it.
Dodgy electrics Poor-quality wiring and incorrectly fitted electrical components can at best blow a fuse, but at worst cause a fire. If you are at all unsure about whether the wiring for a switch or electrical component is safe, have it checked or remove it.
Old wires can break down, resulting in electrical problems, short circuits and blown fuses. Renewing old wires is the safest solution.
Old wiring The metal inside vehicle wiring (usually copper) breaks down over time and eventually stops conducting electricity. When this happens, the best solution is to replace the wires. If a full rewire sounds terrifying, try replacing wiring in small sections.
If a switch or electrical component becomes unreliable, it may be safer to renew it. Faulty components can cause fires.
Faulty components Old – and even new – switches, relays and other components can fail (cheap is not always best), causing electrical faults and fires. If a switch becomes unreliable or hot, check the wiring to it and renew the component.
The main fuse box on a VW Bay Window camper van is located underneath the left side of the dashboard.
Blown fuses A blown fuse can sometimes be an indication that there is a problem, such as a faulty component that is drawing too much current, a bad earth or a faulty switch, especially if the fuse needs changing regularly. Do not ignore such a problem.
Leaking petrol is one of the main causes of fires in a camper van. This is covered in depth later in this chapter.
Petrol leaks This is the number one cause of fires in a Bay Window camper van and is covered in depth in this chapter. Routinely check all fuel pipes and if you can smell petrol, do not ignore it – find the problem and fix it.
Check all pipework and connections for gas appliances such as fridges, heaters and cookers.
Gas leaks Butane and other types of gas are used for cooking, heating and running a fridge. Stored in a pressurized canister or bottle, leaks can occur if pipework and connections are not checked and renewed at recommended intervals.
Install a battery-operated carbon-monoxide detector to ensure that waste gases are not building up inside the camper van.
Carbon monoxide The gas that is burnt by a cooker, fridge or heater creates carbon monoxide. This is often just a small amount, but fridges and heaters, for instance, must have a flue to the outside. Hobs and grills are not normally ventilated, so leave a window open when using them and install a carbon-monoxide detector.
Unwanted water inside the camper van can cause problems with electrics, resulting in blown fuses and fires.
Water leaks Rainwater and any liquids that escape from a freshwater system and sink can create havoc with electrics. Frequently inspect the camper van for signs of unwanted water and if you find any, try to locate the source so as to be able to fix the problem.
Small unsecured objects inside a camper van can turn into dangerous missiles that hurt in the event of an emergency stop.
Flying objects Gas bottles, cutlery, crockery and food can all turn into dangerous missiles if they are unsecured inside a camper van. Make sure that everything is secure and do not assume a lightweight object such as a torch will not hurt if it becomes airborne.
Old material for sound-deadening and upholstery can be highly flammable, so renew it for modern non-flammable products.
Flammable material Old sound-deadening material, curtains, polystyrene and similar flammable material should be removed from the camper van and replaced wherever possible with non-flammable items. This is covered in Chapter 5.
FIREFIGHTING AND PREVENTION
Fire is one of the biggest problems associated with VW Bay Window camper vans. These classic vans have a number of attributes that make them susceptible to catching fire, such as old wiring and electrical components that can short-circuit. The fuel pipes and fuel pump are very close to the air-cooled engine, which can become a source for maintaining a fire. The fuel tank is located in front of the engine, so it can drip-feed petrol on to a fire and keep it alive. Similarly, old sound-deadening material and other soft furnishings can add fuel to a fire. Finally, the assortment of catering equipment, such as gas bottles, cookers and oil, can all cause a fire and keep it going.
So with such a vast assortment of potential fire threats on board, it is worthwhile having an equally wide range of firefighting equipment fitted. These should include the following:
Battery-operated household smoke detectors are cheap to buy and simple to install inside a camper van.
Smoke detectors A battery-operated household smoke detector should be installed in the main living area of the camper van and can also be installed inside the engine bay. This can alert you to the first signs of smoke, although it may be activated when cooking. Most smoke detectors should be positioned in the roof of the vehicle or in the engine bay.
A carbon-monoxide meter should be installed in a camper van to help detect excessive poisonous gases from cooking, heating and a gas-operated fridge.
CO meter A carbon monoxide meter is essential for detecting the poisonous gases generated from a cooker, heater or gas-operated fridge. If the level of carbon monoxide is too high, it can kill the occupants of the camper van, especially if they are asleep. A household CO meter can be used in most cases and is usually battery-operated.
Make sure that a fire blanket can easily be reached and used. Do not hide it away in a cupboard.
Fire blanket A fire blanket can starve a fire of oxygen by being placed over the flames. This is useful for frying-pan fires, but make sure that the blanket is positioned within easy reach of an open door, so that it can be opened quickly without having to reach over a fire.
A handheld fire extinguisher is useful for small fires, but do not count on it to extinguish an engine fire.
Handheld fire extinguisher Even a 1.5–2kg fire extinguisher will probably not put out an engine fire that has been ablaze for a few minutes, but they are useful for small cooking fires. Make sure that such an extinguisher is easy to reach and check the pressure level frequently.
Eliminate the risks of a fire, such as switching off the vehicle’s electrics before leaving it.
Switch off the electrics Sparks and petrol fumes can set an engine ablaze, so eliminate the risks whenever possible. When you leave the vehicle, switch off the electrics if they are not required and fit a battery cutoff switch to ensure that nothing inside the vehicle is live. A full guide on fitting a battery cut-off switch is outlined later in this chapter.
WORKSHOP: HOW TO FIT AN AUTOMATIC FIRE EXTINGUISHER
One of the best methods of catching and extinguishing a fire before it takes hold is to fit an automatic fire extinguisher. This is a particularly popular fitment in the engine bay where fuel leaks, dodgy electrics and other potential fire hazards can exist.
Automatic fire extinguishers are usually triggered by heat, and will spray foam, powder or a gas help to starve the fire of oxygen. The automatic fire extinguisher system shown in the accompanying photographs is manufactured by Firetrace in the UK (www.firetrace.co.uk, 01473 744090) and consists of a dry-powder-filled fire extinguisher and long pipe. The pipe is secured to the roof of the engine bay, across the back of the engine, over the battery and above the fuel pump and carburettor. In the event of a fire, the heat will melt the pipe and activate the fire extinguisher. The dry powder will escape from the part of the pipe that has melted, helping to direct it at the location of the fire.
There are more basic automatic fire extinguishers, which do not have any pipework. Instead, they operate in a similar manner to a traditional fire extinguisher with a nozzle, allowing powder or foam to be dispersed in a small area.
The following steps provide a general guide for fitting an automatic fire extinguisher, with details on how to mount the extinguisher and pipework.
Tools
Cable ties and wire cutters
Electric drill with drill bits
Plastic P-clips as an alternative to cable ties
Spanners and screwdrivers
Time required: two hours
On your own: yes
Difficulty rating: 2/5
Fitting an Automatic Fire Extinguisher
1 Decide upon a suitable location for the fire extinguisher. Most need to be fitted vertically, or at no more than 45 degrees.
1 Decide where the fire extinguisher can be securely mounted. In most cases, this is inside the engine bay, towards the side. The extinguisher usually needs to be mounted vertically, or at no more than a 45-degree angle from vertical.
2 If the fire extinguisher’s cage cannot be fitted directly on to a panel inside the engine bay, a mounting bar and L-shaped brackets can be used.
2 If the cage for the extinguisher cannot be securely mounted inside the engine bay, then a mounting bar and two L-shaped brackets can be used to create a suitable structure to fix the cage and extinguisher in position.
3 Holes may need to be drilled to fit the L-shaped brackets for the mounting bar.
3 Secure the L-shaped brackets inside the engine bay using nuts and bolts. You may need to drill holes to mount these brackets, so check that you are not going to damage wires, pipes or other components.
4 One L-shaped bracket has been fitted here along with the mounting bar, helping to see where the second bracket needs to be fitted.
4 Once one of the L-shaped brackets has been fitted, attach the long mounting bar to it. This will help to measure where the second L-shaped bracket can be fitted. Make sure that the mounting bar is no more than 45 degrees from vertical.
5 The L-shaped brackets can be fitted using an existing mounting point. In some cases, longer bolts may be required.
5 The L-shaped brackets can be fitted on to existing mounting points. You may need to fit a longer bolt in such a case, especially if other components are fitted.
6 The fire extinguisher’s cage can now be secured on to the mounting bar using nuts and bolts with washers and spacers.
6 Once the mounting bar is securely fitted, take the cage off the fire extinguisher and fit it. The cage will have two mounting holes, so these can be used to secure it to the mounting bar with nuts and bolts.
7 Trial-fit the fire extinguisher to make sure that it can be held securely in the cage and that the pipe from it is straight at the join.
7 Trial-fit the fire extinguisher into the cage to make sure it can be secured. Check that the pipe at the top of it is not bent. The first few centimetres of the pipe need to be kept straight to avoid damaging the join.
8 When you are ready to fit the fire extinguisher and pipework permanently, feed the pipework in first.
8 If you are satisfied the fire extinguisher can be securely fitted into the cage, remove it, then feed the long pipe into the engine bay so that it loosely loops over the engine. Secure the fire extinguisher back into the cage.
9 Plastic conduit protects the pipe from being chafed by cable ties, which are used to secure the pipe to the roof of the engine bay.
9 The pipework can be secured to the roof of the engine bay using cable ties, so long as holes are available through which to thread the plastic ties. If this is possible, the parts of the pipe that will be cable-tied need to be protected with plastic conduit.
10 Plastic P-clips can be used to secure the pipe in position, but only if there is room for a screwdriver.
10 If you find it is not possible to cable-tie the pipework in position, then plastic P-clips can be used with self-tapping screws, or magnetically mounted P-clips (these are the most expensive type of fixing).
11 Fit the pipe from the extinguisher across the back of the engine, over the battery and over the fuel pump and carburettor.
11 Start by securing the pipework nearest the fire extinguisher to the roof of the engine bay, routing it over the back of the engine. Make sure that you can loop it round so that it is positioned over the fuel pump and carburettor.
12 Cut off any excess from the cable ties, making sure that there are no sharp edges which can scratch your skin.
12 When you have finished securing all of the pipework to the roof of the engine bay, cut the ends off the cable ties. This can result in sharp edges, so try to leave as little excess as possible and make a clean cut.
WORKSHOP: HOW TO RENEW FUEL LINES AND FIT A NEW FUEL TANK
One of the biggest fire risks of a VW Bay Window camper van concerns the flammable petrol that is used for the engine. This is stored in a steel fuel tank that sits in front of the engine bay and behind the rear seat squab. Old fuel tanks can corrode and leak, and the rubber pipework that feeds the fuel in and out can also perish and leak. If the petrol ignites, a fire can erupt. Similarly dangerous are petrol fumes, especially if you are sleeping inside the van.
Modern petrol now has a high level of bioethanol, which appears in some cases to be speeding up the process of eroding rubber fuel lines and blocking up carburettors (especially if a vehicle has not been used for several months). It also affects the amount of moisture inside the petrol tank, potentially increasing the risk of corrosion. Some specialists have discovered that the fuel lines and the fuel filler neck have perished and split within less than a decade of use. So, if you can smell petrol, it is worth taking a closer look before it’s too late.
The following steps show what is involved in removing a petrol tank and renewing the fuel lines and filler neck. New fuel tanks are available along with fuel lines and the correct shape of filler neck. It is also worthwhile renewing the rubber pipework that connects the expansion tubes. Unlike modern petrol tanks that have a breather to allow fumes to escape and avoid over-pressurizing the tank when the fuel is being sucked through to the engine, a VW Bay Window’s petrol tank has two long lengths of pipework that are routed up to the rear quarters of the vehicle – they can be spotted through the rear vents on the outside. This pipework is largely made of steel, but some sections are joined by short lengths of rubber hose, which should be renewed.
Make sure you buy the latest fuel pipe that is capable of withstanding modern petrol. At the time of writing, this was rated to E10 for bio ethanol fuel, but check with the supplier of your fuel pipe. Also, find a suitable location for the fuel filter, which is easy to access, but safely protected from hot components such as the exhaust.
Set aside at least a full day to renew a petrol tank, which involves removing the engine. Before starting, make sure that the fuel in the petrol tank is as low as possible, then position the vehicle on level ground with the wheels chocked, and disconnect the battery.
Tools
Angle grinder (optional)
Blunt screwdriver
Drills and drill bits
Hammer
Petrol can
Screwdrivers
Sharp knife
Sockets/spanners: 8–17mm
Trolley jack
Two large axle stands
Vice grips
Wheel chocks
Time required: one to two days
On your own: yes
Difficulty rating: 3/5
Removing an Old Petrol Tank
1 Clamp the fuel line to help prevent fuel leaks before the petrol tank is drained.
1 Drain the fuel out of the petrol tank. Look underneath and find the fuel line that runs from the petrol tank to the fuel pump (it will have an inline fuel filter fitted). Clamp this fuel line with a pair of vice grips.
2 Disconnect the fuel line to the fuel pump. The fuel pump shown here is mechanical.
2 Disconnect the fuel line at the fuel pump. On early models, there is a mechanical fuel pump next to the distributor, whereas later models will have an electric pump mounted elsewhere in the engine bay.
3 Put the fuel line from the pump into a petrol can or clean container.
3 Carefully pull the fuel line through and put the end inside a petrol can. Mop up any fuel that spills on to the floor. Some fuel will start to run into the petrol can. Make sure that you have a large enough container.
4 Release the fuel filler cap to help drain out the petrol from the tank.
4 The petrol will drain more quickly if air can get into the tank to force it out, so release the fuel filler cap. Watch the fuel level inside the petrol can or container and make sure that you have another container ready to use.
5 Raise and support the van to provide space to remove the engine.
5 Whilst the petrol is draining out of the old tank, chock the front wheels, raise the rear of the van underneath the gearbox mount and secure it with at least two stands positioned underneath the chassis rails.
6 Remove the engine and slide it out from under the rear.
6 Remove the engine from the van. This will take at least two hours in most cases and is covered in depth in Chapter 8 of this book. The van may need to be raised further to slide the engine out from under it.
7 Slacken the crosshead screws that secure a panel at the back of the engine bay.
7 Remove the panel from the back of the engine bay. This is a steel plate, which is usually secured with a series of crosshead screws. These screws will probably be heavily corroded, so slacken each one first.
8 Two screws along the bottom edge of the panel need to be undone.
8 There are two screws for the panel at the back of the engine bay that can be awkward to find and undo. They are accessed from underneath the bottom edge of the panel and require a long screwdriver to locate them.
9 After undoing all of the securing screws, the panel can be removed.
9 Any screws that cannot be undone will need to be drilled out. Once all the screws have been undone, the panel can be removed. If it is stuck, check that all the screws have been removed.
10 Secure the strap with vice grips when undoing the nut on the end.
10 The petrol tank will now be visible. It is secured with two straps, which have studs welded on to their ends. Each stud is fitted through a chassis rail and secured with a nut. Try to undo these nuts.
11 If the stud on the end of a tank strap shears off, it can be fixed later.
11 If the stud shears off, all is not lost. The remains of the stud will need to be drilled out later and a nut and bolt fitted. Providing the strap can be detached, the tank can be removed, so do not worry if the stud breaks in two.
12 Renew the main fuel line between the petrol tank and the fuel pump.
12 Remove the fuel line between the petrol tank and the fuel pump, which was disconnected and used to drain the tank in steps 2 and 3. This should be renewed, then consider whether the location of the fuel filter is safe and easy to access.
13 Two breather pipes run across the top of the petrol tank.
13 There will be two breather pipes routed across the top of the petrol tank. Note how these are fitted, then remove them. The short lengths of rubber hose must be renewed, but the metal pipework can be refitted later.
14 Detach the two electrical wires connected to the sender unit.
14 Locate the sender unit on the top of the petrol tank. This has two electrical wires attached to it, which are used to send a signal to the fuel-level gauge on the dashboard. Note how these are fitted and disconnect them.
15 Prise off the circular access panel to see more of the fuel filler neck.
15 The fuel filler neck is awkward to access, but there is a removable panel to make it easier. Look for a circular panel on the right side of the engine bay. Use a flat-blade screwdriver to prise it off.
16 Undo any jubilee clips that secure the different parts of the fuel filler neck together.
16 Use a screwdriver to undo any jubilee clips that secure the different sections of the fuel filler neck together. There are a number of parts to the fuel filler neck made of rubber and steel, so detach them first.
17 Once the fuel filler neck has been detached from the tank, the tank can be removed.
17 When there is sufficient movement in the fuel filler neck, the end of it that is attached to the petrol tank can be detached. Once this is done, the petrol tank is ready to be removed from the van.
18 The fuel tank can be awkward to manoeuvre out of the engine bay.
18 Carefully manoeuvre the petrol tank out and into the engine bay. It should be empty of petrol, so will not be very heavy, but it is awkward. An extra person may help here to avoid damaging the van’s paintwork.
Fitting a New Tank and Fuel Lines
1 Carefully fit a new fuel-level sender unit with float into the tank.
1 Take the new petrol tank and make sure it is the correct size and shape as the old one (trial-fit it if you are unsure). Using a new fuel-level sender, position it into the tank with a new rubber O-ring.
2 Tap the sender unit around with a hammer and blunt screwdriver.
2 Twist the sender unit into the hole in the petrol tank, then use a hammer and blunt screwdriver to carefully tap it around in a clockwise direction and secure it tightly in position. There are no fixing screws.
3 Remove the metal circular disc that secures the end of the fuel filler neck.
3 Undo four small screws where the fuel filler cap is fitted, then remove a metal circular disc that secures the end of the fuel filler neck. This enables the entire neck to be removed in the next step.
4 Pull out the old fuel filler neck via the engine bay. Some parts of it are reused.
4 The old fuel filler neck can now be removed from inside the engine bay. Push the end of the neck through at the fuel filler cap, then pull the entire neck through and out. This may take a few minutes to complete.
5 Assemble the new fuel filler neck, making sure that it is the same shape as the old one.
5 Make sure that the new components for the fuel filler neck are the same as the old ones. A steel tube that is part of the old filler neck may need to be reused. Renew all jubilee clips and assemble the filler neck.
6 Fit the new filler neck and pull the end through at the hole for the filler cap.
6 Fit the new filler neck into the van. Manoeuvre it into position from within the engine bay. Ask someone to pull it carefully through at the filler cap end and line up the four mounting holes for the circular disc removed in step 3.
7 Trial-fit the new petrol tank, making sure that it can be fitted and connected.
7 Trial-fit the new petrol tank into position, making sure that the two metal securing straps can be fitted and that all outlets are accessible. You may discover that some of the outlets are obstructed if holes in the bodywork are not large enough.
8 Modifications to the bodywork may be required to fit the new petrol tank.
8 If any modifications are needed for the bodywork, remove the tank and cut out any holes that are required. This may take some time to complete and will require the new petrol tank to be trial-fitted several times.
9 Drilling out a sheared stud for a tank strap can be time-consuming.
9 If the stud for one or both of the securing straps sheared off, they will need to be drilled out and a new nut and bolt fitted instead. This is awkward to do and time-consuming. Start by drilling a 3–4mm pilot hole.
10 Fit the new fuel filler neck on to the petrol tank and secure with a jubilee clip.
10 After securing the petrol tank straps in position, fit the new fuel filler neck on to the petrol tank and secure with a jubilee clip. Make sure that the entire fuel filler neck is secure, refitting the circular disc at the filler cap end.
11 Cut off the old short rubber lengths of pipe on the ends of the expansion pipes.
11 Renew the short lengths of rubber pipe that are fitted on to the ends of the metal expansion pipes. The old ones will probably be brittle, so cut them off with a sharp knife, making sure not to cut your fingers.
12 New rubber pipework is hard to fit, so soften it in hot water.
12 Fitting new rubber pipework can be difficult, so try warming up the ends in a container of hot water. This helps to soften and expand the rubber, making it more pliable for attaching to hard pipes and outlets.
13 Trace all the expansion pipes and renew the short lengths of rubber hose.
13 Trace all the expansion pipes inside the engine bay and renew all the short lengths of rubber hose. It is worthwhile renewing them to reduce the risk of petrol fumes escaping and causing a fire.
14 Refit the expansion pipes that are routed across the top of the petrol tank.
14 Refit all the expansion pipes, including the two that were routed across the top of the petrol tank. Make sure that these are securely fitted, with little risk of them falling off and leaking petrol fumes.
15 Fit an inline fuel filter in an easy to access and safe location.
15 Fit a new length of pipe from the appropriate outlet on the petrol tank to an inline fuel filter in a safe location. Pour some petrol into the tank via the filler neck and look for leaks. Refit the engine.
WORKSHOP: HOW TO FIT A BATTERY CUT-OFF SWITCH


