20,99 €
Mehr erfahren.
- Herausgeber: Crowood
- Kategorie: Lebensstil
- Sprache: Englisch
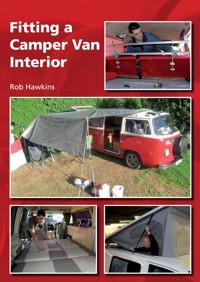
Fitting a Camper Van Interior is a definitive guide to modifying or upgrading a van interior at home. This book offers guidance and advice on how to maximise the interior space, style and functionality of any camper van model. The book breaks down each task with step-by-step photography and instructions, from the initial design stages, right through to expanding the camper van with awnings and elevating roofs. With safety tips throughout, the book covers: considerations when purchasing your camper van (classic or new model?); how to assess an existing interior and determine what you need from your camper van; designing and planning a camper van interior - ideas and suggestions to help decide what you need to include inside a camper van; preparation - how to strip the inside of a camper van and prepare it for a new interior, including fitting insulation, sound proofing, rust protection, flooring and panelling; seats and sleeping - how to make your own seats and fit them, restore a rock and roll bed and fit a hammock; kitchen equipment - step-by-step instructions on making your own kitchen units and fitting equipment such as a fridge and stove; camper van electrics - hooking up at a campsite, running a leisure battery and other ideas for operating electrical equipment; expanding a camper van - how to make a canopy and fit an elevating roof. Illustrated throughout with 753 step-by-step photographs.
Das E-Book können Sie in Legimi-Apps oder einer beliebigen App lesen, die das folgende Format unterstützen:
Seitenzahl: 277
Veröffentlichungsjahr: 2014
Ähnliche


Fitting a Camper Van Interior
Rob Hawkins
THE CROWOOD PRESS
First published in 2014 by The Crowood Press Ltd Ramsbury, Marlborough Wiltshire SN8 2HR
www.crowood.com
This e-book first published in 2014
© Rob Hawkins 2014
All rights reserved. No part of this publication may be reproduced or transmitted in any form or by any means, electronic or mechanical, including photocopy, recording, or any information storage and retrieval system, without permission in writing from the publishers.
British Library Cataloguing-in-Publication Data A catalogue record for this book is available from the British Library.
ISBN 978 1 84797 606 2
Photography by Rob Hawkins, unless otherwise stated.
contents
1 designing and planning an interior
2 safety issues
3 interior preparation
4 seats and sleeping
5 kitchen equipment
6 electrical equipment
7 expanding a camper van
index
1
designing and planning an interior
Before you get stuck into making an interior for a camper van, there are several points to consider first. This chapter deals with choosing the right vehicle for a camper-van conversion and assessing whether it needs modifying to cope with the extra load. There is guidance on deciding what equipment to fit and where it should be fitted, plus the materials that can be used, where to find them and the necessary tools for making an interior.
CHOOSE YOUR VEHICLE
There are so many different vans and dedicated camper vans this book applies to, ranging from the classic VW Split Screen and later Bay Window to the modern Japanese Hiace from Toyota, the Mercedes Sprinter and Ford Transit. Many people would like to have a classic camper van, but are dissuaded by rumours of unreliability, lack of modern equipment and slowing everyone down on country lanes. The price of these increasingly collectible and popular classics also puts people off, when they realize they can get a lot for their money by purchasing something that may not be quite so appealing, but it will provide daily transport and accommodation for holidays.
If you haven’t already bought a van you intend to convert and equip with a camper van interior, then research the subject thoroughly. If you intend to buy second-hand, use websites such as Autotrader, who have a van section at www.Autotrader.co.uk for the UK and equivalent websites in other countries. Also check club websites for specific models. Find out how much particular vans are selling for and whether there are any specific models that demand a higher or lower price. A turbo diesel engine VW T25, for instance, often sells for more than an air-cooled equivalent because it is more economical, returning around 40mpg (7ltr/100km) instead of 20–25mpg (14–11ltr/100km).
The modern VW Bay Window is powered by a 1.4-litre water cooled VW Polo engine, making it more economical, reliable and marginally faster than the original.
The elevating roof on the Mazda Bongo is standard on many models and includes a sleeping compartment, saving thousands on a pop-top conversion.
Which van you choose should be based on a number of factors. Compare the standard specification of different vans to see what you get for your money. For example, many Mazda Bongos already have an electronic elevating roof as standard, with a sleeping compartment for two, pull down blinds, rear heating and seating for eight people that folds down into a double bed, enabling four people to sleep inside the van. These features could cost over £4,000 to fit to some vans, but they are already fitted to most Bongos.
Whilst the Mazda Bongo has camping features fitted during its manufacture, there are a number of vans and minibuses that have been professionally converted into camper vans by the likes of Danbury and Westfalia. Buying such a camper van often means there is already an elevating roof, cupboards, curtains and a kitchen. Such conversions often demand a higher secondhand price.
If you are intending to purchase a standard van with no rear interior and convert it yourself, consider how much space is available, whether the front seats can be converted to swivel round and face the rear, and if access to the rear is possible from the front – some vans have a bulkhead behind the front seats that’s a structural part of the van, so it cannot be removed.
It’s always worthwhile comparing the cost of buying a particular camper van and the equivalent standard van that hasn’t been converted. The standard unconverted van should be a lot cheaper, but carefully consider the cost of a conversion to the same specification. The van may have been used as daily transport with the minimum amount of maintenance, whereas a camper van will probably have less mileage and abuse.
Maintenance is an important point that can be difficult to fully appreciate when purchasing a camper van. Whether you intend to service and repair the vehicle yourself or not, find out the full details of servicing. Modern van engines may have a timing belt that needs to be changed every 40,000 miles (64,000km), for instance – find out how much this will cost to do and whether you can do it yourself. All engines require general servicing, such as oil and filters, so find out how much serviceable items cost and whether you can fit them yourself. There are some big differences. The air-cooled petrol engines found in many classic VW camper vans, such as Split Screens, Bay Windows and some T25s, take a matter of minutes to drain the oil, clean the strainer and top up with 2–3ltr of new oil. Changing the oil on the Mazda Bongo will take much longer, requiring the front seats to be tilted back or removed to access the oil filter, filler cap and dipstick.
This roof-mounted rear heater in a Mazda Bongo is a standard feature on most vehicles.
Buying a standard van, such as this VW T5, may be a lot cheaper than buying the same age of camper van, but the cost of the conversion to the same standard may result in total costs being a lot more.
Classic VW vans, such as the Split Screen and this Bay Window, have an engine in the rear, which is relatively straightforward to access and maintain.
The Mazda Bongo is well known for head-gasket failure, but it’s often caused by neglecting to check the coolant pipe that’s attached to the engine.
Access to the Mazda Bongo engine is via the front seats that tilt backwards, but if an interior is fitted, they have to be removed.
Look into the typical mechanical, electrical or other problems associated with the van you want to buy. Find out how these problems are fixed and if they can be fixed quickly should they arise during a holiday. In some cases, common problems can be eliminated through regular maintenance. The Bongo for instance, has a reputation for head-gasket failure, but this is often caused by a hose between the engine and radiator perishing and leaking. The hose should be checked at every service interval and renewed if it has deteriorated. A similar problem exists on diesel engine T25s, where the radiator is at the front and the engine is at the rear. If the cooling system is not routinely checked and parts renewed, then it will fail and overheat the engine.
However, there are a number of known problems with some camper vans that simply require a stock of spare parts and tools to be kept on board. Spare spark plugs, HT leads, points, condensers and clutch and throttle cables should always be stored inside every air-cooled VW camper van, for instance.
This radiator from a water-cooled VW T25 sits at the front of the vehicle, whereas the engine is at the rear. If the cooling system is neglected, it could leak and the engine will overheat.
Another aspect that’s just as important as maintenance concerns the drivability of a camper van. Consider how you want to use it and how frequently it will need to be used. Do you want to use it as daily transport or lock it away for the winter and tax it for six months of the year? When it’s used, do you need to get to destinations as quickly as possible, or are you happy to take your time? There’s a big difference between driving a classic camper van that may struggle to reach 60mph (100km/h) and a modern van that will cruise all day through Europe at 80mph (130km/h). There’s also the cost implication of travel. A classic VW camper van may return 25mpg (11ltr/100km), whereas a modern diesel engine van can return twice as much. A holiday involving 1,000 miles of travel can result in a huge difference in fuel costs – 40 gallons (182ltr) of fuel for a classic camper van versus 20 (90ltr) for a modern diesel.
This Toyota Hiace has modern controls and power steering that will make a trip down to the south of France seem effortless.
Driving comforts in a classic VW, such as this Bay Window, are limited, but the experience is part of the trip.
There is a noticeable difference between a classic camper van and a modern one when driving. Speed, acceleration, noise, steering and ride comfort are all completely different. Driving a classic camper van has to be part of the holiday and be regarded as a nostalgic experience. A modern camper van is more convenient.
One of the most important considerations when buying a camper van, or a van to convert, is the subject of headroom. It can be one of the biggest expenses to convert, so requires lots of thought and research into what you want. The headroom height of most camper vans falls into three categories. At the basic level, there’s what’s known as the tin top – a low-level roof that cannot be raised. The second option is an elevating roof, which rises up and forms a tent on the top of the camper van; there’s not only room to stand up, but space to add a couple of beds. This is a popular choice because it can be folded down when driving, thus reducing the height of the vehicle and allowing entry into car parks with height restrictions.
It may look nostalgic, but running a classic camper van requires preparation, patience and lots of maintenance.
The third category is a fixed high top. Some vans are sufficiently high as standard (e.g. the Ford Transit high top), but many others require a hole to be cut in the roof and a taller GRP roof to be fitted. The advantage of such a setup is permanent space, allowing extra storage in the roof along with the benefits of beds and headroom. The disadvantages of a high top include not being able to access car parks with height restriction barriers and being battered by side winds on the motorway.
An elevating roof is ideal for adding extra sleeping space and headroom when cooking. Plus, it folds down, allowing the van to fit in to most garages.
A fixed high-top roof provides extra storage and sleeping space and headroom. There’s also less of a risk of leaks over a pop-top.
CONTENTS CHECKLIST
It’s far too easy to become carried away with what you would like to have inside a camper van. Space is generally limited, so the following section helps you to decide whether a toilet, shower and flat-screen television are really necessary.
A good starting point for designing an interior is to consider how many people are going to need to use it and for what purpose. Seating is one of the most important aspects, so make sure you can accommodate everyone that will, or may need to, travel inside the camper van. Additional seating can be created by fitting a bench seat at the front for three people, for example. A full-width rock-and-roll bed in the rear can also seat three people.
When considering how many people you may need to transport in your camper van, also think about the amount of weight you will be carrying, especially with older, less powerful vehicles. Six adults for instance, can weigh almost half a ton if each adult weighs an average of 75kg or roughly 11 stone 10lbs.
Sleeping arrangements are just as important as seating, although they are a little more flexible with awnings and tents. A full-width rock-and-roll bed can usually accommodate two adults and a small child, but if you need plenty of storage space, you may want to fit a narrower ¾ size rock-and-roll bed and fit wardrobes and cupboards alongside. Bunks can be fitted in pop-tops and high top roofs. A hammock can be fitted across the front seats (seeChapter 4 for a step-by-step guide).
A bench seat up front can often accommodate three people.
A hammock can be fitted across the front seats and is suitable for a child.
This three-quarter size rock-and-roll bed is suitable for two people and allows storage compartments to be fitted alongside.
Once you have decided upon the seating and sleeping criteria, the next stage is to plan a list of camping essentials. The basics may include a cool box, cooker and cupboards for food, crockery, cutlery and clothes. However, the list can easily expand with a fridge, table, rear-facing buddy seat, electrics, lighting and sink. If you’ve camped with a tent before, especially with children, you can appreciate how much equipment you often need. Squeezing all of this into a camper van is feasible, but you need to source the correct components and be ruthless with what you actually require.
Space and weight are two major factors that will restrict how much can be fitted inside a camper van. So consider whether you can manage without some equipment. A sink with water tanks for fresh and waste water, for example, can take up a lot of space and will add a lot of weight. One litre of water weighs one kilo, so even if you limit the water to a modest 10ltr, that’s still 10kg that needs to be secured somewhere inside or underneath the camper van.
Deciding where everything can be fitted will help to determine what you can feasibly fit inside the camper van. Think long and hard about how you can use specific equipment. For instance, can you stand up when cooking or will you need to sit down (in which case, you’ll need a seat near the cooker)? When cooking, can you access the cupboards for the crockery, cutlery and food and also the fridge or cool box?
Similar considerations need to be made if you intend to fit a table for dining. Most camper van tables are small and only suitable for two or three people to sit around. You may have to consider fitting additional tables.
Cooking in a camper van can be a logistical nightmare if there’s no room to stand or sit, or to access the cupboards and fridge.
Fitted wardrobes and cupboards don’t take up much space inside this Ford Transit van, but when fitted inside a smaller classic VW, for example, light and elbow room are soon lost.
Storage space for clothes and other items you need to carry is one of the most difficult aspects of designing a camper van interior. You can never have enough storage space, but squeezing lots of wardrobes, overhead lockers and cupboards into a camper van can have its problems, including additional weight, less room to manoeuvre and less light. It’s hard to do, but it’s worthwhile trying to calculate how much space you really need for all the aforementioned items, then looking around the inside of your van to see where they can be stored.
WEIGHT ISSUES
It’s difficult to appreciate the accumulative weight of clothes, a table, tins of food and crockery, and what effect they can have on driving your camper van, but this is one aspect that needs some careful consideration for several reasons.
If you use household kitchen work-tops and cupboards to construct the interior of your camper van, the weight of these is very heavy when compared to the lighter materials shown in this book and the materials used by professional converters. So in many cases, it’s important to source lightweight materials, which is covered later in this chapter.
The positioning of large objects will affect the camper van’s stability under cornering and could be dangerous in the event of an accident. An overhead locker that’s crammed full of food tins and other heavy objects can increase body roll under cornering and become a lethal missile in the event of an accident if it and its contents are not sufficiently secure. Overhead storage is useful, but the materials used to construct a cupboard need to be light, along with the items that are stored inside it.
This retro-looking furniture is heavy and robust, adding unwanted weight to the overall van.
A heavy overhead cupboard can add top-heavy weight to a van, which affects the handling of the vehicle under cornering.
Fitting a performance air-filter should help the engine breathe better and provide a more responsive throttle.
A performance exhaust system can help to make an engine livelier, but make sure it isn’t too loud.
IS YOUR CAMPER VAN UP TO THE JOB?
Extra weight on board is more of a problem for classic camper vans, especially when they are being driven on the road. The additional load means the engine has to work harder, so acceleration may be slower. Reducing the weight of the contents can help, but you may have to consider modifying the engine to produce a little more power to help climb hills and maintain a cruising speed.
Most engines can be mildly tuned with a performance air-filter, which should help improve airflow and provide a better throttle response. If your camper van has a panel-shaped air-filter, manufacturers such as K&N and Pipercross may produce a replacement filter for around £20–30. Otherwise, an open cone-shaped air-filter can probably be fitted either in the form of a specific kit or a universal kit consisting of appropriate pipework. The most expensive performance air-filters are closed-air systems, comprising an air-filter inside a canister with a cold air feed pipe. This is the most effective setup, but can cost over £200 for a made to measure kit.
This classic VW air-cooled engine has been modified with twin carburettors for better fuelling and a performance coil for a more reliable spark.
Don’t expect masses of extra power from a performance air-filter, but it should make the engine a little more driveable and most filters are reusable (they require washing), so after several years they will be cheaper than a disposable filter.
Tuning boxes can help modern diesel and petrol engines to perform better.
A performance air-filter will be of more benefit if other engine modifications are incorporated, such as a free-flowing exhaust system, which helps the engine breathe more freely. Depending on your camper van and its engine, there are a wide range of specialist exhaust systems and silencers that can help. When shopping around, be aware that some systems will generate extra noise. If you want the exhaust noise to be kept to a minimum, look for quiet-pack exhaust systems.
A popular and effective upgrade on many classic petrol engine camper vans is to change the carburettors. Many of the classic VW Split Screens and Bay Windows have a single carburettor, but this can be changed for either a larger single carburettor or two of them. Budget for between £200 and £400 for this modification, which many people regard as money well spent.
There are several engine components that can be uprated to help make sure they remain reliable, especially when the engine is being revved hard to overtake or drive up a hill. An electronic ignition conversion with a high-performance coil, better HT leads and spark plugs will all help and are relatively straightforward to fit.
Even if you have a modern camper van with a strong diesel engine, some of the aforementioned upgrades can be fitted (air-filter and exhaust) to help provide a smoother delivery of power and improve performance. Tuning boxes are also popular, which alter the programming of the engine control unit (ECU) by altering the fuelling. Many can improve the pulling power of an engine as well as making it more economical. Budget for between £200 and £400 for a tuning box.
Whilst improving an engine’s performance may help to compensate for the extra load taken on board with a camper van conversion, the brakes and suspension are also working harder. Routine maintenance will ensure the brakes are working to the best of their ability. On disc brakes, make sure the brake pads are not sticking – remove and clean their edges and around where they sit. Modern disc brakes feature sliders to operate the outer brake pad, which should be free to move in and out.
Servicing the brakes will ensure they are working to the best of their ability.
Some camper vans may require heavy duty springs and dampers to cope with the additional weight of a conversion.
If you want better brakes for your camper van, look into cheap and straightforward modifications, such as better brake pads and braided steel flexi-hoses before spending lots of money on performance brake kits. Simple upgrades, such as fitting ducting to direct cool air to the brakes and prevent them getting too hot under harsh braking, can make a big difference.
The suspension has to work harder when it is carrying additional loads, so you may want to fit heavy-duty springs and dampers. If the vehicle has been lowered, the tyres may catch the arches, so the ride height will need to be raised.
TESTING AND RESEARCH
It’s very difficult to visualize the best way to construct the interior of a camper van. Ideas often fail due to a lack of space or unforeseen problems, so the best way to discover whether they are feasible is to mock them up and test them. For instance, if you would like the front seats to swivel around to face each other, allowing a table to be fitted in the middle and two people to eat at it, start by sitting two people in this position. You may find there isn’t the legroom to do this, but luckily you have only spent a few minutes finding this out.
Some testing isn’t so easy, such as seeing if an assortment of fitted cupboards and wardrobes would block out too much light and make the interior look cramped. In such a situation, use various sizes of cardboard box to act as dummy furniture.
Seating arrangements are one of the hardest aspects of a camper van, especially when it comes to food preparation and dining. However, there are some cheap methods of testing, involving a fold-away picnic table and boxes to sit on instead of seats. Such a setup allows you to move things around and try different seating arrangements.
Trial fitting a table helps to see where it should be fitted and whether a rear-facing seat (wooden box on the right) would be of benefit.
One of the most helpful ways of working out how best to create an interior for a camper van is to visit a show. Here you will find lots of examples of other people’s work, what equipment they have fitted, the materials they have used and the problems they have discovered. Opinions are always mixed, so be prepared to become bewildered.
DESIGN ON PAPER
Once you have formulated your ideas as to the layout and contents you want incorporated into your camper van, don’t solely rely upon a plan in your head. Take measurements to find out whether a fridge, cooker and rock-and-roll bed will all fit in their respective locations. Draw an overhead plan of different layouts, and include measurements to calculate how much space you will have to work with. You may discover that a cupboard alongside a fridge isn’t large enough to fit a cereal box inside or store a water container. Such problems are best identified at this stage.
MATERIALS
The materials you will need to construct a camper van interior can be very expensive or extremely cheap, depending on whether you are willing to shop around and look at a variety of sources.
Camper van related shows are a good source of research to see what other people have fitted in their own vehicles.
The raw materials used for making your own work surfaces, bunk beds and seats vary in price and weight. As a general rule, the heavier the material, the cheaper it is, but that is not always the case. The following points outline some of the most useful materials available and what they can be used for.
♦
Aluminium: Aluminium is strong and lightweight, but sadly not very cheap. However, most metal stockists sell offcuts, which can be used to create a camper van interior. Angled aluminium is useful for making mounts or fixing panels together. Sheet aluminium can be used for doors and worktops.
This aluminium tread plate was purchased as an offcut from a metal supplier and cost £25. It can be used as a kitchen worktop.
♦
Plywood: This lightweight wood is available in different thicknesses and is ideal for doors, worktops, shelves and interior panels. It’s cheap to buy from most DIY stores and easy to cut. It can be painted to produce a professional finish.
Plywood is cheap to buy, available in different thicknesses and easy to cut to shape.
♦
Flexible plywood: Whilst standard plywood is rigid, flexible plywood can bend in one or two directions, making it ideal for curved sections, such as an overhead locker. It’s more expensive than standard plywood.
Curved panels can be constructed from flexible plywood, which can bend in one or two directions.
♦
Medium-density fibreboard (MDF): A popular and cheap material that’s easy to work with, cheaper than plywood, but heavy. Ideal for seat bases, cupboard doors and other rigid panels.
MDF is heavy, but cheap and useful for seat bases and other rigid panels.
♦
Hardboard: Lightweight and useful for adding a finish to a panel. Available in a coloured gloss finish, as well as brown. Suitable for interior panels and covering a seatboard. Moderately flexible and can be cut with a knife.
Hardboard is cheap, flexible and easy to cut. A painted finish is useful for covering old panels.
♦
Vinyl wrap: Tatty or cheap-looking panels can be quickly revived with vinyl. This self-adhesive material is available in a variety of patterns and colours. SeeChapter 3 for a series of step-by-step guides on fitting vinyl to panels.
Covering a panel in vinyl can transform its appearance.
SOURCING PARTS
Camper van and camping specialists are some of the best sources of parts, but a lot of the general equipment you may require can be found elsewhere as well. Cupboard door hinges, door locks and trim can be found at a variety of outlets ranging from caravan manufacturers to general DIY shops, for instance. The following points highlight some ideas for collecting parts from alternative sources.
♦
Old furniture: Household furniture, such as kitchen cupboard doors, an old wardrobe or sideboard can be used to construct a camper van interior. However, the materials used are often heavy, so look for lightweight pine, not thick and heavy chipboard.
Unwanted household furniture is a cheap source of materials, but can be heavy.
♦
Abandoned caravan: An old cara van can be bought for less than the price of a camper van fridge and often has a lot of the equipment and materials you will need. There are also caravan scrapyards, which won’t be as cheap as buying a caravan to strip yourself, but will allow you to buy only the items you need.
Old caravans can be found on eBay and often cost less than a brand new camper van fridge.
♦
Scrapyard vans: There are several breakers yards that specialize in vans or camper vans, where a second-hand pop-top for instance, can be bought, an old rock-and-roll bed or a complete Devon interior.
A second-hand rock-and-roll bed found inside a camper van in a breakers yard may prove to be a bargain find.
♦
Scrap cars: Breakers yards for cars are a cheap source for battery terminals, rubber seals, trim, seats and other car parts that can be used in a camper van.
The seats, trim and electrics from a scrap car can all be used in a camper van.
USEFUL TOOLS
Depending on the extent of the work you plan to do on your camper van, the list of tools may be very basic, such as a saw for cutting wood and a screwdriver for fitting a kitchen unit together. However, this book covers an extensive range of step-by-step guides, showing how to fit everything from a leisure battery to a pop-top roof. A comprehensive list of every possible tool wouldn’t really be of interest, and each step-by-step guide includes a tool list anyway, so the following list outlines some of the tools that have proven to be the most useful when making your own camper van interior.
♦
Staple gun: Useful for attaching upholstery to the underside of a wooden board. Budget for £8–10 plus a few packs of staples.
A staple gun can quickly secure upholstery to the underside of a seat base or trim panel.
♦
Drill: Variable-speed battery-operated drill is ideal for drilling holes and fitting screws.
Time-saving battery-operated drill can make holes and fit screws.
♦
Jigsaw: Useful for quickly cutting straight and shaped pieces of wood. Can also be used for cutting out windows in a panel van and even a hole in the roof for a pop-top or high-top conversion.
Shape wooden panels with a jigsaw. Use a metal blade to cut out windows.
♦
Pop rivet gun: Useful for quickly securing metal brackets and panels in position. Drill a suitable hole (4–5mm usually), fit a pop rivet and squeeze it together with a gun.
Fix panels quickly with a pop rivet gun.
♦
Rivet nut tool: If you need to fit a threaded hole into a panel to secure a bolt, a rivet nut does the job. The tool is similar to a pop rivet gun.
Make your own threaded holes for fitting bolts by using a rivet nut tool.
♦
Angle grinder: Armed with a cutting disc, an angle grinder can cleanly cut through sheet aluminium to help create the correct-sized panels. Also useful for cutting holes for windows and a pop-top or high-top conversion.
Slice through sheet aluminium with an angle grinder equipped with a cutting disc.
2
safety issues
This is probably the one chapter that most readers skip through or bypass. It covers the subjects whose consequences you don’t really want to suffer, whether it’s a fire, an accident or injury either during the creation of your camper van’s interior or whilst camping. However, the best way of preventing such catastrophes is, first of all, to read this chapter and, second, to be proactive. So this chapter outlines many of the best ways of working to avoid disasters and what you can incorporate in your camper van to help prevent fires and accidents.
WHAT CAN GO WRONG?
There are a number of potential disasters that can occur during the creation of your camper van’s interior, whilst you are driving the vehicle and using it for camping. The more you are aware of these possible problems, the better equipped you will be to avoid them. Many of the potential problems require knowledge of how your camper van is constructed and how particular components work. You may not have that knowledge, but the necessary information can always be found.
Electrics
A camper van’s electrics can be extremely complicated or very simple, but in all cases, you need to have at least a basic understanding of how equipment is operated and where the fuses, relay switches and wiring are located should a problem occur.
The biggest problem with a camper van’s electrics concerns fires, which is covered in greater detail later in this chapter. However, there are other less disastrous problems, such as blown fuses and equipment that doesn’t work.
Find out where all of the fuses are located and make sure you have a range of spares.
A good starting point for electrics when it comes to a camper van is to know where the fuse box or boxes are located. Most camper vans usually have them located in the engine bay or underneath the dashboard. When you have found them, look for any diagrams that help identify the fuses and make sure you have the correct spares. Fuses are rated according to amps, so they are usually labelled with a number, such as 10 that represents 10 amps.


