6,99 €
Mehr erfahren.
- Herausgeber: Crowood
- Kategorie: Lebensstil
- Sprache: Englisch
This book contains routes for both off and on road enthusiasts, graded for length and level of difficulty. Each route includes a detailed map, points of interest and refreshment stops, and a lively description of the terrain to be encountered. All cyclists, young or old, mountain biker or tourer, will find something to suit them. All those who cycle south of London will enjoy this book. The entire South Downs way, between Petersfield and Eastbourne, is covered in 3 rides, and the North Downs routes will take the cyclist along the southern line of the M25 from Surrey into Kent.
Das E-Book können Sie in Legimi-Apps oder einer beliebigen App lesen, die das folgende Format unterstützen:
Seitenzahl: 181
Veröffentlichungsjahr: 2011
Ähnliche


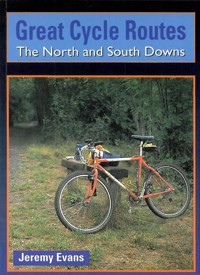
Great Cycle Routes
The North and South Downs
Jeremy Evans
The Crowood Press
First published in 1995 by The Crowood Press Ltd, Ramsbury, Marlborough, Wiltshire, SN8 2HR
www.crowood.com
This e-book edition first published in 2011
©Jeremy Evans 1995
All rights reserved. This e-book is copyright material and must not be copied, reproduced, transferred, distributed, leased, licensed or publicly performed or used in any way except as specifically permitted in writing by the publishers, as allowed under the terms and conditions under which it was purchased or as strictly permitted by applicable copyright law. Any unauthorised distribution or use of this text may be a direct infringement of the author’s and publisher’s rights, and those responsible may be liable in law accordingly.
ISBN 978 1 84797 362 7
Maps based on Ordnance Survey Mapping, reproduced by permission of Ordnance Survey on behalf of The Controller of Her Majesty’s Stationery Office, Crown Copyright MC100038003.
Contents
Introduction
The South Downs
Ride 1: Chichester to Petworth
Ride 2: Stoughton and Harting Downs
Ride 3: From Petworth to Bramber
Ride 4: Around Haywards Heath
Ride 5: The South Downs Way
Ride 6: From Queen Elizabeth Country Park
Ride 7: Kingley Vale and Stansted
Ride 8: Goodwood and the Downs
Ride 9: Selhurst Park and the Downs
Ride 10: Bignor Hill and the Downs
Ride 11: River Arun Ride
Ride 12: Chanctonbury and Cissbury Rings
Ride 13: Bramber Castle and the Downs
Ride 14: Bramber Castle and the Downs Link
Ride 15: Bramber Castle to Wolstonbury Hill
Ride 16: Ditchling Beacon and the Downs
Ride 17: Firle Beacon and the Downs
Ride 18: Alfriston and the Downs
The North Downs
Ride 19: The Downs Link
Ride 20: The Devil’s Punchbowl
Ride 21: Guildford and the Downs Westward
Ride 22: Guildford to Leith Hill
Ride 23: Hatchlands and the Downs
Ride 24: Polesden Lacey and the Downs
Ride 25: Box Hill and the Downs
Introduction
RIDE INFORMATION
Area: Where the ride is located.
OS Map: The relevant OS Landranger 1:50 000 map for the route.
Route: Waymarks from start to finish, with OS grid reference numbers. All of the rides in this book bar the South Downs Way are circular, making it possible to start at a number of locations.
Nearest BR Stations: Most of the routes are accessible from a railway station. Owing to the market-led policies of British Rail which have become extremely bike-unfriendly, it is necessary to check restrictions and costs before you start and board a train.
Approx Length: In miles and kilometres. There should always be some allowance for getting lost or altering the route.
Time: This is very difficult to assess, and will depend on factors such as whether the tracks are dry, how many hills have to be climbed, how fast you ride, and how many pubs and places of interest there are en route.
Rating: An ‘Easy’ ride should be accessible for riders of all abilities, excluding sub-teenage children; a ‘Moderate’ ride may prove harder in terms of terrain, length, hills, churning those pedals, and possibly navigation; a ‘Hard’ ride is best suited to experienced offroad riders with a high level of commitment. However these ratings can be changed by the weather – for instance an ‘Easy’ ride in very dry weather may become a ‘Hard’ ride when the tracks are churned to mud.
Places to Visit / Top Pubs: Virtually all of these rides feature a number of possible pub stops. I have also indicated cafes and other facilities to enjoy along the route.
Stick to the rules, and you won’t get into trouble!
COMMON SENSE OFFROAD
The tracks and trails used for offroad cycling must be shared. The basic problem for mountain bikers is that bikes are generally so much faster than walkers and horse-riders. That is the principal factor which causes antagonism, but why hurry? Why not take it easy and enjoy the ride? Stick to the following common sense rules, and everyone should be happy.
Be safe! Don’t ride into danger.
1. Stay on public bridleways, byways or roads. Never ride on footpaths. Cycling on private tracks or open ground is not usually allowed without permission from the land owner. Always moderate your speed.
2. When you ride offroad, the bridleways and byways are classified as ‘Highways’. This means the Highway Code applies, and you can be prosecuted for riding dangerously, especially if you are involved in an accident. Any form of racing is illegal on a public highway, unless it is a specially organized event and permission has been obtained. Byways may also be shared with motorized vehicles. They should give way to cyclists, but as when meeting any vehicle, it is necessary to play safe.
3. Learn how to prevent skids and ride with control to help prevent erosion, especially in the wet. If it is very wet, it is much better to push or carry your bike. Going off the official tracks and trails can cause unnecessary erosion, as well as damaging plant and animal environments.
4. When you meet other people offroad and in the countryside, be courteous and considerate. Always slow right down and give way to both walkers and horse-riders, even if it means dismounting and lifting your bike out of the way. Bikes are almost silent, so give warning of your approach in as polite a manner as possible. The British Horse Society would like you to ‘Hail a Horse’; we think the very best policy is to come to a complete halt until the animals have passed you by. If you are riding in a group, all go to one side of the track. Take particular care when you ride past children – you may not worry them, but you may terrorize/infuriate their parents.
5. Make sure your bike is safe to ride, and won’t let you down in the middle of nowhere on a fast downhill – learn basic maintenance and take essential spares. In the interests of safety take drink and food, and wear suitable clothing for the weather conditions and length of ride. It is wise to wear a helmet, putting a layer of polystyrene between your cranium and any hard object in the unlikely event of a bad fall particularly on-road.
6. To avoid getting lost, it is always wise to carry a compass and relevant map such as the OS 1:50, 000 Landranger series. You should know where you are, and have the ability to re-plan the route and cut the ride short.
7. Follow the Country Code. Leave nothing behind – no litter, no orange peel, the minimum of noise, no bad memories for yourself or for others, and if possible not even a sign of your wheeltracks. Always shut gates behind you (unless they should obviously be left open). Don’t blast through fields of cows or sheep – neither they nor the farmer will like it. If you ride with a dog for a companion, be sure to keep it under control.
Ride together, but give way to walkers.
USE THAT MAP!
Unless the route is very easy or you know it well, you should never ride without a map, never ride without a compass. Once you get the hang of it, using them is easy and will ensure you know where you’re heading.
A map is a diagram which shows the features of an area of land such as mountains, hills, woods, rivers, railways, roads, tracks, towns and buildings. All these and many other features are shown by special signs that map readers can understand. There is always a table on the map which explains the signs. On a 1:50, 000 map (OS Landranger) 1cm on the map equals 50,000cm on the ground; this equals 2cm for every kilometre, or 1 1/4 in per mile.
THE GRID SYSTEM: Maps are covered by a grid of numbered horizontal and vertical grid lines. The grid is used to find an exact place on a map. To find a grid reference position you read the first three numbers off the vertical grid line which is called the Eastings line. You then read the next three numbers off the horizontal Northings grid line. Where they meet is where you want to be.
CONTOURS: Contours are lines on a map which join areas that are the same height above sea level (in metres). The difference in height between the contour lines is called the vertical height. The closer the lines are the steeper the hill will be. Contour lines are spaced at 10m intervals on 1:50, 000 Landranger maps, and at 5m intervals on 1:25, 000 Outdoor Leisure maps.
It is generally best to arrange your ride so the climbs are short and steep and the descents are long and fast; it is also best to get major climbs out of the way early on the ride. Sometimes it is quite difficult to know if you will be going up or down; a river or stream on the map is a sure sign of dropping down to a valley, but you can also work it out by looking at the contour line height numbers, as the top of the number is always uphill.
Do you know where you’re going.
USING A COMPASS: A compass is a valuable aid to finding your way. The most popular style is the Swedish-made Silva on which most modern hiking (equally suitable for biking) compasses are based. It is low in price, light, very tough, and easy to use.
The compass should be carried on a lanyard at all times; in bad visibility it may be the only means you have of finding the way. The compass needle always points to Magnetic North, but keep it away from close contact with any metallic object to which it might be sensitive. Knowing that the needle points North, you can always follow a course in the direction you wish to go. The vertical grid lines on a map point to Grid North; this may be a few degrees different from Magnetic North, but the difference is very small.
OFFROAD WITH KIDS
Why not take the kids with you? With a little care the whole family can have a great day out, and when the kids are too big for a child seat you can put them in the saddle and still stay in control.
There’s no point in taking children cycling on-road or offroad if they don’t enjoy it, because then you won’t enjoy it. Always follow the three golden rules:
1. Make sure they’re comfortable.
2. Keep them amused.
3. Don’t bite off more than you can chew.
COMFORT: For a child up to around four years of age, go for the best rear-mounted child seat you can find. It must obviously be secure on the bike, with a high back and sides to help protect its occupant if you should fall, deep footwells to protect the feet, and a full harness to hold the child firmly in; a safety bar for the child to grip on to is also a worthwhile extra. Ideally, the seat should also be quick and easy to put on and take off your bike, so when you ride alone the seat doesn’t have to go with you.
It’s a good idea to get children used to wearing helmets as early as possible, but with very young children (under one year old) there is a often a problem making the helmet stay on. This results in a miserable baby with a helmet tipped down over its eyes; best then to do without the helmet and be extra careful, until you can be sure it will sit comfortably in position.
Make sure the straps of a helmet are sufficiently tight. Children won’t like you fiddling under their chins, and your best policy is to train them to put on and take off the helmet themselves as young as possible, ensuring the straps are adjusted to the right length. Shop around for a child helmet and do ask to try it on. As with most adult helmets, removable rubber pads are used to alter the internal diameter, but the most important consideration is that the design of the helmet and its straps hold it firmly on the head. Some helmets seem to want to slide forward on impact, which is useless.
The child is protected from the headwind by your body, but can still get pretty cold sitting there doing nothing; in winter, an all-in-one waterproof/windproof coverall suit does the job really well. Remember that young children require all sorts of extras – extra clothes, nappies, drink, apples, and so on. Try to keep their requirements down to an acceptable minimum; a neat solution is to carry extras in a small backpack that mounts behind the child seat itself.
A child seat can be a lot of fun.
KEEP THEM HAPPY: Young children generally love riding on the back of bikes, and want to tell you all about what’s going on. It can be bad enough understanding them at the best of times, but in this situation it becomes ridiculous and your replies degenerate to a meaningless ‘Yes’ or ‘No’.
With that level of conversation a child will only sit happily in its seat for so long; the duration will obviously be affected by the weather, especially if it’s freezing and foul. Children like regular stops if they’re to stay happy, so take a stash of little treats – apples, nuts and raisins, and so on – and ensure that you get to the picnic or pub (make sure they allow children) on time with the shortest part of the ride left for the end of the day.
Routes should be chosen with care and an eye on safety. A rock-strewn ‘downhill extreme’, which is just waiting to throw you over the handlebars, should obviously be avoided. To start with, keep to mellow and easy offroad routes such as those found in the New Forest or an old railway line such as the Downs Link in Sussex. Moderate uphills are all right when the weight of the child helps back wheel traction; immoderate uphills are plain stupid, as you wheeze and groan pushing both bike and child together.
What about downhills? As long as you’re in control there’s no danger in going fast on a smooth track or road. Rather than hitting the brakes, it’s better to treat it as a laugh and teach the child to get used to the thrill of safe speed.
There comes a time when children grow too big and bored for a conventional rear-mounted seat, but too young to ride their own bike and keep pace (and keep safe) with adults. One answer is the Trailerbike, a remarkable hybrid, which claims it will take children from four to ten years old with a maximum weight of 42kg (6.5 stone). It allows you to ride with your child; they get all the fun of riding their own bike, but you have total control over their speed, where they go, and ultimately their safety. They can also pedal as much or as little as they like. If they have the muscle and aptitude, they’ll help push you uphill as well as down.
The Trailerbike is a hybrid which is excellent as children get older.
Abide by the rules – never ride on footpaths.
OFFROAD RIGHTS OF WAY IN ENGLAND & WALES
PUBLIC BRIDLEWAYS: Open to walkers and horse-riders, and also to cyclists since 1968. This right is not sacrosanct; bike bans are possible if riders are considered to have become too much of a nuisance.
PUBLIC BYWAYS: Usually unsurfaced tracks open to cyclists, walkers, horse-riders and vehicles which have right of access to houses.
PUBLIC FOOTPATHS: No rights to cycle. You probably have the right to push a bike, but the temptation to ride is high and it is best to avoid footpaths whenever possible.
FORESTRY COMMISSION: Access on designated cycle paths, or by permission from the local Forest Manager. At present there is a general presumption in favour of bikes using Forestry land gratis; this may change.
DESIGNATED CYCLE PATHS: Specially built cycle tracks for urban areas; or using Forestry Commission land or railway lines.
PAVEMENTS: Cycling is illegal on pavements. However it is frequently much safer and more pleasant than cycling on the road, and with the proviso that you take great care to avoid pedestrians (who are seldom seen on out-of-town pavements), using pavements can be perfectly reasonable.
WHAT IF BRIDLEWAYS AND BYWAYS ARE BLOCKED?
Cyclists are used to being on the defensive on Britain’s roads; offroad they should stand up for their rights. The relevant landowner and local authority have the responsibility to maintain bridleways and byways and ensure they are passable with gates that work. It is illegal for a landowner to block a right of way, close or divert it (only the local authority or central government can do this), or put up a misleading notice to deter you from using it.
It is also illegal to plough up or disturb the surface of a right of way unless it is a footpath or bridleway running across a field. In that case the farmer must make good the surface within twenty-four hours or two weeks if it is the first disturbance for a particular crop. A bridleway so restored must have a minimum width of two metres, and its line must be clearly apparent on the ground. A farmer also has a duty to prevent any crops other than grass making a right of way difficult to follow. A bridleway across crops should have a two metre clear width; a field edge bridleway should have a clear width of three metres.
If you run into difficulty on any of the above, you can file a complaint with the Footpaths Officer at the local council, giving full details of the offence and a precise map reference of where it occurred.
Some bridleways are more difficult to follow than others!
OFFROAD CARE AND REPAIR
Have you decided on your route, got the right OS map, and your compass? Have you got all the right clothes – ready for rain, wind or sun – plus food and sufficient drink if it’s going to be hot? That just leaves your bike, so don’t risk getting let down by a breakdown.
Always prepare your bike carefully.
BRAKE CHECK: The most important part of your bike – if the brakes fail, you could be dead. Check the blocks for wear, turn them or change them as necessary. Lubricate the cables, check they won’t slip, and if there is any sign of fraying, change them. Lube the brake pivots – if the spring return on the brakes isn’t working well, they will need to be stripped down and cleaned.
WHEELS: Check your tyres for general wear and side-wall damage; look for thorns. If a wheel is out of line or dented, it needs to be adjusted with a spoke key; also check for loose spokes. Always carry a pump and a puncture repair kit.
CHAIN CARE: Give your chain a regular lube – there are all sorts of fancy spray lubes around, some of which cost a lot of money; however, although the more universal sorts are cheap and reliable, they do attract the dirt. If your chain and cogs are manky, clean them with a rag soaked in spray lubricant or a special ‘chain bath’; adjust stiff links with a chain breaker, which is a useful tool to carry.
MOVING PARTS: Clean and lube the derailleur jockey wheels and gear cogs. Lube the freewheel with the bike on its side. Clean and lube the chainwheel gear mechanism. Lube and check the cables for both sets of gears. Lube the bottom bracket – the most basic method is to pour heavy oil down the top tube. Lube the pedals by taking off the end caps. Check that both the cranks and headset are tight. Check that the derailleur lines up properly.
Other things that may go wrong include breaking the chain or having a cable slip, though if you take care of your bike these occurrences are very rare. Just in case, however, it is wise to carry a chainlink extractor, which rejoins a broken chain, 4/5/6mm Allen keys, a small adjustable spanner, and a screwdriver with both a flat head and a Phillips head. The neat solution is a ‘multi-tool’ which includes all these items in one package.
PUNCTURE REPAIR
The most common offroad repair is a puncture and the most common cause is the hawthorn. To cope with this you need a pump, tyre levers and a puncture repair kit; you may also like to carry a spare tube. Always go for a full-size pump with the correct valve fitting; the pump should fit inside the frame, ideally on the down tube. A double-action pump puts in the air fastest.
Two tyre levers are sufficient, either in plastic or metal, whilst a spare tube saves the hassle of finding the leak and doing a patch offroad – unless you puncture twice.
1. Stop as soon as you feel a tyre go soggy: riding on a flat tyre is asking for trouble. Find a suitable place to do the repair – well away from any cars – and turn the bike upside-down. Take care you know where you put things down: it is too easy to lose that little black screw cap that covers the valve.
2. Undo the brake cable near the brake block, flip off the quick release lever at the hub, and remove the wheel. This is more of a fiddle with the back wheel, and it may be necessary to partly unscrew the hub.
Mending the tube is usually a quick operation.
3. You won’t get the tube out unless it is well deflated. Carefully insert a lever to get the tyre wall off the rim, and then work the rim off all the way round one side using two levers.
4. Pull the tube out of the tyre. The next thing is to find the puncture. Inflate the tube, and then slowly pass it close to your ear and cheek. You should hear or feel the leak and be able to locate it. If this fails, you can try submerging the tube in a puddle and watch for tell-tale bubbles.


