5,99 €
Mehr erfahren.
- Herausgeber: BookRix
- Kategorie: Lebensstil
- Sprache: Englisch
Embroidery is no longer just a craft—it’s a creative fusion of art and technology. And with Hatch Embroidery 3, that fusion is more powerful than ever. But powerful software can feel overwhelming without the right guidance. That’s where this book becomes essential.
Hatch Embroidery 3 User Guide for Beginners is not a dry technical manual—it’s a complete, confidence-building roadmap designed to take you from opening the software for the first time to creating professional-quality embroidery designs you’re proud to stitch.
Whether you’re a complete beginner, a hobbyist upgrading your skills, or a small business owner digitizing logos and custom designs, this guide walks you through Hatch Embroidery 3 in a clear, visual, and practical way—one stitch at a time.
What makes this guide different?
✔ Beginner-friendly, no assumptions
You don’t need prior digitizing experience. Every tool, menu, and workflow is explained in plain language with real embroidery context—not confusing software jargon.
✔ Step-by-step, illustrated instruction
From installation and workspace setup to digitizing, lettering, color control, and exporting machine-ready files, each chapter follows a logical learning path that actually makes sense.
✔ Professional techniques made approachable
Learn how to control stitch density, angles,_toggle underlays, manage thread sequencing, and prevent common embroidery problems like puckering, gaps, and thread breaks.
✔ Real-world workflows
This guide doesn’t just tell you what buttons to click—it teaches you how experienced embroiderers think. You’ll understand why certain settings matter and how to adjust them for different fabrics, designs, and machines.
✔ Complete coverage of Hatch Embroidery 3
Inside, you’ll learn how to:
- Navigate the Hatch interface with confidence
- Create embroidery designs from scratch
- Auto-digitize and manually digitize artwork
- Edit and reshape objects professionally
- Work with lettering, monograms, and curved text
- Manage thread colors, palettes, and brand charts
- Preview designs realistically using TrueView
- Hoop, export, and prepare designs for stitch-out
- Troubleshoot common issues and avoid costly mistakes
Whether you’re personalizing gifts, selling embroidered products, or producing client work, this guide helps you work faster, cleaner, and more professionally.
Who this book is for:
- Beginners new to embroidery software
- Hatch Embroidery 3 users who want clarity and structure
- Home embroiderers ready to level up
- Etsy sellers and small embroidery businesses
- Anyone tired of guessing and ready to design with confidence
If you’re ready to stop feeling overwhelmed and start creating embroidery with confidence, precision, and creativity—
Buy a copy now.
Das E-Book können Sie in Legimi-Apps oder einer beliebigen App lesen, die das folgende Format unterstützen:
Veröffentlichungsjahr: 2026
Ähnliche


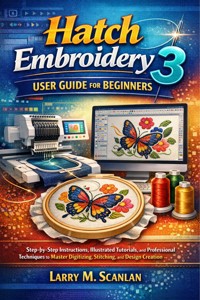
Hatch Embroidery 3 User Guide for Beginners
Step-by-Step Instructions, Illustrated Tutorials, and Professional Techniques to Master Digitizing, Stitching, and Design Creation
Larry M. Scanlan
📜 Copyrights Notice
© 2026. All rights reserved.No part of this publication may be reproduced, distributed, or transmitted in any form or by any means — including photocopying, recording, scanning, or other electronic or mechanical methods — without the prior written permission of the publisher, except in the case of brief quotations used in critical reviews, articles, or educational references.
Illustrations and Visual Content
All illustrations, diagrams, and visual sketches appearing in this guide are original instructional graphics created exclusively for this publication. These images are protected under copyright law and may not be copied, modified, or redistributed, in whole or in part, without express permission from the author or publisher.Any reproduction of the visual content for online tutorials, workshops, or training materials must include full credit to the book title and author.
Software Disclaimer
This book is an independent publication and is not affiliated with, authorized by, or endorsed by Wilcom International Pty Ltd.“Hatch Embroidery” and all related trademarks are the property of Wilcom International Pty Ltd. References to software, features, or brand names are made solely for educational and descriptive purposes. The author and publisher make no claim of ownership to any third-party trademarks.
Accuracy and Liability
Every effort has been made to ensure that the information contained in this guide is accurate and up to date at the time of publication. However, the author and publisher assume no responsibility for errors, omissions, or changes to the software or hardware described.Readers are encouraged to verify current specifications and version details directly from official sources.
Use of this guide and its methods is at the reader’s discretion and risk. The author and publisher shall not be held liable for any direct or indirect damages resulting from the application of the techniques described herein.
Table of Contents
INTRODUCTION
Why This Guide Exists
The Hatch Philosophy: Stitch with Confidence
The Importance of Experimentation
Getting Started with Hatch Embroidery 3
Introduction to Hatch Embroidery 3
Installation and System Requirements
First Launch and Workspace Overview
Understanding Hatch File Types and Extensions
Exploring Hatch Resources and Built-in Help
Exploring the Interface and Tools
Main Menu and Ribbon Structure
Toolbars, Panels, and Dockers
Design View Modes and Zoom Controls
Customizing Preferences and Shortcuts
Saving, Opening, and Managing Projects
Creating and Editing Embroidery Designs
Creating a New Design from Scratch
Using Shapes, Outlines, and Fill Tools
Editing and Reshaping Objects
Combining and Grouping Objects
Using Auto-Digitize and Magic Wand Tools
Digitizing Techniques and Professional Workflows
Understanding Digitizing Fundamentals
Manual Digitizing Step by Step
Auto-Digitizing from Bitmaps and Vector Art
Managing Stitch Density, Angles, and Directions
Troubleshooting Common Digitizing Errors
Lettering, Monograms, and Artistic Effects
Using Lettering Tools in Hatch
Working with Monograms and Borders
Curved and Circular Text Layouts
Applying Artistic and 3D Stitch Effects
Using TrueType and Imported Fonts
Color Management and Thread Control
Understanding Thread Charts and Color Palettes
Color Picking, Swapping, and Matching Tools
Managing Thread Layers and Sequence Order
Previewing Color Variations in TrueView Mode
Saving Custom Palettes and Brand Libraries
Exporting, Hooping, and Stitch-Out Preparation
Understanding Hoop Types and Sizes
Positioning Designs within Hoops
Previewing Stitch-Out Simulation
Exporting Designs for Machine Formats
Printing Templates and Stitch Sheets
Troubleshooting, Maintenance, and Advanced Tips
Common Hatch Embroidery 3 Issues and Fixes
Software Maintenance and Updates
Backing Up and Restoring Projects
Integrating Hatch with Other Software
Continuous Learning and Community Resources
Appendices
Appendix A — Hatch Keyboard Shortcuts & Quick Commands
Appendix B — Common Troubleshooting Error Codes
Appendix C — Glossary of Embroidery Terms
Appendix D — Color Brand Reference Chart
Appendix E — Index
INTRODUCTION
There’s something timeless about the art of embroidery. The soft hum of the machine, the shimmer of thread catching light, and the delicate precision of each stitch all remind us that creativity doesn’t just live in paint or pixels—it lives in the tactile language of fabric and texture. Over the centuries, embroidery has evolved from a purely hand-crafted tradition into a dynamic fusion of art and technology. Today, at the heart of that fusion stands one name that has redefined digital embroidery design: Hatch Embroidery 3.
Whether you’re an absolute beginner eager to personalize a denim jacket with your initials, a small business owner digitizing client logos, or a seasoned professional looking to refine production efficiency, Hatch Embroidery 3 is more than software—it’s a complete creative studio. Built by Wilcom, one of the most respected names in embroidery technology, Hatch represents decades of industry expertise distilled into a user-friendly, visually intuitive platform. With it, you can design, digitize, edit, and export embroidery projects from the comfort of your home or workshop—without needing an engineering degree to understand the tools.
A New Era in Embroidery Design
When computers first began to meet embroidery machines decades ago, the experience was anything but simple. Software was clunky, interfaces were cryptic, and design transfer often felt like navigating a maze of file formats and machine codes. The earliest digitizing systems required costly training and proprietary hardware just to perform basic tasks. The artistry of embroidery risked being buried under layers of technical jargon.
Then came Wilcom’s commitment to accessibility—translating professional-grade technology into approachable software that anyone could learn. Hatch Embroidery 3 embodies that promise. It’s a leap forward in usability and innovation, bringing high-end digitizing capabilities to desktop environments without sacrificing creative control. Version 3 marks a milestone: it combines modern interface design, smoother performance, cloud-integrated resources, and precision tools once reserved for industrial studios.
Imagine being able to trace an image you love—a child’s doodle, a pet portrait, a hand-lettered quote—and transform it into stitches that dance across fabric. Imagine adjusting thread colors, densities, and underlays while instantly previewing how your design will look on denim, silk, or cotton. Imagine importing a photo, letting Hatch auto-digitize it, then refining every curve and stitch until it reflects your vision perfectly. That’s the experience this guide aims to unlock.
Why This Guide Exists
Software manuals, by tradition, have a reputation for being cold and mechanical—filled with terms that assume too much and explain too little. This guide takes a different approach. Think of it not as a manual, but as a companion—one that walks beside you, explaining concepts clearly, demonstrating steps visually, and offering creative insights grounded in real embroidery practice.
The goal of this book is simple: to help you build confidence and mastery in Hatch Embroidery 3, one stitch at a time.
Each chapter in this guide has been crafted with intention. You won’t just learn what each tool does—you’ll learn why it matters, when to use it, and how to combine techniques for the best results. Every explanation is written with both clarity and creativity in mind. Because while Hatch is technical software, embroidery remains an artistic process—and art thrives when it’s understood deeply, not just followed by rote.
The chapters flow progressively, starting from setup and navigation before diving into hands-on creation, digitizing, lettering, and advanced optimization. Along the way, you’ll encounter examples drawn from real-world embroidery scenarios—whether designing a monogram, digitizing a company logo, or adjusting thread colors for a photo-realistic effect. You’ll also find time-saving tips, professional shortcuts, and cautionary notes to help you avoid common pitfalls that even experienced users stumble upon.
Who This Guide Is For
Hatch Embroidery 3 was designed to be flexible. So is this guide. Whether you’re a home hobbyist, small business owner, freelance designer, or educator, you’ll find that the lessons within adapt naturally to your goals.
If you’re new to embroidery software
, this guide will act as your roadmap—starting from installation and basic navigation, gently building your confidence through small, achievable projects.
If you’re migrating from Hatch 2 or other digitizing software
, you’ll appreciate the deep dives into what’s new in version 3: its enhanced interface, smoother rendering engine, and improved workflow logic.
If you run a business
, you’ll learn how to streamline production, manage thread charts, and prepare machine-ready files efficiently.
If you’re a creative professional or educator
, you’ll gain vocabulary and structured methods to teach or document embroidery projects with precision.
The approach throughout this guide is inclusive and encouraging. There’s no assumption that you already know every stitch type or file format. Each concept builds upon the last, creating a cumulative understanding that will serve you whether you’re designing on a small home machine or collaborating with industrial embroidery vendors.
The Evolution of Hatch Embroidery
To truly appreciate Hatch Embroidery 3, it helps to understand where it came from. Wilcom has been developing embroidery software since the early 1980s, long before the personal computer became a design powerhouse. Their flagship professional platform, Wilcom Embroidery Studio, has long been the gold standard in commercial embroidery. When Wilcom decided to create Hatch, they distilled that professional DNA into a more accessible form—retaining the precision but reimagining the interface for artists and crafters.
The result was revolutionary. The first version of Hatch introduced modular licensing—allowing users to start simple and expand capabilities as their skills grew. Hatch 2 refined digitizing accuracy, added faster processing, and introduced cloud-connected libraries. Now, Hatch Embroidery 3 takes everything further with a redesigned workspace, smoother handling of large files, advanced lettering engines, improved stitch simulation, and better integration with modern embroidery machines.
This evolution mirrors how embroidery itself has changed. No longer confined to industrial setups, digital embroidery has become an accessible art form—one that invites creativity, personalization, and experimentation. Hatch stands at that intersection, combining the precision of digital design with the warmth of handmade artistry.
The Hatch Philosophy: Stitch with Confidence
If there’s a single principle at the core of Hatch, it’s empowerment. The software is built to make complex tasks feel intuitive, allowing you to focus on your design rather than wrestling with menus. Features like Auto-Digitize, Object Editing, and TrueView Simulation make it possible to experiment freely—seeing instant feedback before you ever press “Start” on your machine.
But confidence doesn’t come from tools alone—it comes from understanding. That’s where this guide comes in. As you read through the pages, you’ll gain both the technical literacy to operate Hatch efficiently and the artistic awareness to use it creatively. You’ll learn not just to follow the software’s rules, but to bend them to your will—to experiment, adjust, and iterate until your design feels alive.
What’s New in Hatch Embroidery 3
Every major software update brings enhancements, but Hatch 3 isn’t just an update—it’s an evolution. The interface has been refined for smoother navigation and better visibility on high-resolution screens. The color management system is more precise, allowing realistic fabric previews. Stitch generation algorithms have been improved to reduce puckering and optimize pathing. And integration with file formats like SVG, PNG, and JPG has become seamless, making it easier to import external artwork.
Other key updates include:
Enhanced Lettering Engine
– smoother curves, better spacing, and realistic thread simulation for monograms and text.
Faster Stitch Processor
– optimized for multi-core CPUs, improving render speeds for complex designs.
Improved Auto-Digitize Results
– more accurate color segmentation and reduced cleanup after tracing images.
Expanded Thread Library
– includes the latest manufacturer charts and color-matching accuracy.
Updated Export Options
– better handling of popular machine formats (PES, DST, EXP, JEF, VP3, etc.).
New Learning Hub Integration
– direct access to tutorials, community tips, and updates from within the software.
By the end of this book, you’ll be fluent in these new features—and more importantly, you’ll understand how they fit into a practical creative workflow.
The Learning Journey Ahead
Embroidery software can appear intimidating at first glance. Menus upon menus, countless icons, and a seemingly endless list of stitch types—it’s easy to feel overwhelmed. But the secret to mastery lies in rhythm, not rush. This guide was written to match the natural way people learn: step by step, concept by concept.
Chapter 1
begins with the foundations—installation, setup, and first impressions. You’ll learn how to open Hatch, adjust your workspace, and save your first project.
Chapter 2
takes you inside the interface, exploring the ribbons, panels, and dockers that shape your workflow.
Chapter 3
gets hands-on with design creation and editing—showing you how to draw, reshape, and refine embroidery objects.
Chapter 4
dives into digitizing techniques, explaining both auto and manual methods with practical examples.
Chapter 5
introduces lettering and monograms, guiding you through personalized projects.
Chapter 6
focuses on color management, helping you match threads and simulate realistic results.
Chapter 7
covers hooping, exporting, and preparing designs for stitch-out.
Chapter 8
concludes with troubleshooting, maintenance, and long-term creative growth.
By following this sequence, you’ll evolve from a curious beginner into a confident creator—capable of designing professional-quality embroidery projects from scratch.
Beyond Buttons: Developing an Embroidery Mindset
Embroidery is more than a collection of stitches. It’s a conversation between fabric, thread, and imagination. Software like Hatch simply translates that dialogue into digital form. But successful embroidery design also requires understanding tension, underlay, pull compensation, and stitch order. It requires predicting how a machine will interpret your digital commands.
This guide doesn’t treat those aspects as afterthoughts. Instead, it teaches you how to think like both a designer and a technician. You’ll learn to visualize the final outcome before exporting your file, to anticipate how threads behave under tension, and to build designs that are both beautiful and structurally sound.
Each concept will be explained in plain language, reinforced by visual examples and practical exercises. You’ll not only learn how to click buttons—you’ll learn why those buttons matter, and how to make informed choices that reflect your creative intent.
Visual Learning and Practice-Based Instruction
Hatch Embroidery 3 is a visual experience, and so is this guide. Throughout each chapter, you’ll find:
Step-by-step walkthroughs
explaining exactly what to do and why
Visual cues and screenshots
that help you identify each tool
Tips and notes
drawn from professional embroidery workflows
Sketch illustration prompts
at the end of chapters to help visualize complex ideas
If you’re reading the print edition, think of these sketches as companion visuals to reinforce learning. If you’re using the digital version, you’ll benefit from interactive references and linked resources.
The Importance of Experimentation
One of the most liberating aspects of Hatch Embroidery 3 is its tolerance for creativity. You can experiment endlessly—duplicate designs, test different stitch patterns, and preview results instantly. Mistakes become opportunities for discovery. The “Undo” button isn’t a sign of failure; it’s a sign of progress.
This guide encourages you to play—to take every tool you learn and push it beyond its conventional boundary. Create a satin stitch where you’d normally use a fill. Adjust densities to produce textured effects. Layer objects with varying stitch directions for visual depth. The best designs often emerge not from strict adherence to rules, but from fearless curiosity.
Integrating Hatch into Your Creative Workflow
Many modern creators use multiple tools in their design process—graphic software like Adobe Illustrator, CorelDRAW, or Affinity Designer to craft original artwork, and Hatch to bring those visuals to life through stitches. This guide will help you bridge that gap. You’ll learn how to import vector or bitmap artwork, clean it up, assign stitch types, and export machine-ready files—all without losing fidelity or control.
For entrepreneurs, you’ll also discover how Hatch can streamline your business operations—speeding up design revisions, ensuring color consistency, and saving reusable templates for recurring clients.
For educators, the structured nature of this guide makes it an excellent teaching companion for embroidery courses or workshops.
Staying Inspired
Embroidery is as much about patience as it is about precision. The journey from concept to completion can be long—but it’s deeply rewarding. With Hatch Embroidery 3, every project is a chance to learn something new, to combine artistry and engineering in perfect balance.
Throughout this book, you’ll encounter stories, examples, and challenges meant to inspire. Some chapters will ask you to recreate a design from scratch; others will invite you to experiment freely. By the time you reach the final pages, you won’t just know how to use Hatch—you’ll know how to think with Hatch.
A Word on Creativity and Technology
As technology evolves, it’s easy to feel that machines are replacing artistry. But in the world of embroidery, the opposite is true: technology enhances creativity. Hatch Embroidery 3 doesn’t dictate style—it amplifies it. It gives you the tools to express ideas in stitches, blending the traditional charm of needlework with the precision of digital design.
When you sit before your computer, you’re not merely operating software—you’re continuing a centuries-old craft with modern tools. This guide exists to honor that continuity, to make sure that even as the tools evolve, the artistry remains at the center.
Final Thoughts: Your Journey Begins Here
By the time you finish this guide, you’ll have walked through every aspect of Hatch Embroidery 3—from setup to advanced digitizing, from lettering to color harmony, from exporting designs to perfecting stitch-outs. You’ll not only understand how the software works, but you’ll also gain the confidence to let your imagination lead.
So, before diving into Chapter 1, take a moment to think about why you started this journey. Maybe you want to personalize gifts, launch a small business, or simply explore a new artistic outlet. Whatever your reason, you now have a powerful companion—both in this software and in this guidebook—to help you bring your vision to life, one thread at a time.
Welcome to Hatch Embroidery 3—where technology meets creativity, and every stitch tells a story.
Getting Started with Hatch Embroidery 3
Embroidery design software can often feel like a maze when you first open it. Buttons everywhere, toolbars packed with unfamiliar icons, and technical jargon that reads more like engineering instructions than creative direction. But Hatch Embroidery 3 is different. Designed from the ground up to blend professional-level precision with approachable creativity, it invites you to explore rather than intimidates you into hesitation. This first chapter serves as your welcoming tour—it’s where you’ll set up your software, explore your workspace, and gain confidence navigating the powerful yet friendly environment of Hatch.
Before we begin digitizing, coloring, or exporting anything, it’s essential to lay a solid foundation. Think of this chapter as the stitching base layer of your entire learning journey. If your foundation is strong, every design you create afterward will rest on clarity and comfort. You’ll understand how the software behaves, what each workspace element does, and how to keep your system running smoothly.
So, take a deep breath. You don’t need to be an expert in computers or design. You just need curiosity, patience, and a willingness to explore. Hatch Embroidery 3 is built to meet you at your skill level and grow with you. Let’s begin with the most important question of all: what makes Hatch Embroidery 3 stand out in a crowded world of embroidery software?
Introduction to Hatch Embroidery 3
A Software That Thinks Like a Stitch Artist
Hatch Embroidery 3 isn’t just a design program—it’s a creative partner built by people who understand the language of stitches. Developed by Wilcom International, one of the most respected names in embroidery digitizing technology, Hatch brings over 40 years of professional engineering expertise into an environment that feels accessible to hobbyists, educators, and small business owners.
At its core, Hatch 3 is a complete embroidery suite that combines design creation, editing, lettering, monogramming, color management, and machine-ready exporting. Unlike other embroidery applications that focus only on one aspect—such as lettering or auto-digitizing—Hatch integrates every workflow stage in a single, cohesive system. You can draw shapes, assign stitches, edit thread density, preview the result in 3D, and then send it straight to your embroidery machine—all within one intuitive interface.
The goal of Hatch 3 is simple: to turn creative ideas into flawless stitches without overwhelming users with technical complexity.
Key Features That Make Hatch Embroidery 3 Unique
Hatch 3 builds on the strengths of its predecessors with powerful innovations and refinements. Below are the hallmark features that set it apart in today’s embroidery landscape:
🪡 Intuitive Ribbon-Based Interface:
Borrowing the visual clarity of modern design suites like Microsoft Office and CorelDRAW, Hatch’s ribbon interface organizes tools logically by workflow—making it easy to locate commands for creating, editing, or stitching without endless menu diving.
🎨
Enhanced Auto-Digitizing:
Hatch 3’s latest version of Auto-Digitize produces cleaner, more accurate stitch paths from imported images. Its AI-driven segmentation intelligently detects edges, color areas, and shading to minimize cleanup work.
🔠
Advanced Lettering Engine:
The upgraded text module supports smoother curves, better kerning, and improved scaling. You can now adjust letter spacing and alignment with real-time 3D preview and apply creative effects such as shadowing and embossed stitches.
Expanded Thread Libraries:
Hatch includes hundreds of thread brand palettes (Madeira, Isacord, Robison-Anton, etc.) to ensure accurate color matching. Users can also create and save personalized thread sets for specific projects.
📐
Object-Level Editing:
Every shape, fill, and outline is editable at the node level. You can fine-tune stitch direction, adjust underlays, or reshape contours without losing quality.
💡
TrueView Realistic Rendering:
This feature simulates how the final design will appear on fabric, factoring in light and thread texture. It’s especially useful for previewing metallic or specialty threads.
⚙
️ Cross-Software Compatibility:
Hatch reads and writes a wide range of file formats—EMB, PES, DST, EXP, JEF, VP3, and more—making it compatible with almost every embroidery machine brand on the market.
💻
Performance Optimization:
Hatch 3 takes advantage of modern multi-core processors for faster rendering and stitch recalculations, reducing lag even when working on dense, complex projects.
☁
️ Integrated Learning Hub:
The built-in Hatch Academy panel links you directly to tutorials, webinars, and online resources without leaving the software.
Together, these tools transform Hatch Embroidery 3 into a digital artist’s studio—streamlined enough for beginners, yet robust enough for professionals who demand precision.
A Workspace Designed for Clarity and Comfort
The moment you launch Hatch 3, you’re greeted by a visually clean workspace. The interface follows a three-zone design philosophy:
Ribbon Area (Top):
Contains grouped tool categories such as “Design,” “Edit,” “Lettering,” “Colors,” and “View.” Each tab expands to reveal related tools and icons with clear text labels.
Work Area (Center):
The canvas where your embroidery designs come to life. It displays the design grid, rulers, hoop outlines, and guides for measurement and alignment.
Dockers and Panels (Right and Left):
These are collapsible side panels that display properties, object sequences, and color charts. You can drag, pin, or rearrange them based on personal preference.
The Status Bar at the bottom shows information like design dimensions, stitch count, and cursor position—critical for maintaining precision.
What makes Hatch’s workspace truly elegant is its adaptability. You can customize the entire environment—resize toolbars, create shortcut buttons, or even hide certain panels to declutter your screen. For those coming from other software, such as Adobe Illustrator or CorelDRAW, the layout will feel immediately intuitive.
Creativity Without Technical Barriers
Traditional digitizing software often forces users to think like programmers—specifying stitch patterns, coordinates, and angles manually. Hatch 3 liberates you from that rigidity. It understands natural artistic behavior. You can draw with freeform tools, reshape lines visually, and preview the outcome instantly. The “what you see is what you sew” approach gives artists confidence to experiment.
Additionally, Hatch includes context-aware help. Hovering over any icon reveals tooltips with short descriptions and sometimes visual previews. The built-in Help tab links to a searchable knowledge base, saving you countless hours of guesswork.
Every tool, every panel, every option—Hatch 3 was designed to be discovered through exploration, not frustration.
Where Creativity Meets Efficiency
The beauty of Hatch is how seamlessly it bridges the gap between creative exploration and production efficiency. Once you’ve mastered the basics, the same environment will support advanced workflows—batch exporting, thread sequencing, and automation of repetitive design tasks. You’ll find that even as your projects grow more complex, Hatch keeps pace without demanding a steep learning curve.
So whether you’re designing one-of-a-kind gifts, managing a boutique embroidery business, or teaching digital textile design, Hatch Embroidery 3 provides a professional-grade platform tailored to you. It’s more than just software—it’s a long-term creative partner.
Installation and System Requirements
Before exploring all the creative possibilities, we must first ensure Hatch 3 is correctly installed and optimized for your computer. Installing embroidery software is more than just running a setup file; it’s about creating a stable environment that allows the program to perform smoothly and efficiently—especially when dealing with high-density stitch data.
This section will guide you step-by-step through system preparation, installation, activation, and licensing.
Minimum and Recommended System Requirements
Hatch 3 is designed primarily for Windows-based systems, leveraging Microsoft’s graphics framework for rendering embroidery designs. While it can run on modest setups, certain configurations will give you smoother performance.
Component
Minimum Requirement
Recommended for Optimal Performance
Operating System
Windows 10 (64-bit)
Windows 11 (64-bit)
Processor
Intel Core i3 or AMD Ryzen 3
Intel Core i5/i7 or AMD Ryzen 5/7
RAM
8 GB
16 GB or more
Storage
2 GB free space
SSD drive with 5 GB free space
Display
1366 × 768 resolution
Full HD (1920 × 1080) or higher
Graphics
Integrated graphics
Dedicated GPU with 2 GB VRAM
Internet
Required for activation and updates
Required for cloud features
USB Port
For dongle (if applicable)
1 free port
If you are using a laptop, ensure it is plugged into power during installation to avoid system interruptions.
Step 1: Preparing Your Computer
Before running the installer:
Close all other applications.
This prevents file conflicts during installation.
Update Windows.
Run the latest system updates to ensure compatibility with the installer.
Disable antivirus temporarily
(optional). Some antivirus programs may mistakenly flag installers that modify system paths.
Backup existing Hatch files
if upgrading from Hatch 2. Store them in a separate folder to prevent overwriting.
Step 2: Downloading Hatch Embroidery 3
Visit the official
Hatch Embroidery website
(
https://hatchembroidery.com
).
Navigate to the
Downloads
section.
Choose
Hatch Embroidery 3 Full Installer
.
Click
Download
and wait for the setup file (approximately 2–3 GB) to complete.
You can also download the Free 30-Day Trial version, which offers full functionality except for permanent file saving.
Once downloaded, locate the installer file—usually named HatchEmbroidery3_Setup.exe.
Step 3: Running the Installer
Double-click
the setup file.
When prompted by Windows User Account Control, click
Yes
to allow changes.
Choose your installation language and click
Next.
Read the
License Agreement
carefully and click
I Accept.
Select the installation directory (default: C:\Program Files\Hatch Embroidery 3).
Choose whether to install
desktop shortcuts
and
file associations
for EMB files.
Click
Install.
The process usually takes 5–10 minutes depending on your system speed. When finished, click Finish to exit.
Step 4: Activating Hatch 3
Upon launching Hatch for the first time, you’ll be prompted to activate your license. There are three main options:
Online Activation:
Choose “Activate Online.”
Enter your
license key
(received via email after purchase).
Hatch connects to Wilcom’s licensing server and activates automatically.
Offline Activation (for restricted systems):
Select “Activate Offline.”
Generate a request file (*.req).
Upload it from another device to the Hatch website’s activation page.
Download the response file (*.res) and import it back into Hatch.
Trial Mode:
If you’re evaluating, click “Start Trial.”
You’ll have full functionality for 30 days, after which you’ll need a valid license.
Once activated, Hatch stores your credentials securely. You can deactivate later if transferring the license to another computer.
Step 5: Configuring System Settings for Smooth Performance
Proper system configuration ensures Hatch runs efficiently:
Set Windows Display Scaling to 100% or 125%.
Higher scaling can distort interface icons.
Update Graphics Drivers.
Use the latest NVIDIA/AMD/Intel drivers for optimal TrueView rendering.
Allocate Sufficient Virtual Memory.
Go to
Control Panel → System → Advanced Settings → Performance → Virtual Memory
and increase it to at least
8,000 MB
.
Enable Auto-Save in Hatch.
Go to
Options → General → Auto-Save Every 10 Minutes
. This protects against data loss during power outages.
Adjust Color Calibration.
For accurate on-screen color matching, calibrate your monitor using Windows Display Color Calibration or a hardware calibrator.
Step 6: First Launch and Environment Setup
When Hatch opens for the first time, you’ll see the Welcome Screen. This dashboard provides quick access to:
Create a New Design
Open an Existing Project
Access Hatch Academy Tutorials
Check for Software Updates
Manage License
Take a moment to explore the interface layout. Familiarize yourself with:
Ribbon Tabs:
Design, Edit, Lettering, Color, View
Toolbars:
Frequently used commands (New, Save, Undo, Zoom, etc.)
Properties Docker:
Displays editable parameters for selected objects
Color Palette:
Shows the active thread colors in your current design
Spend a few minutes clicking through these elements. Hatch’s environment is designed for tactile learning—the more you interact, the faster it becomes second nature.
Troubleshooting Common Installation Issues
Even with modern installers, occasional hiccups can occur. Here are solutions to common problems:
Installer won’t start:
Right-click the setup file → “Run as Administrator.”
Missing .NET Framework Error:
Download Microsoft .NET 4.8 from the official site and install manually.


