6,99 €
Mehr erfahren.
- Herausgeber: BookRix
- Kategorie: Lebensstil
- Sprache: Englisch
Feeling overwhelmed by your Singer Quantum Stylist 9960? You’re not alone—and this book was written specifically for you.
The Singer Quantum Stylist 9960 is an incredibly powerful sewing machine, but for beginners and returning sewists, its 600 stitches, computerized controls, and advanced features can feel intimidating right out of the box. The official manual tells you what the buttons do—but not how to actually use them with confidence. That’s where this guide comes in.
This book is a calm, step-by-step companion designed for absolute beginners and seniors who want clear explanations, real understanding, and frustration-free sewing. Every chapter is written in plain language, with patience and encouragement, so you never feel rushed, confused, or talked down to.
Inside this guide, you’ll learn:
- Exactly how to unbox, set up, and power on your Singer 9960 safely and correctly
- A full, easy-to-understand physical tour of the machine, so every lever, button, and screen icon makes sense
- Foolproof instructions for threading, bobbin winding, and drop-in bobbin installation—the most common source of sewing problems
- How to achieve perfect stitch tension and avoid bird’s nests, skipped stitches, puckering, and thread breakage
- Clear guidance on utility stitches, zigzag stitching, overcasting, and reinforcement
- How to confidently explore and customize the 600 built-in stitches, alphabets, mirror imaging, elongation, and stitch memory
- When and how to use each presser foot, including buttonholes, zippers, walking foot, free-motion sewing, and more
- Simple explanations of computerized features, including speed control, needle up/down, tie-off stitches, and LCD settings
- A dedicated troubleshooting section that helps you fix common problems quickly—without panic
- Proper cleaning, maintenance, and care to keep your machine running smoothly for years
If you’ve ever thought:
- “I’m afraid I’ll press the wrong button.”
- “Why does my thread keep tangling?”
- “This machine feels too advanced for me.”
By the end of this book, the Singer Quantum Stylist 9960 will no longer feel complicated or intimidating—it will feel like a creative partner you truly understand.
Whether you want to sew clothing, quilts, home décor, repairs, or gifts, this guide gives you the foundation to sew with confidence, accuracy, and enjoyment.
Stop guessing. Stop struggling. Start sewing with confidence.
Buy a copy now.
Das E-Book können Sie in Legimi-Apps oder einer beliebigen App lesen, die das folgende Format unterstützen:
Veröffentlichungsjahr: 2026
Ähnliche


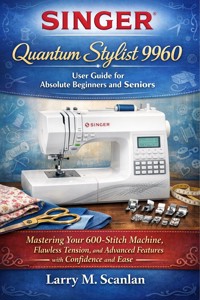
Singer Quantum Stylist 9960 User Guide for Absolute Beginners and Seniors
Mastering Your 600-Stitch Machine, Flawless Tension, and Advanced Features with Confidence and Ease.
Larry M. Scanlan
Copyright © 2026
All rights reserved. No part of this publication may be reproduced, stored in a retrieval system, or transmitted in any form or by any means—electronic, mechanical, photocopying, recording, or otherwise—without prior written permission from the publisher, except for brief quotations used in reviews or educational discussions.
Disclaimer
This book is an independent publication and is not affiliated with, authorized, sponsored, or endorsed by SINGER® or any of its affiliates. While every effort has been made to ensure accuracy, the author and publisher assume no responsibility for errors or omissions, or for any loss or damage resulting from the use of the information contained herein. Users should always follow the official Singer instruction manual and safety guidelines when operating their sewing machines.
Table of Contents
Table of Contents
Welcome to the World of Sewing: Your Singer Quantum Stylist 9960 Adventure!
Unboxing and First Steps: Meeting Your New Machine
1. Unpacking and Inventory Check: What’s in the Box?
2. Identifying the Main Components (A Physical Tour)
3. Connecting Power and the Foot Controller (Crucial Safety Steps and Proper Connection Methods)
4. Navigating the LCD Screen and Basic Settings
5. The Start/Stop Button vs. the Foot Pedal
The Secrets of Smooth Stitching: Threading and Bobbins
1. Choosing the Right Thread and Needle (The Foundation of Good Sewing)
2. Winding the Bobbin (Automatic Winding Made Easy)
3. Threading the Upper Machine Path (Step-by-Step)
4. Using the Automatic Needle Threader (Magic Made Simple)
5. Installing the Drop-in Bobbin
Mastering the Essentials: Utility Stitches and Tension
1. Selecting the Straight Stitch (The Workhorse)
2. Understanding and Adjusting Stitch Length and Width
3. Dialing in Perfect Thread Tension (The Balancing Act)
4. The Reverse and Reinforcement Functions
5. The Zigzag Stitch and Basic Overcasting
Exploring the Universe of 600 Stitches
1. Accessing and Selecting Decorative Stitches
2. The Alphabet and Memory Functions (Personalizing Your Projects)
3. Mirror Imaging, Elongation, and Stitch Editing
4. Satin Stitches and Appliqué Techniques
5. Creating and Saving Custom Stitch Combinations
Presser Feet: Your Machine's Specialized Tools
1. Quick-Change System: Attaching and Releasing Presser Feet
2. The One-Step Automatic Buttonhole Foot (A Dedicated Process)
3. Zipper Insertion with the Zipper Foot
4. Overcasting and Rolled Hemming Techniques
5. Advanced Feet: Walking Foot, Free Motion, and Open Toe
Total Control: Operating the Computerized Features
1. Understanding the Function Buttons (Needle Up/Down, Tie-Off)
2. Setting and Using the Maximum Speed Control Slider
3. Customizing Machine Settings (Volume, Screen Contrast, Language)
4. The Drop Feed System for Free Motion Sewing and Darning
5. Needle Positions and Pivoting (Cornering Like a Pro)
Troubleshooting: Solving Common Sewing Problems
1. The Dreaded Thread Breakage (Upper and Lower)
2. Tangled Messes: The "Bird's Nest" Beneath the Fabric
3. Skipped Stitches and Needle Issues
4. Machine Error Codes and What They Mean
5. Fabric Feeding Issues (Puckering and Uneven Seams)
Longevity and Care: Keeping Your 9960 Running Smoothly
1. Changing the Needle (When and How)
2. Removing and Cleaning the Bobbin Case Area (Lint Patrol)
3. Oiling the Machine (The Manufacturer's Guidance)
4. Proper Storage and Dust Coverage
5. When to Call a Professional (Knowing Your Limits)
Appendix
Appendix A: Quick-Reference Charts
Appendix B: Technical Specifications and Service Data
Appendix C: Fabric Care and Needle Matching Guide
Appendix D: Alphabet and Stitch Editing Codes
Appendix E: Essential Maintenance Checklist
Welcome to the World of Sewing: Your Singer Quantum Stylist 9960 Adventure!
The Invitation to Create
If you are holding this book, chances are you’ve just brought a magnificent piece of technology into your home: the Singer Quantum Stylist 9960. Take a moment and just let that sink in. This isn't just a machine; it's a gateway to an entirely new world of creativity, practicality, and personal expression. Perhaps you’re an absolute beginner who has never touched a needle and thread, or maybe you’re coming back to sewing after a long hiatus, feeling intimidated by all the computerized bells and whistles. We know exactly how you feel. That beautiful, powerful machine sitting on your table can look a little overwhelming right now. It has hundreds of stitches, screens, and specialized feet—it’s like the cockpit of a small airplane! But here is the most important thing you need to know: you are absolutely capable of mastering this machine. This guidebook is dedicated to proving that to you, one simple, reassuring step at a time.
This isn't a dry, technical manual written by engineers. This is your friend, your patient instructor, and your personal guide written specifically for someone who needs the most basic steps broken down, clarified, and explained with genuine encouragement. We will decode the technical jargon, show you exactly where to put the thread, and—most importantly—explain why you are doing it that way. We're going to transform that initial feeling of intimidation into a feeling of excitement and confidence. The Singer 9960 is a fantastic machine because it has been designed to make your life easier; our job is to show you how to unlock that ease. Before you know it, you'll be creating clothes, quilts, home décor, and gifts that you'll be genuinely proud of. So, take a deep breath, plug in that power cord, and let’s start this amazing journey together.
Why the Singer Quantum Stylist 9960? A Legacy of Innovation
You didn't just choose any sewing machine; you chose a machine steeped in history and powered by modern innovation. The name Singer has been synonymous with sewing for well over a century. Since the 1850s, Singer has been bringing reliable, robust, and accessible sewing technology to homes all over the world, revolutionizing how clothes were made and how women spent their time. Today’s computerized machines, like your 9960, are the direct descendants of those original, heavy-duty workhorses, but they’ve added intelligence and incredible versatility. The "Quantum Stylist" designation means you have a machine built for both utility and pure artistry. You get the reliable power that Singer is famous for, paired with the computerized precision needed for intricate stitches, perfect buttonholes, and flawless lettering.
The 9960 is unique because it perfectly bridges the gap between a simple starter machine and a high-end embroidery powerhouse. It’s the machine you can grow into, not out of. The incredible suite of 600 built-in stitches, the automatic needle threader, the speed control slider, and the abundance of specialized presser feet are not meant to confuse you; they are there to eliminate the tedious parts of sewing and let you focus on the creative fun. Think of these features as your personal, automated assistants. When you use the one-step buttonhole foot, you aren’t struggling to make a perfect rectangle; the machine does it for you. When you use the speed control, you aren't fighting the foot pedal; you are setting a comfortable, consistent pace. This machine is your partner, and by the time you finish this guide, you’ll be communicating with it fluently.
Taming the Tech: Computerized Sewing Demystified
The biggest difference between modern sewing and the vintage machines our grandmothers used is the onboard computer. And honestly, that’s where the biggest initial fear comes from. We worry about menus, error codes, and pressing the wrong button. Let's tackle that fear head-on: the computer in your 9960 is your friend, not your boss. It manages things like tension, stitch length, and width with precision that a mechanical machine simply cannot match. It ensures consistency across all 600 stitches.
Think of the LCD screen as your command center. It’s constantly giving you helpful feedback: telling you which presser foot to use, what stitch number is currently selected, and even reminding you if a lever or mechanism is in the wrong position. This is the machine's way of preventing mistakes before they happen. For example, if you select a satin stitch that requires the widest setting, the machine instantly adjusts the width internally and recommends the proper foot. If you start sewing while the bobbin winder is still engaged, the machine will often stop and display a helpful error message. This self-correction and feedback loop is what makes computerized sewing so much easier and more forgiving for the absolute beginner. Once you learn to interpret the simple visual language of the screen, the initial feeling of complexity melts away and is replaced by the joy of precision.
The Beginner's Mindset: Patience and Practice
Before we dive into threading and stitches, let’s talk about the single most important tool you need for this journey: patience. Sewing is a skill, and like learning to ride a bike or play an instrument, it involves muscle memory and coordination that only come with practice. Your first bobbin might be lumpy. Your first straight line might look like a wavy river. That is not just okay—it is expected. Every expert sewist, pattern designer, and professional stitcher went through that exact same wobbly beginning. The difference between those who succeed and those who give up is the willingness to accept that mistakes are not failures; they are data points.
Your goal in the first few weeks shouldn't be to finish a garment; your goal should be to produce a perfect, balanced straight stitch on a scrap of fabric. That’s it. Focus on small, achievable victories. This book emphasizes test-sewing on scrap fabric before committing to your project fabric, and we will constantly remind you to do so. Get comfortable with the feel of the foot pedal, the sound of the motor, and the simple act of guiding the fabric. This process of intentional practice builds the confidence and muscle memory you need to tackle more complex projects later. Remember, sewing is a meditative, rewarding process. If you feel frustrated, step away, take a break, and come back with fresh eyes. Your Singer 9960 is ready when you are.
The Anatomy of Precision: Computerization vs. Mechanical Sewing
To truly appreciate your Singer 9960, it helps to understand the fundamental difference between modern computerized sewing and the purely mechanical machines of the past. Mechanical machines relied on a series of gears, cams, and levers to physically control the needle bar's side-to-side movement and the feed dog's forward motion. Changing a stitch meant swapping a cam or manually turning a dial that physically repositioned a lever inside the machine. While reliable, this system inherently limits stitch variety and precision.
The Quantum Stylist 9960 uses sophisticated stepper motors and digital sensors. When you select one of the 600 stitches on the screen, the onboard micro-processor instantly calculates the required needle position (width) and the timing of the feed dogs (length) for every single stitch. It moves the needle bar with minute accuracy that is impossible for human hands or simple mechanics to replicate. This precision is why your buttonholes will be flawlessly uniform, and your decorative stitches will repeat perfectly. This means your job isn't to fight the machine; your job is to tell it what you want to sew, and it takes care of the how. This digital control over parameters like needle position and stitch dimensions is what gives the 9960 its "Quantum" edge.
Navigating the Ecosystem of Accessories
One of the most intimidating things about the 9960 is the sheer volume of accessories it comes with. It’s easy to look at the tray full of little metal pieces and wonder what half of them do. We will cover this in detail in Chapter 5, but for now, understand that each accessory is a specialized tool designed to simplify a specific, often tricky, task.
The All-Purpose (J) Foot:
This is your default foot. It handles 90% of your basic straight and zigzag sewing. It’s your workhorse.
The One-Step Buttonhole Foot:
This foot literally measures the size of the button and signals the machine to create a perfectly sized, perfect buttonhole without any manual stopping or turning.
The Zipper Foot:
It allows you to sew incredibly close to the zipper teeth without accidentally sewing over them, creating a clean, professional finish.
The Walking Foot:
This specialized foot has its own set of feed dogs that move the top layer of fabric in sync with the bottom layer. This is vital for quilting, matching stripes, and preventing shifting or puckering on slippery fabrics like velvet or silk.
The rule of thumb is this: if a task seems difficult, there is probably a specialized foot or stitch designed to make it easy. The machine is giving you a massive toolbox; our goal in this guide is to teach you when to reach for the wrench (the straight stitch) and when to reach for the precision screwdriver (the rolled hem foot).
The Importance of Quality Supplies (The Unsung Heroes)
While this book focuses on the machine, the quality of your finished project is equally dependent on two things that are not the machine: your thread and your needle. Beginners often make the mistake of buying the cheapest thread and using the same needle for every project. This is a recipe for frustration, including thread breakage, lint buildup, and skipped stitches.
Thread:
Invest in a good quality, medium-weight polyester or cotton thread. Cheap thread sheds excessive lint, which builds up inside your machine and gums up the tension disks. More importantly, it often has weak points that snap mid-seam, leading to massive time loss and frustration.
Needles:
Needles are perishable. They should be changed for every 8-10 hours of solid sewing time. They dull, they bend, and they get micro-burrs that snag the thread. Furthermore, you must match the needle type to the fabric.
Universal:
Good for woven fabrics (cotton, linen).
Ballpoint/Jersey:
Must be used for knits (T-shirts, fleece) because the rounded tip pushes the fibers apart instead of cutting them, preventing holes and skipped stitches.
Denim/Microtex:
Stronger needles used for heavy fabrics or delicate, high-count synthetics.
We will reinforce this concept constantly: if you suddenly start having problems with your stitching, the first things to check are always the needle and the thread. The machine is almost never the culprit; it’s usually the consumables. Treating your supplies with respect and using the right tool for the job is a cornerstone of happy sewing.
The Sewing Environment: Your Creative Nook
A comfortable, well-organized sewing space is crucial for a beginner's success. Your sewing environment shouldn't just be a place where you put the machine; it should be a place where you want to be.
Lighting:
Sewing involves close work and small details. Ensure you have excellent task lighting directly focused on the needle area. While the 9960 has its own bright
LED lighting
, supplemental desk lamps are a great investment. Proper lighting prevents eye strain and helps you see fine details like threading the needle or positioning fabric.
Table Space:
The 9960 needs a
stable, flat table
. The vibration of sewing can cause a wobbly machine to affect stitch quality. Even more important is the space
around
the machine. Sewing involves managing large amounts of fabric (even for small projects). Make sure you have clear table space to the left and rear of the machine to support the weight of your fabric, allowing it to glide smoothly under the needle without being pulled.
Ergonomics:
Position your chair and table so that your back is straight and your elbows are at a comfortable, natural angle to guide the fabric. This prevents fatigue and tension, allowing you to focus on the fine motor skills required for accurate stitching.
A relaxed sewist is an accurate sewist.
Setting up this environment first is a small investment of time that pays massive dividends in comfort, accuracy, and overall enjoyment of your new hobby.
Final Encouragement and What Comes Next
We are thrilled that you’ve chosen this Singer 9960 and this guide as your entry point into the world of sewing. You have acquired a powerful, reliable, and fun machine. You are now equipped with the right mindset: patience, an understanding of the machine’s technological advantage, and a respect for the necessary supplies.
Our journey together starts on the very next page, where we will open that box, identify every key component, and prepare your machine for its first, perfect stitch. Remember our mantra: Small steps, consistent practice, and celebrating every single seam.
Unboxing and First Steps: Meeting Your New Machine
1. Unpacking and Inventory Check: What’s in the Box?
The Grand Unveiling: Your Creative Toolkit Arrives
The moment you open the box containing your Singer Quantum Stylist 9960 is a thrill. This isn't just an appliance; it's the centerpiece of your new creative journey. However, the sheer size of the box and the amount of foam and plastic can quickly turn excitement into a slight feeling of dread. Don't worry. Your machine is carefully packaged, and this first step—the unpacking and inventory check—is not just practical; it's the very first part of your learning process. You are giving yourself a guided tour of all the bits and pieces that make this machine so powerful. Taking the time now to identify every item will save you the frustration of searching for a crucial part later when you’re mid-project.
Before you start pulling things out, find a large, clean, and stable surface—a dining table is ideal—and spread out a clean sheet or towel. This prevents small, vital parts from rolling off the table or getting lost in the packaging materials. Take photos of how things are packed before you remove them; it can be helpful if you ever need to transport or store the machine. Lift the machine out by its base or the built-in carrying handle only. Never try to lift it by the handwheel, the thread guides, or the free arm. Once the machine is safely placed aside, we can dive into the treasure trove of components and accessories. Everything you find is a tool designed to enhance your sewing and make complex tasks simple.
The Core Components: Powering Up Your 9960
These are the items that make your machine function and control its speed. They are essential and should be the first items you securely locate.
A. The Machine Head and Hard Cover
This is the main unit itself. Notice the quality and solid feel of the machine—it’s built for stability and years of work. The hard cover (sometimes a soft fabric cover depending on the model variation) should be placed safely nearby. This cover is vital for keeping dust, the number one enemy of a smooth-running machine, out of the internal mechanisms when you're not sewing. Dust can mix with the small amounts of oil and create a sticky residue that slows down the machine's motor and gears over time.
B. The Power Cord
This standard power cable connects the machine to the wall outlet. Safety Note: Always ensure your machine is off before plugging the cord into the machine or the wall. We will cover the specific power port location in the next section.
C. The Electronic Foot Controller
This large pedal is what most sewists use to control the speed of stitching, much like the accelerator pedal in a car. The electronic control ensures precise speed modulation. The harder you press, the faster the machine sews. We will dedicate a later section to discussing the choice between using the Foot Controller versus the Start/Stop button on the machine itself. For now, note that it has a dedicated plug that connects to the machine. Tip: When sewing, always keep the foot controller flat on the floor—never prop it up on a chair or shelf, as this can lead to accidental pressure and sudden stitching.
The Documentation and Resources: Your Instruction Manual and Warranty
Somewhere in the packaging, usually tucked into a separate plastic sleeve, you will find the accompanying paperwork. These are not exciting, but they are critically important.
The Instruction Manual:
While this book, the
[...The Singer Quantum Stylist 9960 User Guide for absolute beginners...]
is your conversational, step-by-step guide, the official manufacturer's manual is the definitive technical reference. It contains technical specifications, exploded diagrams, and official troubleshooting codes. Keep it handy!
Warranty Card and Registration:
Immediately fill out and return the warranty card or, better yet, register your machine online. The Singer 9960 comes with an excellent warranty (often a long-term limited warranty for the machine head, and shorter terms for electronic parts and labor). Registering ensures you are covered should any manufacturing defect arise.
Do this right away!
The Heart of the System: The Accessory Tray and Its Contents
This is where the real utility of the 9960 shines. The Accessory Tray is the removable compartment that slides onto the Free Arm of the machine. When you remove this tray, you will find most of your included presser feet, bobbins, tools, and specialty items stored safely inside. We’ll list the common inclusions here, but always check your specific model’s packing list as accessories can sometimes vary by region or retailer.
Accessory Type
Item Included
Function and Purpose
Presser Feet
All-Purpose Foot (J):
The standard foot for general sewing, straight stitch, and basic zigzag. Your default workhorse.
Zipper Foot (I):
Allows sewing close to the zipper teeth on either side without catching them.
Buttonhole Foot (R):
The One-Step foot that measures the button size automatically to create a perfect, hands-off buttonhole.
Satin Stitch Foot (A):
Has a groove on the underside to allow the dense decorative stitches (satin/appliqué) to pass smoothly underneath.
Blind Hem Foot (L):
Used for creating invisible hems, often with a dedicated guide for precision.
Overcasting Foot (C):
Specialized foot used with the overcast stitches to finish fabric edges and prevent fraying.
Darning/Embroidery Foot:
Used when the feed dogs are dropped for free-motion quilting or darning repairs.
Rolled Hem Foot (F):
Used for very narrow, neat hemming on lightweight fabrics like scarves or ruffles.
Walking Foot:
Often included, this foot has its own set of teeth to feed the top layer of fabric equally with the bottom layer (essential for bulky materials or quilting).
Bobbins & Spools
Extra Bobbins (Class 15J):
These are the spools for the lower thread. The 9960 requires Class 15J clear plastic bobbins. PRO TIP: Only use the clear plastic ones designed for computerized machines; metal bobbins can interfere with the machine’s internal magnets and sensors.
Auxiliary Spool Pin:
An extra pin that fits onto the machine for using large cones of thread or for twin-needle sewing.
Spool Caps/Felt Discs:
Small discs that slide onto the spool pin to hold the thread spool securely and ensure smooth unwinding.
Tools & Maintenance
Needle Set:
A variety pack of needles (Universal, Ballpoint, Denim) to get you started.
Lint Brush/Seam Ripper:
The Lint Brush is your most important maintenance tool; the Seam Ripper is every sewist’s necessary undo button.
Screwdrivers:
Small L-shaped screwdrivers for changing the needle plate or presser foot holder.
Clearance Plate:
A small plastic plate used to provide extra height when starting a thick seam or sewing buttonholes on heavy fabric.
PRO TIP: Organizing Your Feet
The sheer number of feet can be daunting. As soon as you unbox them, label the compartments of your Accessory Tray or a separate small tackle box. Knowing which is the A-Foot versus the L-Foot will save you hours of confusion, as the LCD screen will often display the recommended foot’s letter.
The Final Inventory Check: Before You Proceed
Once everything is out of the box and identified, place all the small accessories into the Accessory Tray and place the Foot Controller and Power Cord nearby.
Your Inventory Checklist Should Include:
The Machine Head (9960)
Hard Cover
Power Cord
Foot Controller
Instruction Manual / Warranty Info
Accessory Tray containing:
Minimum of 5-8 Presser Feet (including All-Purpose and Buttonhole)
Needles, Bobbins (3-4 minimum)
Spool Caps, Auxiliary Spool Pin
Lint Brush, Seam Ripper, Screwdrivers
Now that your inventory is complete and you’ve met all the components, it’s time for the most important step: getting to know the machine’s physical layout.


