Erhalten Sie Zugang zu diesem und mehr als 300000 Büchern ab EUR 5,99 monatlich.
- Herausgeber: Quintessence Publishing Co. Ltd.
- Kategorie: Fachliteratur
- Serie: QuintEssentials of Dental Practice
- Sprache: Englisch
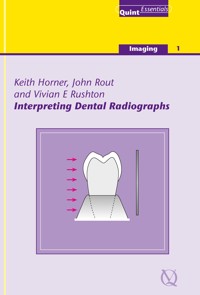
After clinical history-taking and examination, radiography is the "third way" of diagnosis, and dentists face the daily task of interpreting radiographic images to help in patient management. This book aims to give a comprehensive guide to reading x-ray images in dental practice and concentrates on intraoral radiographs. The text builds on a strong foundation of anatomical knowledge and is reinforced by the authors' experience of the radiological appearances that frequently challenge dentists.
Sie lesen das E-Book in den Legimi-Apps auf:
Seitenzahl: 169
Veröffentlichungsjahr: 2019
Das E-Book (TTS) können Sie hören im Abo „Legimi Premium” in Legimi-Apps auf:
Ähnliche


Quintessentials of Dental Practice – 5Imaging – 1
Interpreting Dental Radiographs
Authors:
Keith Horner
John Rout
Vivian E Rushton
Editors:
Nairn H F Wilson
Keith Horner
Quintessence Publishing Co. Ltd.
London, Berlin, Chicago, Copenhagen, Paris, Milan, Barcelona, Istanbul, São Paulo, Tokyo, New Delhi, Moscow, Prague, Warsaw
British Library Cataloguing in Publication Data
Horner, K. (Keith), 1958 - Interpreting dental radiographs. - (The quintessentials of dental practice) 1. Teeth - Radiography I. Title II. Rout, P. G. J. (Peter Graham John) III. Rushton, V. E. IV. Wilson, Nairn H. F. 617.6'07572
ISBN 1850973164
Copyright © 2002 Quintessence Publishing Co. Ltd., London
All rights reserved. This book or any part thereof may not be reproduced, stored in a retrieval system, or transmitted in any form or by any means, electronic, mechanical, photocopying, or otherwise, without the written permission of the publisher.
ISBN 1-85097-316-4
Table of Contents
Tittle Page
Copyright Page
Foreword
Preface
Chapter 1 Basic Principles
Aim
Introduction
What Makes the Image?
The Nature of the Radiation
X-ray energy
X-ray intensity
The Nature of the Object
Atomic number
Physical density
Thickness and shape
The Characteristics of the Image Receptor
How “Accurate” is a Radiographic Image?
Magnification
Image Sharpness
Spatial Perspective
Temporal Perspective
How Should We Interpret the Radiographic Image?
Using the Best Viewing Conditions
Systematic Examination of Radiographs
Summary
Further Reading
Chapter 2 Normal Anatomy
Aim
Introduction
Teeth and the Periodontium
The Tooth
Pulp anatomy
Developing Teeth
Alveolar Bone
The Maxilla
Anterior region
Canine/premolar region
Molar region
Third molar region
The Mandible
Anterior region
Premolar region
Molar region
Sockets and Healing
Further Reading
Chapter 3 Dental Caries
Aim
Introduction
Radiographic technique
Types of caries
Proximal caries
“Pre-radiological”
Enamel Lesion
The Lesion at the Amelodentinal Junction
Dentine Lesion
Lesions at the Pulp
Factors Affecting Radiological Interpretation of Proximal Caries
Monitoring Proximal Caries
Occlusal caries
Factors Affecting Radiological Interpretation of Occlusal Caries
Buccal/lingual caries
Root Surface (Cemental) Caries
Secondary (recurrent) caries
Diagnostic validity of radiology in caries diagnosis
Further Reading
Chapter 4 Radiology of the Periodontal Tissues
Aim
Introduction
Periodontal Disease Classification
Choice of Radiographs
Interpreting Periodontal Bone on Radiographs
Bone Loss
Furcation bone loss
Vertical Bony Defects
Interproximal crater
Infrabony defect
Aggravating Factors
Calculus
Poorly contoured restorations
Tilted teeth
Caries
Other Associated Features
Evidence of occlusal trauma
Bone sclerosis
Maxillary sinus changes
Root resorption
Hypercementosis
Aggressive Periodontitis
Lateral Periodontal Abscess
Periodontal/Endodontic Lesion
Further Reading
Chapter 5 Periapical and Bone Inflammation
Aim
Introduction
Choice of Radiographs
Classification of Inflammatory Lesions
Periapical Inflammatory Disease
Chronic Periapical Periodontitis
Clinical features
Radiological signs
Acute Periapical Periodontitis
Clinical features
Radiological signs
Lesions Associated with Inflammation
External and internal resorption of teeth
Clinical features
Radiological signs
Clinical features
Radiological signs
Hypercementosis
Radiological signs
Pericoronitis
Clinical features
Radiological signs
Osteomyelitis
Clinical features
Radiological signs
Clinical features
Radiological signs
Clinical features
Radiological signs
Clinical features
Radiological signs
Clinical signs
Radiological signs
Further Reading
Chapter 6 Anomalies of Teeth
Aim
Introduction
A Classification of Dental Anomalies
Anomalies of Enamel: Localised or Generalised
Turner’s Hypoplasia
Clinical features
Radiological signs
Amelogenesis Imperfecta
Clinical features
Radiological signs
Clinical features
Radiological signs
Anomalies of Dentine: Generalised
Clinical features
Radiological signs
Clinical features
Radiological signs
Anomalies of Enamel and Dentine
Clinical features
Radiological signs
Altered Crown Morphology
Clinical features
Radiological signs
Anomalies of the Pulp/Root Canals
Pulp Stones/Pulp Sclerosis
Altered Root Morphology
Radiological signs
Supernumerary Roots
Radiological signs
Dilacerated Root
Radiological signs
Shortened Roots
Alteration in Tooth Size
Radiological signs
Radiological signs
Altered Tooth Morphology
Radiological signs
Anomalies Affecting the Number of Teeth
Clinical features
Radiological signs
Additional Teeth (Hyperdontia)
Clinical features
Radiological signs
Further Reading
Chapter 7 Trauma to the Teeth and Jaws
Aim
Introduction
Choice of Radiographs
Trauma to the dentition
Dentoalveolar Fractures
Fractures of the Mandible
Trauma to the Teeth and Supporting Tissues
Luxation
Tooth Fracture
Fractures of the crown
Fractures of the root
Sequelae of Tooth Trauma
Fractures Involving Bone
Dentoalveolar fractures
Fracture of the maxillary tuberosity
Fracture of the genial tubercles
Fracture of the mandible
Further Reading
Chapter 8 Assessment of Roots and Unerupted Teeth
Aim
Introduction
Choice of Radiographs
Mandibular Third Molars
Radiographic Assessment of Mandibular Third Molars
Type and angulation of the impaction
The crown
The roots
Bone factors
Other teeth
Maxillary Canines
Radiographic Assessment of Maxillary Canines
Position
Crown and root form
Follicular size
Condition of other teeth
Retained Roots
Further Reading
Chapter 9 Radiolucencies in the Jaws
Aim
Introduction
Choice of Radiographs
Assessing Radiolucencies in the Jaws
The Site of the Lesion
The Shape of the Lesion
The Margin and Lumen of the Lesion
The Presence/Absence of Expansion
Multiplicity of Lesions
The Presence of a Periosteal Reaction
The Effect of the Lesion on Other Structures
Radiolucencies in the Jaws
Radiological signs
Radicular Cyst and Residual Cyst
Clinical features
Radiological signs
Dentigerous Cyst
Clinical features
Radiological signs
Lateral Periodontal Cyst
Clinical features
Radiological signs
Keratocyst
Clinical features
Radiological signs
Nasopalatine Cyst
Clinical features
Radiological signs
Solitary Bone Cyst
Clinical features
Radiological signs
Ameloblastoma
Clinical features
Radiological signs
Metastatic Deposits
Clinical features
Radiological signs
Surgical (Fibrous Healing) Defect
Radiological signs
Giant Cell Granuloma
Clinical features
Radiological signs
Hyperparathyroidism
Clinical features
Radiological signs
Further Reading
Chapter 10 Mixed Density and Radiopaque Lesions
Aim
Introduction
Choice of Radiographs
Assessing Mixed Density/Radiopaque Lesions
The site of the lesion
The radiopacity of the lesion
The margin of the lesion
Multiplicity of lesions
The effect of the lesion on other structures
Position
Mandibular and maxillary tori
Clinical features
Radiological signs
Compound odontome
Clinical features
Radiological signs
Complex odontome
Clinical features
Radiological signs
Sclerosing osteitis
Socket sequestrum
Clinical features
Radiological signs
Osteomyelitis
Osteosclerosis
Clinical features
Radiological signs
Fibro-Cemento-Osseous Lesions
Clinical features
Radiological features
Fibrous Dysplasia
Clinical features
Radiological signs
Paget’s Disease of Bone
Clinical features
Radiological signs
Osteoma
Clinical features
Radiological signs
Metastatic carcinoma
Radiopacities in the Soft Tissues
Clinical features
Radiological signs
Antroliths and Rhinoliths
Clinical features
Radiological signs
Gingival Inflammatory Hyperplasia
Foreign Bodies
Dental materials
Accidental implantation
Further Reading
Foreword
What proportion of procedures in general dental practice includes the interpretation of radiographs? All but a small percentage. It therefore follows that practitioners of all ages should be skilled in interpreting dental x-rays. This very readable book – Volume 5 in the Quintessentials for General Dental Practitioners Series – has been written to help the hard-pressed practitioner maintain and enhance these skills.
A mine of clinically relevant information, generously illustrated with high-quality radiographic images, Interpreting Dental Radiographs provides an authoritative and comprehensive guide to reading x-ray images. With an emphasis on those radiographic appearances that most frequently challenge even the most experienced of practitioners, this book is an invaluable aid to improved diagnosis. Exposing patients to ionising radiation and obtaining good-quality x-rays is to no avail if the information included in the images cannot be accurately interpreted. All those who read or possibly only dip into this book will without doubt gain new insight and understanding of the information included in dental x-rays – an outcome which can only enhance diagnostic acumen and patient care. Interpreting Dental Radiographs is an excellent addition to the Quintessentials for General Dental Practitioners Series, filled from cover to cover with information for immediate chairside application.
Nairn Wilson Editor-in-Chief
Preface
Radiography is an essential tool in dental practice and almost all patients will need a radiograph at some point during a course of treatment. Successful radiography requires well-maintained and safe equipment, careful film handling, accurate technique and controlled processing. Once a radiograph is produced it must be interpreted correctly. This book aims to provide a guide to successful radiological interpretation.
In preparing the book, we made an early decision to focus principally upon the more common radiological diagnostic tasks. While the choice of subjects making up the chapters is fairly predictable, the content was influenced heavily by the correspondence each of us has had with dentists in general practice over the years. General dental practitioners frequently send radiographs to us for an opinion, a service we are happy to provide. Time has informed us that certain conditions, anomalies and lesions recur as diagnostic problems and we have used this experience to help design the book.
Radiology is an expanding clinical discipline, with new technologies adding to the traditional armamentarium of x-ray set and film or cassette. However, in this book we make no apologies for sticking with the more traditional images that make up the overwhelming workload of the average dentist. In particular, we have decided to concentrate upon intraoral radiography, although there are some exceptions. In some places we refer to “image receptor”, to acknowledge the increasing use of digital radiographic systems in dentistry.
Keith Horner John Rout Vivian E Rushton
Chapter 1
Basic Principles
Aim
The aims of this foundation chapter are threefold: first, to give an understanding of the nature of the radiographic image and the factors that govern its formation; second, to recognise the limitations of radiographs; finally, to describe a systematic approach to image interpretation.
Introduction
Our eyes constantly expose our brain to “images”. Our binocular vision allows us to cope with three-dimensions while our colour vision helps to characterise the subtle variations of the objects around us. In contrast, radiographs seem to present a far simpler view on things: x-ray images are two-dimensional and consist of black, white and shades of grey. Interpretation of radiographic images, however, poses very different challenges from those presented by everyday vision. An understanding of these is essential to interpretation.
What Makes the Image?
Image formation begins with a pattern of x-rays hitting the image receptor (film, intensifying screen/film combination or digital receptor). This pattern is recorded, either chemically (film) or electronically (digital radiography), and displayed as a pattern of densities. The image you see is dictated principally by three factors:
the nature of the radiation
the nature of the objects lying between the x-ray source and the receptor
the characteristics of the image receptor.
The Nature of the Radiation
X-ray energy and intensity are the important factors here.
X-ray energy
X-rays are high-energy, high frequency, short wavelength electromagnetic radiation. However, “x-rays” cover a band within the electromagnetic spectrum ranging from lower energy (lower frequency, longer wavelength) to higher energy (higher frequency, shorter wavelength). How the radiation that comes out of your x-ray set fits into this range of energies depends principally upon the kilo Voltage (kV). Most modern dental x-ray sets in the UK are in the 65 to 70kV band. Previously, many sets were manufactured to operate at 50kV. While the kV affects radiation dose, in this chapter we are concerned with the radiographic image. In this context, lower kV leads to high-contrast “black and white” images with few intermediate grey tones. Relatively higher kV produces images with more subtle variation in grey tones (longer grey scale) and lower overall contrast (Fig 1-1).
Fig 1-1 These images of a tooth and a small aluminium step wedge were produced at 50kV (top) and 90kV (bottom). The difference is subtle but the 50kV image shows greater contrast, seen most easily on the stepwedge.
X-ray intensity
The greater the intensity of x-rays the more radiation hits the film. This produces a higher-density (“darker”) image.
The Nature of the Object
The factors included in the “nature” of the objects are as follows.
Atomic number
Fig 1-2 The most striking example of the effect of atomic number upon x-ray absorption is seen with an everyday radiograph. This bitewing shows the enormous contrast difference between metallic restorations (high atomic number) and everything else. The gold crown is very radiopaque because of its very high atomic number, while the composite restorations in a number of teeth are comparatively radiolucent. The bone and teeth (moderately high atomic number elements) are, in turn, substantially more radiopaque than areas showing soft tissues (low atomic number elements).
Physical density
Atomic size is not the only factor of importance in x-ray attenuation. Physical density also plays a significant role. The most practical example of this is the contrast between air and soft tissues. While the mean atomic numbers of these are quite small, the relatively low density of air means that there is a very obvious contrast on radiographs at air/soft tissue boundaries (Fig 1-3).
Fig 1-3 Air/soft tissue interfaces. Despite the fairly small difference in average atomic number between soft tissues and air, a visible contrast is present due to the large difference in density. The tongue outline is shown by white arrows, the soft palate posterior surface with black arrows.
Thickness and shape
Thicker objects absorb more x-rays than thinner ones of the same material. Of course, in nature, objects are of variable thickness and usually have rounded margins. This means that in a two-dimensional radiograph the object will vary in its radiopacity according to its shape.
In practice, these three factors (atomic number, density and thickness) combine to govern the absorption of x-rays. However, the radiographic image depends upon the ability of the receptor (film, intensifying screen/film combination or digital receptor) to record and display the information in the attenuated x-ray beam.
The Characteristics of the Image Receptor
The important characteristics of the image receptor are:
density
contrast
size of silver halide grains.
Density and contrast are partly governed by the characteristics of the objects in the x-ray beam (atomic number, physical density and thickness, as described above) but are also profoundly influenced by the radiographic process itself. In particular, image receptors all have individual “characteristic curves”, that relate the density to the x-ray exposure. This relationship is only linear for some digital systems, all others being non-linear (Fig 1-4). The reasons for this, and the details of the curves for different image receptors, are not relevant to this book. The important point is that changing the image receptor (e.g. changing from one manufacturer of film to another) will have effects upon the character of the image you see, all other factors being equal.
Fig 1-4 Characteristic curve for dental x-ray film(s). Optical density (vertical axis) indicates the “darkness” of the film. For the same density, film A requires less exposure than film B. Film A is, therefore, the faster film.
The size of the silver halide grains in the emulsion has a strong influence upon the ability of a radiograph to differentiate between structures that lie close together (resolution). Resolution is objectively measured by radiographing test objects containing very fine metal wires of decreasing thickness and intervening distance. It can be expressed as the number of line pairs per millimetre (l.p. mm-1). Dental intraoral film has very high resolution – around 20 l.p.mm-1 – greater than the detail visible to the unaided human eye. This explains why magnification of intraoral (periapical, bitewing) radiographs not only increases image size but also improves the detail that can be perceived. Most intensifying screen/film cassette combinations, such as would be used for panoramic radiography, have a resolution of around 5 to 6 l.p. mm-1, explaining why radiographs produced using cassettes can never reproduce detail as well as intraoral film. The resolution of digital receptors used for intraoral radiography has been estimated at between 6 and 15 l.p. mm-1, depending on the system used. This, in part, may explain research findings that reveal that some intraoral digital systems are less effective at demonstrating fine root canal systems and fine endodontic files than conventional film. Three images of the same object on different image receptors that demonstrate resolution differences are shown in Fig 1-5. Using larger grain sizes is one way of increasing film speed. Thus, higher speed to reduce dose to patients involves a trade-off in terms of a reduction in sharpness of the image. Image sharpness is discussed in more detail below.
Fig 1-5 Three radiographs of the same tooth, taken using conventional dental film (right), an intensifying screen/film cassette combination (centre) and a digital intra-oral x-ray system (left). The difference in image sharpness is obvious, with conventional dental film being best. Indeed, at this magnification the grains of this fast emulsion (F-speed) dental film are visible.
How “Accurate” is a Radiographic Image?
We tend to rely a lot on radiographs in dentistry. This reliance is based upon a trust that the image represents the truth accurately. In reality, no radi-ographic image can be a perfect representation of life. Some of the factors that should be considered are:
magnification
image sharpness
spatial perspective
temporal perspective.
Magnification
All conventional radiographic images are magnified. Radiographs are “shadow pictures” and the size of the shadow depends upon the relative relationship of x-ray source, object and image receptor.
But we can use simple geometry (Fig 1-6) to redefine magnification as:
Fig 1-6 Magnification (M) can be defined as the size of the image divided by the size of the object. It is easier to measure in practice, however, by dividing the source to film distance by the source to object distance.
Thus, to produce an image with as little magnification as possible, we would choose an arrangement where the object was as close to the film as possible and where the x-ray source was far away from both. Many old dental x-ray machines used a very short x-ray source-to-skin distance (10cm). These gave relatively high magnifications compared to the modern machines using a 20cm or 30cm x-ray source-to-skin distance. Because magnification cannot be eliminated in conventional radiography we should use reference markers of known length when measuring distances, e.g. files in endodontic working length estimation.
In digital radiography, images are displayed on the computer monitor at various stated magnifications. However, it is important to remember that a “life-size” image (x 1 magnification) refers to the size of the object as recorded on the digital receptor surface, and will still have some magnification depending on the geometric relationship of x-ray source/object/receptor described above.
Image Sharpness
A radiographic image is always less “sharp” in its outline and its internal detail than the original object. In part, this is related to the fact that, inside the x-ray machine, the radiation derives from an area (the focal spot) rather than an infinitely small point (Fig 1-7). Thus, the “umbra” (= “shadow”) of an object will be surrounded by a “penumbra”, or peripheral blur. Clearly, the bigger the focal spot of the x-ray machine, the greater the blurring. Most dental x-ray sets have a focal spot about 1 mm in width. Focal-spot size tends to increase over years of use. Therefore, at least in theory, years of use will lead to a gradual reduction in image sharpness.
Fig 1-7 x-rays are produced in an x-ray tube (inset image). The main picture shows a close-up of the anode. The focal spot is visible as a small rectangular area on the anode surface.
Penumbra size increases as the distance from focal spot to object decreases and that from object to image receptor increases, as shown in Fig 1-8. Thus, for intraoral radiography the “ideal” situation is to have a very long distance from x-ray source to the patient, with the image receptor as close to the tooth as possible (exactly the same “ideal” as that for reducing magnification). With the paralleling technique for intraoral periapical radiography, the film has to be placed at a distance from the tooth and a longer focus-to-skin distance is needed compared to the old bisecting angle technique, where the film could be pressed closely to the tooth. This is why the paralleling technique is sometimes called the “long-cone” technique.
Fig 1-8 Penumbra, or peripheral blurring, is produced by the fact that x-rays are produced not from a point source but from an area (A). The size of the penumbra is reduced by moving the object closer to the film, or by increasing the distance from the source to the object and film (B).
Sharpness is also influenced by the characteristics of the image receptor (as discussed above).
Spatial Perspective
On radiographs the three dimensions (height, width and depth) are converted to just two (height and width). Inevitably, therefore, the observed image depends upon perspective.
In the dental context, an appreciation of depth in an image is often gained by prior knowledge of normal anatomy. For example, we know that the incisive (nasopalatine) foramen lies to the palatal side of the upper central incisors. However, where anatomical knowledge is not helpful, three-dimensional appreciation can only be restored to radiography by viewing two radiographs with a differing perspective. At its simplest, this will involve taking two images at right angles (Fig 1-9). However, two images with only marginal differences in perspective allow interpretation of three dimensions by using the principle of parallax.
Fig 1-9


