11,49 €
Mehr erfahren.
- Herausgeber: Crowood
- Kategorie: Geisteswissenschaft
- Sprache: Englisch
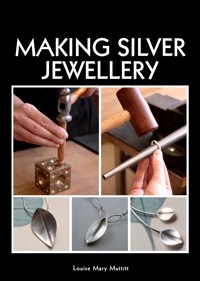
Silver is an exciting and versatile material for jewellery makers, both beginners and the more advanced, and nothing beats the satisfaction of creating and making your own designs. This book shows you how. Full of inspiring ideas and finished pieces, it explains over forty processes including the more advanced techniques such as fold forming and keum-boo and encourages the reader to experiment with their own designs. Contents include: Step-by-step explanations with bench tips from the author's own experience; advice on the jewellery process, including how to gather inspiration for designs and considerations for making wearable jewellery; a chapter dedicated to the surface finishing and polishing of silver to give your designs a professional finish. This is an accessible introduction to making silver jewellery with progression to more advanced techniques. Beautifully illustrated with 324 colour photographs.
Das E-Book können Sie in Legimi-Apps oder einer beliebigen App lesen, die das folgende Format unterstützen:
Seitenzahl: 159
Veröffentlichungsjahr: 2014
Ähnliche


MAKING SILVER JEWELLERY
Louise Mary Muttitt
First published in 2014 byThe Crowood Press LtdRamsbury, MarlboroughWiltshire SN8 2HR
www.crowood.com
This e-book first published in 2014
© Louise Mary Muttitt 2014
All rights reserved. No part of this publication may be reproduced or transmitted in any form or by any means, electronic or mechanical, including photocopy, recording, or any information storage and retrieval system, without permission in writing from the publishers.
British Library Cataloguing-in-Publication Data
A catalogue record for this book is available from the British Library.
ISBN 978 1 84797 684 0
Acknowledgements
I would like to dedicate this book to my wonderful family, who are my husband Martin and my Mum, both of whom give me endless support and help in everything that I do, as well as my brothers and sisters, Anthony, Matthew, Katie and Rosie. You are all pillars of strength to me and I would never have achieved all I have without you. I would also like to extend my thanks to my friends for their continued support. Particular thanks go to Hannah Bates for photography and Natalia Sarrazin for assistance in making jewellery samples. I would also like to thank every individual who has taught me various elements of the craft of silversmithing over the years, and the people who have bought and commissioned works, which enable me to continue to practise the work that I love every day.
CONTENTS
INTRODUCTION
1 THE WORKBENCH
2 SILVER
3 INSPIRATION AND DESIGN
4 STARTING TO WORK WITH SILVER
5 ANNEALING AND SOLDERING
6 TEXTURING SILVER
7 FORMING AND SHAPING SHEET SILVER
8 POLISHING AND FINISHING SILVER
9 WORKING WITH SILVER WIRE
10 FINDINGS AND CHAINS
11 DECORATIVE TECHNIQUES
12 STONE SETTING
APPENDIX
MOHS’ SCALE
SUPPLIERS
FURTHER READING
FURTHER INFORMATION
INDEX
INTRODUCTION
This book aims to be an accessible introduction to the wonderful possibilities of making jewellery in silver. It moves through an extensive range of techniques from simple cutting and filing through to more advanced skills such as fold forming and keum-boo. These are all made accessible with step-by-step guides to the processes, which you can then put into practice in your own pieces. Many of the techniques can be achieved in a small space without the need for significant investment in tools and equipment, and by following these guides you will be able to create high-quality jewellery items in silver.
Making silver jewellery can at times be very challenging; sometimes the solder just will not run as you would like it to, or you heat a piece too much and it melts. Rest assured, it has happened to us all at some point, and your skills will improve with practice. One of the pleasures of making jewellery by hand is the knowledge of the hard work that has gone into the making of a piece. Take pride in the pieces that you make and take time to make and finish them with care. Ensure that solder seams are tight fitting before attempting to solder, smooth edges of pieces properly, remove firestain and make sure that the final surface finish is beautiful. This attention to detail will be evident in the pieces that you make.
It has always given me great joy to make things. Growing up in rural north Herefordshire, my Mum always had projects on the go, from tapestry to knitting, and so as a child I followed in her footsteps, having my own sewing basket with projects inside. Towards the end of primary school I recall starting to collect tiny beads and threading them into necklaces, little knowing then it would be the starting point for my career. Looking back, I can see that working on a small scale has always come naturally to me. About four years later, I attended an after-school club making silver jewellery. For me, the joy of working in silver was instant, and it was not long before I was making my first silver jewellery collection in the garage. In writing this book I have enjoyed remembering that first time I was introduced to silver. It still brings me a moment of delight when a piece is finally completed, turning it and seeing how the surface finish plays with the light around it as the magical quality of the silver shines through.
Growing up in a rural area meant I was surrounded by wonderful plants and flowers all the time, and this led me to greatly appreciate nature. It seems that my instinctive tendency to design and make pieces on a small scale also translates to the inspiration that I source as an artist. Whether I am looking at an oak tree or a more exotic flower in a botanical garden, I am drawn to the immense detail of a single leaf rather than an entire plant. I still marvel as I discover yet more creations by nature in the plant world, and always have a camera close at hand to capture an interesting form. These sources of inspiration are the basis for the development of my jewellery and silverware designs. I have devoted a chapter to helping you to find your own inspirations and resources for jewellery designs, and have also given practical advice for the more technical considerations when designing jewellery.
I studied for a degree in Metalwork and Jewellery at Sheffield Hallam University and as part of the course I spent a semester at Kookmin University in Seoul, South Korea, which was where I learned how to use keum-boo. My workshop is now located in Birmingham’s historic Jewellery Quarter where my practice benefits from a range of highly skilled craftspeople in the local community, from gold platers to stone setters. I continue to thrive on natural sources, such as plants, as inspiration for my designs and take great care over the detail of pieces. For almost a decade now I have been making jewellery and silverware to sell, via galleries and at exhibitions, as well as making pieces to commission for private clients.
Finishing a silver bracelet using wire wool.
This book describes many of the techniques and methods that I use in my own practice as a silversmith. I have had the privilege of being taught by many highly skilled craftspeople over the years. We all do things slightly differently, so take these techniques as a starting point, as you may find effective ways of altering them to suit you. Once you have tried some of the step-by-step techniques and projects, you will hopefully feel more confident about branching out with your own designs. One of the biggest lessons I have learned and would like to pass on to you when working on a new design is this: always think several steps ahead. Time spent planning the processes in order may well save a lot of time later on. For example, when planning to bend a piece of metal, should it be protected with some tape so that it does not get marks which would need to be filed out afterwards? When unsure about a new process or design, trying a sample in brass or copper first can be an effective way to iron out practical issues. Keep a written and photographic record of pieces you make, whether finished or experimental, so that when you want to make a piece again or do something similar you will have notes to refer to which will tell you important technical details such as exactly which diameter the wire was or what you set the rolling mill thickness to.
To be able to spend time making objects and jewellery in silver is a joy, but to have practised these skills for long enough and to have reached a level to be able to share them with others is a great pleasure indeed. As my own enriching creative journey as a silversmith continues, I hope that this book will inspire you and help lead you towards discovering the joy of making jewellery in silver.
The author at work using traditional silversmithing techniques.
CHAPTER ONE
THE WORKBENCH
Setting up a place to work
Taking time over setting up a suitable place to work is important to make working on your silver jewellery easier, and also more enjoyable. Getting it right will also mean you can work more efficiently. You do not need a large space – just enough for a small desk will be sufficient to get started initially. The area should preferably be ventilated and well lit, ideally with natural light. Make sure the area, even if small, is free from other clutter, and has access to a power socket. It should also be dry, as damp will cause tools to rust. Access to a sink is very useful, and it is a good idea to fit the plug hole with a fine strainer, which will catch any small pieces of metal that might otherwise accidentally get washed down the plug hole.
The workbench
The central focus of your workspace will be your workbench, so take time to consider this carefully and choose the best option for you. The main requirement is that it should be sturdy, as you will need to hammer on it and push against it whilst working; for further stability fix it to the wall or floor if you can. The workbench also needs to be the correct height – this will be around 1m (39in). To measure the ideal height for you, first select your chair. Make sure your chair is comfortable as you may be working for long periods of time; an office chair with adjustable height is ideal. Set the chair fairly low, so that your knees are parallel with or just above your waist. The bench top should be at midchest level when you are sitting upright with the chair in this position.
A traditional workbench will have a semi-circle cut out of the front, which allows you to get close to your work. In the centre of the semicircle cut-out, the bench peg is positioned. This is a wedge-shaped piece of wood, with a ‘v’ cut out of it. It supports your piece and helps to keep it stable whilst working on it. The bench peg will be about 12–20cm (5–8in) from your eyes whilst working, and your neck will be in alignment. Do not stoop to work, as this may lead to back problems.
Jewellery workbench.
Underneath the bench peg is either a tray or a bench skin. This will catch small pieces and filings that can be gathered up to reuse or recycle; it also protects the jeweller from any hot or sharp objects.
Some benches have storage drawers built into them. Lots of small hand tools are used when making jewellery, so you do need to consider how you will store them. Small shallow drawers are ideal, as you can find things more easily. It is good to be able to reach tools whilst you are at the bench, leading to more efficient working. You might consider hanging tools from hooks on the wall next to your workbench. This keeps the work surface clutter-free and allows you to reach the tools you need as you need them. Jars and pots on your bench are also useful for small items such as saw blades, pens and scribes.
Ready-made workbenches can be purchased from tool suppliers. There are also second-hand or cheaper benches available, but new workbenches are available for reasonable prices online. If you are just starting out or have limited space, you can build your own jewellery workbench, or convert an old desk or sturdy wooden bench. The bench top should ideally be 5cm (2in) thick. Cut out a semi-circle, and then clamp a bench peg in position. Attach a bench skin underneath; these are traditionally made from leather. Ideally hang the bench skin from hooks so that it can be removed for recovery of metal dust.
Bench peg.
Lighting
Lighting is a crucial consideration when making jewellery. You must ensure that your working area is well lit, as you will be doing a great deal of close work, and natural light should be complemented by a good ceiling light and an adjustable lamp on the bench. Ideally, select an adjustable light with a pivot, which can be clamped securely to your workbench. Adjust the location of the light as you are working, and swing it out of the way when finished. A daylight lamp will give you the best light for jewellery making and can also help to reduce eye fatigue, so is worth investing in.
You may also wish to use a magnifier or a lamp that incorporates a magnifier, to make seeing the smallest details easier. Many jewellers find the ‘Optivisor’ indispensable; this is a binocular glass lens attached to a fully adjustable leather lined headband. It can be flipped out of the way as you are working. Seek advice in a specialist tool shop to find which will work best for you.
Soldering and pickle
Set up an area for soldering, and if the workbench is small consider setting it up in another part of the workshop. A space of about 30cm (12in) wide is ideal. Always make sure you solder in a well-ventilated area. Protect the entire area using heat-resistant blocks, which are usually made from ceramic or asbestos substitute. Smaller soldering blocks can then be used to support the metal pieces as you heat them. As you will be using flames, it is essential that the area for soldering is clear and tidy, with no trip hazards, or items that could catch alight such as scraps of paper or rags. Have a bowl of clean cold water next to the soldering area for quenching. You also need a pickle tank, for removing oxides from your work after heating. You can use a specialist pickle tank, although a slow cooker also works well.
Soldering area.
In terms of selecting a torch to use, it really depends upon the scale of work you will be doing. Small hand torches are a great starting point for small delicate work, such as earrings, lightweight chains and rings. These small torches are readily available and most are run on lighter fuel (butane).
Small hand-held torch.
If however you would like to make larger-scale work, you will need a bigger torch. ‘Sievert’ torches are widely used by silversmiths and most of them come with the ability to change the burner head to get different flame sizes. These torches are usually run on propane gas.
Whichever torch you decide to use, take care to assemble the equipment correctly, and ensure all valves are switched off when not in use.
Tools
These are the hand tools you will need to begin making silver jewellery. As it is quite an extensive list, your toolkit can be built up over time, as you work through various techniques.
Basic toolkit
For marking out, cutting and drilling:
•
marker pens, both fine and broad tipped
•
paper glue
•
scissors
•
metal ruler
•
vernier gauge/callipers
•
ring sizer
•
scribe
•
dividers
•
centre punch
•
piercing saw frame and blades
•
large files – flat and half rounds
•
set of needle files
•
scraper
•
wet and dry paper
•
snips
•
end cutters and side cutters
•
drill and drill bits (a hand drill can also be used for twisting wire)
•
lubricant such as beeswax or candle wax
For shaping, texturing and stone setting:
•
steel flat plate
•
ring clamp
•
vice
•
hammers – planishing, rawhide, ball peen, chasing, bossing, forging/raising
•
doming block and punches
•
swage block
•
number punches, letter punches, decorative punches
•
pliers – round, half round, flat and snipe nosed
•
drawplates
•
ring mandrel (triblet)
•
bangle mandrel
•
pusher (for stone setting)
•
Jeweller’s loupe (choose black-edged as it eliminates reflections)
Hammers: planishing, rawhide, ball peen, chasing, bossing, forging.
Pliers – clockwise from top: round, half round, ring, flat and snipe.
For soldering and other heating processes:
•
tweezers – brass, steel, reverse, plastic
•
borax (or other flux)
•
paintbrush
•
heat-resistant bricks
•
charcoal block
•
honeycomb board (optional)
•
binding wire
•
torch and fuel
•
pickle tank (or slow cooker) and pickle
For cleaning, polishing and finishing:
•
burnisher
•
polishing compounds (tripoli and rouge)
•
polishing mops or felt-covered sticks
•
brass brush
•
pumice powder
•
old toothbrush
•
washing-up liquid
•
silver polish and polishing cloths
Workshop sundries:
•
old rags/towels
•
large paintbrush to dust down work area
•
baking soda or soda ash (to neutralize acid spills)
•
offcuts of wood
•
plughole strainer
•
double-sided tape
Larger tools
These are not essential tools, but are items that you may wish to add to your basic toolkit as you continue to develop your skills making silver jewellery.
Pendant motor
This enables you to drill and polish. It is also very useful for sanding the inside of rings.
Pendant motor(sometimes called flexible shaft tool).
Changing the tool in the pendant motor.
Polishing machine/Barrel polisher
Both of these are excellent for finishing jewellery. The polishing machine pictured is secondhand; it is often worth considering second-hand tools especially when looking at the bigger investment items.
Polishing machine.
Barrel polisher.
Rolling Mill
This can be used to produce textures on metal (see Chapter 6).
Rolling mill.
A safe working environment
Safety equipment
Consider your own health and safety and set yourself up with the following items so that it becomes part of your routine of working to practise in a safe manner.
Safety equipment – clockwise from top:goggles, rubber gloves, dust mask, ear plugs.
Apron
Always wear an apron, and make sure it is made of substantial material. Pickle is a weak acid so will make holes in your clothes; an apron also provides an extra barrier if you were to drop a sharp or hot object. Leather aprons are a good option; at the very least select a robust kitchen apron made of a heavy weave fabric.
Safety glasses
These are essential for any jobs involving a motor, such as drilling and polishing. Never undertake these tasks without goggles.
Rubber gloves
These must be worn to protect your skin when using chemicals, for example when patinating silver.
Dust mask (disposable)
These should be worn to protect your lungs from particle inhalation when sanding or polishing metal. Replace frequently.
Earplugs
These should be worn to protect your hearing while doing loud hammering jobs such as forging.
First aid kit
It is a good idea to have a workshop first aid kit. This should include plasters, dressings, eyewash, antiseptic wipes and cream.
Good working practice
Having set up a good working environment, try to get into good habits; keep your workspace tidy, and avoid leaving items lying around which could be trip hazards, or obstructions such as tools sticking out of a vice which could cause injury. Brush down your workbench daily and gather all the metal dust for recycling. Store chemicals in glass or ceramic bottles, preferably in a locked cupboard, and make sure that they are clearly labelled. Safety Data Sheets are available from tools suppliers for chemicals and other items such as borax and polish; please refer to these for specific health and safety advice as applicable. Dispose of chemicals responsibly, and neutralize acids with soda ash.


