13,99 €
Mehr erfahren.
- Herausgeber: The Crowood Press
- Kategorie: Geisteswissenschaft
- Sprache: Englisch
This practical and well-illustrated book gives a full account of how to make bold, dynamic collagraph prints. It explains a range of techniques from drypoint to collagraph, as well as viscosity printing and mixed media. Packed with finished examples, it also celebrates printmaking as an art form in itself, not just as a process for producing multiples, and encourages the artist to find their own distinct style. The book provides inspiration to achieve vibrant textures and exciting surface effects and there are practical tips to encourage you to experiment and play.
Das E-Book können Sie in Legimi-Apps oder einer beliebigen App lesen, die das folgende Format unterstützen:
Seitenzahl: 126
Veröffentlichungsjahr: 2022
Ähnliche


First published in 2022 by The Crowood Press Ltd Ramsbury, Marlborough Wiltshire SN8 2HR
This e-book first published in 2022
© Vicky Oldfield 2022
All rights reserved. This e-book is copyright material and must not be copied, reproduced, transferred, distributed, leased, licensed or publicly performed or used in any way except as specifically permitted in writing by the publishers, as allowed under the terms and conditions under which it was purchased or as strictly permitted by applicable copyright law. Any unauthorised distribution or use of this text may be a direct infringement of the author’s and publisher’s rights, and those responsible may be liable in law accordingly.
British Library Cataloguing-in-Publication Data A catalogue record for this book is available from the British Library.
ISBN 978 0 7198 4107 1
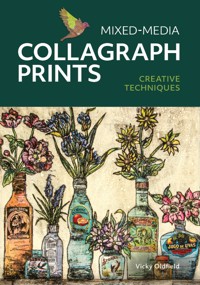
Cover design: Sergey Tsvetkov
Acknowledgements
With great thanks and appreciation to all the printmakers who allowed their work to be represented in this book.
Thank you to my husband and children for proofreading, help with Photoshop, making valuable suggestions and saving me from many an error.
I have had so much help and support over the years from so many printmakers, an incredibly generous and supportive group of people, who have shared techniques and given so much valuable advice. Special thanks to Melvyn Petterson, Colin Gale and Megan Fishpool for all their patience and support when I was starting my printmaking journey.
A big thank you to all the staff, members and visiting tutors who taught me so much during my year as Artist in Residence at Ochre print studio and thank you to the workshop participants from whom I have learnt so much.
I would also like to thank Fraser Marr for his generous help and support with photography and Emma Palmer for allowing me to use some of her photographs taken on a sunny day in my studio.
CONTENTS
INTRODUCTION
CONTRIBUTORS
1GETTING STARTED
2INKING AND PRINTING
3EXPERIMENTING WITH A SIMPLE PLATE
4COLLAGRAPH AND TEXTURE
5CHINE COLLÉ
6PRINTING IN COLOUR
7RELIEF AND VISCOSITY PRINTING
8PRESENTING PRINTS
SUPPLIERS OF ART AND PRINTMAKING MATERIALS
INDEX
INTRODUCTION
Let’s start with the most common question I get asked when people see my work: How did you make it? I soon learned that my descriptions fell on deaf ears, and eyes glazed over as I attempted to describe the techniques used. Demonstrating helped a lot, but there is no better way to understand than by having a go yourself. Creativity is like a muscle; the more you use it the stronger it gets.
The joy of printmaking is in the play, the endless possibilities on offer that can lead the artist to finding a technique that really resonates with their imagery and ideas. There are no rules in art, no right way to create a picture, but the learning process can really help the artist to develop their work and find the elusive look that distinguishes one artist’s work from another.
In this book I am going to take you on a journey through many inexpensive and easy-to-learn printmaking techniques. I will attempt to walk you step-by-step through different processes until you have mastered mediums that hopefully will inspire you. Gradually, through trial, error and perseverance your work will become more cohesive, and you will develop your own distinctive style. Personally, the physicality of the collagraph, as well as its inherently experimental nature, are what draws me to it as a medium.
The term collagraph amalgamates two words, collage and graphic, which gives a clue to what this often overlooked (by the printmaking purists) process is about. Who does not love carving, cutting and sticking, and this isn’t just the construction of the plate from various found elements, but the subsequent use of the plate for printmaking.
This book is about collagraph, but within this remit we will explore a variety of mark-making techniques all using simple, low-tech materials and tools that don’t require elaborate studio equipment to create rich, textural marks. The unpredictability and infinite possibilities of these methods make for an exciting printmaking life.
For most of the projects in this book an etching press is required; this is basically a machine with metal rollers through which a flat-bed slides under considerable pressure. It is possible to print by hand, but the results are often disappointing when compared with using a press. Most cities have a place to go that offers open access, though a training day may be necessary when you join. Check online or with your local art school for studios that offer facilities.
This is a book with over 200 illustrations; it describes methods to achieve stunning prints in a modern and achievable way. It is designed to encourage the reader to use their own imagination and have a go, accepting the successes and embracing the failures as part of the process of making better art.
TIPS FOR BEGINNERS THAT I HAVE LEARNT OVER MANY YEARS OF MISTAKES
•Start small
It’s tempting to start big; you have this amazing piece in mind, but if you don’t understand the process there is always that learning curve to get through. I believe that by starting small – think postcard size – you can make lots of plates and create both quickly and economically. (A caveat here – good paper is not cheap and it’s always worth using good paper; some plates might only produce a couple of good prints.) Starting small allows you to get a few successful pieces out and gain confidence in your new skills, or it can demonstrate that this technique is not for you.
•Keep it simple
I struggle with this one. Don’t begin with an ambitious four-colour print when you’re starting out; it’s best not to begin with too many preconceived ideas. The techniques will lead you in a direction; use them to their strengths rather than trying to bend a technique to your will. You will learn best if you treat the early prints as play and just explore the mark-making opportunities. Simple images and bold shapes can net amazing results.
•Master the medium
Like most art forms it’s important to get to know your tools and how to get the best out of them to suit your way of working. Try different types of paper, different types of ink and a variety of base plates and see what they all have to offer. Something along this journey will speak to you.
•Be curious
•Use social media
Find your tribe; there is a wealth of information out there on the web. Printmakers around the world connect with one another through Instagram, Twitter, Facebook, Pinterest and YouTube. Contact other printmakers to see how they make prints, what tools, paper and plates they are using. Most people are willing to give advice. Check out blogs where printmakers share successes and failures.
•Trust your voice
•There is always something new to discover
The best advice I can give is to experiment, be bold, be playful. There is no right or wrong way to create. Trust over time that your art will become as unique to you as your handwriting.
CONTRIBUTORS
Sue Welfare
Sue’s work is inspired by the coast and country-side of her home county of Norfolk.
@sue.welfare_artist
Mychael Barratt
Mychael is a London-based painter, printmaker and cartographer.
@mychaelbarratt
www.mychaelbarratt.com.
Sumi Perera
Sumi is an interdisciplinary artist, doctor and scientist, who makes interactive artist-book print installations.
sumi_perera
https://www.sumi-perera.com
Barry Goodman
Barry is known for his vintage-style prints. His colourful graphic prints are a unique blend of Pop-Art and Minimalism.
goodmanstpete
www.barrygoodman.com
Anthony Yates
Anthony has explored various forms of printmaking, from etchings with aquatint through to lino and collagraph.
anthonyyatesrba
Katherine Jones
Katherine’s work comprises painting, drawing and a combination of traditional printmaking techniques.
@katherinejones_pp
www.katherine-jones.co.uk
Ruth Barrett-Danes
Ruth uses a variety of materials and processes (collagraph, drypoint, screenprinting or lino cuts) in each of her projects depending on its subject. Her editions are small and variable, which means each print is unique.
www.printmakerscouncil.com/artists/ruthbarrettdanes
Barrett-Danes
Emma Palmer
Emma is a Surrey-based family and business photographer specialising in natural and authentic portraits.
www.emmapalmerphotography.co.uk
CHAPTER ONE
GETTING STARTED
Strictly speaking drypoint is not a collagraph, but as it is the simplest and most direct of the intaglio techniques it is a perfect starting point for learning printmaking. You can make a plate in a matter of minutes and be printing in under an hour. The process is very like using a pen without the ink, drawing with a dry point to create an impression which, when inked, can be printed from repeatedly. Think of it as an etching without the acid.
Traditionally drypoint plates are made by scratching into a metal plate with a strong, sharp point – a needle or burin. The point is used to score the surface like furrows in a ploughed field, causing a shaving of metal to lift on either side of the mark. This is known as the ‘burr’ which holds the ink and prints as a velvety rich line, quite distinct from the sharp clean lines available with an etching where you would be drawing through wax. Repeated impressions mean the burrs wear down quickly so the number of good-quality prints is limited, consequently collectors often favour early editions as these are often richer in tone.
PLATES AND SURFACES
Copper, zinc, aluminium and plastic are the most common options here, but you could make a drypoint on tetra pack packaging or an old CD. The surface you choose often depends on how many prints (edition size) you wish to make, and cost. The plates wear down with each pull through the press, meaning that each impression becomes increasingly light.
Drypoint on cardboard is a great way of producing prints at a fraction of the cost of metal plates. The accessibility has a huge appeal for both experienced and novice printmakers; it’s a great place to start as there is not the worry that comes with making marks on an expensive (if beautiful) copper plate, and with this method there are many ways to make some exciting marks and plate shapes that it would not be possible to create on a metal plate. The edition number is limited, the plates don’t last forever, but it’s a fun way to experiment when learning printmaking.
INTRODUCING TOOLS AND MATERIALS
The only materials needed to start are a plate and a point. The plate can be made easily at home and can be taken outdoors to work on in situ. Any effects associated with line drawing can also be conveyed through drypoint; line qualities can be varied by altering the pressure and angle of the tool, deep marks are made by pressing hard and breaking the surface of the plate. Drawing can rely on lines making contours, or tone can be added by crosshatching or stippling.
Shop-bought intaglio tools can be expensive, with the printmaking shop an Aladdin’s cave of wonders. Beginners are the manufacturers’ dream; I would steer clear until you have found a technique that really inspires you and then start your collection.
When you are starting out you can get creative with home-made tools. Many items can be found in your home; you may have sewing needles, metal skewers or carpenters’ nails, a cheese grater or hole puncher lying around the house. Glass cutting or engraving tools also work well – use them all! This is about having fun and seeing what textures and marks you can create, and which ones resonate with you and your work. You may like to be precise and draw with a needle, or loose and enjoy the freedom of random marks.
Drypoint paper plate
This comes with a shiny, laminated surface that prints bright white. Drypoint card can be purchased from printmaking suppliers but any thin card that is laminated on one side will work. It has the feel of card used for cereal boxes, and the surface can be incised with a drypoint needle to produce lines. Bear in mind that you need to press hard enough to break the plastic surface for the ink to penetrate.
Drypoint card.
Cutting equipment
To prepare the plate you will need scissors and a sharp knife or scalpel, a metal-edge ruler and a cutting board.
Cutting equipment.
Mark-making tools
Drypoint needles need to be strong enough to carve into a plate or break the surface; a solid steel tool is the most used. You can improvise by filing a 15cm (6in) nail to a point, use glassengraving tools or if you have access to any old dental tools, they give a lovely mark.
Mark-making tools.
Roulette wheels (a spiky-surfaced wheel that comes in different sizes) are used for making plate tones. They have spinning heads that roughen up the surface, leaving textures that hold the ink.
Sandpaper comes in varying grades and can be used for laying down large areas of tone. It can be used for rubbing onto the surface in selected areas for a scratched look, or it can be run face-down on an etching plate through the press for an even all-over tone on the plate, or cut into shapes for some specific tones.
Tools for scratching the surface and cutting out shapes.
Tools for cutting out shapes can be fun to use; a hole punch or shape cutter will give an embossed clean paper shape.
INTAGLIO INKS, OILS AND CLEANING
Inks are available in both oil and water-based varieties. There are many new non-toxic inks being developed that are water-washable, however it is important that you do not choose a water-soluble ink – etching inks need to be used with damp paper and water-soluble inks dissolve in water. Water-based etching inks are made with a vegetable oil base and repel water. These inks are used a lot in schools or colleges where avoiding the presence of solvents is a high priority and are a great choice when working with children, if only to stay sane with the cleaning up! However, I find these inks lack the richness of an oil-based ink, which given the choice, I use in my own work. Whatever ink you choose, it is essential that you become aware of how to get the best from it. This is the key skill to learn as early as possible.
Ink and plate oil.
Scrim and rags.
Cotton buds, Yellow Pages and tissue squares.
Ink applicators.
You must be able to wipe intaglio etching inks from the plate without pulling ink from the incised lines, and the remaining ink must then transfer fully to the paper. Relief inks are softer than etching inks and easily transfer solid fields of colour and fine detail from plate to paper. If you do not have relief ink, etching ink can be modified to suit the purpose with plate oil, tack reducer, or other additives.
Copperplate oil is useful for mixing with stiff inks to make them easier to use. It is made from linseed oil and comes in three strengths; thin, medium and heavy. Thin copperplate oil is the best weight to add to ready-mixed inks. The medium and heavy versions are more suitable if you mix your own inks by hand using dry pigments.


