22,49 €
Mehr erfahren.
- Herausgeber: Crowood
- Kategorie: Lebensstil
- Sprache: Englisch
Modelling the East Coast Main Line in the British Railways Era follows the construction of an East Coast Main Line layout in 00 gauge, based on the Little Bytham prototype. Little Bytham, nestled in rural Lincolnshire, is the station nearest to where the fastest steam exploits in the country were achieved. Nearby, the Flying Scotsman became the first steam locomotive to reach 100 miles per hour, Papyrus broke the world speed record for a non-streamlined locomotive, and Mallard set the current world speed record for a steam locomotive. This practical guide escorts the reader through all aspects of constructing an East Coast Main Line layout and topics include baseboard construction, track laying and ballasting; wiring and making signals; modelling scenery, buildings, locomotives, carriages and wagons and how to plan an operation sequence.
Das E-Book können Sie in Legimi-Apps oder einer beliebigen App lesen, die das folgende Format unterstützen:
Veröffentlichungsjahr: 2017
Ähnliche


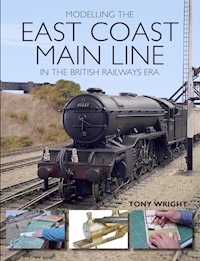
MODELLING THE
EAST COAST MAIN LINE
IN THE BRITISH RAILWAYS ERA
TONY WRIGHT
THE CROWOOD PRESS
First published in 2017 by
The Crowood Press Ltd
Ramsbury, Marlborough
Wiltshire SN8 2HR
www.crowood.com
This e-book first published in 2017
© Tony Wright 2017
All rights reserved. This e-book is copyright material and must not be copied, reproduced, transferred, distributed, leased, licensed or publicly performed or used in any way except as specifically permitted in writing by the publishers, as allowed under the terms and conditions under which it was purchased or as strictly permitted by applicable copyright law. Any unauthorised distribution or use of thistext may be a direct infringement of the author’s and publisher’s rights, and those responsible may be liable in law accordingly.
British Library Cataloguing-in-Publication Data
A catalogue record for this book is available from the British Library.
ISBN 978 1 78500 317 2
Frontispiece: Taken just prior to this book being signed off for printing, this shot illustrates much of what will be described in the following chapters. The trackwork and signals are described in Chapter 3, the structures and buildings in Chapters 5 and 6, and the locomotive in Chapter 7. Here, the B17 is now painted and weathered (by Geoff Haynes) and just above the roof of the first carriage can be seen the gable of one of the station cottages, now completed.
CONTENTS
ACKNOWLEDGEMENTS
INTRODUCTION
CHAPTER ONE: PLANNING
CHAPTER TWO: BASEBOARDS
CHAPTER THREE: TRACKWORK, WIRING AND SIGNALS
CHAPTER FOUR: BASIC SCENERY
CHAPTER FIVE: MODELLING STRUCTURES
CHAPTER SIX: MODELLING BUILDINGS
CHAPTER SEVEN: LOCOMOTIVES
CHAPTER EIGHT: ROLLING STOCK
CHAPTER NINE: TRAINS AND TIMETABLING
CHAPTER TEN: FINE DETAILS
LIST OF SUPPLIERS
LIST OF ABBREVIATIONS
INDEX
ACKNOWLEDGEMENTS
Whenever I write a list of acknowledgements, I’m always conscious of the pitfalls of leaving someone out. If I have done so in this list, then may I please apologize now?
A special thanks to all at British Railway Modelling, particularly to Stephen Warner, John Greenwood, Steve Cole, Ben Jones, Andy York and Howard Smith (currently); also to David Brown, John Emerson and Richard Wilson, my erstwhile colleagues. Several of the pictures in this book were taken during my time at Warner’s and I’m grateful that they can be published here.
To the other editors of the model railway magazines down the years for continuously giving me commissions; these include the late John Brewer, Steve Funt, Roy Johnstone, Dave Lowery, Chris Leigh, Martyn Welch and Tim Shackleton.
I must put on record my appreciation of all the friends who’ve helped with the Little Bytham project. Without their considerable expertise, it would never have been built. Contributors include Ian Wilson, Rob Kinsey, Mick Peabody, Norman Turner, Tony Geary, Norman Solomon, Mick Nicholson, Graham Nicholas, Roy Vinter, Geoff West, Gilbert Barnatt, Ian Rathbone, Geoff Haynes, Bob Dawson, Scott Waterfield and others. All have given their time and expertise to the project and, though money has changed hand on occasions, most has been achieved through the expediency of working in a group and horse-trading. Their contributions will be cited in the following chapters. Successful layouts have been achieved by the writing of numerous cheques, but this book is concerned with the personal making of things, not achieving what one wants by commission, very good though the end results might be.
To the kit manufacturers whose products I’ve built for review or have assisted in the production of new models and writing instructions, including the late John Hughes, Stephen Widdows, Alan Gibson, Dave Ellis, Dave King, Mike Russell, Paul Hill, the late Roger Slade, the late Geoff Brewin and many others.
To Chris Hawkins and George Reeve of Irwell Press who continue to ask me to write books/articles for them (they say I’m cheap!).
To all those layout owners who’ve patiently allowed me to take pictures of their creations.
Finally, to all those I’ve spoken to at shows or in clubs who are interested in this wonderful hobby.
INTRODUCTION
Out of all the tens of thousands of model railway layouts built over the years, it’s probably true to state that only a small proportion of these have been based on actual prototype locations. Though themes might have been followed with regard to the representation of a particular railway company and a particular time period, the majority of layouts built, in all scales and gauges, are of imaginary places. The best of these at least follow prototype practice with regard to station layouts, architecture, signalling and what have you, to the extent that a ‘believable’ scene is created, especially if a fairly tight time period is represented. There are several superb examples of this type of layout illustrated in this Introduction.
‘Borchester Market’, originally built by the late Frank Dyer but now part-refurbished and back on the exhibition circuit. The group has been most sensitive in restoring parts of this old layout, using methods employed by Frank. None of Frank’s stock was bought with the layout, but Ian Forsyth’s beautifully built PDK A2/1 fits into the scene perfectly.
One of the greatest pioneers of ‘realistic’ modelling was the late Peter Denny. Beginning in 1948, and up until the time of his death in 2009, Peter devoted his spare time to creating his model of ‘Buckingham GCR in EM’. As a country parson, he wouldn’t have had much spare time, but he did everything himself and, though not strictly speaking an actual prototype, such was his awareness of real railway practice that it was entirely believable. I say ‘was’ but I should say ‘is’, because it is now in the care of Tony Gee and is operated regularly. Correct operation was essential to Peter’s philosophy.
However, it’s my contention that it’s always better to model an actual prototype. I believe this for several reasons, principally because one has no need to make things up. All the questions one might put to oneself are already answered. How big should a station be? How long should any platforms be? Where are any signals placed? How many bridges need to be built and so on and so on? Granted, this requires a lot of information to be to hand in the form of documents, drawings and, principally, photographs. The sourcing and interpreting of these, particularly the latter, might well constitute many hours of ‘armchair modelling’, but it is absolutely vital to the process. Sourcing enough prototype pictures can also be difficult, but such is the extent of published works nowadays, and the availability of the internet, that it’s never been easier.
Most prototype railway locations tend to be on the large size, particularly main-line locations. Space or, more importantly, the lack of it, can be a militating factor against modelling an actual prototype. That said, some large city termini can be squeezed into extremely tight confinements. Sleepy branch lines can also be represented in not-too-tight a space, but some can sprawl. Of course, we all have to employ ‘selective compression’ at some point, if only to go on/off stage, so to speak. Included in this Introduction are several examples of the modelling of prototype locations and also of modelling where prototype practice has been followed. In almost every case, selective compression has had to be applied, even if, at first glance, the ‘footprint’ for the model might appear to be vast. It is how well this compression has been ‘disguised’ that makes a model entirely convincing, in my view. The layouts shown in this Introduction all look convincing, leading to the absolute ‘suspension of disbelief’.
Though this book mentions prototype modelling in general, it is specifically concerned with the making of my model of ‘Little Bytham’ in OO gauge finescale. I admit the term ‘finescale’ is a bit of a misnomer, because how can OO gauge (which is far too narrow) ever be considered fine scale? That said, I think the term is generally accepted and the majority of readers will know what is meant. It is very much a team effort (large layouts are usually way beyond the work of one person, however skilled, unless they become a lifetime’s work) and the members of the team will be acknowledged later. Though it is region-/time-specific, all the modelling techniques illustrated are applicable to all scales and gauges. I count myself immensely privileged to be part of such a highly skilled team of craftsmen. If nothing else, I hope this book will encourage folk to have a go at the various modelling disciplines for themselves. Much of what will be presented is (possibly) beyond the raw beginner, at least if he/she is working entirely by him/herself. However, everyone has to start somewhere.
Returning to the theme of modelling an actual prototype, of all the ‘Big Four’ companies and their BR successors, there have been far more prototype-based layouts made depicting the LNER/ER/NER/ScR/ECML than any of the others, especially in more recent years. Even if the model is not based on an actual prototype, it will have been based on prototype practice. Obviously, most have been built (and are being built) in 4mm (principally OO), but examples exist in N and O as well. Why there should be such a preponderance of ECML layouts is open to conjecture but I think the principal reason is ‘loco-centric’. By that I mean that locos (particularly big ones) are always the most popular single items when it comes to enthusiasm in railways, both real and model. Perhaps it’s the trainspotter still there in all of us, particularly those of my generation – the massive immediate post-War ‘baby-boomers’ – who grew up with steam railways. This generation, now in early retirement, which is driving the current hobby, are demanding higher and higher standards from the mainstream manufacturers. As for big steam locos, the LNER and its successors had more than all the other three members of the ‘Big Four’ put together (remember that a V2 is bigger and heavier than a ‘King’ or ‘Royal Scot’), with nearly 400 RA9 powerful units.
The LNER/BR legacy. Is this one of the reasons why the ECML is such a popular choice for modellers? Flying Scotsman, fresh from her long-term overhaul, surges through Little Bytham on her first revenueearning trip, to York on 25 February 2016.
Are those big locos the reason for that popularity? Or the fact that in Flying Scotsman and Mallard the LNER/BR has (arguably) the two most famous steam locos in the world? And what about the names some of the others carried? Those evocative ones (the likes of Grand Parade, Royal Lancer and Tudor Minstrel) alongside the absurd (the likes of Pretty Polly, Spearmint and Bachelor’s Button) – names of racehorses – how apposite?
The ‘big engine’ policy carried on into BR diesel days with the peerless ‘Deltics’; worthy successors to the ECML steam thoroughbreds.
The Gresley legacy might, in part, explain the popularity of ECML depictions, epitomized here by this shot of A1 Tracery leaving the shed on the OO layout of ‘Grantham’ being built by Graham Nicholas (and friends). Though this clearly represents a pre-War scene, it does illustrate how beautiful these big ECML locos were, and how much the standard of RTR locos has improved in recent years. Believe it or not, this is an RTR Hornby loco, only slightly modified. That paint finish would rival the work of a top professional.
This book will take the modeller up to the green ‘Deltic’ era on BR, as illustrated here by a modified Bachmann ‘Deltic’, D9015 TULYAR racing northwards through Little Bytham on the Down ‘Afternoon Talisman’. The making up of correct trains will be featured in this book, as shown by this rake, which contains a mixture of Mk1, Thompson and Gresley (articulated) stock. The signal box in the distance in this shot is a mock-up. I’ll be explaining about the use of mock-ups in setting out scenes.
Whatever the reasons for the greater number of models depicting scenes from the east, the principal reason for writing this book is to help and encourage others to investigate how they can do it for themselves. Obviously, though the continuing theme throughout the constructional processes will show how the team built an ECML prototype location, most, if not all, of the methods and techniques to be described are applicable to all aspects of railway modelling, irrespective of the modeller’s principal interest. As has already been made clear, out of necessity, most of what will be described will be based around my own OO gauge layout of ‘Little Bytham’. In fact, its creation has allowed me to write this book around it. It’s a prototype-based model in OO, set in the summer of 1958, of this modest country station, which once existed on the ECML in Lincolnshire, made famous in 1938 when a Yorkshireman drove an A4 through it faster than any steam loco before or since! The choice of 1958 was made for two reasons: one, it’s my own personal ‘high-summer’ of trainspotting and, two, that year was the last full one when trains ran on the Midland (MR)/Midland & Great Northern (M&GNR) section at Little Bytham.
Some of the other layouts shown are from years ago, when much of what was done was pioneering – layouts such as ‘Hitchin’, built by the late Bert Collins, and the seminal ‘Borchester Market’, by the late Frank Dyer. Though the latter was not a model of an actual location, it was based entirely on prototype practice, and such is its importance in the history of railway modelling that it must be included. The reason I class these two layouts as pioneering is because almost everything had to be made by their creators. The fantastic rise in the quality of RTR equipment in more recent years has lessened the necessity of having to make many items from kits or from scratch – the only option for the pioneers.
As mentioned, most of this book is based around my model of ‘Little Bytham’. Here is an overall view taken in the autumn of 2016, showing progress up to that time. Later chapters will describe how the features shown here have been achieved.
Seen from above, a scene on the late Bert Collins’ ‘Hitchin’ layout in OO. Other than the converted Hornby Pullman cars, everything in this picture has been made by Bert from kits or from scratch. Truly, he was one of the pioneers.
Paul Walker’s fine model of King’s Cross in N gauge. There is ‘selective compression’ in this modelling, but the salient features have been captured to perfection.
‘Welwyn North’, built in OO by Chris Worby. In this view a motorized Kitmaster ‘Deltic’ powers north on an express.
One of the most prolific O gauge builders of ECML model locos down the years has been Barrie Walls, of ‘Wallsea’ fame. In this shot, one of his scratchbuilt V2s takes sustenance at a representation of the old coaling stage at New England.
A down-at-heel DJH ‘Austerity’ rattles southwards past the diminutive block post of Gamston on the OO layout built by John Houlden of the same name. It depicted the gradient south of Retford on the ECML in BR steam days, but has since been burnt on a bonfire after its exhibition life came to an end. Anything recoverable was first taken off, of course.
‘Stoke Summit’, built by members of Wolverhampton Model Railway Club in OO gauge was one of the most successful exhibition layouts of the last twenty years, attending seventy shows in that time. The creation of correct-formation trains was essential to its philosophy, as here shown in this shot of the Up ‘West Riding’ hauled by a DJH A1. I built the loco and the train – the methods employed will be described more fully later in the book.
One of the greatest ECML layouts of all time is ‘Retford’, being built in EM by Roy Jackson and his team. In this view, the North Country Continental boat train is being taken westwards over the flat crossing by ‘Britannia’ 70037 Hereward the Wake.
However, railway modelling is above all else a creative hobby, not just an extension of purchasing power, and, as mentioned, I hope this book will encourage folk to have a go at making things for themselves – not be reliant on others doing their modelling for them and not be reliant on what can be ‘achieved’ by just ‘opening the box’. That said, it would be absurd not to exploit what the RTR manufacturers have provided us with in more recent years, such is its excellence and quality. There are examples in this work where I’ve done just that, but those examples have been altered/improved/renumbered/renamed/detailed/weathered, as appropriate.
So, to conclude this brief introduction, may I present a further selection of pictures of layouts based on prototypes, in all scales and gauges? If nothing else, I hope they’re inspirational.
LAYOUTS BASED ON PROTOTYPES
The ‘Gresley Beat’, by Cliff Parsons and friends, in OO is another ‘believable’ layout because everything modelled is taken from an actual location. It represents the south end of the GNR main line into King’s Cross in the LNER’s heyday. Part of Top Shed is depicted, complete with cenotaph coaling stage and part of the shed building. A modified Bachmann V2 is coaled underneath.
The typical terraced streets around Belle Isle are captured to perfection. The architectural modelling is the work of Geoff Taylor, one of the finest exponents of the craft.
The station approach to Alloa, the largest town in Clackmannanshire, is shown here, modelled in OO by a Scottish finescale group. The run-down appearance in BR days of this once important junction is beautifully observed, though the ex-works’ DJH A2 (built by me) does brighten it up a little bit.
More industrial grime (though the level-crossing gates must have recently been repainted) as shown at the ‘Crossing at Billingham’, modelled in OO by the Middlesbrough MRC. Out of necessity, that magnificent signal box will have been scratch-built, though the typical NER footbridge might now be available as a kit.
‘Ackthorpe’, also depicting part of the ex-NER system in BR days, has been built by the Southampton club in OO. It represents this secondary main line as it was in the 1950s and much use, sensibly, has been made of modified/improved RTR equipment.
Though not strictly speaking an actual prototype, because its builder, Eddy Ford, has captured BR iron ore operations over the Tyne Dock–Consett section of the erstwhile NER mineral line in P4, this view is entirely convincing. A later section will be concerned with signalling. No signalling was more complex than that of the NER.
Another not-an-actual-prototype is ‘Blakeney’, a might-have-been terminus on the Norfolk coast as it could have looked in the 1950s. Even though Blakeney exists as a place, it never had a terminus like this, but Geoff Kent has reproduced the most typical ex-GER scenes in miniature one would ever wish to see. Modelled in EM, almost everything about the architecture and road vehicles has been scratch-built in Plastikard.
Graham Hobbs was brought up in the Peterborough area in the 1950s/early 1960s and wished to recreate scenes from his boyhood in miniature; scenes like this, near Greatford level-crossing between Tallington and Essendine on the ECML. Being a retired art teacher (like me), Graham has painted a most natural backscene. Modelled in OO, here a modified Hornby A3 heads an Up express.
The Manchester MRS has created a perfect evocation of the industrial West Riding in OO. Even though there isn’t a real Dewsbury Midland (as modelled), all the structures/buildings are based on actual things, many built by Geoff Taylor, already mentioned. In this view, towards steam’s end, a ‘Britannia’ and a ‘Royal Scot’ exchange greetings as they head their respective cross-Pennine expresses.
One of the greatest of architectural modellers is the ebullient Allan Downes. Left to his own devices, his natural flair will create the most flamboyant of buildings but, given a tight brief, as with this 4mm commission of Spalding Station, the results are truly convincing, even if the real Spalding doesn’t have a girder bridge at its end.
Where space is restricted, with careful selective compression a prototype location can be perfectly captured, especially if the locos and trains depicted are from an earlier period when they were smaller and shorter. Tony Gee has done this to perfection on his EM ‘Gauge Tickhill & Wadworth’. It’s all his own work as well.
Where space is not restricted, then main lines in O gauge can be created. In this scene on Pete Waterman’s fantastic 7mm railway, a ‘King’ begins the descent of Hatton Bank. Given the ‘luxury’ of plenty of space and the fiscal resources to finance a vast model railway, anything is possible, particularly where the objective is clear and well-managed. What else would one expect from Pete?
Where space and financial restrictions are more stringent, then the choice of scale becomes very important. Eric Farragher has chosen N gauge for just those reasons. His exquisite ‘Clifton and Lowther’ represents an actual part of the West Coast Main Line in the northern fells.
If ever anyone wishes to shake off the shackles of RTR dependence, then tackle something like this. Geoff Stenner has built a magnificent model of ‘Oakhurst’, as it was in the nineteenth century, in Scale Seven. He’s built everything himself, mainly, out of necessity, from scratch. I can only dream of ever getting near this standard.
Speaking of standards, which other model railways even come near the standard of ‘Pendon’? While not strictly speaking an actual prototype, though everything about it is a model of an actual place, it must rank as one of the finest, if not the finest, representations of a real railway ever built.
CHAPTER ONE
PLANNING
Nothing is truer in railway modelling than the saying ‘if you fail to prepare, prepare to fail’, which stresses the importance of good planning. We are indulging in a creative hobby that requires the mastery of far more disciplines than probably any other. A working knowledge of history, the conducting of research, a basic mastery of woodworking techniques, competence at wiring (including electric soldering), multi-media constructional techniques (including constructional soldering), an artist’s eye and perseverance are just some of the things required to be a successful railway modeller. Much of what I’ve just stated will be covered in the following pages, but it can only be in the form of an overview.
The sensible modeller equips himself/herself with a reasonable library, including the monthly model railway press, drawings, photographs and an adequate toolkit. With regard to the last-mentioned, tools are best acquired as needed, and always buy the best you can afford. Without doubt, all toolkits should include a general-purpose 25W soldering iron, a temperature-controlled iron, a range of files, pliers, cutters, knives, broaches, drill bits, mini-drill, a range of burrs/cutting discs, screwdrivers plus a couple of decent vices – one fairly large with serrated jaws and one smaller with ‘blind’ jaws. A range of raw materials will also be needed, including flux, solders (70°C, 145°C and electrical), adhesives (PVA, epoxy, liquid poly and superglue) and stock brass/nickel silver and plastic items, and a range of nuts, bolts and screws. More complex tools can be acquired as time/experience/finance permit; tools such as a static-grass applicator, bending and rolling bars. A lathe is not essential, though a decent pillar drill is a real boon. For painting, an airbrush could be desirable, though I’ve always got by without one. However, good-quality sables are essential for decent painting.
Many of the tools illustrated here will be seen in use in later chapters, or, at least, the effects of their use. Such is the importance that I put on the requirements of decent tools to railway modelling, that I’ve mentioned them as early as possible in the book. A list of tool/raw materials’ suppliers is included at the end of the book.
TOOLS
For basic woodwork, a sharp saw is essential. Stanley makes as good a range as any, including this general one being used by Rob Davey. Other general-purpose saws of use are tenon saws, pad saws and piercing saws – the last-mentioned not for woodwork.
A metal smoothing plane is also essential, once more Stanley make a perfectly adequate one. Set at a low cut it can be used for smoothing-off a joint, using the edge of its sole to check things are level or used on its side to smooth-off an edge. Norman Turner is doing the honours in two of the pictures.
Though an almost perfect finish can be achieved using a smoothing plane, the finishing-off of a surface can best be achieved by using a sanding block.
Though the baseboard system shown here came as a kit from Brilliant Baseboards (the proprietor, sadly, now deceased), even though all the joints were cut as well as is possible, it’s still good practice to check for squareness using, most appropriately, a square. Other baseboard kits are currently available.
For setting up any joints or legs prior to final fixing, ‘G’ clamps are most useful.
For internal right-angle clamping while any glue dries, this device is a useful tool. I believe it’s just called a right-angle clamp.
A long spirit-level is also essential for checking everything is level. In this view, Mick Peabody makes sure all is as it should be before further bits are added. A long spirit-level is even more essential for the setting up of exhibition layouts.
After making sure that things are level, sash clamps are also useful for holding components together as any adhesive dries.
Much time can be saved by using a circular saw, though safety goggles must be worn at all times.
An electric drill also saves time, but safety must come first at all times. In this shot Gilbert Barnatt is using a jig for accurately drilling holes for the fixing of legs.
Speaking of such a jig, here it is. Simply made, it’s a tool in its own right. It ensures that all holes for fixing legs are exactly in the same, uniform place.
A range of spanners is also useful for tightening up the various bolts that hold layouts together.
For wooden legs always ensure any outer edges of holes are protected by washers and that any legs are internal (less likely to be accidently kicked) and their tops are just below the baseboard bottoms.
Here is a selection of my basic hand tools and materials. The following chapters will reveal how these are employed.
My most useful soldering iron is this Antex temperature-controlled one. At 50W it has more than enough ‘recovery power’ and is adjustable to suit all forms of soldering.


