Erhalten Sie Zugang zu diesem und mehr als 300000 Büchern ab EUR 5,99 monatlich.
- Herausgeber: The Crowood Press
- Kategorie: Lebensstil
- Sprache: Englisch
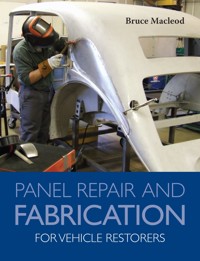
Although it can seem daunting, constructing sheet metal panels by hand is very much within the scope of the amateur restorer working from their own home workshop with the minimum of equipment. Often panels that are sold to replace the originals on historic and classic vehicles are not a good fit. Therefore, to achieve a more accurate fit, making your own panels can be the best solution. This accessible book shows how to make, repair and fit sheet metal body panels for historic and classic vehicles.
Sie lesen das E-Book in den Legimi-Apps auf:
Seitenzahl: 332
Veröffentlichungsjahr: 2025
Das E-Book (TTS) können Sie hören im Abo „Legimi Premium” in Legimi-Apps auf:
Ähnliche


Contents
Introduction
Chapter One Health and Safety
Chapter Two Tools and Equipment
Chapter Three Materials
Chapter Four Measuring, Marking Out and Cutting Sheet-Metal Panels
Chapter Five Making Patterns, Jigs and Tooling
Chapter Six Forming Flat and Single-Curvature Panels
Chapter Seven Forming Double-Curvature Panels
Chapter Eight Panel Preparation and Removal
Chapter Nine Fitting Repair Panels
Chapter Ten Finishing Repairs
Glossary
Index
Introduction
ABOUT THE AUTHOR
I began my career as an apprentice engineer in the late 1970s in a machine-tool manufacturing business, where I learnt to make things to precise dimensions by hand, and to use precisionmachinery.
My main interest was in hand making, so following my apprenticeship I went to work for my father who had trained as a coachbuilder from the age of fifteen, and at that time was running his own business restoring and hand making body panels for the Jaguar XK range of vehicles. This is where I first learnt to make vehicle body panels and to restore original bodyshells. Initially I worked with mild steel panels, then progressed to forming and welding aluminium alloy. Later I worked with less common materials such as stainless steel, brass, copper and titaniumalloy.
During my career I have restored numerous vehicle bodies, working in a variety of materials and using numerous construction methods, including making and restoring timber frames. I have also built completely new bodies from scratch in mild steel and aluminium alloys, from replica early coachbuilt alloy-bodied cars to later post-war all-steelbodyshells.
I have comprehensive experience in all aspects of vehicle body construction and repair, as well as qualifications in joinery and tool making, and am a highly regarded authority in my craft. Through the car-body restoration courses that I have been running for over two decades I have trained countless professionals and amateurs in the making of body panels and in the restoration of original vehiclebodies.
The author in his workshop, hand forming a new front-wing panel in mild steel for a 1950s Jaguar XK.
THE PURPOSE OF THIS BOOK
Forming your own sheet-metal panels by hand is a rewarding experience and is within the scope of the amateur restorer working from a home workshop with the minimum of equipment. Many so-called ‘pattern panels’ that are sold to replace original parts are inaccurate, as they are often made to a price rather than to a good standard of quality. On older vehicles, panels will differ from one vehicle to another on the original bodies. The purpose of this book is to inform you of the techniques and tools needed to make your own panels, and to alter ‘off-the-shelf’ panels to be a more accurate fit to the body that you are workingon.
Overview of the Book’s Content
The text of this book focuses on restoring and making panels as opposed to accident repair techniques, as this type of work is very well covered by other publications written by specialists in the subject. It covers the various methods used to make and repair, and fit and finish, sheet-metal body panels. It does not cover the welding methods used as this is comprehensively covered in an earlier publication by the author, Welding for Vehicle Restorers.
In restoration work it is generally best practice to retain and restore as much of the original bodywork as possible, rather than to fit complete new panels: this maintains the vehicle’s originality, so preserving its authenticity. There are three skills in particular that require a degree of practice in order to achieve a reasonable level of proficiency before carrying out the making and restoration process on a vehicle: these are the cutting, shaping and welding of sheet metal.
It takes practice to achieve a reasonable degree of accuracy in cutting out areas of sheet metal with a powered tool or with hand-operated shears, and it is necessary to become competent in this as it will affect the quality standard of the finished project. Shaping and forming sheet metal accurately and to a good standard of finish requires an understanding of how the material behaves, and the methods used for each process. For example, dent repair is commonly needed on old vehicle bodies, and this can be carried out reasonably quickly and effectively once the correct techniques are understood. Also, welding thin sheet metal is very different to welding thicker materials and requires a knowledge of the specific techniques used, as well as practice in using thesetechniques.
I have set out to explain as simply as possible the methods, materials and equipment I have found to be most useful during my career. Putting all this down on paper can make the whole process seem daunting to the reader, so although this book aims to be a helpful guide to those seeking to restore and make sheet-metal panels in a professional manner, I cannot overemphasise the benefit of attending a hands-on training course to learn these methods from an experienced professional. This has proved to be the best way to fully understand the principles, and to gain the necessary skills in the shortesttime.
The essential equipment required for modest repairs is minimal, so even the novice restorer working from home can achieve a professional standard of finish if he uses the correct techniques. Throughout the book I will endeavour to show how to make panels using the most basic tools, as well as purpose-designedequipment.
There will be a degree of repetition in and between chapters: this is necessary to reinforce and help you understand certain principles that are critical to theprocesses.
TYPES OF BODY CONSTRUCTION USED ON CLASSIC VEHICLES
The majority of car bodies being restored will have a monocoque structure. This means that the body is one unit to which the mechanical components are fitted directly, or it will have subframes that hold certain components. This type of construction relies on the body to support the mechanical components and give strength to the overall structure of the vehicle. This means that any repair work carried out to the bodywork will have significant safety implications, so any repairs need to be completed to a professionally accreditedstandard.
A vehicle that has a chassis means that the body is a standalone unit from the mechanical components. This type of construction relies on the chassis to hold the mechanical components, so the body is not critical to the strength of the overall structure of thevehicle.
Some vehicles will be of semi-monocoque construction, where the main body tub is fixed to a framework that contains the mechanical components. This type of construction relies on the body and frame to give strength to the overall structure of the vehicle. A Jaguar E-Type is a good example of this, where the front end of the vehicle is made up of a frame that contains the engine, suspension and bonnet mountings; the body tub extends no further forwards than the front bulkhead. The body tub and frame are bolted together to form an overall rigid structure to which all the mechanical components are fitted.
Buyer beware! This is the remains of a complete bodyshell following the removal of all the corroded panels and after shot blasting. What looks like a sound body can in fact be mostly rust and body filler.
BUYING A VEHICLE FOR RESTORATION
When buying a vehicle to restore I have found it best to look for a car that is complete, as even small parts that are missing can be expensive to replace. A vehicle that may seem a bargain can often prove to be very expensive to restore as it is likely to need more time spending on it, and more components replacing, than one that is roadworthy even if shabby. It is worth spending more money initially on buying a complete original vehicle rather than an incomplete or badly restored example that will involve more time and cost to be spent on its restoration.
There are common areas of corrosion found on older vehicles, often because bodyshells were insufficiently treated to prevent corrosion during manufacture, and many internal, inaccessible structures were left unpainted. Tell-tale signs of corrosion are poorly fitting doors due to sagging on the hinge posts, and misalignment of panels due to weakening of the vehicle’s overall structure through corrosion. Sagging doors may be due to worn hinges, but can also be a sign that the hinge support frames, which are difficult to access, have corroded, causing the hinges to drop. These areas of the body will involve a lot of time to rectify due to the frame’s inaccessibility, as other panels will need removing in order to gain access to restore them effectively.
Another common area for corrosion is where parts such as bumpers and trim panels are fitted to the bodywork. This is mainly due to the contact between dissimilar metals, which exacerbates the effects of galvanic corrosion (electrolytic action between separate pieces of metal).
Be cautious when buying a vehicle that has had previous work carried out on the bodyshell, as many older vehicles were simply patched up to pass an MOT (Ministry of Transport) test or to keep them roadworthy. Originality and structural strength can be compromised by substandard repair work. Poor repair work is often hidden behind body filler and paint: look for unoriginal paint finish and distortion to the surface of panels – body filler will sink and distort over time, showing as unevenness on the panel’s surface. The most straightforward vehicle to restore is one that has never had any significant work carried out on it, as it will retain its original features.
Restoration of a vehicle body should not be undertaken lightly as it will involve a significant amount of time to carry out successfully. Work should be well planned to ensure that you have all the resources in terms of time, space, equipment and funds to finish the work. Budgets and deadlines are not good values for completing a successful restoration project as it is impossible to predict the amount of time and the cost of any parts needed before the restoration has begun.
However, it is very satisfying to restore a vehicle to its original condition knowing that it will be better preserved for future generations to appreciate.
A more common example of what remains of an old vehicle body following blast cleaning. This bodyshell will need extensive repairs, a daunting prospect for the novice restorer.
Chapter One
Health and Safety
Health and safety should always be taken seriously as severe injury and long-term health conditions can result from a lack of awareness and a lack of discipline in using protective measures. To reduce the risk of harm to yourself and others it is always necessary to understand the risks and use the appropriate protective equipment. It is important to develop safe working habits, as a moment of lapse in concentration when working on vehicles can cause serious injury. Tiredness plays a part in many accidents, so avoid carrying out any operations using power tools or other dangerous equipment when feeling fatigued.
Working alone increases the risk of harm, as you are more likely to lift something that is too heavy and can be unaware of other incidents in the workshop, such as a fire starting, when you are concentrating on a particular job. The environment you are working in can create risks: many household garages have a poor floor surface, a leaky roof and outdated electrics, all of which increase the chances of an accident occurring.
To reduce the risk of injury or harm when working on a vehicle always carry out a visual risk assessment before you begin.
RISK ASSESSMENT AND APPROPRIATE PPE
Exposure to Fumes
All paint, oxides and electroplating should be removed from the surface of the metal panel prior to welding to avoid creating any toxic fumes that may be produced when these are burnt. Avoid welding close to rubber seals or other combustible materials that are likely to give off noxious fumes when heated. A fume mask should be worn and/or effective fume extraction used where there is any risk of fumes being produced. Portable fume extractors are available for this purpose.
Fumes created during the welding of metals have been found to cause cancer when exposure to these takes place over a long period of time; there are no guidelines at present as to what constitutes a safe level of exposure. An air-fed mask is the best option to protect against this risk if carrying out any significant amount of welding.
Exposure to Heat
When welding or heating metal, gloves should always be worn to protect hands and wrists from burns. It is also necessary to protect arms and legs from any burns that may be caused by weld spatter or contact with a hot panel by wearing suitable clothing. Short-sleeved shirts and short trousers should not be worn whilst welding or working on vehicle bodywork as this significantly increases the risk of cuts and burns to exposedskin.
Gloves used for MIG welding should have a high level of heat resistance with long enough cuffs to protect the user’s wrists from burns caused by any weld spatter and the intense light, both of which are produced during the process.
Exposure to Electric Shock
Welding machines and electric power tools pose a serious risk of electric shock. Never use these in wet, damp or highly humid conditions. Ensure that all cables are kept dry and in good condition. Electrically powered tools and machinery should always be connected to the mains current through an appropriately rated electrical circuit breaker.
Exposure to the Intense Light Created by the Welding Process
It is important to protect the eyes from the flash of light that is created by the welding process as this may cause temporary blindness and long-term sight problems if they are subjected to regular exposure. A suitable face mask is an essential piece of equipment for use during welding. A range of varying shades is available, depending on the type of welding employed and the amperage used: a higher amperage will produce a brighter flash during welding, requiring a higher level of protection. Metals such as aluminium are highly reflective, and a higher level of light will be experienced when welding these than when welding mild steel.
Sharp Edges on Metal Panels
Suitable gloves that offer protection from cuts should always be worn when handling sheet metal. Gloves are available in a wide range of different designs and materials. Some offer more cut protection, others more protection from burns or a better grip. I have found that leather is the best material to offer all-round protection and give a reasonable degree of grip. When welding, the standard leather rigger glove, which has a safety cuff to protect the wrist, offers better heat protection than thinner TIG welding gloves when handling hot metal. The disadvantage in wearing thicker gloves is that they provide less control over the torch button, so I usually wear a thick rigger glove on the hand holding the panel and a thinner TIG glove on the torch hand to give a better feel for operating the trigger.
HEALTH AND SAFETY MEASURES
Risks
The appropriate personal protective equipment (PPE) should be used to reduce the risk of harm to yourself and others, as there are serious health issues that can arise from carrying out work on vehicle panels and bodies. These might be caused by any of the following:
• Fumes
• Heat
• Electric shocks
• Intense light created by the welding process
• Sharp edges to metal panels
• Trip and slip hazards
• Movement of heavy objects
Grinding metal is also a common cause of many injuries, which might arise from any of the following:
• Sparks
• Dust
• Projectiles
• Noise
• Vibration
Health and Safety Equipment
• Fume mask – designed to filter out fumes created by welding, grinding or sanding.
• Gloves – heat and cut resistant. Vibration-resistant gloves should be worn when using power tools.
• Welding mask, of a type that is appropriate to the welding process.
• Face shield – use a full-face screen to protect the face from projectiles or splashes.
• Goggles – close-fitting to protect the eyes from dust, projectiles or splashes.
• Ear protection – ear defenders or ear plugs that are suitable for the particular purpose.
• Fire extinguisher – CO2 or equivalent to combat fire in a vehicle or workshop.
Vibration from Power Tools
Vibration-resistant gloves should be worn if working using a power tool over a long period of time to avoid the fingers becoming numb, and possible long-term damage to the nerves. These gloves cushion the hand against the shock created by vibrating tools.
A range of leather gloves used for working with, and welding, metal. Left to right: rigger glove, used for general handling of metals; TIG welding glove; heavy duty welding glove.
Padded, vibration-resistant gloves that protect the user from injury caused by the prolonged use of reciprocating power tools that create significant vibration.
Chemicals
Chemical-resistant gloves must be worn when working with acids, thinners or paint to protect against damage that can cause dry and cracked skin, and the ingestion of chemicals through the skin. To avoid contamination of other surfaces that may be touched after using any of the above, you should have specific gloves for handling the various different substances being used.
Polyurethane-coated gloves should be worn when using chemicals to protect the hands from chemical burns and the ingestion of harmful liquids through the skin.
All chemicals and compounds that are used when cleaning and preparing panels for paint are generally harmful, so all precautions should be taken to avoid breathing in the fumes given off, or allowing the chemical or compound to come into contact with the skin or eyes. Keep a bottle of medical eye wash in the workshop, in a conspicuous place, so that any splashes of harmful liquids or dust can be immediately washed out of the eyes.
Eye wash should be kept in a prominent position in the workshop so that it can be easily accessed to flush out any dust or chemicals as quickly as possible.
A full-face screen should be worn to protect eyes and face from splashes, and a suitable fume mask should be worn to avoid breathing in harmful fumes.
Trip and Slip Hazards
The cables from extension leads, earthing leads and welding torches create trip hazards and should be kept as tidy as possible and put away when not in use.
Any dust produced during the grinding or sanding of metals creates a slippery surface when it falls on to a smooth concrete floor. Sweep up dust and filings at regular intervals to reduce the risk of slipping on these.
Risk of Movement of Heavy Objects
Gas bottles should be stored securely; if free standing, they need to be chained to a wall or a permanent structure. A falling gas bottle presents a risk of crush injury, and harm from high-pressure gas that could be released if the valve is damaged or broken off. Gas bottles are best stored in a mobile trolley to ensure they can’t be accidentally knocked over, and so they can be moved easily to avoid physical injuries that can be caused by lifting or moving such a heavy object. Protective footwear should always be worn in a workshop as there is a high risk of injury to the feet from heavy objects being dropped on them.
Gas bottles should be secured to a bench or solid structure, or stored in a suitable trolley, to avoid the possibility of them being accidentally knocked over.
Ensure that any vehicle being worked on is adequately supported and that the bodyshell is not able to fall over whilst pushing or pulling against it when fitting parts. This is particularly important when working underneath a vehicle: the body should be supported on and fixed to rigid stands. Do not rely on any form of jacking device to support a vehicle as these can fail, resulting in serious injury.
Risk of Fire
A serious risk of fire is always present around any welding and grinding of metal due to the high temperatures attained and the sparks that may be created by these processes. Keep a suitable fire extinguisher close to hand, particularly when welding on a complete vehicle, which will contain a high proportion of combustible materials. I have a small CO2 fire extinguisher in the workshop specifically for this purpose.
Oily rags are a common source of a fire starting, as the slightest spark thrown out from the welding or grinding process can cause these to combust. Keep any combustible materials or chemicals in a sealed container to avoid this problem. Any rubbish bin in a workshop must have a lid to protect the contents from combustion that could be caused by stray sparks.
Welding and grinding should never be carried out near fuel lines or tanks containing explosive gases or liquids. These should be emptied and purged, and filled with an inert gas such as Argon to eject any flammable gases to avoid any possibility of combustion or explosion.
Exposure to Dust
A suitable mask that is designed to filter out fine dust particles should be worn when using an angle grinder or sanding machine. The adhesives that are used to bond sanding particles to their backing are highly toxic and will be emitted into the atmosphere during the grinding or sanding process. Lead body filler, which is used on older vehicles, is particularly harmful when being sanded or ground as it is emitted into the atmosphere as fine dust, which can be inhaled. Paints used on older vehicles will contain compounds that are toxic and are particularly harmful when turned into a fine dust during sanding or grinding, as this can be easily ingested.
Protect yourself and others around you from inhaling these particles by the use of adequate dust extraction and by wearing a suitable filter mask that seals effectively on to your face. Headaches are a common ailment caused by breathing in toxic dust or chemical fumes and are an indicator of their presence in the atmosphere.
A small fire extinguisher should be kept close to hand when welding and grinding as the combustion of materials is an ever-present risk, particularly when working on a vehicle body that is likely to contain flammable materials.
When creating dust or toxic fumes the eyes need to be protected from harmful particles by wearing ski-type safety goggles, which seal on to the face.
Exposure to Projectiles
A full-face polycarbonate shield should be used when grinding metals to avoid sparks causing burns and irritation to the eyes, and burns and/or cuts to the face. Fast spinning machines such as angle grinders can throw out particles of metal at very high speed, and these may cause serious injury to unprotected skin. Protect your whole face from these by using a full-face shield. A leather apron should be worn to protect your body and clothing.
Face masks that offer suitable protection from dust particles when grinding (on the left), or fumes when welding (on the right).
Be aware of other people around you, particularly when using an angle grinder. Also be aware of the direction in which particles are being thrown out, and cover anything in their path that may be liable to damage. A metal-lined cabinet is useful for cleaning components to contain the dust and sparks created during the grinding process; this can also be fitted with a dust extraction hood to take away fine dust and fumes.
A full-face screen provides the best protection when using a powered angle grinder, which can throw out sharp objects at high speed. Goggles that seal to the face should be used to protect the eyes when general dust is present in the air.
Hearing Damage due to Exposure to Noise
Angle grinders and other power tools can cause long-term hearing damage from regular use; this is due to exposure to the high-pitched noise levels emitted from the machine. Wear ear defenders with a high level of noise protection to avoid any hearing damage. All hearing damage is permanent and will become progressively worse if not protected against.
Ear defenders or ear plugs should be worn when using any machinery that emits a loud or high-pitched noise, such as a hand angle grinder. Both should be worn together to protect the ears from very high-pitched noise.
When welding, ear plugs should be worn if there is noise from another source in the workshop. Where particularly high levels of noise are present wear ear defenders on top of ear plugs to protect your hearing from damage.
A combination of personal protective equipment is needed for work operations that present multiple risks. Note the steel bench top and wall shields that protect surfaces from damage; there is also a dust extraction hood above the operator to take away any fine dust particles.
Disposal of Waste Materials
Any waste materials should be disposed of safely. Check with your local council on how to dispose of hazardous waste such as oils, solvents, and acids or alkalis.
Stop and Think!
Before you carry out any work operations on a panel or vehicle body, assess the risks and ensure you are using the necessary protection to avoid any possible harm to yourself or those around you.
Chapter Two
Tools and Equipment
This chapter provides a general summary of the tools and equipment that I have found to be most useful in the fabrication and repair of vehicle body panels. The use of these tools and equipment will be covered in later chapters when explaining the processes used for forming panels.
BUYING TOOLS AND EQUIPMENT
When buying hand tools it is usually worth paying more to acquire better quality items, as these will usually be more durable, more effective and easier to use than cheaper alternatives. However, this is not always the case as some tools are over-priced when compared with others of similar quality. Price is therefore not always the best indicator of quality, so it is a good idea to do some research into which tools other people find work best; magazine product reviews can be helpful in this regard. Older second-hand tools are often made to a higher level of quality than their modern counterparts and can give a better result at less cost. I have bought old, unused tools still in their original packaging for a fraction of the price of the same tool new. Check for damage and severe wear when buying second-hand, as either of these could render the tool unusable.
When buying equipment, it is worthwhile considering the amount of use it is likely to get. Larger, more expensive pieces of equipment, such as wheeling machines, guillotines and folders, will be beyond the needs and resources of the average home restorer, and any work requiring these is best contracted out to a professional fabrication workshop.
Welding machines can be hired at reasonable cost if they are likely to be used for only short periods of time. Second-hand machines will be more affordable to buy, but it is worth employing a qualified electrician to carry out a safety test to check for electrical faults before using a second-hand machine.
MARKING AND MEASURING TOOLS
Marker Pens
Indelible ink marker pens are useful for writing instructions on metal panels prior to cutting and forming, as well as for marking panels to indicate where any excess waste material needs to be removed. They can also be used for highlighting scribed lines to make them more visible. It is useful to have a range of different sized nibs for use in different situations.
Indelible ink marker pens are useful for writing instructions on to sheet-metal panels, and for patterns, as the ink is not easily removed. These can also be used for highlighting scribed lines to make them more visible.
Scriber
A hardened steel scriber with a long straight and hooked end is used for marking out on sheet metal to give a precise line for folding or cutting on a joint. These are easily lost because they are small and dull in colour. To avoid losing the scriber it is worth either dipping the body of the tool in a bright paint, or covering it with brightly coloured tape to make it more visible. The tip of the scriber should be regularly sharpened on a bench grinder to a fine point.
A hardened steel scriber is used for general marking out on sheet metal. This needs to be ground to a sharp point to mark the metal clearly, for cutting or folding, to maintain accuracy.
Marking Blade
A straight-edged blade is indispensable for marking accurately from the edge of a panel to give a clear cutline when trimming for welding in repair sections. An old hacksaw blade, cut halfway along its length at an angle, can be used for this purpose.
A straight-edged blade is used for marking in certain circumstances – for instance, marking from the edge of a panel on to another to create a line for trimming.
Odd-Leg or Jenny Calliper
An odd-leg or Jenny calliper is commonly used to mark a flange of consistent width on to the edge of a panel to define the fold line. This has a rebate in one leg allowing it to be held precisely against the edge of a panel, and a sharp point in the other leg to mark a scribe line on to the panel.
An odd-leg or Jenny calliper is commonly used to mark a flange of consistent width on to the edge of a panel to define a fold line.
Trammel or Beam Compass
A trammel or beam compass is used for marking out large radii. It consists of two trammel heads, containing steel points, that are fitted to a timber or metal beam to give a compass of large enough radius to mark out the desired arc. It is best to have a range of lengths of beam for creating smaller or larger arcs. Aluminium alloy section is best used for this as it is comparatively light in weight yet rigid.
Trammel heads are fitted to a timber or metal beam to create a sizeable compass for drawing large radii on to panels or patterns.
Coachbuilders’ Sweeps
A sweep is a narrow strip of metal that is cut to a very large radius – larger than is practical to mark out with a trammel. It is used to measure, mark out or check the curvature of a panel. It is traditionally 120cm (4ft) in length and 5cm (2in) in width, with the same radius cut on either side. A sweep can also be purpose made to suit a specific panel’s curvature, and used to check the curvature of a new replica panel as it is being formed.
Coachbuilders’ sweeps are used to measure, mark out or check the radius of large radii on shallow curvature panels. These are numbered according to their radius.
Winding Sticks
Winding sticks are straight, parallel lengths of timber or metal sections that are used to sight across to check the flatness of a structure. Aluminium rectangular section is best for these as it is lightweight yet comparatively rigid. These are kept in pairs of the same length; it is useful to have a pair 60cm (2ft) long for checking smaller structures, and 120cm (4ft) long for checking medium-sized structures, as well as a pair 240cm (8ft) long for checking larger structures.
HAND TOOLS
Sheet-Metal Shears
Hand-operated shears are a necessity for cutting the edges of sheet-metal panels accurately, particularly when cutting to a curved line. There are two different main types of hand shear: tinsnips and aviation snips. Tin snips are of a traditional design that allows thin sheet metal to be cut by hand accurately and cleanly without distorting the panel. They are extremely robust and can last a lifetime when maintained well.
Aviation snips are designed to be more efficient in use though are not as robust as traditional tinsnips so don’t stand up to any prolonged heavy use. Their mechanism makes them able to cut with less physical effort, though this mechanism also places extreme pressure on the blades and pivots causing them to break or wear excessively.
Hand shears are used for cutting accurately to a marked line:
1. These are available in different types for cutting right-hand and left-hand on a curved line as well as for cutting on a straight line.
2. ‘Aviation’ snips are better suited to cutting tight curves. These are easier to operate than standard tin snips, but wear out more quickly due to the extra pressure that is exerted on the blades.
3. To facilitate the cutting of convex curved edges grind more metal away from the underside of the blade, making the body of the snip thinner in this area.
4. Monodex cutter: this removes a narrow strip of metal without distorting the surrounding panel. It is useful for cutting large sheets into smaller sections.
There are three types of hand snip available:
Right-hand snip: Used for cutting from right to left on a curved line.
Left-hand snip: Used for cutting from left to right on a curved line.
Straight snip: Used for cutting on a straight or very shallow curved line.
It requires a degree of practice in the use of hand snips to cut accurately to a scribed line without distorting the panel. The blades need to be kept sharp and under the correct degree of tension in order to work effectively.
To sharpen the snips, it is best to use a diamond-coated file as this will remove the minimum amount of material necessary. The surface of the blade that contacts the metal being cut is filed at a shallow angle.
Set the tension between the blades by adjusting the pivot bolt. This is riveted over to prevent the nut from becoming loose in use. If the blades are too tight, loosen the nut slightly; if they are too loose, hammer on the end of the bolt to tighten it.
A test of the snip’s sharpness and correct tightness is to cut a piece of thin paper: this should cut cleanly without folding.
Avoid using the snips to cut rusty steel or corroded aluminium alloy as this will blunt the blades quickly. I recommend having a pair of snips that are used just for this purpose, and a separate second (best) pair that are only used on clean metal.
Oil the joint between the two blades at the pivot point regularly.
Hand snips can be modified to perform better by grinding some material from the underside of the blades: this allows the snip to turn more smoothly, particularly when cutting on the concave curved edge of a panel. If you turn the snip over it will be evident that one blade has a flat surface to it, while the other is radiused: removing some metal from this radiused edge (using a hand-held angle grinder) will make the snip more effective at cutting on a curved line.
Monodex Cutters
The Monodex cutter is used for cutting across the centre of a panel without distorting the surrounding metal (whereas a tin snip would be used for trimming the edge of a panel). This tool cuts out a narrow strip of metal leaving the surrounding panel flat. It is physically demanding to use and will tend to blunt under prolonged use.
A wide range of hammers is used for working on body panels:
1. The three most commonly used types of panel hammers, left to right: cross pein, curved face and planishing hammer.
2. Planishing hammers of differing sizes and weights are used for smoothing sheet metal following shaping or welding.
3. Long reach-headed hammers allow access into deeply shaped panels for shaping or planishing.
4. A bespoke hammer that has been made by adapting a generic hammer head. Material has been added to the head with a MIG welder and ground back to a shape to suit the required purpose.
Hammers
It is useful to have a range of different sized planishing hammers to suit the various applications that they will be used for. A larger hammer will be more unwieldy in use, while a smaller hammer can be used more precisely though will have less effect due to its lower weight.
Some hammers will have a longer reach head to permit better access when working on more deeply shaped sections; these will tend to be more unwieldy in use so are normally only used for this specific purpose when no other hammer will reach the area being worked on.
I have adapted hammers to suit specific projects by grinding the original head to reprofile it, or by adding metal to the head with a MIG welder, which is then ground to the desired shape.
The handle on any hammer should be of a reasonable length to allow the hammer to be swung effectively, and of octagonal section to provide the best grip, and control of the direction in which it is being used.
HAMMERS
A range of different hammers with various shaped heads and weights is needed to carry out work effectively on sheet-metal panels to suit the different processes and shapes of panel being worked on. These include the following:
• The flat-faced or ‘planishing’ hammer is the most commonly used tool for final finishing. The large head helps in smoothing the panel without overstretching the metal or marking its surface.
• The cross-pein hammer is used for rapidly thinning or stretching metal. The sharp end on the head focuses the pressure used on a small area, so thinning the metal efficiently.
• The curved-face hammer is used for thinning or stretching metal in a less aggressive manner than the cross-pein hammer, so avoiding causing excessive marks that would impair the finish of the panel’s surface.
• The curved cross-pein hammer is commonly used for closing a flange round a wire to form a ‘wired edge’ to a panel. The curved narrow end permits better access for this purpose allowing accurate blows to be accomplished, so avoiding marking the surface of the panel.
Flipper or Body Spoon
A flipper or body spoon is used particularly on aluminium alloy panels to smooth the surface. This tool offers a larger surface area on its face than a planishing hammer, and this avoids marking the surface of the panel and overstretching the metal. A flipper is either straight along its length or curved to suit the various shapes of panels being worked on. These were traditionally hand made from an old car leaf spring or a large flat file, which would be heated and bent into the desired shape and ground smooth. However, there is now a large range of manufactured tools available; these are made from hard plastic, hardwood or steel. Plastic and hardwood flippers are only normally used on soft metals such as annealed aluminium alloy.
Body spoons or ‘flippers’ are used for smoothing double-curvature sheet-metal panels; this tool is particularly used on softer materials such as aluminium alloy.
Shaping Block
The shaping block is used to form double curvature-shaped panels in conjunction with the bossing mallet (see box). The best material for this is beechwood as it is reasonably tough, has a ‘close’ grain so is less liable to splitting, and is commonly available from a timber yard in the size needed. The block is made from a section of timber 25cm (10in) by 12.5cm (5in), cut to length as required. A hollow double-curvature shape is carved into the top surface of the block to create an indent into which metal can be hammered. It is useful to have a series of these that have been carved with a range of differently curved indents.
To avoid splits forming in the blocks paint them occasionally with linseed oil, or a similar treatment, to stop the timber drying out.
The following tools are used for shaping sheet metal:
1. Bossing mallets made of various materials with differing weights. From left to right, lightest to heaviest: nylon, beech, oak, boxwood and lignum vitae.
2. A shaping block made from beech that has been carved to create a concave indent for hammering into. This is contained in a purpose-built stand to position it at a comfortable working height.


