11,49 €
Mehr erfahren.
- Herausgeber: The Crowood Press
- Kategorie: Lebensstil
- Serie: Knitting Techniques
- Sprache: Englisch
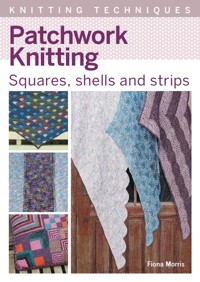
Whether you want to combine yarns of different colours and textures in one piece or simply use up some of your stash, patchwork knitting provides a great way to play with assorted elements. This accessible book guides you through the essential techniques of creating individual units of knitting and joining-as-you-go so that there is minimal sewing up to do once the work is completed. This latest addition to the Knitting Techniques series covers the individual unit shapes of squares (including half, single, double, triple and quadruple squares), shells and strips and goes on to explore myriad ways of working within these units, including combining different stitch patterns such as lace, slip stitch, bias and short row knitting. It explores how the use of colour within an individual unit can change the way it is seen within a larger piece. There are four full knitting patterns and forty-five individual unit stitch patterns, with accompanying images, give plenty of opportunity for practice and inspiration.
Das E-Book können Sie in Legimi-Apps oder einer beliebigen App lesen, die das folgende Format unterstützen:
Seitenzahl: 180
Veröffentlichungsjahr: 2022
Ähnliche


First published in 2022 by The Crowood Press Ltd Ramsbury, Marlborough Wiltshire SN8 2HR
This e-book first published in 2022
© Fiona Morris 2022
All rights reserved. This e-book is copyright material and must not be copied, reproduced, transferred, distributed, leased, licensed or publicly performed or used in any way except as specifically permitted in writing by the publishers, as allowed under the terms and conditions under which it was purchased or as strictly permitted by applicable copyright law. Any unauthorised distribution or use of this text may be a direct infringement of the author’s and publisher’s rights, and those responsible may be liable in law accordingly.
British Library Cataloguing-in-Publication Data A catalogue record for this book is available from the British Library.
ISBN 978 1 78500 980 8
Cover design: Sergey Tsvetkov
Acknowledgements Technical support: Gail Stidolph and Paul Lautman. Photography: Dave Morris.
Contents
Abbreviations
Introduction
1 Squares
2 Shells
3 Strips
4 Playing with Yarns and Colour
5 Developing Your Own Design
Further Reading
About the Author
Index
Abbreviations
beg
beginning
CDD (or s2kpo)
centre double decrease, slip 2 together knitwise, knit 1, pass 2 slipped stitches over together
C1
colour 1
C2
colour 2
dec
decrease
DPNs
double-pointed needles
ds
German double stitch: having turned the knitting part way along a row, with yarn at the front, slip the first stitch purlwise to the RN, pull the working yarn over the top of the RN to the back. If the next row is a knit row, continue knitting. If the next row is a purl row bring the yarn forwards between the needles to continue purling
g
grams
inc
increase
k
knit
kfb
increase by knitting into the front and back of the stitch
k1tbl
knit 1 through the back loop
k2tog
knit 2 together
k2togtbl
knit 2 together through the back loops
k3tog
knit 3 together
k3togtbl
knit 3 together through the back loops
knit-up
with the knitted piece held in your left hand and a needle in your right hand, put the point of the needle through the fabric from front to back under the selvedge chain, wrap the yarn around the needle as if to knit, and pull the loop through to make a stitch on the needle
LHS
left-hand side of an existing unit
LN
left knitting needle
m
metres
m1
make 1 by lifting the strand between the two needles on to the left needle from front to back (like a yarn over loop), and then knit the loop through the back to twist and close the stitch
psso
pass slip stitch over
p
purl
pfb
increase by purling into the front and back of the stitch
p1tbl
purl 1 through the back loop
p2tog
purl 2 together
p3tog
purl 3 together
purl-up
with the knitted piece in your left hand and a needle in your right hand, put the point of the needle through the fabric from back to front under the selvedge chain, wrap the yarn around the needle as if to purl, and pull the loop through to make a stitch on the needle
pm
place stitch marker
rep
repeat
RHS
right-hand side of an existing unit
RN
right knitting needle
RS
right side of the fabric, ie public side
sk2po
slip 1 knitwise, knit 2 together, pass the slip stitch over
skpo
slip 1, knit 1, pass the slipped stitch over
sl1 (within the stitch pattern)
slip the next stitch purlwise
sl1 (Schulz chain selvedge)
slip the last stitch purlwise with the yarn at the front
sl1 (Høxbro chain selvedge)
slip the first stitch knitwise
sm
slip stitch-marker
ssk
slip the next 2sts to the right needle knitwise one at a time, put the left needle through these 2 slipped stitches from left to right and in front of the right needle, and knit the 2 together
ssp
slip the next 2sts to the right needle knitwise one at a time, slip these 2 turned stitches back to the left needle, and purl 2 together through the back loop
st(s)
stitch(es)
w&t
wrap and turn, in garter stitch, slip the next stitch purlwise to the right needle, bring the yarn forwards between the needles, slip the stitch back to the left needle, and turn the knitting to continue working
WS
wrong side of the fabric, ie the side not visible to the public
wyf
with the yarn forwards, ie the working yarn at the front of the work
yb
yarn back between the needles
yd
yards
yfwd
yarn forwards between the needles
yo
yarn over: the working yarn must pass over the right needle from front to back, so the yarn may need to come between the needles before being taken over the right needle
Introduction
The technique of making knitted items from small units joined together has been around for a long time. I remember having to make garter-stitch squares blankets for charity when I was at school. Knitting the squares was fine, but then they had to be joined into a blanket with either sewing or crochet, which wasn’t quite so much fun.
I first came across the patchwork/domino knitting technique in 1997. There was an article and garment in the American magazine Interweave Knits written by Vivian Høxbro called ‘Domino Knitting’ explaining how to knit mitred squares and how to join them with knitting rather than sewing them together.
Sometime later I started to hear about ‘patchwork knitting’ and a man called Horst Schulz, a German who had been using and teaching this technique in Berlin for years. He wrote a couple of books that were translated and published in English in 2000. The two books, Patchwork Knitting and New Patchwork Knitting Fashion for Children, covered a wide variety of patchwork units, with photographs of lots of garments and charted instructions of how to work the individual units, but no garment patterns.
Vivian Høxbro published her book Domino Knitting, originally in Norwegian in 2000 and then in English in 2002. In her book she acknowledges she went on a course with Horst Schulz in the early 1990s, and when she went back to Denmark the Danish knitting guild voted to call the technique domino knitting.
The Horst Schulz books were very inspiring, but many knitters found the instructions difficult to follow as much of the information was presented in chart form. This provided me with the opportunity to offer workshops to teach people how to make the basic units. I have been teaching the technique in England since 2001, based on the version of the technique used in Horst Schulz books, so that is the version I will explain as my default method of making patchwork units. I will also cover the Vivian Høxbro method of making mitred squares, and will expand on a number of different variations of how to knit mitred squares. I will also look at using the shell unit and working with strips of knitting.
TOOLS AND MATERIALS
You don’t need any specialist tools or materials to work patchwork knitting, but there are tools that can make the knitting process easier.
Tools
Any type of knitting needle can be used: straight needles, circular needles or interchangeable of any material. However, as patchwork knitting generally involves working on small numbers of stitches, a short needle can often make the knitting easier. My personal preference is for the 6in-length KnitPro needles, which are available in wood or acrylic.
A selection of knitting needles, including the KnitPro short needles and children’s needles.
When joining or edging pieces of patchwork knitting, a circular needle may be required due to the large number of stitches that result from joining lots of units together.
Due to the nature of the work, making small units, scissors are frequently used so a pair of small sharp scissors is recommended.
Locking-stitch markers are also very useful as they can be placed into the knitting to show which side of the fabric is the right side of the piece of work. Garter stitch looks the same on both sides so it is easy to lose track of which side of the fabric you are working on. It is important to know which side of the fabric you are working on, since decreases are usually worked on a particular side of the fabric.
Other tools and notions, scissors, locking-stitch markers, squared paper.
Waistcoat drawn full size on paper.
Squared paper can be useful when planning your project, and large sheets of paper are also useful when making items that need to be drawn out to full size.
Materials
Patchwork knitting can be worked in any weight or fibre of yarn. Different weights of yarn can be used in the same project as long as the proportions of each yarn are the same in each unit of that project. Yarns of different fibre content can also be used in the same project as long as the finished item is laundered according to the most delicate yarn.
A selection of yarns.
Squares and shells knitted in different yarns.
The ability to combine small amounts of different yarns makes this technique a great way to use up oddments in your stash, producing completely unique pieces of work.
CHAPTER 1
Squares
The square is the most commonly used unit in patchwork/domino knitting, particularly the single mitred square. The technique can also be used to make double, triple and even quadruple squares, and there are a number of ways of making even the basic single square.
For the piece of knitting to be square it needs to be worked in a stitch pattern that has a ratio of two rows to one stitch – that is, two rows measures the same as one stitch. Mitred squares are generally worked in garter stitch. They can be worked in any pattern, but if worked in a stitch pattern that does not include garter stitch – that is, stocking stitch or a ribbed stitch pattern – the finished piece will not be a square shape.
Garter-stitch squares, garter ridges squares, stocking-stitch squares, knit 1 purl 1 ribbed squares and knit 2 purl 2 ribbed square.
THE BASIC ELEMENTS OF A MITRED SQUARE AND PATCHWORK KNITTING
• The cast-on forms two sides of the square so needs to be a stretchy variety.
• Decreases are worked at the centre of the fabric repeatedly at the same point.
• Double decreases may be worked every other row, or a single decrease worked every row.
• Stitches are reduced from the cast-on number of stitches to one stitch/loop to finish.
• The side edges of the knitting form the other two sides of the square.
• New squares are knitted on from existing squares to build a larger piece of fabric.
CAST-ON
A good cast-on for patchwork knitting is the knit cast-on since it has a lot of flexibility. Many knitters do not like this cast-on as typically it gives a loopy edge; however, in patchwork knitting this is very useful as the loops make it very easy to pick up stitches if you want to knit another square working away from the cast-on edge.
The knit cast-on is a two-needle cast-on and is worked as follows:
Step 1: Place a slip knot on the left needle.
Step 2: *Put the right needle into the stitch on the left needle, take the yarn round the needle point to make a new stitch, pull the new loop through and twist it on to the left needle point.*
Step 3: Repeat from * to * for the required number of stitches.
DECREASES
In order to produce a square, the stitches cast on need to be reduced at a rate of either one stitch per row, or two stitches every two rows. Working a double decrease creates a more pronounced mitre. There are a number of methods of working a double decrease: k3tog (a right-leaning double decrease), sk2po (a left-leaning double decrease), or s2kpo/CDD (a centre double decrease).
An alternative to working double decreases is to work two single decreases at the centre on every other row, or to work one single decrease at the centre of the piece every row.
Later in this chapter there will be examples and detailed instructions of how to make squares with all these different decreases.
SELVEDGES
The squares can be knitted without working a selvedge. However, with patchwork knitting a new square is often knitted on to an existing square by knitting-up stitches from the edge of the existing square, so knitting squares with a chain selvedge makes it easier to knit-up the correct number of stitches from the edge for the next square.
One stitch equals two rows of knitting. If you work a chain selvedge, one chain stretches over two rows, so when knitting-up stitches you can knit-up one stitch for every chain for the new square. There are a number of ways to work a chain selvedge.
Whichever method you use to make a chain selvedge, it is important to have clearly visible chain stitches at the edges of your knitting. Most of the samples in this book have been worked with the method used in the Schulz books.
MAKING A CHAIN SELVEDGE
Schulz method
At the beginning of every row, k1tbl, work to the last stitch of the row, with the yarn at the front, sl1 purlwise.
Høxbro method
On the first row knit to the last stitch, p1.
On all subsequent rows, sl1 knitwise, work to the last stitch, p1.
This method does give a twisted chain stitch at the edges.
Other methods
RS rows: k1tbl, work to the last stitch and sl1 knitwise.
WS rows: p1, work to the last stitch and sl1 knitwise.
RS rows: sl1 knitwise, work to the last stitch, sl1 knitwise.
WS rows: p1, work to the last stitch, p1.
Note
You need to check the instructions provided in the abbreviations as to how to slip the stitch – that is, knitwise or purlwise – as generally the abbreviation ‘sl1’ is used for either method.
THE SINGLE MITRED SQUARE: THE SCHULZ METHOD
The Schulz method casts on an even number of stitches. The cast-on or stitch knit-up is counted as Row 1. Row 2, a wrong-side row, is also the first decrease row, which is a single decrease, k2tog, to give an odd number of stitches for the remainder of the square. All the remaining decreases are k3tog (or p3tog) on wrong-side rows.
The chain selvedge starts with k1tbl, work to the last stitch, sl1 with the yarn at the front.
If you are working a knit row, before slipping the last stitch bring the yarn between the needles to the front, and then slip the stitch purlwise. If you are working a purl row, the yarn is already at the front so slip the last stitch purlwise.
Horst Schulz single-mitred square in garter stitch.
Basic Schulz single-square pattern
Row 1 (RS): Using the knit cast-on, cast on 22sts.
Row 2: k1tbl, k9, k2tog, k9, sl1.
Row 3 and all odd-number rows: k1tbl, knit to the last stitch, sl1.
Row 4: k1tbl, k8, k3tog, k8, sl1.
Row 6: k1tbl, k7, k3tog, k7, sl1.
Row 8: k1tbl, k6, k3tog, k6, sl1.
Row 10: k1tbl, k5, k3tog, k5, sl1.
Row 12: k1tbl, k4, k3tog, k4, sl1.
Row 14: k1tbl, k3, k3tog, k3, sl1.
Row 16: k1tbl, k2, k3tog, k2, sl1.
Row 18: k1tbl, k1, k3tog, k1, sl1.
Row 20: k1tbl, k3tog, sl1.
Row 22: k3togtbl.
Cut the yarn and pull the yarn end through this last loop.
WEAVING IN THE YARN ENDS
A very useful technique to master when working patchwork knitting is weaving in the yarn ends as you go. The yarn ends are woven in on the wrong side of the fabric. When working a knit row on the right side it is possible to weave in the yarn end as you go. When working a knit row on the wrong side of the fabric it is not possible to weave in the ends. However, when working a purl row on the wrong side of the fabric it is possible to weave in the yarn ends as you go.
It is generally recommended to weave in the yarn ends for about ten stitches. The technique is worked in two steps over two stitches, trapping the yarn end on the wrong side of the fabric with the knitting yarn every other stitch. The smoothest way to work the technique is to hold the yarn end to be woven in the left hand (assuming you are knitting throwing style with the working yarn in your right hand). It can also be used by moving the yarn end up and down over the right needle point with the right hand.
Step 1, with the yarn end in the left hand: Put the point of the right needle into the next stitch, take the yarn end over the point of the right needle, then knit the stitch with the working yarn but make sure not to take the yarn end through the stitch.
Step 1 of weaving in the yarn: taking the yarn end over the right needle before knitting the stitch.
Step 2, with the yarn end in the left hand: Hold the yarn end down at the back of the fabric and work the next stitch as normal.
Step 1, not holding the yarn end: Lift the yarn end over the top of the right needle so it hangs towards the front of the fabric, and then knit the next stitch.
Step 2, not holding the yarn end: Bring the yarn end back to the wrong side of the fabric and work the next stitch, making sure the working yarn passes over the yarn end.
Step 2 of weaving in the yarn: holding the yarn end down at the back of the fabric while working the next stitch normally.
Joining squares
The smoothest join is worked by knitting-up stitches from the edge of an existing square through the chain selvedge on either side of an existing square or through the cast-on loops of an existing square.
Patchwork squares have decreases at the centre, which creates a visible mitre to each square. When knitting-up stitches to join a new square to an existing square it is very important to consider the direction of the mitre. This will be covered in more detail later in this chapter.
KNIT-UP STITCHES
In this book the term ‘knit-up stitches’ is used throughout, rather than ‘pick up stitches’, when referring to creating new stitches by knitting through the fabric of an existing piece. Do not try to pick up the stitches on a needle first and then knit them. When working the knit-up stitch, put the point of the right needle through the fabric of the existing piece under both loops of the chain selvedge, or through the cast-on loop made by working a knit cast-on, and pull the working yarn through to make a new stitch on the right needle.
Right needle point placed correctly through the fabric of the existing piece ready to knit-up a stitch.
Joining a square to the RHS of an existing square
Half the stitches required for the square will be cast on and half the stitches will be knitted-up. To join a new square to the RHS of an existing square, first cast on eleven stitches. With the existing square, right side facing, held in your left hand and the needle with cast-on stitches in your right hand, starting at the cast-on edge, knit-up one stitch for every chain up the edge for eleven stitches.
Cast on 11sts and then knit-up 11sts from the edge of the existing square.
The new square knitted on to the right-hand edge of the previous square.
As you work the knit-up you can also weave in your tail end as you go.
Turn the knitting and continue to work a single square following the instructions from Row 2 of the basic Schulz pattern.
Joining a square to the LHS of an existing square
With the existing square in your left hand, right side facing and starting at the point of the existing square, knit-up one stitch for every chain down the edge of the existing square for eleven stitches. Turn the knitting round and cast on eleven stitches to give a total of twenty-two stitches for the new square.
Knit-up 11sts from the edge of the existing square, and then cast on 11sts.
The new square knitted on to the left-hand edge of the previous square.
11sts knitted-up from the edge of the right-hand square, and 11sts knitted-up from the edge of the left-hand square.
As you work the knit-up you can weave in your tail ends as you go.
Continue to work a single square following the instructions from Row 2 of the basic Schulz pattern.
Knitting a new square between two existing squares
To knit a new square between two existing squares you will knit-up half the required stitches from an edge of each existing square.
With the right sides of the existing squares facing you and holding them in your left hand, starting at the point of the right-hand square, knit-up eleven stitches down the LHS of the right-hand square, and then knit-up eleven stitches up the RHS of the left-hand square.
The new square knitted between two existing squares.
Turn the knitting and continue to make a new square following the instructions from Row 2 of the basic Schulz pattern.
THE SINGLE MITRED SQUARE: HØXBRO METHOD


