8,39 €
Mehr erfahren.
- Herausgeber: Batsford
- Kategorie: Lebensstil
- Sprache: Englisch
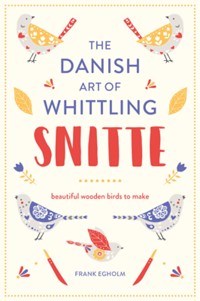
A fascinating practical introduction to the Danish art of whittling, with inspiration and instructions for making adorable decorative wooden birds. Snitte, Denmark's art of wood whittling, is a rite of passage for most Scandinavians, and the passion for it lasts a lifetime. Wood whittling's practical, outdoorsy nature has been married to fine craftsmanship in this beautiful book about creating wood-sculpted birds that can be left uncoloured and crisp as they are in wood or coloured carefully to make exquisite sculptures. Written by a passionate Danish woodsman, Frank Egholm, the book teaches even the beginner the basics of wood whittling a bird shape with step-by-step demonstrations (and templates), how to mount them elegantly on real pieces of wood, and how to paint them delicately to bring out their colourful beauty. From the familiar robin, blue tit and wagtail to the less common yellowhammer, the book has templates for eight European birds. Whether you are new to whittling or are looking for a fresh project with your whittling skills, this is a perfect book to make something special and tap into the wonders of Scandinavian craft.
Das E-Book können Sie in Legimi-Apps oder einer beliebigen App lesen, die das folgende Format unterstützen:
Seitenzahl: 20
Veröffentlichungsjahr: 2017
Ähnliche


CONTENTS
Getting started
Whittling your bird
Painting birds
Displaying your birds
More advanced bird projects
Useful information
GETTING STARTED
Before you get started on whittling your birds, make sure all your equipment is in place. On the following few pages we’ll explain how to design and draw your bird template.
WHITTLING SMALL BIRDS
Small birds with folded wings make really good whittling projects. Adults and children from about the age of 11 can carve birds.
Of course, your first attempt at whittling a bird will be challenging, but it will be easier the second time and practice makes perfect, as the saying goes. Using dry limewood as a material and cutting the bird’s outline out of a block of wood first makes the process relatively simple. Lime is a soft wood and easy to carve, but you can also use other soft woods, such as poplar, alder or basswood. The bird can then be mounted in a decorative fashion – for example on a piece of driftwood – and painted.
So, once you are equipped with a sharp knife and a pre-cut block, it’s time to whittle.
DRAWING
For templates, see here, but you can also find inspiration in bird books and on the Internet.
Use a block of wood with a thickness of about 3.5–4.5cm (1⅖–1⅘in).
The simplest method is to draw the profile of a bird on the block of wood, so that the neck and tail are pointing in the same direction along its length. Position the template so that it lies along the wood grain, as otherwise the beak can break easily.
CUTTING OUT THE BIRD SHAPE
Once you’re happy with your bird shape, you can start to cut it out. There are several ways you can do this, depending on what equipment you have.
To cut out the bird shape you can use a scroll saw with a strong blade, or a jigsaw with a narrow blade for curves.
You can also use a fretsaw/hand scroll saw if you prefer, or a band saw with a narrow blade.
SAFETY
If you are not confident, protect the hand holding the piece of wood with cut-resistant safety Kevlar gloves, for example. See supplier list, here. You can also protect your thumb and fingers with leather finger guards (or you can cut the finger off a thick glove).


