Erhalten Sie Zugang zu diesem und mehr als 300000 Büchern ab EUR 5,99 monatlich.
- Herausgeber: Batsford
- Kategorie: Lebensstil
- Sprache: Englisch
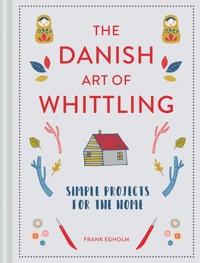
A delightfully Danish guide to whittling for the home, crammed with projects for all ages and abilities. Our interest in the simple but satisfying art of whittling has never been higher. Our Danish-inspired book on whittling (snitte in Danish) has a range of wonderful simple whittling projects for the home. The beautiful Scandinavian projects range from simple wooden toys for children, including a bird whistle, ring catcher, animal figures and a wooden sword to practical items like door hooks, butter knives and then to decorative pieces such as a wooden necklace, buttons, delicate carved flowers and a chess set. All the projects are amazingly simple, and with the visual step-by-step technique section at the front of the book, even a beginner could take on these projects. The art of whittling has never been more accessible and these beautiful but simple projects capture the spirit of the Scandinavian love of craft and nature. Author and Danish craftsman Frank Egholm shares not only his considerable knowledge but also his passion for simple wooden carving.
Sie lesen das E-Book in den Legimi-Apps auf:
Seitenzahl: 58
Veröffentlichungsjahr: 2023
Das E-Book (TTS) können Sie hören im Abo „Legimi Premium” in Legimi-Apps auf:
Ähnliche


CONTENTS
GETTING STARTED
Introduction
Tools and skills
TOYS
Sword and sabre
Ring catcher
Magic propeller
Windmill
Flying propeller
Buzzing whirligig
Somersaulting bear
FIGURES AND ANIMALS
Elf 1
Elf 2
Figures
Angels
Mouse
Bear
Bird
Mary and Joseph
USEFUL THINGS
Whistles
Hook
Butter knives
Hiking pole
Beads
Buttons
Pendant
Cork decorations
Whittling knife and sheath
Flower
GAMES
Quoits
Mouse game
Chess
Suppliers
Index
About the author
GETTING STARTED
Read this section to help you choose the best knife and other tools and materials, and to learn the basic techniques that will help you whittle safely.
INTRODUCTION
In recent years there has been a resurgence of interest in the age-old art of whittling, when a knife is used to carve shapes from fresh wood. It’s a simple, inexpensive craft that the whole family can get involved in, with parents or grandparents passing on their knowledge to their children, and brothers and sisters helping each other out.
Whittling has many advantages: it is an easy way to create things; it is absorbing; it enables new abilities to be acquired; and it improves concentration, coordination and willpower. People have always enjoyed whittling wood – not only does it promote a combination of different skills, but it’s an enjoyable way to pass the time, too, and motivation for getting outside.
In my experience, whittling brings people together in a group where the atmosphere is almost always friendly, encouraging many a cosy chat, which makes it a great activity for families to enjoy together.
Frank Egholm
TOOLS AND SKILLS
The kind of whittling described in this book requires only a few tools, and a wide variety of things can be made with just a knife and a saw. Whether enjoyed as a group or family activity, it is important that you know how to handle a sharp knife safely and that the safety rules are observed at all times, so please read the sections on whittling methods and techniques (see her) and the safety rules (see here) before making a start on any of the projects.
THE WOOD
Most of the items in this book are carved from fresh branches, which are usually easier to carve than dry wood. I have generally used twigs and small branches with a thickness of 1–4cm (⅜–1½in) from a variety of tree species, such as birch, hazel, cherry, poplar, alder or lime, but other types can also be used. Knotty branches, side branches and nodes can be difficult to work with, but can provide decorative opportunities for the more experienced whittler. If carving patterns in the bark, it is best to choose wood with a nice, smooth bark that is not too thick.
Sometimes you will want to use the wood in which the pith – the spongy centre of the branch – is not too thick (see the projects for advice on this). If you are not lucky enough to have fresh wood available from your garden, ask neighbours or friends if they have some they can spare when pruning, or speak to the gardeners in your local park. Good fresh garden waste can often be found at recycling centres, too.
To avoid cracking, the wood must not dry out too quickly, so store it outside in a cool, dry place. This is also a good way to prevent an unfinished piece from drying out and becoming too hard in between whittling sessions; alternatively, keep an ongoing project in a plastic bag (although not for too long, otherwise it may go mouldy). Soft woods, such as poplar, alder and lime, can be used for pieces that are to be worked on over a longer period. An ideal starter wood for simple projects is dry lime wood as it is so easy to carve.
Learning to whittle helps improve concentration and dexterity. To help avoid accidents, whittlers should never sit within arm’s reach of each other.
THE WHITTLING KNIFE
When selecting a whittling knife, here are a few things to look out for:
• Choose a knife with a short blade – a length of 4–7cm (1½–2¾in) is best; some shapes can be difficult to carve if the blade is longer.
• The ideal cutting angle for a whittling knife is 20–25 degrees (see Sharpening the knife, here).
• The handle should be comfortable to hold; smaller knives will require smaller handles.
• A handle that is thicker in the middle and thinner towards each end fits the hand well and provides a good grip.
• For beginners, a knife with a small finger-guard is a good idea, but a large finger-guard of the kind often found on scout knives can get in the way when whittling.
Various whittling knives, some with whittled handles (see here).
It’s a good idea to keep your knives together in one place.
Some suppliers of whittling knives are listed on here. If you want to make a whittling knife yourself, these suppliers also sell knife blades, and there are instructions for making a handle and sheath on here.
Method 1, cutting away from yourself.
WHITTLING METHODS AND TECHNIQUES
First, read the safety rules on here. For extra safety, you may want to protect your hands with cut-resistant protective work gloves.
Cutting away from yourself
The whittling knife must be sharp so it cuts easily and produces a good smooth cut (see Sharpening the knife, here). When whittling your mantra should be: ‘Always cut away from yourself.’ Here are two ways to do this:
METHOD 1: The easiest method is to hold the wood in one hand – the holding hand – and take the knife in your other hand, using it to cut away from you further along the branch. Watch out for your thighs and the fingers of your holding hand. One disadvantage of this method is that the knife moves out into space after leaving the wood, giving you less control over the blade (see the photographs opposite).
Method 2: For more controlled and delicate carving, use the thumb of the holding hand to push and support the back of the knife blade; in this way, the knife will make cuts as it is pushed and twisted (see the photographs opposite and below). It can take a little practice to become proficient at this method and the unaccustomed action may make the skin on your thumb a little sore to start with, although the wearing of a thumb guard can help with this.
Small cuts produce neatly finished surfaces – aim to remove small chips of wood at a time. This will produce curves that can be rounded off better when sanding and helps you to get a good feeling for the finished shape while you are carving.
Method 2, using both hands to control the knife.
Other cutting tips
When cutting into the wood, cut downhill along the grain of the wood as shown in the illustration below: the arrows on the illustration below show the direction in which the wood should be cut and you should turn the wood as necessary to make sure that you are always cutting away from yourself.


