13,99 €
Mehr erfahren.
- Herausgeber: John Wiley & Sons
- Kategorie: Lebensstil
- Serie: Teach Yourself VISUALLY (Consumer)
- Sprache: Englisch
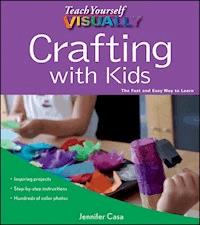
Get creative with kids Unplugging kids from their MP3 players and game systems forone-on-one family time is a great way to reconnect in today'shectic world. And what better way to spend time together than doingan activity that's not only fun but also promotes creativity andself-expression? Teach Yourself VISUALLY Crafting with Kids is packed withstep-by-step instructions for making crafts throughout the year,from outdoor projects to gifts and party favors to holiday decor toprojects that promote learning through play. * 75 fun, simple projects for adults to make with kids * Concise, two-page lessons show you all the steps to a skill andare ideal for quick review * Detailed color photos demonstrate each step and helpful tipsprovide additional guidance Loaded with easy-to-follow instructions and fun, simpleprojects, Teach Yourself VISUALLY Crafting with Kids givesparents, caregivers, and teachers the tools they need to make themost of the time they spend with kids.
Sie lesen das E-Book in den Legimi-Apps auf:
Seitenzahl: 179
Veröffentlichungsjahr: 2011
Ähnliche


by Jennifer Casa
Teach Yourself VISUALLY™ Crafting with Kids
Copyright © 2011 by Wiley Publishing, Inc., Hoboken, New Jersey. All rights reserved.
Published by Wiley Publishing, Inc., Hoboken, New Jersey
No part of this publication may be reproduced, stored in a retrieval system or transmitted in any form or by any means, electronic, mechanical, photocopying, recording, scanning or otherwise, except as permitted under Sections 107 or 108 of the 1976 United States Copyright Act, without either the prior written permission of the Publisher, or authorization through payment of the appropriate per-copy fee to the Copyright Clearance Center, 222 Rosewood Drive, Danvers, MA 01923, (978) 750-8400, fax (978) 646-8600, or on the web at www.copyright.com. Requests to the Publisher for permission should be addressed to the Permissions Department, John Wiley & Sons, Inc., 111 River Street, Hoboken, NJ 07030, (201) 748-6011, fax (201) 748-6008, or online at http://www.wiley.com/go/permissions.
Wiley, the Wiley Publishing logo, Teach Yourself VISUALLY, and related trademarks are trademarks or registered trademarks of John Wiley & Sons, Inc. and/or its affiliates. All other trademarks are the property of their respective owners. Wiley Publishing, Inc. is not associated with any product or vendor mentioned in this book.
The publisher and the author make no representations or warranties with respect to the accuracy or completeness of the contents of this work and specifically disclaim all warranties, including without limitation warranties of fitness for a particular purpose. No warranty may be created or extended by sales or promotional materials. The advice and strategies contained herein may not be suitable for every situation. This work is sold with the understanding that the publisher is not engaged in rendering legal, accounting, or other professional services. If professional assistance is required, the services of a competent professional person should be sought. Neither the publisher nor the author shall be liable for damages arising here from. The fact that an organization or Website is referred to in this work as a citation and/or a potential source of further information does not mean that the author or the publisher endorses the information the organization or Website may provide or recommendations it may make. Further, readers should be aware that Internet Websites listed in this work may have changed or disappeared between when this work was written and when it is read.
For general information on our other products and services or to obtain technical support please contact our Customer Care Department within the U.S. at (877) 762-2974, outside the U.S. at (317) 572-3993 or fax (317) 572-4002.
Wiley also publishes its books in a variety of electronic formats. Some content that appears in print may not be available in electronic books. For more information about Wiley products, please visit our web site at www.wiley.com.
Library of Congress Control Number: 2011921208
ISBN: 978-0-470-64370-9
Printed in the United States of America
10 9 8 7 6 5 4 3 2 1
Book production by Wiley Publishing, Inc. Composition Services
Praise for the Teach Yourself VISUALLY Series
I just had to let you and your company know how great I think your books are. I just purchased my third Visual book (my first two are dog-eared now!) and, once again, your product has surpassed my expectations. The expertise, thought, and effort that go into each book are obvious, and I sincerely appreciate your efforts. Keep up the wonderful work!
—Tracey Moore (Memphis, TN)
I have several books from the Visual series and have always found them to be valuable resources.
—Stephen P. Miller (Ballston Spa, NY)
Thank you for the wonderful books you produce. It wasn’t until I was an adult that I discovered how I learn—visually. Although a few publishers out there claim to present the material visually, nothing compares to Visual books. I love the simple layout. Everything is easy to follow. And I understand the material! You really know the way I think and learn. Thanks so much!
—Stacey Han (Avondale, AZ)
Like a lot of other people, I understand things best when I see them visually. Your books really make learning easy and life more fun.
—John T. Frey (Cadillac, MI)
I am an avid fan of your Visual books. If I need to learn anything, I just buy one of your books and learn the topic in no time. Wonders! I have even trained my friends to give me Visual books as gifts.
—Illona Bergstrom (Aventura, FL)
I write to extend my thanks and appreciation for your books. They are clear, easy to follow, and straight to the point. Keep up the good work! I bought several of your books and they are just right! No regrets! I will always buy your books because they are the best.
—Seward Kollie (Dakar, Senegal)
Credits
Acquisitions Editor
Pam Mourouzis
Senior Project Editor
Donna Wright
Copy Editor
Lynn Northrup
Editorial Manager
Christina Stambaugh
Vice President and Publisher
Cindy Kitchel
Vice President and Executive Publisher
Kathy Nebenhaus
Interior Design
Kathie Rickard Elizabeth Brooks
Photography
Matt Bowen
Additional Photography
Jennifer Casa
Special Thanks…
To the following companies for supplying materials used in this book:
Clover Needlecraft, Inc.www.clover-usa.com
Ornamenteawww.ornamentea.com
Plaid Enterprises, Inc.www.plaidonline.com
About the Author
Jennifer Casa is a mama, homemaker, artist, designer, and maker of many things. She thinks a great day involves any combination of sewing, knitting, cooking, craft time with her kids, and rockin’ out with her husband. She creates patterns and projects for crafters of all ages, and her work is featured regularly in online and print publications. She lives nestled between the city and the country in Ohio with her husband and twin daughters.
Visit JChandmade.typepad.com for more projects and inspiration.
Acknowledgments
I would like to thank my Agent, Linda Roghaar, for her tremendous support and encouragement, and for presenting me with this wonderful opportunity. I would also like to thank Pam Mourouzis and Cindy Kitchel for their guidance while writing this book. My sincere appreciation goes to Donna Wright for her professionalism, editorial expertise, and kindness throughout this project. Thanks also to Matt Bowen for excellent photography, as well as the entire team at Wiley for pulling this book together so marvelously.
Thanks to my friends and family—most especially my daughters—who prototyped each and every project, and cooperated with my requests for “just one more photo” over the course of the past year. I would also like to thank my parents for cheering on my creative endeavors ever since I was a child. A big thank you to all of my blog readers, who have shared kindness, inspiration and laughter for years. And thanks especially to Meg McElwee for a thoughtful late-night conversation that helped me navigate the road to becoming an author. Most of all, I want to thank my husband, Pat, for believing in me. You are surely special.
For Sophia and Natalie—you make my days sparkle. xoxo
Chapter 1: Kid-Friendly Crafting in Your Home
Kids are amazing little teachers, and we are blessed to have them in our lives. The freedom with which they approach and delight in arts and crafts is truly inspiring. Children have the courage to innovate without fear of judgment or failure—a lesson from which we can all surely benefit. Celebrate creativity in your home by designating a kid-friendly craft space that everyone can share and enjoy.
Before you get started, there are a few things to consider—the amount of time you spend crafting, what materials are on hand, and how to best organize everything so it contributes to a positive atmosphere in your home rather creating clutter. This will make art and craft endeavors at home even more enjoyable experiences shared by you and your kids.
Tune In to Your Kids
Crafting with children is about so much more than what you’re making—it’s about the conversations, the laughter, and the warmth you feel in your heart long after a project is complete. It’s about the experience. Tune in to your kids’ creative spirits, learn from them, and celebrate being in the moment.
Listen
Kids thrive when given the opportunity to do things by and for themselves, but they also need and desire guidance. An excellent way to provide that is to work side-by-side with them, encouraging their sense of discovery. You can support and nurture their independent spirits by simply listening—turn off your transmitter and turn on your receiver.
Kids can sometimes find it difficult to articulate and express themselves, making it even more important for us to be aware of nonverbal cues. Transitions can be especially challenging—the start of school, moving to a new city, the addition of a new baby, etc. Arts and crafts present a fantastic opportunity for you to share time together, soothe anxieties, express love, and be supportive. Let them do the talking and follow their lead—goodness knows, kids are incredibly creative, and they can teach us a great deal.
Be Playful
Just be. It sounds simple, right?
As adults, it is easy to become overwhelmed by our lengthy to-do lists. Even if things are not written down, we are somehow always aware of what needs to be done. This is yet another reason why it is so important to make time each day to be together without those distractions. If it will help you, write it on your to-do list—giving yourselves that shared creative time will enrich both you and your children.
Be reasonable. Choose projects you can accomplish within a given timeframe rather than try to rush something to completion. Your kids will learn the importance of delivering on one’s promises. And just as much as they learn from us, we can learn from them.
Try something new. And never be afraid to make mistakes. Mistakes happen to all of us. Sometimes, really great things can happen when you take a detour. What happens happens, so ride the waves and see where they take you. Be in the moment.
Adapt the Projects
This book is filled with projects that will appeal to kids of all ages. You can work on these projects as written, or simply use them as a springboard for your own creative endeavors. Encourage your kids to rethink, modify, and transform these projects into something of their own design.
A great example of this is what happened while we were prototyping our family of peg pals (Chapter 9). My daughter noticed we had not included our cat among our family of peg pals—and without skipping a beat, she scampered off to the next room where I saw her turn a small peg on its side, and create our peg cat with a marker and a few pipe cleaners. She was so excited to share her surprise with us, and I was thrilled that she felt confident and empowered to make the project her own.
It is my sincere hope that you and your kids use this book as a springboard for your own creativity, and that you feel inspired to make the projects and activities your own.
Materials and Organization
There is no shortage of impressive craft supplies on the market. Your local arts and crafts store is a great resource, the aisles filled with a wide variety of quality craft materials. A simple starter project you can work on together is stocking your own craft bin, drawer, or entire cabinet at home. Consider your space, then discuss what interests your kids—perhaps there is a color, texture, shape, or crafting medium. Check around your home for materials you may already have on hand, and then stock up on basic supplies you will need.
Organization and Storage
In our home, we transformed what was our dining room sideboard into an awesome craft cabinet, and our dining room is now the main arts and crafts zone in our home. A bit untraditional, perhaps. But we considered our lifestyle and how we truly live in this space. We determined that heirloom dishes could be safely stored in the basement and brought up to be appreciated on special occasions when we use them. That said, you do not need to do this in your space—rather, I suggest that you assess your space as well as your lifestyle, and then create a solution that you can all enjoy and that will work for you. It does not matter if you have a single craft bin or an entire craft cabinet, as long as everything has a place.
Storage Solutions
Clear storage bins with lids are great because they allow you to see what is inside each container before opening it. But you do not need to spend a dime on storage bins if you prefer not to. Reuse cardboard shoe boxes, canisters, and so on, paint or cover them with decorative paper, and clearly label the contents. Store like items together. Place tapes, glues, and fasteners in one bin, fill another with felt scraps, and yet another can hold craft foam stickers. Save clear plastic to-go containers—after a thorough washing, they work great for storing art supplies.
Organize Your Craft Space
Get down to your kids’ level—I mean that quite literally. Think about how they will interact with the materials and space, and put your arts and crafts storage area at their height. Use storage containers that they can easily maneuver independently. And remember to keep all your materials and tools age-appropriate.
Basics
A great start is to have a variety of papers, and an assortment of good-quality crayons, colored pencils, or markers. Stamp pads are fun for everyone, whether used with store-bought stamps or originals you have carved from erasers. A small watercolor set travels well and encourages creative expression while on-the-go. (See the first photo).
There are many adhesives available, all with different applications. White glue is terrific for paper crafts; thicker craft glue is better when working with felt, fabric, or foam; hot glue dries quickly and offers a secure bond; and glue sticks are simple to use at any age. Scotch tape and painters’ tape are also nice to have on hand, and duct tape is incredibly versatile.
To protect your work surface, use a piece of oilcloth, a vinyl tablecloth, or simply lay out some newspapers. A bucket is great for mixing, blending, dyeing, and even washing up after working with outdoor crafts.
Essential Tools From Around the House
Cutting develops fine motor skills and hand-eye coordination, so be sure to have good scissors in age-appropriate sizes. Rulers are excellent measuring tools and also help young hands draw straight lines. A single-hole punch can be used not only with paper, but also on plastic and lightweight fabrics.
Have a few different kinds of paintbrushes, including fine, medium, and broad tip, as well as foam applicators. You can easily wash these and use them over and over. Paint stir sticks are handy for stirring, scooping, digging, and building, and also provide a nice straight edge. Needle nose pliers are useful in twisting wire, as well as picking up small items in tight spots. And keep your stapler filled with staples.
Measuring spoons and cups are valuable tools not only for cooking, but for arts and crafts as well. A wooden spoon, butter knife, and chopsticks are terrific for stirring, mixing, pressing, smoothing, and even cutting soft clay. Consider setting aside a few kitchen utensils specifically for arts and crafts.
Tools For Your Wish List
A good set of alphabet stamps can be used to apply ink to paper or fabric, as well as make impressions in clay. A screw punch is similar to a single-hole punch; however, it can create a hole from any angle and is not limited by the edge of a paper. A craft knife or rotary cutter and self-healing mat can be very precise, but both are incredibly sharp and best used by adults.
A few other fun items you might want to consider investing in include a good-quality weaving loom, pompom makers, craft punches, and a needle-felting tool and mat.
Supplies From the Recycling Bin
Think outside the box—chances are your home is already well-stocked with free craft materials.
Something as simple as cardboard tubes from paper towels and toilet paper rolls can be transformed into telescopes, marble runs, snorkels, antennae, tunnels for tiny play figures, or sliding boards on a playground made of building blocks. Newspaper is also a handy material to keep around—not only is it great for protecting your work surface from drips and spills, but it can also be painted and transformed into something new. Milk cartons can be washed, disassembled, and repurposed. Small bottles and jars make great storage for leftover paint and glue. And small, clean plastic containers from yogurt or pudding are useful for blending paint, rinsing brushes, and organizing small tools or supplies.
Accessibility and Cleanup
An important part of creating a kid-friendly craft space is taking necessary safety precautions. Consider the ages of the kids who will use these materials, as well as those who may interact with them, even if only in passing. Taking preventive measures when establishing your craft space will create a more comfortable and functional environment for everyone.
Make it Accessible
Depending on the configuration of your craft area, you will want to determine what you would like your kids to be able to access independently. Be reasonable with your choices and try not to overwhelm kids with too many craft materials at once. Rotate materials on a regular basis to stimulate their interests. You may even want to take some time after your kids are in bed to set up a certain craft for the next day. Bookmark a project and assemble all the necessary materials, and when they rise and shine the following morning, follow their lead.
Make it Safe
Be sure to store larger and possibly harmful materials out of reach of children. Items like a hot glue gun, wire snips, pliers, and a craft knife are best stored in a separate area that only adults can access, and pulled out for use on craft projects together. If you have small children, you will also want to store items such as paint, plaster, and adhesives separately.
Messes Happen
It’s true. Paint will spill, markers will bleed through onto things, and glue will end up where you would rather it not. But messes don’t have to be a big deal. Teach your kids how to clean up after themselves by examples. We keep a low drawer stocked with clean dishrags and towels so they are at the ready when the need for cleanup arises.
Just relax and have fun.
Enjoy the process.
And enjoy each other.
Happy crafting!
Chapter 2: Spring Cleaning
Springtime brings with it an urge to clean out and spruce up our homes. In this chapter, we use readily available materials—and a few surprising ones, at that—to start fresh and celebrate the season. These simple and fun home décor projects are sure to liven up and brighten your home. Enjoy!
What’s Your Fabric Sign?
Personalize any space in your home with original fabric-wrapped wire signs. They are simple to make, and your kids will especially enjoy adding their own special tags to their rooms. Whip up one special sign, or an entire alphabet to create an interchangeable piece. They will bring a new energy to your surroundings, whether you use them for specific celebrations or year-round décor.
Let’s Make It
Time: Approx. 15 minutes per letter
Materials
• Scrap paper and a pencil
• Aluminum jewelry wire (12-gauge)
• Wire snips (used for jewelry making)
• Needle nose pliers
• Fabric in a variety of prints and colors
• Quilt batting scraps (or an old sweatshirt)
• Scissors
• Low-temp hot glue gun (or craft glue)
Create the Wrapped Letters
1 Sketch how you would like your letters to appear on pieces of scrap paper. Play with the size, shape, and scale of the letters until you are happy with your template.
2 Use your sketch to estimate how much wire you need for the first letter and cut it.
3 Shape the wire into letter form with your hands. If necessary, cut additional pieces of wire to complete each letter shape.
4 Cut the fabrics and quilt batting scraps (or an old sweatshirt) into 1"-wide strips.
5 Place a small amount of glue on the end of one of the batting strips and begin winding it around the wire letter, overlapping your wraps slightly as you go. When you reach the end of the strip, add another drop of glue to secure it to itself and the form.
6 Continue to work in this manner as you wrap the entire form with batting to create a sturdy letter that is still pliable.
7 Repeat this process using the fabric strips until the letter is wrapped in fabric.
8 Shape the letter with your hands until you are pleased with the final look.
9 Repeat this entire process with the remaining letters on your sketch.
TIP
Display Options
There are many ways you can display your signs.
• Suspend each letter from the ceiling using fishing wire to create a floating sign.
• Scatter the individual letters of your sign above a doorway and secure them in place with small tack nails.
• Paint a 1⁄4" dowel so it will blend in with the wall color. Secure each letter of the sign to the dowel rod with a small dot of glue and tie with invisible thread. Rest both ends of the dowel on two small tack nails in the wall.


