11,49 €
Mehr erfahren.
- Herausgeber: Crowood
- Kategorie: Lebensstil
- Sprache: Englisch
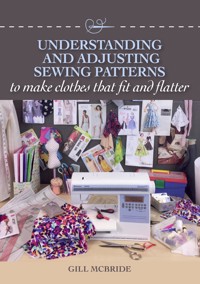
Everyone feels good and looks better in well-fitted clothes. This practical book explains how to make garments that really fit you and flatter your shape. It is a step-by-step guide to understanding fully what is included on a sewing pattern envelope and the contents within, so that you can make the clothes you want look amazing. Aimed at those home sewers who have no confidence in fitting, this book will be your best friend and will guide you through the process of sewing successful clothes with a professional fit and finish.
Das E-Book können Sie in Legimi-Apps oder einer beliebigen App lesen, die das folgende Format unterstützen:
Veröffentlichungsjahr: 2018
Ähnliche


UNDERSTANDING AND ADJUSTING SEWING PATTERNS
to make clothes that fit and flatter
GILL MCBRIDE
THE CROWOOD PRESS
First published in 2018 by
The Crowood Press Ltd
Ramsbury, Marlborough
Wiltshire SN8 2HR
www.crowood.com
This e-book first published in 2018
© Gill McBride 2018
All rights reserved. This e-book is copyright material and must not be copied, reproduced, transferred, distributed, leased, licensed or publicly performed or used in any way except as specifically permitted in writing by the publishers, as allowed under the terms and conditions under which it was purchased or as strictly permitted by applicable copyright law. Any unauthorised distribution or use of thistext may be a direct infringement of the author’s and publisher’s rights, and those responsible may be liable in law accordingly.
British Library Cataloguing-in-Publication Data
A catalogue record for this book is available from the British Library.
ISBN 978 1 78500 448 3
Acknowledgements
I would like to thank the following sewing students for their help with the photographs: Christine, Rita, Ros, Nicola and Mandy. Thanks to Jane Hunter of Hunters Atelier, for help with the photographs and diagrams.
CONTENTS
INTRODUCTION
1 THE PATTERN
2 UNDERSTANDING YOUR BODY MEASUREMENTS
3 SEWING AND FITTING THE TOILE
4 ALTERING THE PAPER PATTERN
5 FITTING ON A DRESSFORM
6 GET CREATIVE!
GLOSSARY
INDEX
INTRODUCTION
When a well-dressed person passes by, you will always notice them. They look good, walk tall and clearly feel good about themselves.
The clothes we wear reflect the mood we are in. How often have you stood in front of the wardrobe, doors open, looking at the clothes hanging inside and you can’t decide what to wear. You can’t find the right garment to suit your mood for the day. On the other hand, you may need to dress to suit the things you will be doing that day. If you are going to have a lazy day at home, you’ll probably choose comfortable casuals, such as soft trousers, a sloppy sweater or a loose T-shirt. If you are going to an important meeting, a smart skirt and blouse with a nice fitted jacket might be your choice. Whatever the day holds, your clothes are an important reflection of who you are and who you want to be. Knowing that your clothes fit well and that you look good in them can boost your mood, no matter what you are doing.
It’s so infuriating when we see something in a shop that we love, but it just doesn’t fit us properly. We might try the garment on, only to find that the darts are in the wrong place, the waistline is too high, the bust is too tight or too big, the length is wrong or the waist/hips don’t fit. Sometimes we can buy a new garment and take it home and fix it so that it does fit us better, but how annoying is it that we have to alter a ready-to-wear garment.
Fitting is key. Clothes that fit well make us feel good, make us look good and give us confidence. When we wear a garment that doesn’t fit just right, we end up tugging at the hem, pulling at the waist, fixing the shoulders and so on. Sometimes we are not aware of this constant rearranging of our clothes. But if we examine our wardrobe and pick out the garments that we feel really good wearing, this is probably because they fit well and we feel very comfortable in them.
It is the same when making your own clothes. Fitting is key. We buy a pattern, we cut it out and we make a new dress/jacket/trousers. Then we try the garment on and it may be OK, but not quite right. Luckily, we have made the garment in calico first! So we haven’t ruined our gorgeous fabric on a garment that doesn’t fit properly. We take our calico toile (also called a muslin, and sometimes a fitting garment or test garment) and we begin to make fitting adjustments. Once we have achieved what we want in terms of fit and design, we then transfer all those adjustments to the paper pattern, ready to cut out the garment proper in our gorgeous fabric. That’s how fitting works.
Shape and size don’t matter. Fitting is necessary for big and little, cuddly and slim, tall and short people. Once the fit is right, though, the garment will look great. A well-dressed person wearing well-fitting clothes is just that. We don’t notice size or shape when we are looking at someone who is wearing beautifully fitted clothes. Well-fitted clothes enhance everybody.
Is Fitting Difficult?
There is a lot of anxiety around fitting. Many of us think we can’t do it. There are lots of books on fitting and many of them make it seem very technical and very specialized, and this is also sometimes the case if the garment being fitted has a demanding design and unusual construction methods. But actually, anyone can learn how to fit the kind of clothes that we make at home for ourselves and our families. All it takes is time, a bit of judgement, common sense and growing confidence. The more you do it, the more you will learn about fitting and the more confident you will become about actually doing it. If we learn about the most common fitting issues concerning bust, hips, shoulders and trousers, that will allow us to fit almost all garments on ourselves and others to a really good standard. Once we are confident with those fitting issues, then our ability to recognize finer fitting issues will increase, and our fitting solutions will improve and also become more creative.
Learn Your Own Methods of Fitting
All commercial patterns come with lengthen/shorten lines. It is sensible to use them if the length of the garment you are fitting is not right, because they have been placed on the garment in an area that will not affect the style. For instance, there are often lengthen/shorten lines below the bust, below the hips, above the knee and above and below the elbow on sleeves. Use these lines if they are in the right place and they produce the desired result.
However, if you are fitting a garment on someone who is long from waist to hip, then you will almost certainly need to lengthen the dress, skirt or trousers between the waist and hip. The same applies to someone who is long from shoulder to bust apex/bust point. If the garment needs to be lengthened or shortened at either of those places – or any other part of the garment – then make the adjustment on the pattern at the point where you think it is going to produce the best result. Don’t always rely solely on the guidelines given on the pattern pieces if you think there is a better alternative.
There is no right or wrong way of fitting. There are lots of guidelines and there are many traditional and accepted ways of fitting. There are also many sensible and straightforward ways of fitting. For instance, many people will feel apprehensive about making a full bust adjustment. It seems very complicated and many of us will try and avoid doing one. But actually, the traditional method of making a full bust adjustment can work very well on garments with both darts and princess seams. Once you understand the principle and have completed your first adjustment, the fear of making this adjustment is removed. You will tackle your next one much more confidently, and the door will be opened to you for making many more garments with darts and princess seams.
There are also less traditional, more creative ways of making fitting adjustments that work well for lots of fitting issues, and there is a lot of information available describing those more creative methods and the philosophy behind them. The key thing is that you understand the principle behind the method you have chosen and you can follow the method. Decide which way suits you best for each individual fitting issue and use it. Ultimately, if you do enough fittings, you will find your own preferred methods, and your growing confidence will allow you to make judgements about how to fit each individual garment on different people. You will probably end up using a mix of traditional methods and some that you have developed yourself because they work for you and get good results.
This applies equally to those of us who prefer to sew only for ourselves and our family, and to those who use a dressform to fit garments. We look at books and use methods that we think we can follow and that we think will work for us, and eventually we also end up using methods that we have developed ourselves.
The Tools for Fitting
You will start with your chosen pattern and a length of calico. It is best to use a medium to lightweight calico as it drapes and fits the body reasonably well. It is also good for marking with a marker pen and it presses quite well. A heavy calico will be quite stiff and not so easy to work with. However, if you are making something that will be sewn in a stretch fabric, then calico won’t work. You will need to buy some stretch fabric that will be similar in characteristics to your final chosen fabric to make your toile.
Once you have made your toile and have completed some of the fitting exercises, then you will need particular tools. These include:
Fig. 1 Tools needed for fitting.
French curve. This is a drafting ruler that is shaped a bit like a giant apostrophe! The curves on it are graded and there is also a straight-line ruler on one side. French curves come with either metric measurements (centimetres) or imperial measurements (inches), so make sure you buy the right one for you. This tool is used for marking new curves and lines on paper patterns and is invaluable. Many people draw freehand curves, but the French curve allows you to do a far better job.
Tape measure. Always an essential tool in the sewing room.
Pattern tissue. This can be purchased tissue or it can be all those large pieces that you would normally throw away when cutting out your pattern. Keep them in a handy box because they are extremely useful for making pattern alterations.
Sticky tape. Look for a ‘magic’ tape that you can write on. This is the best type to use on pattern tissue and can also be used on your fabrics – for instance, to mark the wrong side when both right and wrong sides look identical. It doesn’t mark your fabric when you remove it.
Marker pen. These are important for marking alterations on your toile. Even though alterations and adjustments are pinned in, they are usually also marked on the toile with marker pen. Any colour is good!
Fine-tipped pen. Invaluable for marking permanent alterations on the pattern tissue.
Pencil and eraser. Draw in new curves and lines with a pencil before going over them with the fine-tipped pen.
Paper scissors. An essential – in order to protect those precious fabric scissors!
Fitting is a learning process. The more you do it, the more comfortable you will be with making personal fitting adjustments to a garment either for yourself or for someone else. Your fitting skills will improve the more you use them, and you will become more creative with your fitting skills and understand that there is no one particular way to solve a fitting problem. It’s important to work with the fabric and the person who is being fitted, and it’s important to know how the wearer wants the final garment to look. Be confident and enjoy fitting!
CHAPTER ONE
THE PATTERN
When we buy a pattern, we have usually done so because we love the picture on the front. The style, the fabric, the drape, the shape – whatever it is has said to us: ‘make me!’ But how do we know if that pattern is actually what we want, that it will suit us, or even if we can actually make it?
We can find out if the pattern will work for us by using the information given on the pattern envelope. There are two elements to the pattern envelope – the front cover and the back cover – and there is a lot of information on both. We need to read this information carefully before we buy the pattern, and especially before we invest in some gorgeous fabric to make the garment.
The Pattern Envelope
The first thing that attracts us to a particular pattern is what we see on the front cover. There may be a lovely photograph of a model in the garment or a really nice drawing. But it also has more important information.
Fig. 2 Pattern envelopes showing garments in photographs and drawings.
On the envelopes shown in Fig. 2 there is a mixture of photographs and drawings. The photographs give us a much better impression of what the garment will actually look like. Vintage patterns always have drawings of their dresses and coats, and look so wonderful with their tiny waists and voluminous skirts. But it is important to remember that the final garment will look quite different on us than it does in the picture. This can be affected by a number of things.
Which Pattern House Has Made the Pattern?
The pattern house is the company that has made the pattern, for instance Vogue, Colette, New Look. Is it a well-known pattern house or is it a new one that you’ve not seen before? It may be a make of pattern that you have used regularly and you know that they fit you without too much adjustment. If it’s a new pattern house, then you will have to learn about their sizing and fitting. Many of the new pattern houses have sizing that is a bit different to the more established brands. In addition, the designer of this particular pattern may be different from the in-house designers usually used by the pattern house; this is especially the case with Vogue and McCall patterns. This information will be highlighted on the front of the envelope. Again, it may be a designer that you particularly like or one that you have not seen before, or whose garments you have not made before.
What Is the Size of the Pattern?
Choosing the right pattern size is vital if you are to avoid lots of fitting problems. When you are buying a new pattern, check carefully on the envelope to see what size pattern you have been given. The size range of the pattern is usually marked at the top of the front of the envelope, as seen in Fig. 2 above. Many patterns include all sizes from the smallest to the largest in the same envelope, and some have size ranges such as 6–8–10–12–14 and 16–18–20–22.
It is really important that you are sure what size range is offered on your pattern. It is crucial to remember that the size of garment that we sew is almost always one size, and sometimes two sizes, larger than the size we buy in ready-to-wear. So if your pattern envelope reads sizes 6–14 and you know that you buy a size 12 or 14 in ready-to-wear, then you must check the body measurements on the back of the pattern envelope before you buy it, to ensure it will be big enough. It is much easier to reduce a pattern by one or two sizes than it is to size up.
Many patterns are now also drafted with variable bust fittings. This is great for those who have struggled to make full bust adjustments or small bust adjustments, because the pattern has those different sizes included in the envelope on separate tissue pieces all ready to cut out.
Remember: the size of your pattern is just a number! When you have made your fabulously fitting garment, no one will think about what size it is. They will look at you and admire your wonderful new outfit! So check the size on the front of the envelope before you buy and make sure you buy the right one.
TIP: PATTERN SIZE
Remember – we always sew at least one size larger than we buy in ready-to-wear. So make sure you buy the correct size of pattern.
How Much Does the Pattern Cost?
Finally, the price! Some patterns are very expensive, others not so much. Many of the new designer ranges are at the top end of the price bracket, but if you love that garment and can make it fit you beautifully, then you can use the pattern again and again. So the cost of the pattern becomes less important and you have a wardrobe of clothes that fit and suit you really well.
The Back of the Envelope
Now we must look at the back of the envelope. For most of us, the back of the envelope is simply about how much fabric we need, and that’s sometimes all we look at. However, it gives us more information than this and it’s a really good idea to start looking at it more closely. In fact, there is so much information that the pattern house needs to give us that it doesn’t always fit on the back of the envelope, so you might find it inside, either on the instruction sheet or on the pattern tissue itself.
Line Drawings
The first thing we should look at on the back of the pattern envelope is the line drawing of the garment. This is where we can see more clearly which pieces go to make the garment. The line drawings may have front and back views, or just back views if the front cover picture is quite clear. Looking at these drawings helps us to understand the construction features and the number of pieces included in the garment. We might then realize that the dress has princess seams that we couldn’t discern from the picture on the front, the jacket might have bust darts that we know will never fit us properly, or the trousers might have design and construction features that we’re not keen on. Conversely, the line drawings may highlight design features that really appeal to us. They will also show options, such as sleeves, lengths, different neck finishes and a variety of other design features, that are possibly not very clear in the image on the front cover. Examine those line drawings carefully before you decide if the pattern is right for you.
Fig. 3 A vintage dress.
Fig. 4 How line drawings on the back of the pattern envelope reveal hidden design features.
Fig. 4 shows the line drawings for the vintage dress in Fig. 3. How many of us would have realized when we first looked at the drawing on the front of the envelope that this dress is made like an apron? It has a front, a back and a neckhole, and is joined only at the shoulders.
Seeing the line drawings really helps us to understand what the details on a garment are, where the darts are, if there is gathering, where the zip is placed (if there is one) and so on, and this can influence our pattern choice. So look closely at the line drawings before finally making your purchase. You can do this online too, if you are buying your patterns that way.
Pattern Body Measurements
The pattern measurements seen in Fig. 5 are overlooked by many of us. They are often on the flap of the envelope or placed above the fabric requirements, but sometimes we have to search them out.
Fig. 5 Standard body measurements used to draft the pattern design.
These standard body measurements are very important because they are the actual body measurements that the pattern house has used to draft and make the pattern. Some of the established pattern houses still use measurements quite close to those they used a long time ago when patterns were first produced commercially, and as a result they don’t fit the modern shape of women as well as they could. So what often happens is that our personal measurements regularly cross over two or sometimes even three sizes. We’ll address how to solve this in the next chapter.
Finished Garment Measurements
Finished garment measurements are extremely useful – when we can find them! They are often found at the bottom of the back of the envelope (seeFig. 6). They tell us what the actual finished size of key measurements (bust, waist, hips, length) of the garment will be. Not all of these measurements will be included on the pattern envelope, and some that we would like to see are often not shown. Many pattern houses are now printing finished bust and hip measurements on the pattern pieces, and although not nearly so handy, you might be able to find the information there.


