Erhalten Sie Zugang zu diesem und mehr als 300000 Büchern ab EUR 5,99 monatlich.
- Herausgeber: The Crowood Press
- Kategorie: Lebensstil
- Sprache: Englisch
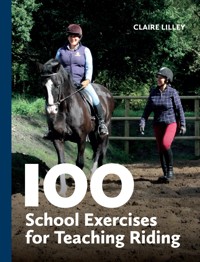
In this book, you will find exercises for all levels of horse and rider, from novice level to advanced, in both dressage and jumping, including the use of props in training. The author shows how exercises can be combined to create the optimum learning experience for rider and horse, both from a teaching perspective and for solo training – a 'teacher in a book'. Claire Lilley draws on her may years of experience as a riding coach, with insight from being a student in her formative years. She explains exercises from the teacher's perspective: what to look for, and key teaching points to consider. The last section of exercises is for development as a teacher, inviting the riding teacher to evaluate their own skills so as to to improve their coaching methods. Suggestions are given to improve coaching methods, such as observational skills of the physical and mental capacities of both horse and rider. Finally, training plans are given, using the exercises in practice, with consideration as to whether lessons are individual, shared or group, as well as lesson location. This book will be a valuable resource for riding instructors and pupils alike, a welcome addition to the teacher's library.
Sie lesen das E-Book in den Legimi-Apps auf:
Seitenzahl: 259
Veröffentlichungsjahr: 2023
Das E-Book (TTS) können Sie hören im Abo „Legimi Premium” in Legimi-Apps auf:
Ähnliche


The teacher must be fully focused on their student, for safety reasons, when teaching jumping.
First published in 2023 by J.A. Allen, an imprint of
The Crowood Press Ltd, Ramsbury,
Marlborough, Wiltshire SN8 2HR
www.crowood.com
This e-book first published in 2023
© Claire Lilley 2023
All rights reserved. This e-book is copyright material and must not be copied, reproduced, transferred, distributed, leased, licensed or publicly performed or used in any way except as specifically permitted in writing by the publishers, as allowed under the terms and conditions under which it was purchased or as strictly permitted by applicable copyright law. Any unauthorised distribution or use of this text may be a direct infringement of the author’s and publisher’s rights, and those responsible may be liable in law accordingly.
British Library Cataloguing-in-Publication Data
A catalogue record for this book is available from the British Library.
ISBN 978 0 7198 3502 5
Disclaimer
The author and the publisher do not accept any responsibility in any manner whatsoever for any error or omission, or any loss, damage, injury, adverse outcome, or liability of any kind incurred as a result of the use of any of the information contained in this book, or reliance upon it. If in doubt about any aspect of equestrianism and riding, readers are advised to seek professional advice.
Photos by
Dougald Ballardie
Cover design by Blue Sunflower Creative
CONTENTS
Introduction
EXERCISE CHAPTERS:
Novice Dressage (20 × 40m Arena)
1. Establishing Dressage Position
2. Stretching (Warm-Up)
3. Straight Lines
4. Transitions: Halt/Walk/Trot
5. Corners
6. Changes of Rein (Direction) on the Diagonal
7. Circles (20m Diameter)
8. Single Loops
9. Figure of Eight
10. Work on a Long Rein (Cool-Down)
Novice Jumping (20 × 40m Arena)
11. Establishing Jumping Position
12. Warm-Up for Jumping
13. Establishing Lines of Approach
14. Before the Fence: the Take-Off
15. After the Fence: the Landing
16. Trotting Poles with a Fence
17. Single Jumps from Trot
18. Course Riding Technique
19. Simple Course in Trot
20. Cool-Down for Jumping
Novice Props (20 × 40m Arena)
21. Warm-Up
22. Using Dressage Letters
23. Cones for Turning onto the Centre Line
24. Cones for Corners
25. Cones for Circles (20m Diameter)
26. Cones for Single Loops
27. Poles for Straight Lines
28. Poles for Changes of Rein (Direction) on the Diagonal
29. Poles for Figures of Eight
30. Combination Props for Accuracy
Intermediate Dressage (20 × 60m Arena)
31. Stretching
32. Transitions
33. Medium Trot
34. Changes of Rein (Across the Arena)
35. Circles (15m Diameter)
36. Shoulder-In
37. Loops (Double)
38. Serpentines (Three Loops)
39. Leg Yield
40. Turn Around the Forehand
Intermediate Jumping (20 × 60m Arena)
41. Refining Jumping Position
42. Warm-Up
43. Perfecting Lines of Approach
44. Trotting Poles with a Single Fence
45. Trotting Poles with a Double Fence
46. Canter Poles
47. Single Fences from Canter
48. Course Riding Technique
49. Simple Course in Canter
50. Cool-Down
Intermediate Props (20 × 60m Arena)
51. Stretching
52. Using Dressage Letters: Improving Engagement
53. Cones for Circles (15m Diameter)
54. Cones for Double Loops
55. Cones for Leg Yield
56. Cones for Turn On/Around the Forehand
57. Poles for Shoulder-In
58. Poles for Changes of Rein (Direction) Across the Arena
59. Poles for Three-Loop Serpentines
60. Combination Props for Accuracy
Advanced Dressage (20 × 60m Arena)
61. Circles (10m Diameter)
62. Collection/Extension
63. Rein-Back
64. Serpentine (Four Loops)
65. Travers/Renvers
66. Half-Pass
67. Counter-Canter/Flying Changes
68. Half-Pirouettes
69. Passage
70. Piaffe
Advanced Jumping (20 × 60m Arena)
71. Refining Jumping Position
72. Warm-Up
73. Difficult Lines of Approach
74. Canter Poles with an Upright Fence
75. Canter Poles with a Spread Fence
76. Double Fence from Canter
77. Bounce Fence
78. Two-Stride Double
79. Jumping Grid
80. Whole Course in Canter
Advanced Props (20 × 60m Arena)
81. Using Dressage Letters: Improving Lateral Work
82. Cones for Transitions
83. Cones for Circles (10m Diameter)
84. Cones for Zigzags
85. Poles for Travers
86. Poles for Changes of Rein (Direction)
87. Poles for Four-Loop Serpentines
88. Poles for Rein-Back
89. Combination Props for Accuracy
90. Combination Props for Collection and Extension
What Makes a Good Teacher: Guidelines for Teaching Technique
91. Teaching Philosophy
92. Sharing Experience
93. Teacher Attributes
94. Teaching Style
95. Teaching Methods
96. Professional Boundaries
97. Lesson Planning
98. Assessing Horse and Rider Limitations
99. Setting Challenges for Horse and Rider
100. Giving Constructive Criticism (‘Feedback’)
How to Use Exercises in Practice
Safety Considerations
Lesson Location: Indoor School; Outdoors; Field
Individual Lessons
Shared Lessons (Two Riders)
Group Lessons
Training Plans: Combining Exercises Together to Create a Lesson Theme
Conclusion
References
The rider’s ability to focus on themselves and their horse should be encouraged.
INTRODUCTION
Learning is life-long, whether we are students or teachers wishing to develop and to expand knowledge, learn different techniques, or explore ways of putting things across to pupils. Additionally, self-development in personal qualities, confidence, and lesson presentation skills are of equal importance.
Drawing on my own experience, both as a teacher and a pupil through a long riding career spanning over forty years, this book aims to give ideas for exercises to use in training horses and riders in both dressage and jumping. Training can be enhanced with the use of props, such as ground poles and cones, so exercises that use these imaginatively, to clarify and refine lessons, are also included in this book.
All riding instructors/coaches/teachers are, or have been, riders, so this book has appeal to the teacher wishing to improve their own riding. Even the most experienced top-level riders hone their expertise by constantly improving their horsemanship skills. They do this by re-visiting the basic, fundamental skills of riding, and seek to add interest and value to their own training by putting together different training plans to suit all eventualities.
A rider remembers their first teacher all their life, so the impression they are left with of their learning experience should be positive. To lay a sound foundation for teaching, the Scales of Training are adhered to throughout this book.
As a rider, this book gives insight into what your riding instructor/coach is expecting from you and your horse, and can aid you in preparing for lessons, as well as consolidating prior learning.
The new teacher will learn skills for future development and to ensure their teaching is on track for the student in front of them. More experienced teachers may take on new ideas to incorporate into their teaching methods.
Here, exercises are given for all levels of horse and rider, from novice level to advanced, in both dressage and jumping, including the use of props in training. The intermediate section is aimed at elementary level dressage, with the advanced section from medium level upwards. The aim is that exercises can be combined to create the optimum learning experience for rider and horse, both from a teaching perspective and for solo training – a ‘teacher in a book’. The teacher’s view – teaching position (TP) – is indicated in the diagrams as a guide as to the best viewpoint for the exercise.
The last section of exercises is for development as a teacher. Suggestions are given to improve teaching technique, such as observational skills of both physical and mental capacities of both horse and rider.
Finally, training plans are given, using the exercises in practice, with consideration as to whether lessons are individual, shared or group, as well as lesson location.
In order to teach safely, attention should be given to the surface being flat, with good footing. An arena is ideal: a 20 × 40m school is adequate for the novice section of this book.
A 20 × 60m arena is recommended, though not necessary, for both intermediate and advanced level exercises, though all exercises given can be adapted for use in both arena and field.
NOVICE DRESSAGE (20 × 40m ARENA)
1. ESTABLISHING DRESSAGE POSITION
Aim of the exercise
Assessing a correct position in the saddle is fundamental to the rider being effective in giving clear aids to their horse, and gives them the opportunity to progress in their skills.
This exercise can be viewed from TP1 to give a side view on both reins, and TP2 and 3 to give a front and rear view.
Step-by-step explanation of the exercise
Starting from D on the left rein in medium walk, horse and rider turn onto the quarter line (5m in from the arena edge), halting opposite B (indicated in green). They then proceed on the quarter line, turning left across the arena opposite M. They then track left at H, continue on the track to K, where they turn left again to repeat the exercise.
☐ This exercise can be ridden in trot and canter. A change of rein is required to repeat the exercise on the right rein.
☐ In order to assess the rider’s overall position in the saddle, it is important to view them from the side, head on and from behind.
☐ With the side view assessment, the rider should sit tall in the saddle, upright on the seat bones. There should be a vertical alignment of shoulder, hip and heel.
☐ When viewed from the front, the rider should appear central to the horse. Check that their knees and feet are level, and that the thighs are in close contact to the horse. Their head should be facing forwards between the horse’s ears.
☐ From the rear, a clearer view of the torso can reveal further details of any lateral collapse through the upper body.
☐ Regarding lower leg position, the upper calf should be on the horse’s body, and the feet parallel to the horse’s sides. The heels are visible from this rear view, so note if the toes are turning in or out. The stirrups should be hanging vertically.
Common faults and how to rectify these
• If the rider sits to the rear of their seat bones, this increases pressure on the horse’s back under the back of the saddle, and pushes the leg position too far forwards. The alignment of their hips and shoulders should be adjusted, as this will rectify the leg position.
• With their weight to the front of their seat, the rider will tend to perch on the pommel, loading the horse’s withers, which can impinge on its shoulder movement. Their leg position will be too far back. Sitting with their weight evenly distributed in the saddle will place the legs correctly.
• Should the rider collapse at the waist to one side, this affects their stability in the saddle, with a risk of losing balance, or even falling off. To help rectify this, ensure the stirrups are even, and that the saddle is not over to one side. Assess the alignment of the rider’s spine from head to hips and rectify any deviation from the vertical.
2. STRETCHING (WARM-UP)
Aims of the exercise
The aim of the exercise is to promote relaxation throughout the whole of the horse’s body by stretching through the back, with freedom of the neck.
This exercise can be viewed from TP1.
Step-by-step explanation of the exercise
Starting from A in medium walk on the left rein, horse and rider proceed to B, where they ride a 20m-diameter circle. On the circle, the rider encourages the horse to stretch through the back, lengthening the reins as the horse stretches forwards and downwards. On returning to B, they take up the contact and proceed around the arena to E, where the circle is repeated. On returning to E, they continue to A to repeat the exercise.
☐ A change of rein is required to ride this exercise on the right rein. Once established in walk, this exercise can be ridden in trot.
☐ Once the rider has lengthened the reins, with the horse taking its neck forwards and downwards for a few steps, ask them to gradually retake the contact. Repeat this give and retake of the reins several times until the rider is at ease with this exercise, without affecting their position in the saddle.
☐ Stretching on a loose rein, with total freedom of the neck, is the ultimate aim, with both horse and rider relaxed and confident in each other. If the rider becomes tense, affecting the horse’s state of mind, then the contact should be taken up, and worked again, to aid concentration and re-establish trust before trying again.
Common faults and how to rectify these
• Assess the rhythm of the walk, checking that the rider is not focused on forwardness, going too fast, to the detriment of the regularity and over track of the horse’s natural walk.
• It is important that the horse’s head and neck reach forwards and downwards towards the ground. If the horse’s nose is behind the vertical, there is no beneficial stretch through the back.
• Look for balance and evenness of stretch through the horse’s body in both directions. Any drifting into or out of the circle indicates rider imbalance, so this needs to be addressed. Crookedness in either horse or rider will hinder the horse’s ability to stretch through the back and neck.
• Working on a 20m diameter circle is a safer way of stretching the horse, should it be fresh at the beginning of a session. If the horse is unsettled, it is safer for the rider to work the horse calmly in other exercises before stretching.
• Observe the rider’s position, noticing any tendency to lean forwards as the horse stretches, as this could put the horse out of balance, on its forehand. Their upper body should remain upright, encouraging the horse to step under its body with the hind legs.
TOP TIP
Stretching work is beneficial for mental relaxation, for both horse and rider, when used at regular intervals during a training session.
Stretching work on a long rein is important for relaxation, for both horse and rider, between exercises.
3. STRAIGHT LINES
Aims of the exercise
The aim here is to take an overview of both the body alignment of the horse and the straightness of the rider’s posture in the saddle, which impacts on the straightness of the horse.
This exercise can be viewed from TP1 to give a front and rear view.
Step-by-step explanation of the exercise
Starting from A on the left rein in medium walk, horse and rider turn onto the quarter line (5m in from the arena edge). They then proceed on the quarter line, turning left across the arena opposite M. They then track left at H, continue on the track to K, where they turn left again to repeat the exercise.
☐ This exercise can be ridden in trot and canter. A change of rein is required to repeat the exercise on the right rein.
☐ From the front view on the quarter line, check for displacement of the horse’s neck to one side, which could be a result of more weight carried on the opposite foreleg, with the effect of drifting to the side through the shoulder.
☐ Viewed from the rear, the horse’s hip bones should be level, as should be the rider’s shoulders and pelvis. Check whether the rider is sitting equally on both seat bones, and putting the same amount of weight in each stirrup.
☐ The horse’s tail should hang vertically. If it is held to one side, this can indicate either tension, or a lack of alignment through the spine. Both sides of horse and rider should mirror each other.
Common faults and how to rectify these
• With straightness issues, mistakes stemming from rider inconsistency can easily be rectified with training. If the horse is not straight, the rider should be corrected first, to see if this resolves the problem.
• An uneven contact affects the position of the horse’s head, tipping the nose to one side, with the ears being unlevel. Making sure the rider has equal contact on both sides of the bit can rectify this issue.
• If the horse’s head is unsteady, this is likely to be a result of the rider’s hands being too active on the reins, so make sure the rider keeps their hands still.
• Regarding the horse, any deviation of the haunches to one side indicates crookedness. One hip may also be lower than the other, suggesting unevenness of weight on the hind legs. Drifting to either side is indicative of loss of balance, which could be a result of the rider sitting to one side, or the horse being weaker on one side of its body.
TOP TIP
Persistent crookedness, affecting the straightness of the horse, may be due to other factors besides rider technique, so advice from other professionals, such as the vet, farrier or saddler should be sought.
4. TRANSITIONS: HALT/WALK/TROT
Aims of the exercise
The aim here is to improve the quality of transitions between halt, walk and trot, assessing the preparation by the rider for each transition.
This exercise can be viewed from TP1.
Step-by-step explanation of the exercise
Starting from A in medium walk on the left rein, a transition to halt is ridden at the centre of each side, letters A, B, C and E, before proceeding in medium walk.
☐ Once the walk-halt-walk transitions are achieved on both reins, progression to transitions halt-walk-trot-walk-halt can be made as follows: with the rider in halt at A on the left rein, ask them to proceed in walk to the middle of the long side. At B, they should proceed to trot.
☐ At C a walk transition is ridden, before continuing to E, where a halt transition can be made. Continue in this pattern, with a transition at each of these letters.
☐ A change of rein is required to ride this exercise on the right rein.
☐ Each transition should be executed as the rider’s knee is level with each letter. This is a good test of accuracy in training, but also as preparation for competing in dressage.
☐ The rider’s position and balance should be assessed, along with the effectiveness of the aids, and the rider’s understanding of how the horse should work through its back into a consistent contact. The better the transition, the more subtle the seat, leg and rein aids appear.
Common faults and how to rectify these
• Lack of forward planning can result in overuse of the aids to active transitions at the letters. The emphasis should be on the quality of the transition, even if the rider overshoots the letter, or is too early in the transition.
• It can be useful to count down the steps into a downward transition, with three half-halts, for example 3-2-1-halt. For an upward transition to walk from halt, if the preceding downwards transition was correct, the horse should be in balance, with sufficient energy to go forwards from a subtle aid.
• When riding a transition from walk to trot, a common fault is to speed up the walk, in anticipation of the trot, with the belief that going faster generates impulsion. If the horse’s balance and outline are maintained through the transition, with the hind legs under the body, it is far easier to maintain the rhythm and tempo of the walk, and trot.
TOP TIP
Transition work has a cumulative effect on the horse’s way of going. The horse should work in a correct outline relevant for its stage of training, that is a longer, lower outline for a novice horse than for a more advanced horse.
5. CORNERS
Aims of the exercise
The aim here is to develop accuracy and precision when riding corners. Generally, corners connect one movement to another, but taking them as a stand-alone exercise helps to improve consistency of bend, balance and rhythm.
This exercise can be viewed from TP1. Standing on the outside of the square gives a view of both the inside and outside of horse and rider.
Step-by-step explanation of the exercise
Starting from A in medium walk on the left rein, the rider rides a square, riding through the corner between A and F, turns left at B and E, and riding through the corner between K and A. A change of rein is required to ride this exercise on the right rein.
☐ Assess if the bend of the horse is consistent with the curve of each corner. Each of the corners of the square should be ridden as a quarter of a 10m-diameter circle, connecting to a straight line before and after. Look for accuracy of the line ridden, and how the rider prepares for each corner.
☐ Riding a corner correctly, with the horse in balance, requires the co-ordination of the rider’s inside and outside rein and leg aids. This is easiest done in walk, giving more time to make corrections before attempting to ride the square in trot.
☐ Riding this exercise in walk, initially, gives time to correct the technique of the rider, with the aim that the horse improves in suppleness and relaxation as the exercise progresses. Aim for three repetitions of the square before changing direction to ensure even working on both reins.
Common faults and how to rectify these
• Turning too sharply through the corner can happen if half-halts are not used to balance the horse beforehand. The rider may rely on strong rein aids to turn instead of using their outside leg in co-ordination with their hips and shoulder position.
• The horse may fall in off the track after a corner. This can occur if the rider is not supporting the horse through the corner with their inside leg and outside rein aids, allowing the horse to fall in off the track. This can be prevented with better preparation, and keeping the horse slightly flexed to the inside (inside position) all the way around the square.
• Variations in rhythm may occur, either by the rider slowing the horse down before a corner in an effort to ride correctly, though this could be a useful teaching point. Speeding up through a corner suggests a lack of care for the horse’s balance, so it may benefit the rider to remind them to keep a steady rhythm in an even tempo.
TOP TIP
Learning from this exercise can be applied to the following Exercise 6 and Exercise 7: Circles.
6. CHANGES OF REIN (DIRECTION) ON THE DIAGONAL
Aims of the exercise
The aim of this exercise is to perfect the rider’s technique and accuracy when riding the horse from corner to corner, on the diagonal line.
Once the exercise is achieved in walk, it can be repeated in trot.
This exercise can be viewed from TPs 1–4.
Step-by-step explanation of the exercise
Starting from A in medium walk on the left rein, the rider proceeds to F, changing the rein across the diagonal from F to H. They proceed around the arena on the right rein to M changing the rein from M to K. The exercise can be repeated from A.
☐ Observe how the rider executes the corners at F and M, as they turn the horse onto the diagonal line. Note how they ride into the corner at the end of the diagonal, M and K, assessing the consistency of bend in both directions.
☐ Assess the straightness of the horse on the diagonal, and on the short side of the arena. Watch the lines and how the rider presents the horse onto the diagonal from each of the corners.
☐ Viewing horse and rider from the side on the diagonal line, assess the outline of the horse and the rider’s position. Note also the quality of the walk, bearing in mind rhythm and tempo.
☐ Focusing on changes of rein across the diagonal as an exercise addresses any difference in the horse’s way of going on both reins, improving suppleness and balance. One of the challenges to the rider is to both accurately bend the horse through the corners, and ride straight on the diagonal lines.
Common faults and how to rectify these
• If horse and rider are unbalanced on the corners, this can affect the overall evenness of the length of stride and rhythm through this exercise.
• Turning too soon onto the diagonal, and prematurely returning to the track at the end of the diagonal – in effect cutting the corners – can be a result of inaccuracy from the rider. To rectify this, make sure they turn onto, and away from, the diagonal when their outside knee is opposite the designated letter, F, H, M and K.
• Cutting the corners can also be a result of incorrect use of the supporting aids, namely the inside leg and outside rein. Ensure the rider keeps their outside rein contact sufficient to guide the horse through the corners, but not so firm that it impedes its ability to bend.
• Overshooting the corners can be caused by the rider turning their head, rather than turning their hips and shoulders in the direction of travel, causing the horse to fall out through the shoulder. To rectify this, check the rider’s position through the corners, and the effectiveness of their outside rein and leg.
TOP TIP
Changes of rein should be used frequently through training sessions to ensure an equal amount of work in both directions.
7. CIRCLES (20m DIAMETER)
Aims of the exercise
The aim here is to explain the concepts of flexion and bend when riding a 20m-diameter circle.
This exercise can be viewed from TP 1 and TP2.
Step-by-step explanation of the exercise
Starting from A on the left rein in medium walk, the rider commences a 20m-diameter circle, using the four circle points 1–4 (shown in blue) to check if all four segments of the circle are ridden uniformly. On returning to A, horse and rider proceed on the circle line to circle point 2, to ride straight (shown in green) proceeding around the arena to re-join the circle at circle point 4 (shown in green). They then resume the circle at the A end of the arena.
☐ A change of rein is required to ride this exercise on the right rein. Once the exercise is achieved in walk, it can be ridden in trot.
☐ As a guide, the horse should be on the track for one step when the rider’s knee is in line with each circle point. The rider should half-halt at each of the circle points, bringing focus to the horse’s way of going, as a check point for outline and balance.
☐ The effectiveness of the rider’s outside aids should be assessed from outside the circle, which also gives a view of the evenness of longitudinal bend through the horse.
☐ A key teaching point is how the horse leaves, and returns to, the track before and after the circle, circle points 2 and 4. Note the rider’s concept of flexion and bend, and how they prepare the horse for commencing, and finishing, the circle.
☐ The shape of the circle, the balance of horse and rider, and the rhythm of the walk should be observed.
Common faults and how to rectify these
• If the shape of the circle is inconsistent, this can be rectified by asking the rider to halt at each circle point (if riding the circle in walk) in order to maintain the horse’s balance through each quarter circle. When riding the exercise in trot, walking a horse’s length (three or four steps) at each circle point can ensure the shape of each segment is consistent.
• The rhythm and tempo of the walk or trot may change during this exercise: for example, when commencing the circle the horse may slow down; or it may speed up when leaving the circle to go straight. To improve regularity throughout this exercise, the rider could be asked to count the horse’s strides in rhythm.
• If the horse appears reluctant to bend on one rein more than the other, make sure the rider’s position is symmetrical and that their aids are equally effective when riding on both the left and right reins, as these can impact on the suppleness of the horse.
TOP TIP
Combine with Exercise 3: Straight Lines and Exercise 5: Corners.
Establishing correct flexion prior to riding a circle.
8. SINGLE LOOPS
Aims of the exercise
This exercise is aimed at improving the suppleness of the horse and precision of the rider’s control when riding shallow loops, 5m in from the track.
This exercise can be viewed from TP1 and TP2.
Step-by-step explanation of the exercise
Starting from A in medium walk on the left rein, a 5m shallow loop is ridden between F and M. A second 5m loop is ridden on the next long side, between H and K. The exercise can be repeated from A. Once achieved in walk, it can be ridden in working trot.
☐ A change of rein is required to ride this exercise on the right rein.
☐ The corner between A and F is ridden with the horse flexed left. Leaving the track as the rider’s knee reaches F, horse and rider proceed straight towards a point on the quarter line opposite B, commencing the shallow loop.
☐ As they reach the deepest part of the loop, the horse is flexed right, to return to the track at M. Riding straight towards M, the rider flexes the horse to the left, in preparation for the corner between M and C. They should reach the track as their knee lines up with M, finishing the loop.
☐ A second shallow loop is ridden on the next long side, by inclining from H to a point on the quarter line opposite E, before returning to the track at K, in preparation for the corner between K and A.
☐ Assess how the rider rides through the corners at the A end of the arena, before and after the incline in off the track. They should be ridden to the same depth and the same number of strides taken by the horse through each one. Look for consistency of bend, and the rider’s aids to position the horse.
☐ As they incline off the track, check the straightness of both horse and rider. View the change of bend as they reach the deepest point of the loops, opposite B and E. Check again for straightness from this point to the corners at the C end of the school.
Common faults and how to rectify these
• Should the rider be using too much inside rein in an effort to ask the horse for flexion and bend, this can be rectified by the correct use of the rider’s inside leg to support the horse through the corners. Make sure they are turning their shoulders in the direction of travel.
• Accuracy on reaching the quarter line at the deepest point of the incline affects the overall shape of the loop, so this needs to be highlighted.
TOP TIP
A more advanced option is to ride the loops in canter, as an introduction to counter canter.
9. FIGURE OF EIGHT
Aims of the exercise
A figure of eight is ridden as two circles that join together. The aim is to assess the uniformity of bend on both circles.
This exercise can be viewed from TPs1–4.
Step-by-step explanation of the exercise
Starting from X on the centre line facing B, in medium walk, a 20m-diameter circle left is ridden. On returning to X, horse and rider proceed onto a 20m-diameter circle right. On reaching X for a second time, the figure of eight is completed.
☐ A change of rein is required before commencing the figure of eight at X with horse and rider facing E. The circle at the A end will be to the left, and the circle at the C end will be to the right.
☐ Once achieved in walk, this exercise can be ridden in trot.
☐


