23,99 €
Mehr erfahren.
- Herausgeber: J A Allen
- Kategorie: Lebensstil
- Sprache: Englisch
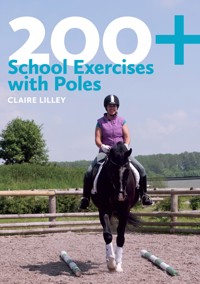
This book discusses ground-pole training for all disciplines and shows how you can make the most of precious schooling time. It provides quick and easy pole layouts, using just a handful of poles. Different exercises are given for each pole layout, so there is no need to move the poles during a session. Exercises range from the simple to the more intricate, with the inclusion of more transitions, lateral work, raised poles/cavalletti, or riding in a different gait. Claire Lilley explains how these pole exercises can help you to ride with precision and improve your horse's way of going, adhering to the scales of training. You can also use the different layouts to check whether you are sitting straight, turning correctly, and riding transitions and lateral movements properly. She lists common rider faults for each exercise to help riders self-correct if schooling alone. As an experienced trainer herself, Claire knows that this book will prove an invaluable resource for riding instructors, providing a veritable cookbook of ideas for lesson plans. Poles are a great teaching tool, adding variety to every lesson and helping the teacher to explain lessons to the pupil. Teacher's tips are given for each exercise. Claire says: "Try the exercises for yourself and I'm sure you will be amazed at the improvements that can be made both in your riding technique and in your horse's way of going. You will never be bored with schooling again!"
Das E-Book können Sie in Legimi-Apps oder einer beliebigen App lesen, die das folgende Format unterstützen:
Veröffentlichungsjahr: 2017
Ähnliche


200+ SCHOOL EXERCISES WITH POLES
CLAIRE LILLEY
J.A. ALLEN
First published in 2012 by J.A. Allen, an imprint ofThe Crowood Press Ltd, Ramsbury, Marlborough Wiltshire SN8 2HR
www.crowood.com
This impression 2016
This e-book first published in 2017
© Claire Lilley 2012
All rights reserved. This e-book is copyright material and must not be copied, reproduced, transferred, distributed, leased, licensed or publicly performed or used in any way except as specifically permitted in writing by the publishers, as allowed under the terms and conditions under which it was purchased or as strictly permitted by applicable copyright law. Any unauthorised distribution or use of this text may be a direct infringement of the author’s and publisher’s rights, and those responsible may be liable in law accordingly.
British Library Cataloguing-in-Publication DataA catalogue record for this book is available from the British Library.
ISBN 978 1 90880 965 0
The right of Claire Lilley to be identified as author of this work has been asserted by her in accordance with the Copyright, Designs and Patents Act 1988.
Disclaimer of LiabilityThe author and publisher shall have neither liability nor responsibility to any person or entity with respect to any loss or damage caused or alleged to be caused directly or indirectly by the information contained in this book. While the book is as accurate as the author can make it, there may be errors, omissions, and inaccuracies.
Cover design and layout by Cox Design, WitneyEdited by Martin DiggleIllustrations by Carole Vincer
CONTENTS
Introduction
Arena Diagrams
Before You Start – Training Tips For Every Session
Layout 1 (40 x 20m arena)
Single pole across centre line at X. (6 exercises)
Layout 2 (40 x 20m arena)
Single pole along the centre line with the centre of the pole over X. (7 exercises)
Layout 3 (60 x 20m arena)
Two poles on the centre line equidistant from the centre point at X, at about 12m apart. (7 exercises)
Layout 4 (60 x 20m arena)
Four poles in a ‘star’ formation, two laid out along the centre line and the other two horizontal, with their outer ends near R and S, and a single pole on the centre line at D. (6 exercises)
Layout 5 (40 x 20m arena)
Two parallel poles either side of the centre line at A, with one end of each pole 6m in from the top end of the track (level with F and K) and about 6m apart. (7 exercises)
Layout 6 (40 x 20m arena)
Two parallel poles across the middle of the centre line over X at about 1m apart. (6 exercises)
Layout 7 (40 x 20m arena)
Four poles set out as four sides of a square with open corners, each pole across a diagonal of the arena. X is the centre point of the square. The distance between the poles is 7m. (7 exercises)
Layout 8 (40 x 20m arena)
Two sets of parallel poles, one between D and X, and the other between X and G, with the pairs of poles 1.3m apart, either side of the centre line. (7 exercises)
Layout 9 (40 x 20m arena)
Three sets of parallel poles (poles 1.5m apart) equally placed along the centre line. (7 exercises)
Layout 10 (60 x 20m arena)
Four equally spaced poles laid down the centre line. (8 exercises)
Layout 11 (60 x 20m arena)
Two poles placed across the centre line each 15m in from the short side of the arena – one 3m above L, the other 3m below I. (7 exercises)
Layout 12 (40 x 20m arena)
Three poles placed across the centre line with the middle pole across X and one at each end of the arena 10m away from A and C. (6 exercises)
Layout 13 (40 x 20m arena)
Three poles laid in a sequence at one side of the arena, just in from the track, set at 3.5m apart. (6 exercises)
Layout 14 (40 x 20m arena)
Four poles laid in a sequence against the wall/fence at the A end of the arena, set at 1.3m apart. (6 exercises)
Layout 15 (40 x 20m arena)
Four poles against the wall/fence at the A end of the arena set at walk distance (about 0.8 m) apart, and one single pole on the other short side at C. (6 exercises)
Layout 16 (40 x 20m arena)
Four poles across the centre line of the arena set at about 0.8m apart for walk distance. (6 exercises)
Layout 17 (40 x 20m arena)
Four poles evenly spaced along one diagonal of the arena, in from the track at the corners. (6 exercises)
Layout 18 (40 x 20m arena)
Four poles, each one placed at the beginning/end of a diagonal, with one end 5m in from the track. (6 exercises)
Layout 19 (40 x 20m arena)
Four poles laid out as a square with open corners at right angles to the centre line, with each pair of poles placed 7m apart. (6 exercises)
Layout 20 (40 x 20m arena)
Four poles laid out with two poles long-ways 2m in from the track, with a gap of 12m between the ends of the poles. (6 exercises)
Layout 21 (40 x 20m arena)
Four poles laid in a sequence on the track, halfway down one of the long sides, set at 1.3m apart for trot distance. (8 exercises)
Layout 22 (40 x 20m arena)
Three poles laid across the middle of a diagonal set at 3.5m apart – a bounce stride in canter. (6 exercises)
Layout 23 (40 x 20m arena)
Four poles set at trot distance –1.3m apart – on the short side at the C end of the arena. (7 exercises)
Layout 24 (40 x 20m arena)
Four poles set out with each one at right angles to the wall/fence in the middle of each of the four sides, 1.5m in from the track. (8 exercises)
Layout 25 (40 x 20m arena)
Four poles laid out to form a square, with one pole parallel to the short side at A, laid across the centre line, 3m in from the edge of the arena. Each pair of poles should be 7m apart. (8 exercises)
Layout 26 (40 x 20m arena)
Four poles set out at trot distance – 1.3m apart – across the centre line between E and B. (8 exercises)
Layout 27 (40 x 20m arena)
Four poles equally placed from end to end along the quarter line with a gap of about 5–6m between them. (7 exercises)
Layout 28 (40 x 20m arena)
Two poles set at each end of the arena, 5m in from the short side of the track and about 10m apart end to end, equidistant either side of the centre line. (8 exercises)
Layout 29 (40 x 20m arena)
Four poles, one each laid out on in the middle of each side of the arena at A, B, C and E, parallel to the fence and about 1.5m in from the track. (6 exercises)
Layout 30 (40 x 20m arena)
Four poles laid out in a ‘star’ formation in the centre of the arena, with a gap of about 10m between the inner ends of the poles (7 exercises)
Acknowledgements
My thanks to Lesley Gowers at J.A. Allen for pulling everything together and getting this book published. I am also very grateful for the eagle eye of Martin Diggle when editing the text – collating the text and the diagrams was a Herculean task – and I am indebted to Carole Vincer who brought my hand-drawn sketches (my electronic drawing ability being somewhat limited at present) into the digital age.
I owe a big debt of gratitude to my husband, Dougald Ballardie, for all his support (and many cups of tea!) and for pulling out all the stops to shoot the cover photo when the weather was appalling – dodging heavy showers and waiting for the right moment plus a bright blue sky was no mean feat!
Listen to what your horse has to say and you will learn something new every day
Claire Lilley
INTRODUCTION
These days there is never enough time for anything, let alone schooling your horse enough to make a big difference in his progress. This book discusses ground pole training for all disciplines and shows how you can optimise precious schooling time and makes the most of limited timescales. It explains quick and easy pole layouts, using no more than six poles. Different exercises are given for each pole layout, so there is no need to move the poles during a session.
The various exercises given for each layout can be ‘mixed and matched’ to form an interesting and varied schooling session – a total workout for you and your horse. While some exercises are designed specifically for a 60 x 20m arena, any of those designed for a 40 x 20m arena can be ridden in a large arena. A flat area in a field will do just as well.
The layouts are suitable for any horse or pony. The only time you may need to adjust distances is when poles are laid in a sequence for walk, trot or canter, but once you know the distance suitable for your own horse or pony, set-up will be quick and easy. (The distances suggested in the text are sensible ‘average’ distances, but minor adjustment might be necessary for some horses.)
Each layout includes several different exercises to try. The exercises are given with a ‘recipe’ of movements to ride for each layout, with step-by-step instructions. Exercises range from the simple to the more intricate, with the inclusion of more transitions, lateral work, raised poles/cavalletti, or riding in a different gait.
You might ask ‘Why use poles?’ The answer is that simply asking your horse to step over a single pole will accentuate the bending of the leg joints, and demand suppleness through the back in order to do so. The horse can either work in a stretching forwards/downwards outline, or be in a rounded outline. Riding over poles is great for giving every horse an all-round gymnastic workout!
The exercises help you to ride with precision, improving the horse’s way of going and establishing correct training according to the scales of training, namely:
Rhythm
Suppleness
Contact
Impulsion
Straightness
Collection
You can use the different layouts to check whether you are sitting straight, turning correctly, and riding transitions and lateral movements properly. The common rider faults are listed for each exercise to help you to self-correct if you are schooling alone and do not have access to a trainer.
However, this book is as valuable for the riding instructor as for the rider. Poles are a great teaching tool, adding variety to every lesson and helping the teacher to explain lessons to the pupil. Teacher tips are given for each exercise when they are being used in riding lessons.
Before you ask, yes I have ridden every exercise in this book! My horses really enjoy pole work and I also use poles frequently as a teaching tool.
Try the exercises for yourself and I’m sure you will be amazed at the improvements that can be made both in your riding technique and in your horse’s way of going. You will never be bored with schooling again!
ARENA DIAGRAMS
The exercises in this book are based on the geometrical patterns that can be ridden in a conventional dressage arena. The majority can be ridden in 40 x 20m arena, and these same exercises can usually be adapted for a 60 x 20m arena: those that necessarily require a 60 x 20m arena are identified on the page.
Each exercise within this book is accompanied by a diagram showing the layout of the poles and the route taken; however there is not space on the individual diagrams to show clearly all the arena dimensions, and the centre line markings, if shown, would often be obscured by lines indicating the route taken.
Therefore, the diagrams on this page offer comprehensive guidance to the dimensions and layout of both sizes of arena, including the centre line markers for the 60 x 20m arena, which are mentioned in some exercises, but which may be unfamiliar to some readers.
BEFORE YOU START – TRAINING TIPS FOR EVERY SESSION
Loosening up – the importance of stretching
The horse needs to stretch forwards and downwards with his neck in order to de-contract his back muscles and to tuck his pelvis under. This is essential for correct work in a rounded outline. If your horse is a bit fresh and stretching at the beginning is not a safe option, then do it after a few minutes of steady work on a contact, to gain his concentration and to make sure he is ‘on your aids’ before stretching. Control the horse with your body – then you can allow him to stretch in balance.
Maintain balance – half-halts
One thing to remember – the function of the half-halt is to teach the horse to ‘take weight behind’. Any issues regarding balance simply need a well-executed half-halt – or several half-halts. A half-halt is a body aid – not an isolated rein aid. A simple way of explaining a half-halts is a very brief ‘Stop, go’.
Aids for a half-halt
Sit up tall and brace your back and stomach (tighten your core muscles). Close both legs (calves, knees and thighs). Close your elbows to your sides (press your shoulder-blades back and down) and keep the contact steady with still hands. This aid (back, legs and elbows) must be just firm enough to ‘press’ the horse up to a steady hand, then the aid softens, releasing the half-halt. The message to the horse is ‘step under me and get off my hands!’ i.e. ‘take weight behind’.
Working through the back
The horse should ‘swing through his back’ and move comfortably under you into a steady, supportive contact. This requires you to have good co-ordination of seat, leg and rein aids. This only occurs when you have a good ‘feel’ for the horse regarding how much and when to use your aids. ‘Feel’ is as important as breathing and should be second nature to every rider. Force does not come into it – ever!
Transitions
Take time to prepare for every transition – there is no point in riding a bad transition for the sake of it. Prepare with half-halts. A good rule is that your aids should SUPPORT, ASK, ALLOW. Remember you are training your horse, not fighting with him.
Collecting and extending
Collect with half-halts so the horse is ‘taking weight behind’ sufficiently for the forehand to rise (‘lift through the withers’ is a good thought). Extension only comes from collection – the horse must have the ‘engine’ engaged to produce impulsion. The hind legs must have ‘pushing power’, and the hind legs drive the extension. A trot that is only ‘flashy in front’ is biomechanically incorrect and does not have true engagement or impulsion.
Flying changes
To ride a flying change, you need to be able collect your horse in canter, and to keep him straight. Your contact must be soft. If your horse is ‘against your hand’ and not truly collected, taking weight behind, you will never ride a good change.
Sitting and rising trot
Rising trot should be used at intervals to keep the horse relaxed through the back, and as a reward for learning a new exercise. Stretching work in rising trot is an essential part of every schooling session.
You may gasp in horror at the thought of sitting to the trot over poles, but believe me, it is the best way of improving back movement for both horse and rider and for you to really ‘get the feel’ of the horse’s back movement – especially when ridden without stirrups! If you cannot sit to the trot, I suggest you learn fast! A rider who sits well is able to use their back to influence the horse and improve the horse’s back strength.
Raised poles/cavalletti – working in a light seat
What I’ve said above notwithstanding, all riders should be able to balance in their stirrups in all gaits – though many cannot! A balanced light seat is as important as sitting to the trot. With your weight out of the saddle, you can free up your horse’s back muscles, allowing him to relax and loosen up through his back. The light seat is a useful seat over raised poles and small fences, allowing the horse the freedom to round his back, and enabling you to remain in balance should the horse ‘miss’ or put in an extra stride.
Bend and flexion – positioning the horse
Set your horse up for turns, circles and lateral work. Positioning the horse indicates to him that you are going to turn right or left before you actually do so. (Rather like driving the car – hopefully you would indicate to turn before you actually do so!) Positioning the horse can be described as ‘invisible bending’, where the rider has the horse ready in position for any movement on the right or left rein without it being apparent to the onlooker.
When riding, the horse should be either positioned to the right or left, or absolutely straight. Turn your hips and shoulders to position the horse, i.e. in the direction of the bend required.
Flexion occurs at the poll – the head is ‘positioned’ to the inside of the bend using both reins – not by pulling on the inside rein.
Bend occurs in the ribs and is asked for fundamentally by your inside leg at the girth. The outside leg behind the girth controls the bend. Using both legs simultaneously asks the hind legs to step forwards under the horse’s body.
Riding lateral movements
Lateral movements develop collection (taking weight behind). The better the collection, the more valuable lateral work is. You must be clear in your own mind the differences in amount of bend between riding the horse ‘in position’ (see bend and flexion above), shoulder-fore and shoulder-in. This is important for setting the horse up for all lateral movements – for example, positioning the horse prepares for everything. Shoulder-fore prepares the horse for shoulder-in. Shoulder-in prepares the horse for half-pass. When riding haunches-in and haunches-out (travers and renvers) it is just as important to control the horse’s shoulder position as the haunches.
Cooling down
Slow down in walk, trot or canter and allow your horse to stretch. Ease the reins longer a little at a time, so your horse chews quietly at the bit as he takes his neck forwards and downwards. This can be done with or without going over poles. Finish in walk on a loose rein. Praise your horse!
Positive mental attitude
It is very important when riding to be confident, especially when working with poles. If you dither about and are not totally focused on the job in hand, your horse can lose trust in you. Indecision on your part can result on your horse knocking poles, spooking or dodging out to the side. With pole work, the same rules apply as in jumping – throw your heart over the fence/pole and your horse will follow! If you trust your horse, he will trust you – work as a team and not against each other.
Remedial work
Pole work is a fantastic way of improving ‘faulty gaits’ such as pacing in the walk, ‘all in front and nothing behind’ in trot, or the hind legs ‘sticking together’ (kangaroo jumps!) in canter. They can also be excellent rehabilitation after injury, but obviously, do take veterinary advice when working out a training programme in these circumstances.
Summary
Vary the exercises. While you should repeat each exercise to establish correct work, (two or three times should be sufficient) there is no need to repeat the same one endlessly – there are enough ideas in this book to keep you going for ages! If you get a problem with an exercise, either take a break on a long rein or try a different approach. What does not work today may work tomorrow!
LAYOUT 1 (40 x 20m arena)
Single pole across centre line at X.
EXERCISE 1.1
Follow red, blue, green and purple lines – spiral in and out on a circle around the pole.
Start from H on the left rein in medium walk. At E, ride a 20m circle to the left around the pole (red line). On returning to E, spiral closer to the pole (green line), reducing the size of the circle to 10m, collecting the walk as you do so. Ride a 10m circle around the pole (blue line). Spiral out again (purple line), resuming medium walk as you increasing the circle size, and rejoining the 20m circle, still on the left rein, at B. Ride a full 20m circle left (red line) starting and finishing at B.
Change the rein elsewhere in the school. Ride the exercise on the right rein, starting from K, and riding a 20m circle right at E (red line).
✚Ride the exercise in trot. Start the 20m circle in rising trot. As you spiral in around the pole, sit to the trot. On spiralling out, take rising trot as your circle reaches 20m in size. Repeat on the right rein.
✚Ride the exercise in working canter, collecting the canter as you spiral in, and resuming working canter as you spiral out.
Lesen Sie weiter in der vollständigen Ausgabe!
Lesen Sie weiter in der vollständigen Ausgabe!
Lesen Sie weiter in der vollständigen Ausgabe!
Lesen Sie weiter in der vollständigen Ausgabe!
Lesen Sie weiter in der vollständigen Ausgabe!
Lesen Sie weiter in der vollständigen Ausgabe!
Lesen Sie weiter in der vollständigen Ausgabe!
Lesen Sie weiter in der vollständigen Ausgabe!
Lesen Sie weiter in der vollständigen Ausgabe!
Lesen Sie weiter in der vollständigen Ausgabe!
Lesen Sie weiter in der vollständigen Ausgabe!
Lesen Sie weiter in der vollständigen Ausgabe!
Lesen Sie weiter in der vollständigen Ausgabe!
Lesen Sie weiter in der vollständigen Ausgabe!
Lesen Sie weiter in der vollständigen Ausgabe!
Lesen Sie weiter in der vollständigen Ausgabe!
Lesen Sie weiter in der vollständigen Ausgabe!
Lesen Sie weiter in der vollständigen Ausgabe!
Lesen Sie weiter in der vollständigen Ausgabe!
Lesen Sie weiter in der vollständigen Ausgabe!
Lesen Sie weiter in der vollständigen Ausgabe!
Lesen Sie weiter in der vollständigen Ausgabe!
Lesen Sie weiter in der vollständigen Ausgabe!
Lesen Sie weiter in der vollständigen Ausgabe!
Lesen Sie weiter in der vollständigen Ausgabe!
Lesen Sie weiter in der vollständigen Ausgabe!
Lesen Sie weiter in der vollständigen Ausgabe!
Lesen Sie weiter in der vollständigen Ausgabe!
Lesen Sie weiter in der vollständigen Ausgabe!


