20,99 €
Mehr erfahren.
- Herausgeber: The Crowood Press
- Kategorie: Lebensstil
- Sprache: Englisch
Many aspects of railway modelling are the same whatever scale you choose, but N Gauge has particular benefits: namely, that there is more space for scenery, longer trains and extensive fiddle yards. This leads to specific challenges in the design and layout to ensure a realistic-looking model. Assuming some familiarity with the basics of N Gauge, this book provides guidance and instruction to extend and develop modelling skills to produce a layout that is scenically impressive: planning baseboards, integrating scenery with the backscene, and keeping everything in harmony. With over 250 colour photographs, it includes constructing baseboards and scenery; how to make models of real buildings; using different systems for moving vehicles and controlling them; building, painting and finishing rolling stock from kits and, finally, what is needed to make a successful exhibition layout and how to perform demonstrations.
Das E-Book können Sie in Legimi-Apps oder einer beliebigen App lesen, die das folgende Format unterstützen:
Seitenzahl: 291
Veröffentlichungsjahr: 2021
Ähnliche


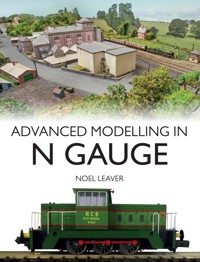
ADVANCED MODELLING IN
N GAUGE
Rhosteigne was built by Keith Robbins, and is now owned by Nick Beischer, who has developed it further. The impressive scratch-built LMS signal box sets the location. The passing Farish A1 Pacific shows the level of detail of modern N-gauge models.
ADVANCED MODELLING IN
N GAUGE
NOEL LEAVER
First published in 2021 byThe Crowood Press LtdRamsbury, MarlboroughWiltshire SN8 2HR
www.crowood.com
This e-book first published in 2021
© Noel Leaver 2021
All rights reserved. This e-book is copyright material and must not be copied, reproduced, transferred, distributed, leased, licensed or publicly performed or used in any way except as specifically permitted in writing by the publishers, as allowed under the terms and conditions under which it was purchased or as strictly permitted by applicable copyright law. Any unauthorised distribution or use of this text may be a direct infringement of the author’s and publisher’s rights, and those responsible may be liable in law accordingly.
British Library Cataloguing-in-Publication DataA catalogue record for this book is available from the British Library.
ISBN 978 1 78500 946 0
AcknowledgementsThanks are due to the many people who have helped me with this book: Julian Thornhill and Alison McGregor for proof reading; Grahame Hedges, who has made valuable contributions and allowed me to use many of his photographs; Richard Bardsley, who suggested I write it; the many members of the N-gauge group at Farnham and District Model Railway Club who have helped; the builders of the different layouts pictured; and to everyone who has given me permission to use pictures they have taken, particularly Tony Wright and Chris Nevard for their photographs of Wickwar.
Cover design by Blue Sunflower Creative
CONTENTS
INTRODUCTION
1 TOOLS, ADHESIVES, SOLDER
2 MAKING IT LOOK REAL
3 BASEBOARDS
4 FIDDLE YARDS AND AUTOMATION
5 TRACK AND WIRING
6 SCENERY AND BACKSCENES
7 BUILDINGS AND SIGNALS
8 ROLLING STOCK
9 ROADS AND VEHICLES
10 PAINTING AND FINISHING
11 EXHIBITION LAYOUTS
IMAGE CREDITS AND LAYOUT BUILDERS
INDEX
INTRODUCTION
This book assumes you are already familiar with the basics of N-gauge modelling; if not, Making a Start in N Gauge by Richard Bardsley (Crowood) is an excellent introduction to the subject. I hope to be able to extend your skills: to build more from scratch; to be more ambitious in the scenery you develop; and to look at how technical advances can increase reliability and allow for a more complex layout.
You may be creating a layout with a view to exhibiting it. I will show you how you can create an impact, make your layout stand out from the others, and ensure that all the elements blend together. I will help to ensure that your layout runs reliably and is easy to operate at an exhibition.
Stoney Lane Depot by Grahame Hedges recreates a small area of South London around 1990, showing how you can create a complex urban scene in a small area. The scenic part is about 7 × 2ft (2 × 0.6m). It showcases Grahame’s scratch-built buildings.
Moorcock Junction is set in the Yorkshire Dales, with rolling hills and more sheep than people (Andy Calvert). For each layout I give the builder’s name, but many layouts will have been sold, as this one, or in a few cases scrapped.
Many aspects of railway modelling are the same whatever scale you choose, but N gauge has some particular benefits. One is that you have a lot more space for scenery. A 2ft (60cm) deep scenic baseboard with a twin-track main line in O gauge only has space for a low-relief building. In OO you can model a row or two of houses or a river. But in N you can fit in a big factory, a housing estate, or a considerable area of countryside.
N gauge has space for long trains. A twelve-coach train in O would be nearly 20ft (6m) long, and most layouts are not that long! Even in OO you are likely to want to shorten the trains. But in N it is less than 6ft (2m). This makes N particularly good for modelling main lines. Even with limited space, you can still run five- or six-coach trains.
In N gauge, the fiddle yard holds a lot more trains. You can fit ten times as much stock in a given area as in O. However, because the fiddle yard is bigger, it will be more complex and difficult to operate, so for large layouts, the design of the fiddle yard is very important. It is an ideal area for automation, which can make operation simpler and more enjoyable.
Basingstoke models the four-track Southern Region main line, with a double-track Western Region line joining. It runs full length, twelve-coach trains.
Totnes is one of the finest scenic layouts on the exhibition circuit, with a superb backscene blended with the scenery.
You should think about the backscene from the start, since in N gauge it can transform a layout. It should blend as seamlessly as possible with the colours and scenery on the layout.
While N-gauge models are very small and it is difficult to see details unless very close up, digital cameras reveal a lot more, and in a large part your layout will be judged on photographs. I recommend taking photographs regularly when modelling, so you can correct defects that only show up on camera.
WHAT IS N GAUGE?
‘N gauge’ or ‘N scale’ refers to using 9mm-gauge track to represent standard-gauge track. This is accurate for a scale of 1:160, which is used in the USA and on the Continent. For historical reasons British N gauge uses 1:148 scale models running on 9mm track, and in Japan models are 1:150 scale running on 9mm track representing either standard or 3ft 6in gauge. A further complication is British 2mm FineScale, which is 1:152 scale running on 9.42mm-gauge track. All the layouts and models illustrated are to British N gauge unless otherwise stated. You can use models to 1:150 or 1:152 scale alongside 1:148 models, but models to 1:160 scale are sufficiently different that care is needed. Buildings should fit in, as should vehicles if they are not put next to a similar and obviously larger vehicle. However, rolling stock, such as a continental van, is likely to look wrong.
NEW TECHNOLOGIES
Digital technologies have made a big impact on railway modelling with DCC (direct command control), but this is only the start. Low cost computers such as the Arduino and Raspberry Pi can connect together points, signals, train detectors and train control to provide automation. Automation can prevent operational errors, deal with repetitive operator tasks, and operate signals that otherwise you might not change.
The main reason for the dramatic improvement in the quality of N-gauge models over the last thirty years is the introduction of new manufacturing technologies. Some have become compact and cheap enough for modellers to own.
From top left, clockwise: A pair of wagon bodies printed by Shapeways; LMS Patriot body printed by Shapeways; resin-cast Prestwin wagon body (2mm SA); laser-cut kit for GWR Loriot from Osborns Models; 3D-printed BM container from Osborns; 3D-printed figures from ModelU.
3D printing is the technology most talked about: resin 3D printers are available for a few hundred pounds and can produce superb results. Computer printers that print directly on to a model are coming down in price, though are still too expensive for individuals. Laser cutters and CNC milling machines are close to being affordable, but few modellers can justify having them. I have not written about how to use these technologies, partly because they are constantly evolving, but mainly because most modellers will not need to use them. I have bought many 3D-printed, CNC-milled and laser-cut items, but have never designed any myself. Even if you create your own digital designs, you can send them off to be 3D printed, laser cut, or made into decals.
In the future, modelling will increasingly be at a computer rather than the workbench. I use CorelDRAW to create artwork for decals and etched components, and Photoshop for backscenes and sides of buildings. Time spent learning to use drawing and photo-editing software is likely to be well spent.
CHAPTER ONE
TOOLS, ADHESIVES, SOLDER
TOOLS
I have a lot of tools – I like buying them! I’ve started with the basic tools I use most of the time, then listed some ‘nice-to-have’ tools that are useful for certain work.
BASIC TOOLS
Pliers: I use a pair of miniature long-nosed pliers all the time, sometimes a similar pair of round-nosed pliers for bending wire into a curve, and occasionally larger pliers to grip something more firmly. A pair of long-nosed pliers with the nose ground very thin is useful for adjusting hand-built track, and parallel-jaw pliers make a good hand vice.
My ‘workbench’ is a rectangle of MDF with a lip of thin wood fitted round three sides to stop things falling off, and varnished to seal it. On top of this is a self-healing green cutting mat for most cutting, and a rectangle of ‘Tufnol’ sheet on which to cut out etches and solder. Suitable small blocks are available to buy at many exhibitions or on the internet. On one corner is a watchmaker’s vice. Together with a few basic tools, it is easy to move if I want to work elsewhere. It is small, as I often travel by public transport: if I used a car I would have made it bigger. You need plenty of light, a couple of spotlights, and if possible, additional room lighting, such as spotlights pointing at the walls to give indirect light.
Tweezers: I have a number of different tweezers, all stainless steel (to avoid solder sticking) and with fine points.
Files: An old 6in (15cm) medium file gets a lot of use, particularly on plastic. 12in (30cm) files in various cuts are reserved for filing metal – I look after these carefully and store them in a felt-lined drawer so they don’t rub against other tools. I have a variety of needle files: the two I use most are a half-round and a knife-edged file. Smaller needle files are useful for small spaces. Use emery boards (nail files) for filing plastic and card, the sort with a card centre. A 1mm-diameter round file is extremely useful for opening out small holes. They are known as ‘seconds files’ and are available from suppliers of jewellers’ tools.
Knives: Practically the only knife I use is a scalpel. The other knife I have is one with a snap-off blade: it is good for shaping foam when making scenery with a new blade fully extended.
Scalpel with a retractable blade. I prefer these to simple handles, as they are much safer for carrying. It is fitted with my preferred #15 blade, a small curved blade, though most modellers I know prefer a larger, straight blade, #11.
Callipers: My favourite tool is a set of 4in (100mm) digital callipers. I do all my measuring with them. For N gauge, this size is better than the more common 6in (150mm). They will measure either imperial or metric, and can be locked to a particular width. They are useful for cutting strips off plastic sheet, as shown in the photos.
When you want to cut a rectangle of plastic to fit inside a wagon, the only tool you need is callipers. Set them to the width of the hole, then lock them in that position with the screw.
Run them down the edge of a sheet of plasticard, putting pressure on the jaw towards the middle of the sheet so it scores a line. Bend the plasticard and it will snap cleanly along the line. Scoring and bending is the recommended way to cut plasticard, better than cutting through with a knife. Repeat to cut to length.
Rulers: I use rulers mainly as straight-edges. Most are steel, though a favourite is a transparent plastic ruler with a metal strip on one edge, that I use when cutting card. It is useful to be able to see what is under the ruler when positioning it, and a grid drawn on the plastic helps you to check it is square to what you are cutting.
Drills: A set of drills ranging from 0.3mm up to 2mm covers nearly everything. The 0.3mm and 0.35mm drills break easily and blunt more quickly than larger drills. As you will probably use these sizes more than any others, buy a packet of ten extra ones. I use 0.35mm rather than 0.30mm when possible as I don’t break as many. I do nearly all my drilling with the drill in a pin vice, particularly for small holes: you are likely to break them if you use a mini-drill. Remove small drills from the hole frequently to clear the swarf, as they don’t clear themselves as well as larger drills. When drilling metal either by hand or with an electric drill, use a little standard oil or saliva as a lubricant, as it speeds drilling and helps preserve the drill.
Most modellers have a cheap vice with jaws that are not properly parallel, and can wobble. It is difficult to work on small objects with such a vice. Spend perhaps double on a precision watchmaker’s vice, which is much easier to use.
Clamps: Clamps are useful, for example for holding work while glue sets. It is worth having a variety of shapes and sizes. Small bulldog clips and clothespegs are good when soldering etches.
Soldering iron: Your soldering iron is an important tool, and a good one need not cost a lot if you shop around. Go for a temperature-controlled iron. As well as letting you set the temperature, they heat up faster than normal irons. The ones that have a separate station with the controls are easier to use. A chisel bit is suitable for most work, though you might want other bits such as a conical bit. If the iron is not one of the big brands, I recommend buying spare bits with the iron as they may be difficult to find later. You need a stable stand for it, and many come with one. If necessary fix it to a block of wood. When you finish soldering, clean the tip and add a small amount of solder before turning off. This will preserve the tip and extend its life.
My temperature-controlled iron and stand. Buy a brass wool-tip cleaning pot such as the one shown: they work better than the old-fashioned damp sponge, and don’t need to be kept moist. Use it regularly when soldering and your tip will stay in good condition. The small pot is ‘tip tinner’, to use if the tip gets very dirty. Push the hot iron into it, then wipe it in the cleaning pot; repeat until it is clean. Never file the tip to clean it, as it has a thin iron coating that you will remove.
Saws: A razor saw is good for making fine cuts in both plastic and metal. One with fine teeth will do most things. For large items a junior hacksaw is better. For cutting out intricate shapes in metal, use a piercing (or jewellers’) saw – these are also useful for cutting out holes in plastic sheet. Get one where the length of the frame is adjustable.
Using a piercing saw. Clamp a ‘sawing pin’ to the edge of your bench – this is just a rectangle of wood or metal with a narrow V-shaped slot in it; it is easy to make one out of scrap. Select a suitable blade: the gap between the teeth must be no more than about a third the thickness of the sheet being cut. However, do not use one finer than needed, as the thin ones break more often. I suggest having 2/0, 4/0 and 6/0 size blades. Mark clearly the line you want to cut: in the photo the area round the line was blackened with a marker pen before scribing the line. An alternative is to stick a paper drawing on to the metal and cut through it.
To cut a hole in the middle of a sheet, drill a hole large enough to take the blade, inside where you are cutting. Clamp one end of the blade in the handle end – note that, unlike most saws, the teeth must be facing the handle because the saw cuts on the pull stroke, not the push stroke. Put the blade through the hole, then clamp the other end of the blade. Loosen the adjustment on the top of the frame and open it out until the blade is taut (it pings when you flick it); then lock the frame. Lubricate the blade: beeswax is traditional, but vegetable oil or soap will work.
Put the work on the saw table positioned so you will be cutting away from yourself, with the handle of the saw below the work. Lift up the saw, then let it come down pressed against the metal. Hold the saw loosely and do not use much force, as the work is done by the weight of the saw. Move the work around as you cut so you are always cutting away from yourself. Parts of broken blades can be reused by shortening the frame.
Scissors: A sharp pair of scissors is one of the most useful tools you can have, together with a pair of tin snips for cutting sheet metal. Side cutters will cut and strip wires, but you need special cutters for steel wire. Track cutters are (as you might guess) for cutting rails – they cut dead straight on one side. Do not use them on anything harder than rail.
Broach or reamer: A cutting broach or reamer is the easiest and most accurate way of opening out a hole that is too small; it is better than a drill as it stays centred. For N gauge get one of the sets that goes from 0.45mm to 1.4mm (these are the sizes at the widest part; they overlap so there is one suitable for any hole from about 0.25mm to 1.4mm).
Fibreglass brush: A fibreglass brush will remove heavy or hard deposits, such as on a very dirty loco, or excess solder on a metal kit. Be careful, however: the brush is fierce and you can easily remove paint, or even parts of the model if used on plastic. Fragments of glass break off and can get embedded in your hands, causing itching and some pain (in essence itching powder), so use gloves and work so that bits drop to the floor rather than on the bench.
Top left is a Garryflex abrasive block, ideal for cleaning etches before use. In the green packet is a set of fine cutting broaches, and two small round files I keep with them. Below is a 2mm fibreglass brush, and at the bottom a palette knife.
I always carry a ‘Cybertool’ Swiss army knife. It has (amongst other things) scissors, tweezers, pliers, a miniature screwdriver, and a screwdriver with interchangeable bits. I find I can do most N-gauge loco maintenance with it.
Palette knife: A palette knife is a sort of mini trowel, and is good for applying and smoothing filler, both for scenic work and on models. You can get these at art shops and online.
NICE-TO-HAVE TOOLS
You can do without these tools, but it may take longer or be more difficult to achieve accuracy. You might have access to them at your model railway club.
Cutters: A pair of cutters with hardened steel edges will cut piano wire; places such as Screwfix sell them. Sprue cutters help to get plastic parts off the sprue: I prefer the tweezer-action type to the ones like pliers. Look in the foot-care section of Boots for interesting small cutters.
Drills: A mini-drill makes drilling small holes easier and faster, and is a real boon if you have a lot to do. I only use it for drills of 0.5mm or larger – smaller ones break too easily. You can use it with a cutting disk for hard metal such as piano wire, and for cutting rail – it is about the only way to make a gap in already laid track. You should always wear some eye protection when using a cutting disk, as they can shatter and fly off. A couple of steel burrs are worth having for removing metal or plastic – for example, removing the posts in the centre of Oxford Diecast coach bodies.
There are many makes of drill to choose from, and a wide range of prices. Get one with a good range of speeds. I prefer a chuck to collets as it is faster to use, even if slightly less accurate. One drill to look at is the Proxon Micromot 60/EF; they have a cordless version if you prefer that.
My Proxon TBM 220 bench drill. On the left side is an adjustable depth stop, and on top are the collets for different-sized drills. I have added the KT 70 compound table, which lets you move the work precise distances in any direction.
A bench drill – a vertically mounted drill – makes drilling accurate vertical holes easy, and small drill bits are less likely to break than with a hand-held drill. You can use them for light milling with a milling tool, for example on plastic. A cheaper alternative is a bench stand for your mini-drill.
Styrene cutter: This tool cuts styrene strip to exact lengths. If you do a lot of building from styrene they save time and give greater accuracy. When cutting thick strip, the blade tends to go at an angle, so the cut is not vertical; it is better to make a shallow cut and then bend the strip to complete the cut.
This styrene cutter has a cast-metal base and metal arm; cheaper ones are plastic and can flex when cutting.
Etch bending tool (‘hold and fold’): This tool helps bend etches along straight lines. It is useful if you make a lot of etched metal kits, though a good vice is almost as good. They come in a wide variety of sizes.
Resistance soldering unit: This unit has a transformer that supplies a very large current (typically 40 amps) at a few volts. The earth contact is attached to the metal, solder paste or solder plus flux is put on the joint, then a carbon probe wired to the positive is put against the work where it is to be soldered. The current is turned on briefly by a foot switch. The resistance at the tip of the probe causes the area round it to get very hot and melt the solder; you can move the probe along a seam to solder all the way along. The probe can help hold the work in place. Joints can be made with a minimum of solder, and are excellent for joining two sheets of metal. Some use them occasionally, others use them all the time for non-electrical soldering. If you are interested there is often someone demonstrating one at the larger exhibitions.
Resistance soldering unit. Six different power levels can be selected: for most work in N gauge a low one is all you need; the higher ones can vaporize small etches. The high settings let you solder to large pieces of metal. The return lead is attached to the steel plate by a crocodile clip; the work is held against the plate by magnets and the tip of the probe.
Bench power supply: This is a variable voltage DC supply, with an adjustable current limiter; 0–15 volts is a good range. It shows the voltage and current taken. Cheap ones can cost less than a DC train controller, and are very useful if you do a lot of fiddling with electrics or electronics, or just for testing locos.
My old bench power supply: modern ones have a digital readout. The current limiter reduces the chances of accidental damage. It also supplies fixed voltage DC at 5V and 12V.
A multi-cutter tool; cordless is more convenient than mains-powered. It is shown with the small saw blade, suitable for making holes in baseboards. The larger saw blade is good for trimming ply, the tool on the right is a sander, and the other a scraper.
Multi-cutter tool: This has an oscillating head that can be fitted with a variety of tools. The saw blades will rapidly cut a rectangular hole in a baseboard, or trim a sheet of ply on the end of a board to the height you want for the scenery.
BUYING TOOLS
Quality tools work better and last longer. I buy a lot of my tools from jeweller’s tool suppliers such as CousinsUK and Shesto, both online. Their prices are very reasonable and the quality is good.
ADHESIVES
Whatever the glue, grease or oil on the surfaces will reduce the strength of the bond. Wash plastic, metal or resin first with diluted isopropyl alcohol, then wipe dry with a paper towel.
A few of the adhesives I use regularly. I use Roket Card Glue and a gel superglue the most.
PVA GLUE
This is the best glue for paper and card, and will bond many other materials, though the bond is not particularly strong on non-porous materials. I use it for fixing things to the baseboard. I like Roket Card Glue for making buildings as it has a very good grab; it is fine for other work, too.
PLASTIC GLUES
More accurately plastic glues are solvents, and they work by dissolving a little of the surface of the plastic on both sides of the joint. This mixes, then sets as the solvent evaporates, forming a weld, so a good joint is as strong as the plastic. They only work on bare plastic: if it is painted use something else. I use Butanone for most plastic kits and for styrene strip, as it grips well while still allowing a bit of time for adjustment. Many model shops sell it, or it can be bought in larger quantities online. Apply it with an old paintbrush, as it tends to ruin brushes. Run the wetted brush along the side of the joint, with the parts held together, and the solvent is sucked into the joint by capillary action. For a really strong joint, rub the two parts together after applying the adhesive so any irregularities are flattened or filled in.
Sometimes for larger items when I want more time, I use Revell Professional, which is thicker and applied to one side of the joint before assembling. These two glues will glue styrene, and Butanone works on many, but not all other plastics. If Butanone doesn’t work I try Plastic-Weld, which bonds very quickly. Do not leave the cap off or loose, as it evaporates quickly.
Note there are some plastics, such as polythene, that cannot be glued, and others where an epoxy or cyanoacrylate glue is needed. Butanone will bond plastic to some porous materials such as wood strip: it seems that some of the dissolved plastic penetrates the wood, then when it dries, it forms a mechanical bond. I have managed to glue styrene to some ‘impossible’ plastics by first scoring the surface of the hard plastic with a knife held at a shallow angle to lift small flaps and give the styrene something to lock on to.
EPOXY RESIN GLUES
These give a strong bond on most materials. You mix the two parts, then you have a limited time in which to use them. Before gluing, clean any grease off, then slightly abrade the surface with fine wet-and-dry to help the glue key. Wash to get the dust off, and allow to dry completely. Do this and you will get a very strong bond. Normal epoxy is workable for about one hour, and sets fully hard in twenty-four. You can get a ‘rapid’ version, which sets faster but is only workable for five minutes, but I don’t use this as it is not as strong. If you want the joint to set faster, just put it in an oven set to 50°C for an hour or so. I found the rapid version became unusable after a couple of years, while I am still using some ten-year-old standard adhesive.
SUPERGLUES (CYANOACRYLATE GLUES)
These glues will stick most things, including skin and metals, though they are not good on ABS plastic, polythene or leather. The two basic varieties are liquid and gel, and there are some special types such as odourless (which does not fog glazing), and ones developed for gluing plastics. The liquid version comes in different thicknesses: the thinner it is, the faster it bonds – the very thin (hot) versions are almost instantaneous. You can apply thick and gel glues to one surface, but for the thin versions it is better to apply it to the edge of the joint and let it get sucked in. The strongest joints are when there is only a very thin layer of glue.
The gel versions are semi-solid and I find them easier to work with, as they stay put and give you a few seconds to make adjustments. They are slightly flexible compared to the liquid glues, though they do not form as strong a bond (but it is still very good).
For either type, do not apply the glue directly from the bottle to your work: put a little on a scrap bit of plastic or shiny card, and transfer it to your work on the tip of a pin. Buy small tubes of gel glue, as they only last a few months once opened. Have a bottle of medium liquid glue as well.
Superglue is quite brittle, and can break off if knocked. It is best for parts that are held together mechanically, for example by a tab in a slot, and relatively poor for attaching detail to a flat surface: in this case solder or epoxy will be better. Always clean the nozzle after use, and don’t leave glue in the nozzle, where it will set solid. Keep the glues cool and dry to extend their life.
OTHER FIXATIVES
Contact adhesives such a UHU and Bostik are sometimes useful, but can be messy. I occasionally use them when I know I might want to take things apart later, as you can usually prise joints apart. For larger areas spraycans are good, as they ensure a thin, even coat of adhesive.
Copydex: A latex rubber adhesive sold for fixing carpets. It is excellent for any sort of fabric, and will bond most materials. It is very resistant to bangs and shocks. It is good for sticking cork to a baseboard.
Insta Stik: A strong, general-purpose polyurethane foam adhesive, sold at DIY and tool outlets, and applied using a sealant gun. I use it for sticking foam and wood when making scenery; you need to clamp it for five minutes while it foams. It dries hard in under an hour, and will fill substantial gaps. It is advisable to wear gloves, as it sticks extremely well to skin and it takes days to get it all off. When you finish using it, let some glue come out of the gun and form a knob over the end of the spout. This will keep the remainder usable for several months. It can be useful for jobs around the house as well.
Double-sided tape: This tape is easy to use without making any mess, and can give a strong bond. There are two main types. One is very thin and is best for joining two completely flat surfaces, or when at least one material is flexible and can be pressed on. It can be used for fixing track down, or a small rectangle can be used to hold a weight or load in place on a wagon. It is fairly easy to prise apart later if you need to, especially if it is warmed with a hair dryer. The other type has a flexible layer about 1mm thick, so can be used on surfaces that are not flat. It is very sticky: I use small squares for holding wires and electronic components in place. You can unstick items and put them back many times.
A number of the less permanent adhesives, although double-sided tape and Pritt can be used for permanent joints. On the right are the two fillers I use.
Blu Tack and Tacky Wax: These are temporary fixatives. I use them for emergency repairs at exhibitions, such as to hold a coupling rigid when a wagon keeps uncoupling.
Milliput: An epoxy putty, which can also act as an adhesive. I use the Superfine White. There are two components that have to be kneaded together for five minutes before use. It can be given a very smooth finish by going over it with a damp palette knife, and it dries rock hard. Its down side is the time it takes to mix it, so I often use a ready-mixed filler such as Squadron, though it is not as strong.
SOLDER AND FLUX
You will be familiar with cored electrical solder, which contains rosin flux. It is ideal for electrical soldering, but not so good for models as it tends to form blobs on a surface, rather than flow on to it. The rosin flux forms a protective layer; it can be painted over, but is better removed. Rosin is less active than most other fluxes, which is why it need not be cleaned off, but it means it is more difficult to get a good joint. Stronger fluxes will cope with some dirt or oxide on the metal to be soldered. For metal kits I use either a separate flux plus a solder suited to what I am doing, or solder paste: a mix of finely ground solder and flux, which you put on the joint.
The solders and fluxes that I use regularly.
My preferred fluxes are dilute phosphoric acid (widely available), or Powerflow plumber’s flux. The latter will work on ‘difficult’ metals such as steel.
Apply flux to the joint, and put the solder on the tip of the iron, or put a small slice on the flux. An alternative is to use ‘solder balls’ on the work: small balls of solder sold in various sizes. Either way you don’t need to hold the solder. The disadvantage of a flux other than rosin is that you must wash off any remains before painting. If left on, over time it reacts with the metal and causes paint to bubble or loosen.
For etched metal kits, I mostly use Carr’s 188°C sheet solder. It will go into thin layers, and can make joints with minimal solder. For adding details I sometimes use Carr’s 145°C detailing solder with a lower melting point, so you can use a cooler iron, which prevents previously soldered joints coming apart. If a fillet of solder is needed to reinforce the inside of a joint I may use electrical solder. For small parts I often use solder paste, and almost always when using my resistance soldering unit. Low-melt solder is needed for white-metal kits: I prefer the 100°C version to the 70°C as it is stronger.
I do most of my work with the iron set to a temperature of 325°C as I use lead solders. The iron must be hot enough to melt the solder quickly, but if it is hotter than needed it reduces the life of the tip, and risks damaging the work. An iron that is not temperature controlled needs to be a little hotter to start with, because when you start soldering it is less able to maintain the temperature. When working on large pieces of metal the iron may need to be hotter than usual to provide extra heat; otherwise use a larger iron or a resistance soldering unit. With lower-melt solders I reduce the temperature, perhaps to 200°C.
Lead solders are easier to use than modern lead-free solders. Lead-free solders are now used commercially because of the health hazards of prolonged exposure to lead, but for occasional hobby use just be careful to wash your hands afterwards. With lead-free solder the iron needs to be a little hotter, as these solders have a higher melting point.


