20,99 €
Mehr erfahren.
- Herausgeber: Crowood
- Kategorie: Lebensstil
- Sprache: Englisch
The airbrush is an essential tool for modellers striving for professional-looking results. It can greatly enhance the quality of your modelling output, whether applying a full livery scheme or simply blending in areas of new paintwork. A good airbrush will offer unparalleled levels of finish and consistency, as well as the chance to create unique effects such as weathering and stencilling.
Das E-Book können Sie in Legimi-Apps oder einer beliebigen App lesen, die das folgende Format unterstützen:
Seitenzahl: 338
Veröffentlichungsjahr: 2012
Ähnliche


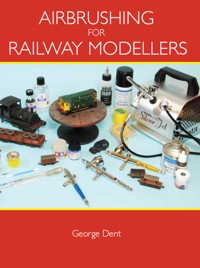
AIRBRUSHING FOR RAILWAY MODELLERS
George Dent
Copyright
First published in 2011 by The Crowood Press Ltd, Ramsbury, Marlborough, Wiltshire, SN8 2HR
www.crowood.com
This e-book edition first published in 2012
© George Dent 2006
All rights reserved. This e-book is copyright material and must not be copied, reproduced, transferred, distributed, leased, licensed or publicly performed or used in any way except as specifically permitted in writing by the publishers, as allowed under the terms and conditions under which it was purchased or as strictly permitted by applicable copyright law. Any unauthorised distribution or use of this text may be a direct infringement of the author’s and publisher’s rights, and those responsible may be liable in law accordingly.
ISBN 978 1 84797 464 8
CONTENTS
TITLE PAGE
COPYRIGHT
PREFACE
ACKNOWLEDGEMENTS
INTRODUCTION
CHAPTER ONE:CHOOSING THE RIGHT AIRBRUSH
CHAPTER TWO:ASSEMBLING A SPRAYING KIT
CHAPTER THREE:PAINT
CHAPTER FOUR:GETTING STARTED
CHAPTER FIVE:SURFACE PREPARATION
CHAPTER SIX:PRIMING AND PAINTING
CHAPTER SEVEN:CLEANING AND ROUTINE MAINTENANCE
CHAPTER EIGHT:MASKING-UP
CHAPTER NINE:COLOUR MATCHING AND BLENDING WITH FACTORY FINISHES
CHAPTER TEN:CLEAR COATS
CHAPTER ELEVEN:METALLIC FINISHES
CHAPTER TWELVE:AN INTRODUCTION TO WEATHERING
CHAPTER THIRTEEN:SCENIC WORK
CHAPTER FOURTEEN:ADVANCED TECHNIQUES
AFTERWORD
USEFUL CONTACTS
BIBLIOGRAPHY
INDEX
PREFACE
Model making, in various forms, has been an important part of my life for nearly thirty years. Having trained and worked variously as a museum conservator, graphic artist and guitar maker, each of these vocations has helped inform my modelling, be it in practical or theoretical terms. In 2004 I became the in-house Model-Maker and Feature Writer for Model Rail magazine and my work has also appeared in Railway Modeller and the two volumes of Detailing and Modifying Ready-to-Run Locomotives in OO Gauge (The Crowood Press, 2009).
Being a professional modeller has afforded me the luxury of access to a broad range of airbrushes, paints and equipment and it is the aim of this book to not only pass on the benefits of my experiences – good and bad – but also to remove the lingering mystique that surrounds the art of airbrushing. Experienced airbrush users should also find plenty here, including an array of helpful tips and tricks that I’ve learned over the years. In addition, a variety of advanced techniques are covered, all of which can combine to help you achieve highly realistic results.
ACKNOWLEDGEMENTS
Many of the products and materials featured in this book have been generously provided by the following: Alex Medwell and Lisa Munro (The Airbrush Company), Dennis Lovett (Bachmann) and Robin Carpenter (Cammett Ltd). Thanks also to Charlie Petty (DC Kits), Arran Aird (C-Rail), Dave Young (Ten Commandments), plus David and Ron at SMTF model shop, Poynton.
Ben Jones, Chris Leigh and Richard Foster at Model Rail have been very supportive of my various book ventures, to which I am grateful. Thanks also to the staff at The Crowood Press and Nick Brodrick of Steam Railway magazine.
Jeanne Carr’s cottage in Settle once again proved a good place to write a manuscript and Scrivener’s Books of Buxton supplied much useful reference material. Special thanks to my equine brothers, Jim and Mikey, plus the staff at Bank Farm and last, but by no means least, to the Dent Collective: Julie-Marie, Maude, Leonard and Hannah.
Airbrushing not only offers the chance to improve our modelling output but is an enjoyable pastime in itself.
INTRODUCTION
The technique of airbrushing remains something of a ‘Dark Art’ to many modellers, akin to the mysteries of low-temperature soldering or brass rolling. However, successful use of an airbrush is within the reach of any modeller, provided that he or she seeks to gain a basic understanding of the materials and equipment involved. Additionally, a good degree of practice is vital.
Contrary to common belief, airbrushing is not a practice reserved for those with deep pockets. Happily, the cost of both airbrushes and compressors has fallen considerably in recent years and the boom in cheap imported goods has also forced established brands such as Badger and Iwata to bring down their prices in the face of stiff competition. Naturally there will always be a need to pay for precision instruments, which is what a lot of ‘high end’ airbrushes can be classed as. But these are not always suitable purchases for an occasional hobbyist and the introductory chapters aim to help you choose spraying equipment that’s right for your own particular needs.
Given prior knowledge of paint thinning, an understanding of how an airbrush works and access to a source of compressed air – even a car tyre – anyone can get to grips with airbrushing. It is, after all, just another skill that has to be learnt through practice. Indeed, my own early experience of spraying model trains consisted of using a bargain basement airbrush, given away free with a magazine subscription. Once I’d learned how to mix the paint correctly and achieve the right air pressure, the strengths and limitations of the tool soon became clear. From then on, airbrushing proved to be an enjoyable exercise.
One of my first attempts at airbrush weathering can be seen on this Hornby Pacer. Undertaken way back in 1990, a cheap Humbrol airbrush and canned propellant was used. The overly coarse spray pattern is symptomatic of poorly mixed paint and incorrect air pressure.
WHY USE AN AIRBRUSH?
The benefits of airbrushing can be summed up by the following adjectives:
• Speed
• Consistency
• Quality
• Accuracy
• Convenience
• Uniqueness
• Enjoyment
The speed aspect is self-explanatory: even if multiple coats are required for each shade within a complex colour scheme, the rapidness of application will always be attractive, whether you’re a hurrying professional or a relaxed hobbyist. When the technique has been mastered, the consistency of paint application from an airbrush is almost impossible to replicate, particularly on miniature models. So much fine detail can be obliterated by too thick a coat of paint, especially where numerous layers have been spread onto the surface.
Airbrushing allows models to be customized, enhanced or refinished with a greater degree of consistency. Indeed, even the most practised brush-painter will struggle to match the quality of finish possible with even a budget range airbrush. This OO gauge Class 31 has been repainted and weathered using a mid-priced Badger airbrush and Railmatch enamel paints.
Portraying a grimy steam locomotive can be achieved far more efficiently with an airbrush; with experience, livery and weathering schemes can be undertaken very quickly. Even the need for masking can be dispensed with, as was the case here: the ultra matt finish of the smokebox was sprayed freehand, while subsequent fine layers of dirt-coloured paint blended in the ‘joint’ with the factory finish.
The quality of finish is also dependent upon the painter knowing what he or she is doing, but the results can be superb, even with only a modest set-up and level of experience. Ditto the accuracy facet, as a well-handled tool can get paint where it’s meant to be without the invasiveness of a brush. The ease with which an airbrush can be ‘flushed’ between paints depends to a degree upon the design of the tool but, generally speaking, they are simple to clean.
Certain paints, particularly cellulose, acrylic or metallic finishes, perform at their best when sprayed. Additionally, there are a number of paint effects that can only be achieved by airbrush, such as ‘fogging’ or ‘misting’, where overlapping colours blend gently rather than meeting with a hard edge (see Chapter 14). Many weathering techniques are also unique to airbrushing, such as exhaust staining or streaking effects.
With each of the above benefits comes the pleasure of seeing your treasured modelling project finished to a high standard, rewarding all the hard work expended prior to the painting stage. Whenever a new technique is learnt, there is bound to be a degree of frustration when things go wrong, but persistence is the key. With this in mind, the most essential background information is presented in the opening few chapters of this book: firstly, the main forms of airbrush, spraying equipment and paints are considered, before moving on to demonstrate basic spraying techniques away from any models. In this way, with only scraps of paper or card to waste, we can develop our proficiency without the worry of making expensive mistakes.
THE BIG ‘P’
There is only one way of becoming proficient in the art of airbrushing and that is by practice. The same can be said about developing any new skill, be it learning to drive or play a musical instrument. The other important ‘P’ is patience and this is one virtue that all of us modellers are meant to possess. This isn’t always the case and if you’re getting fed up, then stop and do something else instead. This is, after all, a hobby and is intended to bring relaxation and enjoyment to participants. Unless you enjoy making a martyr of yourself, come back with a clear mind and don’t give up. Also, don’t set unrealistic targets: it will take time to master the technique. It can’t be rushed, but it can be fun.
Throughout the following chapters, I have tried to convey just how many facets of railway modelling can benefit from the use of an airbrush. Locomotives, rolling stock, scenery, buildings, track and infrastructure are covered, adapting painting techniques and equipment set-ups to cope with each.
In the space of a couple of hours, a ready-to-run locomotive can be transformed with a little weathering, taking away the ‘plasticky’ look of the original model. While weathering powders can produce similar ‘smoke’ effects, nothing compares to an authentic misting of oily enamels over a diesel’s roof.
Every element within this miniature scene has received some degree of work with an airbrush. The track, scenery and buildings have been treated collectively, to blend all of the individual components together for a natural-looking appearance.
CHAPTER ONE
CHOOSING THE RIGHT AIRBRUSH
Finding an airbrush that suits your particular needs is an important step on the road to proficiency in spray painting techniques. There are countless brands and model specifications to draw from and choice will depend on a number of factors. Price is obviously important, as is the type of work envisaged. Or, more precisely, what scale are you working in and how much use is the tool likely to see?
Issues such as comfort and balance can be subjective and it helps to try out any airbrush before buying. Competing brands aim to offer a better ergonomic experience and various novel ideas have been introduced over the years, some more successful than others. Most respectable dealerships will permit trials of specific products and offer unbiased advice, based on their own expertise in the field. It’s not in their interest to sell you something you don’t need as they will be aiming to attract repeated custom and hope for a recommendation to friends. Therefore, a quick telephone call to a firm such as The Airbrush Company will be worth the effort (see Useful Contacts).
Before browsing catalogues or websites, it will be advantageous to learn some basic facts concerning the main categories of airbrushes, how they work and how they came to exist in the first place.
With so many different models on the market, choosing the right airbrush can be a daunting prospect.
A BRIEF HISTORY OF AIRBRUSHING
Since the development of commercial and industrial paint formulas, the means of speeding up application and consistency of finish had been sought. However, it wasn’t until the end of the nineteenth century that a solution presented itself, developed by an American shopkeeper from an air-powered contraption built to spray whitewash. Initially agriculture was the main outlet for this machine, although within a decade the principle was developed to form what we now know as the Spray Gun. In turn, this invention allowed factory production volumes to increase, assisted by the introduction of nitrocellulose paints in the 1920s. Indeed, it allowed Henry Ford to offer motor cars in colours other than black!
On a smaller scale, artists and draughtsmen had also been looking into ways of projecting paint onto surfaces without the use of brushes and, in the 1880s, both British and American inventors were hard at work developing what would become known as the Airbrush. At the same time, a similar tool was being developed for medical applications by a certain Dr DeVilbiss. This American practitioner desired a means of treating throat infections in a non-invasive way and such was the success of the ‘atomizer’ that his company eventually branched out into artists’ airbrushes. DeVilbiss remains one of the most respected brands in the airbrush market today.
By 1895 the first internal mix, dual-action airbrush was released, aimed squarely at water colourists. Using the same basic principles that are still in use today, these early tools would not look out of place on a twenty-first century modeller’s workbench. Indeed, the airbrush has changed relatively little over the decades, with innovations being concerned more with refining the brand rather than revolution. That said, one of the biggest departures from the established ‘method’ has been by the Testor Corporation, which has pioneered the use of interchangeable plastic nozzles in its Aztek range.
It remains that the big players in the twenty-first century airbrush market are of North American origin: DeVilbiss (established Ohio, 1888), Paasche (California, 1904), Badger (Illinois, 1963) and Testor (Illinois, 1929). Iwata, a Japanese concern, has established itself as a highly respected manufacturer over the last thirty years or so, although the company has been in existence since the 1920s. Curiously, the influx of airbrushing equipment from other Far Eastern countries has come relatively late, although this situation has since changed dramatically. Indeed, the market is now awash with cheap airbrushes, compressors and accessories of varying quality.
While we’re on this subject, I must add a word of warning. The growth in the hobby airbrush market has also seen the proliferation of pirated goods, trading on the reputations of established firms. Mostly selling over the Internet for rock-bottom prices, these fake goods are not only inferior in material and build quality, but are probably supporting dubious working practices in poor and developing nations. If such ethics don’t worry you, then that’s fine. You can have a so-called Iwata, for instance, for a ‘tenner’ and it will last a few years under occasional use without ever giving the level of performance that a ‘real’ one would. However, I like to know where my money’s going and would rather save for a bit longer than settle for substandard goods. The reassurance of quality-controlled production, a long warranty, spare part availability, technical support backup and the option of compatible accessories make it more economical, in the long term, to plump for a well-known brand, especially if you intend to get a lot of use out of your airbrush.
WHAT IS AN AIRBRUSH?
All airbrushes are designed to atomize a liquid before projecting it onto a waiting surface. Compressed air is required to achieve this and the propellant must come from an external source. The pressurized air is released through the tool by the depression of a sprung trigger, whereupon it is forced into a narrowing chamber at the nozzle. The velocity of the air is thus increased (known as the Venturi effect), creating a force sufficient to collect particles of paint being fed into the airstream by gravity or suction.
If you desire a tool that can create subtle effects at close quarters, such as shading in and around complex surfaces, then an internal mix, double-action airbrush is required.
A double-action airbrush package need not break the bank. This Premi-Air airbrush is a perfect entry-level tool, offering the ability to produce great levels of finish both in terms of overall livery coats and delicate weathering tasks.
Provided the liquid is of the correct viscosity, the paint particles will become evenly dispersed within the airflow (known as atomization) as it is released from the nozzle of the airbrush. If all of the necessary factors are correct – air pressure, paint mix and distance from surface – a highly consistent and even paint job can be achieved.
Until about 1980 airbrushes were seen as precision instruments for artwork or photo retouching, not least as the equipment was very expensive. Developments in cheaper tools and the advent of canned propellant subsequently opened up the use of airbrushes to the hobbyist market and they are now used for all sorts of things. As well as modelling and custom automotive art, there has also been massive growth in spray tanning, make-up application, nail art and cake decoration. The possibilities are truly endless.
The proliferation of airbrushing away from the more obvious art and hobby realms is worth keeping in mind, as it may help in sourcing unusual accessories or paint formulas that may not be marketed directly to your own hobby sector, but may still be of use. Not that I’m recommending using skin-tanning paints to weather your locomotives!
AIRBRUSH TYPES
It can be said that there are two main classes of airbrush and their description denotes where, in the spraying process, the paint and air are brought together.
EXTERNAL MIX
Sounding fairly self-explanatory, external mix airbrushes pass a jet of air over a paint reservoir on the outside of the tool and the resultant vacuum effect works to draw the liquid into the airstream. Paint flow can be altered by adjusting the distance between the paint reservoir nozzle and the air jet, although this can only be achieved when no air is being emitted and, according to brand, may require the use of a small spanner.
Generally of a cheap and cheerful nature, these tools are usually constructed of tough, solvent-proof plastic with a demountable paint reservoir. Particularly suited to beginners, there’s only one thing to think about when painting: the control of the air. Also, as no paint enters the tool itself, cleaning is confined to the paint jar and its nozzle, greatly speeding up the job. There is also very little to go wrong with these tools, nor many parts to wear out.
Results can be acceptable after a degree of practise, although thinning the paint to the right consistency is paramount for an even finish. Even then, the paint is not atomized as well as it is in an internal mix airbrush, making it impossible to achieve the same degree of finesse. Indeed, they are not suited to fine detail work, not only because the paint flow cannot be controlled, but for the fact that the tool itself is usually quite unwieldy.
External mix tools blur the line between what is strictly an airbrush and what could be more accurately referred to as a mini spray gun. Although they were once marketed as the latter, these tools lately have come to be bracketed together with the former. Manufactured by various brands such as Humbrol, Expo, Revell, Badger or Testor, they are commonly offered in starter packs, complete with a plastic hose and a small can of liquid propellant. A decent example of this type of airbrush will certainly provide a good introduction to spray painting for a very modest outlay. However, don’t expect top of the range results from a bottom of the range package.
INTERNAL MIX
Internal mix devices, on the other hand, make use of either gravity or siphon-fed paint cups, feeding the paint into an internal chamber where the particles of liquid are mixed with the air before being emitted through the nozzle.
Originally devised for applying watercolour paints or inks, the use of quick-drying modellers’ enamels or cellulose was not what the original designers had in mind. As a result, paints must be mixed to a thinner viscosity than with external mix ’brushes. On the other hand, the system allows for lower air pressures to be used successfully, thus lending them well to hobbyist use with small air compressors or bottled supplies (see Chapter 2).
Containing a typical budget-priced airbrush, this kind of package retails for under £20 and can offer a cheap route into the hobby. Although acceptable results can be achieved with practise and a good air supply, these tools do have many limitations.
Cheaper airbrushes – or mini spray guns – work in the ‘external mix’ format, having all the important workings outside of the body, making for easy cleaning and maintenance. The paint nozzle (lower) can be raised to increase the flow of paint being drawn into the airflow.
While acceptable for general use, finer work such as bespoke weathering or small-scale detail work is beyond this type of airbrush. Variation in width of spray is only achieved by altering the distance between the tool and model’s surface: a wider line is achieved by moving further away, which also provides a mistier finish. However, working further from a subject can be risky, especially with acrylic paints, as the paint will dry before it hits the surface, leaving a rough finish.
Internal mix airbrushes can also be defined by their ‘action’, or more explicitly, by how far the paint and airflow can be adjusted.
Single Action. The majority of single-action airbrushes have an adjustable needle inside the nozzle, moved back and forth within the tool by means of a hand-wheel at the rear of the instrument. Painting usually has to be interrupted while an adjustment is made and the further back the needle is moved, the more paint is admitted into the nozzle to mix with the air. This explains the singular ‘action’ in the description; the airflow cannot be adjusted – it’s either ‘on’ or ‘off’.
Double Action. Sometimes also referred to as dual action, both paint and airflow is governable. Press the trigger to release the air, while pulling back on the same control will also emit the paint. The further back the trigger is moved, the more paint is released and the harder the trigger is depressed, the higher the air pressure will be (within the limits of the supply).
Offering extra versatility, these tools do take a little time to get used to, hence why single-action airbrushes are more popular with beginners. Cost is a factor too, as double-action airbrushes incorporate more sophisticated workings and are naturally more expensive. Results can be far superior, however, as the control of both the air and paint permit the creation of a greater range of effects, perfect for ultra-detailed work at close quarters. Paint flow is automatically cut off before the airflow (as the trigger is released, the cycle of the internal components shut off the paint supply before closing the air valve, and vice versa) meaning that the risk of splattering at the end of each stroke is minimized (see Chapter 4).
This dismantled Iwata airbrush illustrates a typical dual-action, gravity-fed internal mix tool: (1) nozzle rim; (2) nozzle; (3) needle packing; (4) airbrush body; (5) paint cup; (6) paint cup lid; (7) trigger; (8) needle chuck; (9) tailpiece; (10) needle; (11) air hose connector; (12) air/trigger valve; (13) needle packing spanner.
Semi-double Action. Semi-double (or ‘fixed double’) action airbrushes offer something of a halfway house between the two formats, with the trigger movement controlling the flow of air and paint in fixed proportions only. The maverick Testor Corporation has taken control options further by offering an airbrush (the Aztek A470) that can be used in either single-, fixed double or double-action modes. In this case, the trigger operates in the familiar lateral way, while a roller control on the top of the tail end ‘dials in’ the amount of paint flow.
The paint flow from most single-action airbrushes is adjusted by means of a thumbwheel, usually at the rear of the tool. The further back the needle is drawn, the more paint will be released. Painting must be interrupted while adjustments are made.
Double-action airbrushes allow the paint and airflow to be controlled from the same trigger. Pressing down governs the air, while moving the trigger backwards increases the amount of paint released. An airbrush should also be comfortable to hold and operate, especially if you expect to be spending a few hours at a time operating one.
The popular Badger single-action, siphon-fed airbrush – in this case a 200NH model – is a nice tool to use. Well balanced and comfortable to grip, the underslung paint jar leaves a clear view of the subject for the painter and a choice of jar sizes is available. Although lacking the versatility of double-action airbrushes, excellent results can be achieved with this and similar specification tools.
The Aztek airbrush is of a quite different concept to all other airbrushes, showing some laudable innovations in materials and operation. Produced in the US by the Testor Corporation, the durable acetyl resin body is solvent-resistant and the air supply is fed into the tail end, allowing the tool greater freedom of movement. Various sizes of paint cup can be fixed on either side.
Due to the unusual shape, the Aztek airbrush must be held in a slightly different way to a more ‘traditional’ airbrush, but it remains comfortable and easy to use.
PAINT FEEDS AND CUPS
Siphon paint feeds work on the same principle as a drinking straw, the paint being drawn into the nozzle by suction. Locating beneath or to either side of the airbrush body (most allow for left- or right-handed users), keeping the top of the nozzle free helps with close-up work, maintaining a line of vision between the eye and the subject.
Gravity feed cups may be fixed or interchangeable units and fitted either atop or to the side of the airbrush. Paint simply runs down into the chamber, waiting for the trigger to be engaged before it is admitted into the nozzle. I have no hard and fast evidence to back up my experience, but I’ve found gravity-fed airbrushes to work more effectively.
Regardless, unless the paint reservoir is permanently fixed, interchangeable jars and cups are usually a friction fit, allowing for quick colour changes and easier cleaning. Having a few spares to hand speeds things up further, especially if a number of paints are prepared beforehand, with just a quick flush with thinners in-between. The other benefit of separately fitting paint cups is the choice of sizes available, the capacity being chosen to suit specific tasks.
Fixed cups are not a problem, although some models, such as the Premi-Air G35 budget airbrush (illustrated below), offer only small capacity receptacles. Frequent topping up during larger painting tasks is not the greatest hardship, but it does add to the time involved and increase the spillage risk. The likelihood of the paint going ‘off’ before the job is complete is also increased, leading to potential blockages or a compromised paint finish.
Airbrushes with separate paint cups offer the convenience of both quick colour changes and the use of different-sized receptacles for various tasks. Most paint bottles and cups feature small vent holes: do not block these as they provide a pressure release in the event of the airbrush being blocked. Without them, the lid can be blown off with the paint following it!
NOZZLES AND NEEDLES
Internal mix airbrushes have their needles matched to the size of the aperture in the nozzle. Unless the needle is a perfect fit, the tool will not operate properly. Needles are precision-ground components and must be treated with the utmost care when dismantling for cleaning. A bent or damaged needle tip cannot be fixed and must be replaced (see Chapter 7).
Airbrushes are sometimes specified in terms of either the nozzle or needle size, but this means more or less the same thing. However, for the purpose of standardization, this book will refer to the ‘nozzle’ size. Generally speaking, the size of the nozzle dictates the type and viscosity of fluids that can readily pass through it; the smaller the nozzle, the thinner the paint must be. It also follows that the fineness of spray also increases as the nozzle size decreases. A general-purpose airbrush will have a nozzle size of around 0.5mm and this will suit the majority of tasks that a railway modeller will ask of it.
However, a smaller nozzle (such as 0.3mm) will give a more refined spray that is perfect for creating fine lines, close-up detail work and bespoke weathering jobs. It would also be well suited to painting models in N gauge and below. Iwata produce airbrushes with nozzle sizes down to 0.18mm (Custom Micron B) for the most exacting precision work but, not only are these expensive, they are also less suited to many ‘general’ tasks as the maximum width of spray is so narrow. Fine nozzle airbrushes are also less forgiving of incorrectly thinned paint and poor levels of cleanliness. The smaller aperture is far more prone to blockage and fast drying cellulose, super enamels and acrylics may all cause problems in this respect, unless thinned and applied correctly.
Interchangeable nozzles are a recent innovation, most popularly endorsed by Testor Aztek airbrushes. Maintenance free, these durable plastic nozzles screw into the front end of the tool and need no form of adjustment or dismantling to clean (they can simply be flushed through with thinners or left to soak to remove stubborn build-ups of paint). Colour coded as to size, they can be used across the Aztek range for a variety of specific tasks.
On most double-action airbrushes, the needle and chucking screw are accessed by removing the tailpiece cover. Ease of dismantling is an important factor in choosing an airbrush as regular cleaning will be rewarded with optimum performance. The insides of an airbrush are also a good indication of how well the tool has been machined.
The delicate nature of airbrush needles can be appreciated in this view of 0.3mm (left) and 0.5mm diameter tips. Damaged tips render an airbrush unusable and are difficult to repair; replacements usually being necessary.
The finer the nozzle, the finer the spray pattern can be. This PremiAir tool sports a 0.3mm needle and a nozzle arrangement allowing the panel lines on this Class 14 to be weathered freehand – just a steady hand is required.
A shaped needle chuck screw is a rare but welcome feature as it permits easy refitting of the needle after cleaning, without the risk of damaging the fine tip.
Aztek airbrushes feature interchangeable plastic nozzles that are easy to clean and virtually maintenance free. Offering incredible versatility, simply swapping nozzles allows anything from the broadest strokes to the finest detail to be achieved with a single airbrush.
The shape of the nozzle’s rim also has a part to play in how the airbrush works at close quarters. Those fitted with a castellated (or ‘crown’) rim permit the tool to work much closer to the subject, as the air rebounding from the surface can escape harmlessly through the gaps. With a solid rim, this ‘blow-back’ causes rough edges to fine lines and an increased risk of paint runs. The majority of airbrush ranges offer a choice of rims, as either separate accessories or supplied as part of an airbrush package.
Having a choice of nozzle rims is also helpful, increasing an airbrush’s versatility. These are both supplied with the cheap Premi-Air G35.
Crown-shaped nozzles allow the airflow to escape through the sides of the rim rather than blowing back against the airbrush, resulting in a finer finish. The delicate needle tip on this Paasche Talon TG is, however, rather more exposed to damage with such an open nozzle rim.
Another useful feature added to some double-action airbrushes is adjustable needle travel. Here, a grub screw is utilized to limit the lateral travel of the needle, thus forming what is essentially a ‘paint flow limiter’. A worthwhile addition for those who will be doing lots of close-up work, it can prevent too much paint being released by any involuntary movement of your finger on the trigger. Setting the ‘limiter’ further back also produces more consistent broad strokes.
Nozzle rims can dictate how well an airbrush performs at ultra-close quarters. Despite this Iwata HP-CR sporting a 0.3mm needle and nozzle assembly, the round rim is a limiting factor, although spraying with the rim removed is an option explored in Chapter 14.
Adjustable needle travel screws are helpful for fine detail work as they limit the amount of paint emitted even when the trigger is pulled back fully. Presetting the travel distance before spraying will avoid some nasty accidents.
OTHER CONSIDERATIONS
Comfort is a vital factor to consider before settling on a particular airbrush model. It has to be a pleasure to hold and work with, without causing tiredness in the fingers, wrist and arm. Triggers can sometimes be stiff (although this may be down to the ‘newness’ of a tool) and dual-action devices may require not a little strength in your finger.
Pistol grip triggers (as illustrated on the Iwata TR2 shown here) offer heightened comfort, especially for larger projects where repeated strokes will be necessary over a long period. They are also very helpful for those with less physical dexterity or who suffer joint or muscular problems. The larger trigger requires much less strength to operate, being squeezed with two or three fingers as opposed to a single one.
Pistol grip triggers offer a comfortable alternative to the more common button-type trigger.
Although a little less manoeuvrable in tight spots due to its larger size, this Iwata TR2 is great for repetitive tasks such as overall livery applications. The demountable paint cup can be mounted on either side to suit left- and right-handed users and an inline moisture filter is supplied.
Inclusion of a pressure regulating valve in the body of the airbrush can be found on certain ‘higher spec’ models, allowing a greater degree of fine tuning of the airflow without having to reach over to a control on the compressor or air bottle: a handy feature to possess. We’ll look more at pressure regulators in Chapter 2.
Availability and compatibility of accessories within a range, allowing for the upgrading of particular models or to create a more versatile tool from a ‘basic’ model, is another pertinent fact to consider. A look through the catalogues of different airbrush suppliers or manufacturers will give a hint as to the breadth and ease of supply of extra parts or spares.
Assess the build quality of a tool before you buy one. If the sales blurb in the catalogue does not tell you what an airbrush is made from, ask the dealer. It may not be a make-or-break factor in a prospective purchase but it should give some idea of how well it has been built and how long it is likely to last. Iwata tools are built with a lifetime’s use in mind and incorporate stainless steel throughout the interior of every airbrush, hence they come with a free ten-year warranty. High-quality chrome plating of all exterior surfaces is also important as it permits easier cleaning.
The materials forming the various internal fluid and air seals is also worthy of investigation. They must be able to withstand years of being exposed to harsh thinning and cleaning compounds. A cheaper tool will see these fittings perish quickly, while better quality tools will sport ultra-durable materials such as PTFE or Teflon. Finally, packaging may not seem an obvious factor, but having a nice padded box to keep the tool in will help it last longer and avoid damage.
Air pressure adjustment valves (the screw on the underside of this Iwata airbrush) are fitted to higher specification airbrushes, although inline valves can also be obtained as cheap accessories (see Chapter 2). Although not essential features, they do allow for instant fine tuning at the tool end, rather than at the compressor.
The packaging of an airbrush may not be your first concern but a padded, tough plastic case is not to be sniffed at, not least as it will keep your precious tool clean and protect it from damage. This box contains a mid-range Paasche airbrush, braided hose, airbrush holder, tools and a useful instructional booklet.
WHERE TO GO FROM HERE
When searching for an airbrush, don’t confine yourself solely to modellers’ outlets. Instead, try looking in art shops as the same brands are often aimed at artists, craftsmen and modellers alike; there may be price differences across different stores and it helps to shop around. On the other hand, firms such as The Airbrush Company or Graphic Air Supplies make life much easier, providing one-stop shops for all your airbrushing needs. Having a source of expert technical advice on the end of a telephone and a full spare parts and repair service also provides peace of mind.
It may not be possible to find a single tool that will cover a whole lifetime’s airbrushing requirements, but there are a few specific models that offer a greater amount of flexibility. Interchangeable nozzles and needles, paint cups and compatible accessories all help to provide more scope to develop an existing product. Consider the fact that cheaper brands may not be around in ten years’ time, so locating spares will prove difficult.
Finding an airbrush that is comfortable, reliable and does the things that you need it to do is a rewarding experience. The act of spraying paint should be something to look forward to and feeling frustrated with the limitations of your tools is not a recipe for success. Take the time to form your own decision about what you need, making an informed choice rather than an impulse buy. There are hundreds of models out there, produced in large numbers and available from countless outlets in the UK and abroad, so if you’re not sure, try somewhere else. Consider other modellers’ recommendations too, asking around at modelling shows or by seeking impartial advice from the large online modelling community (such as www.rmweb.co.uk).
An airbrush is nothing without a suitable air source and in the following chapter we shall discuss various supply options. Also, a variety of tools and accessories will be outlined that will help us to develop our skills in spraying paint.
CHAPTER TWO
ASSEMBLING A SPRAYING KIT
An airbrush is nothing without a source of air. That much may be obvious, but ensuring a plentiful and reliable source is not as simple as it may seem. While making a carefully considered airbrush purchase, extra funds must also be provided to procure the compressed air as well as other vital accessories such as a moisture trap, air hose, tool holder, paint strainers, gloves and face mask. There are also cleaning agents, thinners and paint mixing tools to remember.
There are ways of lessening the burden, perhaps by choosing one of the many Starter Packs offered by various manufacturers and dealers, which usually include an airbrush, hose, filter and air supply. This will get you started and allow for upgrading of individual components as you go, thus spreading the cost.
AIR SUPPLIES
Any airbrush, no matter how expensive and finely constructed, is only as good as its air supply. To get the best out of even a cheap beginner’s tool, a consistent supply of air is essential. The air must be both clean and free of water vapour when it meets the paint at the airbrush, as well as being supplied at a constant, steady pressure. Inline filters can see to the first requirements, but the latter is not so easy.
CANNED PROPELLANT
A sealed container of compressed air cannot recharge itself, so any usage will see the pressure decrease irretrievably. Only a fairly weak pressure is generally required to spray paint onto miniature models and some form of regulation of the air is essential. But then, as the supply wanes, even that pressure will not be maintained and a new source will have to be found.
Such finite sources include the canned propellant commonly seen in model stores alongside budget airbrush sets. These can be used successfully in very short bursts but the cost can be high in the long term. Offered in various sizes, they are certainly handy, ultra-portable and are suited to very quick painting jobs such as touching-up work and weathering tasks.


