20,99 €
Mehr erfahren.
- Herausgeber: Crowood
- Kategorie: Lebensstil
- Sprache: Englisch
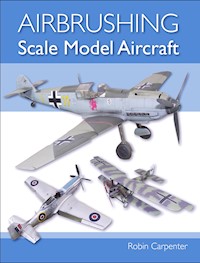
Airbrushing Scale Model Aircraft is a practical guide to the application and techniques of painting aircraft in any scale. It provides guidance on buying airbrushing equipment, setting it up and operating it safely, and offers detailed explanations of how airbrushes and compressors work, alongside their various components. The reader is taken through basic exercises to learn how to control airbrushing equipment before moving on to more advanced paint application techniques. This book also includes guides to preparation, information on the use of primers, and a handy troubleshooting guide to help identify and resolve common faults.
Das E-Book können Sie in Legimi-Apps oder einer beliebigen App lesen, die das folgende Format unterstützen:
Veröffentlichungsjahr: 2018
Ähnliche


AIRBRUSHING
Scale Model Aircraft
Robin Carpenter
THE CROWOOD PRESS
First published in 2018 by
The Crowood Press Ltd
Ramsbury, Marlborough
Wiltshire SN8 2HR
www.crowood.com
This e-book first published in 2018
© Robin Carpenter 2018
All rights reserved. This e-book is copyright material and must not be copied, reproduced, transferred, distributed, leased, licensed or publicly performed or used in any way except as specifically permitted in writing by the publishers, as allowed under the terms and conditions under which it was purchased or as strictly permitted by applicable copyright law. Any unauthorised distribution or use of thistext may be a direct infringement of the author’s and publisher’s rights, and those responsible may be liable in law accordingly.
British Library Cataloguing-in-Publication Data
A catalogue record for this book is available from the British Library.
ISBN 978 1 78500 476 6
Contents
Introduction
1 Aeroplanes
2 Preparation
3 Tools and Equipment
4 Getting to Know Your Airbrush
5 Primers
6 Paint Applications
7 Painting Full Schemes
8 Weathering
Appendix I Paint Application Trouble-Shooter
Appendix II Airbrush Cleaning Quick Reference
Glossary
Useful Addresses
Index
Introduction
Since the invention of aircraft, for a variety of reasons, people have had the desire to model them in one form or another. During World War II, for example, aircraft models were used for identification training; carved wood or balsa wood kits was the starting point for these models. Injection moulding came into play in the mid-1930s using cellulose acetate, which gave far more accurate results in far less time. In the 1950s, polystyrene was commonly used and is still used today. Initially, the mouldings were very basic and dimensions were not very accurate, frequently leaving bare cockpits and undercarriage bays. From the 1960s onwards, plastic-injection moulding came on in leaps and bounds, and present-day mouldings include very detailed cockpit interiors and wheel-bays. In addition to injection-moulded plastic, some modern kits include polyurethane resin and etched brass parts, and there are after-market companies, like Eduard and Aires, going one step further to produce super-detailed resin and etched brass accessories.
Injection moulding has advanced since the 1950s and manufacturers are improving all the time. This 1/48 scale undercarriage bay is from a 2008-produced Tamiya F-16. This kind of detail would have been unheard of in years gone by, from a mainstream producer.
Once the model has been made, most modellers will have the desire to paint it, to provide an accurate representation of the real thing. Most people start painting with brushes, and a skilled painter with the right brushes can make any model look good. Armed with an airbrush and a little expertise, however, you can make a model look very good indeed, whatever the base material. This book is written to assist you in buying and setting up your equipment, then using your airbrush from beginner level to more advanced techniques and gaining the skills to give an expert finish.
A typical multimedia kit that includes etched-brass and resin components, as well as the plastic parts. These accessories enable the builder to go a step further with details and building skills.
Eduard manufacture, under the Brassin label, this superb super-detailed 1/48 scale Merlin 61 engine, which also includes engine bay covers and etched-brass details (not shown in this picture).
A BIT ABOUT THE AUTHOR
After service in the Royal Navy, I joined the aviation industry and for twenty-two years I painted real aircraft for a living, working on historic aircraft made from canvas and wood, Spitfires, air ambulances, through military aircraft and helicopters to Boeing 767s, including executive aircraft like The Queen’s Flight. I was heavily involved in the design and first application of the colourful exterior scheme of the display aircraft Hawker Hunter ‘Miss Demeanour’ in the late 1990s, and I have been making models of ships, dioramas and aircraft as far back as my childhood. In 2003, I put my first love of model-making and my career skills together and formed a company supplying paints and painting equipment to the hobby market. From this I developed my present work. For the past thirteen years I have been teaching beginners in airbrushing at a class for model-makers. In my view, the principles of painting a model are the same as painting real aircraft – it is just a question of scale. The beginner’s class has given me insight into problems modellers have when they start to airbrush. In this book I will share my experience to give you the confidence and skill to produce a well-painted model, something to be proud of, and help you deal with many of the pitfalls you may come across.
I do not teach people to spray paint, I teach people to be in control of their equipment. Just like handwriting, everyone will develop their own airbrushing techniques and habits, both good and bad. Only by learning from your mistakes will you advance. So, believe in yourself, prepare your project, read this book and enjoy your airbrushing.
In the preparation of this book I would like to thank the Airbrush Company for their unfailing support with my courses and their encouragement for writing the book, as well as for providing access to photograph some airbrushes, compressors and equipment; to my wife Rosemary for her support in helping me put this book together; and to numerous enthusiasts, groups and museum staff for their help and permission in obtaining images by allowing access to exhibits, engines and to air side. I am particularly grateful to the staff at Duxford, Cosford and Gloucester Aviation Museums. My thanks also go to my publisher who made the initial suggestion and who have helped me through the writing process.
Chapter One
Aeroplanes
To get a realistic finish to any model aircraft, there is no substitute for thorough research. Once you have chosen a subject, go and look at a full-size example, if you can, but be aware that modern security criteria can make this problematic with some subjects. In the UK there can be restrictions, and in other countries this will likely be the case, so always make sure you have permission – it is always good manners to ask first. If you can’t get out, there are lots of good books available at specialist bookshops or at your local library. Searching on the internet can provide you with information you would not get access to at an air show. Museums are ideal for historical aircraft; some of them allow close access and have engine cowlings or doors open for those who want to go the extra mile with detailing.
When looking for details associated with particular aircraft, museums are the place to go. Recently, at the RAF Museum Cosford, this Ju-52 engine bay was exhibited fully uncovered, showing many details and colours of the components.
This is a cockpit of a Jet Provost available for the visitor to go and sit inside. Notice the wear and tear, scuffs and bare rivets around the cockpit. The entry and exit sills are covered with padding or scuff plate, to stop injury to visitors and damage to the aircraft.
MILITARY AIRCRAFT
If you can get access to an aircraft of your choice, take pictures of areas such as wing folds, undercarriage bays and cockpits. Take notes, particularly of the tones, shades and of damaged areas. Remember that the digital photograph development process can change the colour of paintwork, depending on your camera and computer settings. Also, make careful notes about colours and tones you can see. Steel exhausts on World War II aircraft are often misrepresented. Painting them in a monotone rust colour does not represent the real thing, unless the subject has been abandoned to the weather somewhere, and even then corrosion will be random and in different colour tones. Modern military jet aircraft with reheat have a ceramic surface, where light grey and off-white is more usual. Note the pattern of exhaust stains on fuselages and wings; they will be different depending on where the exhaust outlet is and the airflow over the wings.
This picture of a P-40 was taken at Duxford and the aircraft is currently in flying condition. The exhaust pipes show typical colours that can appear on the outside of individual exhaust stacks.
When painting real military aircraft in grey and green camouflage, a wet-on-wet system is usually used. Both colours are done at the same time; the aircraft is marked out for the pattern first, then two or more painters with the grey start to paint and block in their section, followed by several painters with the green. They put on the soft edge to the camouflage and block in their section. With this style of painting, the green over-spray will blend in well with the grey, but it will change the shade of the grey. Painting may start with BS381/637 medium sea-grey but the finished aircraft colour will be darker. Obviously it is not practical to use this system on a model. Modellers will usually paint the lighter colour first, mark out the camouflage, then add the darker colour later. There are various other methods for creating camouflage patterns and these will all be covered in the camouflage section of Chapter 6 and the British World War II demonstration in Chapter 7.
Another aircraft exhibited from, and currently flying out of, Duxford is this Spitfire. Note the rust on the exhaust where at least five different colour tones can be seen. Also, note the faint light grey and brown exhaust stains on the fuselage.
White ceramic coating can be seen in this SR-71 exhaust system.
Note the grey exhaust cone has both light and darker grey tones running horizontally and the stainless heat shields have various coloured stains.IAN BROWN
CIVIL AIRCRAFT
Civil airline and executive aircraft will usually be kept to a high standard with only small paint chips or oil and grease stains visible. There are always exceptions, and some light aircraft can get to look quite tatty and unloved. The burning of jet fuel actually leaves a grey or brown residue on airliner exhaust cones. Some of the latest engines look to have stainless steel parts that appear to have burnt blue and purple tones. White is the most common colour used on airliners but there are many different shades of white and some airlines are insistent upon a particular shade.
Corporate colours on logos or parts of the aircraft, such as fin and rudder or engines, are specific colours and matching these can be difficult, but there are model paint manufacturers whose ranges cover some airline colours. Hannants’ Xtracolor range is one. By taking a picture of the airliner with you to a local model shop and going through their paint range, you will most likely find a close match. Don’t be too rigid about the colour you chose, because appearance varies according to paint application methods, primer colour and light conditions. So, when choosing a shade to apply, the person you should aim to please is yourself.
Some nice details of typical staining from grills and underwing panels. Note also the different colour reds on the cowlings. Small details like these can make a huge difference to a model, giving it a more realistic look.IAN BROWN
One of the later aircraft engines showing the blue stainless steel cone. These can also have a purple tone to them.IAN BROWN
ENGINES
One area that can make or break the look of a model aircraft is the engine; again museums and the internet are good resources for information on colours and details. Many museums have engines on display, but it is those on the aircraft that will be more useful, providing no major restoration work has been done. The engines displayed at ground level are usually freshly painted and sometimes cut away to display the internal workings. These engines may not be entirely honest in their representation of colour. You can usually tell which ones are accurate by the condition of them, and then by cross-referencing photographs taken with images available on the internet or in books. Early aviation engines were usually bare metal – often a combination of aluminium alloys, steel, brass and copper. This produces quite a colourful pallet in comparison to later engines, which are often painted in a single colour. Bear in mind all these metals come under intense heat and often become covered in castor oil, which gives the modeller an opportunity to be very creative with metalizing and weathering, to help make the finished product far more realistic. Engines that are painted will show areas of wear and tear, chipped paint around nuts and bolts, pipe connections and areas with restricted access.
Keep your eyes open when visiting hangars. This engine was amongst others stored on racks. It shows the engine in original condition, not polished and buffed up like the one in the next picture.
Engines are often found around the edge of aircraft displays in museums, but they are not necessarily in original condition.
This engine has had an unfortunate end, but the colours caused by heat to the cylinders are worth noting.
PROPELLERS
The wear and tear patterns on propellers are very different, depending upon the environment in which they are working; aircraft taking off from an aircraft carrier will not get too much punishment, whereas aircraft taking off from a quickly built runway on a coral island will have a lot of chipping and wearing on both the propeller and the airframe. Blades are likely to have sustained more damage on the rear outer third than the front side. Early wood propellers can be painted, varnished wood or a mix of both. A frequent mistake modellers can make is to place metal chippings on propellers that were, in reality, made of other materials, for example, both Jablo blades and Hydulignum blades were both made from compressed wood. Jablo laminated blades, manufactured in Manchester, were covered in Rotoloid sheathing. Some had metal strips attached to the leading edge and some were sheathed in brass around the leading edge, depending on the specifications of the customer. These types of propellers were used extensively in World War II and are still used today. Therefore, if you are going to put chipping on propellers, be aware of the possible variants and try to ascertain the type of blades that were fitted to the aircraft you are doing.
A wooden propeller fitted to a Gloster Gamecock in the Gloucestershire Aviation Collection. Note the brass-sheathed leading edge.
One of the P-40 propeller blades’ rear faces, showing erosion on the leading edge and pitting on the rear face. The pitting is caused by small stones and mud picked up off the runway during take-off and landing. There are also a fair number of bug splats amongst the pitting.
Another propeller with leading-edge erosion and chipped paint.
Engineers are often shown with ground crew ‘pulling through the propeller’, which means rotating the propeller by hand. The technique is important on inverted engines, if they have been standing for a while. It’s possible for oil to bypass the pistons and fill the cylinder head internally, which will cause hydraulic lock and can seriously damage the engine. If engineers who do this work have greasy hands, they will stain the propeller, and this effect can be replicated by dry-brushing and smudging small areas with a slightly different shade of black, or using a stained clear gloss coat on to selected areas of each prop.
BIPLANES
Painting model aircraft such as biplanes and triplanes, both civil and military, may require different treatment from a monoplane aircraft, depending on the colour scheme, because of the variety of materials that might be represented. An all-yellow trainer aircraft should not present too much of a problem, but a World War I aircraft with olive drab upper surfaces, doped linen lower surfaces and, perhaps, natural wood panels and struts will need to be painted in sub-assemblies. Otherwise a very difficult masking procedure would need to be undertaken, with the possibility of breaking something. Painting sub-assemblies requires both good kit quality and good building skills.
On some early propellers you can find a mix of varnished and painted wood.
Weathering linen-covered aircraft has its challenges. Castor oil could act like a paint stripper on the paints used in the manufacture of linen at the time, and mud and rough airstrips would leave their mark on lower surfaces too. All these possibilities, together with frequent use of exposed engines, can make a model of this period a very interesting and attractive project. Representing aircraft that are clear doped linen can be problematic if you are looking for a realistic finish, as you can often see through the fabric, which reveals blurred images of the ribs, spars and sometimes the roundel painted on the top of the wing.
In this picture, the internal wing structure is visible through the fabric, as is the roundel painted on top of the wing. Notice the rib tapes are more visible as they pass through where the roundel is located, and all the rib tapes appear lighter than the fabric. Also note the inter-plane struts’ wood grain and colour.
Chapter Two
Preparation
The top surface of the paint will be a reflection of what is underneath, so any imperfections, deep scratches, gaps, lumps and bumps will show up. Trying to bury them with paint will not work, so proper preparation is vital. Inspect all surfaces for gaps and imperfections and lightly mark them with a pencil so you do not forget where they are. Inevitably you will need to use a file or sanding stick to rub down seams, joints or excess glue marks, and there is an abundance of material to choose from. Firm favourites amongst modellers are the sponge sanding sticks that are used by manicure technicians. There are various grades, from 100 grit up to 1,200 grit for general sanding, and 3,000 grit to12,000 grit for polishing and buffing. The softer sponge sanders will allow you to ride over small raised details like rivets or small vents without damaging them. Please be aware that some metal finishes are so fine they will show up scratches from rubbing down if you have used too coarse a sanding stick or finishing pad.
A typical selection of sanding sticks for use in preparation stages.


